

Spoolin's attempt to Spool...

 Feb 3, 2011 | 12:07 AM
#342
Teching In
Joined: Jun 2009
Posts: 47
Likes: 0
From: Torrance, CA
4 flathead screwdrivers and a lot of frustration got them of for me. Mine was out though. But i'm seriously lucky I didn't break them or throw the heater core across the room first!!
Last edited by Quinnster; Feb 3, 2011 at 12:28 AM.
Feb 5, 2011 | 01:59 AM
#343
Thread Starter
GFYS and STFU
iTrader: (8)
Joined: Jan 2007
Posts: 13,870
Likes: 4
From: Here and sometimes there too.
Update time!!
I'm at the point in the build where it's more fabrication than it is anything else and when it comes to fabrication...well I don't have the tools for it so that really slows me down.
Anywho, I ran the battery cable from the back of the truck all the way up front into the engine bay. I ran it inside the frame rails 95% of the way and wrapped it inside some irrigation tubing after the advice of a friend. Works like wire-loom only better and more flexible. Only drawback is instead of using welding cable I ended up using commercial grade wiring that is like 6 strand 0 gauge. Stuff is super stiff and hard to move and I spent alot of time getting it to where I wanted it. Anyways, I needed to re-locate the Junciton box bracket since I moved my PCM and my hot parts were in the way, so instead of building a new bracket, I bent mine to fit!! Here's the new location for it...
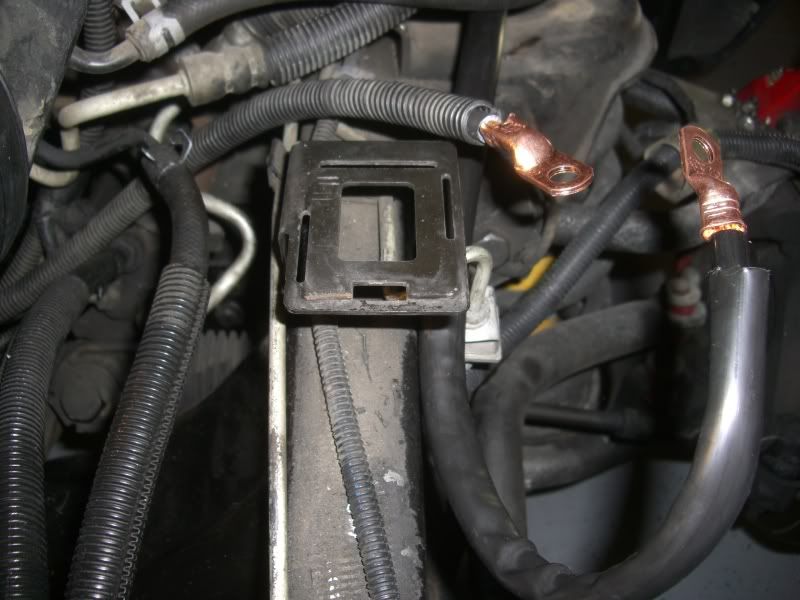
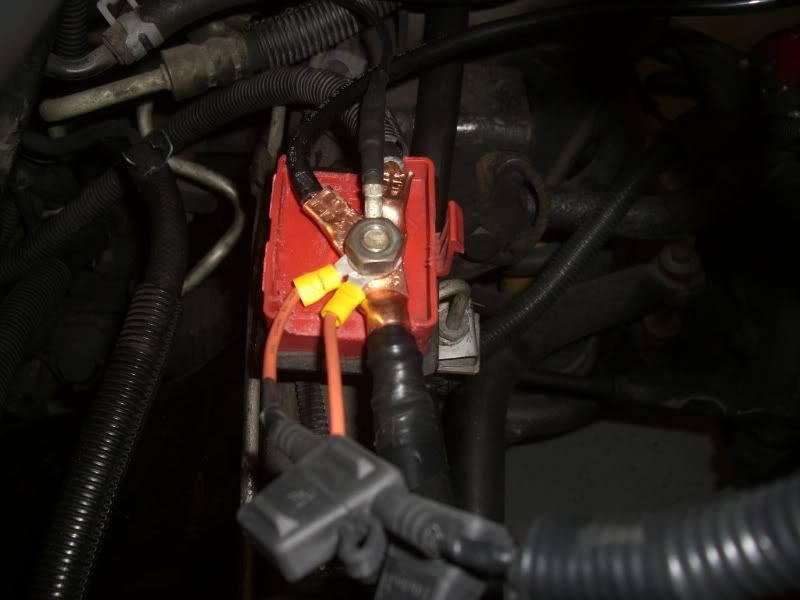
I was able to get most of the necessary wires onto the bolt. My only regret is that I wasn't able to find the stock GM connector anywhere that crimps onto the main cable without cutting it so as to allow it to run un-impeded to the starter yet still supply power to the bolt. I had to cut the cable and crimp on some eyelet terminals.
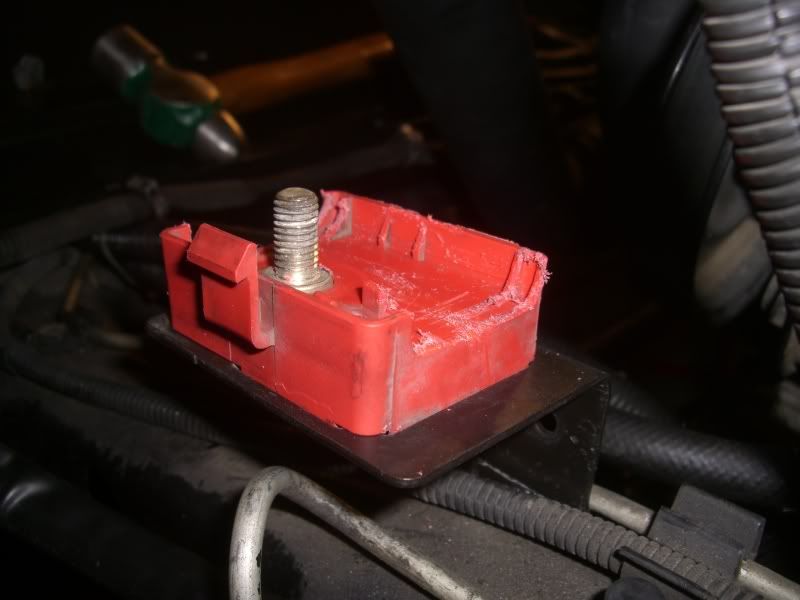
I still have the amp power supply to hook up but I'm gonna run it back to the battery since there isn't enough room on the common stud for it.
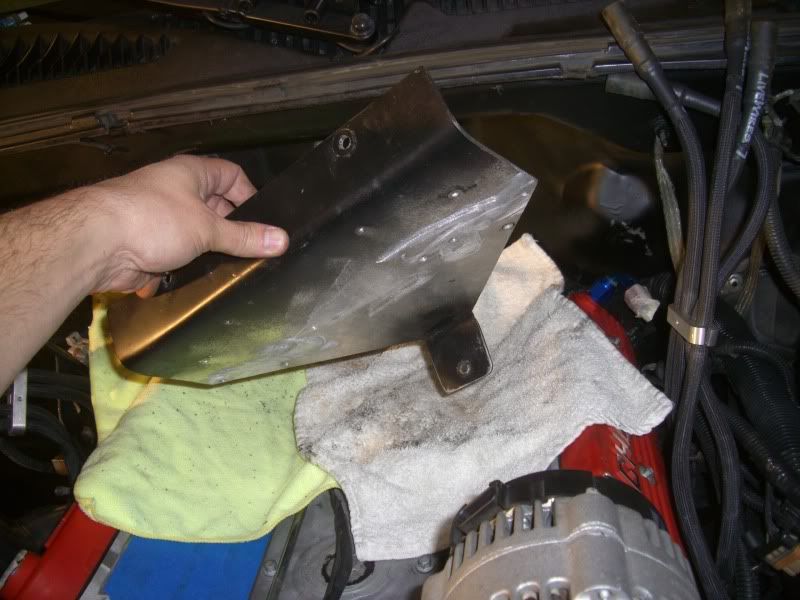
Next I moved onto the coil packs!
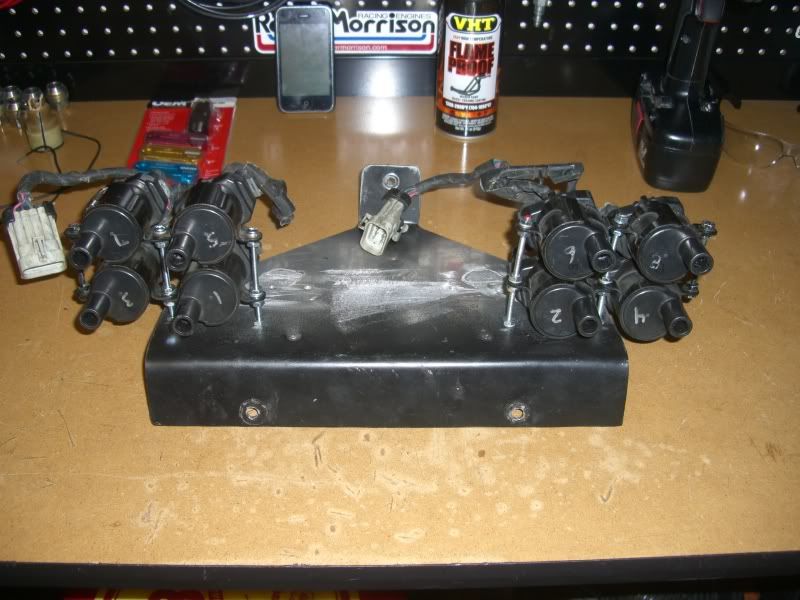
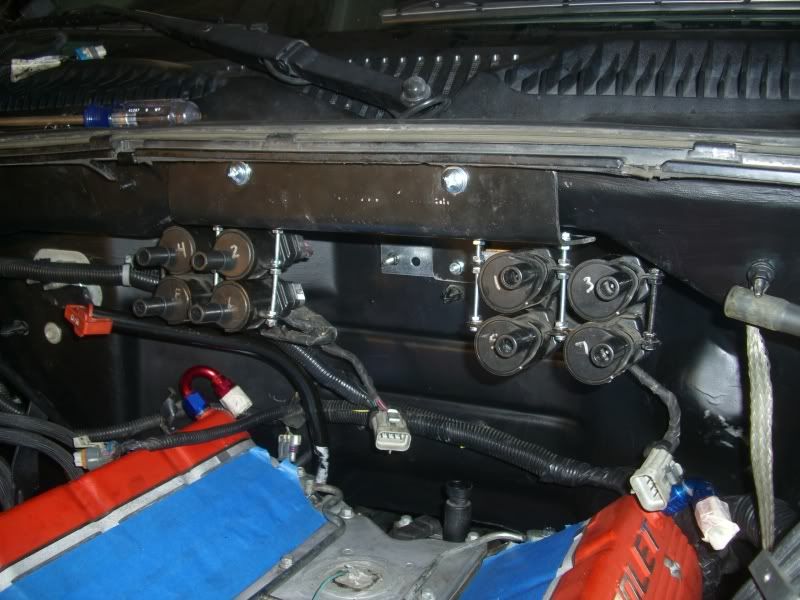
Took me the better part of 3 days to hunt down the tools I needed and the pieces that were required to make this happen. Anyways, here's the mounting bracket...
I mounted it up against the back of the fire-wall like so...
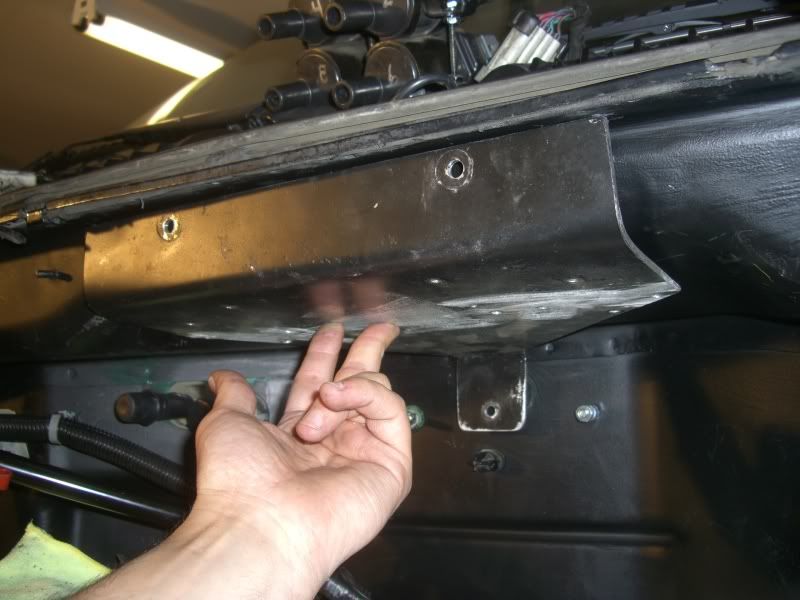
To mount it I bought a NutSert tool and went ahead and drilled a few holes in the fire-wall...BIG HOLES, and inserted two of them to support the bracket!!
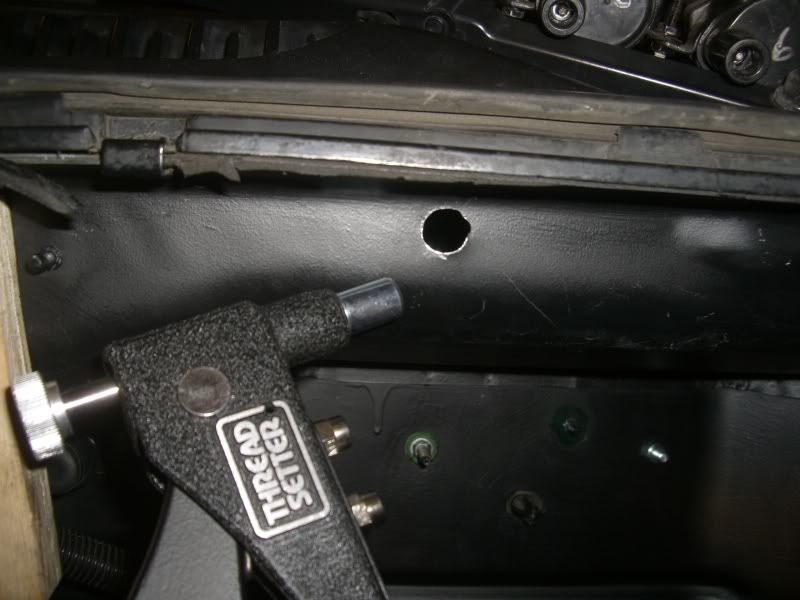
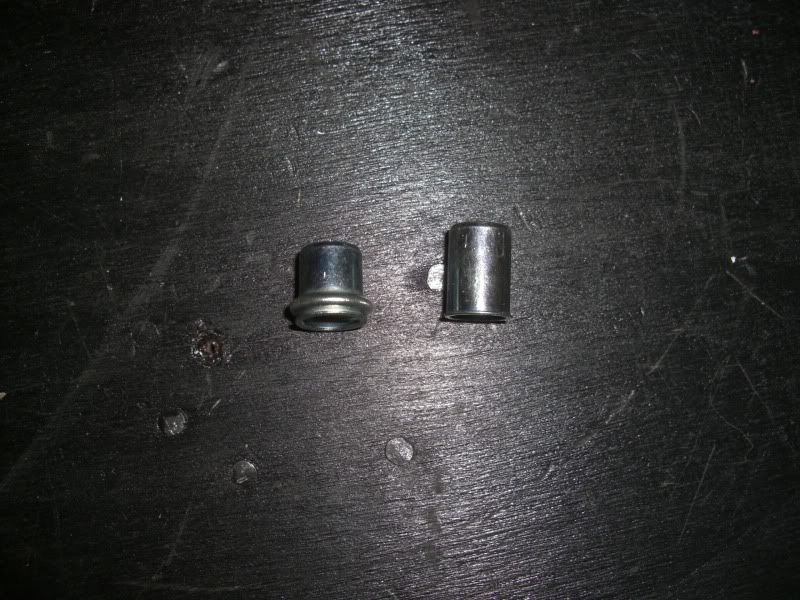
Here's what the threaded bolt rivet things look like when crimped...
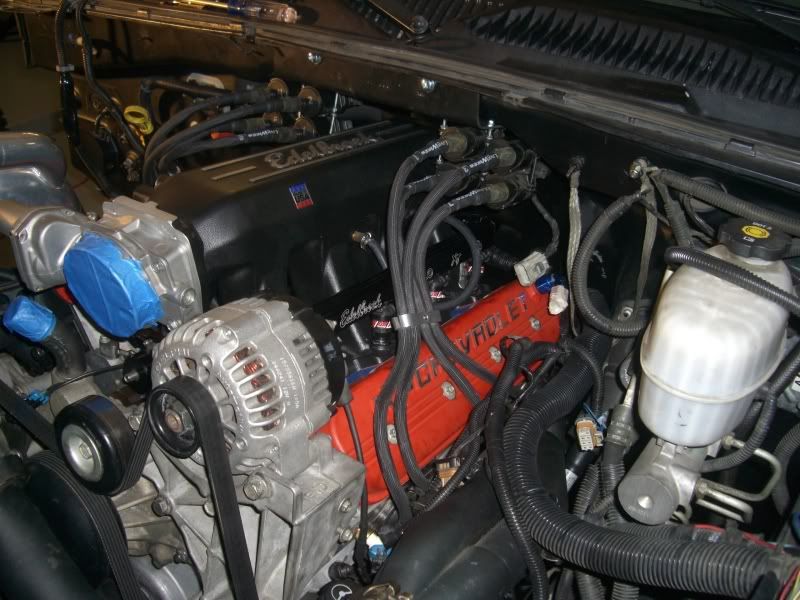
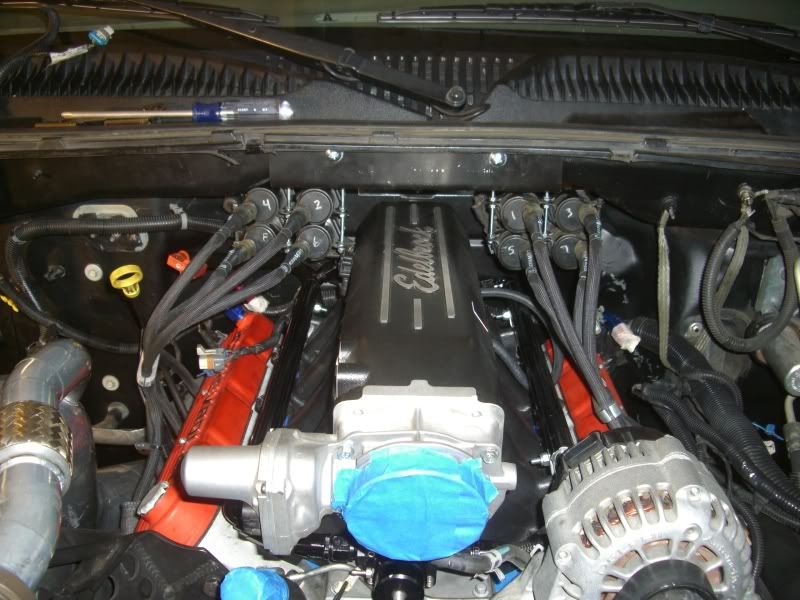
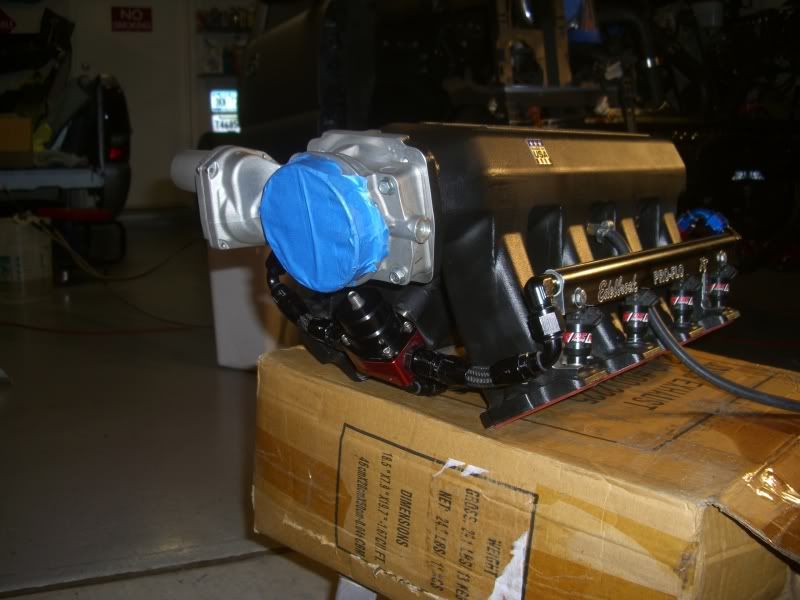
Here's the coil packs assembled on the bracket so that my big *** intake would clear it! (This is the only time I've regretted getting this intake. If I had a Vic Jr. or the truck intake I would of been able to keep my heater hoses and what not.
Anyways...
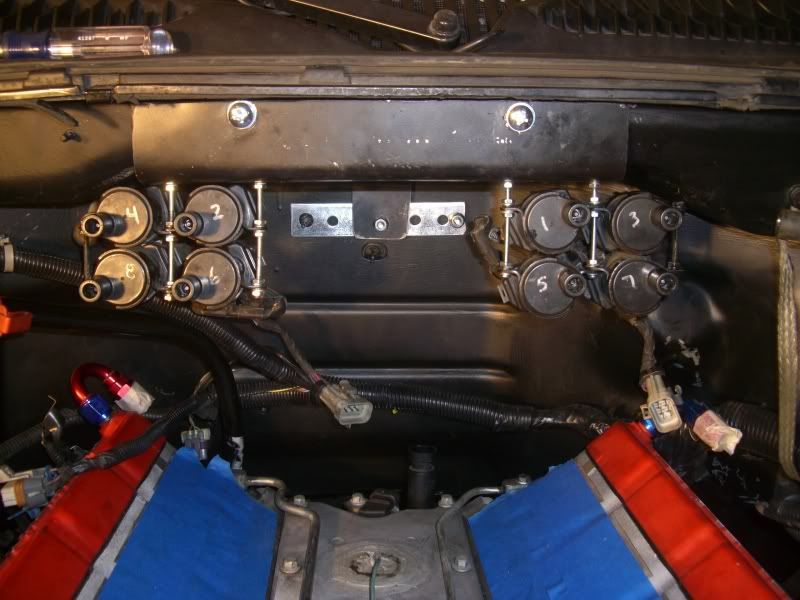

Coil wires run...
There's still a few things I need to finish up, I wanted to re-paint alot of it but unfortunetly I'd rather get this thing done and on the road at this point since I'm kinda of under the gun to finish this now.
I'm at the point in the build where it's more fabrication than it is anything else and when it comes to fabrication...well I don't have the tools for it so that really slows me down.
Anywho, I ran the battery cable from the back of the truck all the way up front into the engine bay. I ran it inside the frame rails 95% of the way and wrapped it inside some irrigation tubing after the advice of a friend. Works like wire-loom only better and more flexible. Only drawback is instead of using welding cable I ended up using commercial grade wiring that is like 6 strand 0 gauge. Stuff is super stiff and hard to move and I spent alot of time getting it to where I wanted it. Anyways, I needed to re-locate the Junciton box bracket since I moved my PCM and my hot parts were in the way, so instead of building a new bracket, I bent mine to fit!!
Here's the new location for it...I was able to get most of the necessary wires onto the bolt. My only regret is that I wasn't able to find the stock GM connector anywhere that crimps onto the main cable without cutting it so as to allow it to run un-impeded to the starter yet still supply power to the bolt. I had to cut the cable and crimp on some eyelet terminals.
I still have the amp power supply to hook up but I'm gonna run it back to the battery since there isn't enough room on the common stud for it.
Next I moved onto the coil packs!
Took me the better part of 3 days to hunt down the tools I needed and the pieces that were required to make this happen. Anyways, here's the mounting bracket...
I mounted it up against the back of the fire-wall like so...
To mount it I bought a NutSert tool and went ahead and drilled a few holes in the fire-wall...BIG HOLES, and inserted two of them to support the bracket!!
Here's what the threaded bolt rivet things look like when crimped...
Here's the coil packs assembled on the bracket so that my big *** intake would clear it! (This is the only time I've regretted getting this intake. If I had a Vic Jr. or the truck intake I would of been able to keep my heater hoses and what not.
Anyways...
Coil wires run...
There's still a few things I need to finish up, I wanted to re-paint alot of it but unfortunetly I'd rather get this thing done and on the road at this point since I'm kinda of under the gun to finish this now.
Last edited by Spoolin; Feb 5, 2011 at 02:15 AM.
Feb 5, 2011 | 02:04 AM
#344
Thread Starter
GFYS and STFU
iTrader: (8)
Joined: Jan 2007
Posts: 13,870
Likes: 4
From: Here and sometimes there too.
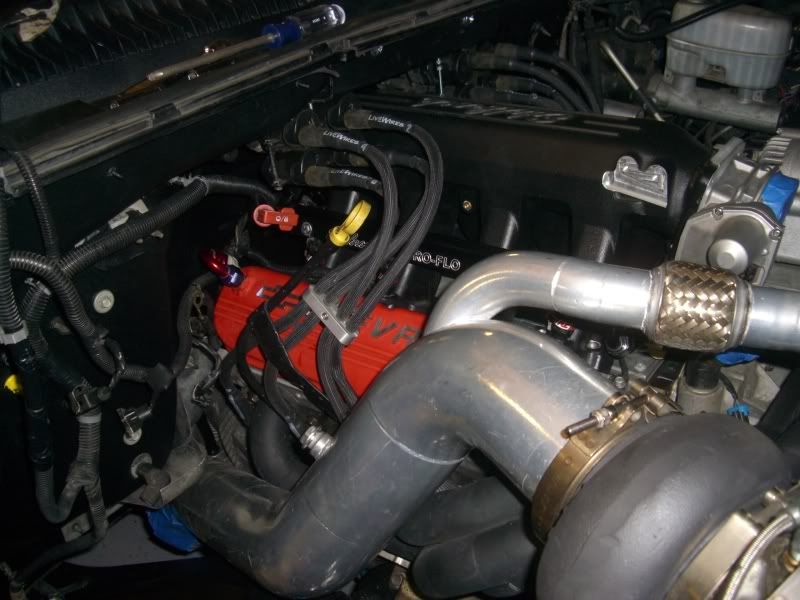
Next up was the fuel system. I wanted to charge the system to check for leaks as well as flush it out of any debris. I first flushed all the lines individually and then hooked them all up together and ran the whole system for about 3 minutes...
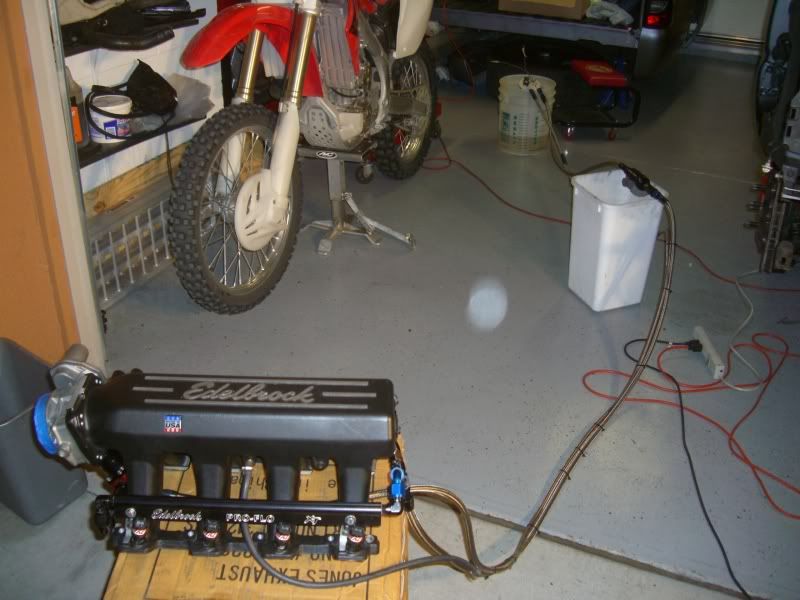
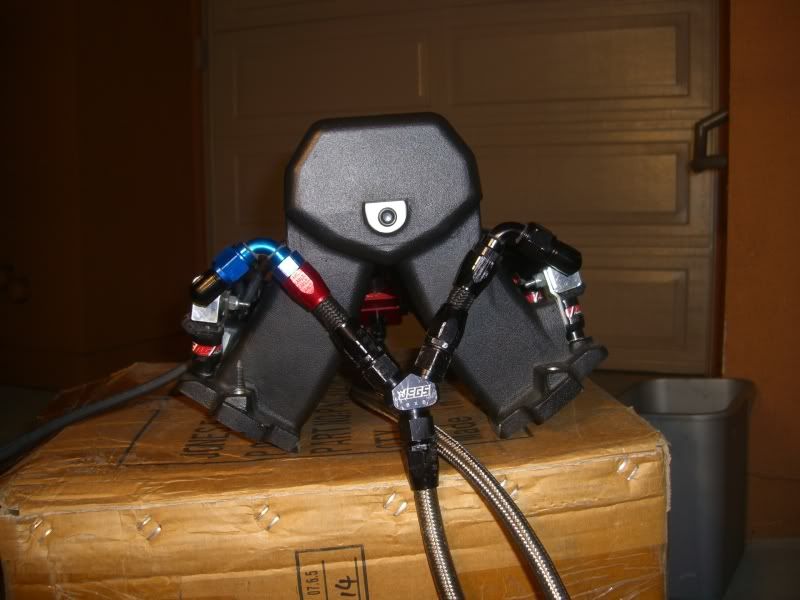
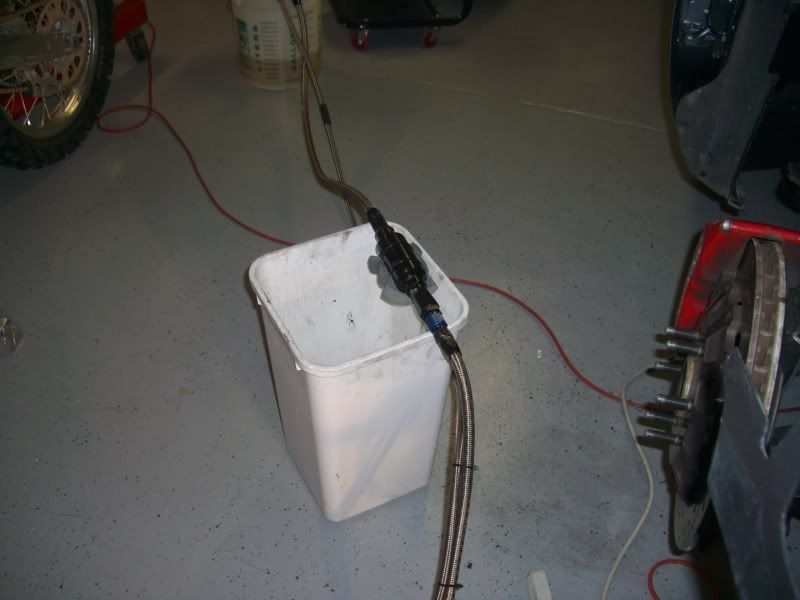
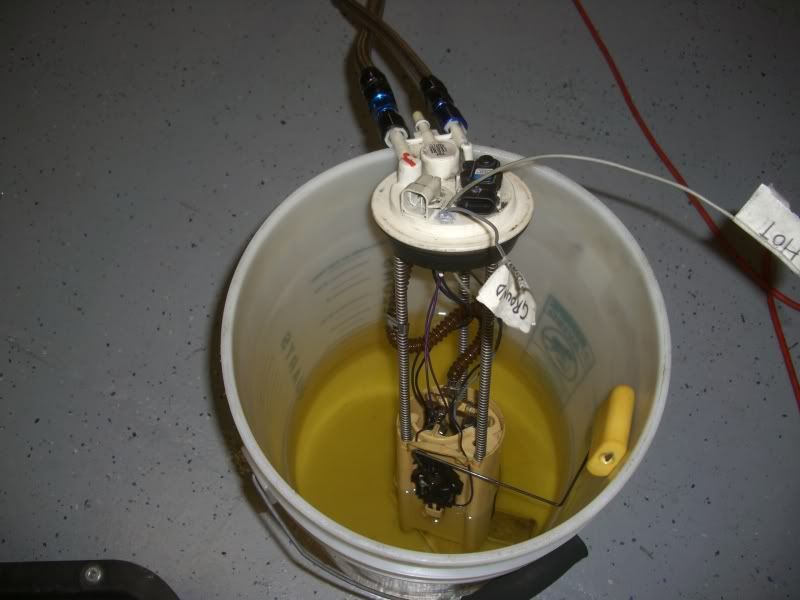
There was a bit of rubber junk from the hoses assembly that did get shot out. And I also found two leaks, one major, and the other minor. The major leak was just a question of tightening down some fittings, the smaller one requires me to get a new piece of hose. No biggie, just another set-back though. I should be ready to throw the intake back on for the final time hopefully this weekend and be done with the fuel system.
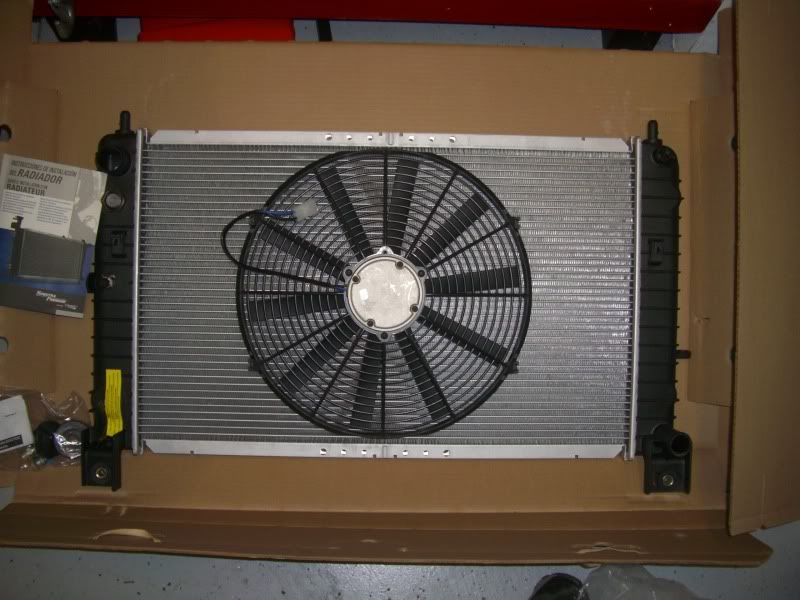
I also got my new radiator and fans today, they look so tiny!!!
There was a bit of rubber junk from the hoses assembly that did get shot out. And I also found two leaks, one major, and the other minor. The major leak was just a question of tightening down some fittings, the smaller one requires me to get a new piece of hose. No biggie, just another set-back though. I should be ready to throw the intake back on for the final time hopefully this weekend and be done with the fuel system.
I also got my new radiator and fans today, they look so tiny!!!
Feb 5, 2011 | 02:47 AM
#345

Lookin real good man, coming along very nicely! Hey that NutZert tool kicks *** huh? We have one at work...I plan to get myself one eventually.
Are you going to have enough room for the engine to torque without the intake hitting the coils?
Are you going to have enough room for the engine to torque without the intake hitting the coils?
Feb 5, 2011 | 03:40 AM
#346

9 Second Truck Club
iTrader: (16)
Joined: Sep 2006
Posts: 3,655
Likes: 5
From: Colorado Springs, Co/ Central, Ca
Next up was the fuel system. I wanted to charge the system to check for leaks as well as flush it out of any debris. I first flushed all the lines individually and then hooked them all up together and ran the whole system for about 3 minutes...
There was a bit of rubber junk from the hoses assembly that did get shot out. And I also found two leaks, one major, and the other minor. The major leak was just a question of tightening down some fittings, the smaller one requires me to get a new piece of hose. No biggie, just another set-back though. I should be ready to throw the intake back on for the final time hopefully this weekend and be done with the fuel system.
I also got my new radiator and fans today, they look so tiny!!!

Last edited by stock48; Feb 5, 2011 at 09:32 AM. Reason: Add
Feb 5, 2011 | 09:39 AM
#347

Looking good
I would recommend that you solder the main power cable crimped connectors, as I used that wire on a few occasions and before/after soldering the terminals I would see a 1/2 volt vaiance because of the contact patches.
On the Pro-Flo did it have any interference with the heater lines, or only after the coils were relocated?
Feb 5, 2011 | 04:47 PM
#348
Thread Starter
GFYS and STFU
iTrader: (8)
Joined: Jan 2007
Posts: 13,870
Likes: 4
From: Here and sometimes there too.
As far as engine rocking is concerned, I left about 3/4 of an inch between the coil packs and the intake. I hope it's enough but I'm prepared to adjust as needed. Only way to really know is take a peek at it when it's on the dyno.

I just talked to the guy who'd gonna be doing my exhaust/fixing some cold piping and I'm gonna be towing the truck to him by the end of the coming week. And he thinks I might have it back in a week or two, he's not sure. The guy is seriously legit which means he's really $$.

Today in his shop he had a Pagoni Zonda, Ferrari Enzo, two Aston Martin's, and two Gallardo's.

Where I'm at right now is I need to...
Re-install the intake,
Run the fuel lines,
Run the grounds from the battery and the fuel tank,
Clip in the wiring harness to all the sensors,
Run fuel tank vent,
Run the oil feed and oil return lines to the turbo,
Put the radiator/intercooler back in,
Wire up and mount the efans,
Run vents to the back of truck,
Install/mount the tranny cooler and run the lines,
Install drive-shaft,
Install bed,
Install overflow tank,
And finally run all coolant plumbing lines.
(I know there's one or two things I'm missing...)
I'm waiting on a couple parts but I could get all that done in a day, hopefully monday. But I know the tranny cooler mount will take a little while.
Looking good
I would recommend that you solder the main power cable crimped connectors, as I used that wire on a few occasions and before/after soldering the terminals I would see a 1/2 volt vaiance because of the contact patches.
On the Pro-Flo did it have any interference with the heater lines, or only after the coils were relocated?
I would recommend that you solder the main power cable crimped connectors, as I used that wire on a few occasions and before/after soldering the terminals I would see a 1/2 volt vaiance because of the contact patches.
On the Pro-Flo did it have any interference with the heater lines, or only after the coils were relocated?
Pro-Flo fits fine, it's the coil packs that are the problem. Don't hesitate to use this intake if it's something your thinking about using, up to now it's served me really well, apart from having a huge ***!
 Feb 5, 2011 | 04:55 PM
#349


