Petro's Project ERL Superdeck 427 w/ Whipple 2.9L
 Jun 21, 2017 | 10:32 PM
#381

Don't you figure if the engineers at ARP thought a quick polish would benefit their product they would do it before they packaged them? I get the reasoning behind a lot of what you're doing but fasteners are a highly engineered system. I personally wouldn't interfere with the fit of the threads against each other. They rely on a certain amount of friction for their holding power and lubricating the threads gets you to their specified values. They have some highly specialized testing and manufacturing facilities to reach the tq and tensile strength numbers they advertise. I doubt you have the means to test and measure what you're actually improving or harming in the way of tq value.
At the end of the day, its your time and dollars but there are a few things here that I wouldn't personally be reinventing in my garage.
Not busting your ***** here, this is a top notch build, but I'd hate to see a failure due to just plain ol overthinking something.
At the end of the day, its your time and dollars but there are a few things here that I wouldn't personally be reinventing in my garage.
Not busting your ***** here, this is a top notch build, but I'd hate to see a failure due to just plain ol overthinking something.
Jun 21, 2017 | 11:12 PM
#382


You can also bring a bolt up to torque spec three times. The first two polish and burnish the bolt threads, the nut surface, and the bearing surface between the nut and cap. By a third torquing, everything’s polished and slicker than after the first. It’s lost the friction that gives the initial reading on the torque wrench. That third, final reading is accurate to within 0.0002 inch of bolt stretch on ARP bolts using ARP moly lube, according to ARP’s Tom Smith.
Jun 22, 2017 | 02:38 PM
#383
Another good practice for fasteners is to torque them them in sequence at progressively higher torque values until you reach the recommended value then wait 5 minutes, loosen the bolt/nut, torque to final value in sequence, wait another 5 minutes, loosen again and apply final torque value in sequence. For studs make sure the upper threads aren't shouldered on the surface but above it. You can also clean the coating off to achieve cleaner threads.
Jun 22, 2017 | 07:48 PM
#384
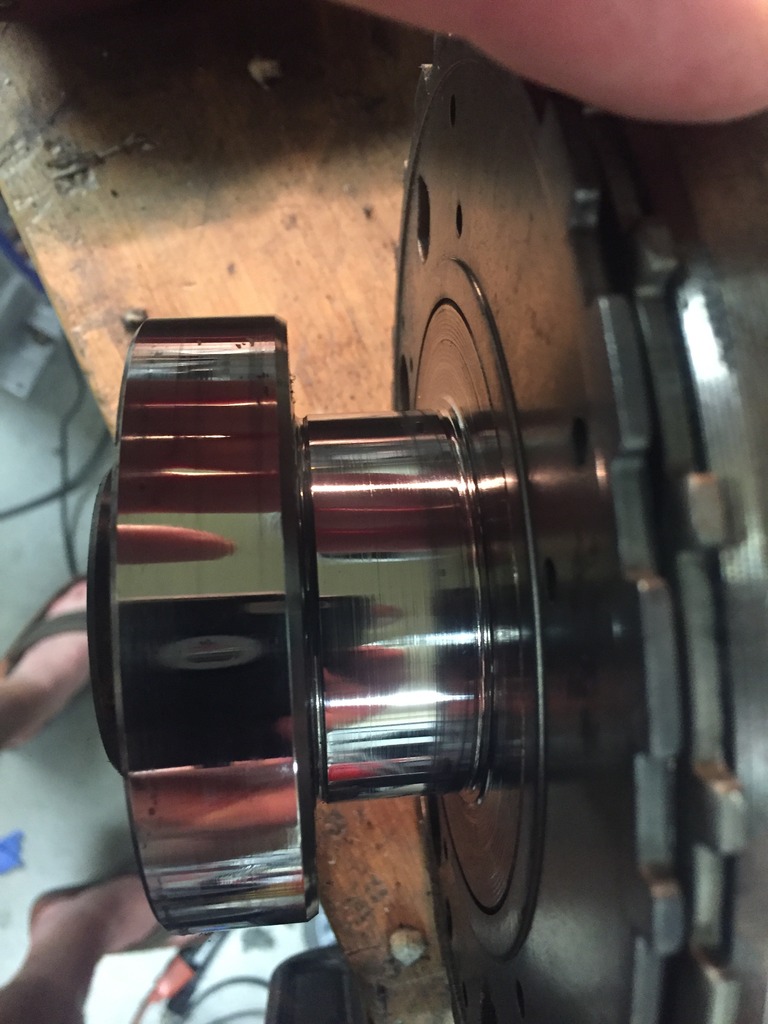
Messing some more stuff up. You can see radial marks/grooves where the polishing belt media clumped up or caught a piece of metal that didn't get flushed out during the process causing marks. Shining these surfaces up let's you see the imperfections. Belt speed, backing material, backing thickness, type of coolant used etc etc all affect the finished product.

 Jun 24, 2017 | 03:58 PM
#386
Polishing the thrust faces on the connecting rods with a strip of denim. I was surprised at how many nicks and gouges there were on these. Titanium connecting rod thrust faces are typically coated because of way the metal galls itself. I will be be coating these shortly even though they aren't titanium just because.


 Jun 25, 2017 | 11:01 PM
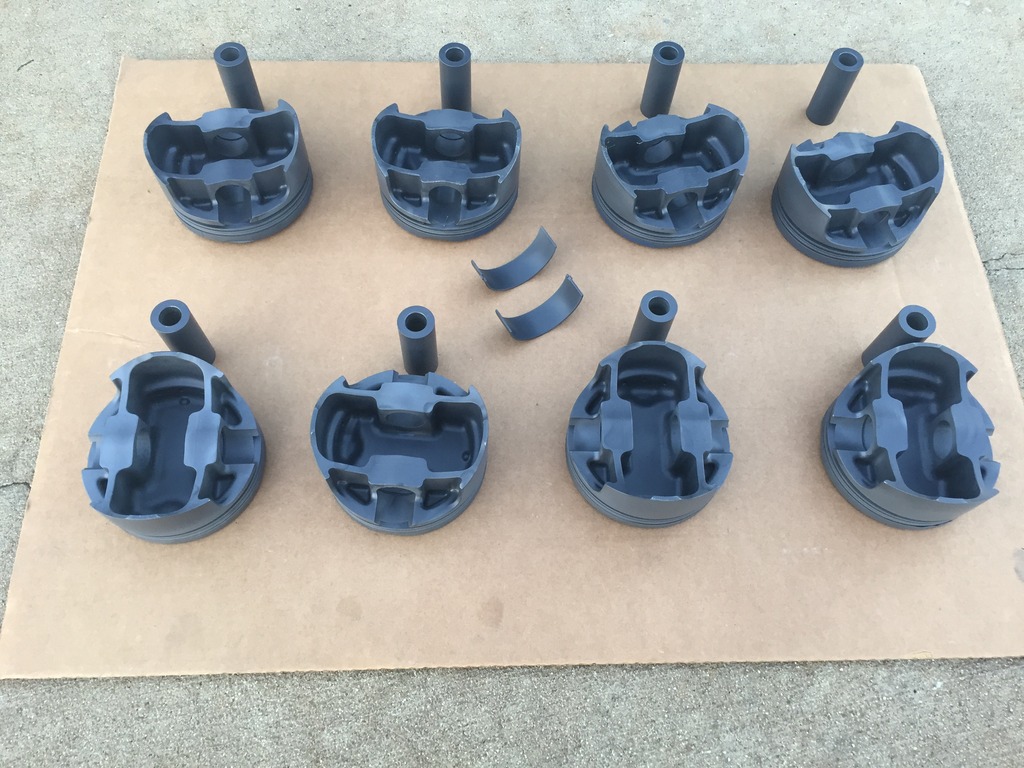
#389
Got the pistons and wrist pins coated with microslick after sanding/deburring sharp edges, polishing, etching. I still have to coat the tops with the thermal coating. I meant to build a crankshaft polishing stand today but ran out of time. I will be polishing it to have a isotropic/non-directional finish vs the unidirectional one it currently has. Also tested coating a extra set of rod bearings with the mircoslick. They turned out really nice. Oh and I also put a very light chamfer in the small end oil holes of the rod.