

Spoolin's attempt to Spool...
 Feb 8, 2011 | 08:47 PM
#371

So I guess you arent flying down for the meet either?
The cam plug is a little flat black two wire plug that should be close to your oil sender plug on the harness unless you cut the plug off or something.
The cam plug is a little flat black two wire plug that should be close to your oil sender plug on the harness unless you cut the plug off or something.
Feb 9, 2011 | 12:11 AM
#372
Thread Starter
GFYS and STFU
iTrader: (8)
Joined: Jan 2007
Posts: 13,870
Likes: 4
From: Here and sometimes there too.
I plan on flying down. Jarrett (stock48) is also going apparently!!


 Feb 10, 2011 | 04:04 AM
#377
Thread Starter
GFYS and STFU
iTrader: (8)
Joined: Jan 2007
Posts: 13,870
Likes: 4
From: Here and sometimes there too.
Sweet!! Progress was made today! 
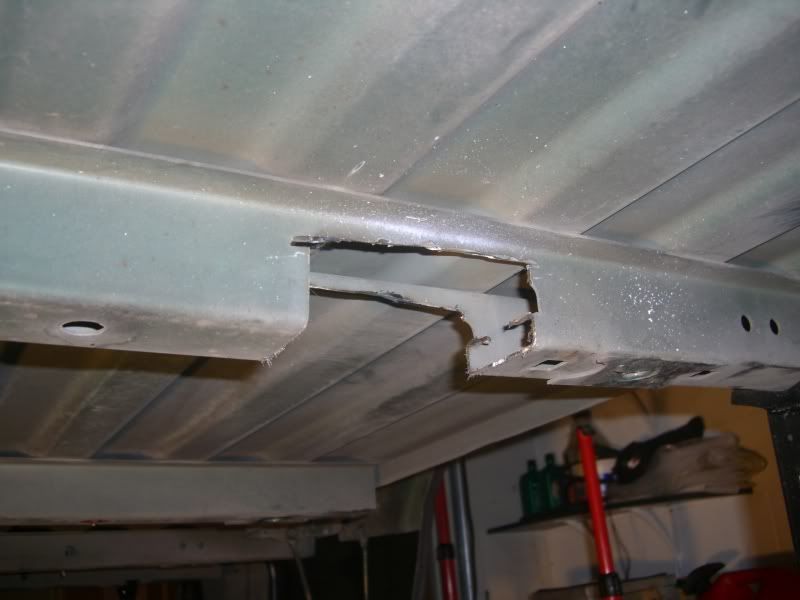
First, here's the carnage from yesterday...
This is the last cross member under the bed closest to the bumper, looks like my payload capabilities have been affected!! I needed to cut it out so the filler and fuel bucket would clear, I've since cleaned up the cuts so they are smooth as a elephants ***...
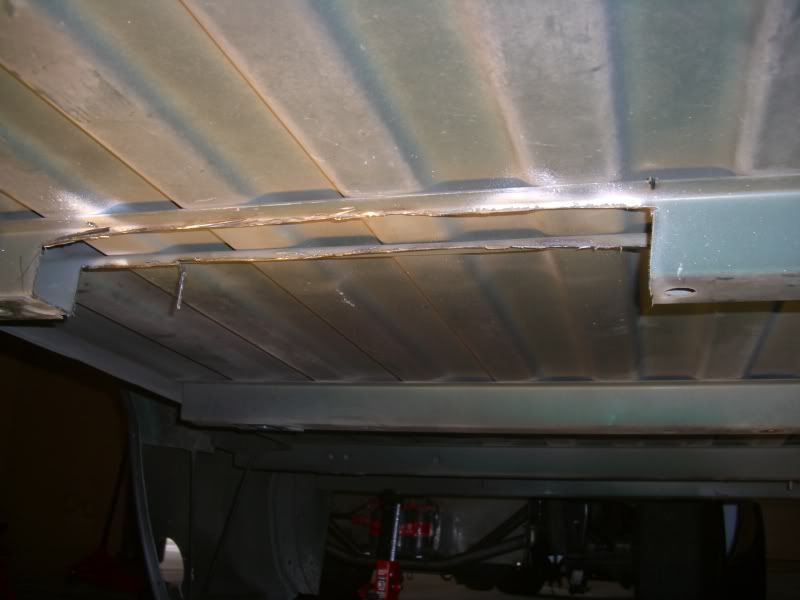
And I cut this little section out so that my two extra bungs would have room as well once I decide what I'm gonna do with those eventually...
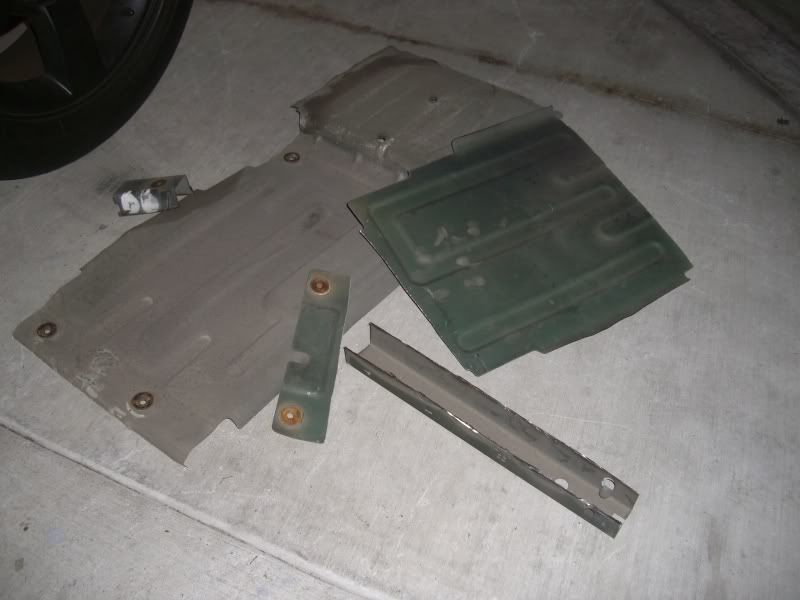
Here's part of a pile of all the heat shields and crossmembers that I cut-out. I had to drill the bolts out that holds the heat shields in place. This stupid job took me about 3-4 hours.
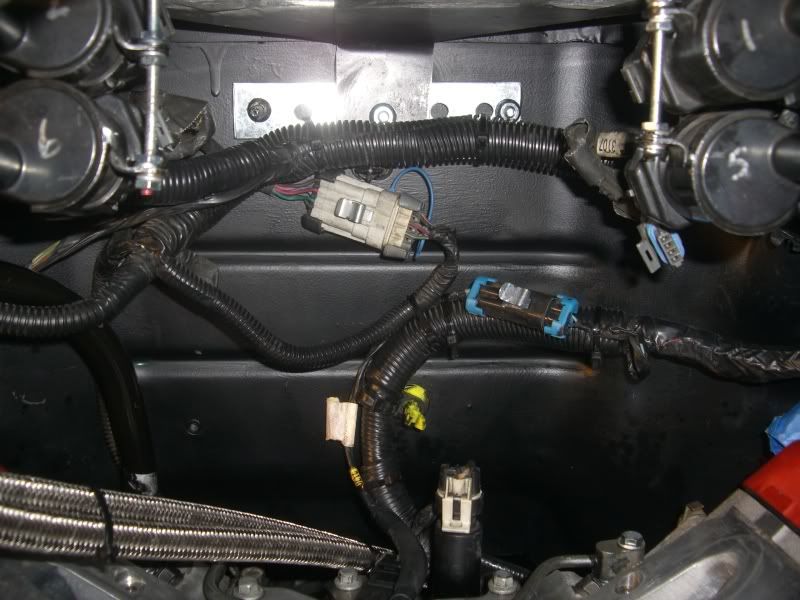
I also did some zip-tying of the harness up on the firewall so it's not out and all over the place...
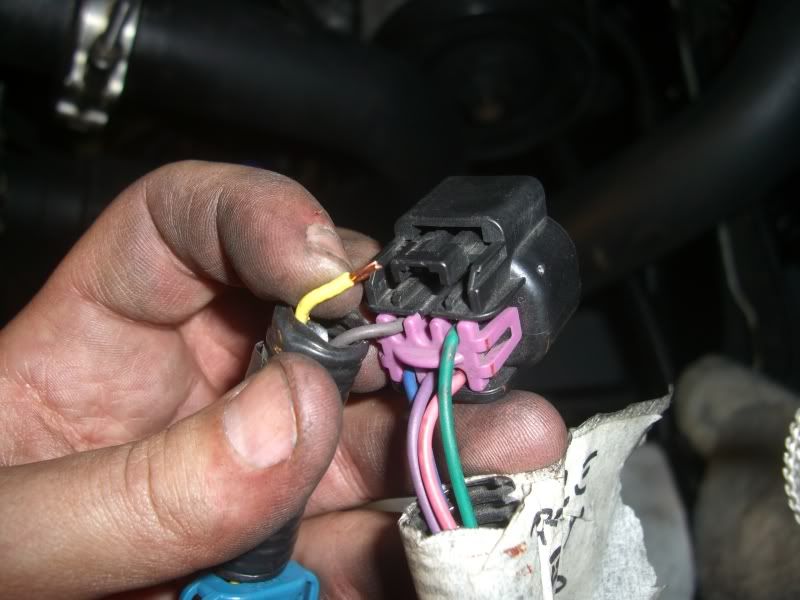
When I was fugging around with the wiring I found that my TB connector had a wire pop out I'm gonna have to fix that...
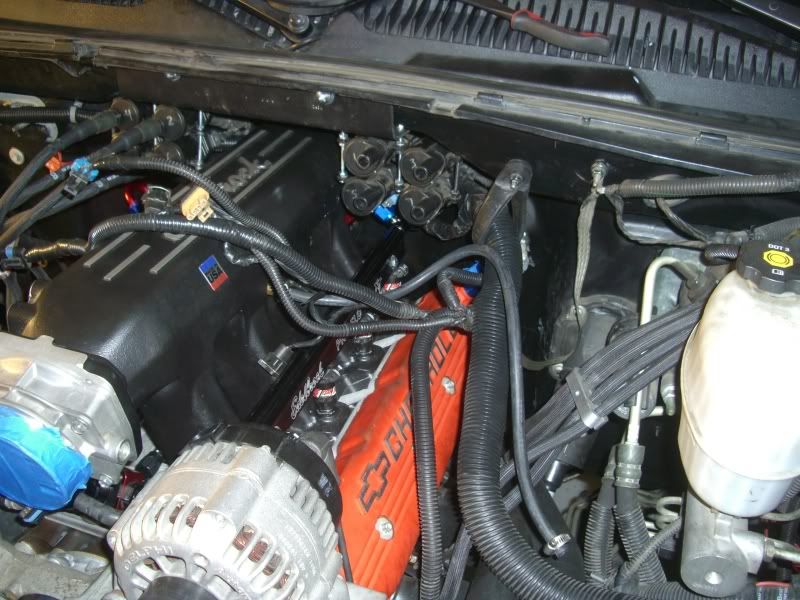
I dropped on my intake for the last time and Torqued it down. Ran the harness on the passenger side so it's all tucked away and mostly out of sight, so this side is pretty much finished...

Here's the diver's side as of now...
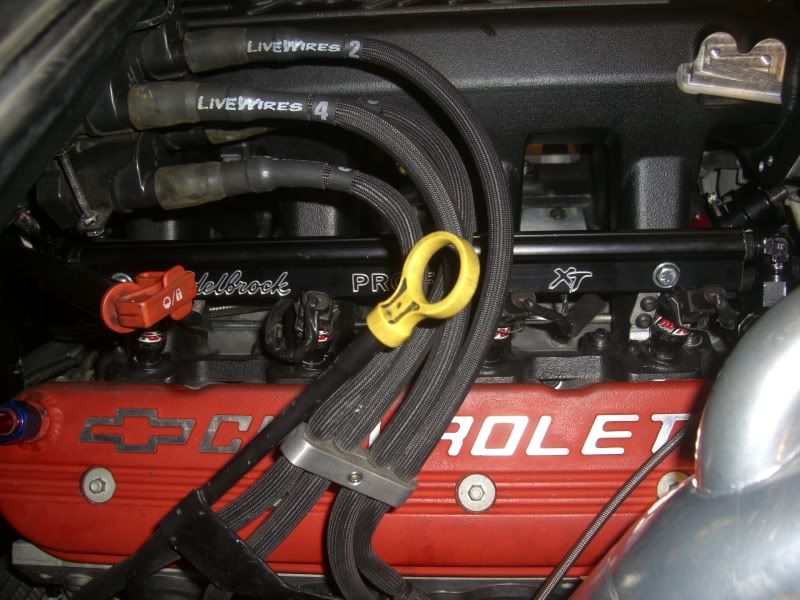
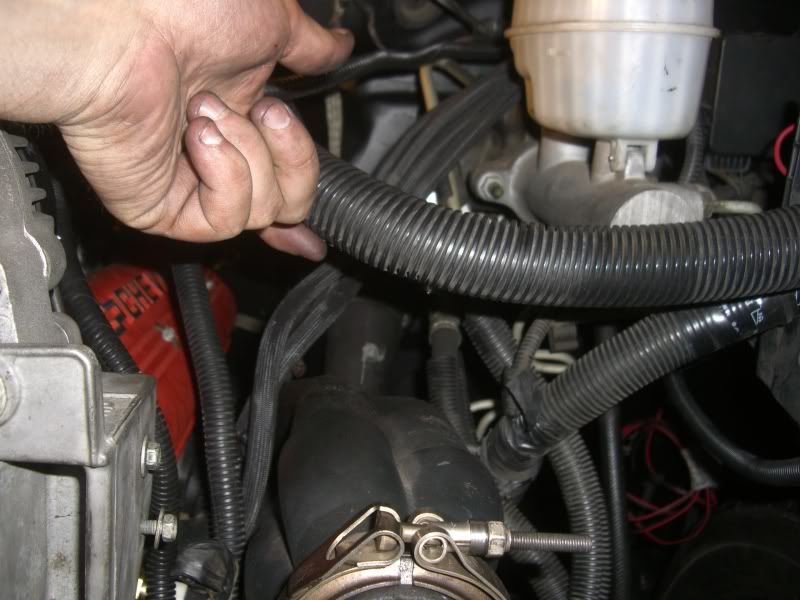
Before I can clip everything in I have to figure out a way to keep the main harness off the header, anyone have any suggestions?
Here it where I want it to be...
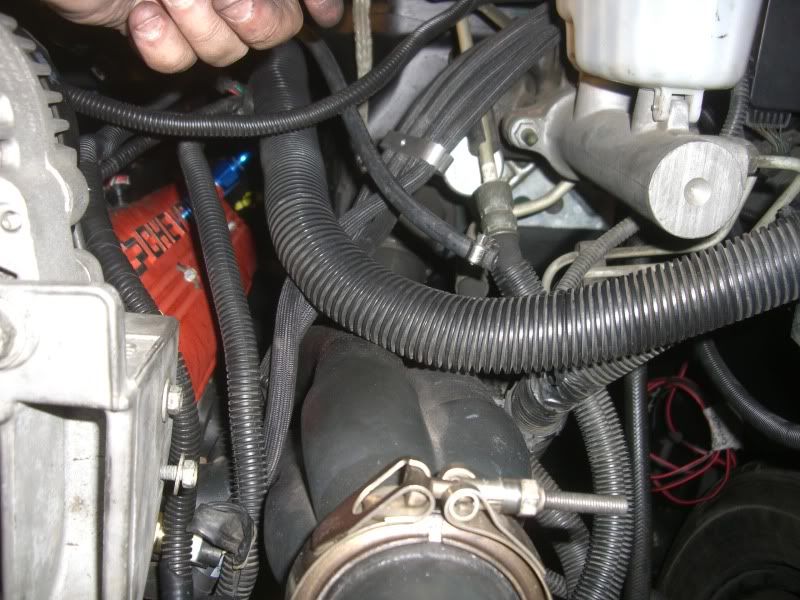
And here's how it currently lies, it pretty much just sits on the manifold. Things gonna cook obviously so...anyone...anyone...?
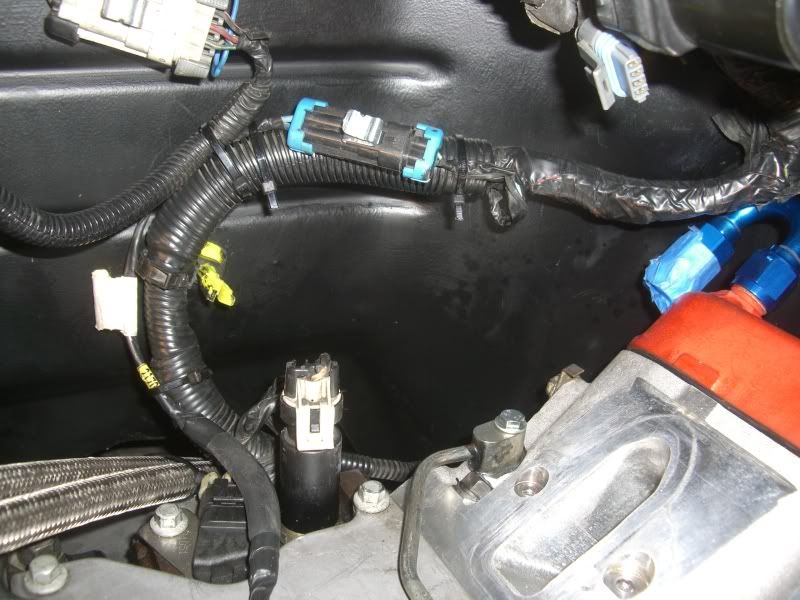
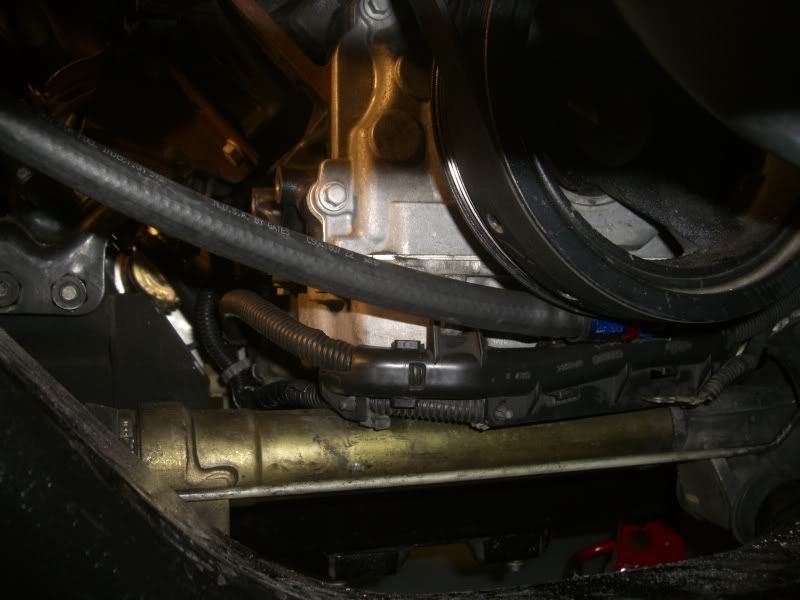
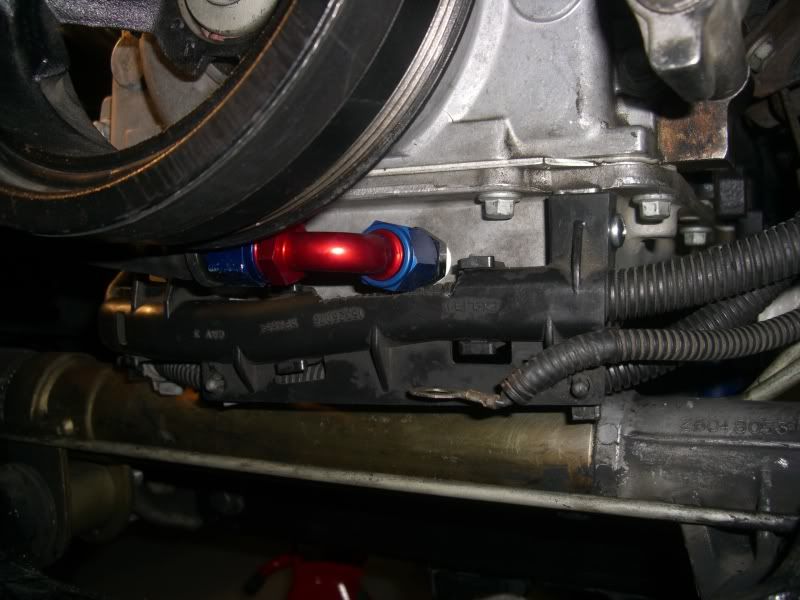
I also got around to running the turbo oil supply and return, here's where I ended up placing the return...
First, here's the carnage from yesterday...
This is the last cross member under the bed closest to the bumper, looks like my payload capabilities have been affected!!
I needed to cut it out so the filler and fuel bucket would clear, I've since cleaned up the cuts so they are smooth as a elephants ***...And I cut this little section out so that my two extra bungs would have room as well once I decide what I'm gonna do with those eventually...
Here's part of a pile of all the heat shields and crossmembers that I cut-out. I had to drill the bolts out that holds the heat shields in place. This stupid job took me about 3-4 hours.
I also did some zip-tying of the harness up on the firewall so it's not out and all over the place...
When I was fugging around with the wiring I found that my TB connector had a wire pop out
I'm gonna have to fix that...I dropped on my intake for the last time and Torqued it down. Ran the harness on the passenger side so it's all tucked away and mostly out of sight, so this side is pretty much finished...
Here's the diver's side as of now...
Before I can clip everything in I have to figure out a way to keep the main harness off the header, anyone have any suggestions?
Here it where I want it to be...
And here's how it currently lies, it pretty much just sits on the manifold. Things gonna cook obviously so...anyone...anyone...?
I also got around to running the turbo oil supply and return, here's where I ended up placing the return...
Feb 10, 2011 | 04:04 AM
#378
Thread Starter
GFYS and STFU
iTrader: (8)
Joined: Jan 2007
Posts: 13,870
Likes: 4
From: Here and sometimes there too.
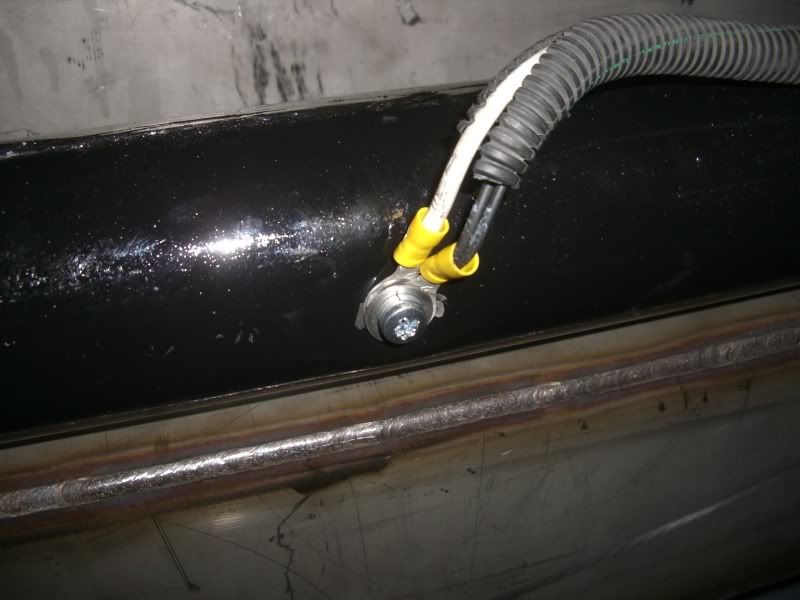
I finished up all the fuel lines as well, ran them back to the fuel tank and needed to do some wiring before popping the bed on so I got to work on that. Here are a couple grounds (for what I don't know but I assume it's the tail-lights since it part of that harness)...
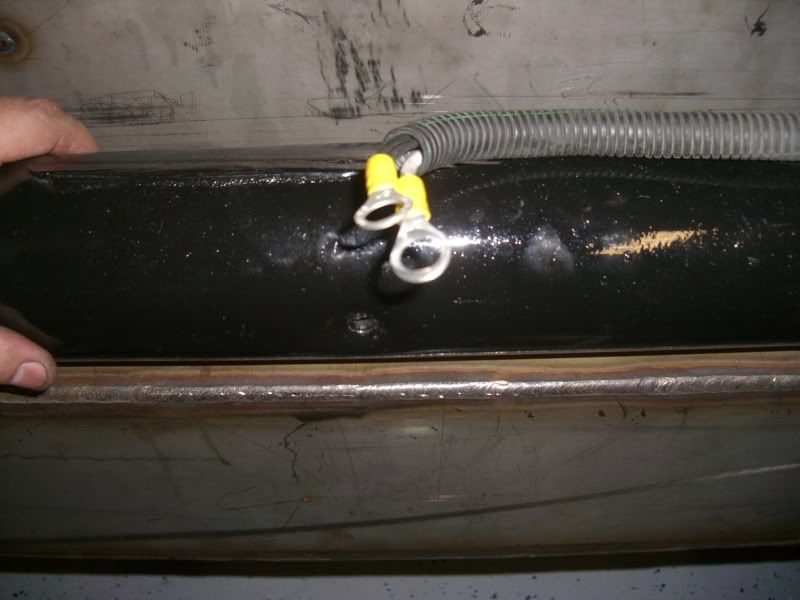
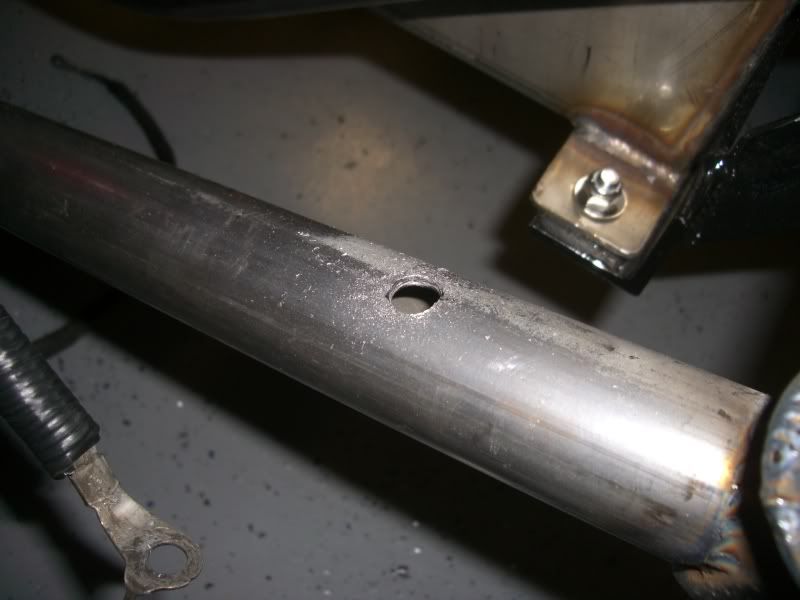
Drilled a hole in a cross member...
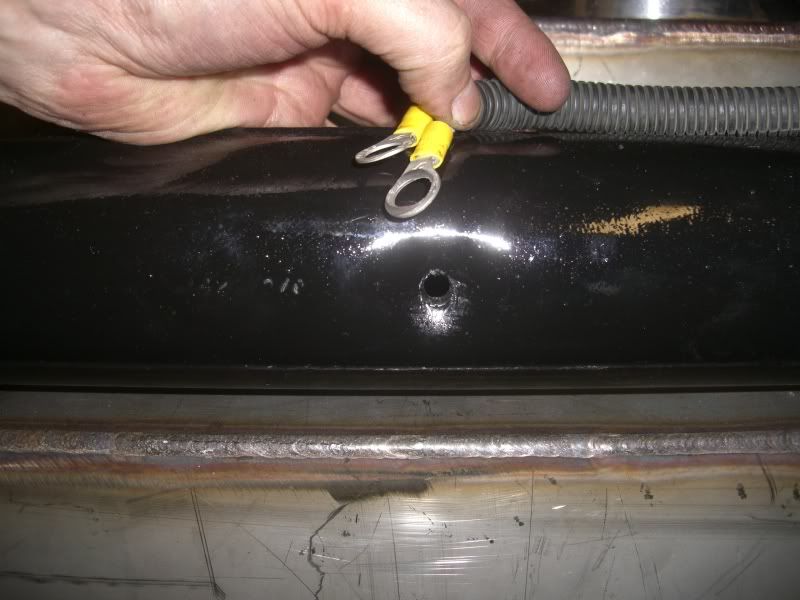
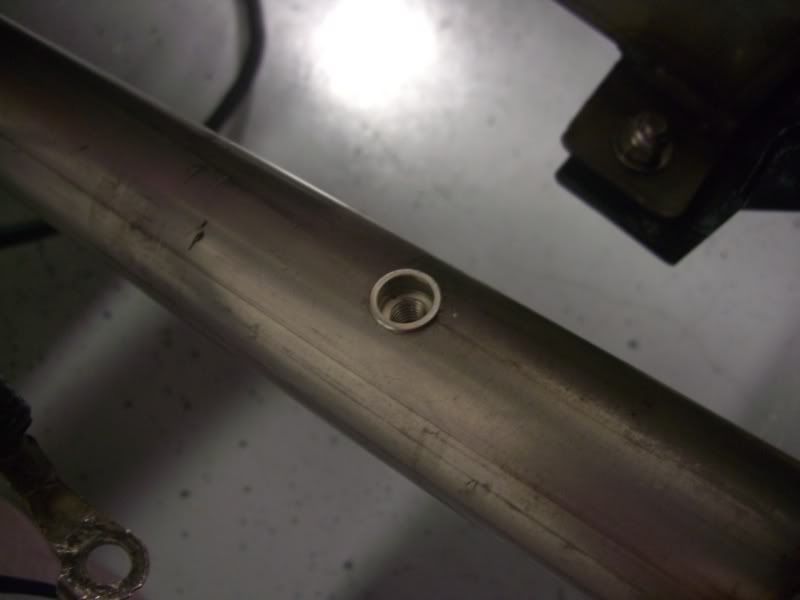
Chipped some paint away so there would be some good contact patch and then popped in a nutzert...
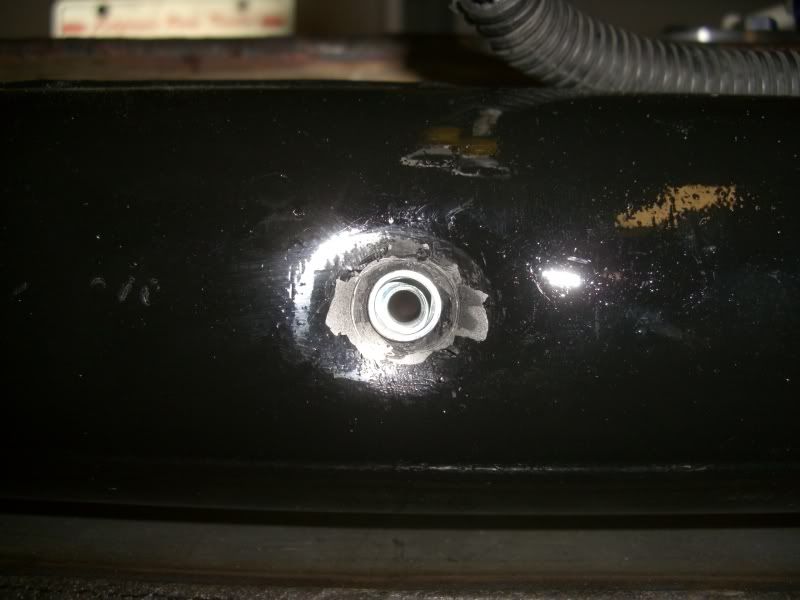
And threw on a bolt. So that's grounded well hopefully...
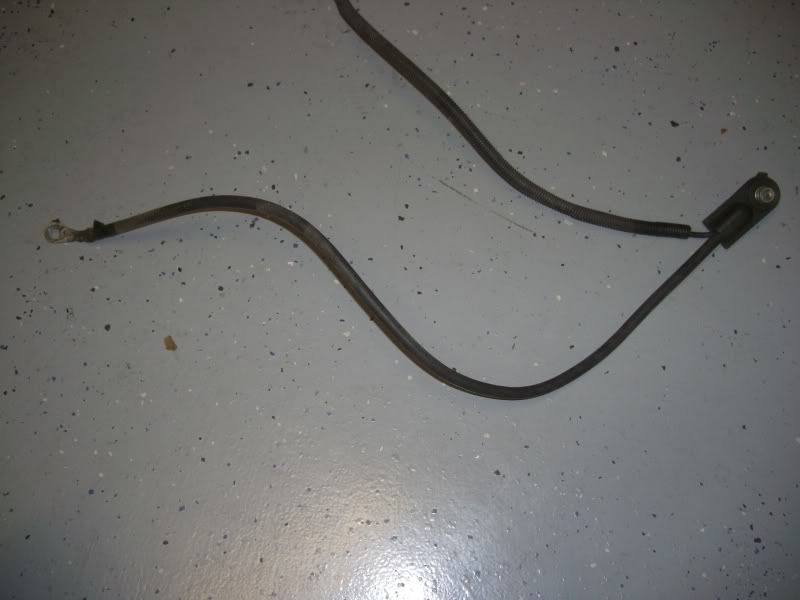
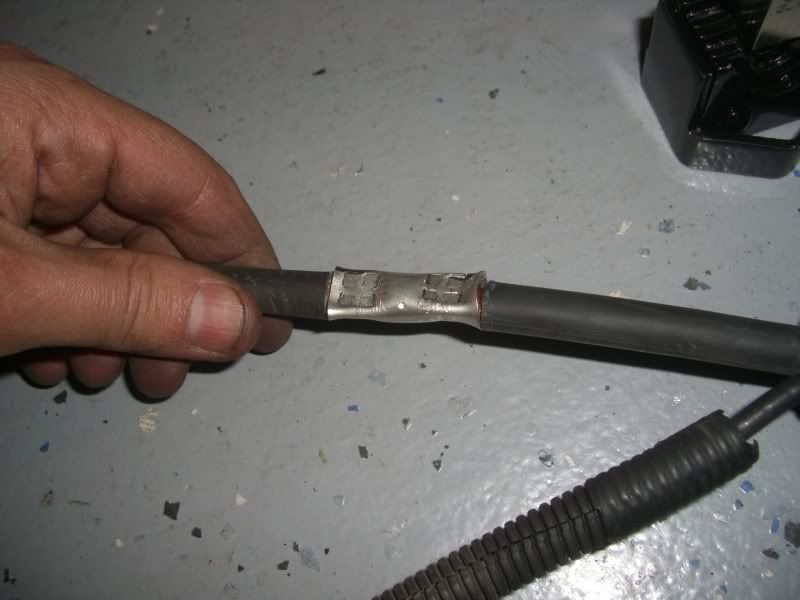
Next I moved on to the battery ground, the stock ground wire is 34" inches in length and I only needed 13" so...
Stock length...
Cut down to 13" inches...
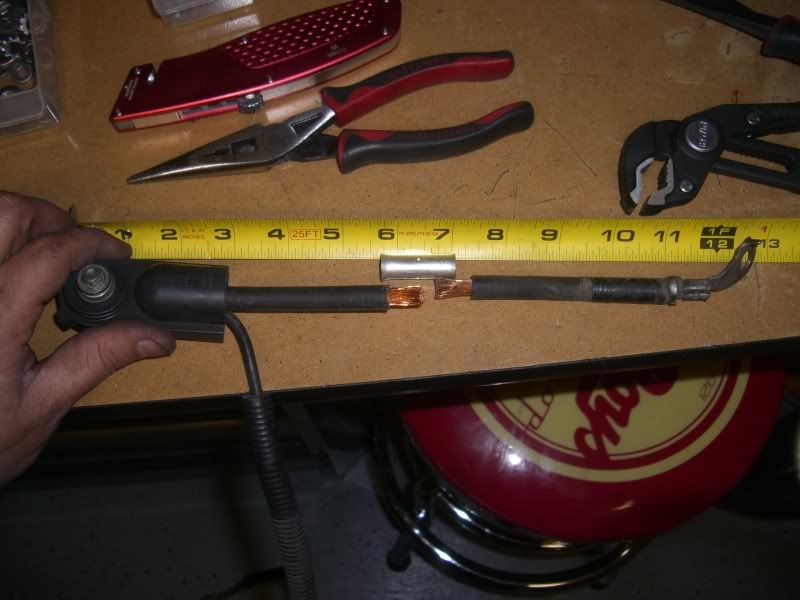
This is a nifty big gauge wire crimper that I got at a welding store. I couldn't afford the $150 crimpers for huge gauge wire but this little $15 gem is awesome!
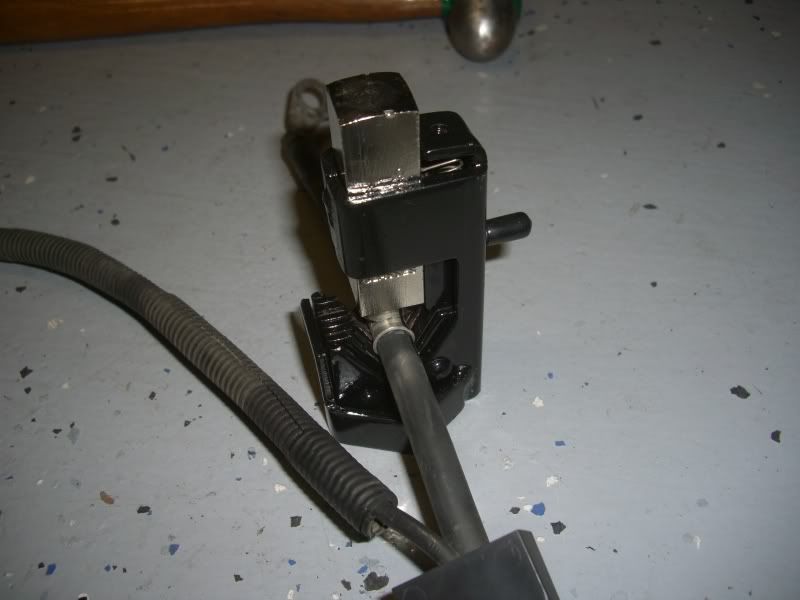
Couple hammer blows later and I have one wire again...
Took a drill to a cross-member again...
Put in another nutzert or whatever they are called...
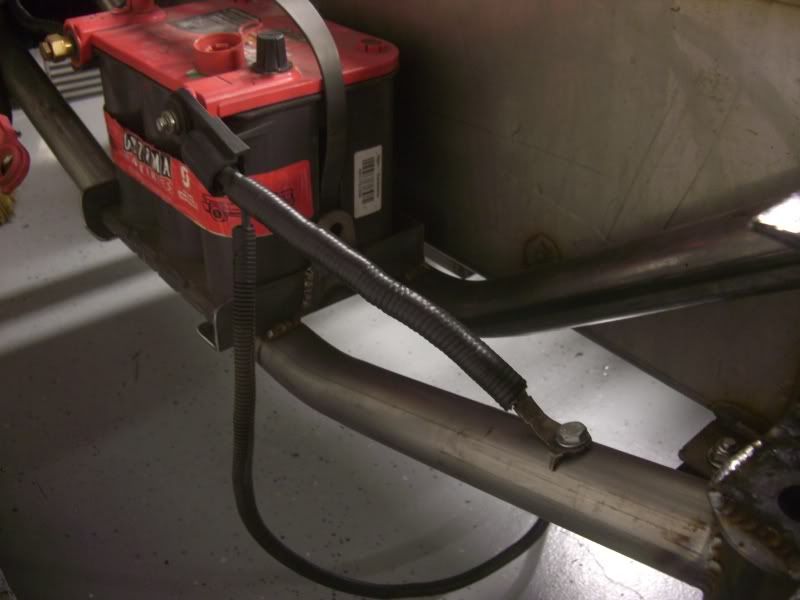
And now I have a shortened battery ground that looks pretty clean...
Drilled a hole in a cross member...
Chipped some paint away so there would be some good contact patch and then popped in a nutzert...
And threw on a bolt. So that's grounded well hopefully...
Next I moved on to the battery ground, the stock ground wire is 34" inches in length and I only needed 13" so...
Stock length...
Cut down to 13" inches...
This is a nifty big gauge wire crimper that I got at a welding store. I couldn't afford the $150 crimpers for huge gauge wire but this little $15 gem is awesome!
Couple hammer blows later and I have one wire again...
Took a drill to a cross-member again...
Put in another nutzert or whatever they are called...
And now I have a shortened battery ground that looks pretty clean...
Feb 10, 2011 | 04:14 AM
#379
Thread Starter
GFYS and STFU
iTrader: (8)
Joined: Jan 2007
Posts: 13,870
Likes: 4
From: Here and sometimes there too.
Tomorrow I need to put the bed back on and hopefully I can tow this truck to the exhaust shop where they can take their sweat *** time making it look good and sound better! I just hope the hole that I drilled in the bed for the filler neck is properly aligned...
Guess I'll find out tomorrow!!
Guess I'll find out tomorrow!!
Feb 10, 2011 | 06:05 AM
#380

On The Tree
Joined: Oct 2009
Posts: 156
Likes: 0
From: Jersey Village
I absolutely LOVE the way you have your coils set up, it's such a simple look, yet comes out super slick. The whole project is coming together great, the attention to detail is incredible.
As for the main harness, I can think of a couple ways to get it done, but it won't be in keeping with the look under the hood. From your pics, I can really only see two locations to piggyback a little harness support from, the most likely I'd say would be the accessory bracket closest to the harness. If you have access to sheet metal, it would be a thing you could make in a short time that, IMO, would look good and be functional. I can sketch an idea on one of your pics if you want, just to show you where my mind is at?
Again, awesome build, following it very closely!