

2000 Chevy Silverado project "Charlie Murphy"
 Nov 3, 2013 | 11:04 PM
#231

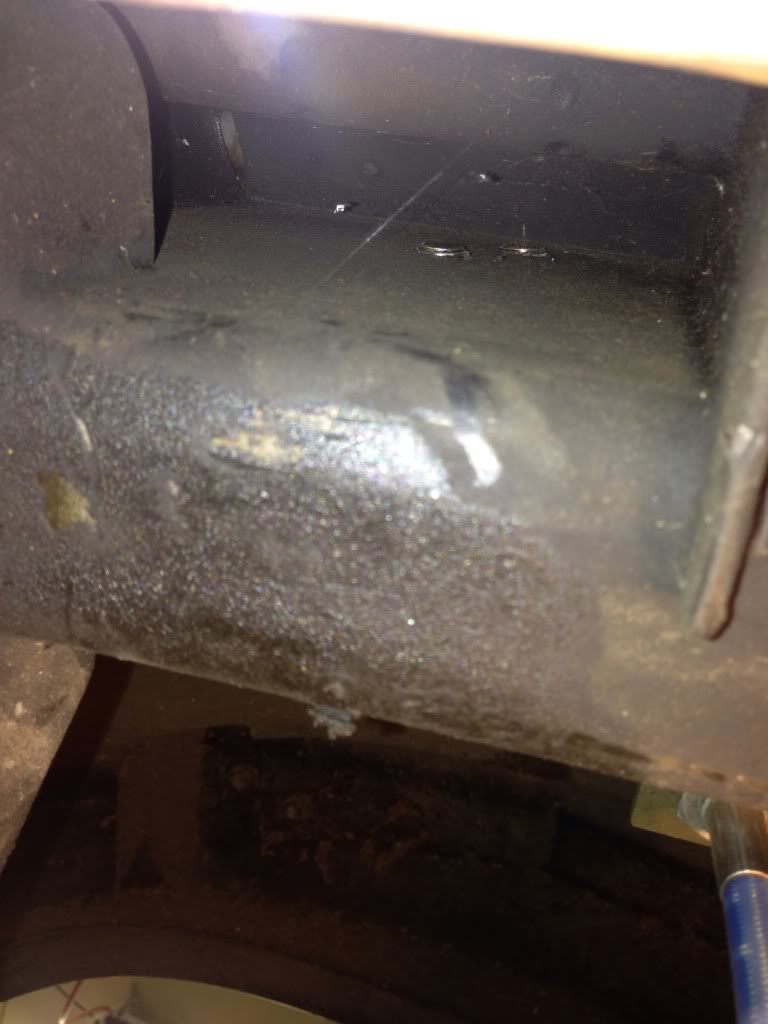
Yep, you need to sawzall that corner off, pretty easy job. I also ended up sawzalling the bumpstop cup off and using an aftermarket one on the bottom.
The driver side bolts suck...make sure you put the top one in first because you wont be able to get to the top one if you do the bottom one first. I didnt take the cv off when I did mine, but maybe that would have made it easier.
The driver side bolts suck...make sure you put the top one in first because you wont be able to get to the top one if you do the bottom one first. I didnt take the cv off when I did mine, but maybe that would have made it easier.
I picked up where I left off, bolting on the upper reinforcement mount.
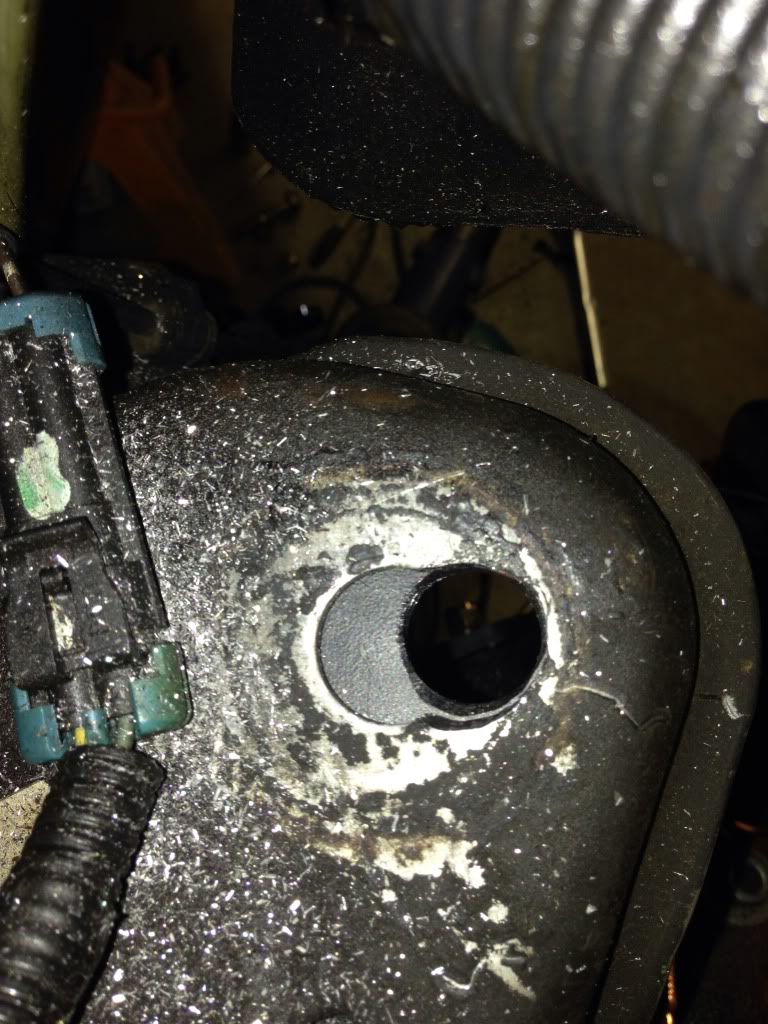
Here's what you're dealing with on the drivers side.
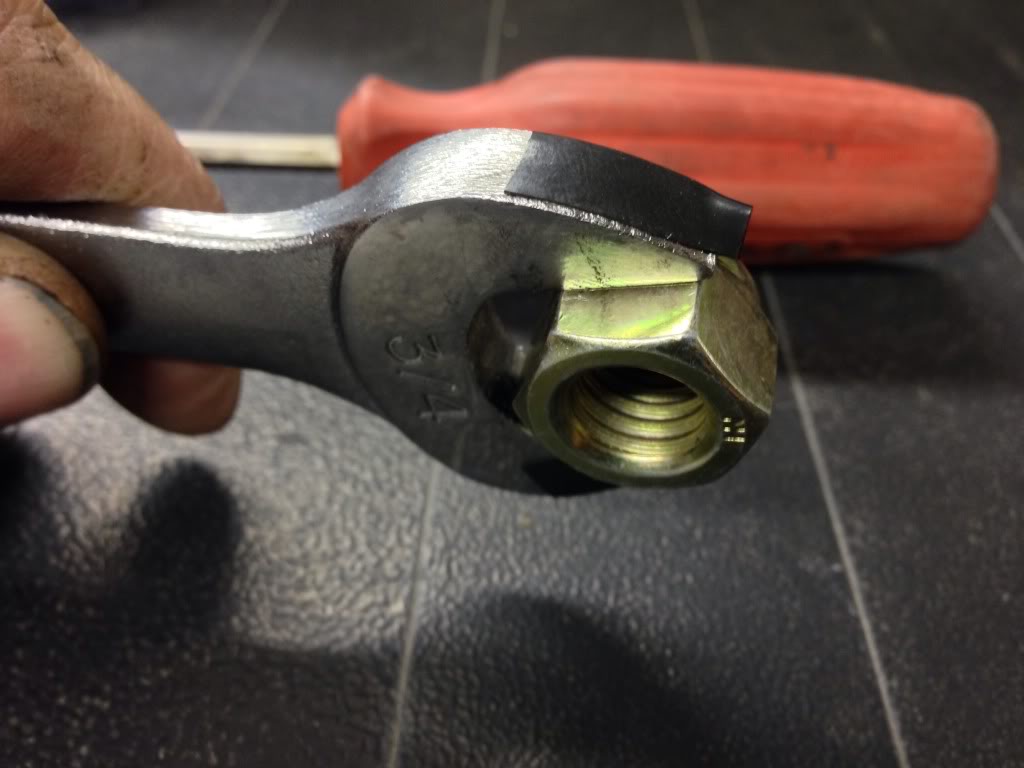
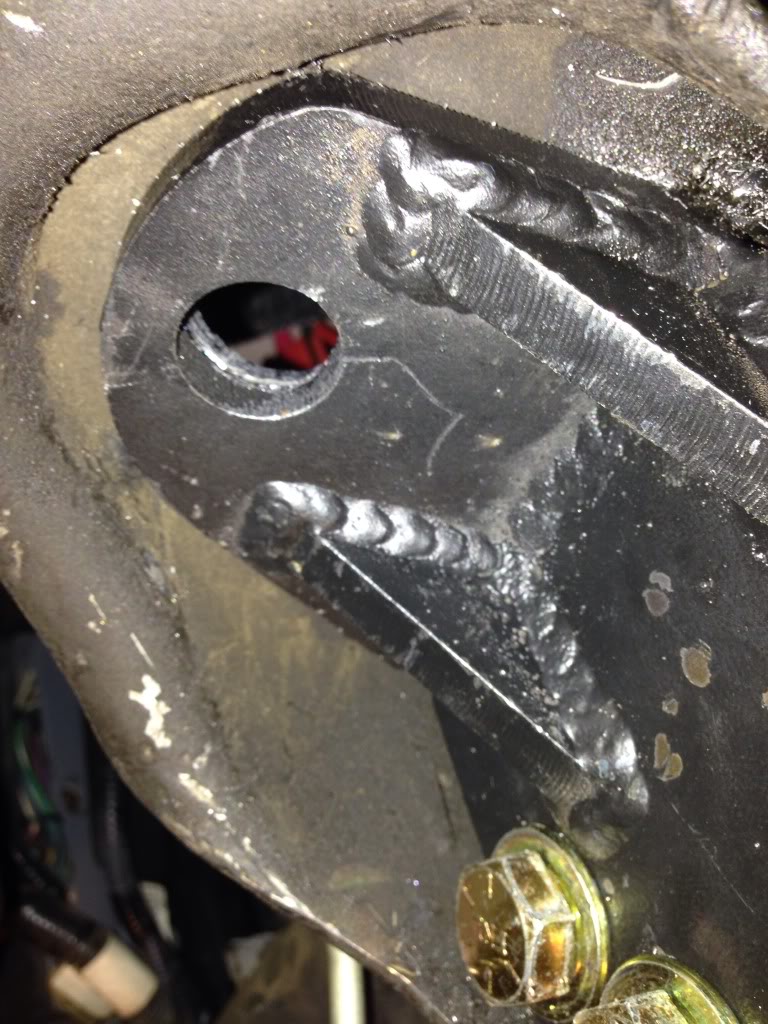
You have to put the upper nut on first. To do this, I removed the drivers side cv and taped the nut onto the wrench. Like this.
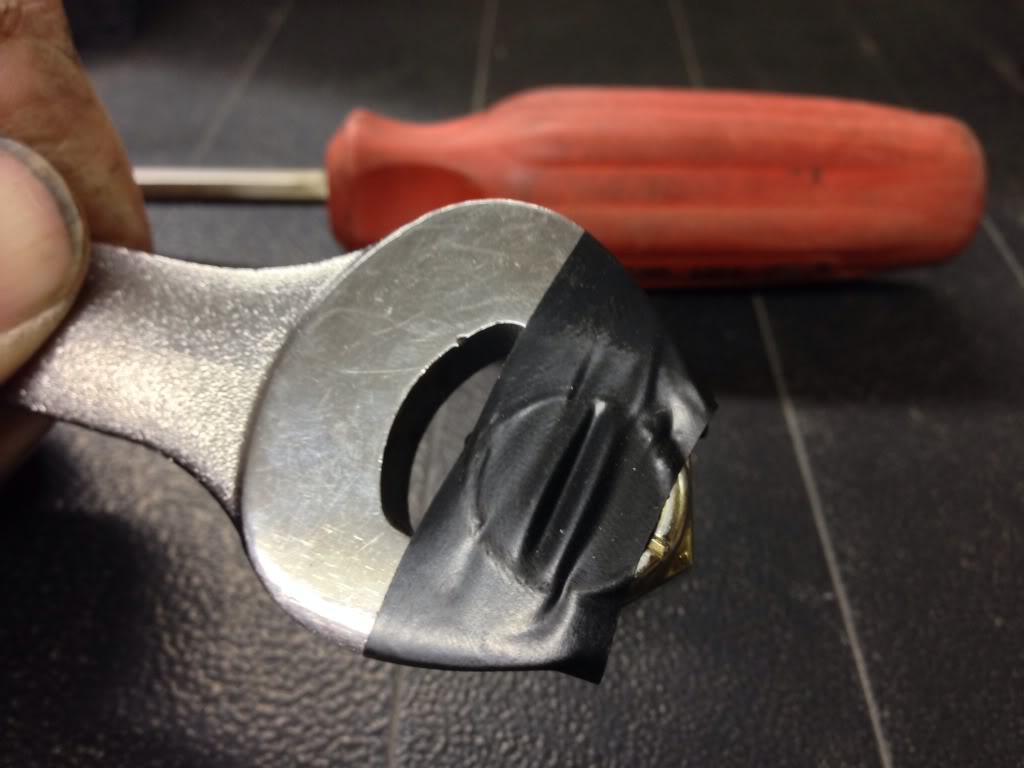
You have to make sure you tape the nut towards the top like this. Otherwise, the wrench hits the frame. At least it did on my setup. If you clamped the mount in a little differently, you may not need to do this.
After I got the mount bolted in, I had to open up the factory upper shock mount. I used a carbide burr my step father had from when he ported his heads.
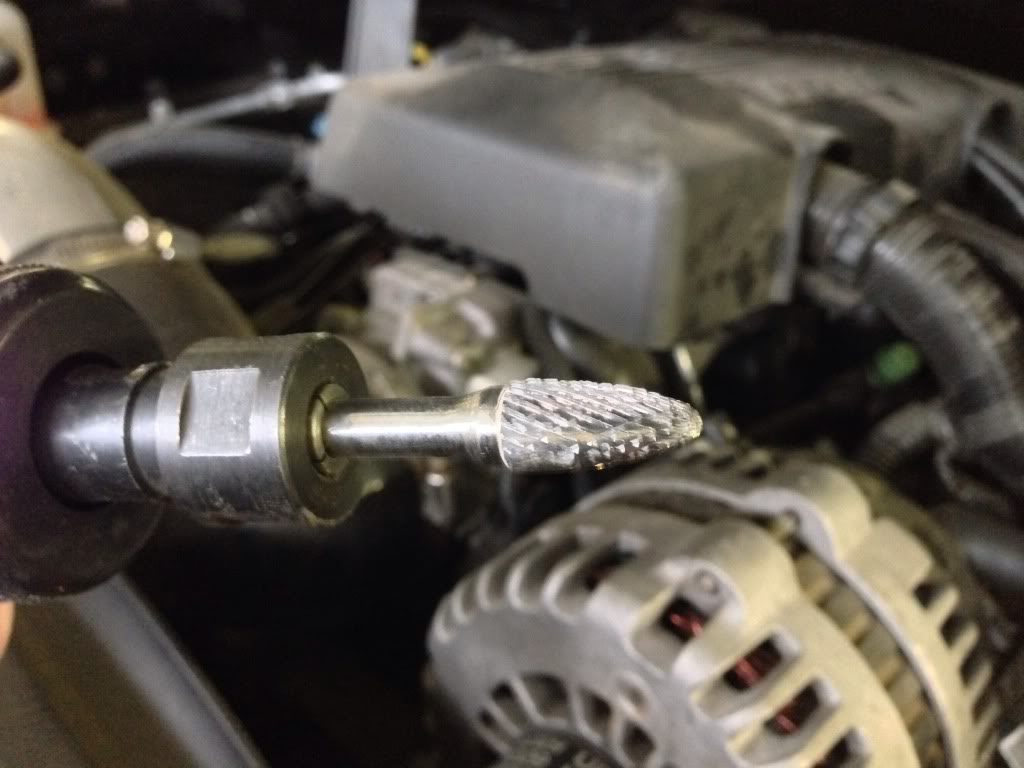
I'm sure other installs will vary slightly.
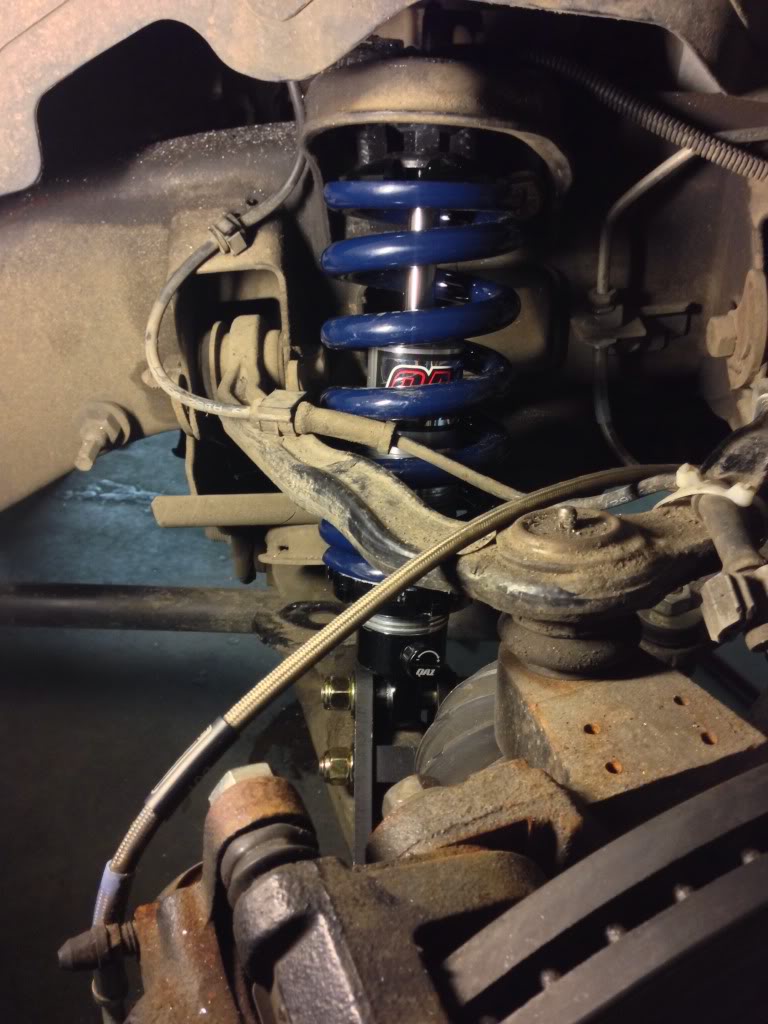
Here we go, all installed. The upper shock mount (stud) isn't bolted on in this picture, but there is pressure on the lower a-arm from a jack. I actually jacked it up enough to get it off of the jack stand.
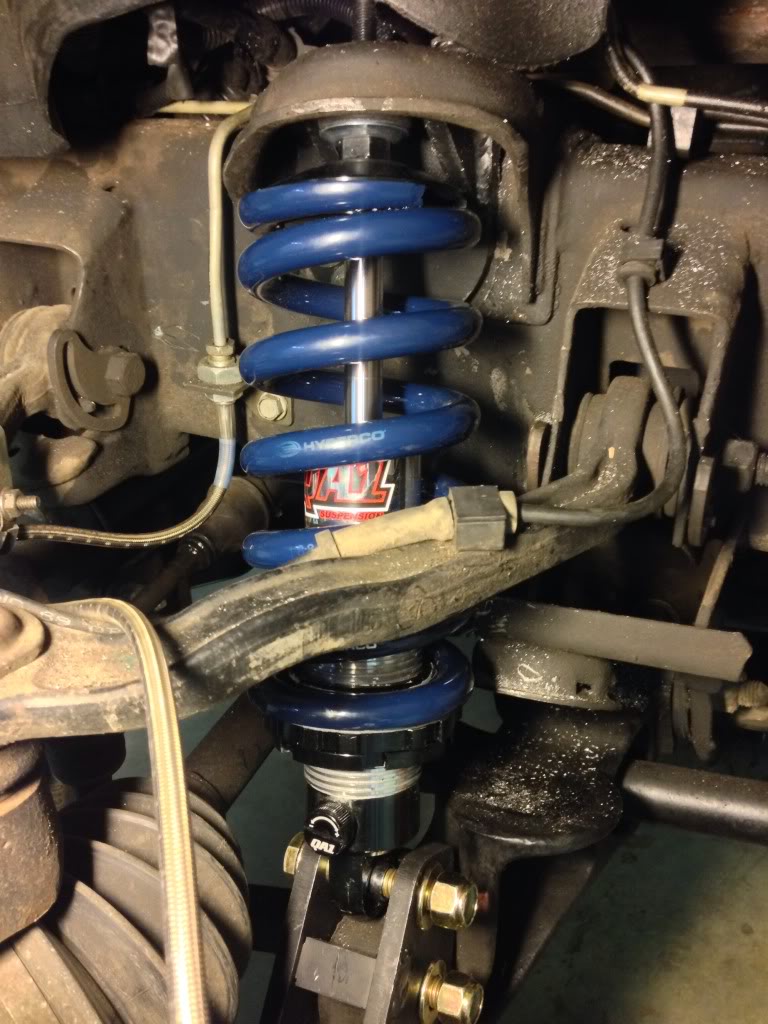
It's close, but everything clears.
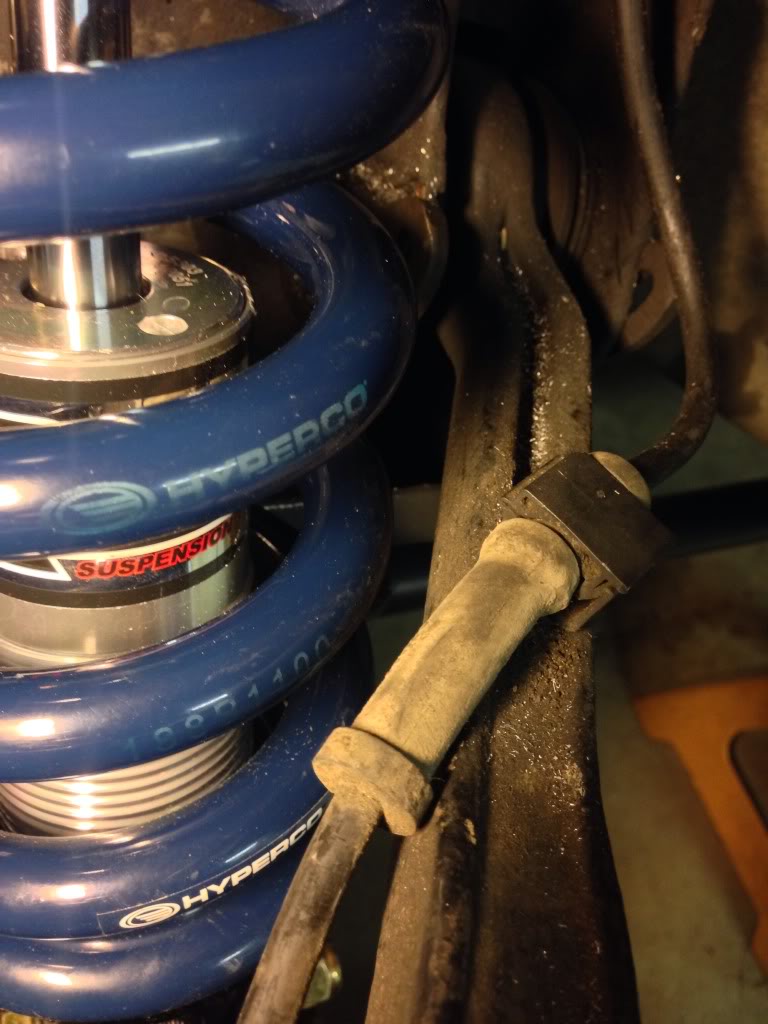
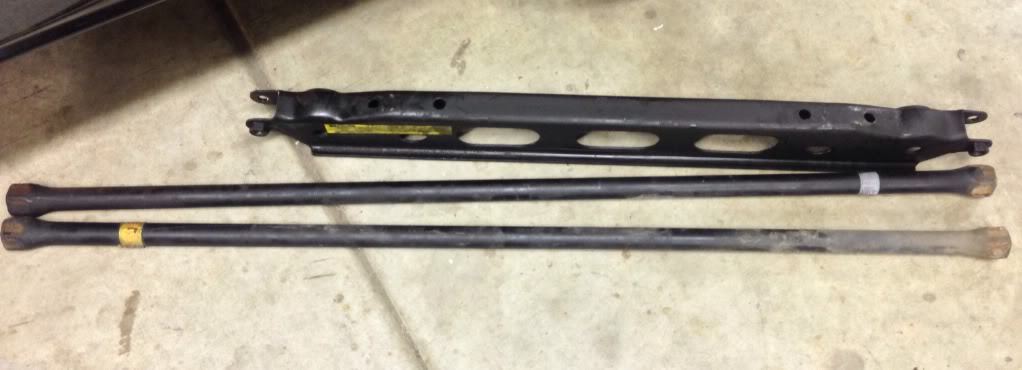
Repeat for passengers side. You can see the torsion bar is still in place, it's actually disconnected.
Bye, bye, torsion bars.
Here it is sitting back on the ground.
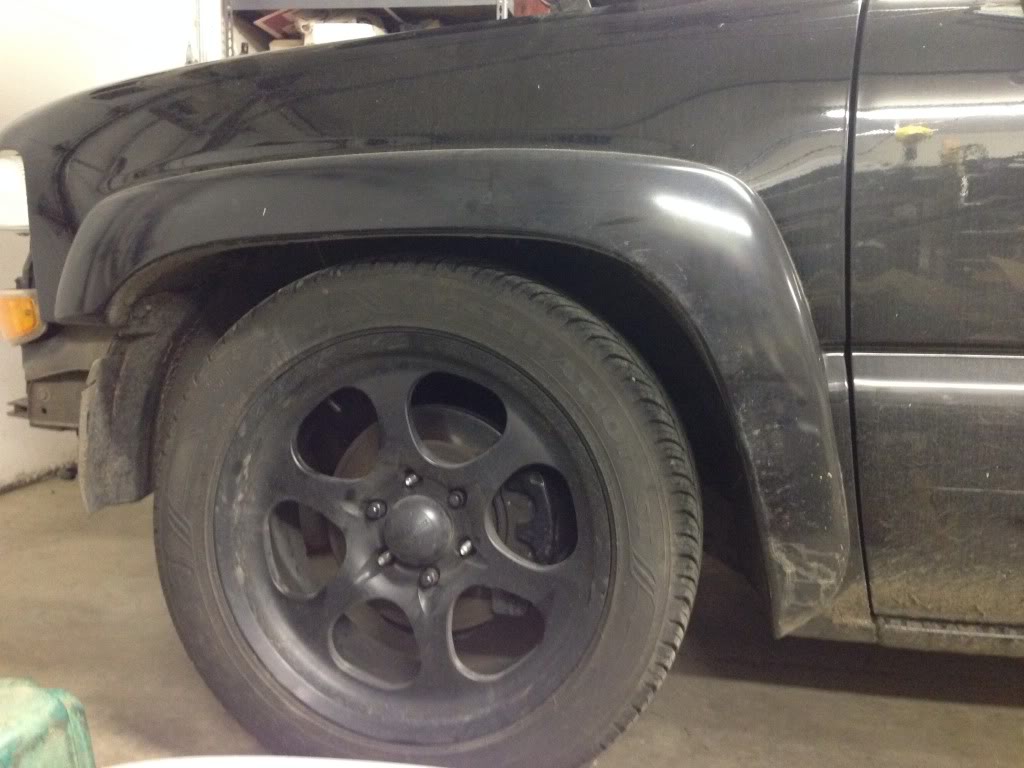
I jumped up and down and it felt great. Not stiff at all. Tons of travel, especially compared to the lowering keys and bumpstops. Amazing really.
I haven't adjusted the Coilovers at all yet. They're just the way they were when I installed them. The height came out to be about 30 inches. I need to crank them up a bit. Also, I haven't adjusted the dampening ***** yet either.
Next up, I need to get the height where I want it. Then install some bumpstops. After that, I'll install my rear helper airbags and finish up the towing package.
Nov 4, 2013 | 07:34 AM
#232


Joined: Jan 2006
Posts: 16,282
Likes: 438
From: Huntsville, AL
Nice! I did the same thing with the driver side bolts. The important thing is just dont overtighten them because the frame feels like it collapses easy right there.
I have my shocks set between 9 and 12/18 depending on what I want. Might want to start with a 10 setting since you dont have bumpstops on yet.
When I clamped the uppers I used a 5/8 bolt through the top hole to make sure it would line up, I didnt need to trim the hole at all when I did that.
I didnt see the little spacers on the bottom of the shock bolts, did you get those?
Nov 4, 2013 | 11:09 AM
#233
Nice! I did the same thing with the driver side bolts. The important thing is just dont overtighten them because the frame feels like it collapses easy right there.
I have my shocks set between 9 and 12/18 depending on what I want. Might want to start with a 10 setting since you dont have bumpstops on yet.
When I clamped the uppers I used a 5/8 bolt through the top hole to make sure it would line up, I didnt need to trim the hole at all when I did that.
I didnt see the little spacers on the bottom of the shock bolts, did you get those?
I have my shocks set between 9 and 12/18 depending on what I want. Might want to start with a 10 setting since you dont have bumpstops on yet.
When I clamped the uppers I used a 5/8 bolt through the top hole to make sure it would line up, I didnt need to trim the hole at all when I did that.
I didnt see the little spacers on the bottom of the shock bolts, did you get those?
Nov 4, 2013 | 11:15 AM
#234
Joined: Jan 2006
Posts: 16,282
Likes: 438
From: Huntsville, AL
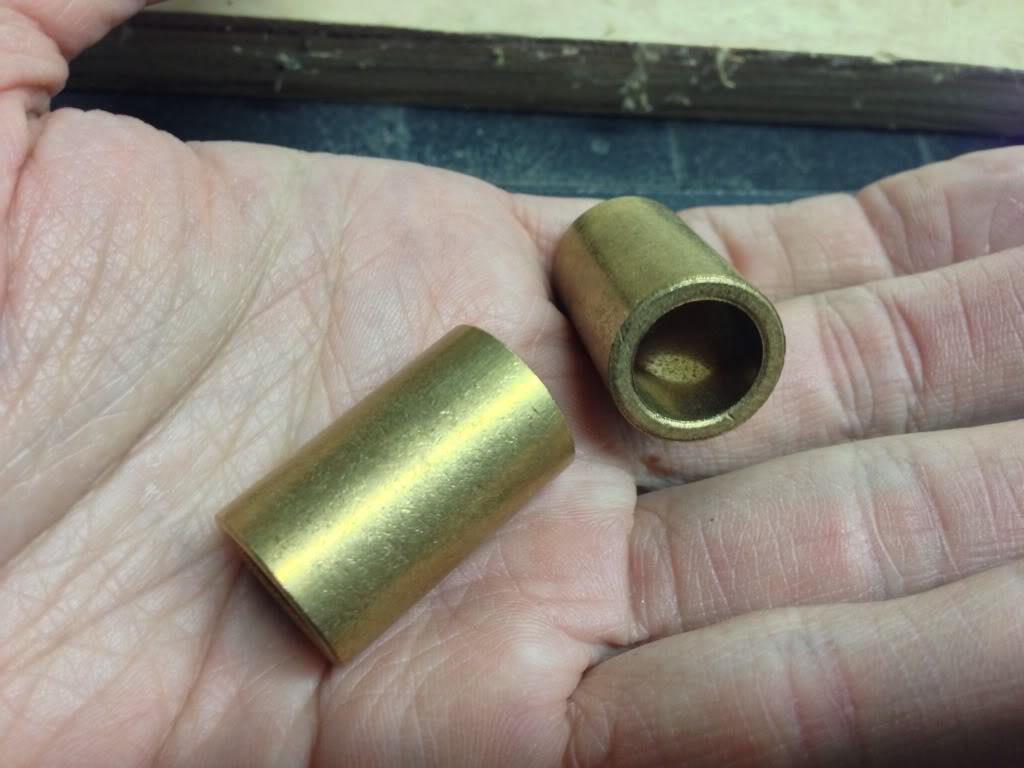
No, they are seperate. http://www.summitracing.com/parts/aaf-all18571
I guess we both missed it in reviewing your parts list. Really they are just there to make sure the lower part doesnt move around on the bolt. Any way you can use a 3/8" spacer will do the same job, just the above part is cheap and works well.
I guess we both missed it in reviewing your parts list. Really they are just there to make sure the lower part doesnt move around on the bolt. Any way you can use a 3/8" spacer will do the same job, just the above part is cheap and works well.
Nov 4, 2013 | 01:22 PM
#235
No, they are seperate. http://www.summitracing.com/parts/aaf-all18571
I guess we both missed it in reviewing your parts list. Really they are just there to make sure the lower part doesnt move around on the bolt. Any way you can use a 3/8" spacer will do the same job, just the above part is cheap and works well.
I guess we both missed it in reviewing your parts list. Really they are just there to make sure the lower part doesnt move around on the bolt. Any way you can use a 3/8" spacer will do the same job, just the above part is cheap and works well.
Nov 4, 2013 | 01:28 PM
#236
Joined: Jan 2006
Posts: 16,282
Likes: 438
From: Huntsville, AL
Yep, cheap, and the exact size I needed. For guys using the procomp top adapter, the same company makes a 1/2" version that works perfectly for that for about the same cost.
Nov 5, 2013 | 04:25 AM
#237
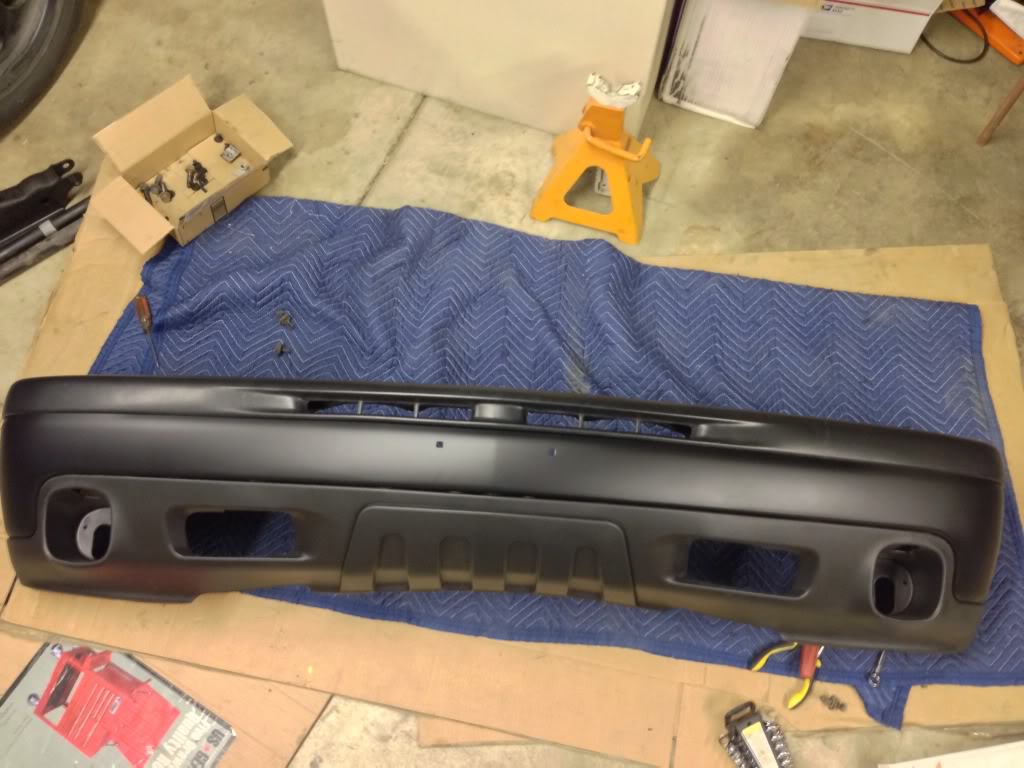
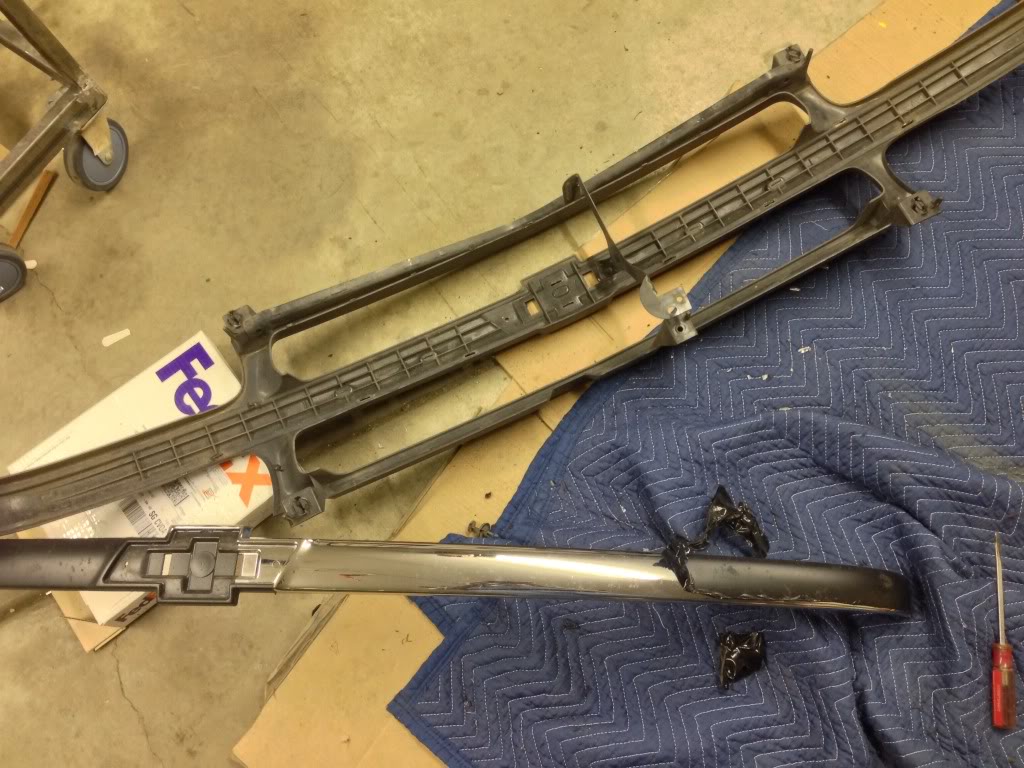
My bumper came back from getting powder coated.

So I assembled it. Much better!
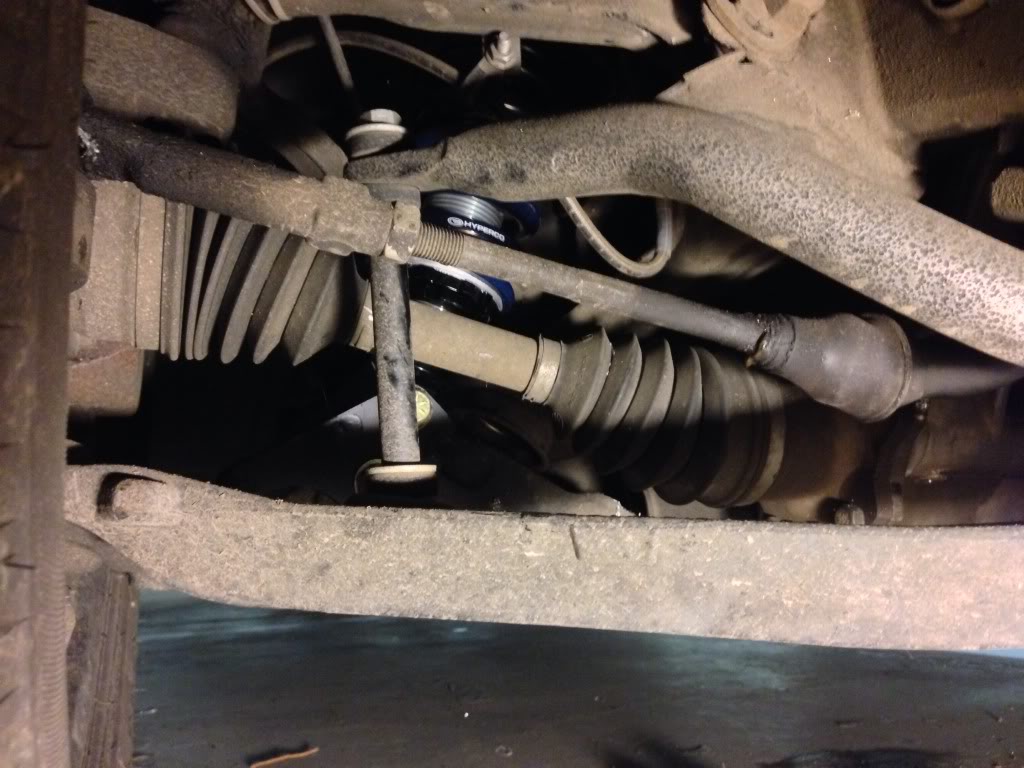
I haven't adjusted to the proper ride height yet, nor have I gotten an alignment, but if you were wondering what my CV angles looked like.
I had previously plastidipped my front bumper and all the chrome on the grill. Since I had the bumper powdercoated, I decided to paint my grill instead.
The chrome part of the grill isn't too hard to remove. I ground off the parts where the plastic was welded together.
Once I had the 2 parts separated, I picked at the plastidip and peeled it off.
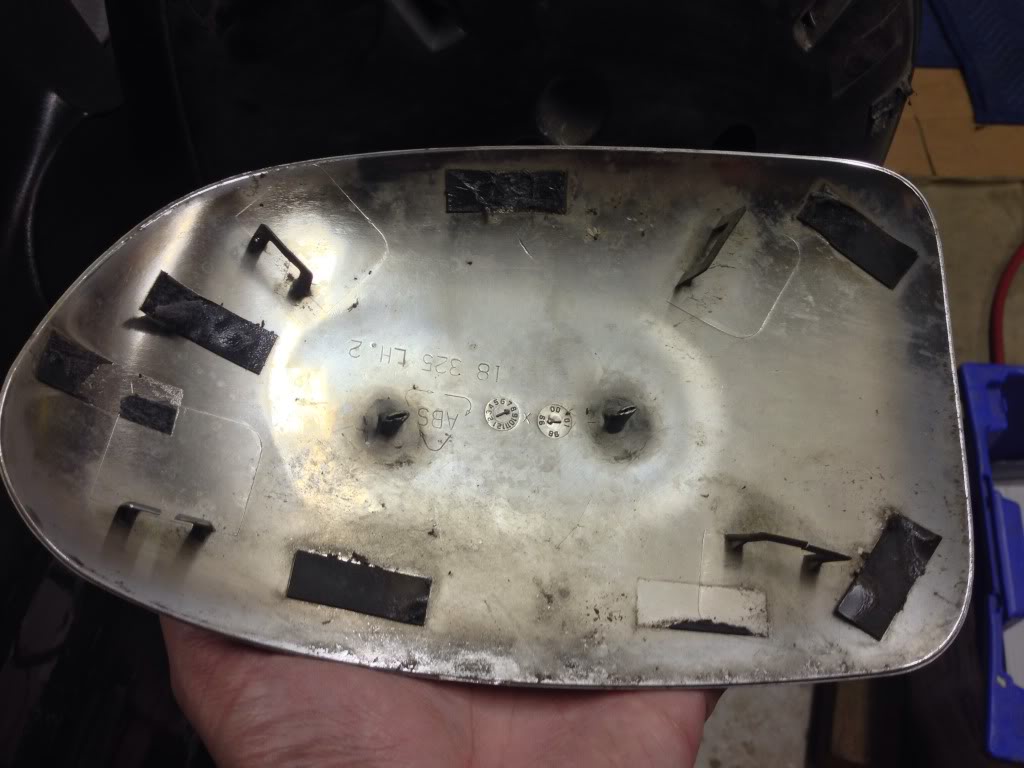
I removed the chrome parts of my mirrors. I always thought the chrome mirrors looked stupid. Anyway, I couldn't find a picture of exactly how these were secured.
They're secured with 4 hooks and several pieces of tape. Mostly the tape.
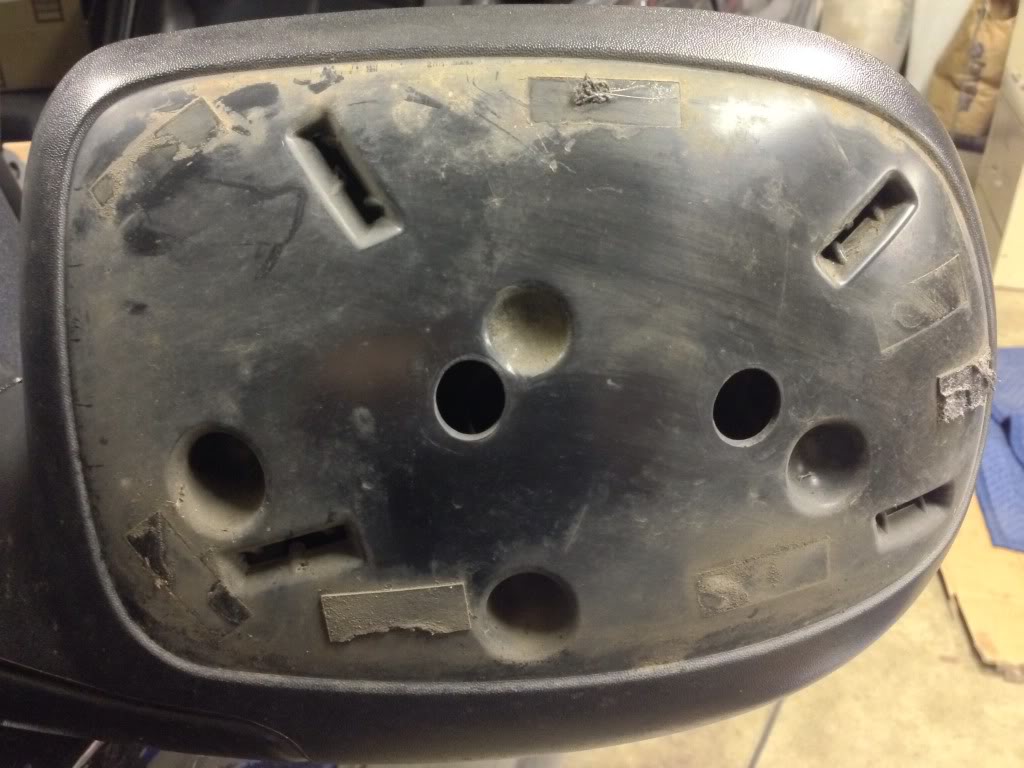
I broke several of the hooks because I didn't really know where they were located.
Once I had everything off, I block sanded out the high spots. I suppose if you really wanted to do it right, you'd fill the nicks and chips. I don't care to take it quite that far. My truck isn't pristine by any measure.
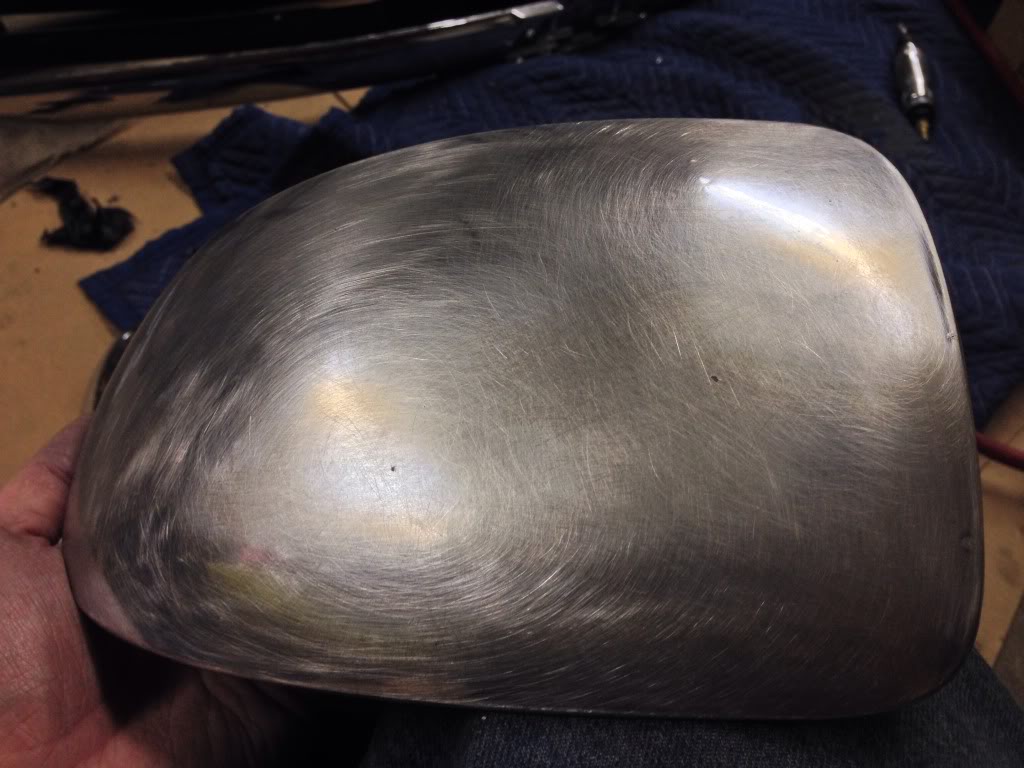
I sanded all 3 pieces until I was happy enough. Then I used mineral spirits to clean off any sand residue and finger prints.
I let it sit for a bit and let the mineral spirits evaporate off. Then I primed my pieces.
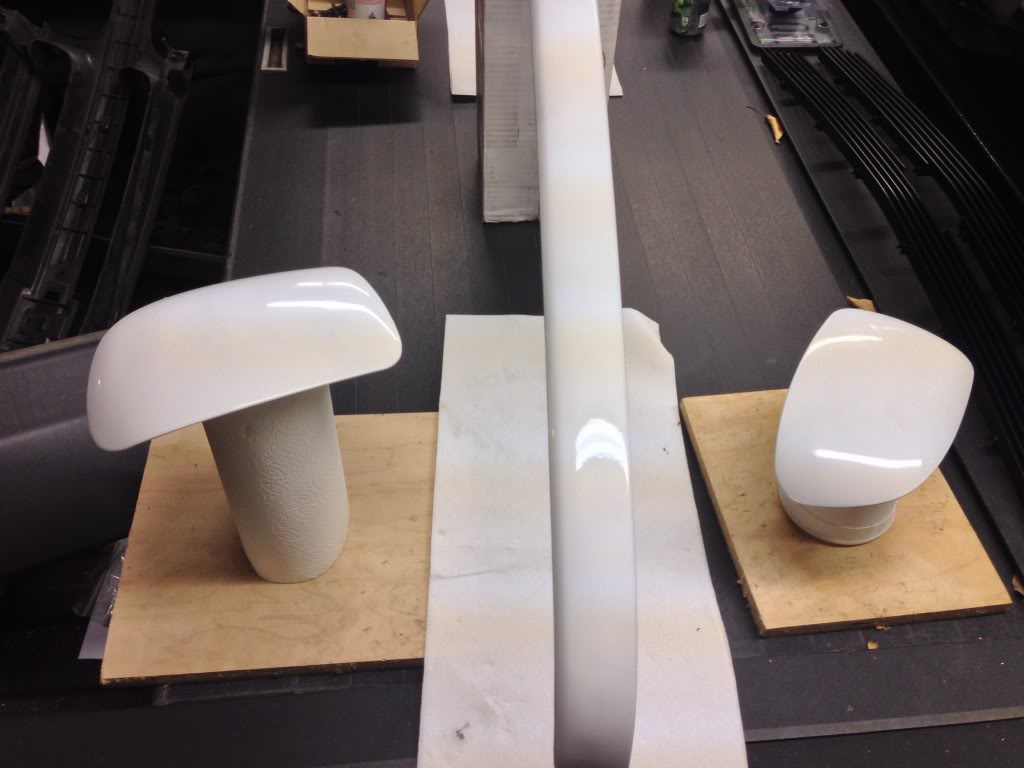
Hopefully tomorrow I can get out there to put a coat of paint on them.
So I assembled it. Much better!
I haven't adjusted to the proper ride height yet, nor have I gotten an alignment, but if you were wondering what my CV angles looked like.
I had previously plastidipped my front bumper and all the chrome on the grill. Since I had the bumper powdercoated, I decided to paint my grill instead.
The chrome part of the grill isn't too hard to remove. I ground off the parts where the plastic was welded together.
Once I had the 2 parts separated, I picked at the plastidip and peeled it off.
I removed the chrome parts of my mirrors. I always thought the chrome mirrors looked stupid. Anyway, I couldn't find a picture of exactly how these were secured.
They're secured with 4 hooks and several pieces of tape. Mostly the tape.
I broke several of the hooks because I didn't really know where they were located.
Once I had everything off, I block sanded out the high spots. I suppose if you really wanted to do it right, you'd fill the nicks and chips. I don't care to take it quite that far. My truck isn't pristine by any measure.
I sanded all 3 pieces until I was happy enough. Then I used mineral spirits to clean off any sand residue and finger prints.
I let it sit for a bit and let the mineral spirits evaporate off. Then I primed my pieces.
Hopefully tomorrow I can get out there to put a coat of paint on them.
Nov 5, 2013 | 09:18 PM
#238
 Nov 5, 2013 | 09:42 PM
#240
I would have went with them too if I had known I needed them. Maybe add a parts list to your coilover thread? Or include them with your hardware?