


Z06 Brakes are on, for MCGAUGHY applications! *PICS INSIDE*
 Jan 3, 2009 | 11:05 PM
#1

Thread Starter
TECH Resident
iTrader: (24)
Joined: Jul 2006
Posts: 879
Likes: 0
From: Ft.Lauderdale, FL
 Z06 Brakes are on, for MCGAUGHY applications! *PICS INSIDE*
Ok, with the PATIENT assistance from 3rd_Chevy (Chris on GMFS.com), we were able to install the Z06 front brake setup in two days time. Why so long you ask? Well, the brackets (Supersub's (Ray) Generation II) don't bolt-on 100% for McGaughy's drop spindles. I'll post the correct way to install these brackets with the 17" McGaughy's spindles and post why things are needed to be done the way they are as we go along... this is tedious work, but a great outcome and well worth the money spent!
To start off, the upper and lower knuckles on the McGaughy's spindles need to grinded down to allow for the bracket to situate itself against the spindle. The back of the knuckles also needs to be grinded smooth. As seen pictured below:


Now, when we bolted up the brackets originally, the bracket sats a tad too far away from the sindle, which when the caliper was bolted on it created about 1/4" of the pad to hang off the back of the rotor. The bracket needed to be closer to the spindle to allow the caliper to be snug up to the rotor and allow the pads to make full contact. I came to the conclusion that the only way to get the brackets to work was to bore out the top and bottom mounting holes where the bracket meets the spindle. So I went ahead and used a rotozip (thanks Chris!) and bored out the TOP hole on the mounting bracket about 1/4" so it created a "slot" and allowed for adjustability to get the bracket right. I also bored out the bottom mounting hole about 1/8" to get the bottom of the bracket closer to the spindle as well.
The first picture below is how the bracket initially bolted up to the spindle with just the knuckles grinded. You can see that when the caliper is mounted, is sat way far back making the pads hang off the back:
Bracket (1st time):

Which caused this:


See in this picture, the caliper sits a good ways off the rotor hat, not good:
This next photo show what we had to do. Where the yellow is, we needed to eliminate that gap, basically remove the yellow by making the bracket closer. The red slash areas are what else we needed to grind down off the spindle's knuckles. The top arrow shows which direction we needed to bore out the top hole. The bottom arrow shows was drawn in error, lol.

Soooo... off the the workbench we go to bore out the bracket holes:

Top hole:

Top hole on the left, bottom hole on the right:

So, we now have fixed the gap where the bracket meets the spindle. This was the BIGGEST hurdle. Just took some time and some thinking of how to get this bracket to work, and it does.
Next issue. The caliper does not center itself directly over the rotor. So we added a washer between the bracket and the spindle to "push" the bracket back about 1/16". This is how the bracket should look all bolted up to the spindle, notice the location of the washers:


Now I SHOULD have taken a few more pictures with the caliper mounted and whatnot, but it got really late and Chris's wife was naggin him to get his *** home. So we bolted everything together, spun the rotor freely, installed the stainless brake lines, bled the brakes, and ended up with this:


Now, in all honesty, who the hell wants to look at this when you could have what's pictured above????

***I'd like to add a special thanks to Chris (3rd_Chevy) for his assistance in making this happen. Chris did all the grinding and alot of removal and reinstallation of the rotor, bracket, and caliper. I think he can do this blindfolded if he wanted to. Also a special thanks to Ray (Supersub) for giving me the oppertunity to experiment with his brackets to get them to work on dropped applications. Also a special thanks to my wife for putting up with me this weekend and my constant trips to the auto parts store! Ya'll are the best!!!***
To start off, the upper and lower knuckles on the McGaughy's spindles need to grinded down to allow for the bracket to situate itself against the spindle. The back of the knuckles also needs to be grinded smooth. As seen pictured below:
Now, when we bolted up the brackets originally, the bracket sats a tad too far away from the sindle, which when the caliper was bolted on it created about 1/4" of the pad to hang off the back of the rotor. The bracket needed to be closer to the spindle to allow the caliper to be snug up to the rotor and allow the pads to make full contact. I came to the conclusion that the only way to get the brackets to work was to bore out the top and bottom mounting holes where the bracket meets the spindle. So I went ahead and used a rotozip (thanks Chris!) and bored out the TOP hole on the mounting bracket about 1/4" so it created a "slot" and allowed for adjustability to get the bracket right. I also bored out the bottom mounting hole about 1/8" to get the bottom of the bracket closer to the spindle as well.
The first picture below is how the bracket initially bolted up to the spindle with just the knuckles grinded. You can see that when the caliper is mounted, is sat way far back making the pads hang off the back:
Bracket (1st time):
Which caused this:
See in this picture, the caliper sits a good ways off the rotor hat, not good:
This next photo show what we had to do. Where the yellow is, we needed to eliminate that gap, basically remove the yellow by making the bracket closer. The red slash areas are what else we needed to grind down off the spindle's knuckles. The top arrow shows which direction we needed to bore out the top hole. The bottom arrow shows was drawn in error, lol.
Soooo... off the the workbench we go to bore out the bracket holes:
Top hole:
Top hole on the left, bottom hole on the right:
So, we now have fixed the gap where the bracket meets the spindle. This was the BIGGEST hurdle. Just took some time and some thinking of how to get this bracket to work, and it does.
Next issue. The caliper does not center itself directly over the rotor. So we added a washer between the bracket and the spindle to "push" the bracket back about 1/16". This is how the bracket should look all bolted up to the spindle, notice the location of the washers:
Now I SHOULD have taken a few more pictures with the caliper mounted and whatnot, but it got really late and Chris's wife was naggin him to get his *** home. So we bolted everything together, spun the rotor freely, installed the stainless brake lines, bled the brakes, and ended up with this:
Now, in all honesty, who the hell wants to look at this when you could have what's pictured above????
***I'd like to add a special thanks to Chris (3rd_Chevy) for his assistance in making this happen. Chris did all the grinding and alot of removal and reinstallation of the rotor, bracket, and caliper. I think he can do this blindfolded if he wanted to. Also a special thanks to Ray (Supersub) for giving me the oppertunity to experiment with his brackets to get them to work on dropped applications. Also a special thanks to my wife for putting up with me this weekend and my constant trips to the auto parts store! Ya'll are the best!!!***


 Jan 3, 2009 | 11:12 PM
#4
 Jan 4, 2009 | 12:00 AM
#5
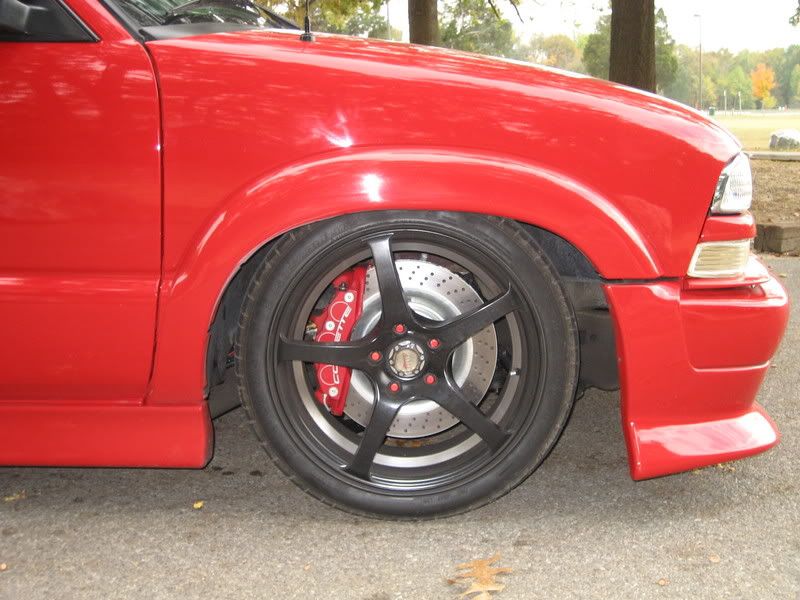
The smallest wheel you can run is an 18" wheel.
http://www.s10forum.com/forum/f14/s1...brakes-289013/
Looking nice OP!
I beleive the normal C6 Corvette rotors are the same, just in a black panted finish with the "Corvette" decal on the calipers. 3 cyl. for the front and 2 cyl. for the back.
http://www.s10forum.com/forum/f14/s1...brakes-289013/
Looking nice OP!
I beleive the normal C6 Corvette rotors are the same, just in a black panted finish with the "Corvette" decal on the calipers. 3 cyl. for the front and 2 cyl. for the back.
Trending Topics
 Jan 4, 2009 | 09:03 AM
#10
Thread Starter
TECH Resident
iTrader: (24)
Joined: Jul 2006
Posts: 879
Likes: 0
From: Ft.Lauderdale, FL

PM me, i'll point you in the right direction
