SHOW & SHINE DISCUSSION Appearance | Detailing | Wheels | Truck of the Month
Sponsored by:
Sponsored by:

My console swap

Thread Tools
 
Search this Thread
 
Old Jul 22, 2007 | 12:24 PM
  #1  
Nick™'s Avatar
Thread Starter
TECH Fanatic
iTrader: (2)
 
Joined: Mar 2005
Posts: 1,966
Likes: 0
From: Red Stick, La
Default My console swap

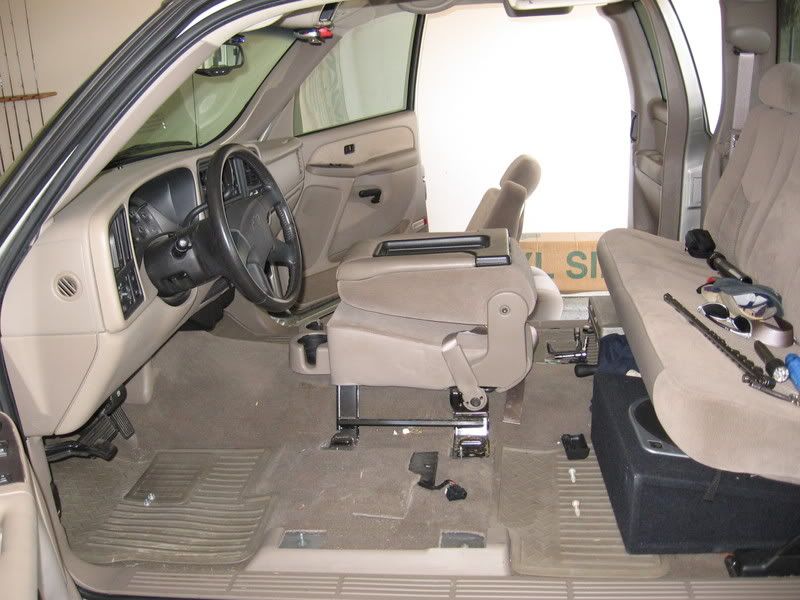
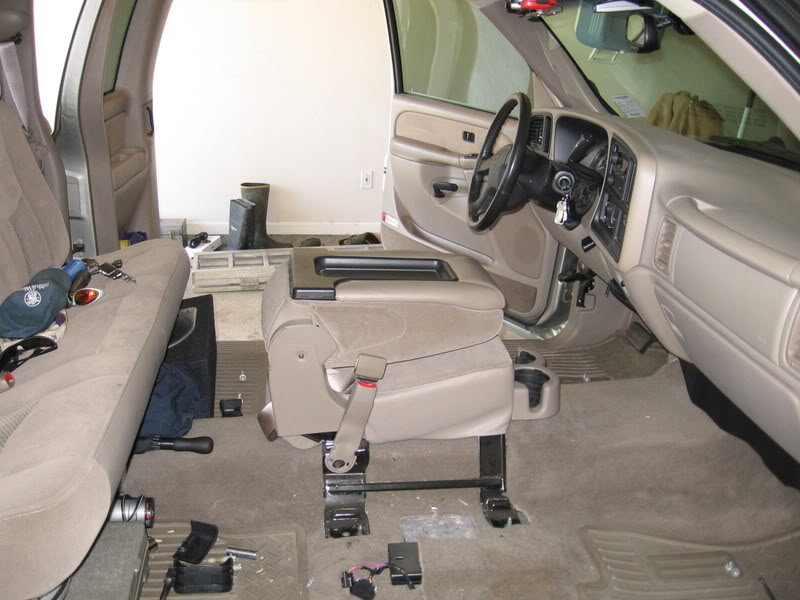
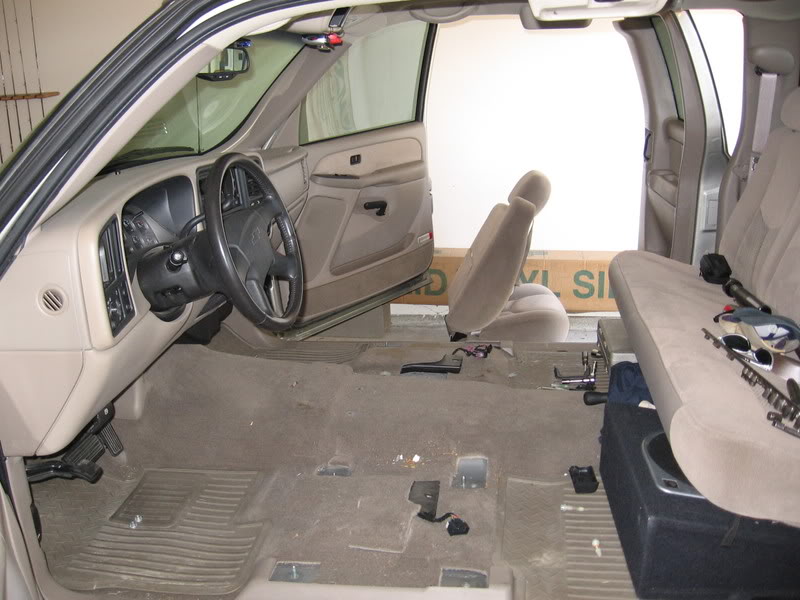
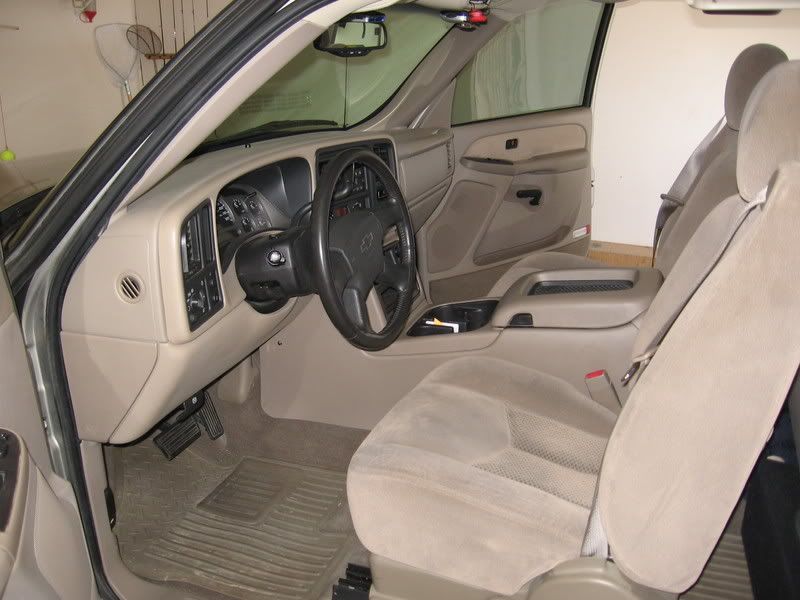
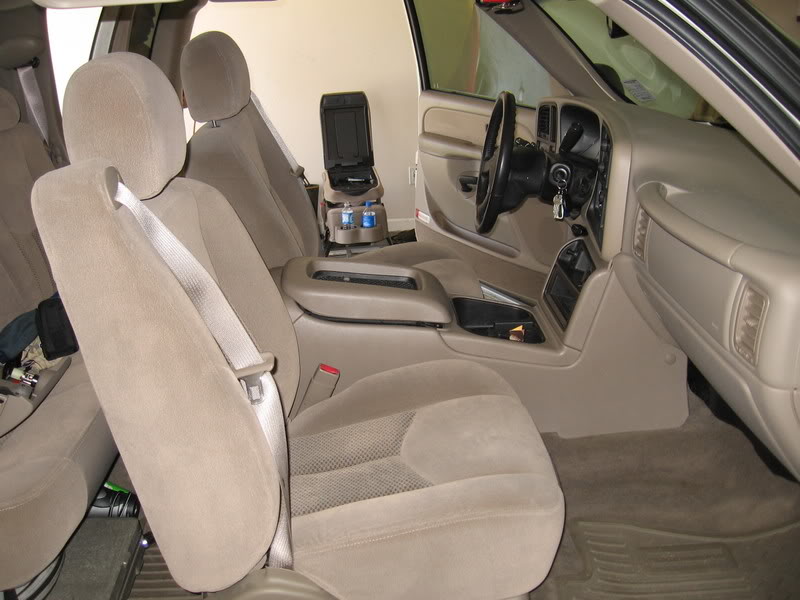
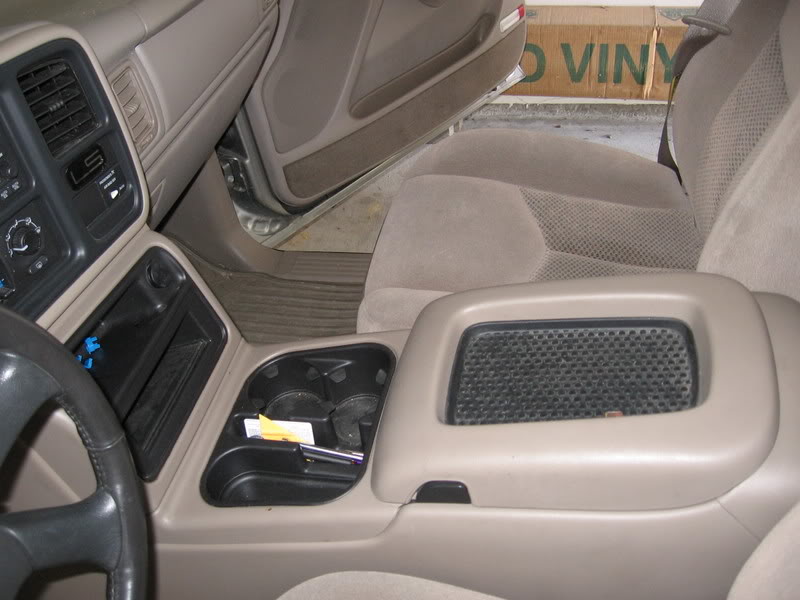
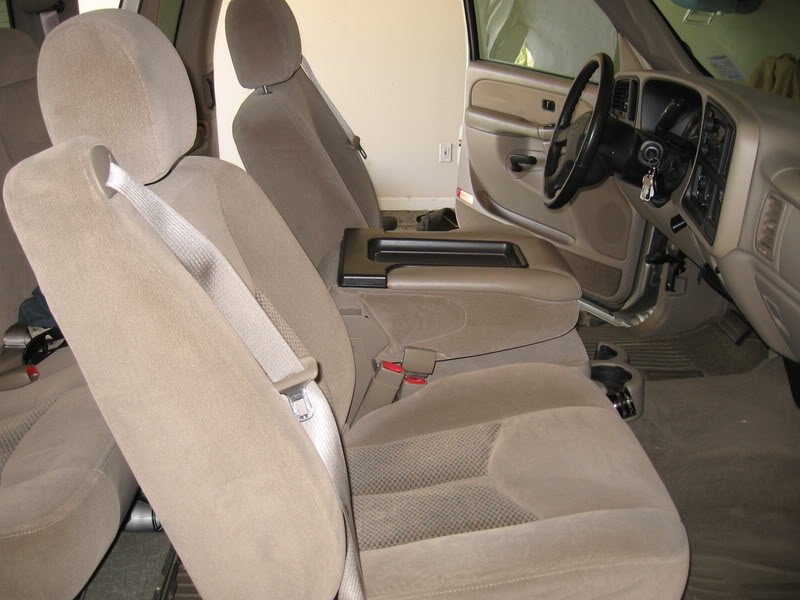
well, my truck came equipped with the 40/20/40 bench seat with fold down console from the factory and I just completed the swap to a full console. Obligatory pics included below

before:
Name:  IMG_0557.jpg
Views: 14700
Size:  67.0 KB
during:

Name:  IMG_0563.jpg
Views: 13154
Size:  73.4 KB
Name:  IMG_0564.jpg
Views: 8578
Size:  79.1 KB
after:

Name:  IMG_0568.jpg
Views: 12894
Size:  70.1 KB
Name:  IMG_0567.jpg
Views: 20418
Size:  67.0 KB
Reply
Old Jul 22, 2007 | 12:46 PM
  #2  
TECH Enthusiast
iTrader: (7)
 
Joined: Aug 2006
Posts: 624
Likes: 0
From: El Paso
Default

Dude looks great!!! I have been thinking of doin this as well. Level of dificulty 1-10 and how much did you pay for console?
Reply
Old Jul 22, 2007 | 01:15 PM
  #3  
Nick™'s Avatar
Thread Starter
TECH Fanatic
iTrader: (2)
 
Joined: Mar 2005
Posts: 1,966
Likes: 0
From: Red Stick, La
Default

I got the console on ebay. difficulty? removing the seats isn't too bad, it depends how comfortable you are with cutting the dash. You have to cut the piece out in the center for the console to fit... I'd call it a 5. If you are comfortable with a cam swap you can do this, careful planning and research will get you there.
Reply
Old Jul 22, 2007 | 01:50 PM
  #4  
TxStVanWilder's Avatar
On The Tree
 
Joined: Jan 2007
Posts: 164
Likes: 0
From: Rockwall, Tx
Default

how did you hook up the power outlets ... is it all plug and play?
Reply
Old Jul 22, 2007 | 03:18 PM
  #5  
Nick™'s Avatar
Thread Starter
TECH Fanatic
iTrader: (2)
 
Joined: Mar 2005
Posts: 1,966
Likes: 0
From: Red Stick, La
Default

I was able to use the harness for the original plugs, a little rerouting, but it worked. There is an additional aux plug on the back of the console that I haven't hooked up yet, but I'll figure out a plan and get that later.

Reply
Old Jul 22, 2007 | 05:04 PM
  #6  
tdrumm's Avatar
TECH Addict
iTrader: (18)
 
Joined: Oct 2003
Posts: 2,373
Likes: 0
From: Northeast, NJ
Default

So you didn't get the console specific piece with the glovebox? Any pics of how you cut the regular part, and some close ups of that joint please.
Reply
Old Jul 22, 2007 | 05:21 PM
  #7  
Tootall's Avatar
TECH Senior Member
iTrader: (79)
 
Joined: Jun 2002
Posts: 5,175
Likes: 1
From: League City, Tx
Default

looks great, can you take pics of where you had to cut?
Reply
Old Jul 22, 2007 | 05:49 PM
  #8  
RedHot04's Avatar
TECH Enthusiast
20 Year Member
iTrader: (1)
 
Joined: Apr 2006
Posts: 601
Likes: 5
From: Virginia
Default

Looks nice. Good time to get up all the hidden crumbs too!
Reply
Old Jul 22, 2007 | 05:55 PM
  #9  
lowered's Avatar
Registered User
 
Joined: Jul 2007
Posts: 6
Likes: 0
Default

haha more like good place to hide the crumbs at
Reply
Old Jul 22, 2007 | 06:33 PM
  #10  
Nick™'s Avatar
Thread Starter
TECH Fanatic
iTrader: (2)
 
Joined: Mar 2005
Posts: 1,966
Likes: 0
From: Red Stick, La
Default

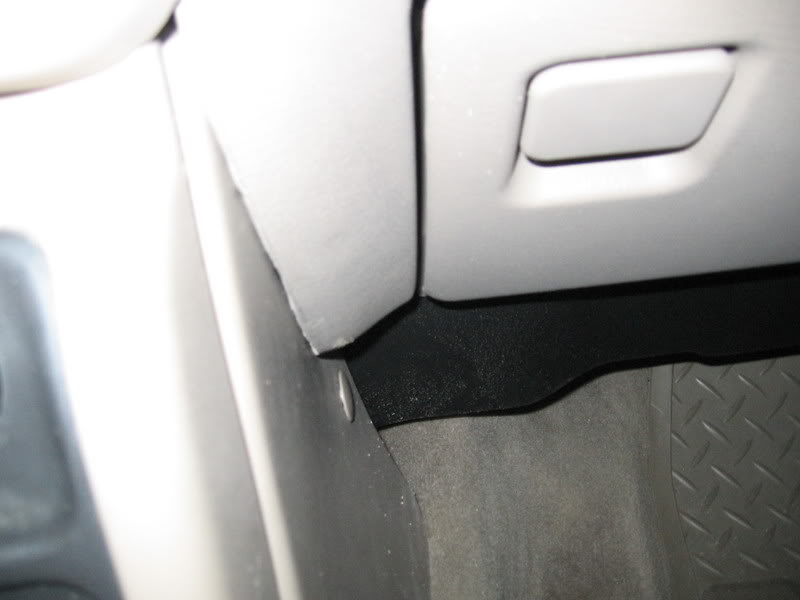
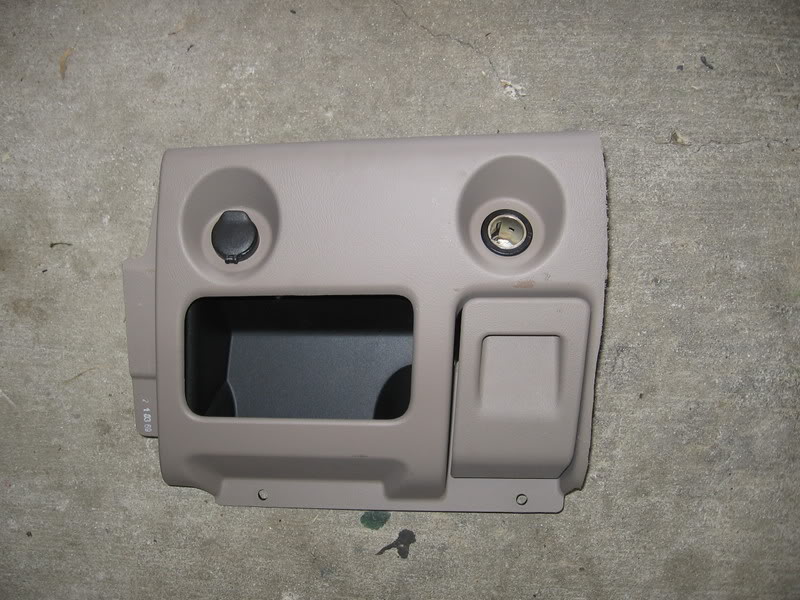
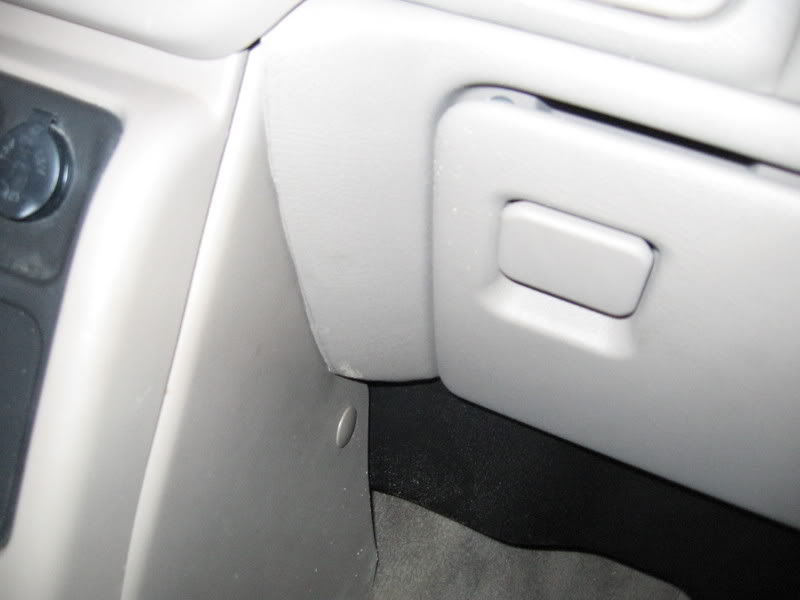
ok, got the requested pics... I tried to get a passenger's view and a worse angle view, also a pic of the piece that's removed. I didn't clean my pen line off where I marked it and the pic makes it look rougher than it is, I made the cut with a jigsaw and left extra material and finished it off with a dremel:
Name:  IMG_0574.jpg
Views: 8299
Size:  34.9 KB
Name:  IMG_0573.jpg
Views: 8225
Size:  36.8 KB
Name:  IMG_0575.jpg
Views: 8270
Size:  91.3 KB

and yes, I seized the opportunity and vacuumed the carpet
Reply


All times are GMT -5. The time now is 02:22 PM.