

Project Man-Van
 May 31, 2013 | 01:28 AM
#371
Thread Starter
GFYS and STFU
iTrader: (8)
Joined: Jan 2007
Posts: 13,870
Likes: 4
From: Here and sometimes there too.
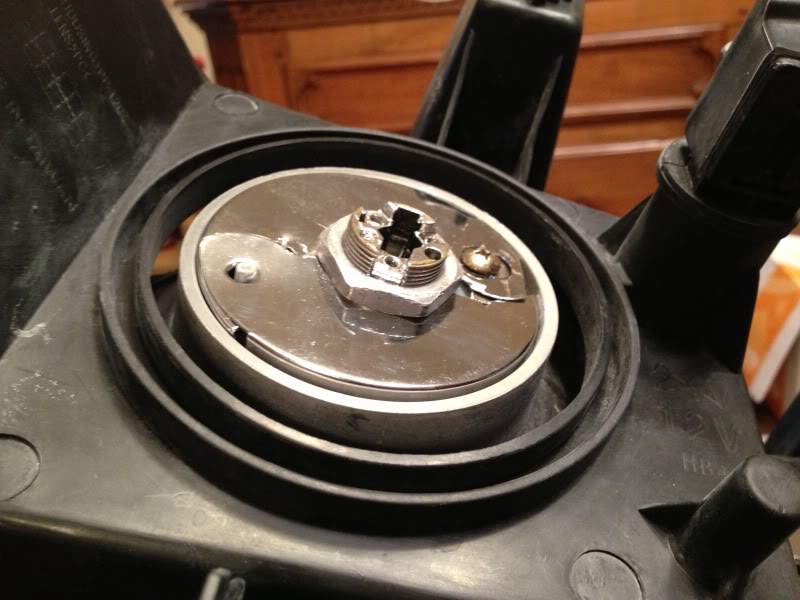
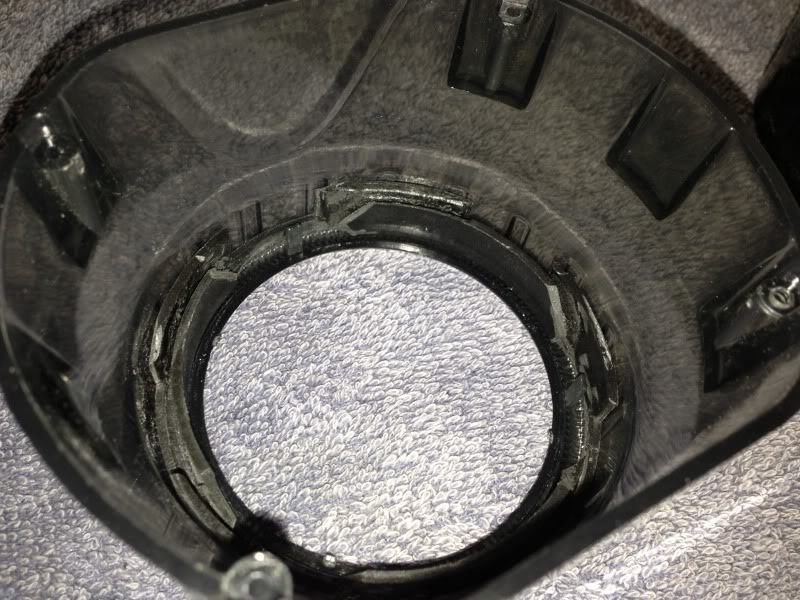
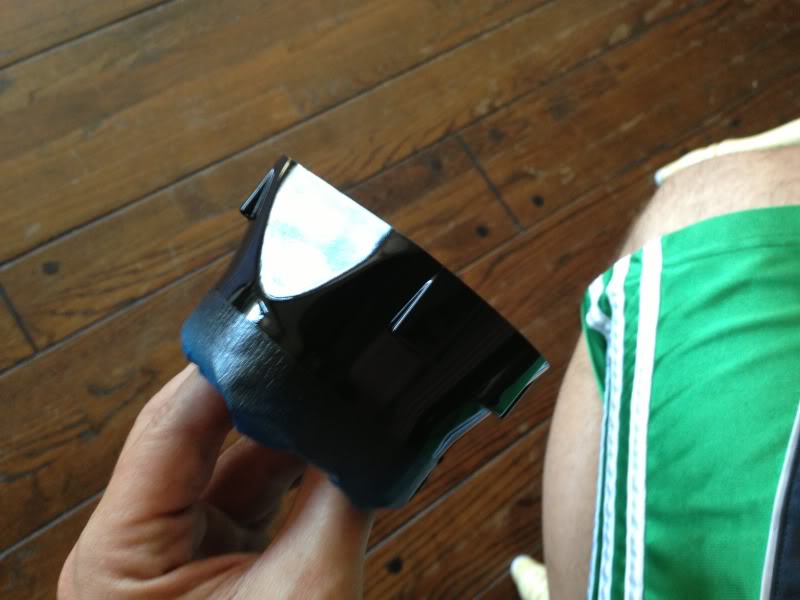
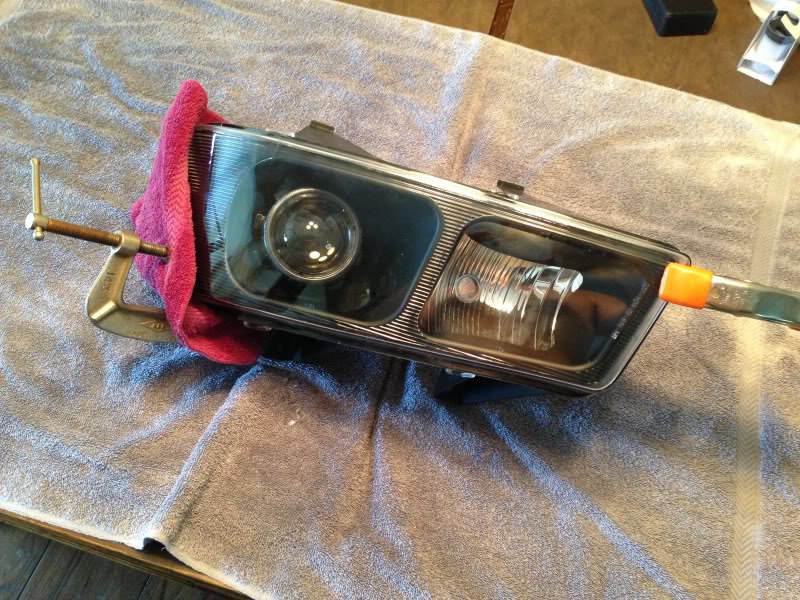
Took me a full day of grinding, test fitting, grinding, test fitting and back again until I finally ground enough down so that the projector would fit. Problem was that I ground down so much that there was now nothing left to hold the projector in the reflector anymore. So I went to Home Depot and started buying random things that might work and finally found something to make a false back with:
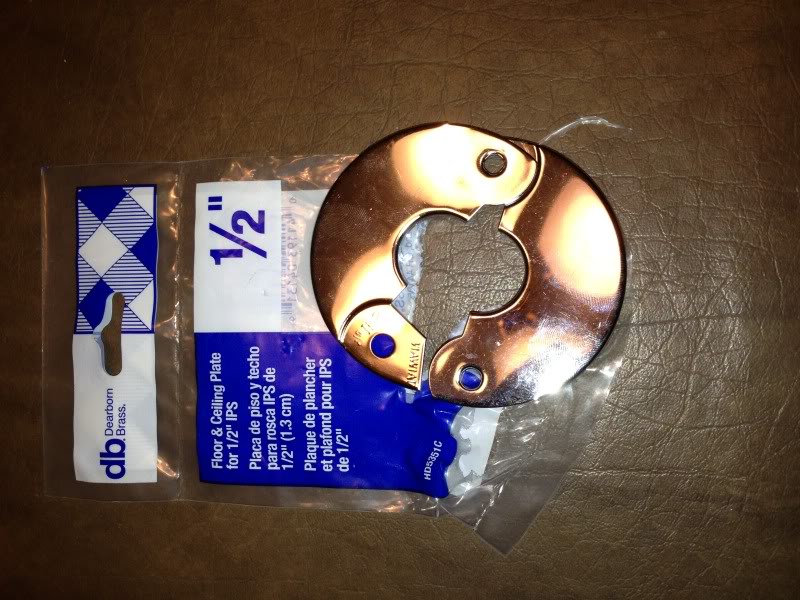
I really have no idea what it is, looks like a piece for plumbing in a bathroom but I did a good job of hacking it up to make it work...
One on the left is modified, one on the right is normal...
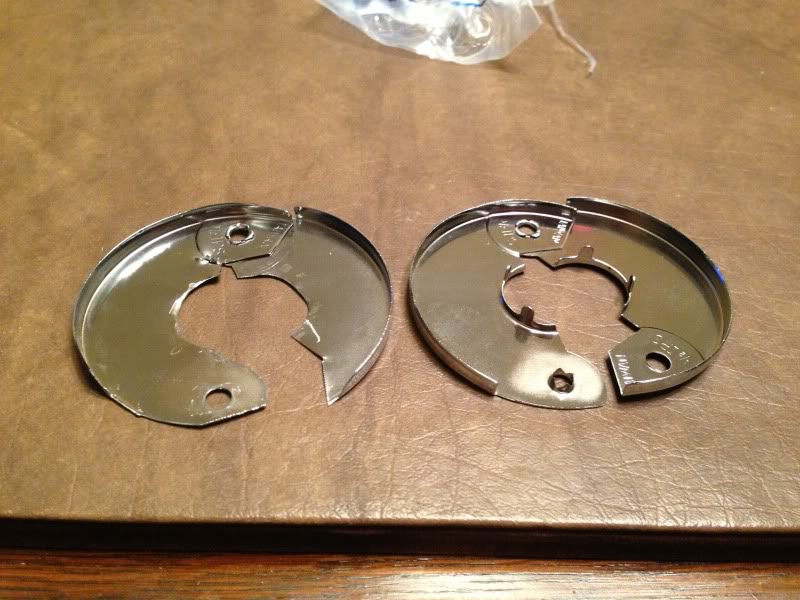
For some reason I don't have a picture of all that I had to grind out of the reflector, but basically it's everything that's behind that plumbing plate:
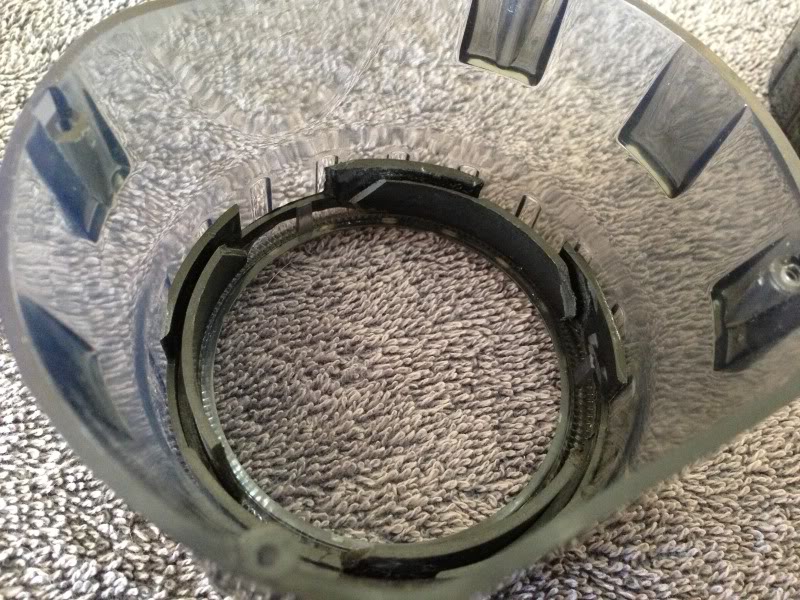
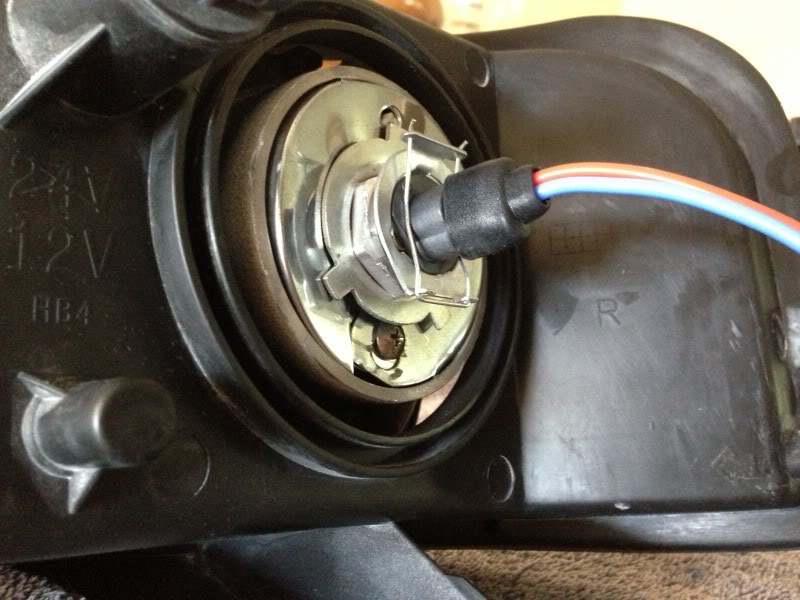
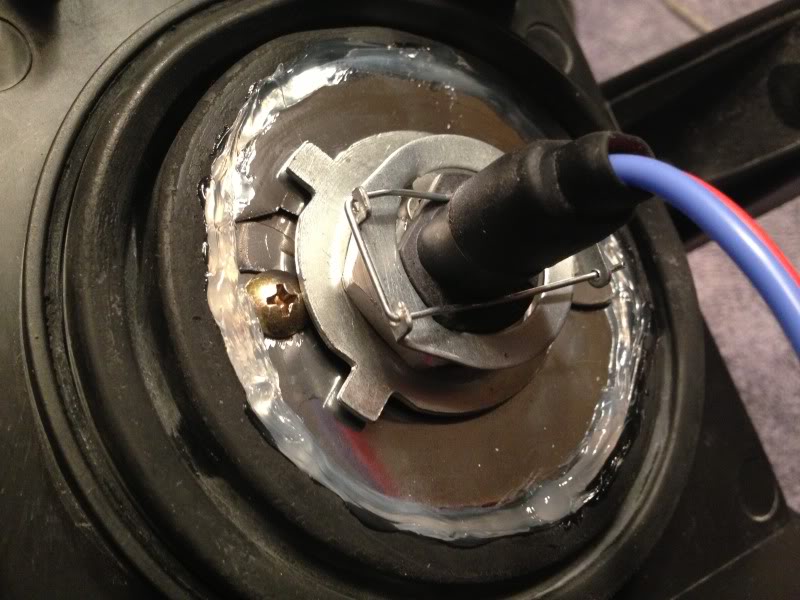
And with the locking nut on there's enough thread left for the light bulb locking pin to go on.
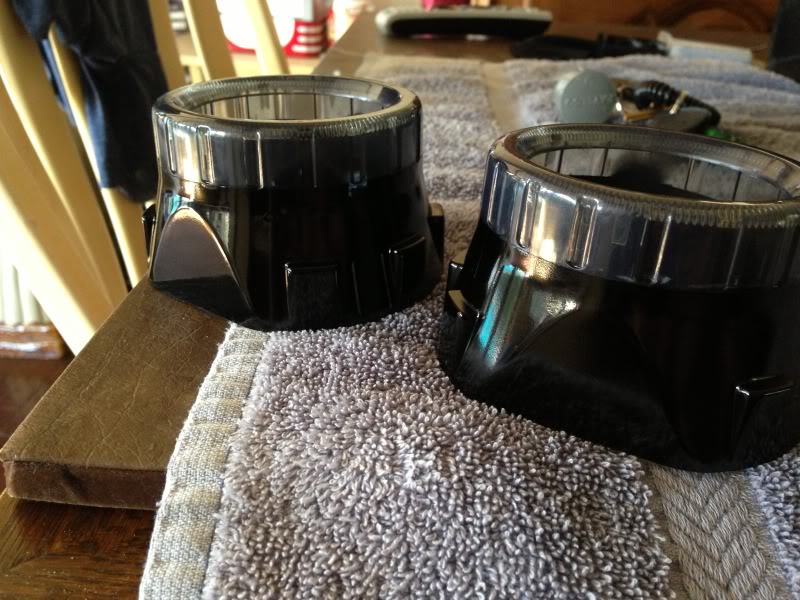
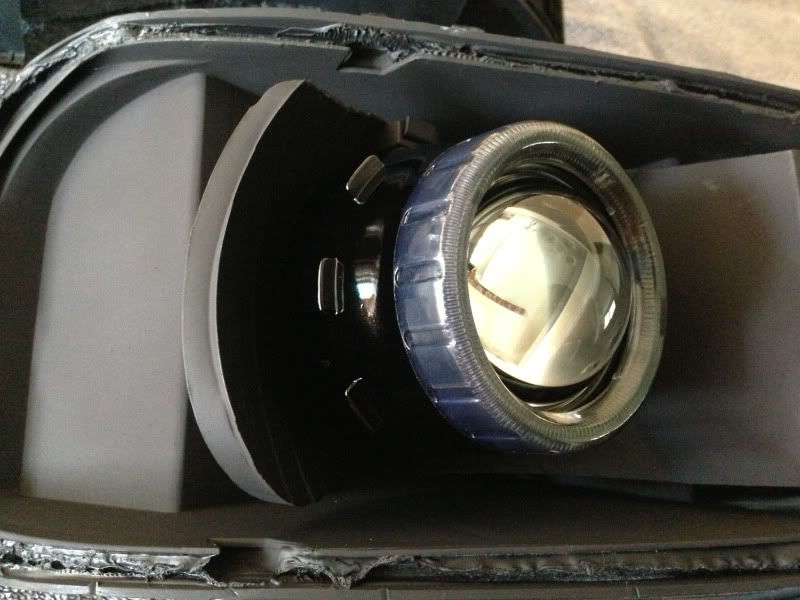
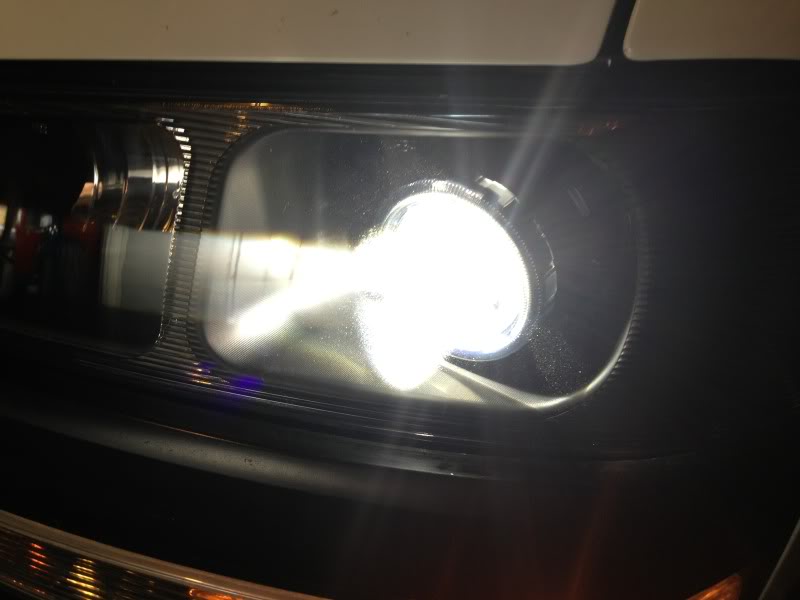
Next up was making the Graphite shroud work,
I had to do quite a bit of modification for it to fit my application, primarily because the way they designed it to work added 3/8th of an inch to the height of it which did not allow it to clear the top lens of the headlight even with everything I had ground out of it.
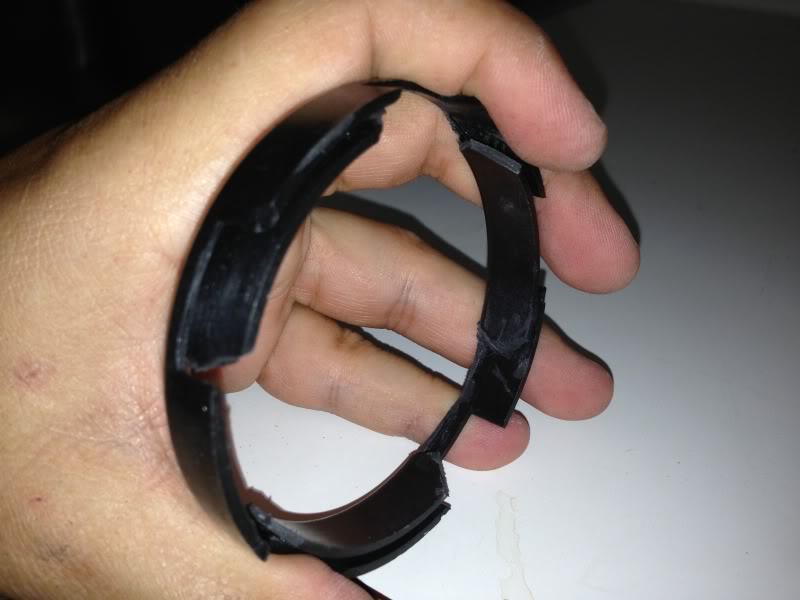
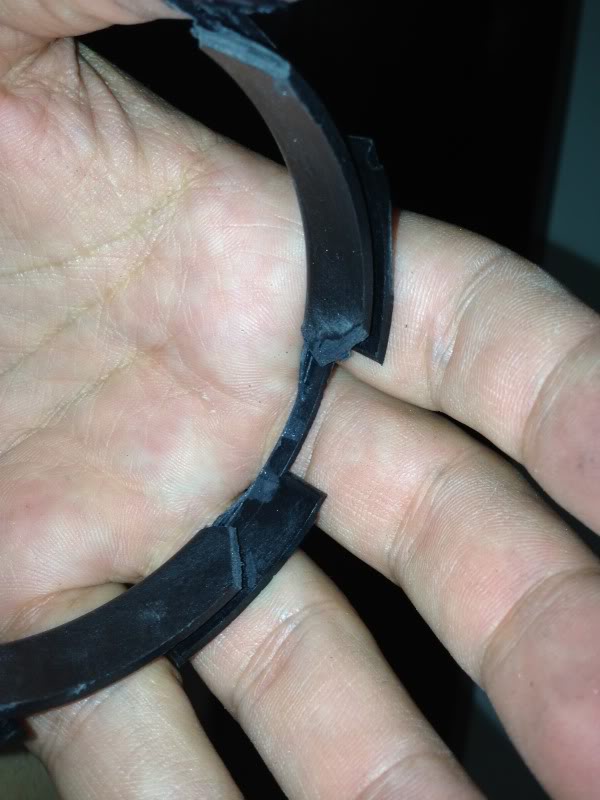
So to make it fit more or less flush I had to modify the shroud centric rings down so they fit completely down into the shroud:

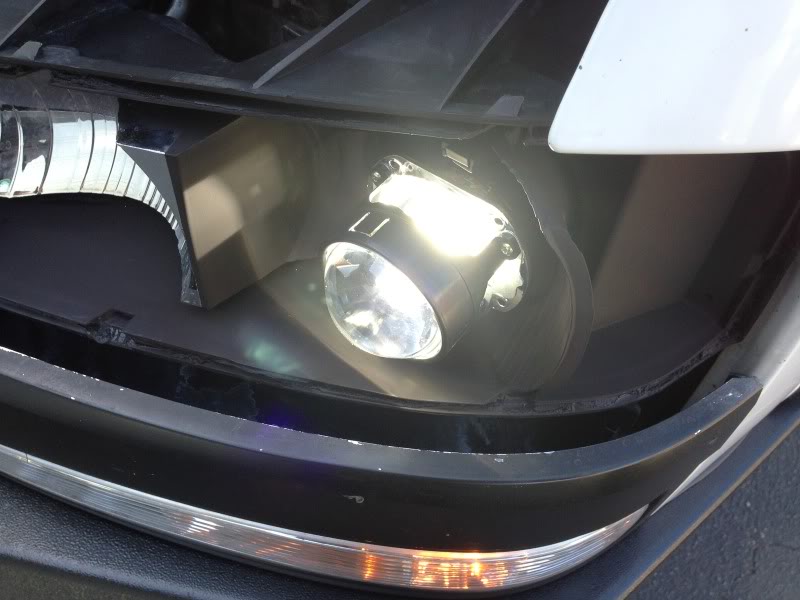
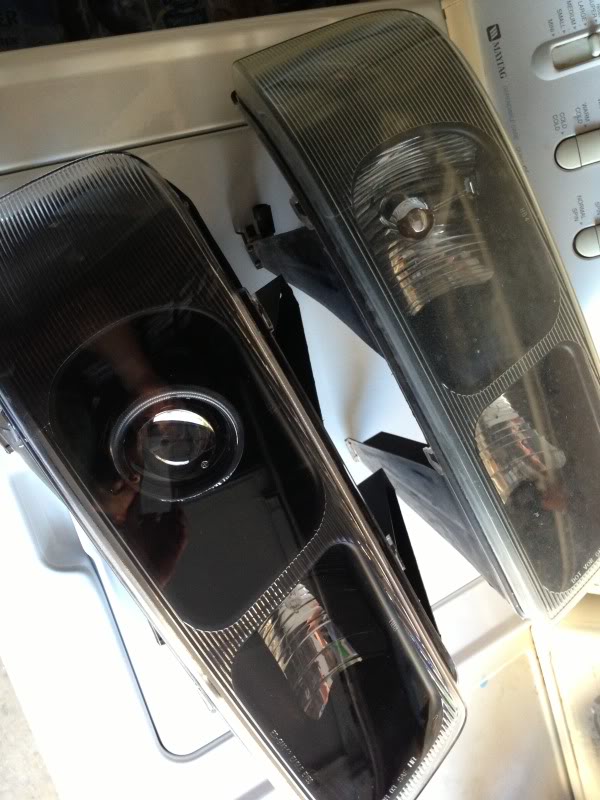
Next up, because of the type of head-light housing this universal kit was supposed to go in I ended up having issues with light leaking out the side of the shroud and blinding passing motorist because of how far out these projectors stick out of the reflector housing,
This is without the shroud but even with it on, this was the amount of light that would leak out the side of the shroud:
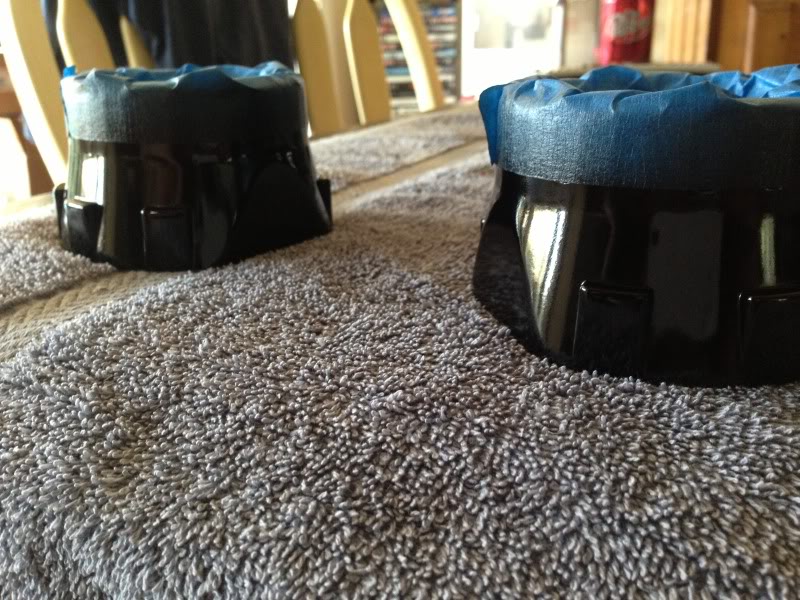
so I had to paint them, I painted the inside with the same VHT Flame proof paint:
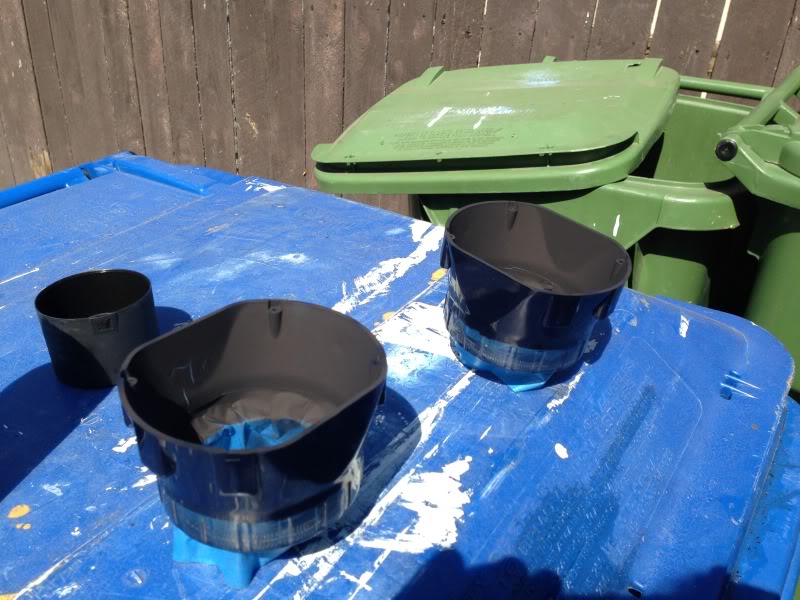
And then painted the outside with VHT Night Shade (same stuff used to tint taillights):
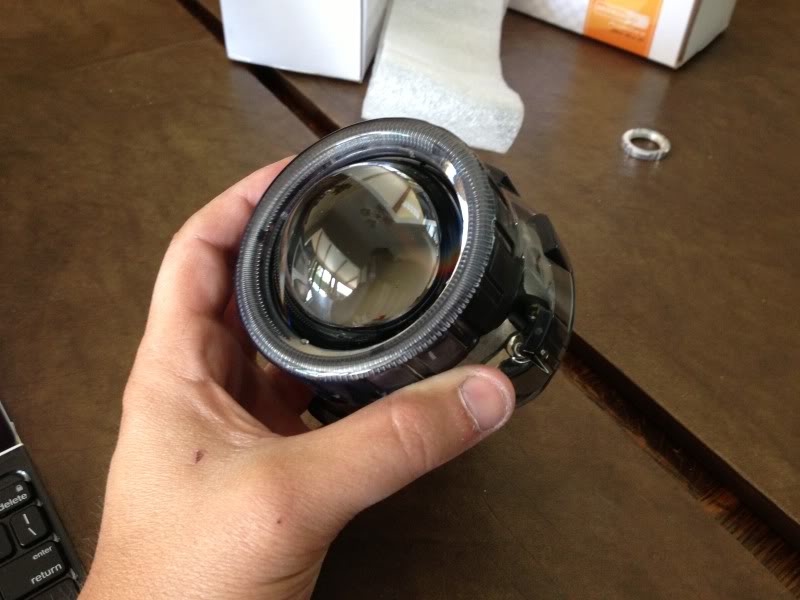
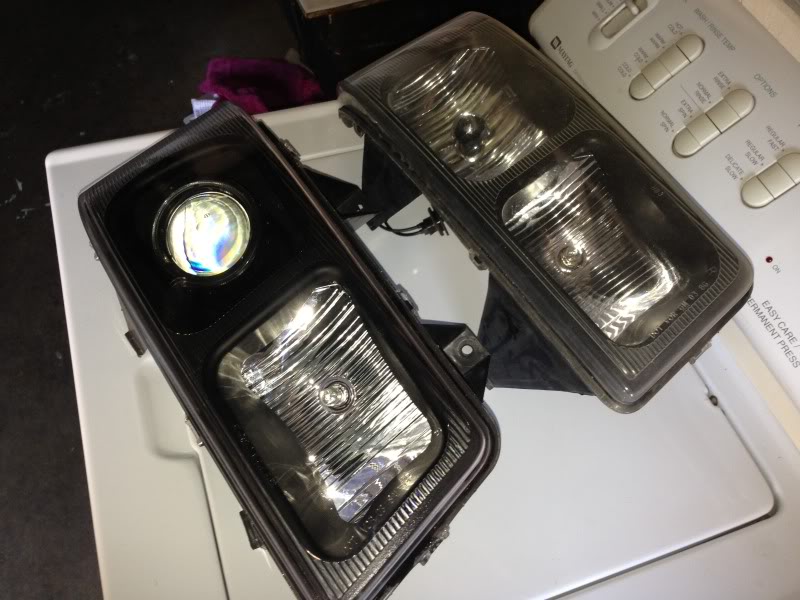
So here's the Projector without the Shroud:

And then with the Graphite Shroud on:
I really have no idea what it is, looks like a piece for plumbing in a bathroom but I did a good job of hacking it up to make it work...
One on the left is modified, one on the right is normal...
For some reason I don't have a picture of all that I had to grind out of the reflector, but basically it's everything that's behind that plumbing plate:
And with the locking nut on there's enough thread left for the light bulb locking pin to go on.
Next up was making the Graphite shroud work,
I had to do quite a bit of modification for it to fit my application, primarily because the way they designed it to work added 3/8th of an inch to the height of it which did not allow it to clear the top lens of the headlight even with everything I had ground out of it.
So to make it fit more or less flush I had to modify the shroud centric rings down so they fit completely down into the shroud:
Next up, because of the type of head-light housing this universal kit was supposed to go in I ended up having issues with light leaking out the side of the shroud and blinding passing motorist because of how far out these projectors stick out of the reflector housing,
This is without the shroud but even with it on, this was the amount of light that would leak out the side of the shroud:
so I had to paint them, I painted the inside with the same VHT Flame proof paint:
And then painted the outside with VHT Night Shade (same stuff used to tint taillights):
So here's the Projector without the Shroud:
And then with the Graphite Shroud on:
May 31, 2013 | 01:29 AM
#372
Thread Starter
GFYS and STFU
iTrader: (8)
Joined: Jan 2007
Posts: 13,870
Likes: 4
From: Here and sometimes there too.
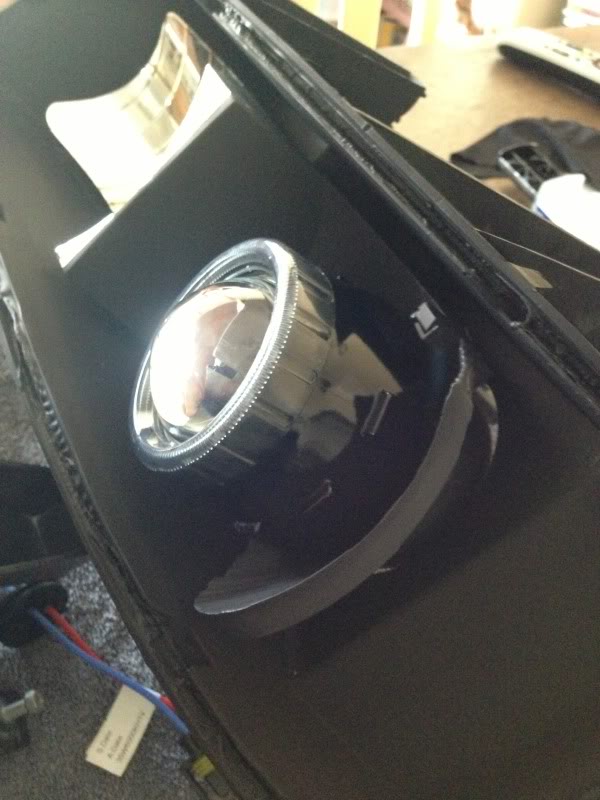
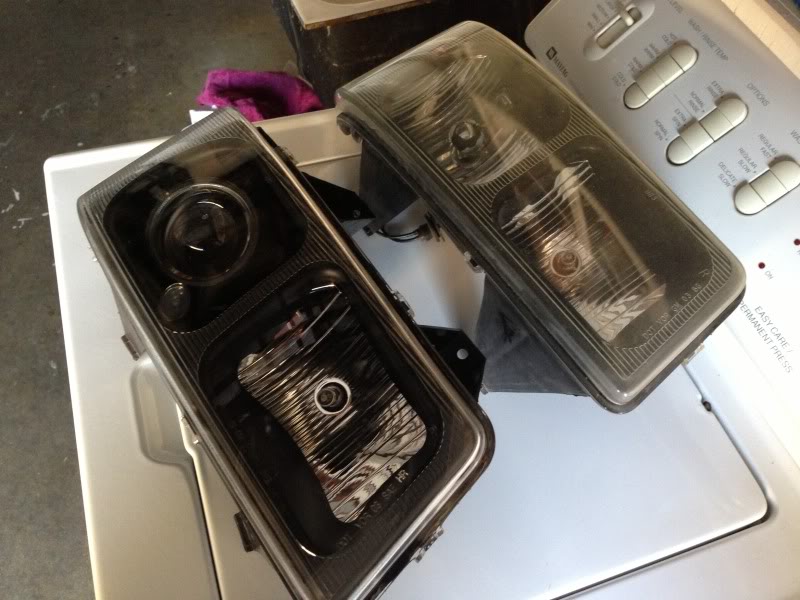
Then it was time for complete disassembly for cleaning, then re-assembly and mock-up to adjust the angle and height of them.
Here's what the back looks like all mocked up with the lightbulb retaining clips in:
And then it was baking time again, had to put them back in the oven to melt that glue/gunk and then clamp the lights back together:
Also had to Silicone the back so that they were somewhat sealed from water getting in:
And then they are drying now and I'll probably be swapping them in here pretty soon as soon as the silicone dries.
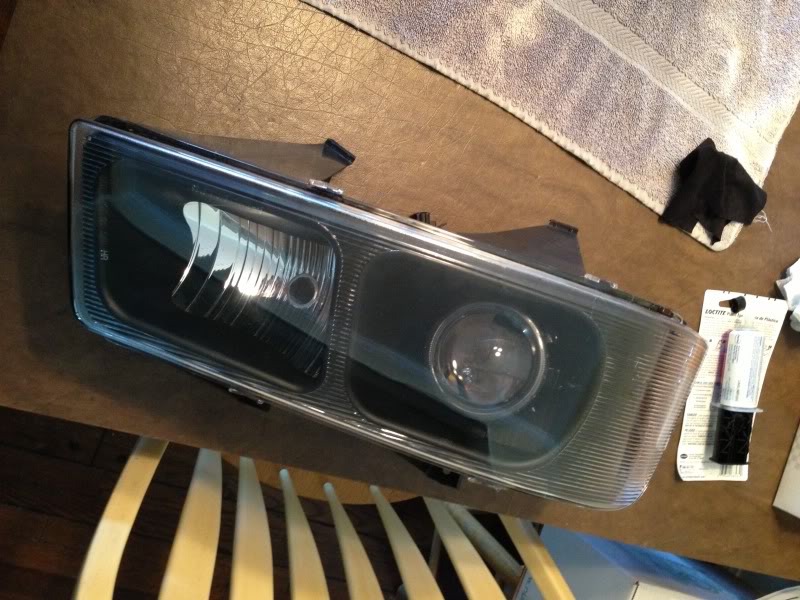
Here's the final product:
And next to the stock headlights:
So that's it for now, all in all in probably took me over 20 hours over 3-4 days to get it done. Now that I know what it takes to make them work I could probably do a set in 2-3 hours but most of the time was just trial and error and grinding and some creative thinking to figure out how to make them work.
I'll post up an update later on what they look like installed and working!
Here's what the back looks like all mocked up with the lightbulb retaining clips in:
And then it was baking time again, had to put them back in the oven to melt that glue/gunk and then clamp the lights back together:
Also had to Silicone the back so that they were somewhat sealed from water getting in:
And then they are drying now and I'll probably be swapping them in here pretty soon as soon as the silicone dries.
Here's the final product:
And next to the stock headlights:
So that's it for now, all in all in probably took me over 20 hours over 3-4 days to get it done. Now that I know what it takes to make them work I could probably do a set in 2-3 hours but most of the time was just trial and error and grinding and some creative thinking to figure out how to make them work.
I'll post up an update later on what they look like installed and working!
May 31, 2013 | 02:42 AM
#373
Thread Starter
GFYS and STFU
iTrader: (8)
Joined: Jan 2007
Posts: 13,870
Likes: 4
From: Here and sometimes there too.
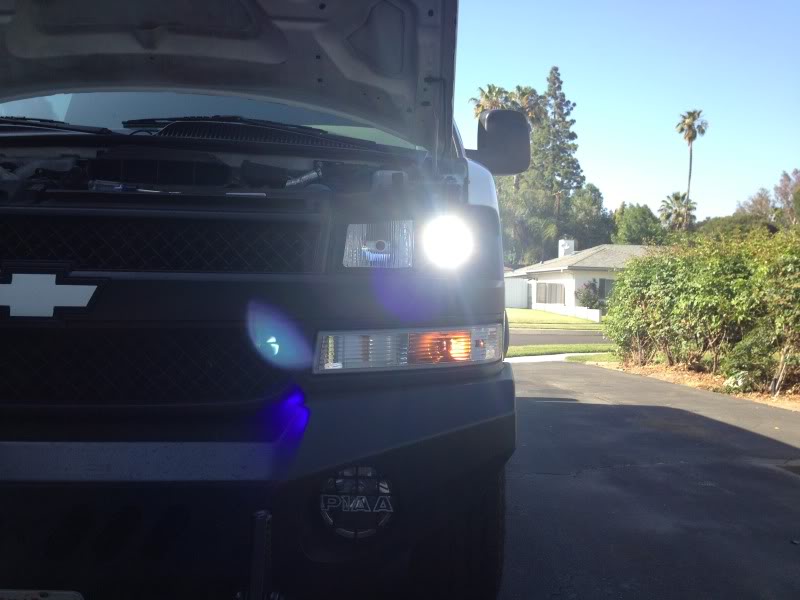
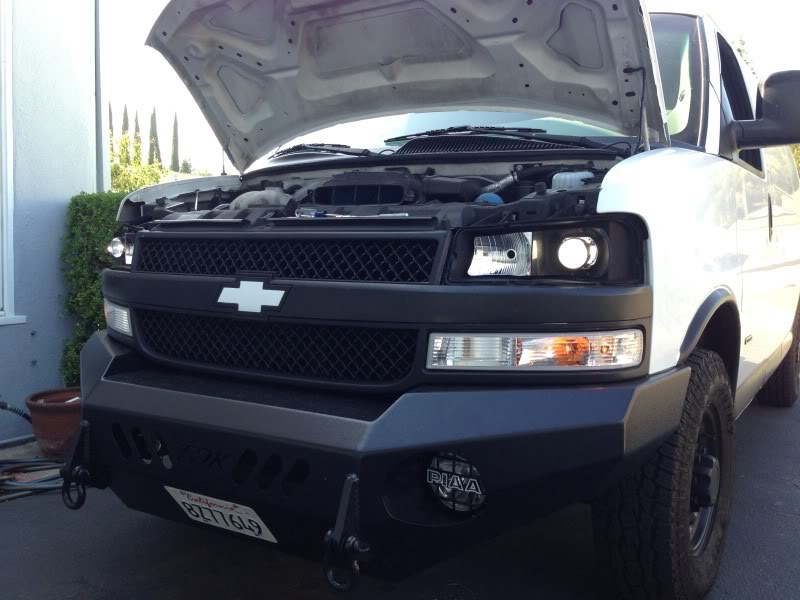
All done!!
They work and they look great, will probably have to do a little adjusting when I get a chance to make sure they work and are pointed in the correct direction but overall I'm pretty happy.
Here's the comparo between an HID inside a halogen housing and then one inside a projector housing. (passenger side is a Projector and the Drivers side is a Halogen housing)
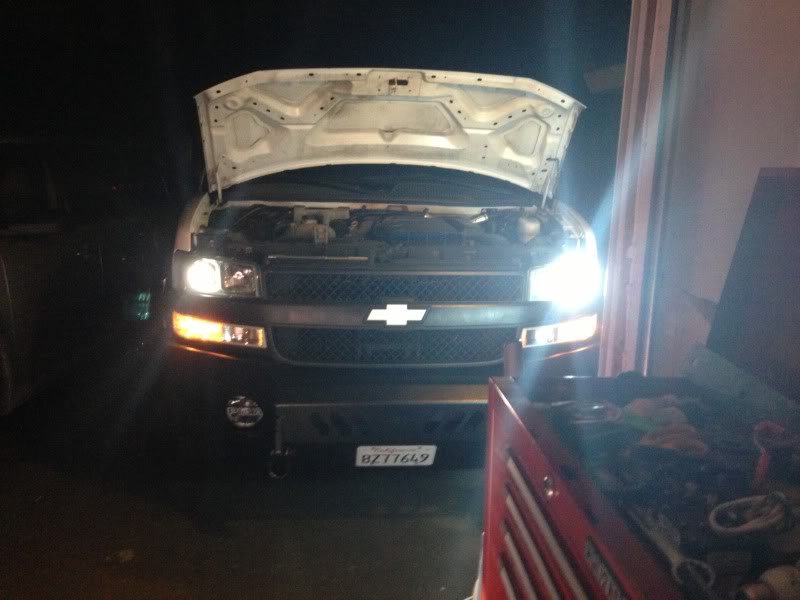
Projector (notice how focus'ed the light is):
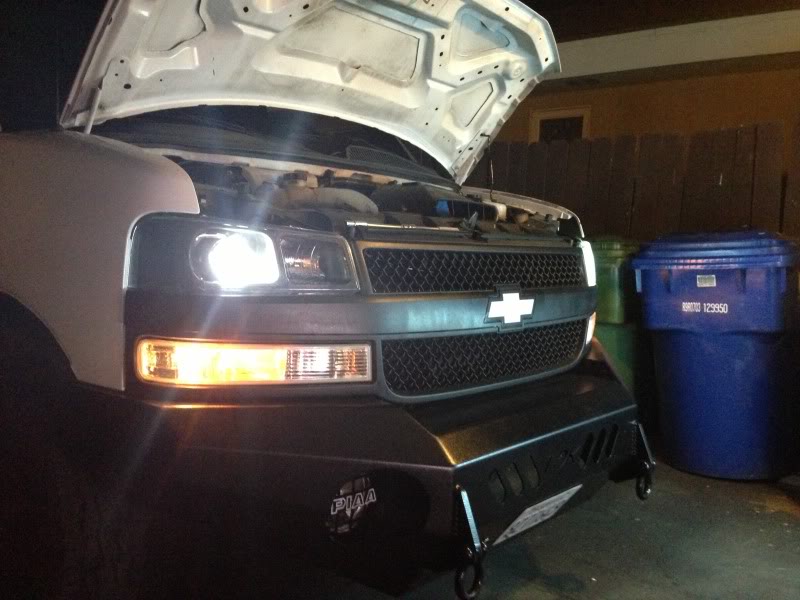
Halogen (you can see how scattered the light is):
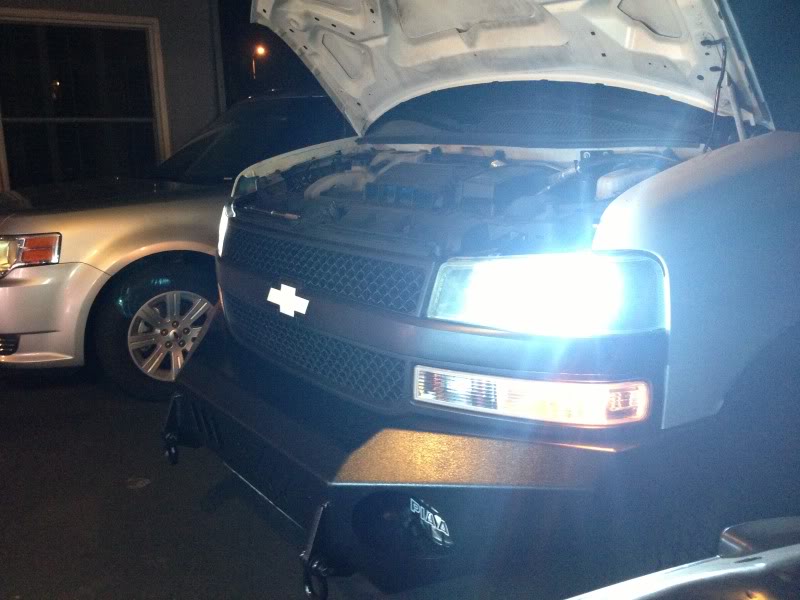
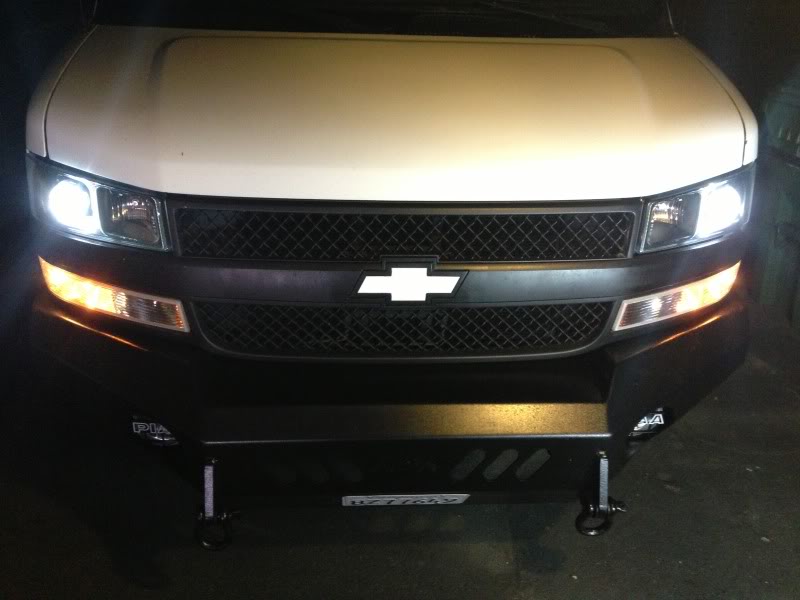
And with both the Projectors in...
And here's how well the shroud blocks any light from being scattered elsewhere, I do wish I did a better job of cleaning the inside of the headlight before glueing it back on! Dohh!
Anyways...all done!
They work and they look great, will probably have to do a little adjusting when I get a chance to make sure they work and are pointed in the correct direction but overall I'm pretty happy.
Here's the comparo between an HID inside a halogen housing and then one inside a projector housing. (passenger side is a Projector and the Drivers side is a Halogen housing)
Projector (notice how focus'ed the light is):
Halogen (you can see how scattered the light is):
And with both the Projectors in...
And here's how well the shroud blocks any light from being scattered elsewhere, I do wish I did a better job of cleaning the inside of the headlight before glueing it back on! Dohh!
Anyways...all done!
 May 31, 2013 | 06:03 AM
#375

Those are perfect! Very nice job man.
Everyone says to not bake the truck headlights but I have never seen anyone post up how it didn't work for them. Maybe if I decide to tackle this again with my truck I will bake them. I like the bake method a lot better than cutting. TONS cleaner
Everyone says to not bake the truck headlights but I have never seen anyone post up how it didn't work for them. Maybe if I decide to tackle this again with my truck I will bake them. I like the bake method a lot better than cutting. TONS cleaner

 May 31, 2013 | 02:39 PM
#378
Thread Starter
GFYS and STFU
iTrader: (8)
Joined: Jan 2007
Posts: 13,870
Likes: 4
From: Here and sometimes there too.
 Thanks!!
 Those are perfect! Very nice job man.
Everyone says to not bake the truck headlights but I have never seen anyone post up how it didn't work for them. Maybe if I decide to tackle this again with my truck I will bake them. I like the bake method a lot better than cutting. TONS cleaner
Everyone says to not bake the truck headlights but I have never seen anyone post up how it didn't work for them. Maybe if I decide to tackle this again with my truck I will bake them. I like the bake method a lot better than cutting. TONS cleaner
 However I don't use it for work...unless laying pipe is a job...

However then I won't be unique anymore!!

And then everyone on this site would be a
 May 31, 2013 | 07:57 PM
#379
Thread Starter
GFYS and STFU
iTrader: (8)
Joined: Jan 2007
Posts: 13,870
Likes: 4
From: Here and sometimes there too.
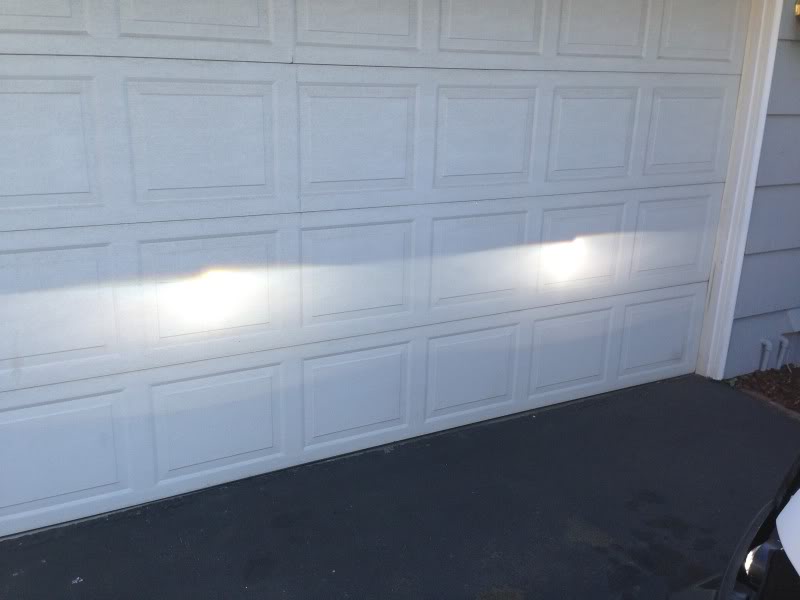
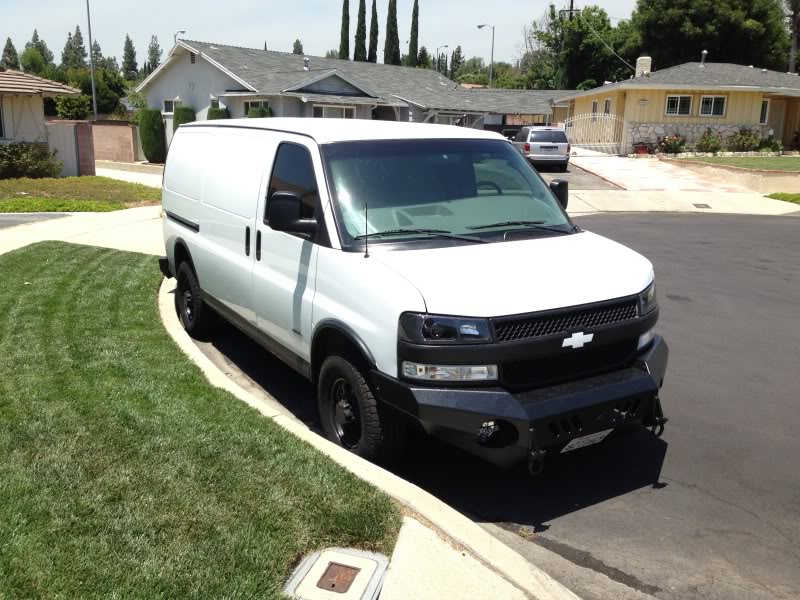
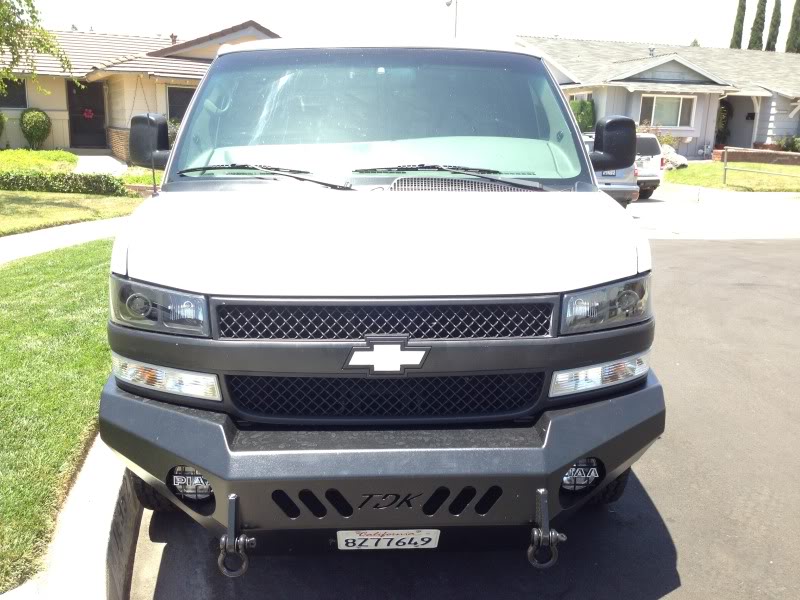
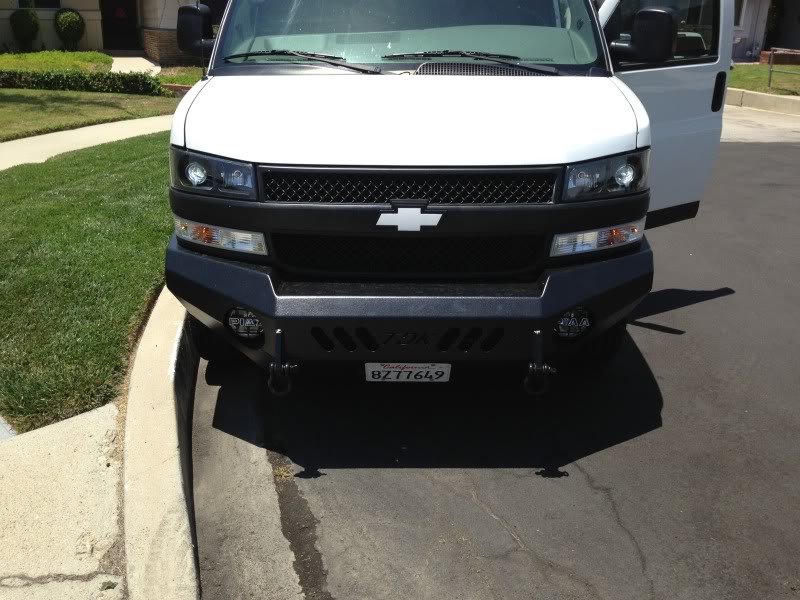
Daylight pics...
Lights on...if you stand above the cut-off point of the shroud you can't/won't be blinded by the HID's:
Below the line is another story! Lol

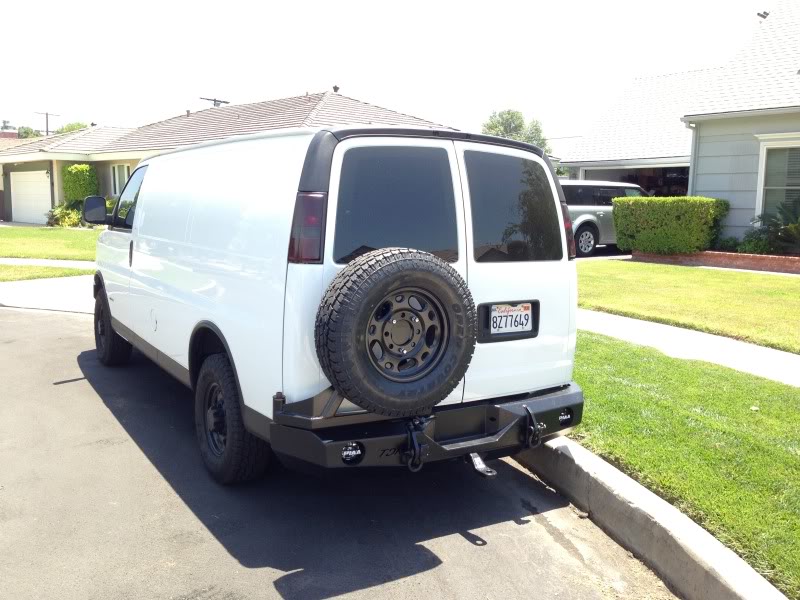
Back with the tinted taillights
7-pin towing plug installed:
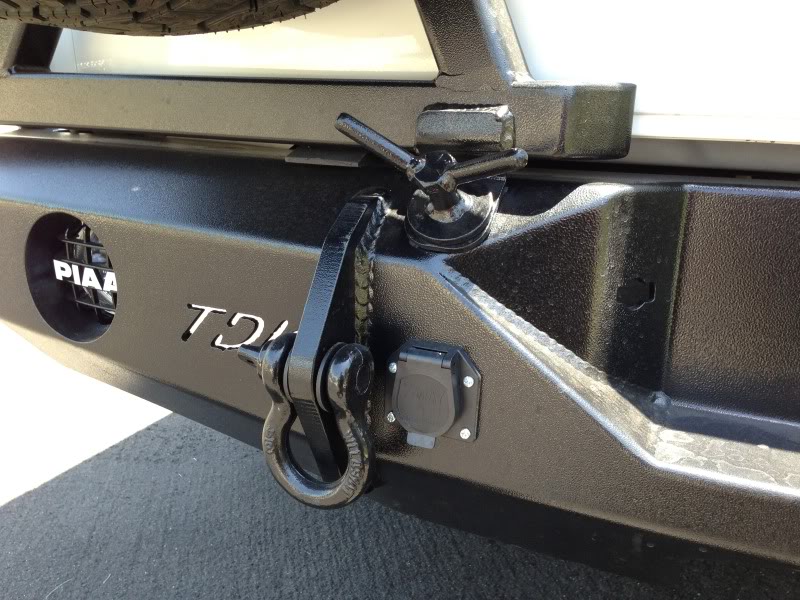
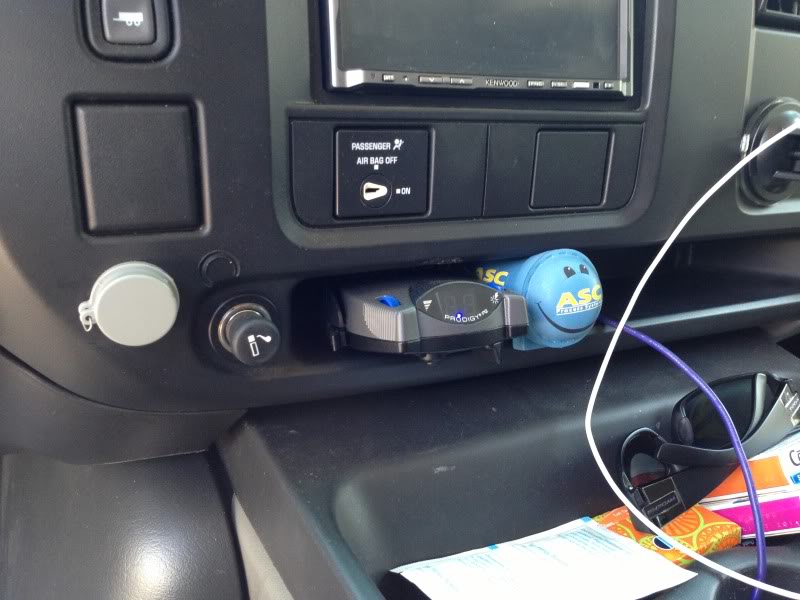
And my Trailer brake controller:
Lights on...if you stand above the cut-off point of the shroud you can't/won't be blinded by the HID's:
Below the line is another story! Lol
Back with the tinted taillights
7-pin towing plug installed:
And my Trailer brake controller:

