

obs 14 bolt semi-float swap
 Aug 21, 2011 | 01:46 AM
#11
Thread Starter
On The Tree
iTrader: (2)
Joined: Apr 2011
Posts: 110
Likes: 0
From: dana point, california
alright, it's been a while but i made some progress with the 14bolt. here it is.
this is the 'starter kit' that por-15 has. it worked out pretty good since the can was just the right amount for the rear end.

this is how potent their 'marine clean' is. this was only about 10 min after applying it.
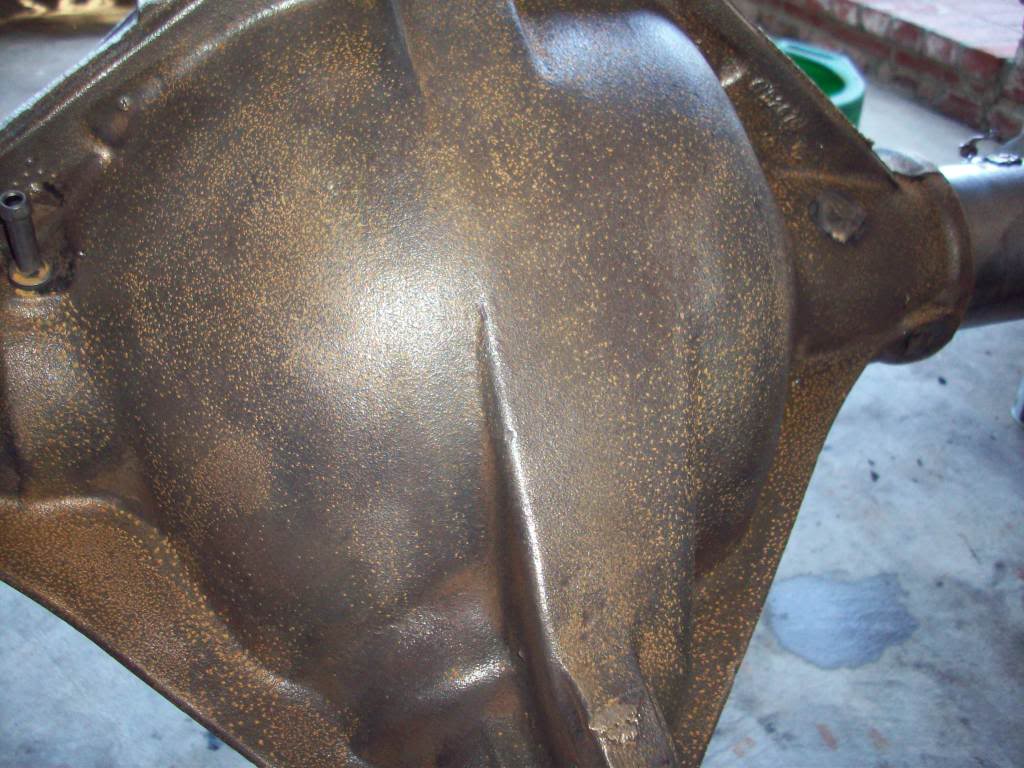
after applying their 'metal ready' product to it.
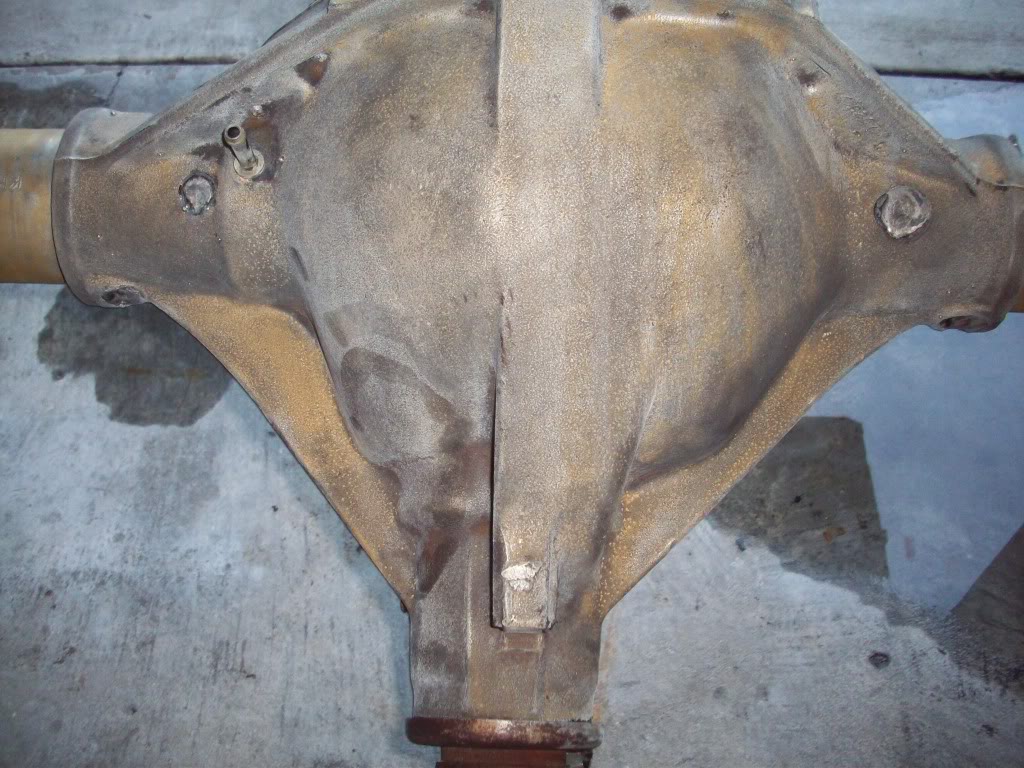
after 2 coats of por-15
after 2 coats of top coat
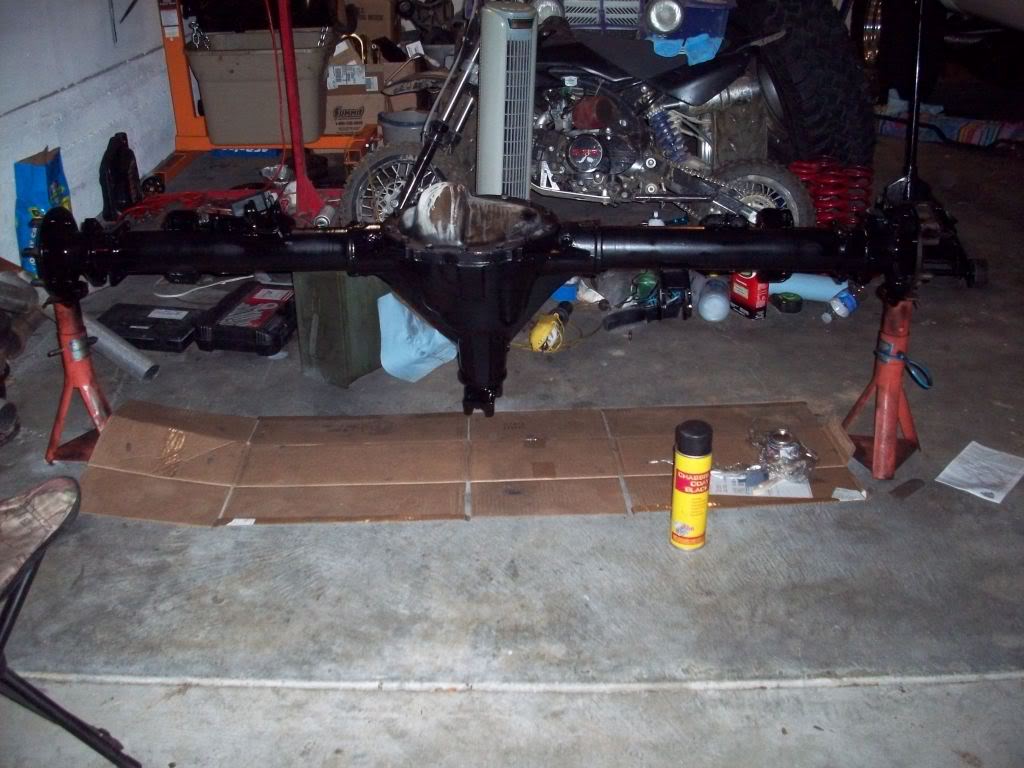
new bearings, seals, and backing plates on

ta cover just sitting in place
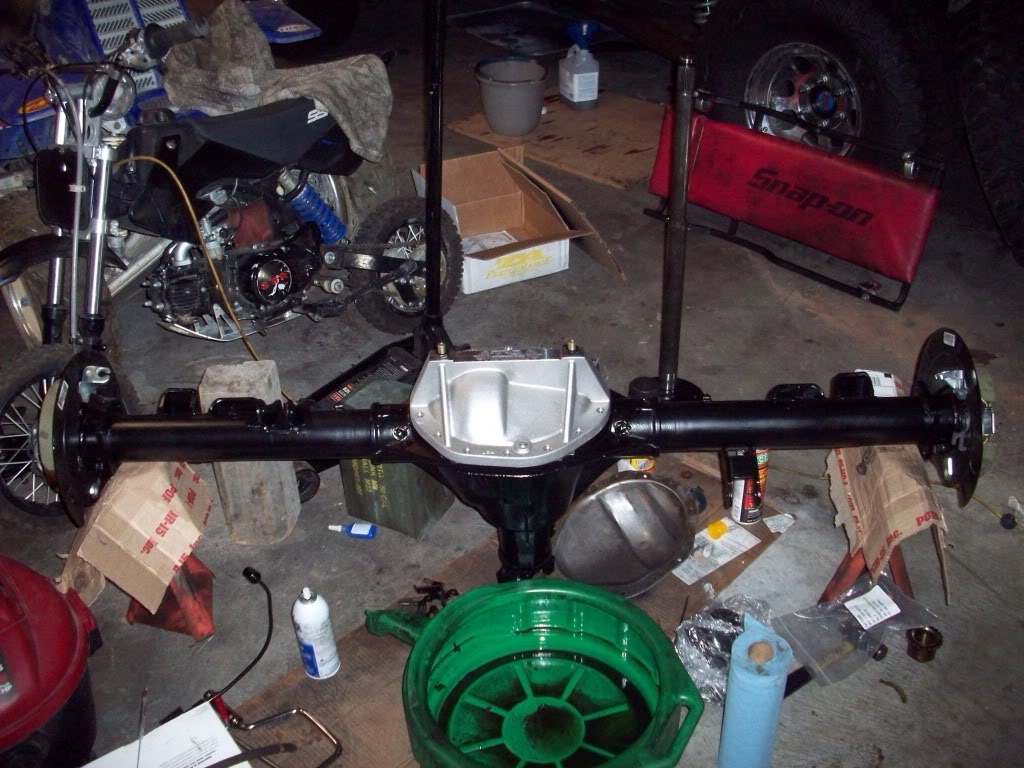
i still have to get the axle flanges machined down, or take a grinder to them. then find some help to get it swapped.
this is the 'starter kit' that por-15 has. it worked out pretty good since the can was just the right amount for the rear end.
this is how potent their 'marine clean' is. this was only about 10 min after applying it.
after applying their 'metal ready' product to it.
after 2 coats of por-15
after 2 coats of top coat
new bearings, seals, and backing plates on
ta cover just sitting in place
i still have to get the axle flanges machined down, or take a grinder to them. then find some help to get it swapped.
Aug 21, 2011 | 10:54 AM
#12

I like the way the POR-15 sets in the pics. I ended up doing 6 coats with VHT chassis black paint and so far its holding up well. If your by yourself a tranny jack works decent for installation/removal.
Aug 21, 2011 | 11:41 AM
#13
Thread Starter
On The Tree
iTrader: (2)
Joined: Apr 2011
Posts: 110
Likes: 0
From: dana point, california
as far as installation goes im just going to put the tires on it and roll it into place.
Nov 3, 2011 | 10:52 PM
#15
Thread Starter
On The Tree
iTrader: (2)
Joined: Apr 2011
Posts: 110
Likes: 0
From: dana point, california
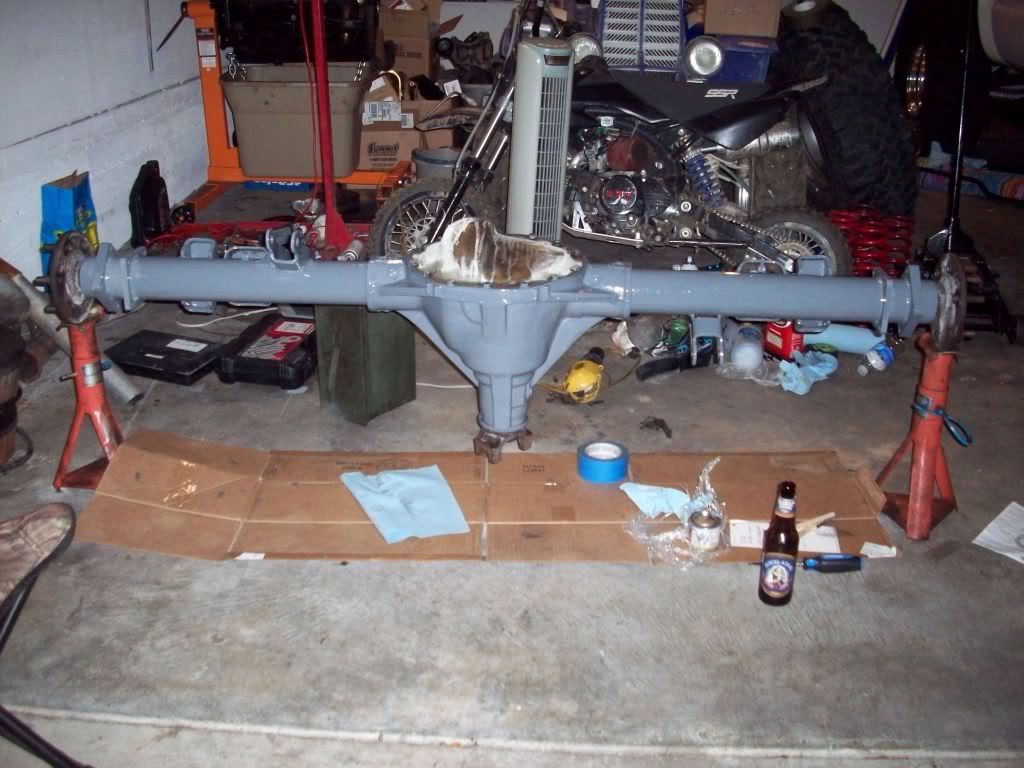
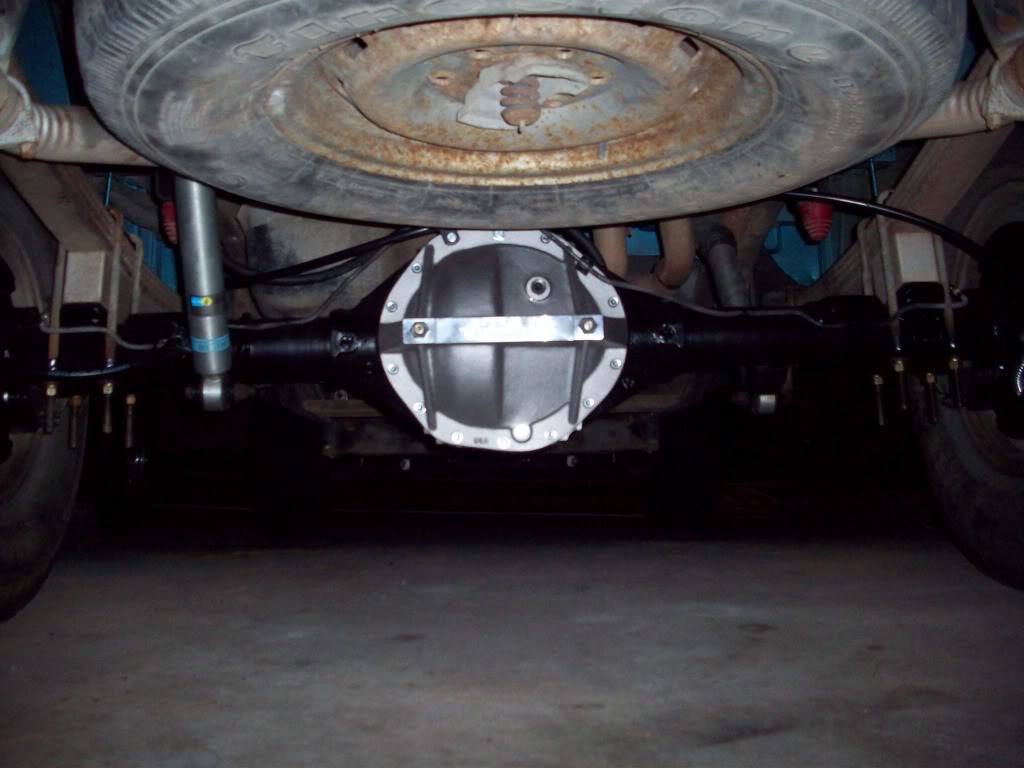
Here's the final prep and install of the 14 bolt. Its actually been in the truck since september, I've just been to busy with work to update this thread.
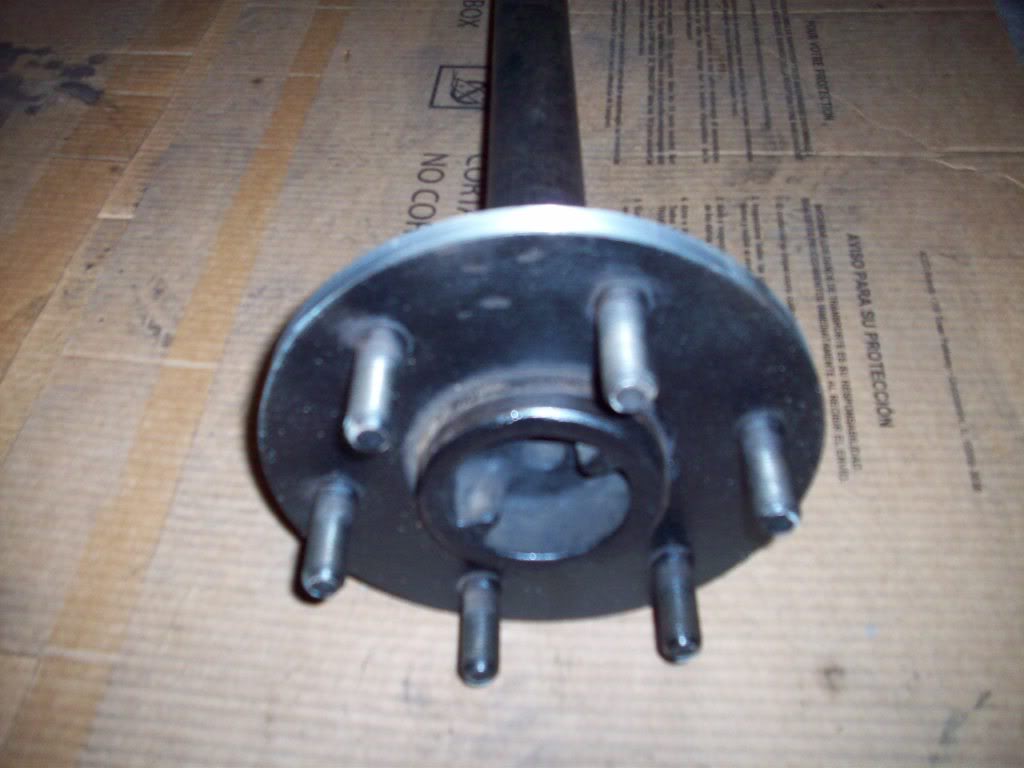
Axle flanges shaved down with a lathe.
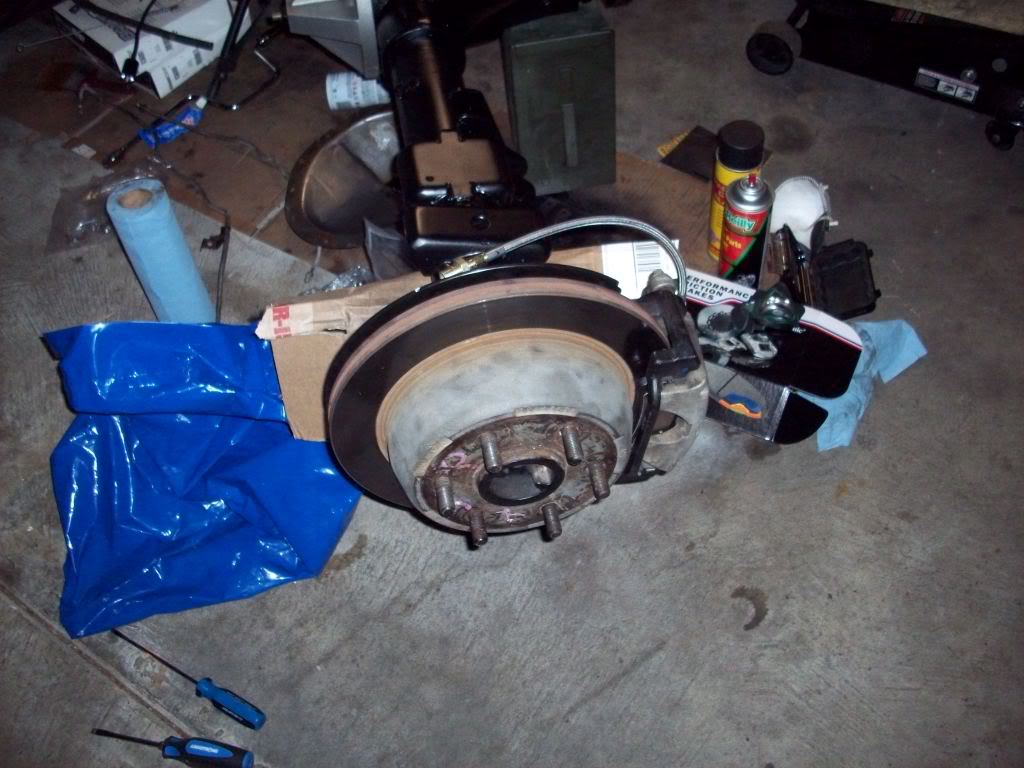
Brakes set up and ready
The 10 bolt coming out
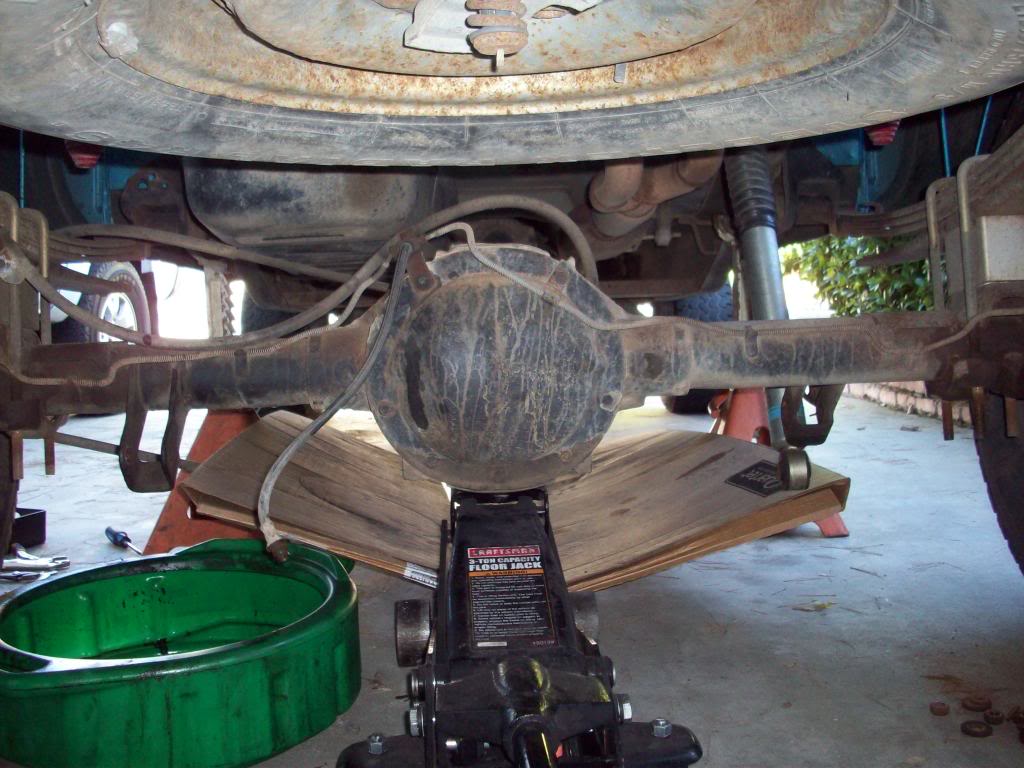
I didn't have a free hand to take pics during the swap but it went as smooth as it could. I still need to cut the u-bolts.
I ended up damaging the aluminum yoke trying to press the old u-joint out to swap the 1350 conversion joint in. My driveline guy said they couldn't weld a new yoke on the aluminum so i had to get a steel driveshaft made.

Everything's been working great so far. I have a very slight vibration at about 75mph, not sure what it is right now. Speedometer is off a little due to the lower ratio, but I like having more low end. I still need to either swap the master cylinder or add a proportioning valve to be able to use the rear discs at their full potential. POR-15 is holding up pretty well, however the topcoat has scratched in a few places.
The only thing I haven't figured out yet is how to convert the parking brake cables. Probly just need to make a trip to the junk yard.
Axle flanges shaved down with a lathe.
Brakes set up and ready
The 10 bolt coming out
I didn't have a free hand to take pics during the swap but it went as smooth as it could. I still need to cut the u-bolts.
I ended up damaging the aluminum yoke trying to press the old u-joint out to swap the 1350 conversion joint in. My driveline guy said they couldn't weld a new yoke on the aluminum so i had to get a steel driveshaft made.
Everything's been working great so far. I have a very slight vibration at about 75mph, not sure what it is right now. Speedometer is off a little due to the lower ratio, but I like having more low end. I still need to either swap the master cylinder or add a proportioning valve to be able to use the rear discs at their full potential. POR-15 is holding up pretty well, however the topcoat has scratched in a few places.
The only thing I haven't figured out yet is how to convert the parking brake cables. Probly just need to make a trip to the junk yard.
Nov 3, 2011 | 11:43 PM
#16


Looks good under there. Glad to see you got it finished!
Your probally better off not haveing the aluminum D-Shaft. How ever they can be repaired maybe the shop you went to is not capable of it but others are. I hope its not the new shaft that is causing the vibration.
Your probally better off not haveing the aluminum D-Shaft. How ever they can be repaired maybe the shop you went to is not capable of it but others are. I hope its not the new shaft that is causing the vibration.
Nov 4, 2011 | 12:14 AM
#17
Thread Starter
On The Tree
iTrader: (2)
Joined: Apr 2011
Posts: 110
Likes: 0
From: dana point, california
Looks good under there. Glad to see you got it finished!
Your probally better off not haveing the aluminum D-Shaft. How ever they can be repaired maybe the shop you went to is not capable of it but others are. I hope its not the new shaft that is causing the vibration.
Your probally better off not haveing the aluminum D-Shaft. How ever they can be repaired maybe the shop you went to is not capable of it but others are. I hope its not the new shaft that is causing the vibration.
Nov 4, 2011 | 12:21 AM
#18
I figured they could be repaired, but I'm over it. The new driveshaft was balanced at 9k rpms. Or so the guy said. I didn't change the pinion or carrier bearings so the vibration could very well be from either of those. Any suggestions on narrowing down whats causing it?
Also Deppends on how the shaft was ballanced. Im not an expert but I know they have different ways to balance them. 1 way gets it nearly perfect. The other gets it in the ball park but deppending on the application you could detect a small amount of vibration.
Nov 4, 2011 | 05:59 PM
#19
Thread Starter
On The Tree
iTrader: (2)
Joined: Apr 2011
Posts: 110
Likes: 0
From: dana point, california
The Joints could cause it esspecially if you damaged it while trying to press them out.
Also Deppends on how the shaft was ballanced. Im not an expert but I know they have different ways to balance them. 1 way gets it nearly perfect. The other gets it in the ball park but deppending on the application you could detect a small amount of vibration.
Also Deppends on how the shaft was ballanced. Im not an expert but I know they have different ways to balance them. 1 way gets it nearly perfect. The other gets it in the ball park but deppending on the application you could detect a small amount of vibration.

