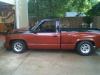
Converting the HD to strip/weekend only.

 Oct 17, 2010 | 08:25 PM
#22

Ran out of wire as I was welding the spiders. Yes it it licoln(snap-on) locked but not finished. Like I said I engaged the clutches of the G80 so welding the spider is just a back up.
Oct 17, 2010 | 10:42 PM
#24
No. I will take some pics tomorrow.
The G80 has clutches on both axle gears. Behing the ,ring gear, side clutches is a cam that is spun by the "govner" and engages the clutches. I removed the "govner" and spun the cam so the clutches were tight and welded the cam so it couldn't turn.
http://www.justchevytrucks.com/images/300_re6L.jpg
You can see the govner(top round part) and the lock(lower wide cam) if you look next to the ring gear you see the teeth that the govner uses to spin the cam. I will get some good pics tomorrow.


 I did that one time before, but never caught it on vid
  Oct 17, 2010 | 11:06 PM
#26
The seat are Spec D tuning. Bridal style I think. They must be last years model or maybe 2 because they aren't listed on there web sit currently. I havn't had time to look around and find the exact seat online but it doesn't really matter.
Oct 19, 2010 | 02:13 AM
#27

You def. got a project on your hands. I know how you feel. Lots of work ahead. My opinion is that you should just leave the dash alone. I really doesn't weigh all that much. I doubt you'd be able to build anything lighter and have it look as good or stay in one piece unless you build a very thin aluminum dash. Even still I think it would be more work than its worth. Save your time and money for other areas of improvement.
Oct 21, 2010 | 05:57 PM
#28
I think I am going to use the stock plastic for the most part. Remove all the metal behind it and put a few small supports so it won't sag. I will probably make a glass glove box door and maybe a few other small holes in the dash. The radio and heater controls will probably be a piece of plexi to mount switches and whatnot.
I started the hood but the resin I had was old and didn't work quite right. I am going to see if I can salvage the layer I have made and add two more layers as was the original plan. If the sanding doesn't go well I will start from scratch with new fresh resin and the proper roller(buddy has worked on glass boats) I will have the hood made in no time. I will post pics of the hood so far tomorrow if I remember to take pics and I will post the Lincoln locker tonight when I get home.
I started the hood but the resin I had was old and didn't work quite right. I am going to see if I can salvage the layer I have made and add two more layers as was the original plan. If the sanding doesn't go well I will start from scratch with new fresh resin and the proper roller(buddy has worked on glass boats) I will have the hood made in no time. I will post pics of the hood so far tomorrow if I remember to take pics and I will post the Lincoln locker tonight when I get home.
Oct 22, 2010 | 11:35 PM
#29
Been putting in some more hours on the HD.
Who the hell needs 5" of frame!
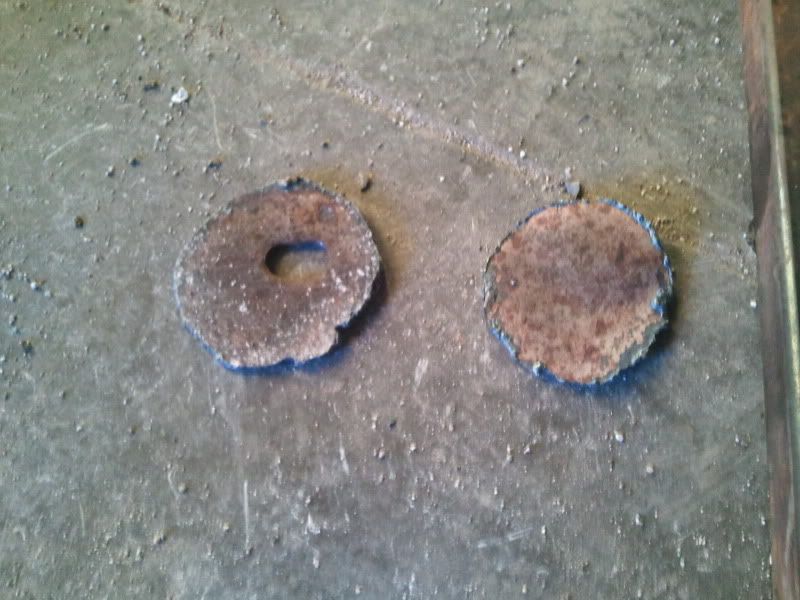

The frame has a bulge in it at the top right of this picture. After cutting out the inside frame I cut a filler piece and welded it in. The rest of the circle is tight to the frame(about 75% of the hole).

I plan to replace about a one inch arch of the hole on the outside of the frame because there isn't allot of the frame left. It is boxed at the location I made the hole but being it is such a high stress area i want to make sure to more then over build it. Filling in part of the hole will also let me have a third mounting point for the side pipe. The inside of the hole needs to be open because my flex pipe will be in this hole(reason for it so big) and it needs room to move. After filling part of the hole I will determine if i need a small gusset on he outside of the frame again to make 100% sure it is built to take at least twice the stress it will ever see.
I forgot to take pics of the hood but I have decided to scrap the current part and start fresh with the fesh resin.I will post pics still just to show people what went wrong with the sticky resin.
I also have the Lincoln locker rapped up but the pics I took came out like poo. I need to remember my good camera because the phone just can't focus up close.
Who the hell needs 5" of frame!
The frame has a bulge in it at the top right of this picture. After cutting out the inside frame I cut a filler piece and welded it in. The rest of the circle is tight to the frame(about 75% of the hole).
I plan to replace about a one inch arch of the hole on the outside of the frame because there isn't allot of the frame left. It is boxed at the location I made the hole but being it is such a high stress area i want to make sure to more then over build it. Filling in part of the hole will also let me have a third mounting point for the side pipe. The inside of the hole needs to be open because my flex pipe will be in this hole(reason for it so big) and it needs room to move. After filling part of the hole I will determine if i need a small gusset on he outside of the frame again to make 100% sure it is built to take at least twice the stress it will ever see.
I forgot to take pics of the hood but I have decided to scrap the current part and start fresh with the fesh resin.I will post pics still just to show people what went wrong with the sticky resin.
I also have the Lincoln locker rapped up but the pics I took came out like poo. I need to remember my good camera because the phone just can't focus up close.