

2000 Chevy Silverado project "Charlie Murphy"


 Jun 28, 2016 | 02:48 AM
#512

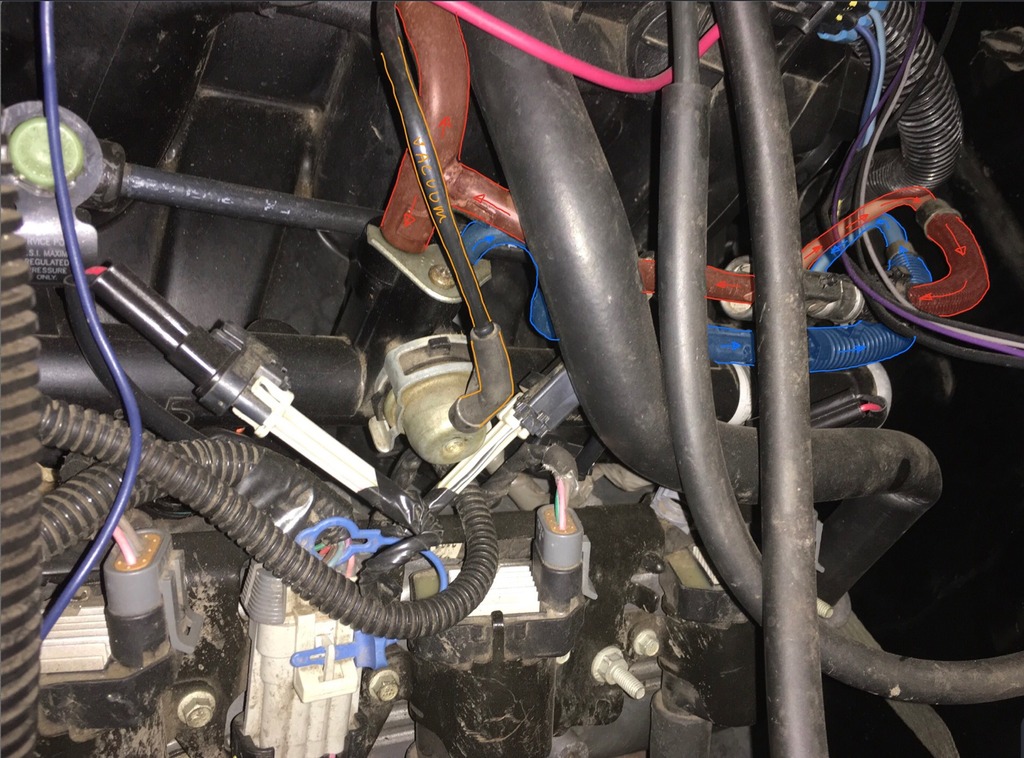
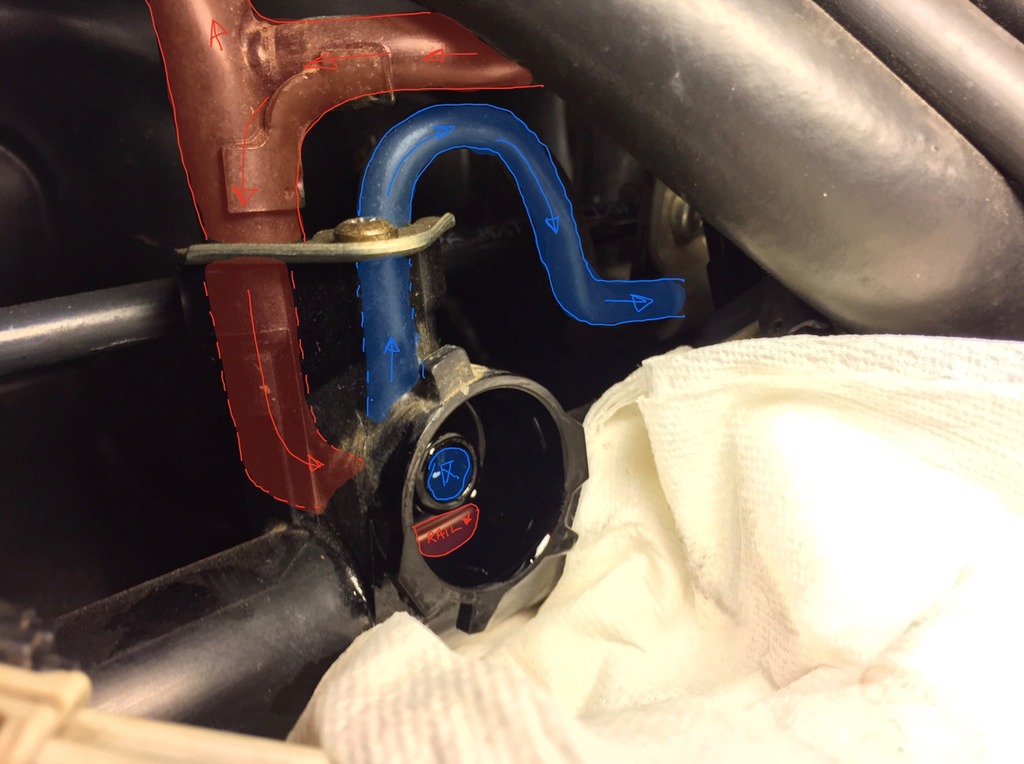
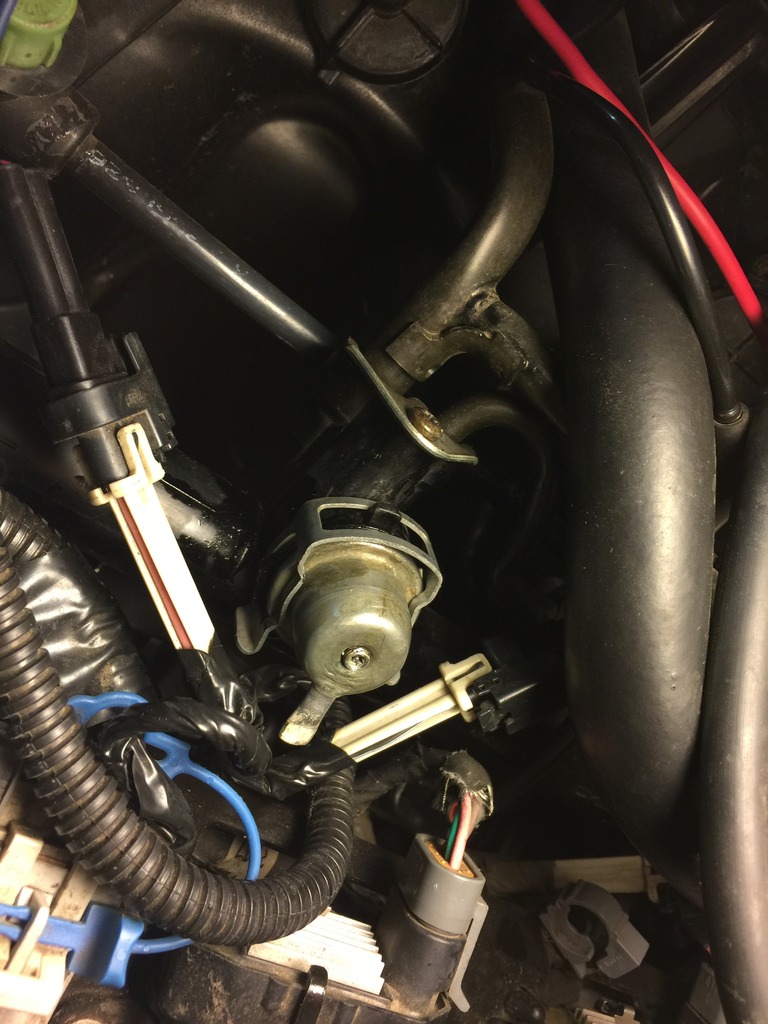
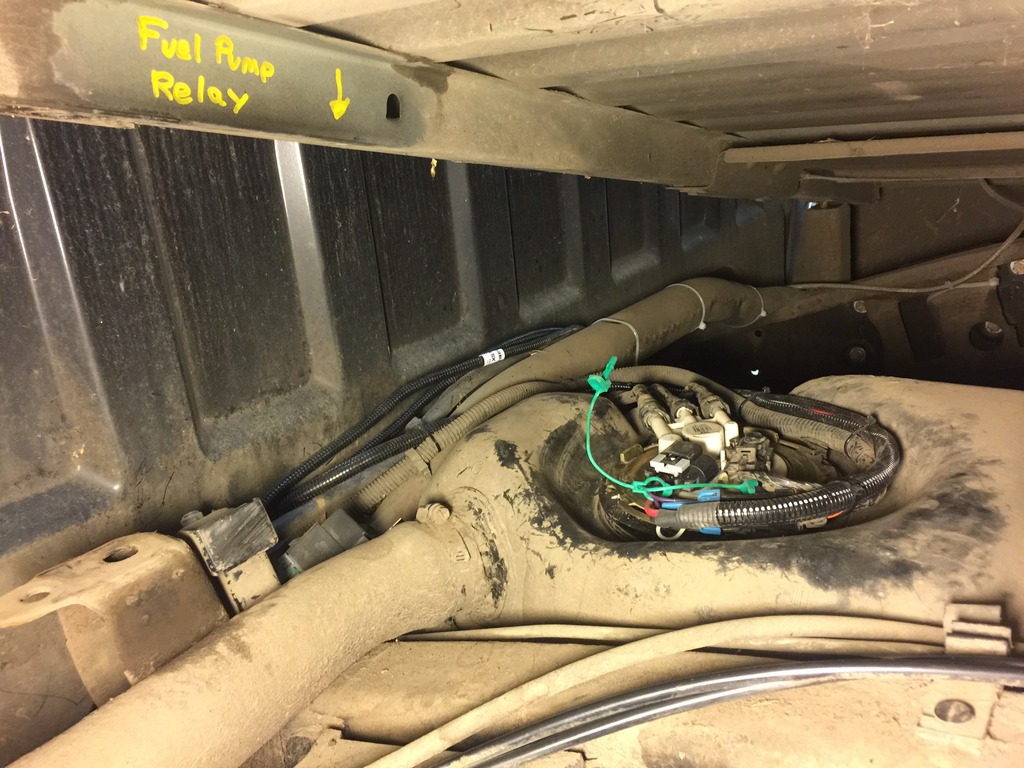
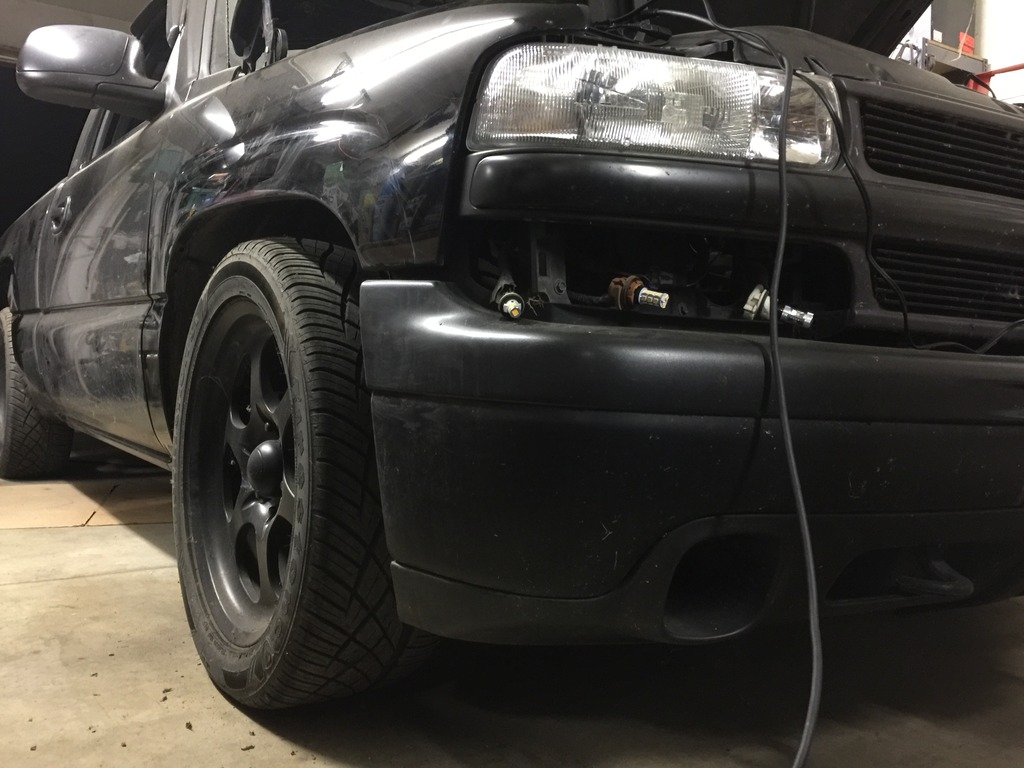
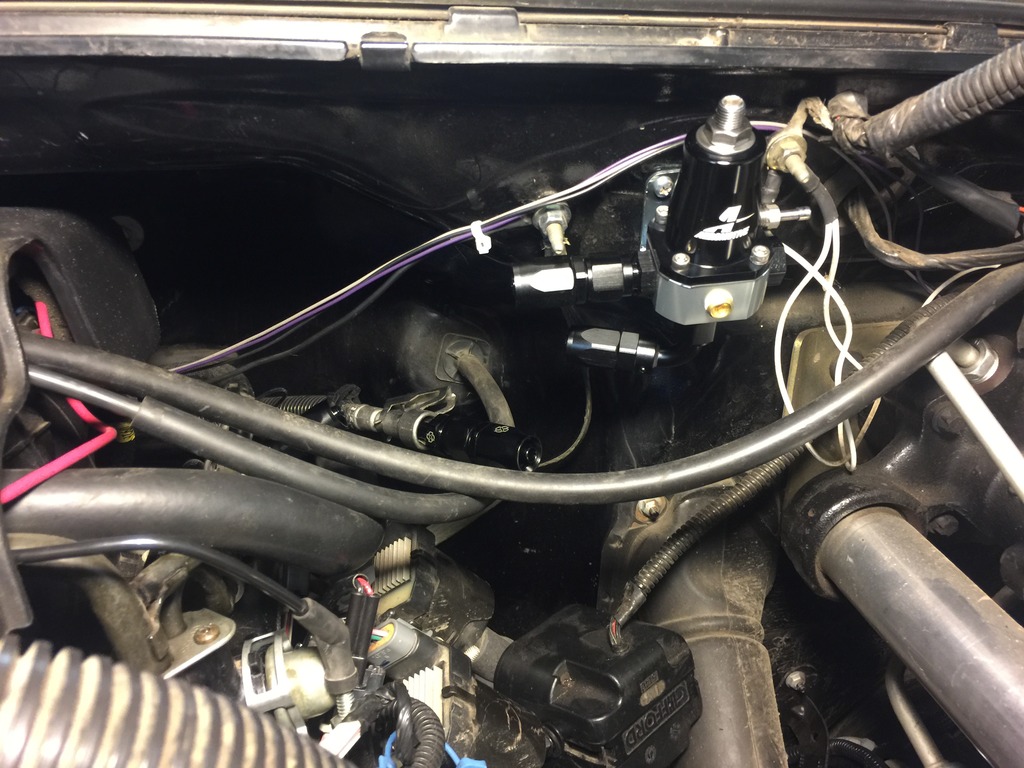
Decided to give replacing the factory fuel pressure regulator a try. In case you don't know, here's where it's located on 99-02 trucks.
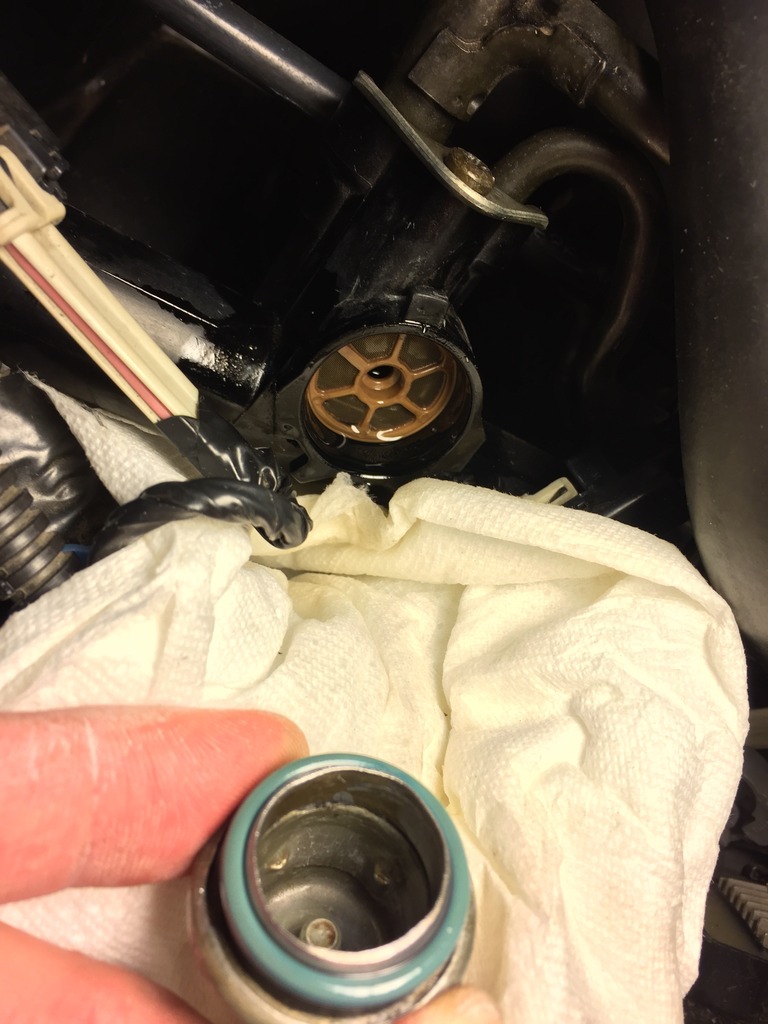
On the left the factory part from 2000, on the right the $75 part from NAPA. Yes $75 freekin dollars. WTF? I know I could order a cheaper one online and save myself $20 or so...

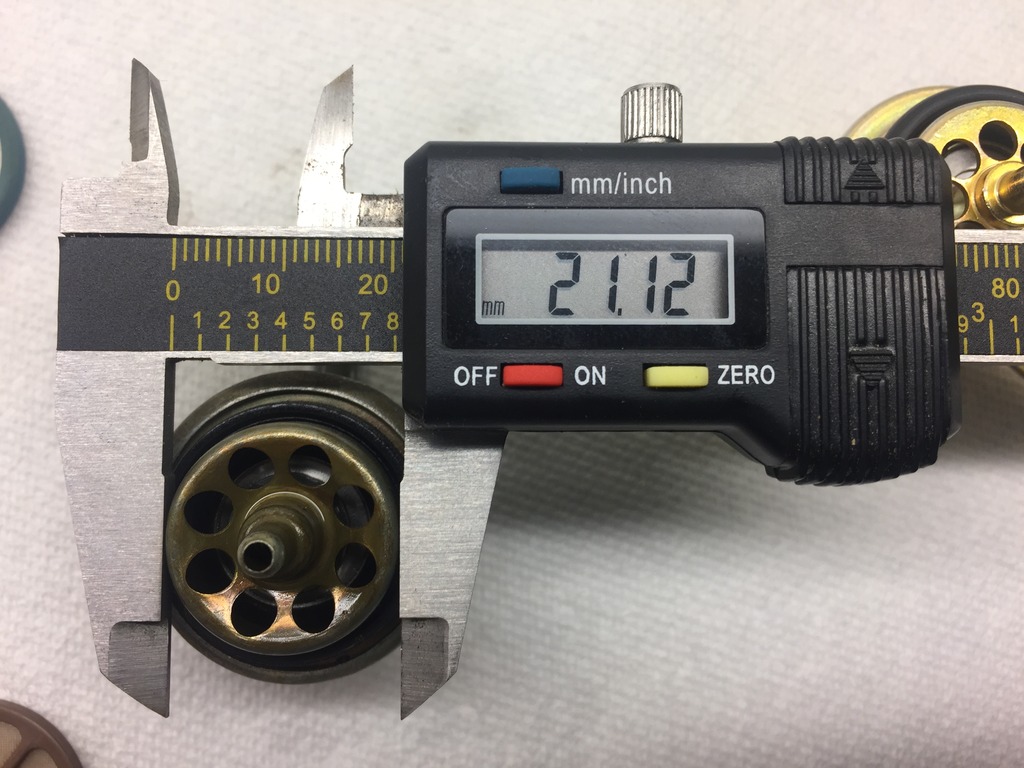
A closer look at the factory part.

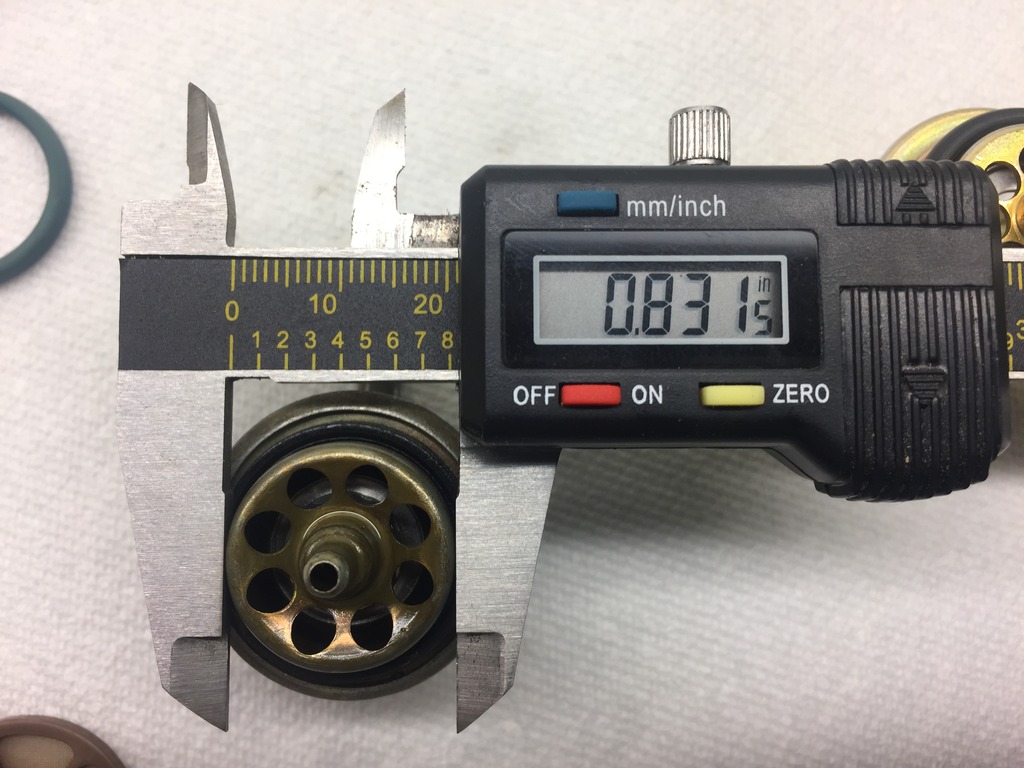
In case you were curious how big the hole is that's returning fuel.
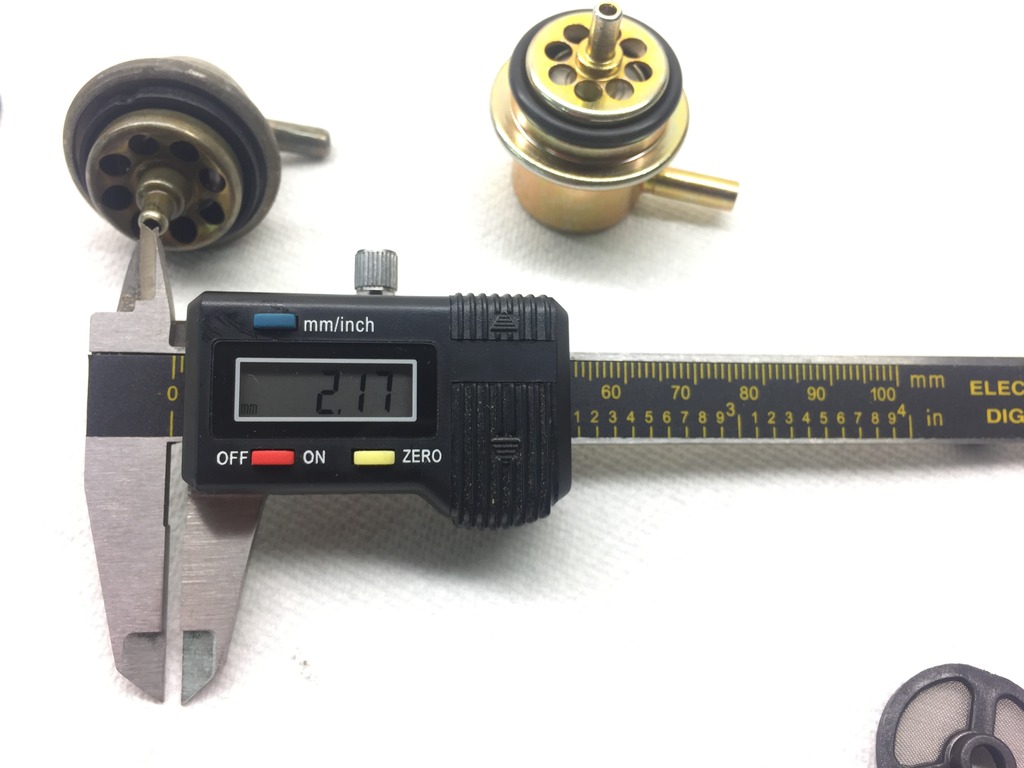
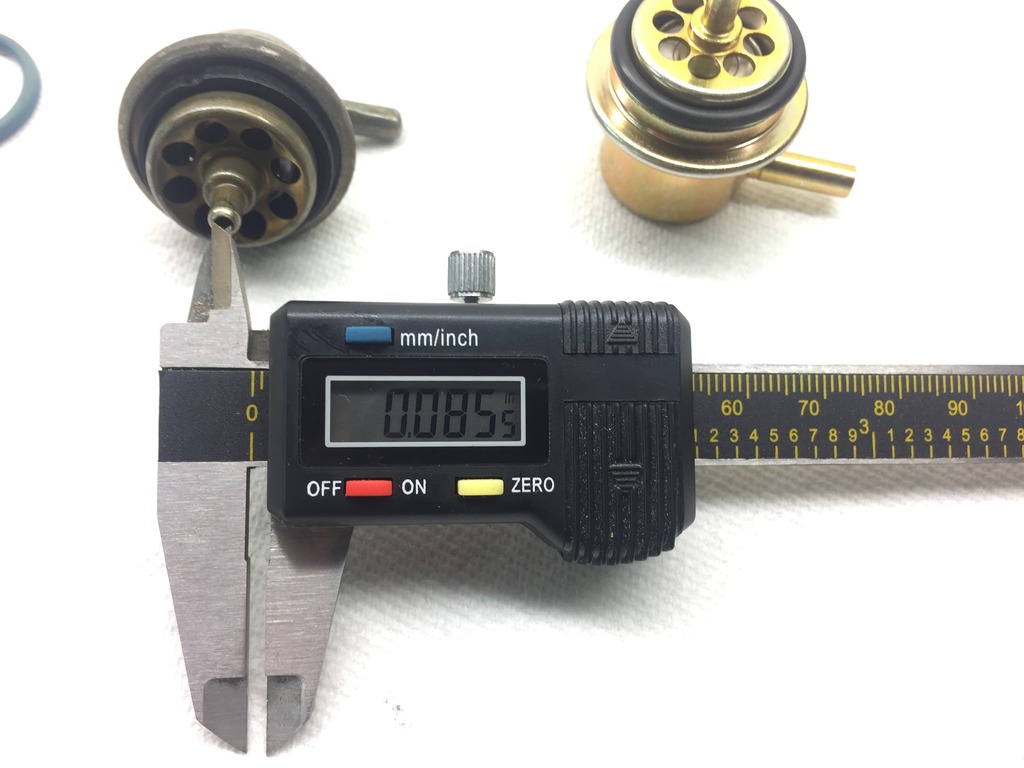
And if you were interested in making a plug/bypass.
I found this problematic. The replacement regulator doesn't fit snugly. This pic is taken with the engine running, so apparently it's not a problem.
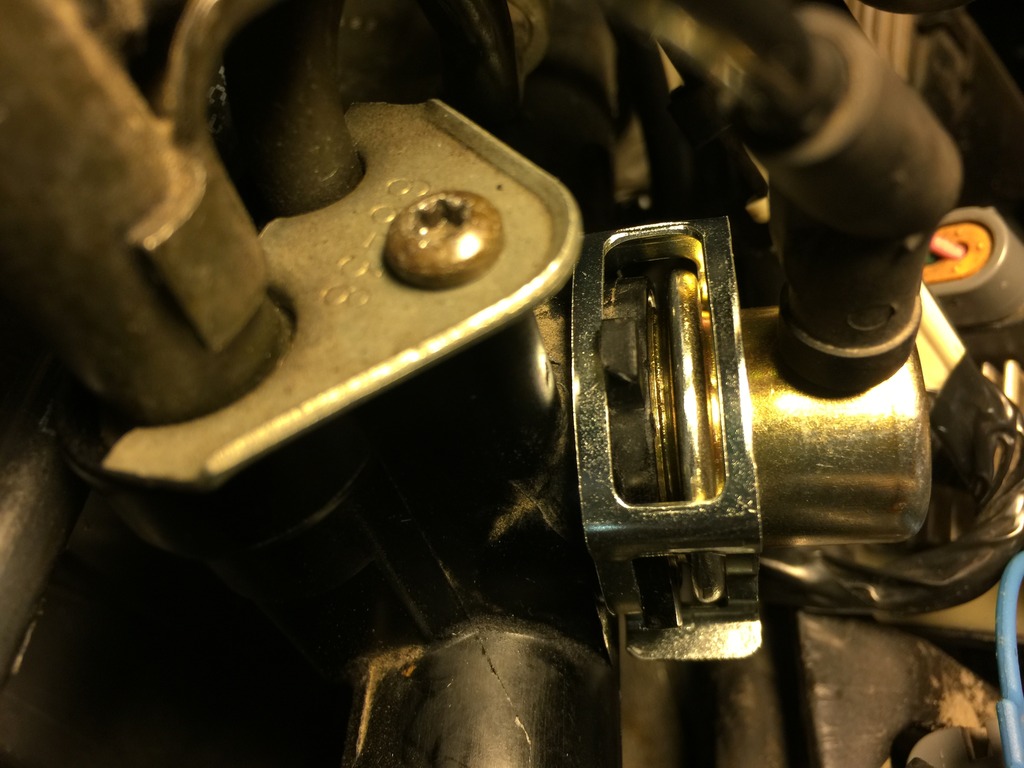
That being said, this is a problem.
So that was a waste of time and $75. Damn it. External regulator here I come.
I can't find a reliable source for a billet bypass plug and I wanted to know how the factory regulator worked, so...

I cut the return part out by cutting the holes with cutters. Then I pushed the center piece to the side and cut the diaphragm out with an exact-o knife. Finally, I pulled everything apart.
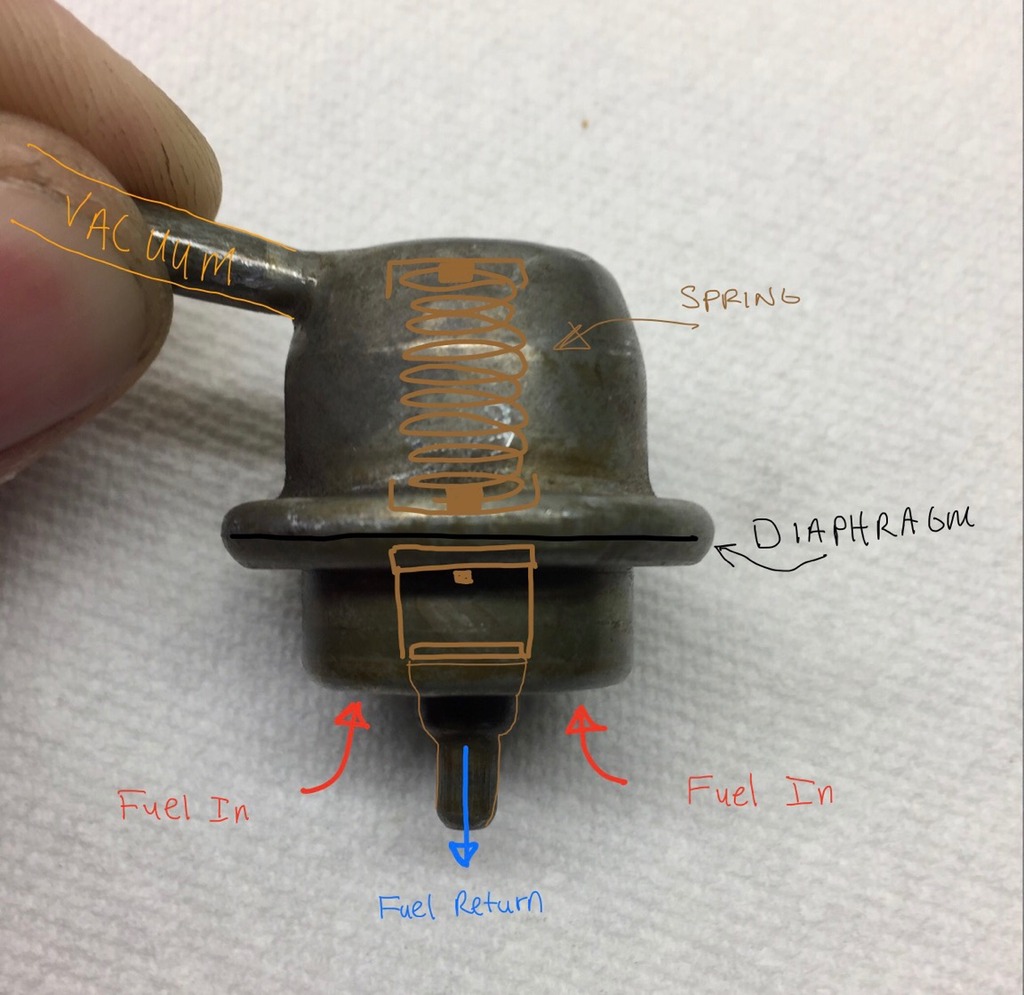
Here's the gist.
Now that the regulator is useless, I needed to plug the vacuum port. So I crimped it and filled it with solder.


I'm sure it's clear how this all works now, but just in case it isn't.
Now, I can still fit the screen in there, so I went ahead and put it in there and installed my soldered hollowed out regulator.
No leaks!
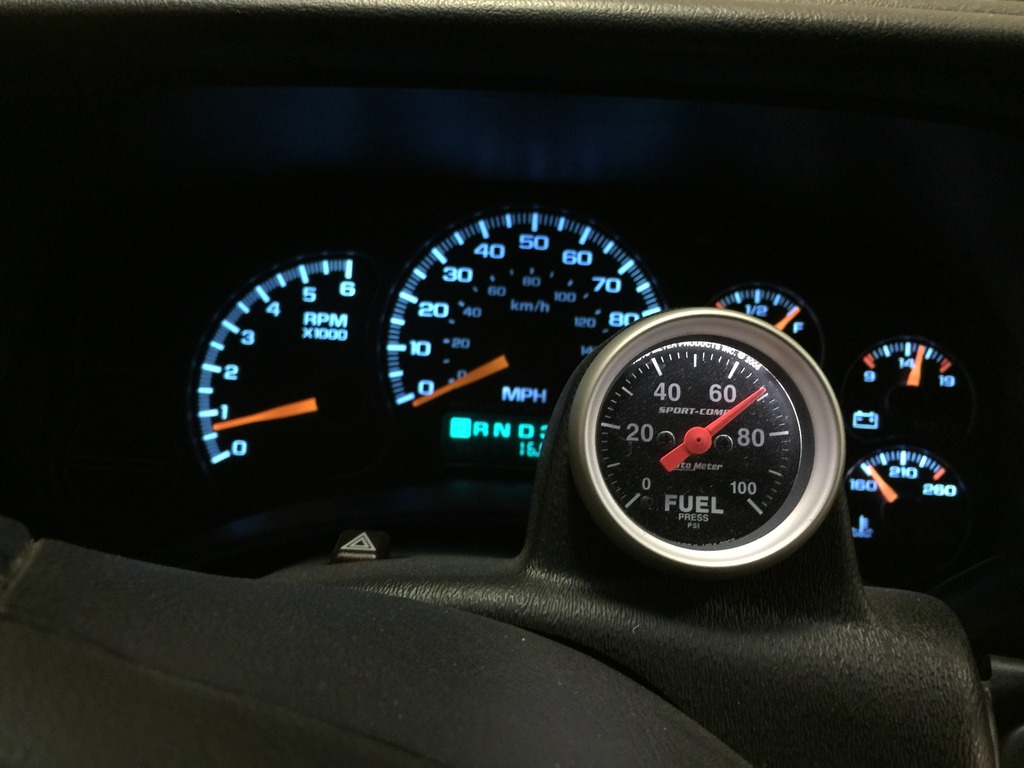
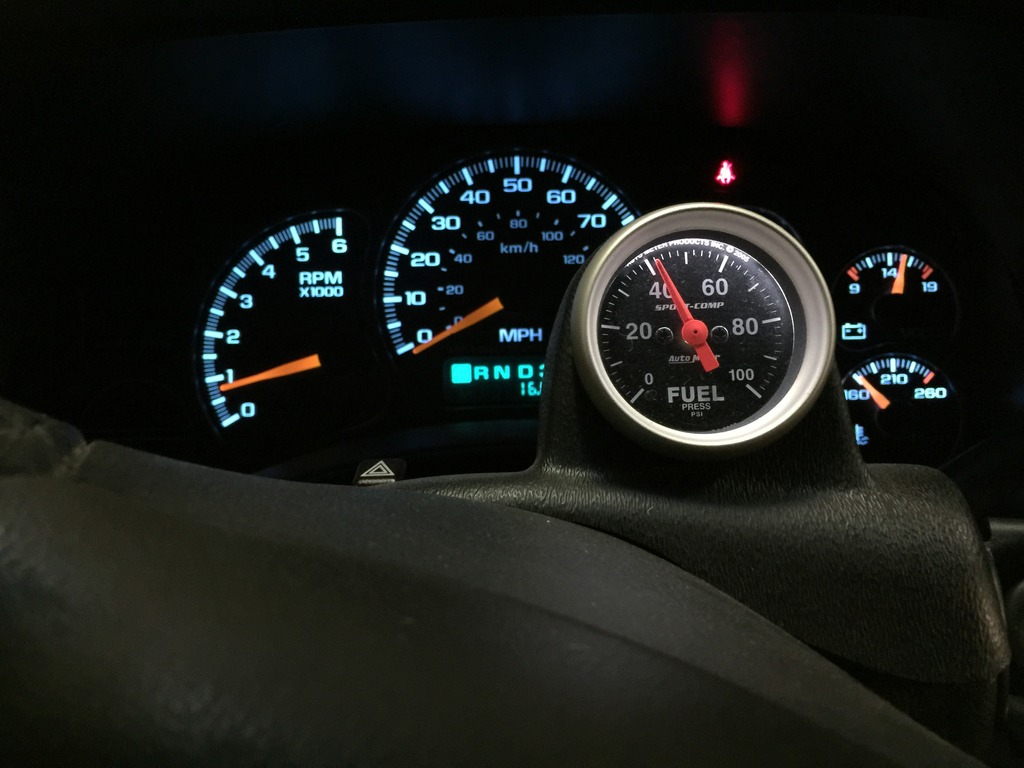
Unregulated fuel pressure:
Obviously I can't run it or drive it this way. I'll reinstall the Napa piece and button everything up tomorrow. Next up is researching external fuel pressure regulators. Probably Aeromotive a1000 and $100 in adapters and fittings. LMAO.

On the left the factory part from 2000, on the right the $75 part from NAPA. Yes $75 freekin dollars. WTF? I know I could order a cheaper one online and save myself $20 or so...

A closer look at the factory part.

In case you were curious how big the hole is that's returning fuel.


And if you were interested in making a plug/bypass.


I found this problematic. The replacement regulator doesn't fit snugly. This pic is taken with the engine running, so apparently it's not a problem.

That being said, this is a problem.

So that was a waste of time and $75. Damn it. External regulator here I come.
I can't find a reliable source for a billet bypass plug and I wanted to know how the factory regulator worked, so...

I cut the return part out by cutting the holes with cutters. Then I pushed the center piece to the side and cut the diaphragm out with an exact-o knife. Finally, I pulled everything apart.
Here's the gist.

Now that the regulator is useless, I needed to plug the vacuum port. So I crimped it and filled it with solder.


I'm sure it's clear how this all works now, but just in case it isn't.

Now, I can still fit the screen in there, so I went ahead and put it in there and installed my soldered hollowed out regulator.

No leaks!

Unregulated fuel pressure:

Obviously I can't run it or drive it this way. I'll reinstall the Napa piece and button everything up tomorrow. Next up is researching external fuel pressure regulators. Probably Aeromotive a1000 and $100 in adapters and fittings. LMAO.
Jun 28, 2016 | 08:10 AM
#513

Joined: Jan 2006
Posts: 16,282
Likes: 438
From: Huntsville, AL
Good time to go to some ebay rails to clean up the whole thing, I think there is a guy that sells some that fit these intakes on there. If not, its just some spacers to make it work with any generic fuel rail.
Jun 29, 2016 | 04:20 AM
#514
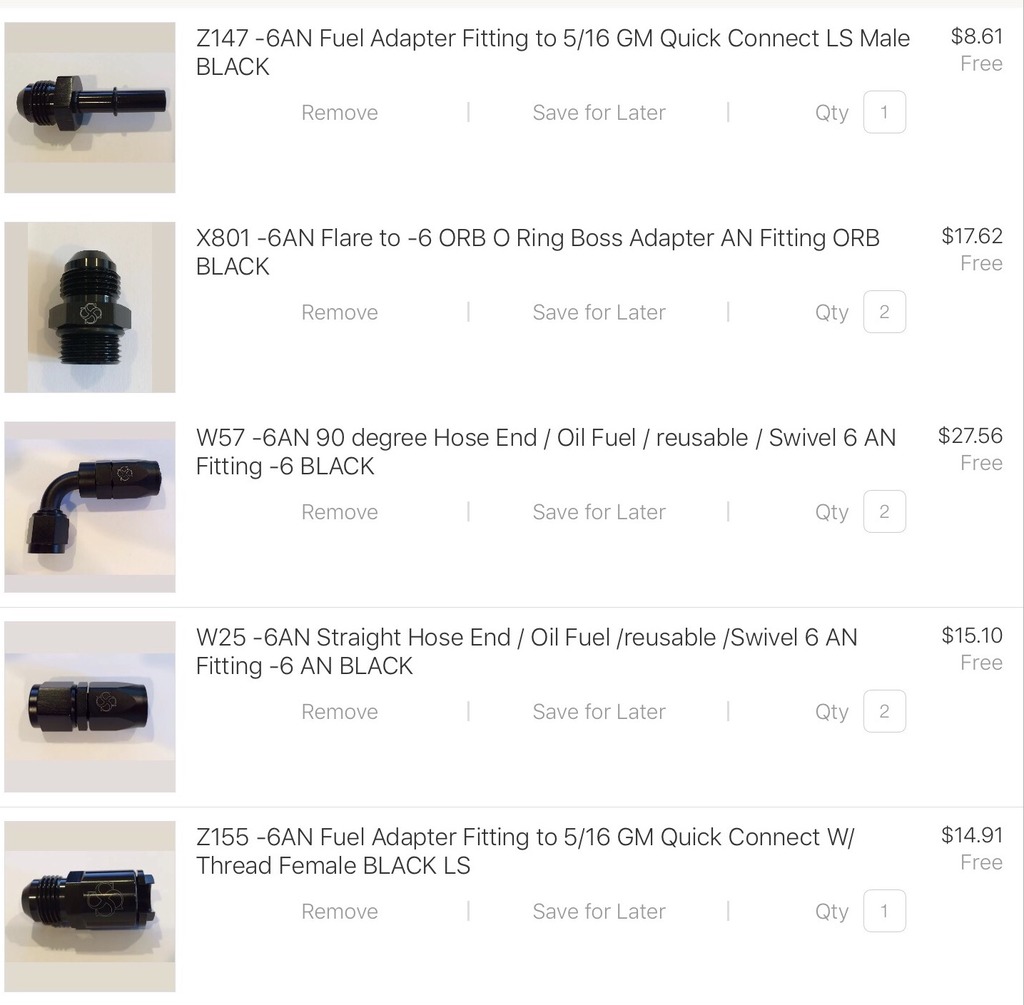
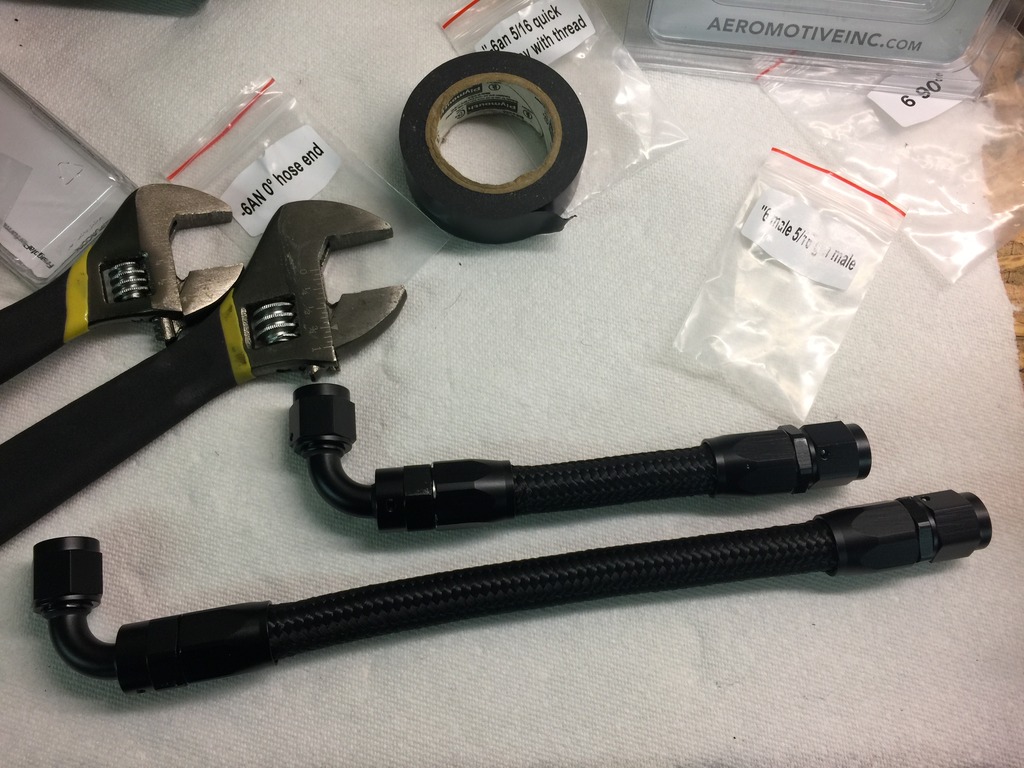
I ordered all of the parts I'll need to adapt the factory fuel rails to an aftermarket fuel pressure regulator. I did a bit of research and this is what I came up with.
First off, I decided to go with the Aeromotive 13129 FPR, you can check it out here:
EFI Bypass Regulator ? Aeromotive, Inc

A few people on this site have ran it, and I haven't seen any one complain about it. As far as the fittings, I ended up ordering everything off of eBay. At first I priced it all on amazon, but eBay came in over $40 cheaper.
Hopefully the parts show up sooner than later, in the mean time, I button everything back up. I zip tied everything down and out of the way. I even left future me a note.
First off, I decided to go with the Aeromotive 13129 FPR, you can check it out here:
EFI Bypass Regulator ? Aeromotive, Inc

A few people on this site have ran it, and I haven't seen any one complain about it. As far as the fittings, I ended up ordering everything off of eBay. At first I priced it all on amazon, but eBay came in over $40 cheaper.

Hopefully the parts show up sooner than later, in the mean time, I button everything back up. I zip tied everything down and out of the way. I even left future me a note.
 Jun 30, 2016 | 04:04 AM
#515
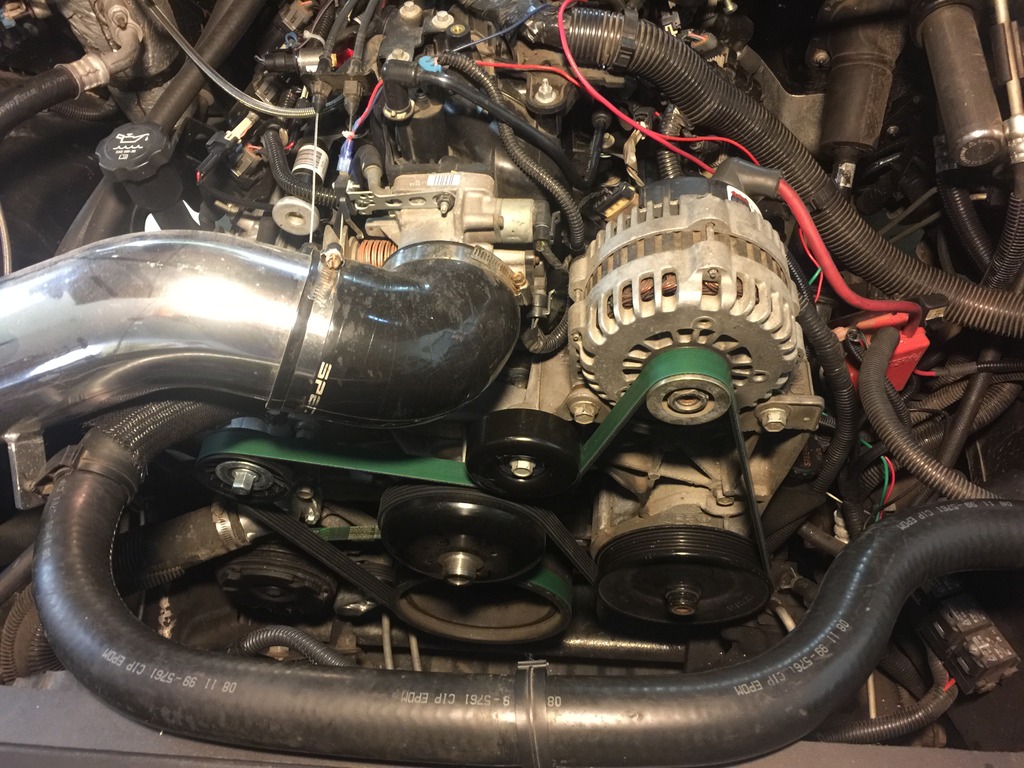
I've been having a squeaky belt right when it shifts. I decided to replace the tensioner on the AC as well as the one for main belt. I also replaced the idler as well.
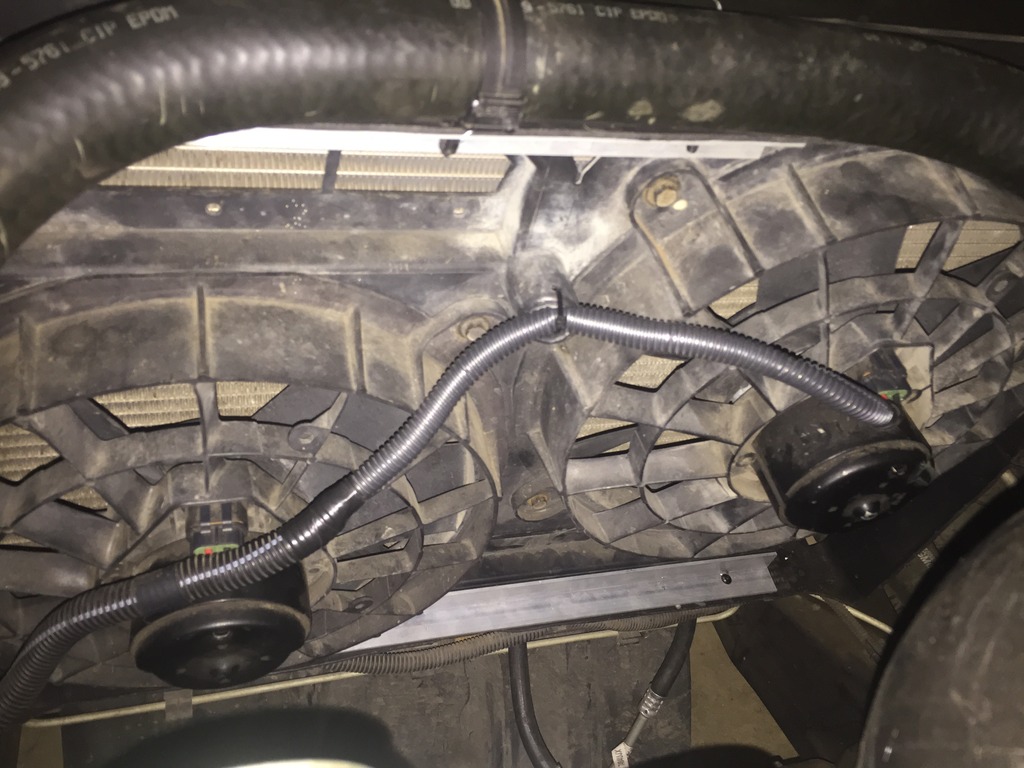
I thought I had secured the LS1 fans pretty well. They used to be captured in the factory clutch fan shroud. When I trimmed the shroud, I put little braces to hold them in. Well, during all of my testing and tuning, they actually came free. Luckily I caught it before the serpentine belt made contact.
Now they're held in place top and bottom with angled aluminum which is bolted to the fan shroud.
I have a few more things to take care of while I'm waiting on the fuel pressure regulator to show up.
Tinting my third brake light and front side marker lights. I switched to LED daytime running lights and they're crazy bright, so I'm going to tint the assemblies. You're welcome world. LOL
I need to readjust the rear away bar. It's hasn't been right since I went with the 9.5" 14 bolt.
Also, the larger rear axle doesn't clear my exhaust, so it's cut off and needs resupported.
The stereo needs to be gone through. I took the fuses out but don't remember why.
I need to paint and wrap my turbo exhaust parts.
Once I get the fuel pressure figured out, I'll drive it around for awhile and then I suppose it's turbo install time.

I thought I had secured the LS1 fans pretty well. They used to be captured in the factory clutch fan shroud. When I trimmed the shroud, I put little braces to hold them in. Well, during all of my testing and tuning, they actually came free. Luckily I caught it before the serpentine belt made contact.
Now they're held in place top and bottom with angled aluminum which is bolted to the fan shroud.

I have a few more things to take care of while I'm waiting on the fuel pressure regulator to show up.
Tinting my third brake light and front side marker lights. I switched to LED daytime running lights and they're crazy bright, so I'm going to tint the assemblies. You're welcome world. LOL
I need to readjust the rear away bar. It's hasn't been right since I went with the 9.5" 14 bolt.
Also, the larger rear axle doesn't clear my exhaust, so it's cut off and needs resupported.
The stereo needs to be gone through. I took the fuses out but don't remember why.
I need to paint and wrap my turbo exhaust parts.
Once I get the fuel pressure figured out, I'll drive it around for awhile and then I suppose it's turbo install time.
Jul 1, 2016 | 04:26 AM
#516
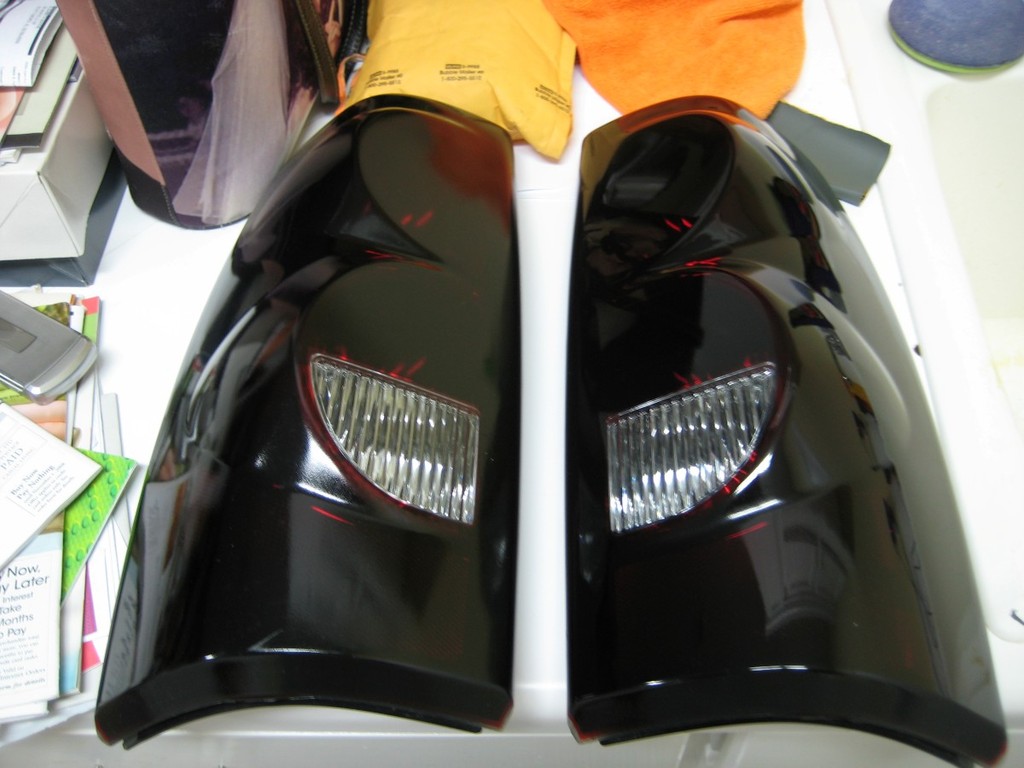
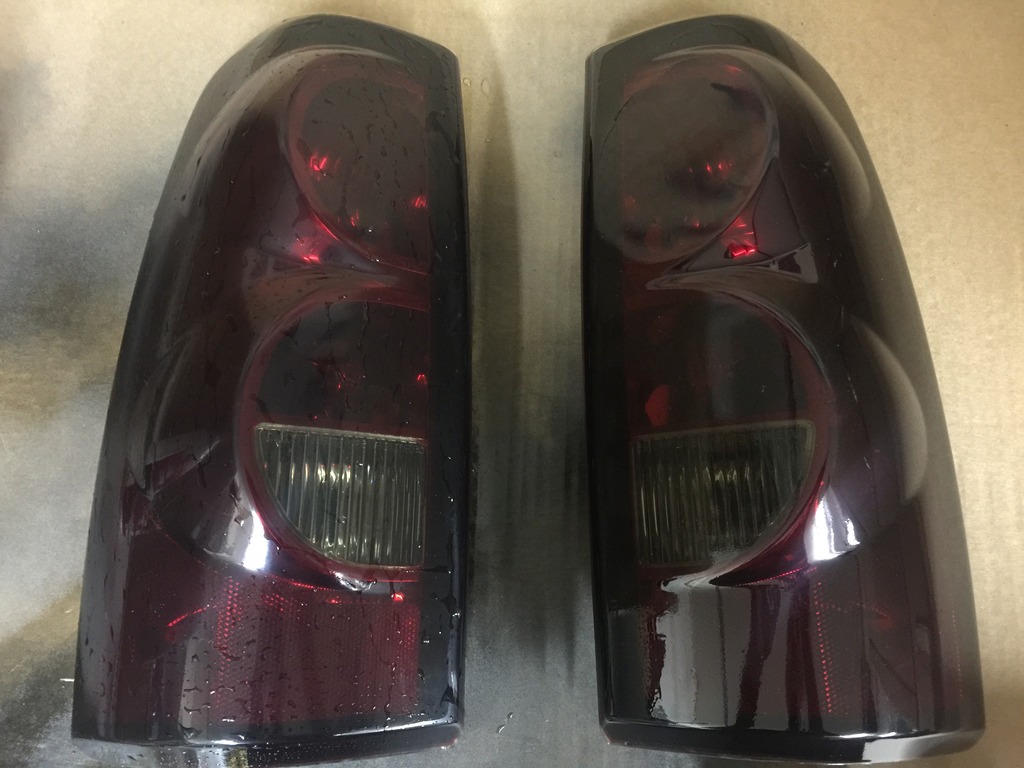
Alright, time to tint some stuff! First up, I bought some taillights that someone else tinted. I wasn't super thrilled with how they looked, so I wet sanded out what I could and then went ahead and wet sanded everything while I was at it.
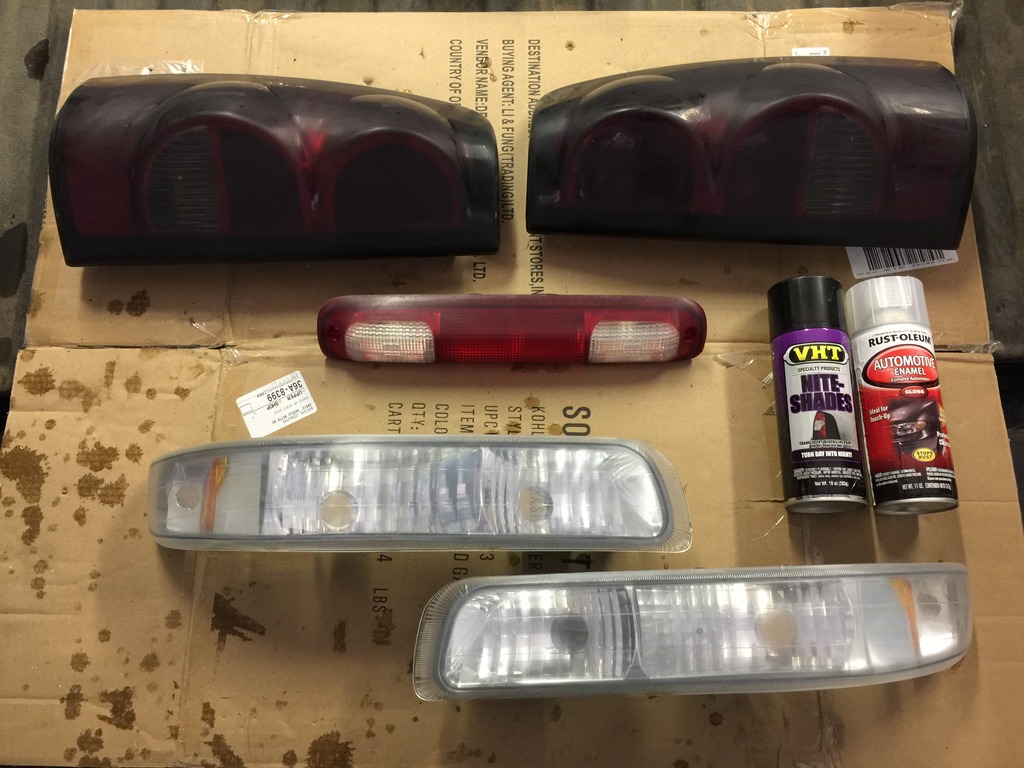
I had originally planned on retinting the taillights but decided otherwise for fear of them being too dark. I cleaned the surfaces and sprayed very light coats waiting 10 minutes in between.
Here's the first coat.
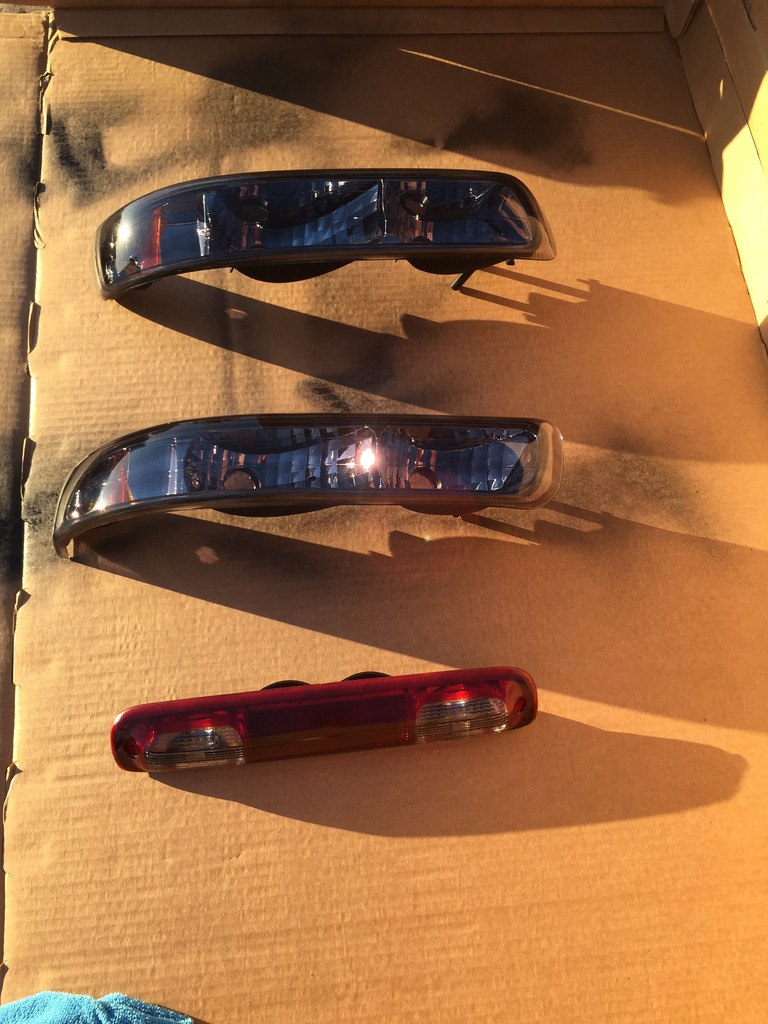
And the third.

Holy cow this is really a case where a little bit goes a long way. I should have stopped at two coats. Everything came out a bit darker than I thought they would. My third brake light is darker than my taillights. The guy I bought the taillights from must have only done two coats.
Now, don't be a dumbass like me and accidentally drop what your painting on the cardboard.
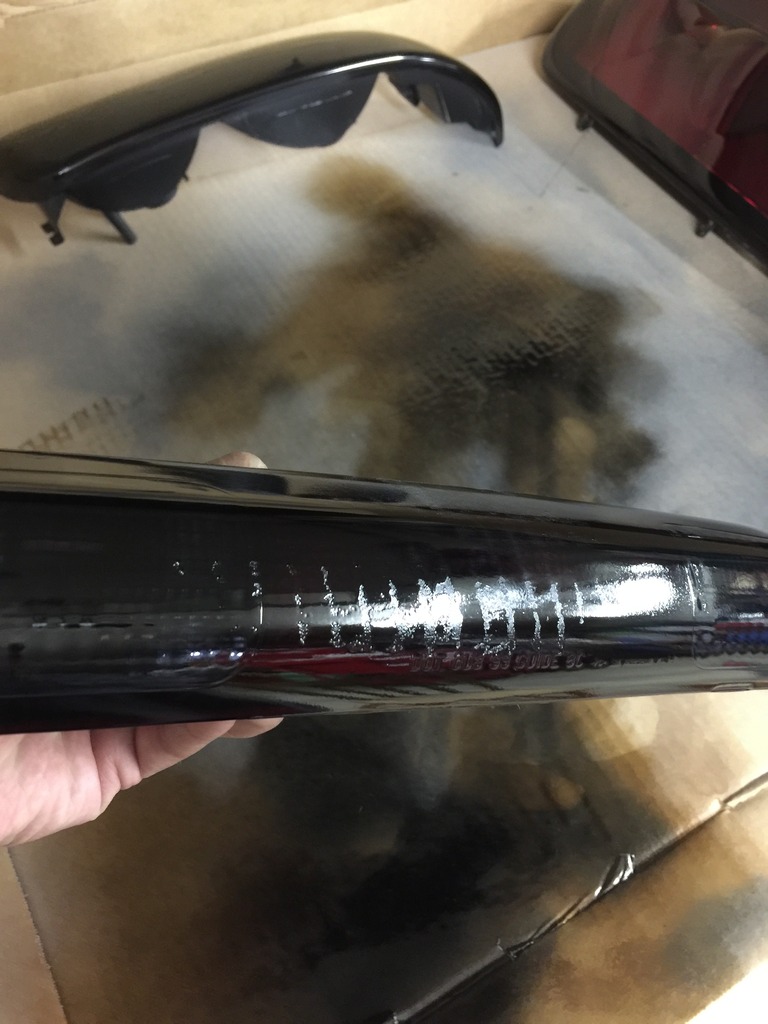
Tomorrow I'll try cutting and buffing and see what happens.
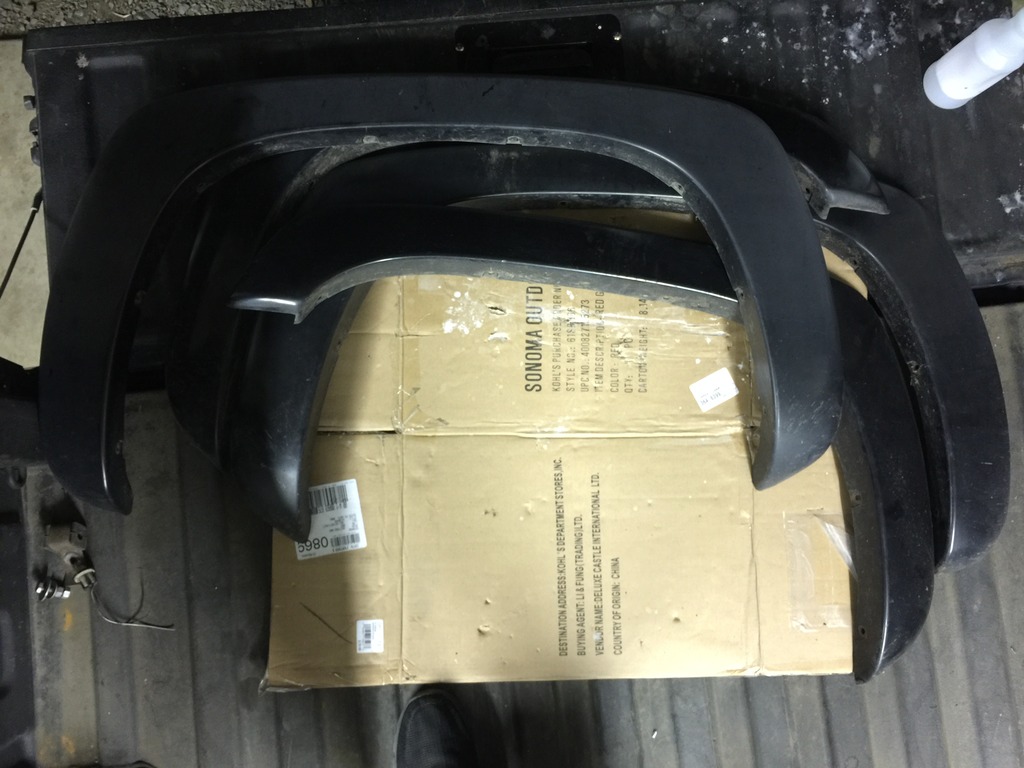
I've been debating the removal of my 4x4 fender flares for years. Today I decided to take them off. I reasoned, if the paint underneath is awful, I can always put them back on. Also, the rears are really faded. Not sure why, but they are. I'll paint them before they're reinstalled.
The flares are held in by 6 or so clips and 2 additional button type connectors. I ended up just cutting off the connector. The clips all came out easily. They're the same design as the ones you can find elsewhere on the truck.
There's 16 years worth of dirt in there.

I thought this was interesting. This is the front flare. Both sides had layered buildup like this.

Are the painted flares rare? I've had people ask to buy them from me. I've been told most were textured.
Not the best pic, but everyone knows what these trucks look like anyway.

I had originally planned on retinting the taillights but decided otherwise for fear of them being too dark. I cleaned the surfaces and sprayed very light coats waiting 10 minutes in between.
Here's the first coat.

And the third.

Holy cow this is really a case where a little bit goes a long way. I should have stopped at two coats. Everything came out a bit darker than I thought they would. My third brake light is darker than my taillights. The guy I bought the taillights from must have only done two coats.
Now, don't be a dumbass like me and accidentally drop what your painting on the cardboard.

Tomorrow I'll try cutting and buffing and see what happens.
I've been debating the removal of my 4x4 fender flares for years. Today I decided to take them off. I reasoned, if the paint underneath is awful, I can always put them back on. Also, the rears are really faded. Not sure why, but they are. I'll paint them before they're reinstalled.
The flares are held in by 6 or so clips and 2 additional button type connectors. I ended up just cutting off the connector. The clips all came out easily. They're the same design as the ones you can find elsewhere on the truck.
There's 16 years worth of dirt in there.

I thought this was interesting. This is the front flare. Both sides had layered buildup like this.

Are the painted flares rare? I've had people ask to buy them from me. I've been told most were textured.

Not the best pic, but everyone knows what these trucks look like anyway.
 Jul 1, 2016 | 08:10 AM
#517
Joined: Jan 2006
Posts: 16,282
Likes: 438
From: Huntsville, AL
So this is from when I did mine back in 08. I want to say 3 or 4 light coats but I cant remember exactly. This is before I polished them:

Left not polished, right polished (megauirs #7 glaze)
Both polished and waxed:


Left not polished, right polished (megauirs #7 glaze)

Both polished and waxed:

 Jul 2, 2016 | 03:38 AM
#518
Those turned out awesome! I would have masked off the backup lights as well had I started from scratch, or maybe one light coat, mask then a second coat. That way it's a tiny bit tinted, but not so much that the backup lights are useless.
I cut and buffed everything. Rather than try to hold down the pieces, I decided to hold down the machine.
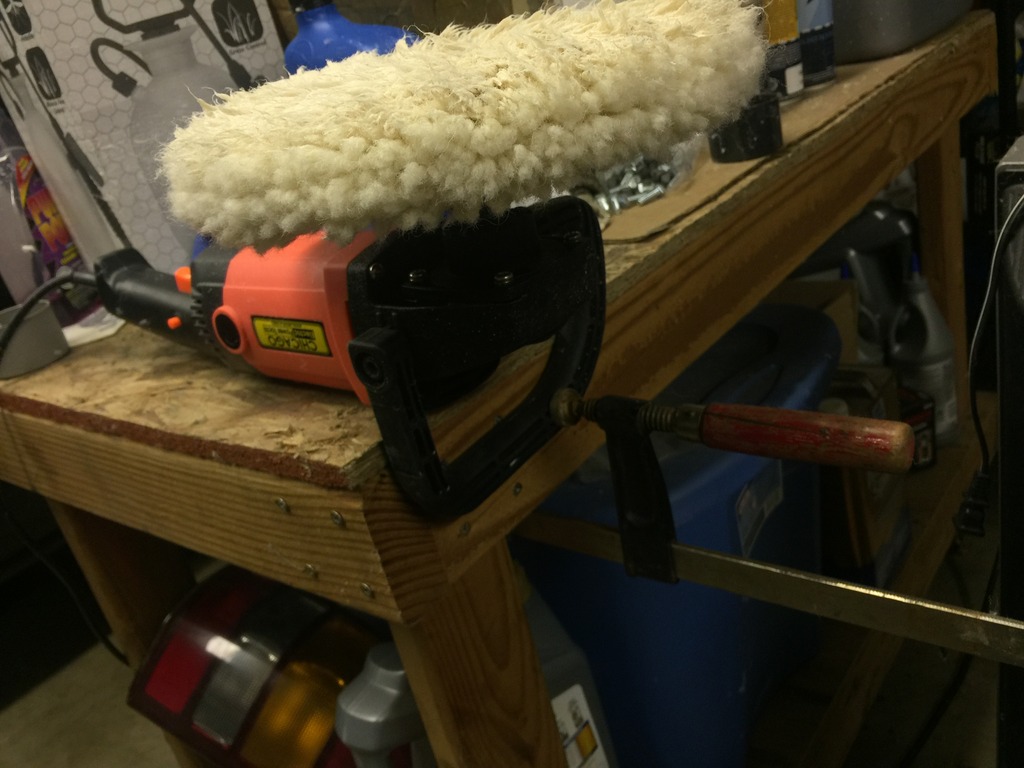
It's hard to tell, but the one in the left has been through the wool pad treatment and the one on the right has not. They come out almost matte prior to any polishing.
I forgot to take pics but basically I went over everything thing with the wool pad, then polished everything with a foam pad. I installed the taillights, third brake/cargo light, and front marker lights. I hope I don't hassled too much. These came out way darker than I thought they would. 2 coats would have been plenty.

They look pretty good, but in all honesty I should have taken the time to wet sand then polish then buff. There are a few runs here and there, I'm just tired of messing with them. Most of the imperfections are due to the nozzles on the paint cans.
I cut and buffed everything. Rather than try to hold down the pieces, I decided to hold down the machine.

It's hard to tell, but the one in the left has been through the wool pad treatment and the one on the right has not. They come out almost matte prior to any polishing.

I forgot to take pics but basically I went over everything thing with the wool pad, then polished everything with a foam pad. I installed the taillights, third brake/cargo light, and front marker lights. I hope I don't hassled too much. These came out way darker than I thought they would. 2 coats would have been plenty.

They look pretty good, but in all honesty I should have taken the time to wet sand then polish then buff. There are a few runs here and there, I'm just tired of messing with them. Most of the imperfections are due to the nozzles on the paint cans.
Jul 3, 2016 | 03:34 AM
#519
Yay, all my pieces showed up today. I was thinking I'd have to wait until after the 4th.

I had to move my alarm horn to mount the fuel pressure regulator.
I ordered 4 feet of fuel line. LOL. The return line was only like 3 1/2 inches. Haha.
I ended up moving the horn down and adjusted the fuel regulator. My pressure is back at 50 psi with the vacuum line hooked up.
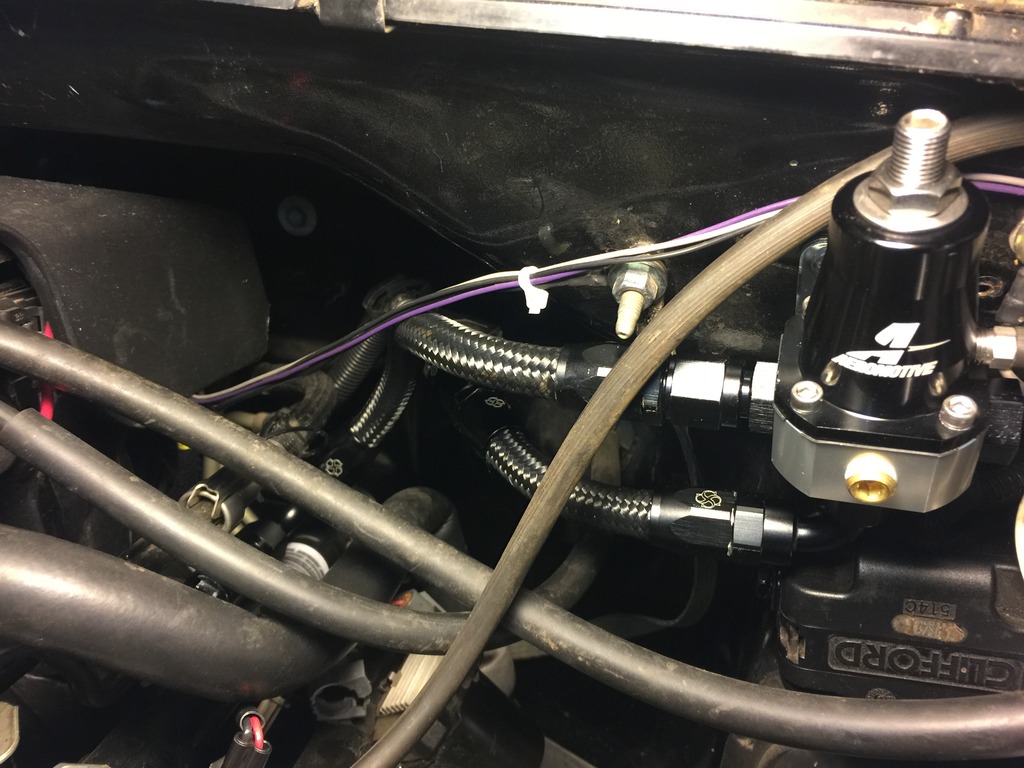
So there you have it. It seems to be possible to hollow out a factory fuel pressure regulator and adapt an external regulator. If it ends up not working, I'll report back.

I had to move my alarm horn to mount the fuel pressure regulator.

I ordered 4 feet of fuel line. LOL. The return line was only like 3 1/2 inches. Haha.

I ended up moving the horn down and adjusted the fuel regulator. My pressure is back at 50 psi with the vacuum line hooked up.

So there you have it. It seems to be possible to hollow out a factory fuel pressure regulator and adapt an external regulator. If it ends up not working, I'll report back.
Jul 4, 2016 | 01:06 AM
#520
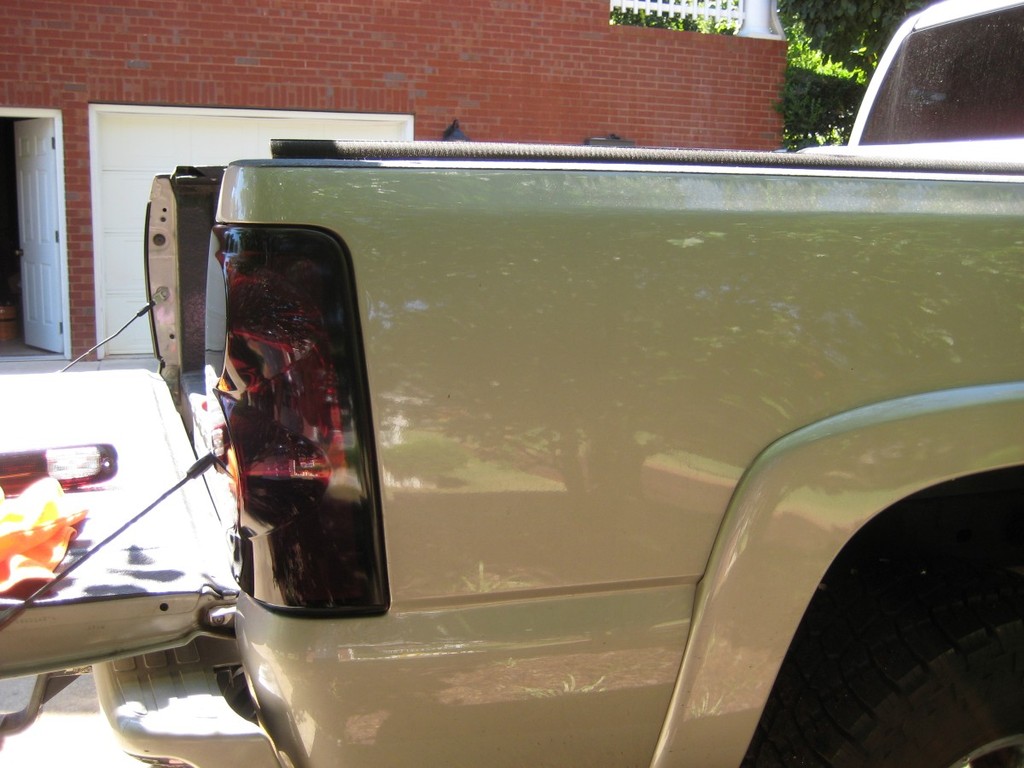
I drove to the car wash and knocked most of the dirt off. I wanted to get a better look at what was behind the fender flares. It's not good. I'm going to take a clay bar to it, then cut/buff. If it's too bad, I'll repaint the flares and put them back on.
I think I prefer the look without the flares though.
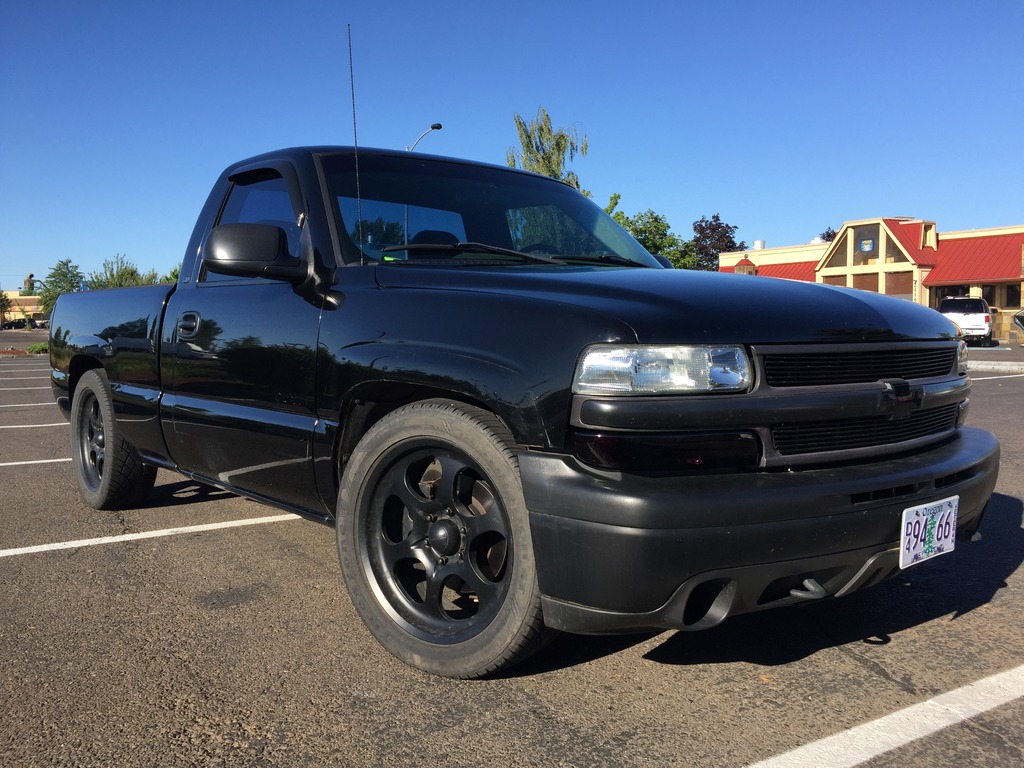
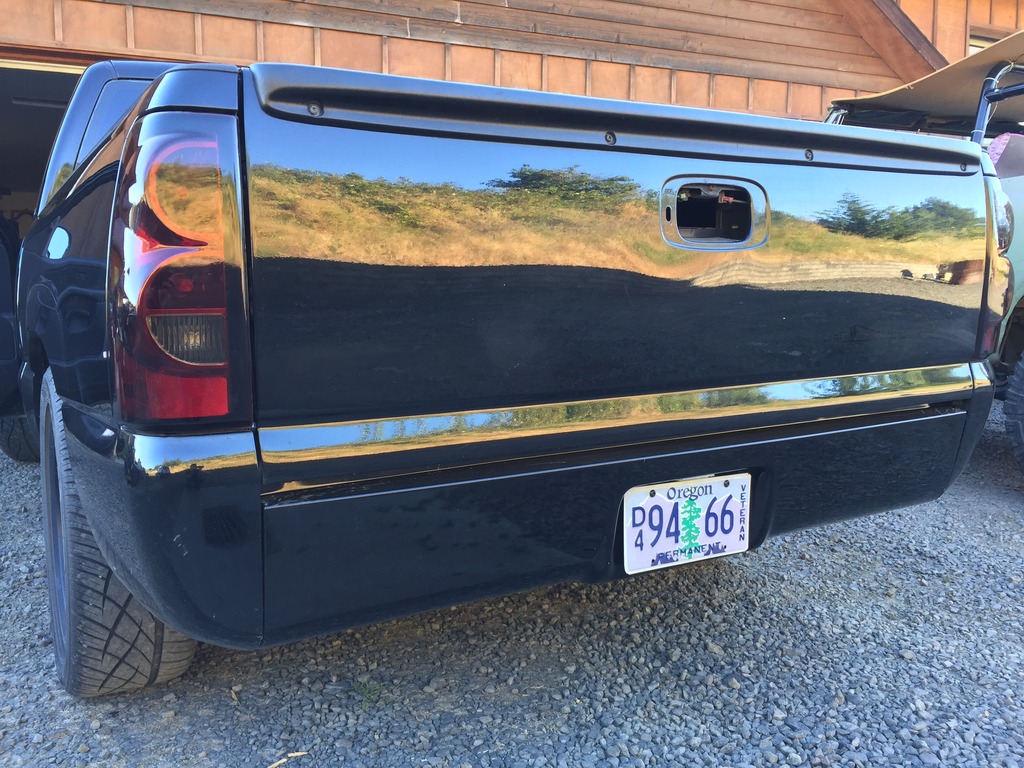
What's funny is that, in some ways, the paint on the roll pan is actually better than the paint on the truck.
Either way it blends in pretty well for a rattlecan job.
Now that I've tinted all my taillights, I went ahead and installed LED lights in the third brake light. Unfortunately when on my test drive, the cruise control stopped working.
Luckily, I had some load resistors that I had planned on using before I put in the LED flasher.
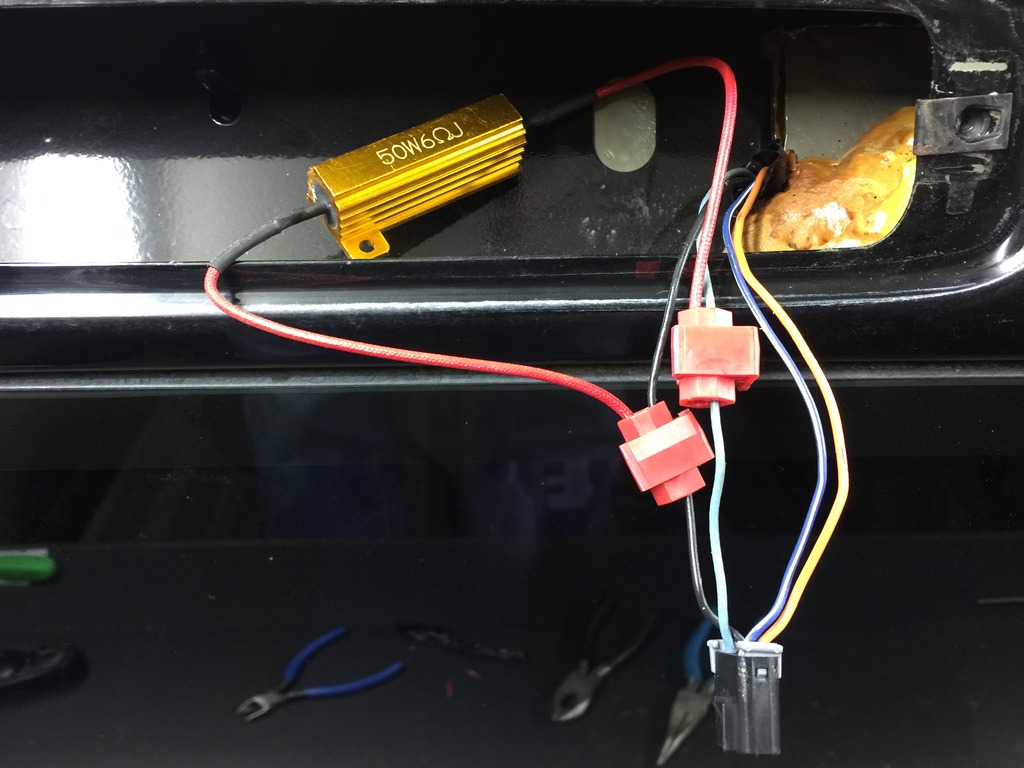
Apparently the cruise control needs some resistance from the brake lights before it'll engage. One load resistors on the light blue and black wires cured it. Normally I'd mount the resistor down, because it's going to get hot, but behind the third brake light, there's nowhere for it to go and nothing flammable.
I've adjusted the FPR too keep my fuel pressure at 50psi with the vacuum line connected at idle or off throttle. When under load it moves up to around 58psi. This is correct, yes?
I think I prefer the look without the flares though.

What's funny is that, in some ways, the paint on the roll pan is actually better than the paint on the truck.
Either way it blends in pretty well for a rattlecan job.

Now that I've tinted all my taillights, I went ahead and installed LED lights in the third brake light. Unfortunately when on my test drive, the cruise control stopped working.
Luckily, I had some load resistors that I had planned on using before I put in the LED flasher.

Apparently the cruise control needs some resistance from the brake lights before it'll engage. One load resistors on the light blue and black wires cured it. Normally I'd mount the resistor down, because it's going to get hot, but behind the third brake light, there's nowhere for it to go and nothing flammable.
I've adjusted the FPR too keep my fuel pressure at 50psi with the vacuum line connected at idle or off throttle. When under load it moves up to around 58psi. This is correct, yes?