
My 5.3 to 6.0 swap


 Jul 11, 2011 | 02:38 AM
#64
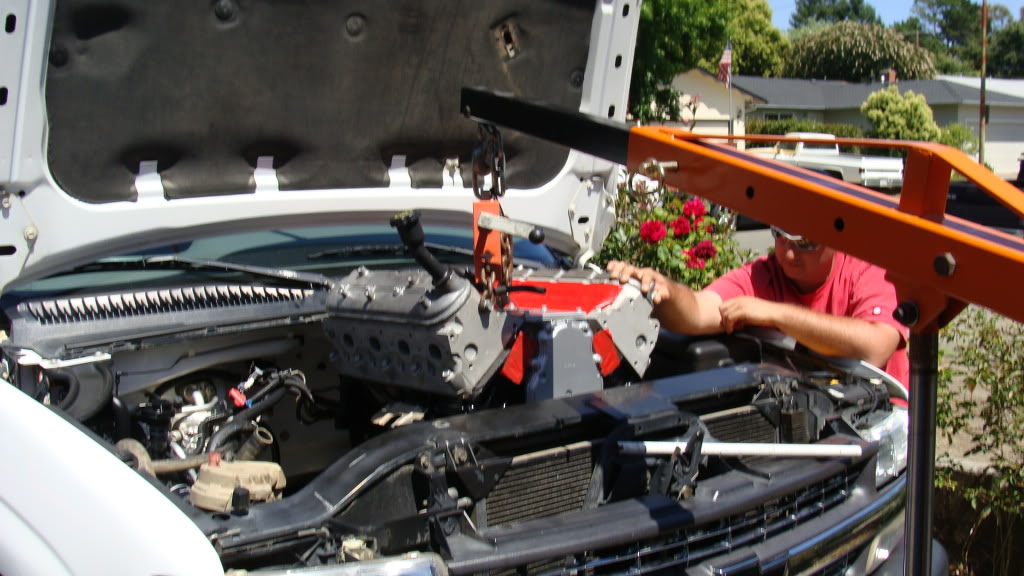
Got alot done this weekend. Cleaned up/degreased the engine compartment a little bit more and dropped the motor in. Now All thats left is painting the valve covers, installing the pushrods (due delivery tuesday), and install the alternator,power steering pump, fans, shroud, etc.
The new water pump I bought ended up being one for an LS2 corvette so i need to get the right thermostat and housing for it but I will have the rest of the parts in the next few days and after getting the computer tuned by probably blackbear next payday it will be running soon!
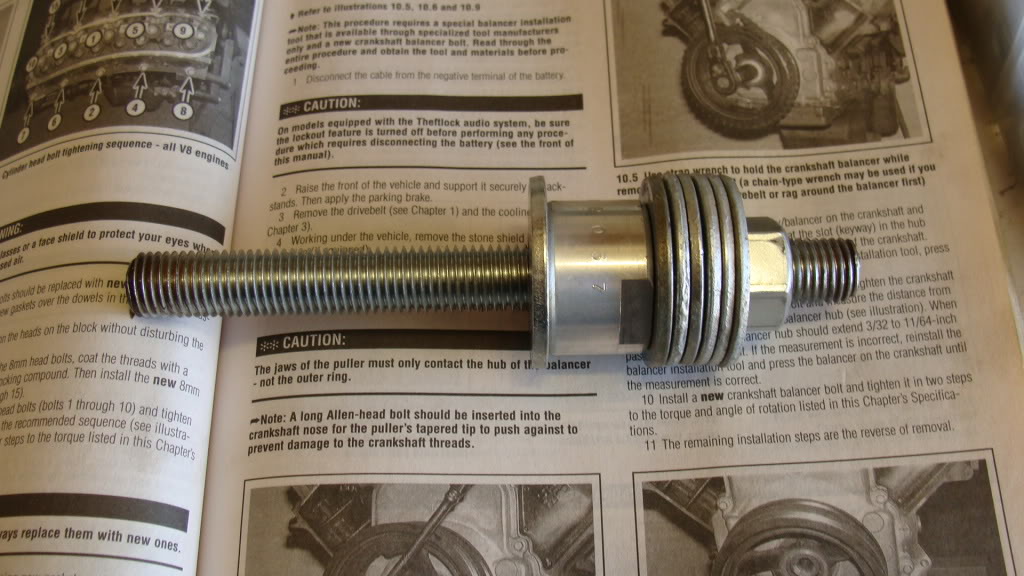
-= Bought some metric allthread, made a balancer install tool =-
.
.
-= Installing the balancer =-
.
.
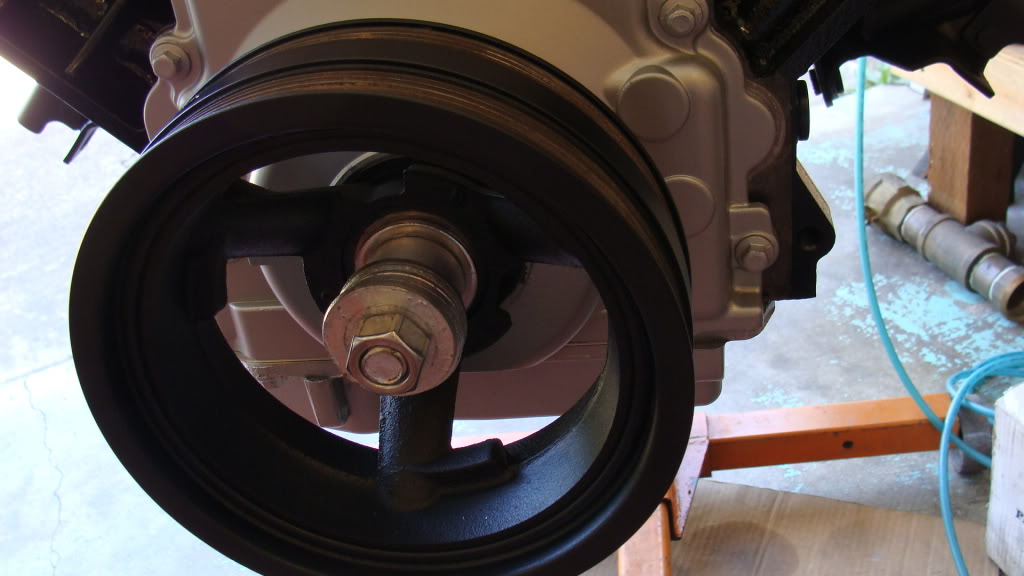
-= And IN it goes! =-
.
.
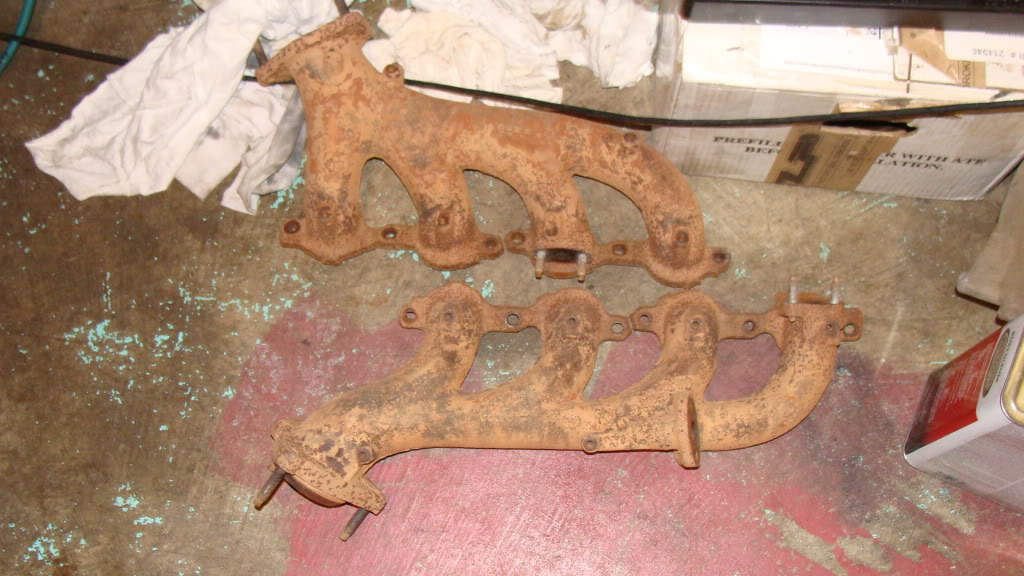
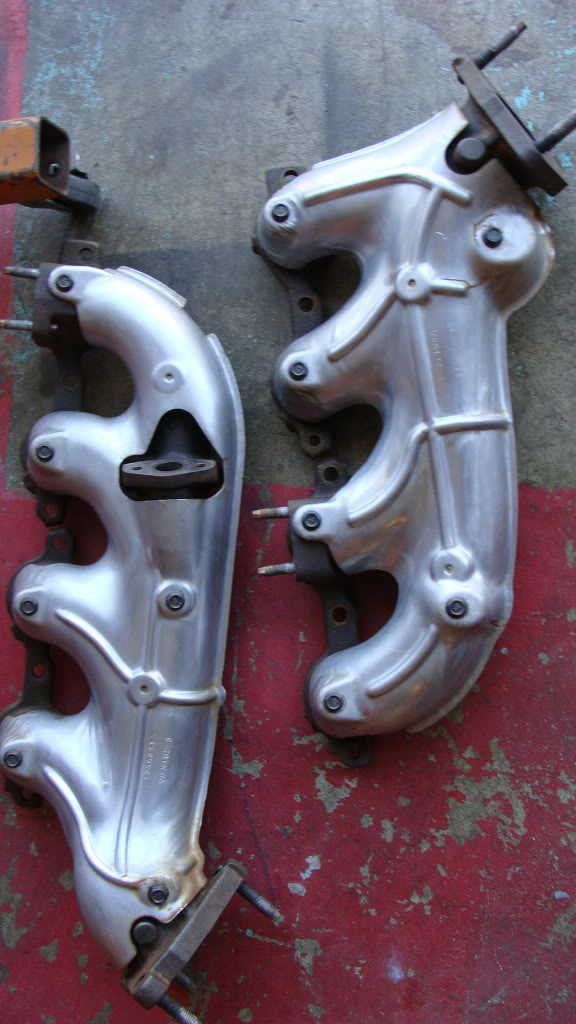
-= I know the factory manifolds are never anything to look at, but with all the 4 wheeling I used to do in the truck the amount of cooked on mud was rediculous so I ended up wirebrushing the manifolds back down to bare metal and polished the heat shields to try to at least keep them from adding uglyness to my fresh motor! =-
-=Before=-
.
.
-=After=-

.
.
-= Heat shields, one stained, one polished=-

.
.
-= Minimal uglyness =-
.
.
-= Done for the weekend, almost there! =-

The new water pump I bought ended up being one for an LS2 corvette so i need to get the right thermostat and housing for it but I will have the rest of the parts in the next few days and after getting the computer tuned by probably blackbear next payday it will be running soon!
-= Bought some metric allthread, made a balancer install tool =-
.
.
-= Installing the balancer =-
.
.
-= And IN it goes! =-
.
.
-= I know the factory manifolds are never anything to look at, but with all the 4 wheeling I used to do in the truck the amount of cooked on mud was rediculous so I ended up wirebrushing the manifolds back down to bare metal and polished the heat shields to try to at least keep them from adding uglyness to my fresh motor! =-
-=Before=-
.
.
-=After=-
.
.
-= Heat shields, one stained, one polished=-
.
.
-= Minimal uglyness =-
.
.
-= Done for the weekend, almost there! =-
Jul 23, 2011 | 02:46 PM
#65
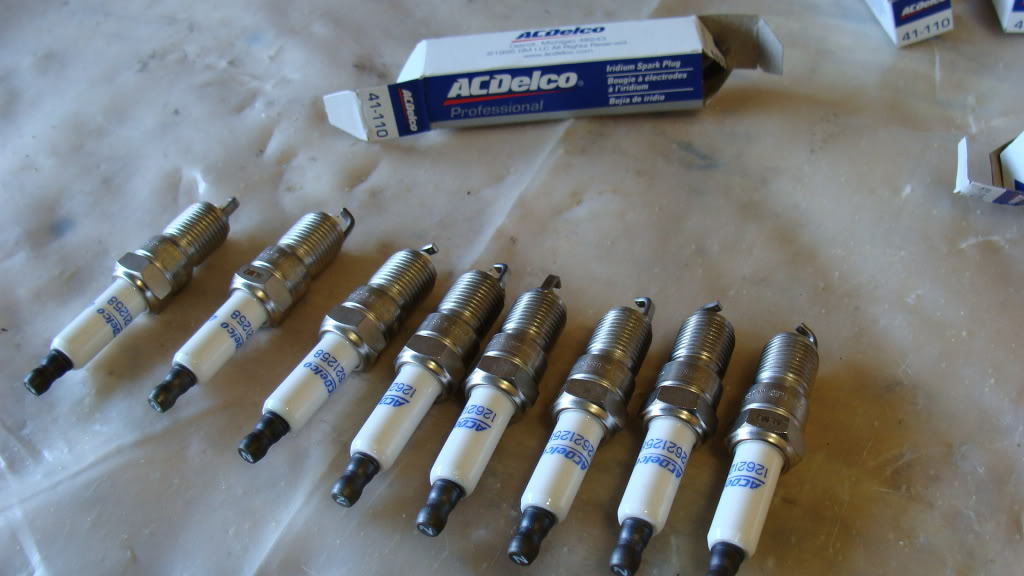
Got a couple more parts in the mail, couple misc heater/coolant hoses, 7.35 pushrods, the right thermostat housing for the newer style water pump, spark plugs & wires. Also got my computer shipped out to blackbear for a tune. I also put oil in it. Used 3qts of 5w30 and 3qts of SAE30 for the first fill for better lube during the break-in. Next month I will smog and register it and be back on the road!
Handfull of things left to do:
Install fan, shroud, tension and idle pulleys, belts, computer (once i get it back), refill tranny and coolant, paint PS/ALT bracket and reinstall PSpump and alternator, and install airbox and tube.
-= Got the valvecovers painted, just like the oil pan I didn't bother to really smooth them out since im using the Cast aluminum color trying to keep it looking like just fresh aluminum instead of painted=-

-
-
-=Installing pushrods=-

-
-
-=Rockers installed and torqued down=-

-
-
-=New thermostat, housing, and hoses=-

-
-
-=New plugs=-
-
-
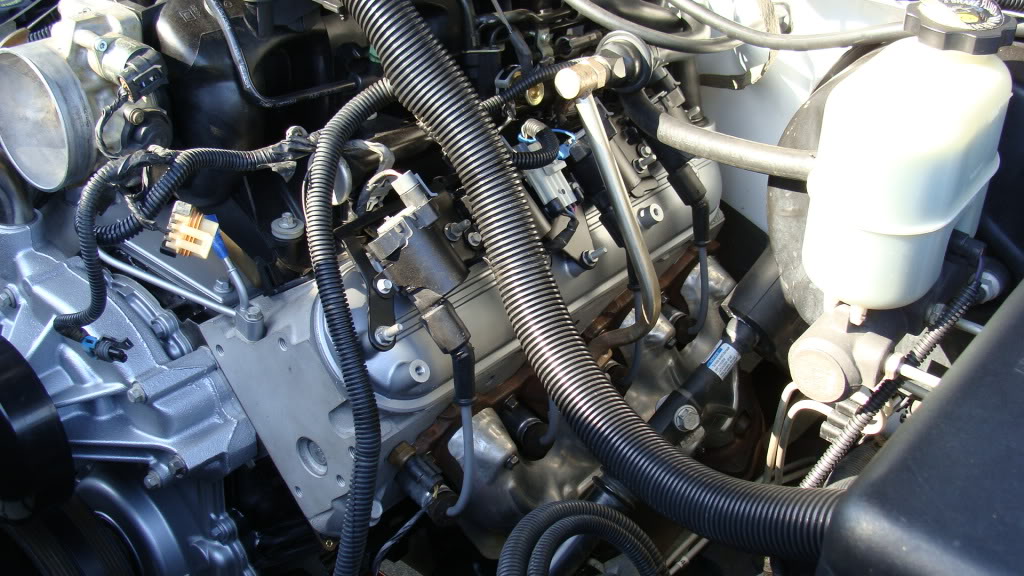
-=Coils, wires, and plugs installed=-
Handfull of things left to do:
Install fan, shroud, tension and idle pulleys, belts, computer (once i get it back), refill tranny and coolant, paint PS/ALT bracket and reinstall PSpump and alternator, and install airbox and tube.
-= Got the valvecovers painted, just like the oil pan I didn't bother to really smooth them out since im using the Cast aluminum color trying to keep it looking like just fresh aluminum instead of painted=-
-
-
-=Installing pushrods=-
-
-
-=Rockers installed and torqued down=-
-
-
-=New thermostat, housing, and hoses=-
-
-
-=New plugs=-
-
-
-=Coils, wires, and plugs installed=-
Jul 27, 2011 | 06:37 PM
#66
So I just ended up selling some unused parts from my jeep and went ahead and spent the extra $$ on a new 2002 camaro dual electric fan setup.(couldn't help myself lol) Now I'm gonna be sending the computer right back to blackbear to have him set it up for the efans like I should have done in the first place and see about getting a harness to connect it. Definatley will clean up the engine compartment as well as the hp gains. How much hp does a clutch fan usually rob? adding this will add a little extra time to my build but hey after about a year what's another few weeks right?
Jul 30, 2011 | 12:26 PM
#67

So I just ended up selling some unused parts from my jeep and went ahead and spent the extra $$ on a new 2002 camaro dual electric fan setup.(couldn't help myself lol) Now I'm gonna be sending the computer right back to blackbear to have him set it up for the efans like I should have done in the first place and see about getting a harness to connect it. Definatley will clean up the engine compartment as well as the hp gains. How much hp does a clutch fan usually rob? adding this will add a little extra time to my build but hey after about a year what's another few weeks right?
Make sure you have Justin account for the A/C pressures when setting up the tune for the fans. I had to get a beta version of HP Tuners to do this properly on my '03 Sierra.
Love the thread. Thanks for the info.
Aug 3, 2011 | 10:09 AM
#68
Well I talked to justin w/blackbear and he informed me that he had already set up my PCM for electric fans when he tuned it. He did inform me that with my year (2000) that they don't always operate the electric fans properly and when it acts up it will run them at full speed when driving at 45mph or slower. Anyone have any input on this or think it will be an issue?
I got the LS1 fans in the mail yesterday too so now I just gotta make some brackets to mount them and decide if i'm going to make a wiring harness or spend the $90 or so and just buy one complete from blackbear or nelson. It's hard to spend almost $100 on a harness that consists of just 3 relays and a few special plugs, especially since I only paid $120 for the fan assembly! Has anyone made their own harness on the cheap?
I got the LS1 fans in the mail yesterday too so now I just gotta make some brackets to mount them and decide if i'm going to make a wiring harness or spend the $90 or so and just buy one complete from blackbear or nelson. It's hard to spend almost $100 on a harness that consists of just 3 relays and a few special plugs, especially since I only paid $120 for the fan assembly! Has anyone made their own harness on the cheap?
Aug 3, 2011 | 02:41 PM
#69
I've never had any problems with the efans on my 99 (with an 02 PCM though). I have noticed lately that when I start the truck up and the ac is on, the pcm will command the fans on for whatever reason, before it is up to turn on temp (never noticed that before?). If I turn the ac off for a second, the pcm will shut the fans off and they will operate as they should? Hope that it's not an issue with the Nelson harness, which has given me 6+ years of flawless operation...I doubt it.
But anyway, many members here have made their own harnesses, if you search the GM General section there is a lengthy thread with a bunch of info in it
But anyway, many members here have made their own harnesses, if you search the GM General section there is a lengthy thread with a bunch of info in it
Aug 4, 2011 | 10:20 AM
#70
Yeah $98 for a couple plugs and relays seems pretty crazy, looks like I can build my own for around $30 if I can get the special fan plugs from the local pick-n-pull. gonna go look this weekend.