
My 5.3 to 6.0 swap
 Jun 13, 2011 | 11:56 AM
#52

Got the block and all parts back from the machine shop.
-Boiled the block
-Honed cylinders for new rings
-Cleaned all parts
-Polished crankshaft
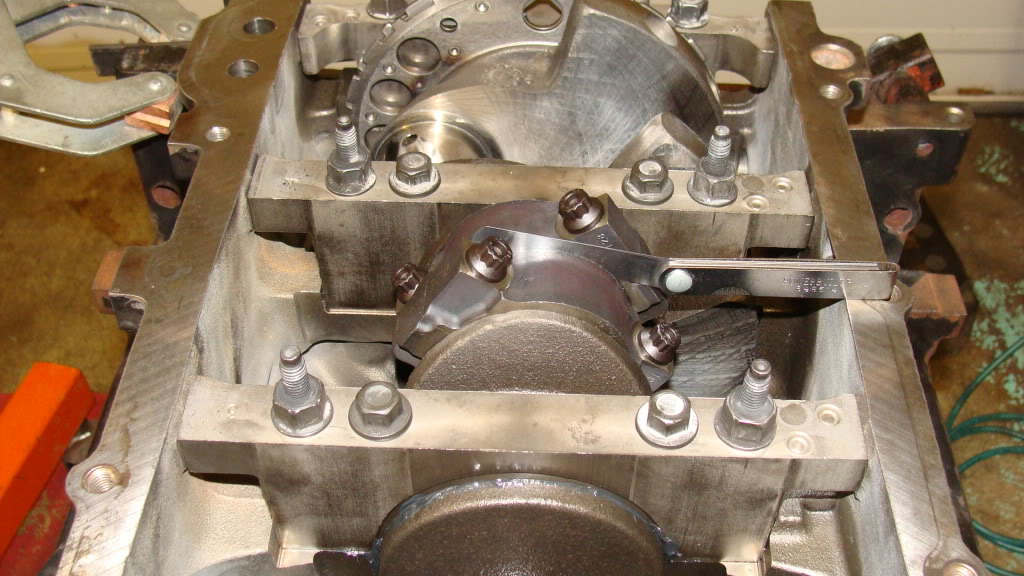
-Re-sized rod ends (were out of round after installing ARP bolts)
-Installed Clevite CAM bearings
-Spec'd and provided Clevite Rod and main bearings
-Spec'd and provided Sealed Power piston ring set
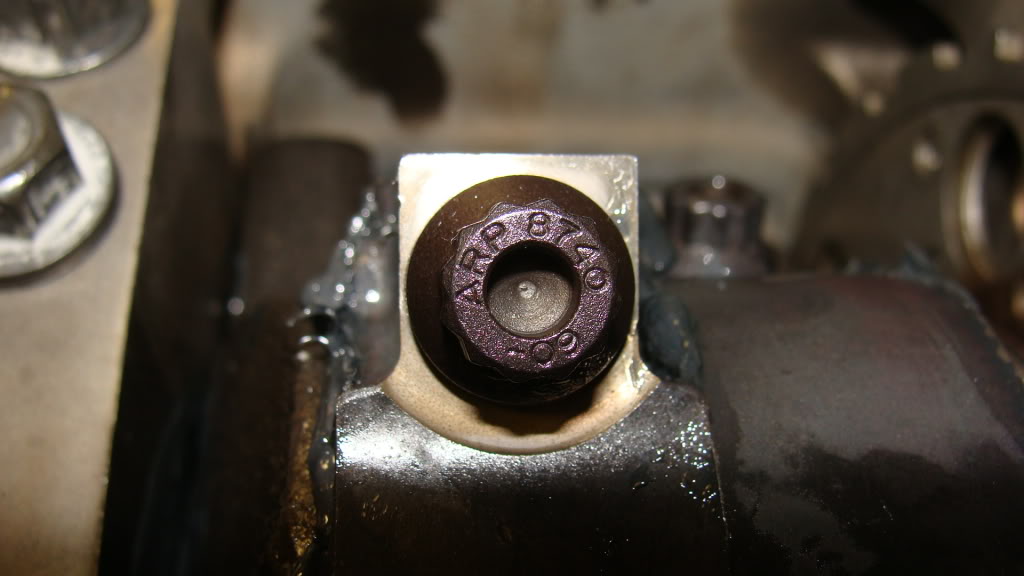
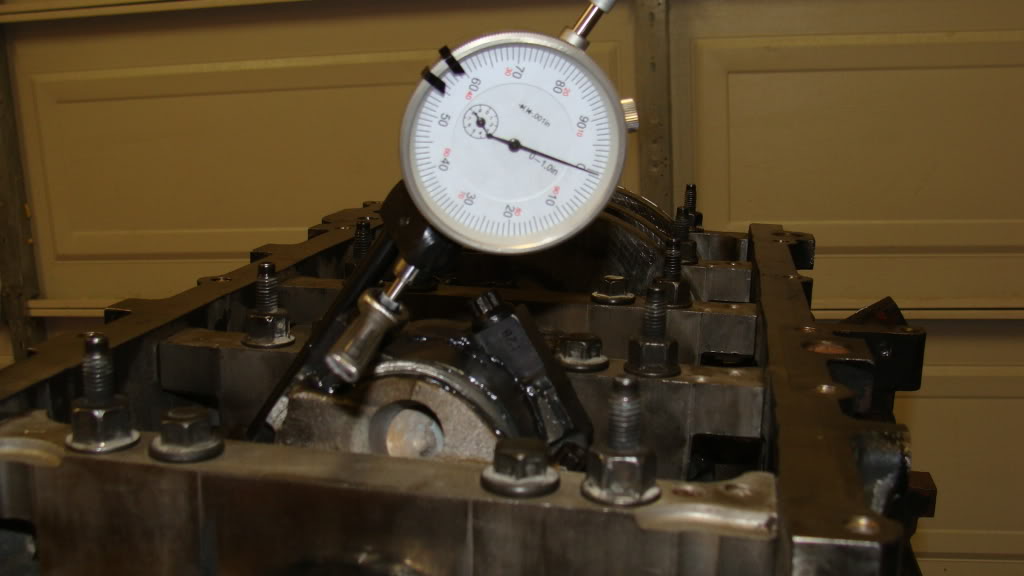
So far I have Cleaned the block inside and out with mineral spirits. Brushed all oil passages with nylon engine brush kit, and blew everything out with compressed air. Installed the crank and cam along with the HD timing chain set. All main bering clearances are within spec as well as crankshaft endplay and reluctor ring runout.
Tonight I will be borrowing my neighbors ARP bolt stretch guage for the rod bolts, Check the end gap on the piston rings and then start installing the piston/rod assembly's.
Finally some progress! really feelin good about it now, all this waiting for $$ in between parts orders the last 7+months seemed like years but really gave me time to think everything out and make the right decisions.
-=Back from the machine shop=-
-
-
-
-= New bearings =-
-

-
-= Measuring crank end-play =-
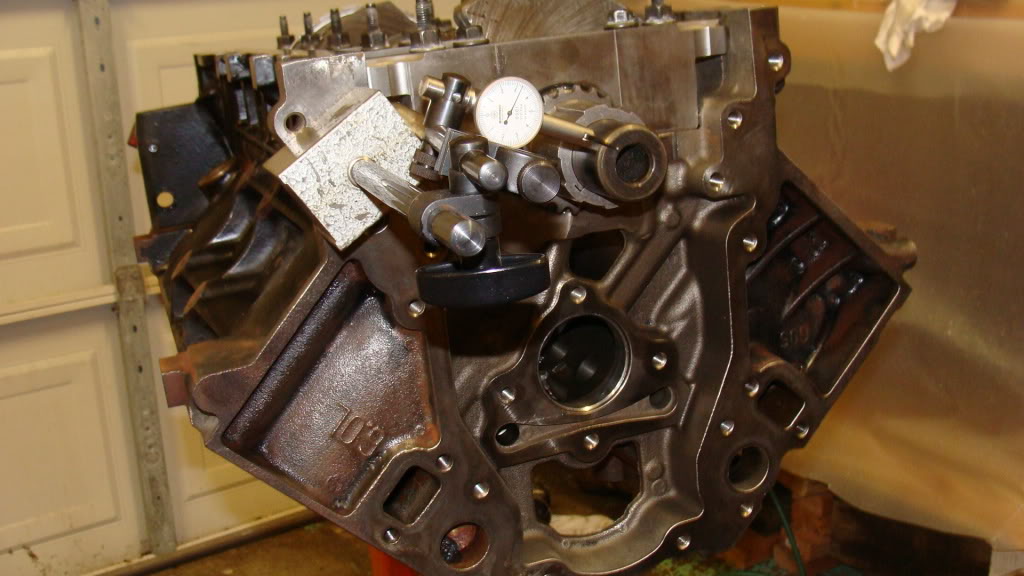
-
-= Measuring reluctor ring runout =-
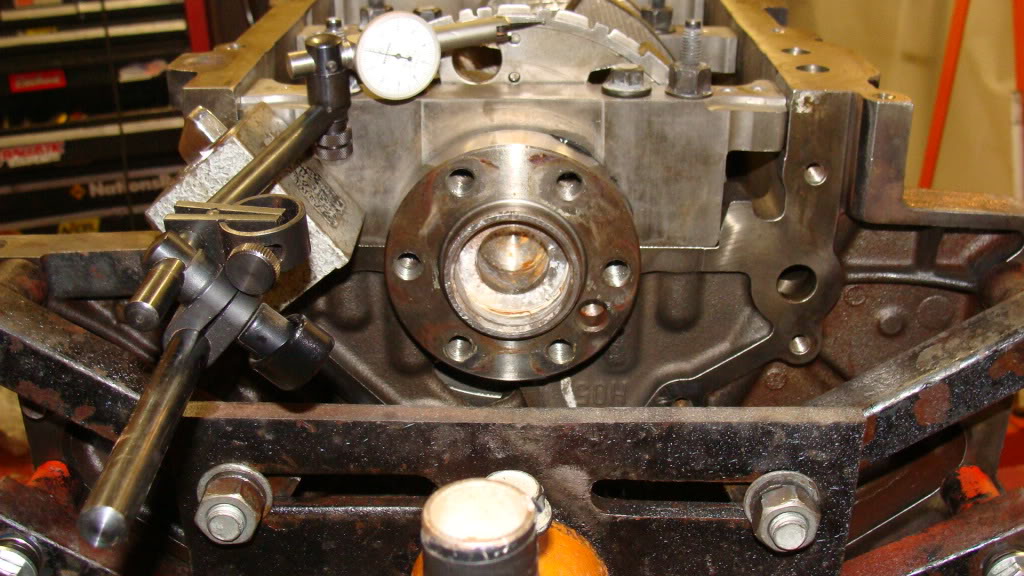
-
-= Vinci trucker cam (216/224 .551 .551 115lsa ) =-
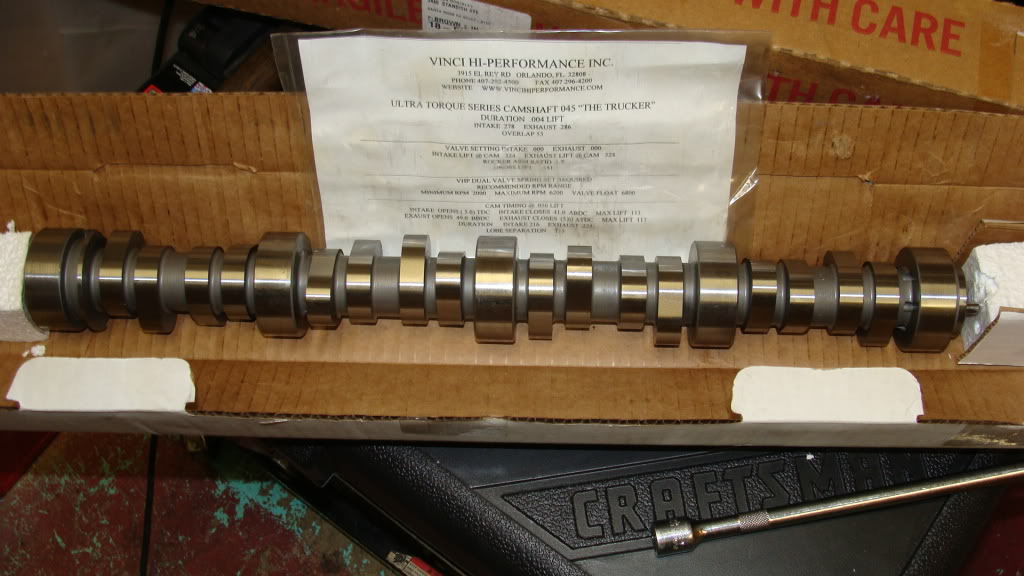
-
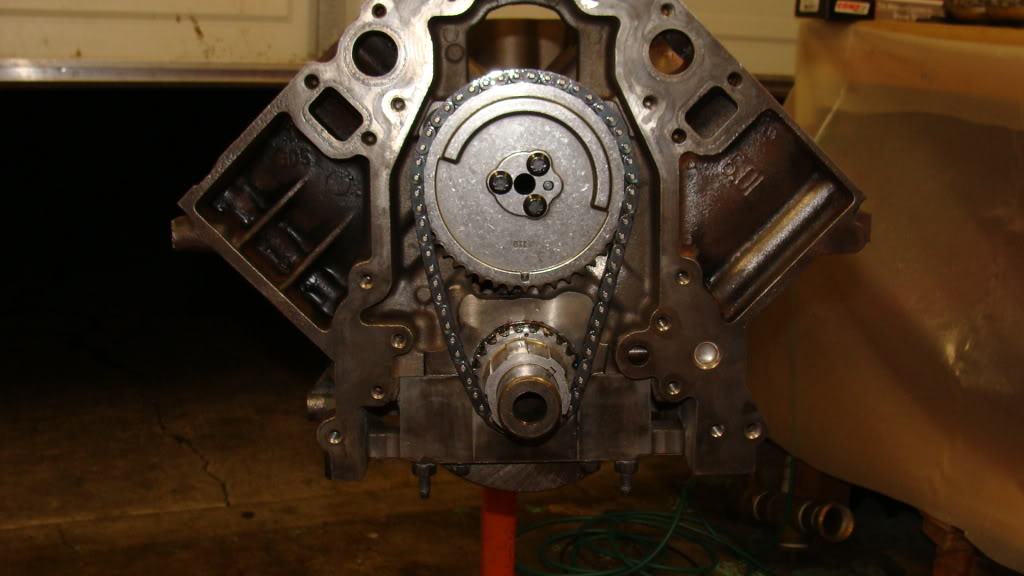
-= Crank, cam, and timing set installed=-
-Boiled the block
-Honed cylinders for new rings
-Cleaned all parts
-Polished crankshaft
-Re-sized rod ends (were out of round after installing ARP bolts)
-Installed Clevite CAM bearings
-Spec'd and provided Clevite Rod and main bearings
-Spec'd and provided Sealed Power piston ring set
So far I have Cleaned the block inside and out with mineral spirits. Brushed all oil passages with nylon engine brush kit, and blew everything out with compressed air. Installed the crank and cam along with the HD timing chain set. All main bering clearances are within spec as well as crankshaft endplay and reluctor ring runout.
Tonight I will be borrowing my neighbors ARP bolt stretch guage for the rod bolts, Check the end gap on the piston rings and then start installing the piston/rod assembly's.
Finally some progress! really feelin good about it now, all this waiting for $$ in between parts orders the last 7+months seemed like years but really gave me time to think everything out and make the right decisions.
-=Back from the machine shop=-
-
-
-
-= New bearings =-
-
-
-= Measuring crank end-play =-
-
-= Measuring reluctor ring runout =-
-
-= Vinci trucker cam (216/224 .551 .551 115lsa ) =-
-
-= Crank, cam, and timing set installed=-
Last edited by brandon_6667; Jun 19, 2011 at 02:49 AM.
 very nice
Jun 13, 2011 | 11:34 PM
very nice
Jun 13, 2011 | 11:34 PM
#54
so while test fitting my piston rings they all measure between .022-.025 for the top rings and .025-.027 for the 2nd rings.
I cannot find any solid info on what they should be, what do you guys think?
I cannot find any solid info on what they should be, what do you guys think?
Jun 14, 2011 | 12:48 PM
#55
I just talked to an engine builder/machine shop that specializes in the GM LS motors. They said Its right around where it should be and will be perfectly fine. he gave me the formula they use for LSx motors to determine MINIMUM ring end-gap.
.0035 xBoresize for top ring
.0040 xBoresize for 2nd ring
Which gives me
.0035 X 4.00" =.014 MINIMUM end gap for top ring
.0040 X 4.00" =.016 MINIMUM end gap for 2nd ring
So my .022-.025 top rings and .025-.027 2nd rings should work perfectly fine so now I can continue the build and the thread this evening!
Jun 14, 2011 | 02:45 PM
#56
I have decided to do this swap as well, this thread helps a bunch
looks like yours is coming along without a hitch.
if you dont mind me asking, about how much cost is involved in having the machine work and cleaning done to the short block?
Im looking at picking up a shortblock or individual components. Im not sure what additional costs Im looking at to get it going as far as machine work and checking it all out.
Jun 14, 2011 | 08:26 PM
#57
I have decided to do this swap as well, this thread helps a bunch
looks like yours is coming along without a hitch.
if you dont mind me asking, about how much cost is involved in having the machine work and cleaning done to the short block?
Im looking at picking up a shortblock or individual components. Im not sure what additional costs Im looking at to get it going as far as machine work and checking it all out.
looks like yours is coming along without a hitch.
if you dont mind me asking, about how much cost is involved in having the machine work and cleaning done to the short block?
Im looking at picking up a shortblock or individual components. Im not sure what additional costs Im looking at to get it going as far as machine work and checking it all out.
It was $323 for the machine work
and $242 for all the bearings and piston rings.
-------------------------------------------
Clevite rod bearings $27
Clevite main bearings $98
Sealed power piston ring set $108
Degrease/install cam bearings $50
Cylinder hone all cylinders $48
Boil block $65
Resize rod ends/spec all bearings $120
Polish crankshaft $40
Jun 14, 2011 | 11:06 PM
#58
I don't mind..
It was $323 for the machine work
and $242 for all the bearings and piston rings.
-------------------------------------------
Clevite rod bearings $27
Clevite main bearings $98
Sealed power piston ring set $108
Degrease/install cam bearings $50
Cylinder hone all cylinders $48
Boil block $65
Resize rod ends/spec all bearings $120
Polish crankshaft $40
thats around where I was guessing, not too bad for insurance. thanks dude.
Jun 19, 2011 | 03:22 AM
#59
Got back at it this morning, installed and checked clearances on all rod bearings, installed the pistons and rings, got all the ARP rod bolts stretched with the stretch guage and all went well. First time i've used a bolt stretch gauge, pretty cool ****. wiped down the outside of the block, masked and applied 2 coats of engine enamel primer and 2 coats of gloss black engine enamel. Gonna let the paint dry overnight and see what I can get done tomarrow.
------------------------------------------------------
-= Checking clearanced with the plastiguage, using feeler guages to keep
from twisting the rods while tightening the rod bolts
-
-
------------------------------------------------------
-= Piston rings all installed and properly clocked, plastiguage cleaned off
now ready to lube up and install.

-
-
------------------------------------------------------
-=Lubed everything up with assembly lube and started installing the pistons and rods for the final time!
-
-
------------------------------------------------------
-= getting ready to start cranking down the ARP rod bolts
-
-
------------------------------------------------------
-=All rod pistons and rods installed and cranked down for the final time

-
-
------------------------------------------------------
-= Masked off the block, 2 coats of engine primer, 2 coats gloss black
-
-
------------------------------------------------------
-= Looking foward to it!
------------------------------------------------------
-= Checking clearanced with the plastiguage, using feeler guages to keep
from twisting the rods while tightening the rod bolts
-
-
------------------------------------------------------
-= Piston rings all installed and properly clocked, plastiguage cleaned off
now ready to lube up and install.
-
-
------------------------------------------------------
-=Lubed everything up with assembly lube and started installing the pistons and rods for the final time!
-
-
------------------------------------------------------
-= getting ready to start cranking down the ARP rod bolts
-
-
------------------------------------------------------
-=All rod pistons and rods installed and cranked down for the final time
-
-
------------------------------------------------------
-= Masked off the block, 2 coats of engine primer, 2 coats gloss black
-
-
------------------------------------------------------
-= Looking foward to it!
Jun 26, 2011 | 08:39 PM
#60
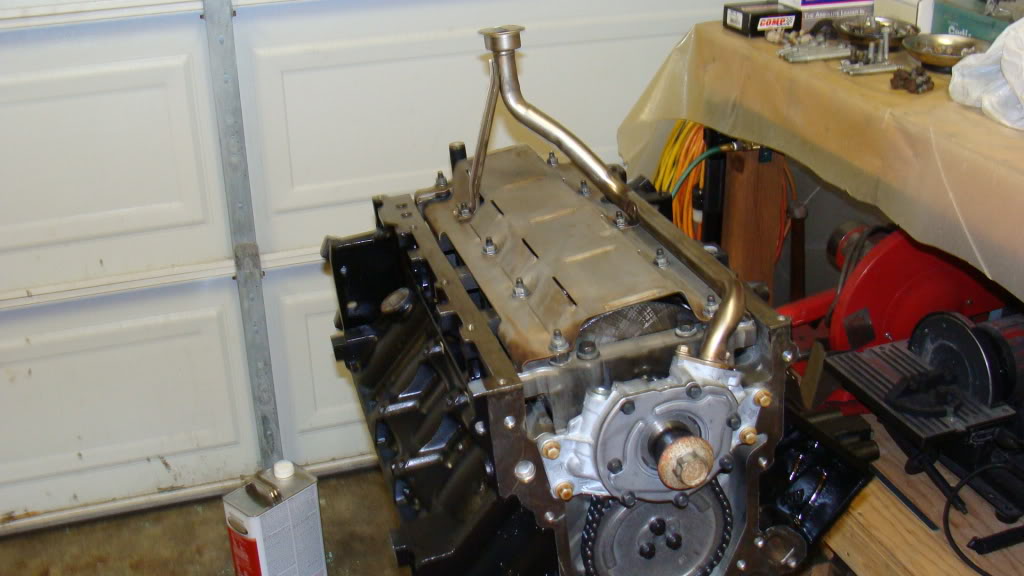
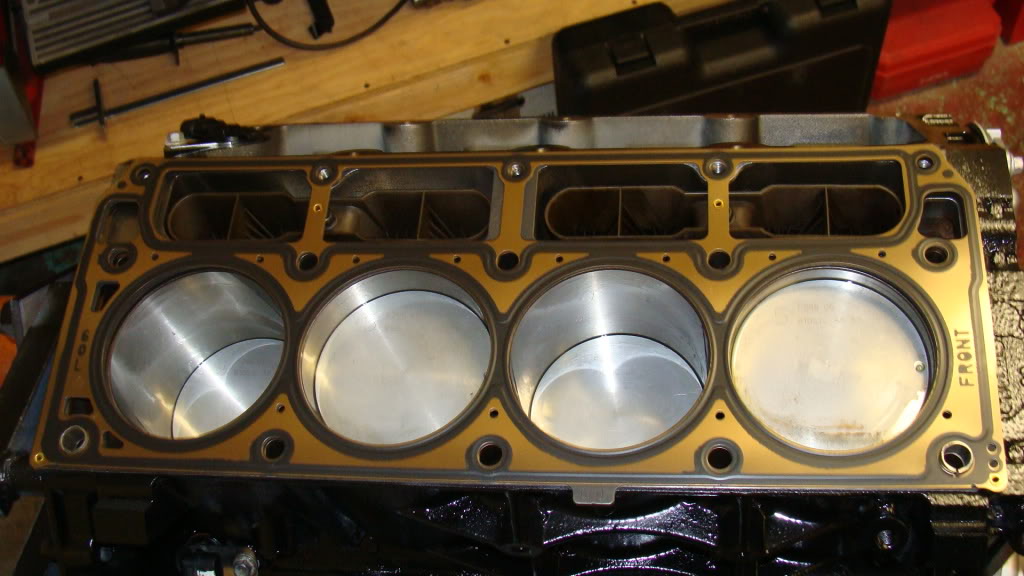
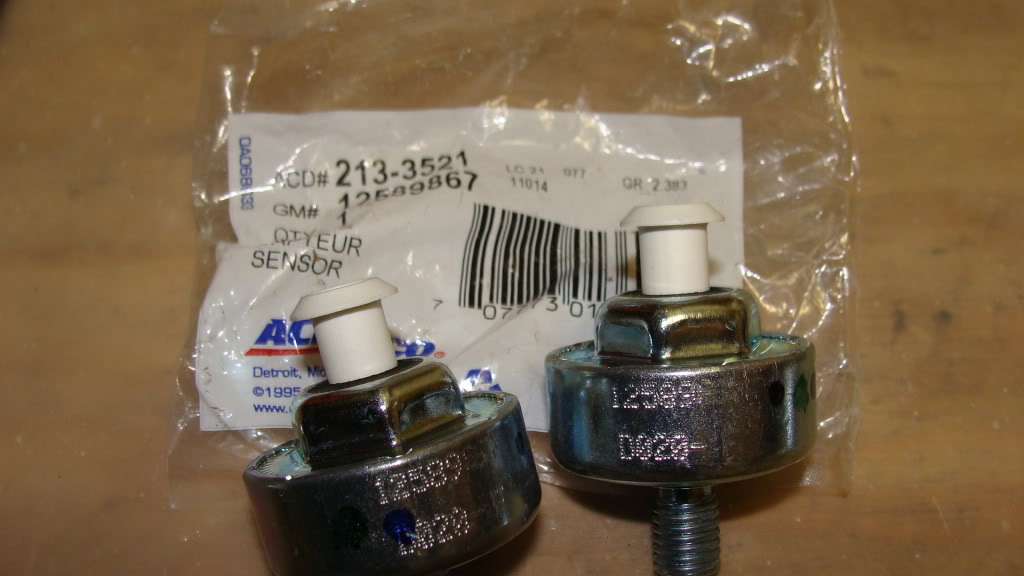
made alot of progress this weekend. Got the oil pan, water pump, valley cover, and timing cover along with all the bolts primed with etching primer and painted with "cast aluminum grey" engine enamel. Got the SDPC high volume oil pump installed and got the LS7 lifters in and got both the heads on and torqued down to spec. Installed front/rear/valley covers all with new gaskets and seals and installed new knock sensors.
I also measured for correct pushrod length with the compcams 7702 checker. Looks like I need some 7.35 pushrods instead of the 7.4's I had which were originally bought for my 5.3 cam swap before I decided to go with the 6.0 and LS7 lifters. So im going to be ordering the 7.35s and if I get them before the end of the week I may be dropping this thing in the truck this weekend!

-
-
-= SDPC high volume oil pump, feed tube, and Windage tray installed-
-
-
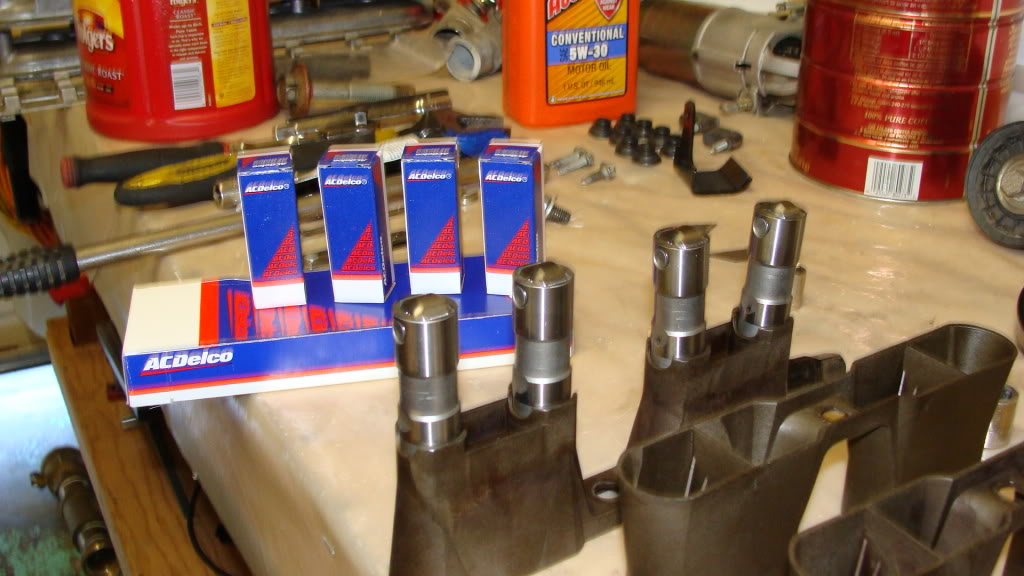
-= New LS7 lifters right before lubing them and installing
-
-
-= New MLS head gaskets
-
-
-= New knock sensors
-
-
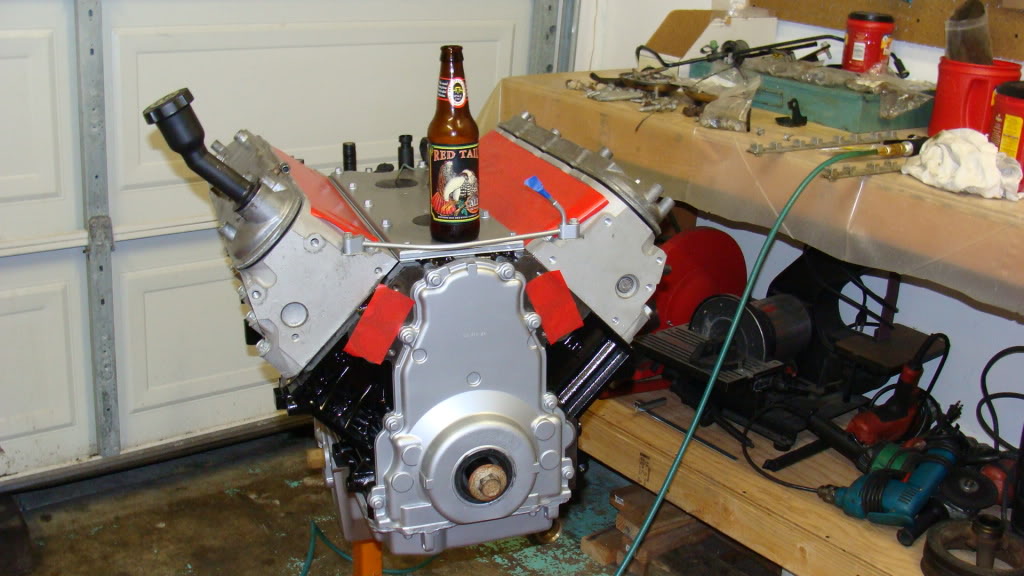
-=All buttoned up for the day, ready to start drinkin now!
I also measured for correct pushrod length with the compcams 7702 checker. Looks like I need some 7.35 pushrods instead of the 7.4's I had which were originally bought for my 5.3 cam swap before I decided to go with the 6.0 and LS7 lifters. So im going to be ordering the 7.35s and if I get them before the end of the week I may be dropping this thing in the truck this weekend!
-
-
-= SDPC high volume oil pump, feed tube, and Windage tray installed-
-
-
-= New LS7 lifters right before lubing them and installing
-
-
-= New MLS head gaskets
-
-
-= New knock sensors
-
-
-=All buttoned up for the day, ready to start drinkin now!