
Finally pinned my crank - A pictorial
 Nov 26, 2009 | 04:47 AM
#41

TECH Enthusiast
Joined: Jan 2006
Posts: 629
Likes: 0
From: Vegas
How common is it for the crank pulley to spin with a mp112? I think mine might be slipping but I'm not positive. I've seen no dust but I'm going to get a gatorback anyway and then go from there if my boost doesn't increase.
 Feb 7, 2010 | 04:20 PM
#43

Teching In
Joined: Nov 2007
Posts: 19
Likes: 0
From: San Diego, CA
You know..... I worked for callaway corvettes and helped them open there new facility in Corona CA in the same building as Eibach springs. You can deff. machine both crank and pulley for a key way. Let me tell you it is less exspensine and less time to just drill the crank and pulley. Also it is very important that you replace the crank bolt once you do this procedure. If this is not done with proper yield to torque specs, some people have had these back themselves out. jsut an FYI!
 Jun 4, 2010 | 08:50 PM
#45

I pinned the crank when it was 6.0L. When I stopped in during the 408 build to see how it was going, he had it fully assembled already. I saw the old balancer installed, with pins, and no new holes. ... I right away thought he put the stock crank back in until I saw it by all my other parts. We had talked about the pinning kit and I knew he didn't have one, so I had to ask how ... he did it. In a milling machine, with a ball end mill. They do it all the time because they do blower motors.
I finely got around to pinning my crank over the weekend and the kit I got from Joe at Left Coast came with an ARP crank bolt(nice). ARP specs state to use their molly lube and torque to 235 lb.ft.. Since I didn't have a torque angle gauge I was happy to get a recommended torque # for install making it even easier for me. It IS reusable and it sure looks like a step up from the stock bolt and washer. Install was fairly easy and I had plenty of room to work after removing the elec. fans. I use the Kent Moore flywheel holding tool and find this tool to be invaluable as it only takes 10 min. to remove the starter and install in its place. This makes bolt removal and reinstall a snap.
ARP crank bolt # is 234-2503 and it comes with a 1 1/16" 12 pt. head...
ARP crank bolt # is 234-2503 and it comes with a 1 1/16" 12 pt. head...

Why is it only 235, whereas Dewmanshu's was 280?
Dewmanshu, I don't wanna lose pin kit myself. Did u ever find the 1st crank pin kit after u pinned yours? Crank bolt was 280 ft lbs & a 6' monkey bar? Uh oh.

when using a supercharger a belt runs from the crank to all the accessories and to the supercharger... well people are having problems with the crank pulley spinning on the crank.. so this fixes the problem.. the stock pulley and crank have no pin or key from the factory.. so the only thing keeping it from spinning is the friction from it being pressed on the shaft. which is fine untill you put a high load on it like a supercharger..
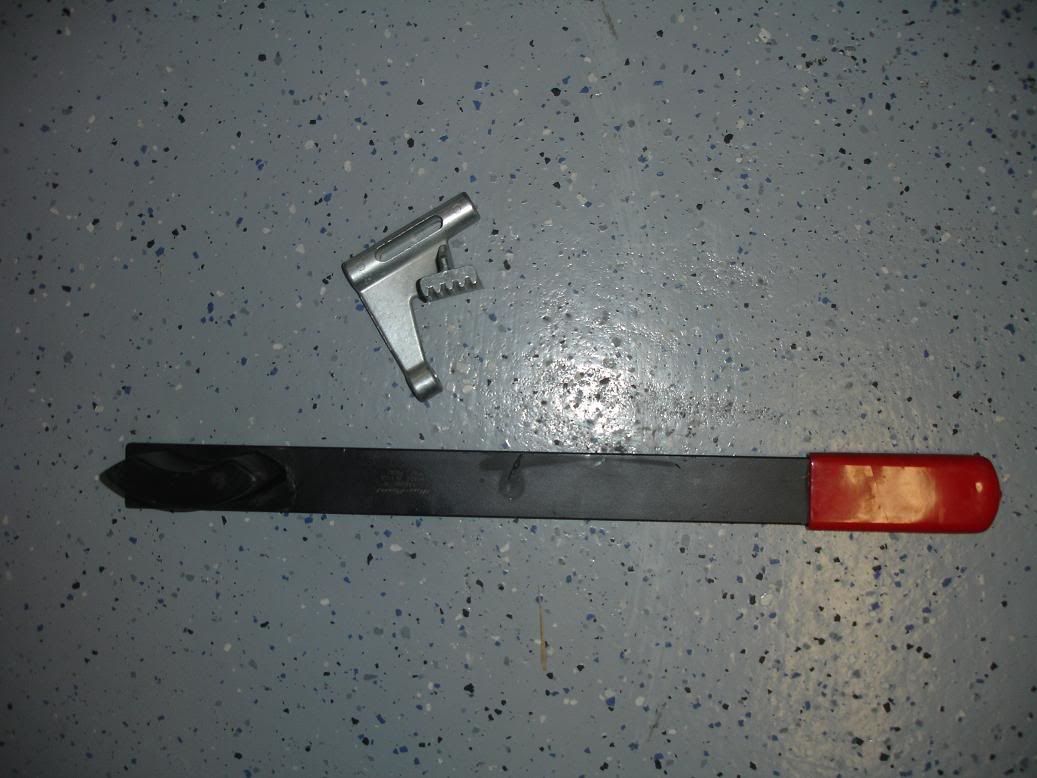
I first bought the blue point tool in the pictures below. It wasn't cheap. It works but not well and you basically have to have some one hold it. I don't recommend it at all. Ive read others using chains, screwdrivers, wrenches and things pryed somewhere in the pulley or flexplate to lock an engine. I personally bent a 1/2" drive extension double once trying to torque the pulley bolt.
I had also read that you can get a crank bolt torqued properly in a manual transmission car. I've pinned a crank on a GTO with a manual and wound up using the kent moore tool on it even. Not saying I couldn't have gotten the bolt torqued properly but it wasn't going well.
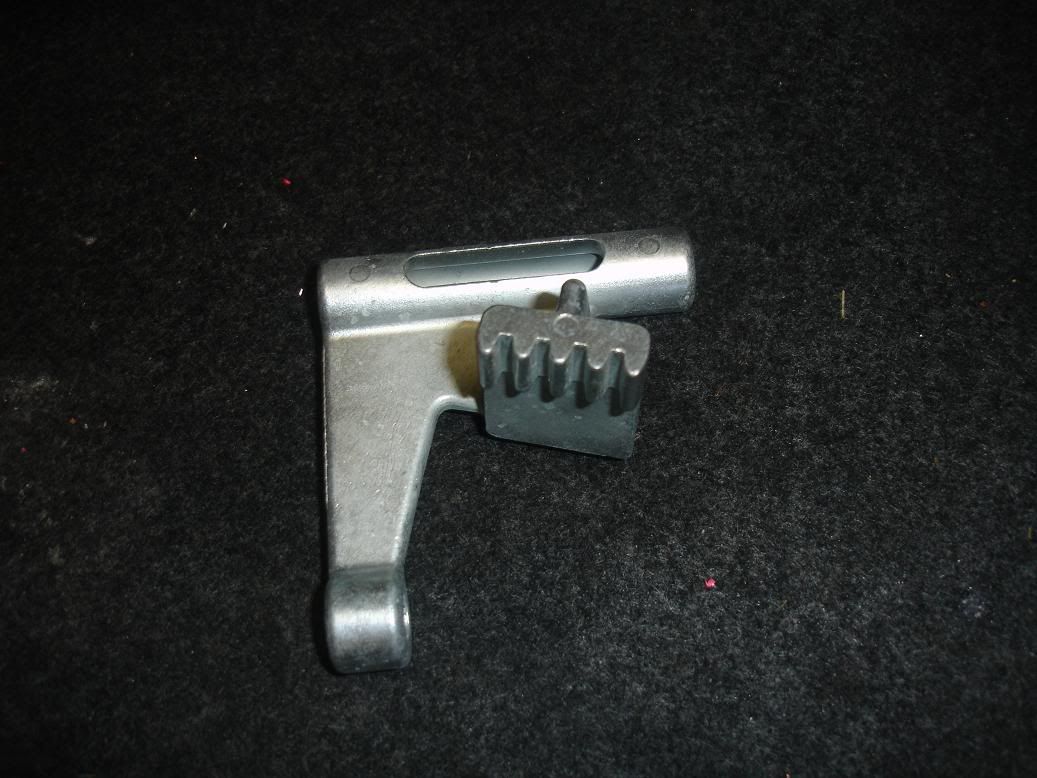
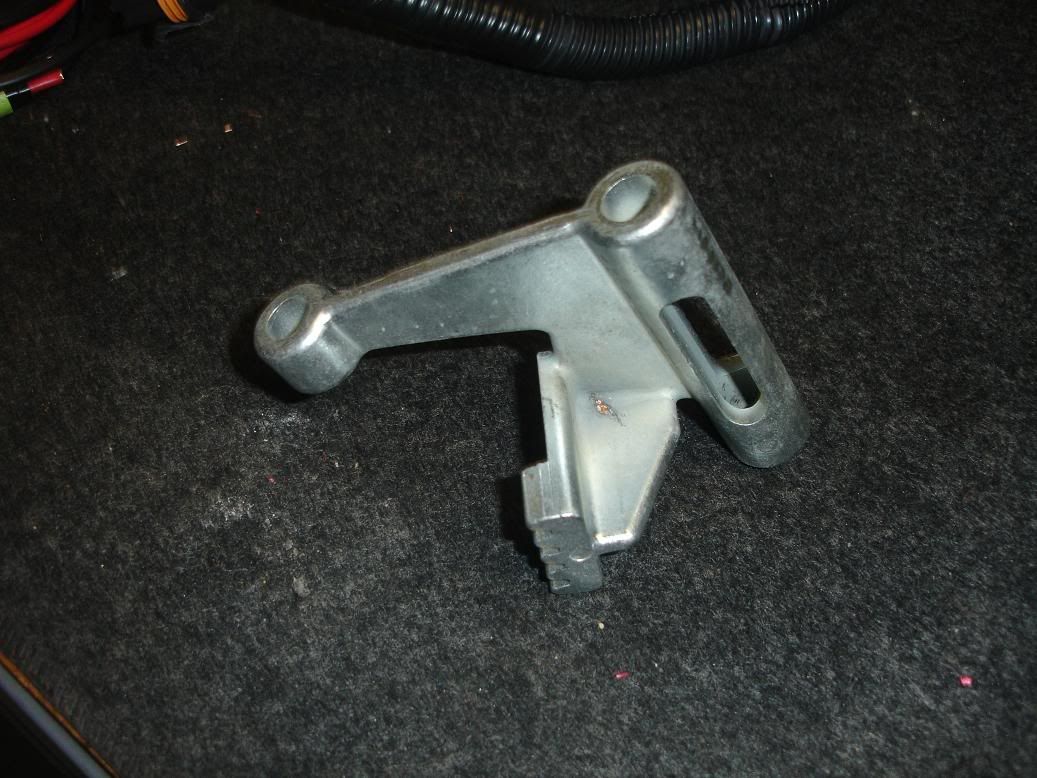
If you are torquing the crank bolt in an LS1 style engine I call the Kent Moore tool a must. It works perfectly. You remove the starter. Put it in place bolt it down with the starter bolts and do what you need to do.
 After doing this and even before, I've wondered how ...you'd get the balancer lined back up to fit the pins back in should you ever remove it?
I had also read that you can get a crank bolt torqued properly in a manual transmission car. I've pinned a crank on a GTO with a manual and wound up using the kent moore tool on it even. Not saying I couldn't have gotten the bolt torqued properly but it wasn't going well.
If you are torquing the crank bolt in an LS1 style engine I call the Kent Moore tool a must. It works perfectly. You remove the starter. Put it in place bolt it down with the starter bolts and do what you need to do.
After doing this and even before, I've wondered how ...you'd get the balancer lined back up to fit the pins back in should you ever remove it?That flywheel holding tool J-42386-A isn't cheap, but I read today where a guy used it more than all his other LS1 tools combined.
That's a good point I hadn't thought of. How do you index the pulley to the shaft if you have to remove it in the future so the hole in the hub will line up with the hole in the shaft when you put the pulley back on? This is a problem because it has to be aligned perfectly or the pin won't go in without being damaged. Since this is an interference fit there is NO room for error. This is where a keyway is superior to pinning, but if you don't already have a keyway I think pinning is a viable alternative considering the cost of removing the crank and having a keyway machined into it.
Redrilling would weaken the crank unless the holes were in near perfect alignment and you drilled only to the next oversize. I wouldn't attempt any other type of a redrill.
Just put a scribe marks on the crank snout and the pulley hub and go back later to see if they are no longer indexed.
Redrilling would weaken the crank unless the holes were in near perfect alignment and you drilled only to the next oversize. I wouldn't attempt any other type of a redrill.
Just put a scribe marks on the crank snout and the pulley hub and go back later to see if they are no longer indexed.
I worked for callaway corvettes and helped them open there new facility in Corona CA...You can deff. machine both crank and pulley for a key way. Let me tell you it is less expensive and less time to just drill the crank and pulley. Also it is very important that you replace the crank bolt once you do this procedure. If this is not done with proper yield to torque specs, some people have had these back themselves out.
Callies Performance, Adam, I'm curious how much it'd be replace the crank with a double keyway forged crank from Callies? I mean for the future, "a friend" might wanna do a bottom end for boost.

This thread is full of info, sorry to be so lengthy. This sticky is invaluable info for someone who is comtemplating doin this.

Last edited by fastnblu; Jun 4, 2010 at 09:01 PM.
Sep 21, 2010 | 02:43 PM
#46
J-42386 is invaluable whether doing crank pinning, cam, or both.
I pinned crank yesterday. I had the rad. & efans out for cam swap, but think if just efans were out it could be done w/. a 90� drill. DO wear safety glasses!! Esp. if blowing out shavings w/. air or if you're doin it layin on ground. I just learned over core support. Use some cutting oil on drill & reamer too. Pretty straight forward.
I pinned crank yesterday. I had the rad. & efans out for cam swap, but think if just efans were out it could be done w/. a 90� drill. DO wear safety glasses!! Esp. if blowing out shavings w/. air or if you're doin it layin on ground. I just learned over core support. Use some cutting oil on drill & reamer too. Pretty straight forward.
Sep 21, 2010 | 04:00 PM
#47

TECH Fanatic
Joined: Sep 2009
Posts: 1,818
Likes: 0
From: PHX AZ
J-42386 is invaluable whether doing crank pinning, cam, or both.
I pinned crank yesterday. I had the rad. & efans out for cam swap, but think if just efans were out it could be done w/. a 90� drill. DO wear safety glasses!! Esp. if blowing out shavings w/. air or if you're doin it layin on ground. I just learned over core support. Use some cutting oil on drill & reamer too. Pretty straight forward.
I pinned crank yesterday. I had the rad. & efans out for cam swap, but think if just efans were out it could be done w/. a 90� drill. DO wear safety glasses!! Esp. if blowing out shavings w/. air or if you're doin it layin on ground. I just learned over core support. Use some cutting oil on drill & reamer too. Pretty straight forward.
May 23, 2011 | 12:39 AM
#48

I've done a lot of machining, If you wanted to mill a keyway into a crank snout with it still in the block it would just be a lot of set-up time but otherwise the machining wouldn't be too bad. You would probably have to do it with the block upside down and use extended tool holders. You would then broach the keyway in the pulley and away you go. This kit looks too easy to bother messing with all of that trouble though.
To speed up getting the pulley back on I would think you could make a washer with the same hole spacing but slightly oversize and use two pieces of drill rod polished a couple thou smaller than the holes and use them as alignment pins to get it back on there. Then pull the bolt and washer out and replace the drill rod pieces with the real pins.
To speed up getting the pulley back on I would think you could make a washer with the same hole spacing but slightly oversize and use two pieces of drill rod polished a couple thou smaller than the holes and use them as alignment pins to get it back on there. Then pull the bolt and washer out and replace the drill rod pieces with the real pins.
 Feb 18, 2012 | 10:30 AM
#50

Good info in here, will be doing this when I get home in a few weeks when installing my Procharger. I wish I could see the pictures at the start of the thread but my work computer is blocking the link cause "KY" is in the link and it think's it's pornographic LOL
Will check this later again on my laptop.
Will check this later again on my laptop.