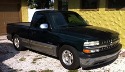
4.8L 80mm Single Dirty Grandpa Truck Build

 Apr 30, 2014 | 12:21 AM
#112
Thread Starter
TECH Apprentice
Joined: Jan 2005
Posts: 357
Likes: 0
From: St Petersburg, FL
Little update� going to do a couple post because it�s not quite that little lol.
Heater hoses:
So the truck has been running great. Had a little snafu with the stupid quick connects for the heater hoses take a crap, but was able to pull it over before it overheated. Fixed it with a few 90 degree hoses for a V6 silverado. Part number is B80400 and are $10.99 down here in FL. I bought 2 and 5/8 x 3/4 barb adapters to fit my existing 3/4 lines. I took off the quick connects, slid these bad boys past the lip on the heater hose nipple and clamped. Perfect for getting the lines to run by the passenger fender out of the way. Included a side view with the side exhaust below
Apr 30, 2014 | 12:26 AM
#113
Thread Starter
TECH Apprentice
Joined: Jan 2005
Posts: 357
Likes: 0
From: St Petersburg, FL
Boost controller:
Another issue I was having was with my Apexi AVCR boost controller, which by the way is still bad *** considering I�ve had it for 10 years now. Turns out connecting the VSS to the unit so you can do boost by gear/speed, will mess with the ABS and speedometer. I had to disconnect it because it was causing all kind of crazy **** with the ECU. I�m thinking I can fix with a diode so it doesn�t back feed voltage to the ECU. TBD�.
Turns out I also had a bad solenoid sensor which if any of you have ever looked at replacing; they want $100 for the Apexi valve. Did a little research and picked up a MAC valve off of Ebay for $26 shipped. Same valve they use for Haltech or AEM. Worked like a charm. Part nUmber is MAC 35A-AAA-DDBA-1BA
Boost Control Solenoid Valve BCS Mac 35A AAA Ddba 1BA Turbo PWM EMS ECU | eBay
Cranked up the boost to 10psi. I had 12 degrees at 10psi in for base timing so it wasn�t anything to write home about. Couple of buddies and I did a little adjustment and up�d the timing to 18 degrees at 10psi. It did the trick for burn outs up to 70 mph. which is good.
Here�s a little video of myself and a friend giggling like little school girls.
Turbo Silverado + 2 idiots = Happy Easter! - YouTube
Apr 30, 2014 | 12:37 AM
#114
Thread Starter
TECH Apprentice
Joined: Jan 2005
Posts: 357
Likes: 0
From: St Petersburg, FL
Crank Pin:
So in a effort to not pay $80 for a drill bit and a jig I decided to devise my own tools for pinning a crank. Turns out it worked. Here’s what I did.
I had a 2” x 2” hunk of aluminum bar stock. Drilled a 5/8 hole in the center (little smaller than 16mm, but sand down the bolt shank to get it to fit) in the middle with a1/4” hole on center with the snout and the balancer line.
Take an old crank bolt cut the top off, sand down the shank to slide into the 5/8” hole in the jig. Drill and tap a 8mm x 1.25 thread so you can hold the jig to the bolt you’ll thread into the crank to center the jig.
Take an old 1/4” drill bit and cut the shank off to 0.750”
Take your pulley off and install the jig. I ended up replacing the pulley with a new one for kicks. Drill your hole 0.900”. your balancer will sit off the snout about 0.150” so you’ll need to drill deeper to get the 0.750” pin in the hole. You don’t want it to be flush with the balancer because it’ll pull in as you tighten the crank bolt. There can be a gap.
I used a pneumatic 90 degree drill with a regular 1/4” drill bit. The metal is cast, so it takes about 2 min to drill 0.900” deep.
On a side note, if you pick up a cheap $12 set of spring comrpessors from harbor freight, coincidently they have the same pitch as the crank bolt. You can use that bolt and nut off it to press the balancer on. I actually used the aluminum jig between the nut and balancer as a stand-off/washer to drive the pulley on the crank.
Worked like a charm. I have $18 into the setup. All $18 went to the 5/8 drill bit from home depot.
Apr 30, 2014 | 12:45 AM
#115
Thread Starter
TECH Apprentice
Joined: Jan 2005
Posts: 357
Likes: 0
From: St Petersburg, FL
Couple more random pics. Picked up a cheapy turbo blanket off of ebay. They all look the same so I went with a $60 one. Prices range from $30 to $100 for what appears to all be the same blanket.
I haven’t tried it yet due to the fact the truck is still sitting. I totally forgot to get a new crank bolt, so waiting on amazon to drop it off so I can do some more burnouts. Seems like all of my friends use the old bolt, but the interwebs dares me to break something. Figured I’d play it safe and throw in a new bolt.
Also hand cut a TB flange for a buddy. He’s back-halfing a Saturn SC2 and dropping in a V6 out of a CTS and throwing a single turbo on it. Should be pretty bad ***.
 Apr 30, 2014 | 12:50 AM
#117
Thread Starter
TECH Apprentice
Joined: Jan 2005
Posts: 357
Likes: 0
From: St Petersburg, FL
There is basically no E85 down here and frankly I do not like screwing around with E85 or race gas.
This little turd will be 20 psi on 93 when its all said and done. I'll do it without meth, just figured i could squeeze out some more powa.
need to get a 4l80 in it before anything else can happen. besides breaking stuff of course.
Apr 30, 2014 | 12:55 AM
#118
 Keep it up man. What do you need to upgrade before it sees 20psi?
Apr 30, 2014 | 12:58 AM
Keep it up man. What do you need to upgrade before it sees 20psi?
Apr 30, 2014 | 12:58 AM
#119
Thread Starter
TECH Apprentice
Joined: Jan 2005
Posts: 357
Likes: 0
From: St Petersburg, FL
too bad its like $2500 worth of crap i want.
going with i think an FTI 3600 converter, junk yard trans, shift kit, rebuild kit, drive shaft and new 10 bolt 1350 yoke.
It'll be this year, but probably not until this fall. I'm a broke SOB.
that's awesome to hear that you haven't broken it at 13psi. this 4.8 have runs strong. My other goals is to do intake and cam. I just bought a 3 bar map to log back pressure on HP tuners. I did a visual check with a mechanical gauge and its pretty close to 1:1 @ 6.5 psi. I bet it got worse upping the boost, but i'll have to see. If it's close to 1:1 i'm throwing a cam with 5-10 degrees of overlap to see what it'll do. Going to upgrade the valve train to so i can rev it out to 7000~7500.