
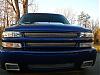
Double DIN in 00 silverado
 Nov 16, 2007 | 01:12 AM
#1

Has anyone made a double DIN fit into the 00 silverado? I'm in the process of putting a 7" monitor and cd/dvd player into mine. It's not all one unit, it;s two seperate units. Total height is 4.14 inches. Any help would be great.
Nov 16, 2007 | 11:52 AM
#2

 Nov 19, 2007 | 06:41 PM
#4

TECH Apprentice
Joined: Feb 2007
Posts: 386
Likes: 0
From: Houston, Tx.
there are different ways of doing this mod. this is probably the way i would do it just so that it looks more stock
http://www.cardomain.com/ride/825435/2
http://www.cardomain.com/ride/825435/2
 Dec 20, 2007 | 12:59 AM
#6

On The Tree
Joined: Dec 2006
Posts: 130
Likes: 0
Word...
The mount that holds the Radio and Hvac Controls is what makes the difference... Get that from an 03+ and retrofit it into your 99-02... Then get the Dash bezel from an 03+... Its not 100% bolt on but if you use your imagination you can do it in a few hours...
The mount that holds the Radio and Hvac Controls is what makes the difference... Get that from an 03+ and retrofit it into your 99-02... Then get the Dash bezel from an 03+... Its not 100% bolt on but if you use your imagination you can do it in a few hours...
Dec 24, 2007 | 08:00 AM
#7
Do the manual HVAC units from '99-'02 trucks and '03+ trucks have the same plugs in the back? Would this be a "plug 'n' play" conversion if you acquired the '03+ manual HVAC controls, '03+ radio/HVAC controls bucket and a '03+ dash bezel?
Trending Topics
Dec 24, 2007 | 12:17 PM
#8

 Dec 8, 2008 | 03:52 AM
#9

Teching In
Joined: Jul 2007
Posts: 37
Likes: 0
From: rosemead ca
heres his write up!!!!
back in Summer of '06, I performed a double-DIN conversion on my truck to install a Pioneer AVIC-D1 double-DIN navigation. I bought it used in June '06 for a pretty good price (at the time) on eBay of $570 shipped. I then downloaded the updates to turn it into an AVIC-D2. It was an awesome head unit, but unfortunately, its iPod interface sucked horribly even with the iPod2Car interface. This page shows how the conversion was done.
Double DIN Conversion
Installing a double-DIN stereo was not a small job. This is because 99-02 trucks are designed for a 1.5-DIN (3" tall) stereo. Double-DIN is 4" tall. There are at least 5-different ways I've seen other people perform a 2-DIN conversion. The easiest and most common way is to use a 03-06 radio/climate control bracket and bezel and modifying the bracket and climate control to fit. The main benefit to this method is all the work is invisible since nothing is done to the bezel. All the other ways involve difficult fabrication. Only after purchasing a 03 radio bracket and bezel did I decide I really didn't like how it looks:
- The 03 climate control opening is too tall for the 99 climate control, it also doesn't have the right curvature, the opening is also too narrow partially obscuring the OFF and DEFROST labels.
- The 3/4" of blank space below the airbag disable switch looks cheesy, you can tell they took the old design and just stretched it out on the bottom like an afterthought.
- I didn't like the idea of modifying the climate control because I might want to switch to the automatic one someday, then nobody would buy my old one if it's all chopped up.
- I didn't like the idea of chopping the lighter jack door and ashtray door to clear the larger 03 bezel.
So after careful measurement of my existing bezel, I decided it was plenty tall enough for double-DIN and could be modified. If I screwed it up, no big deal, I could always go back to the 03 bracket/bezel method.
Here are pics of how it was done...
First, I removed the old HU. It was a JVC KD-AVX2. Very nice, for a single-DIN unit.
Then I made some brackets cut out of sheetmetal using an angle grinder/cutting disc. I used a hammer and pliers to bend them. I reused the plastic side brackets from the single-DIN installation kit.
It fits! It snaps right in. Well, I had to cut and bend a metal bracket behind it with my angle grinder first. Since I had a road trip to take, I cut a big rough hole into the bezel so it could go back on temporarily until I had time to make it look good. I cut the notch out of the upper left of the opening later, so I could use those scrap pieces... more on that later.
I debated doing this next step, which is lowering the climate control. At its current position, the trim ring wouldn't fit on the radio. Since I was planning to make the radio opening in the bezel exactly the same dimensions as the 03-06 factory radio opening, I would need the trim ring to fill in the space. I also thought lowering the climate control would make the overall appearance more balanced and make it so I could have a decent sized bar across the bottom of the HU to look more factory. So, that was when I decided after measuring a hundred times to lower the climate control exactly 4.0mm.
To remove the bracket involved drilling out 2 rivets in the back (not fun) and removing 4 7mm hex screws. I cut out the climate control mounting areas using a Dremel and used aluminum tape to hold them in their new position.
Pic on the left shows the aluminum tape. I used JB Weld to permanently bond the mounting holes to their new positions. Then I sanded it smooth, but had to keep reminding myself not to go overboard because it's not a visible part!
Left pic shows the trim ring fits on the HU, with 2mm to spare between the trim ring and climate control. Right pic is where I started to build the radio opening. I could have made the opening fit tighter to the HU, but I decided to use the exact dimensions of the 03-06 radio opening. The reason behind this is I will probably want to swap out the HU for a new one in the future so I wanted the opening to be a universal size rather than only fitting a particular model. I had cut out the 1.5 DIN opening completely intact, so all I had to do was section it horizontally to shorten it about 1/4". I then took those pieces I cut out and glued them to the vertical sections. Then those little scrap pieces I cut out from the bezel earlier were used to extend the height to exactly the correct height. Since the bezel is made of PC (polycarbonate), I used Tenax7R (methylene chloride) as the glue. It isn't really a glue, but a solvent. It solvent-welds the pieces together for maximum strength.
Next step was to cut out the climate control opening. I then took the climate control opening and solvent-welded it to the newly assembled radio opening. A ton of measuring with calipers, Dremeling and test-fitting involved in this step to get the divider bar exactly uniform.
Left pic is test fitting the new openings into the dash. A lot of fine Dremel work involved to get the new openings to recess into the bezel. After some very careful test-fitting with it installed, I used aluminum tape to hold the openings in their exact position. After this, I solvent welded a lot of scrap pieces into the gaps to hold everything together. Then to fill the gaps, I took all the shavings and smaller scrap pieces and soaked them in Tenax7R in an attempt to make a liquid polycarbonate sludge. It was difficult to work with because methylene chloride evaporates real fast and the best consistency I could get out of my polycarbonate sludge is like super chunky peanut butter.
Eventually, I did make it work. Sanded, made more chunky sludge, brushed more Tenax7R on it, repeat... eventually it started to look pretty good. It took a lot of wet-sanding with 220 and 320 grit. I used an old 9V battery and AAA battery as sanding blocks! Left pic shows the finished product. Since the sludge was chunky and dried so quickly, I was left with some pinholes and tiny cracks. It was difficult to get polycarbonate sludge smooth and liquid enough to fill them, so I used a very thin coat of JB Weld to fill in pinholes and surface cracks. Pic on the right shows after I sanded the JB Weld smooth.
Last step was to paint with flat black. To duplicate the original texture, I painted from about a 16" distance to give it a slight orange peel. It came out real well. The finished product on the left, and installed on the right. I couldn't get a good daylight pic, but the camera flash does bring out some detail (and dirt, and fingerprints, ugh).

Thread
Thread Starter
Forum
Replies
Last Post
Offroadunleashed
Trucks and SUV Classifieds
0
Jul 20, 2015 02:25 PM
FlowmasterMufflers
Foreign Performance Discussion
0
Jul 9, 2015 12:23 PM