

Trick Turbo Kit Install - steps and pics
 Aug 19, 2013 | 08:13 PM
#1


 Trick Turbo Kit Install - steps and pics
First sorry for taking so long to put this up but here goes nothing.
This is what I did when installing my turbo kit from Rick. Follow at your own risk and ask as many questions as you want. Hopefully anyone buying a kit can use this to answer questions and ease the install before making new threads and searching through other builds.
Here is my first thread when I bought the kit. A lot of n00b questions were answered here.
https://www.performancetrucks.net/fo...tricks-501958/
New the fun part before opening anything, soak every exhaust bolt that you will remove with PB Blast or Liquid Wrench. ( pass manifold, oil fill tube into the block, y pipe, mid pipe, all the rubber exhaust hangers )
The kit was shipped very nicely packaged and safe. heavy duty boxes and tons of bubble wrap.
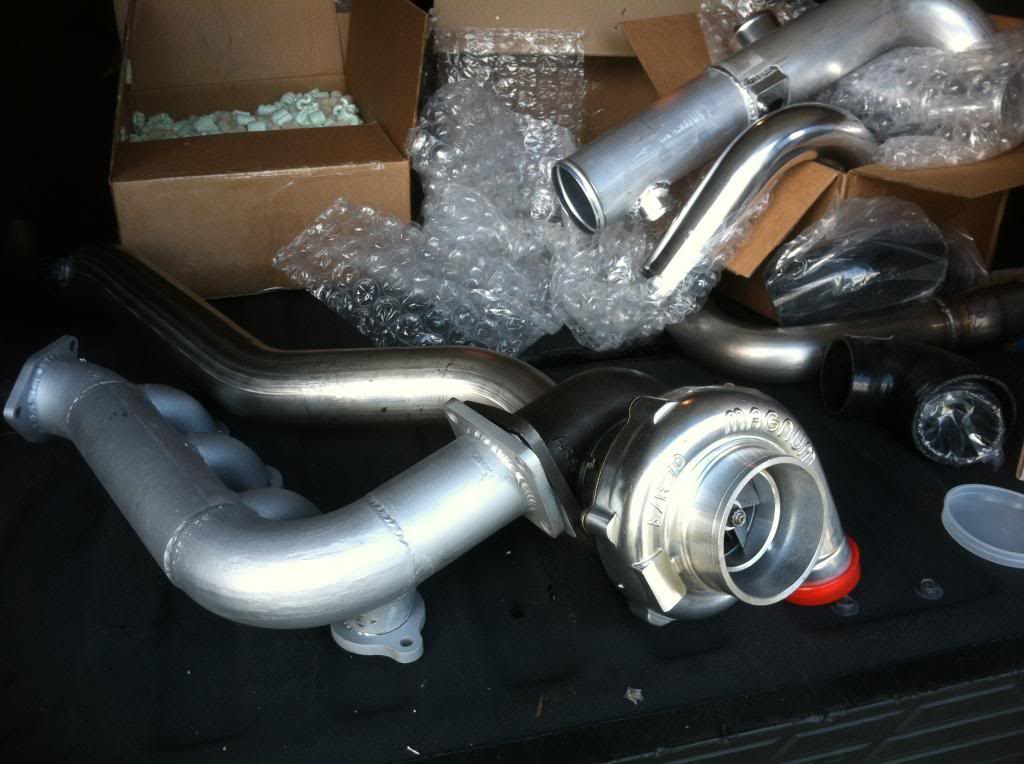
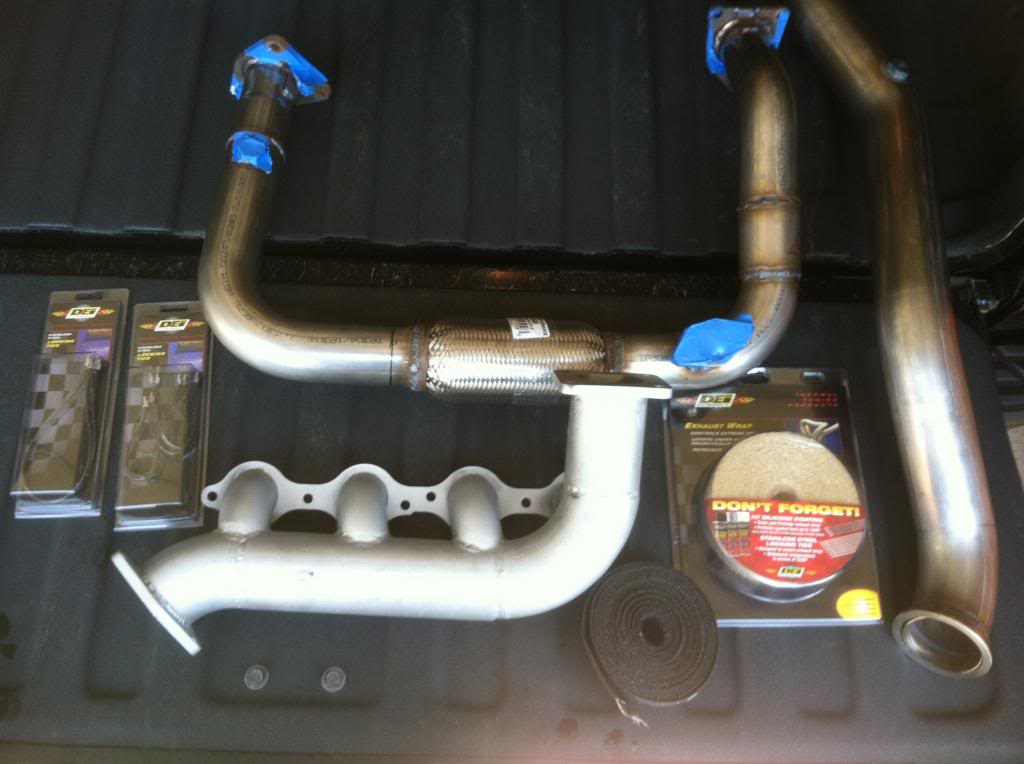
What I did first was mount the intercooler. Remove the top plastic radiator cover and front grill. be careful with the little tabs holding the grill, use a needle nose.
unbolt the stock trans cooler and let it hang there. Or better yet remove it and replace w a big cooler. I left mine on because I did not have my tru cool yet. remove the brace that the cooler was bolted to. Look at the sensor on the pass side ( empty bolt hole ), move this sensor from the front of that brace where the hole is to the outside as shown in pic.
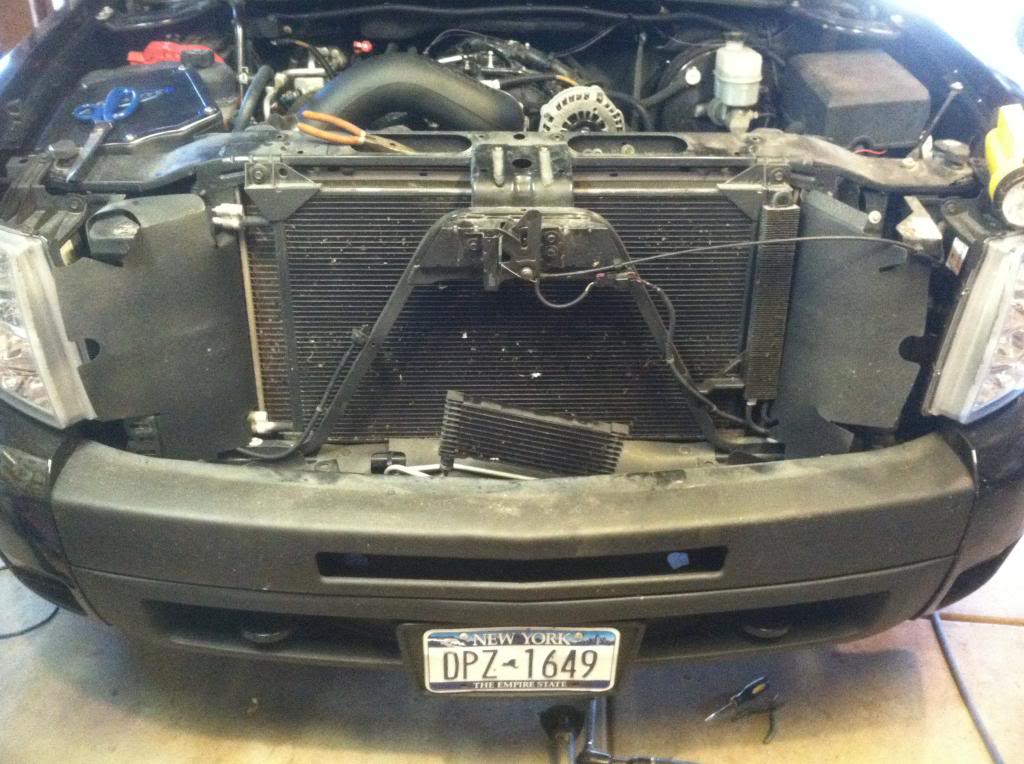
Cut these tabs off the bumper to fit the intercooler. 1st pic is the driver side, 2nd pic is the pass side
See the bolt and holding the powersteering cooler on the front bracket. remove that and cut the front part of the bracket off.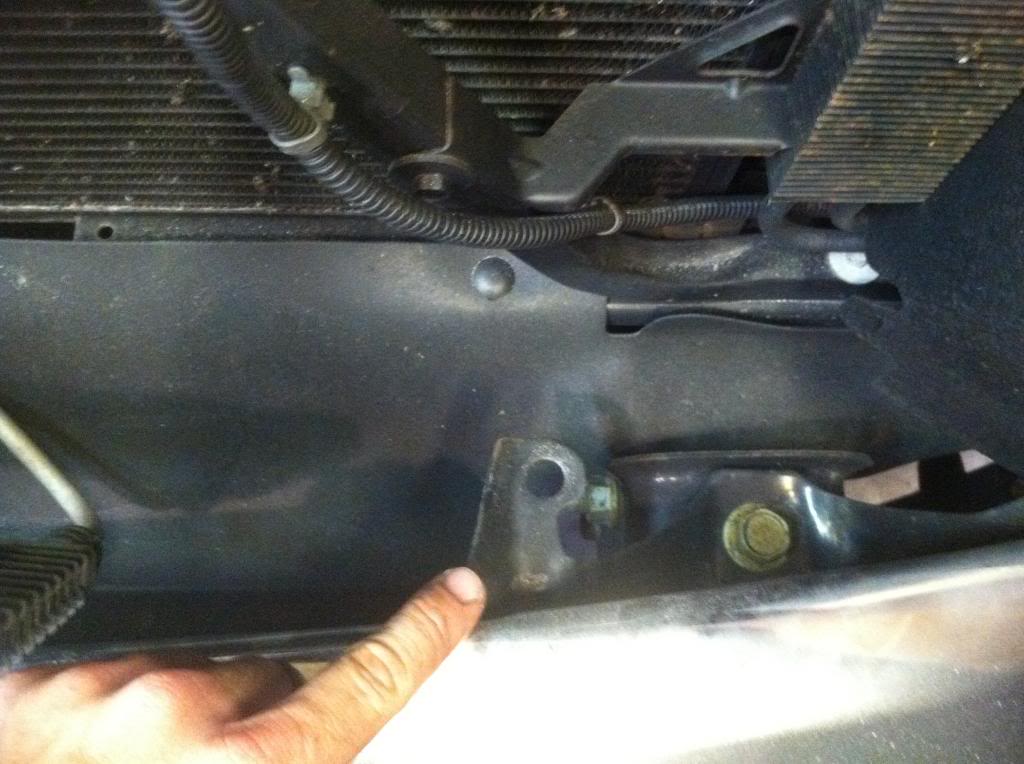
use a self taping screw into the vertical brace to hold the cooler. Also move the wire to the back side of the brace.
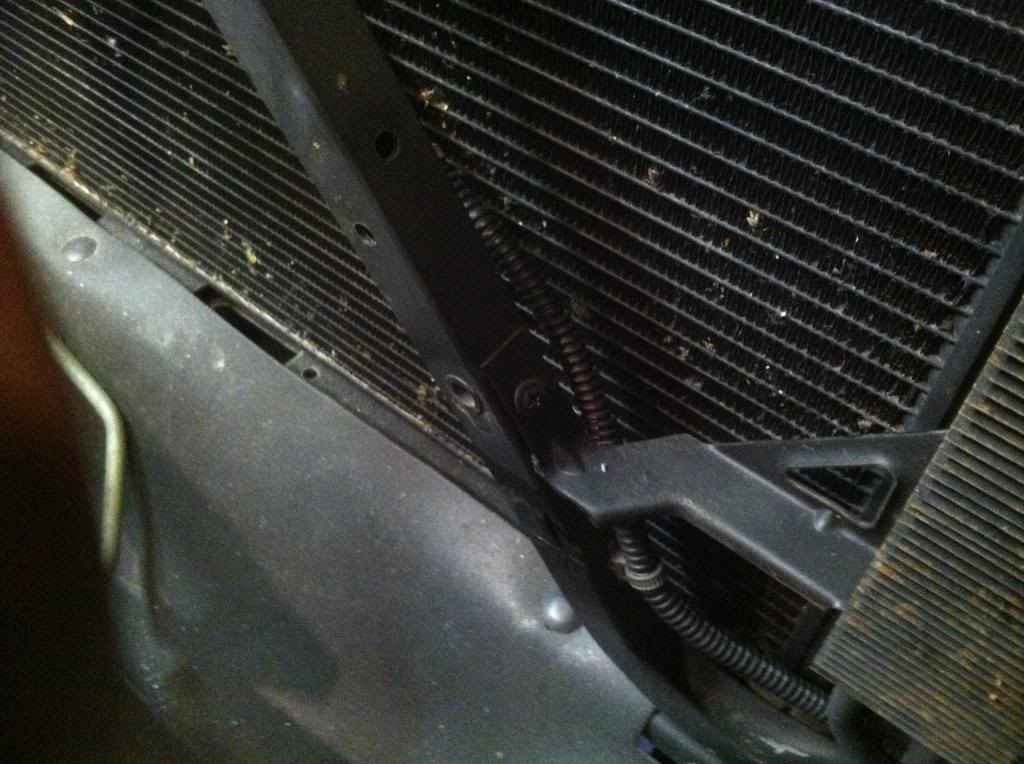
pass side ear to cut off. Also notice the wire, move this sensor on the vertical bar of the brace so the IC mounts flush to the front of the Bracket.
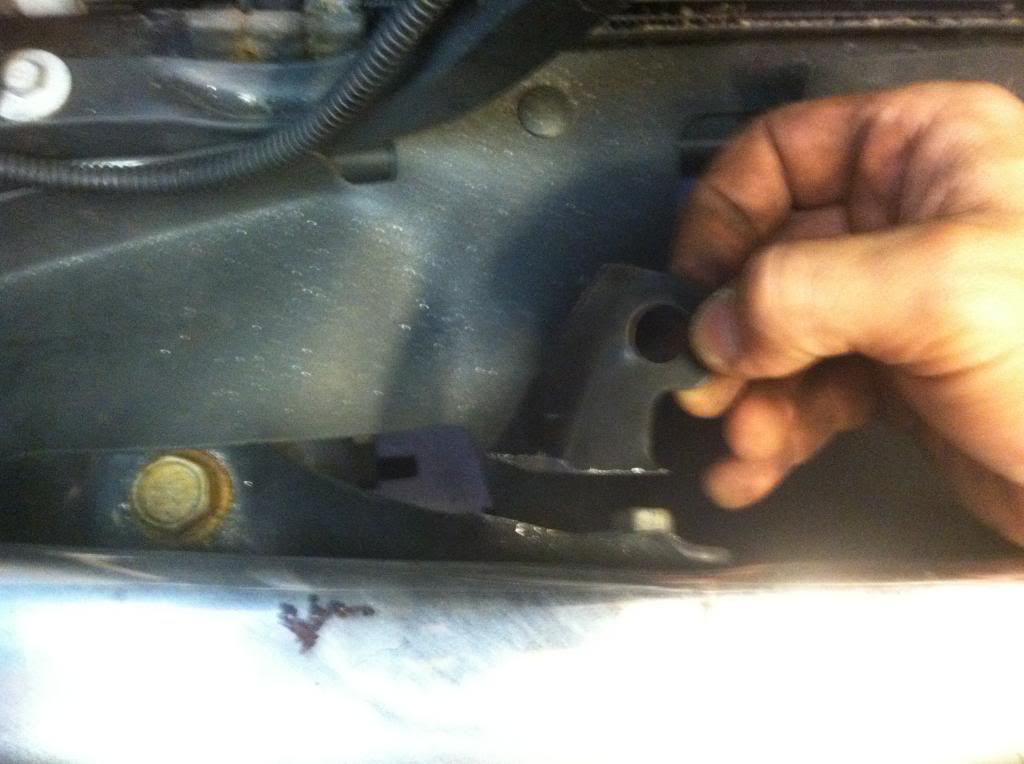
start fitment of IC. I used painters tape to hold on card board on the front and back when handling it to avoid messing up the fins. I snugged the brackets to the IC to mark the holes to drill. I mounted the bottoms first.
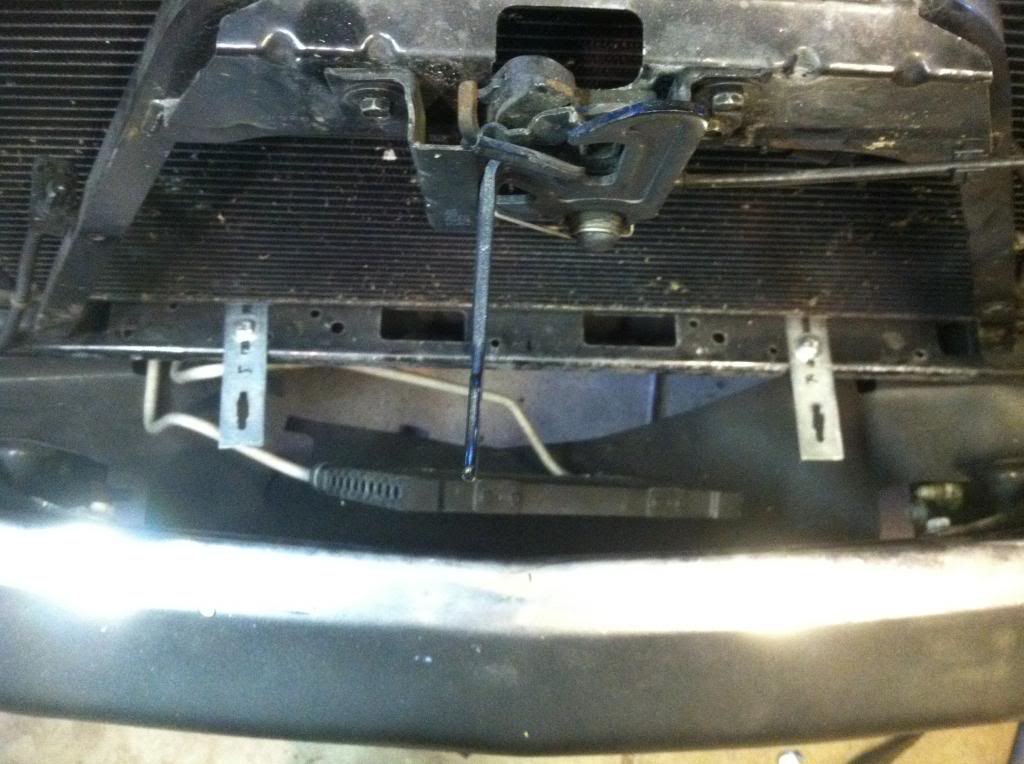
Here is a zoomed in pic of what I did. reem the holes a bit to slide the IC to make fine adjustments.
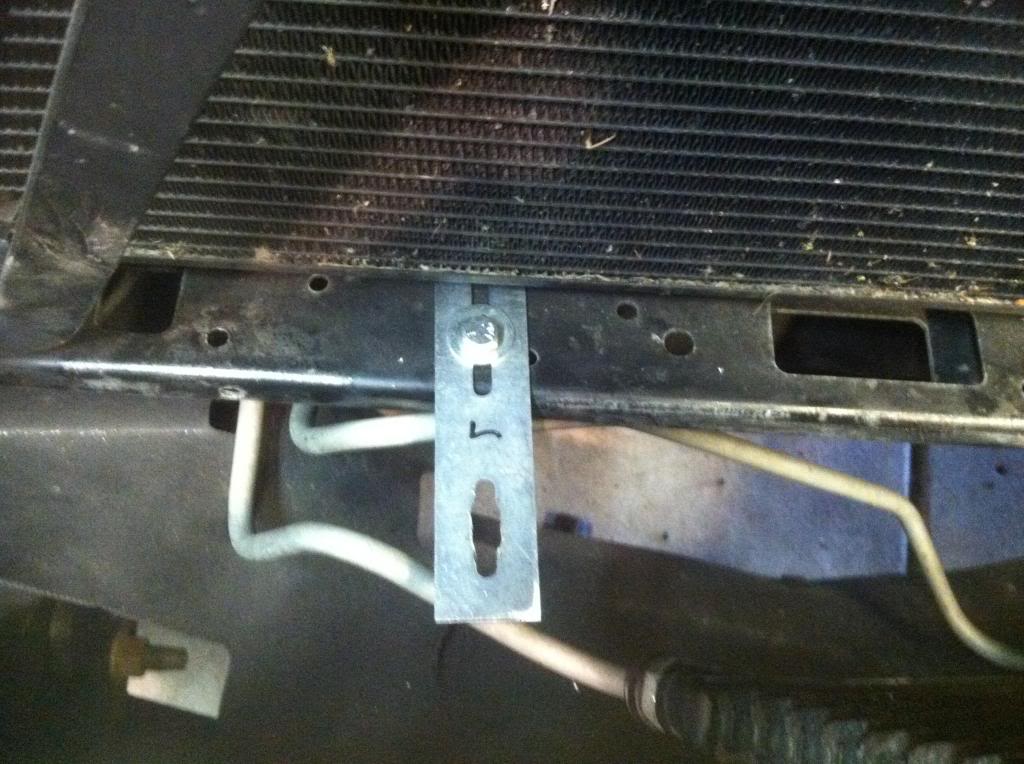
Snug the bottom bolts into the ic.
Mark and drill the top holes.
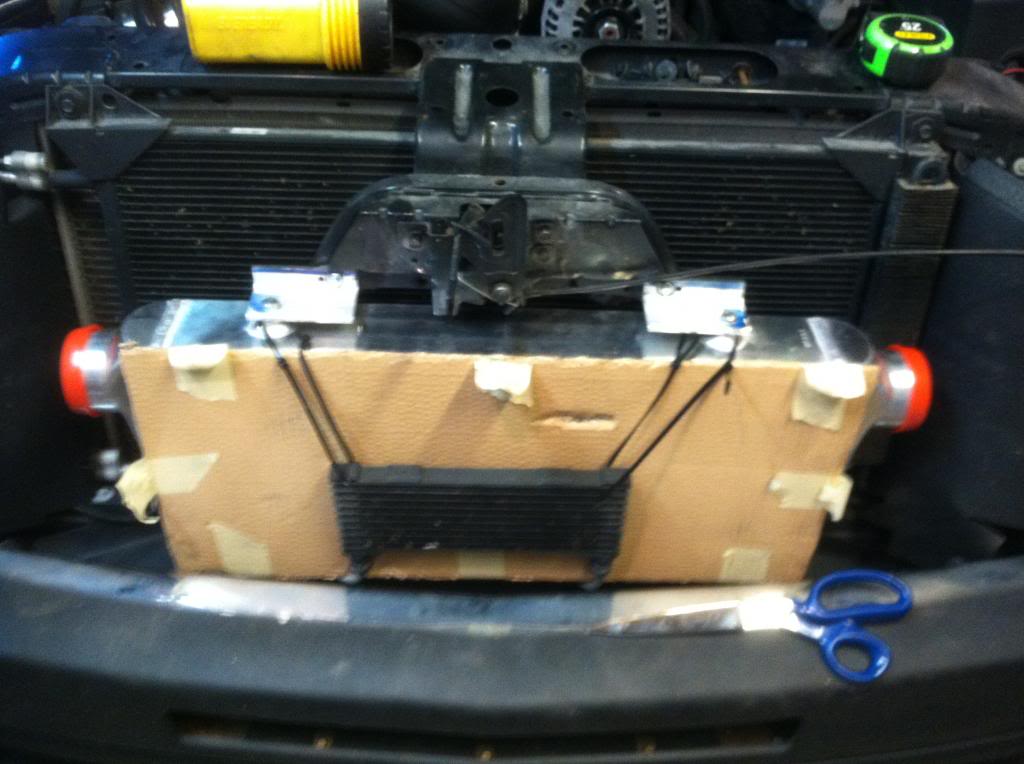
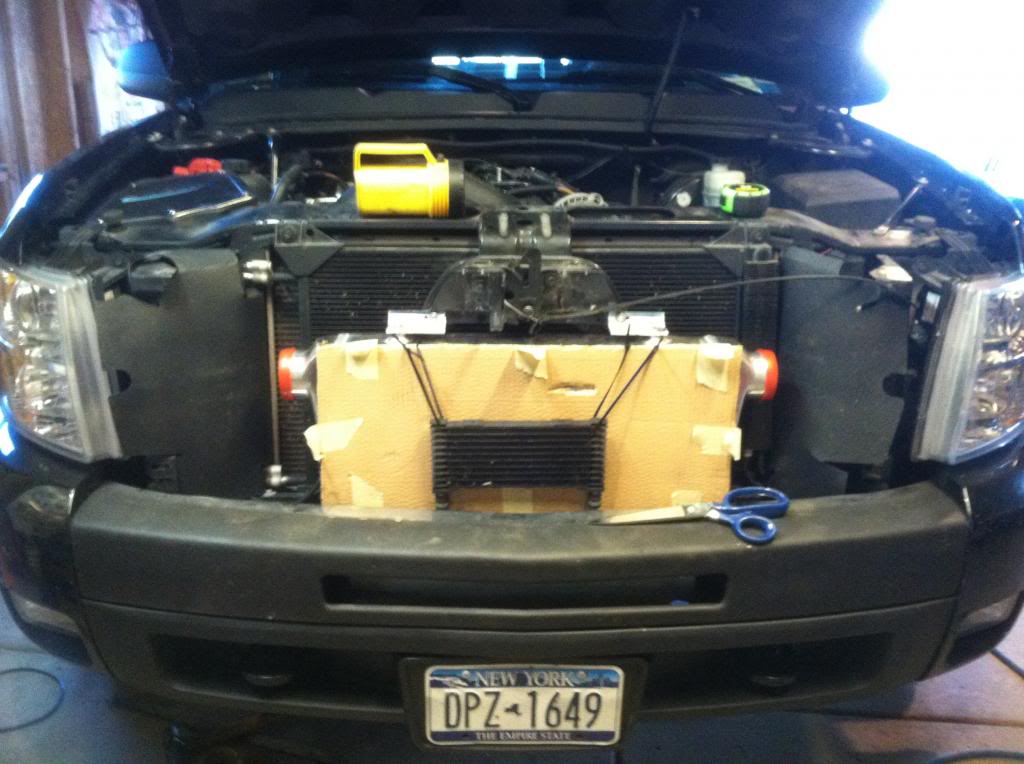
Tighten the mounting brackets and bolts. Do no over tighten though. After mine was bolted up, I tugged on the IC and it didn't move. I removed the card board and zip tied the cooler back.

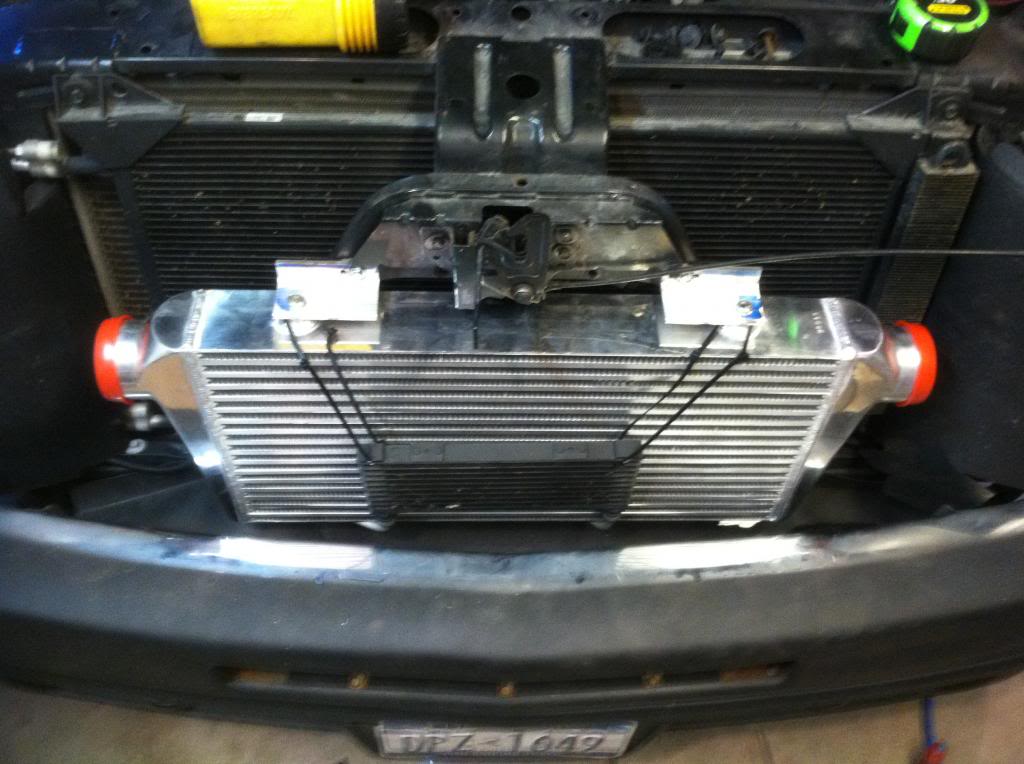
I would again recommend to upgrade the cooler now, its like 60 bucks and you already have everything out of the way. I later put the tru cool behind the IC and in front of the radiator. I did this to months after the turbo install but here are pics.
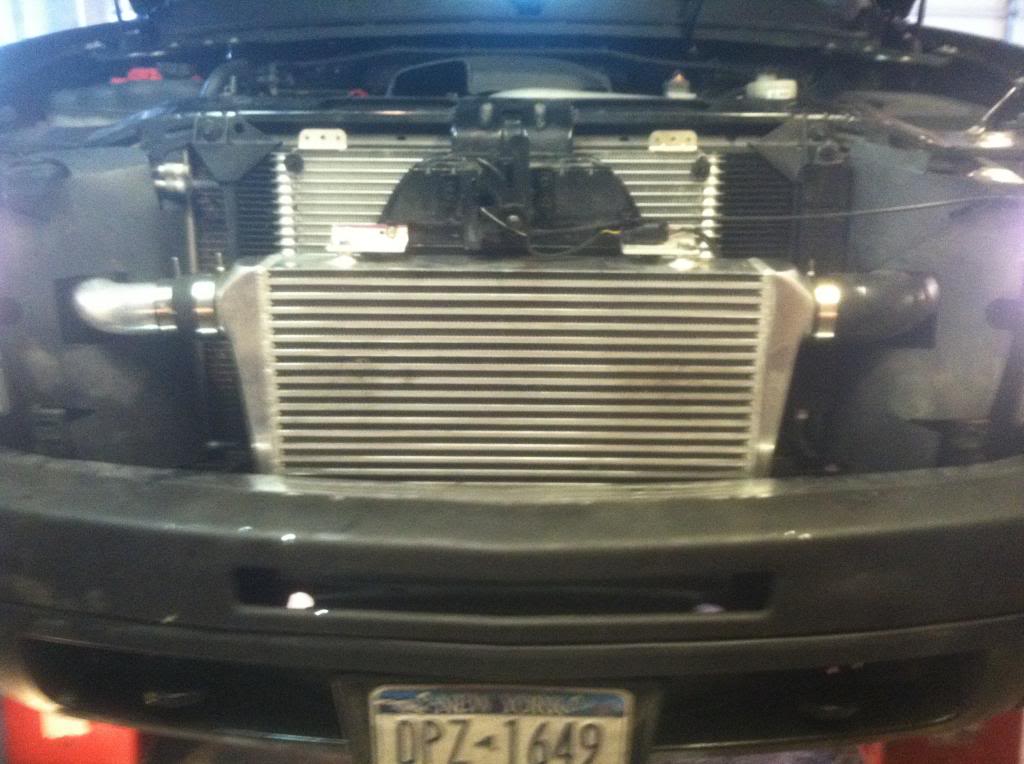
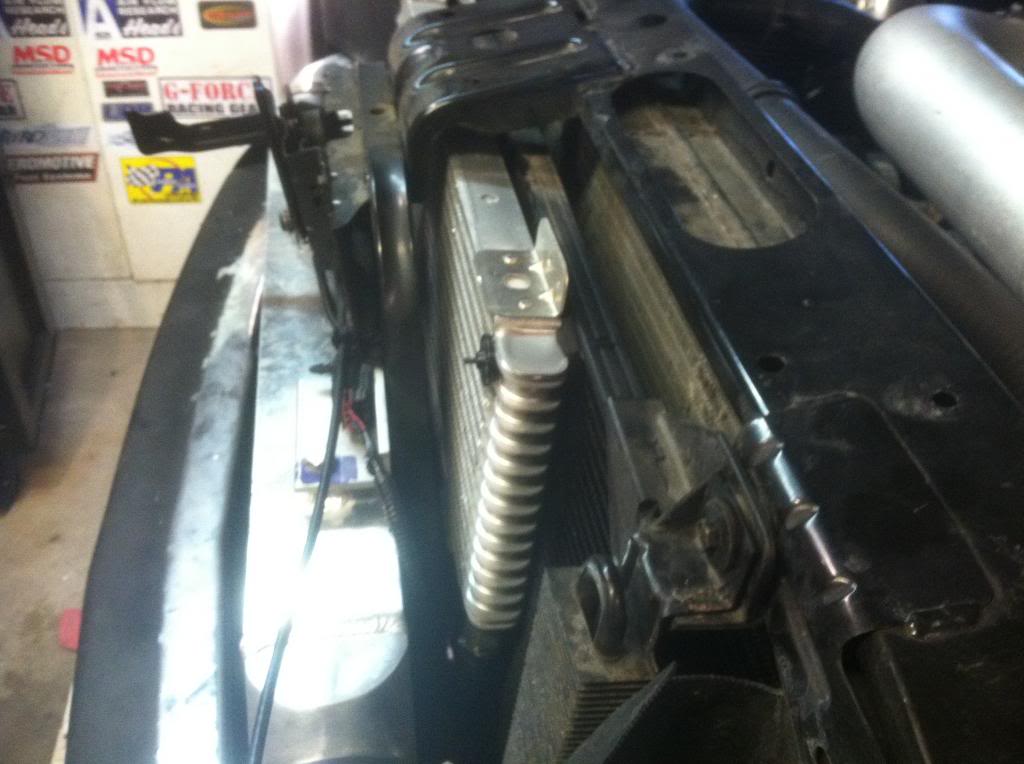
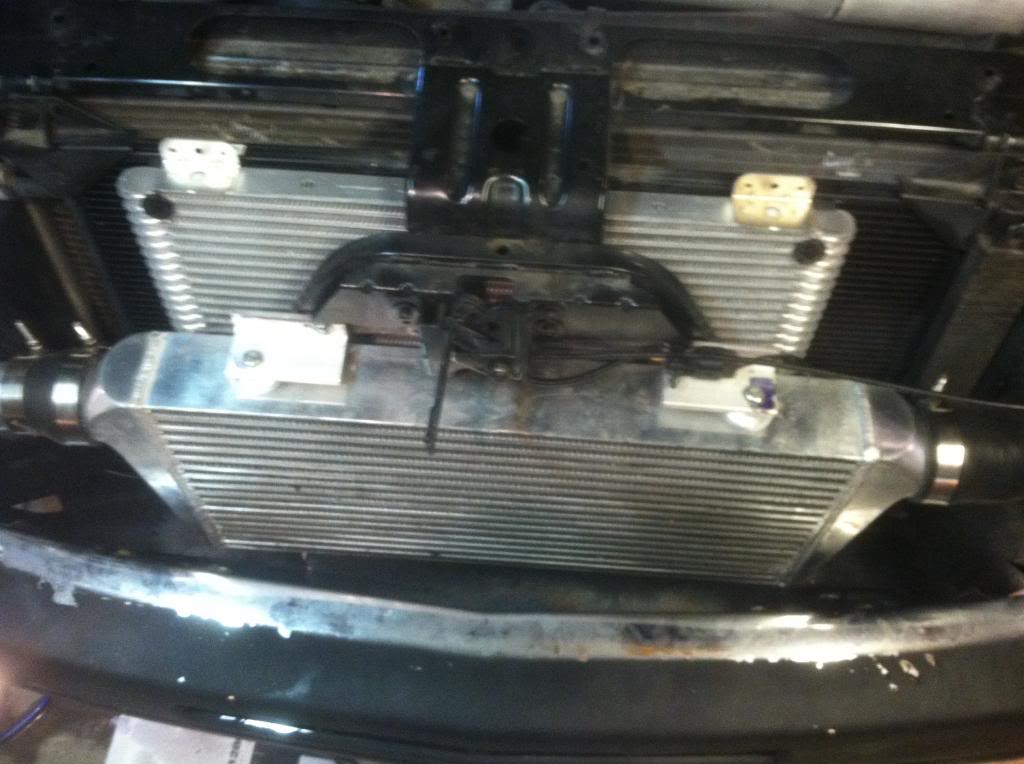
First part is complete, this will take some time but worth it, check the IC w a level and make sure the grill brackets wont hit the fins.
This is what I did when installing my turbo kit from Rick. Follow at your own risk and ask as many questions as you want. Hopefully anyone buying a kit can use this to answer questions and ease the install before making new threads and searching through other builds.
Here is my first thread when I bought the kit. A lot of n00b questions were answered here.
https://www.performancetrucks.net/fo...tricks-501958/
New the fun part before opening anything, soak every exhaust bolt that you will remove with PB Blast or Liquid Wrench. ( pass manifold, oil fill tube into the block, y pipe, mid pipe, all the rubber exhaust hangers )
The kit was shipped very nicely packaged and safe. heavy duty boxes and tons of bubble wrap.
What I did first was mount the intercooler. Remove the top plastic radiator cover and front grill. be careful with the little tabs holding the grill, use a needle nose.
unbolt the stock trans cooler and let it hang there. Or better yet remove it and replace w a big cooler. I left mine on because I did not have my tru cool yet. remove the brace that the cooler was bolted to. Look at the sensor on the pass side ( empty bolt hole ), move this sensor from the front of that brace where the hole is to the outside as shown in pic.
Cut these tabs off the bumper to fit the intercooler. 1st pic is the driver side, 2nd pic is the pass side
See the bolt and holding the powersteering cooler on the front bracket. remove that and cut the front part of the bracket off.
use a self taping screw into the vertical brace to hold the cooler. Also move the wire to the back side of the brace.
pass side ear to cut off. Also notice the wire, move this sensor on the vertical bar of the brace so the IC mounts flush to the front of the Bracket.
start fitment of IC. I used painters tape to hold on card board on the front and back when handling it to avoid messing up the fins. I snugged the brackets to the IC to mark the holes to drill. I mounted the bottoms first.
Here is a zoomed in pic of what I did. reem the holes a bit to slide the IC to make fine adjustments.
Snug the bottom bolts into the ic.
Mark and drill the top holes.
Tighten the mounting brackets and bolts. Do no over tighten though. After mine was bolted up, I tugged on the IC and it didn't move. I removed the card board and zip tied the cooler back.
I would again recommend to upgrade the cooler now, its like 60 bucks and you already have everything out of the way. I later put the tru cool behind the IC and in front of the radiator. I did this to months after the turbo install but here are pics.
First part is complete, this will take some time but worth it, check the IC w a level and make sure the grill brackets wont hit the fins.
Aug 19, 2013 | 09:21 PM
#2

Thanks for posting this. It is nice to see how the intercooler mounts. I'm about to do the 40k in the next few months and I want to go ahead and put it out of the way. How are those plastic mounts working for you?
 Aug 19, 2013 | 11:05 PM
#4
Now start taking air box/intake tube off and the stock exhaust off. I started from the tailpipe and worked my way forward. I jacked up the truck and undid the one exhaust band to remove the muffler and tail pipe as one unit. Remove the 02 sensors in the Y pipe and remove the y pipe from the manifolds. Then remove the inner fender liners from both wheel wells. The plastic little clips and a couple little bolts hold them in.
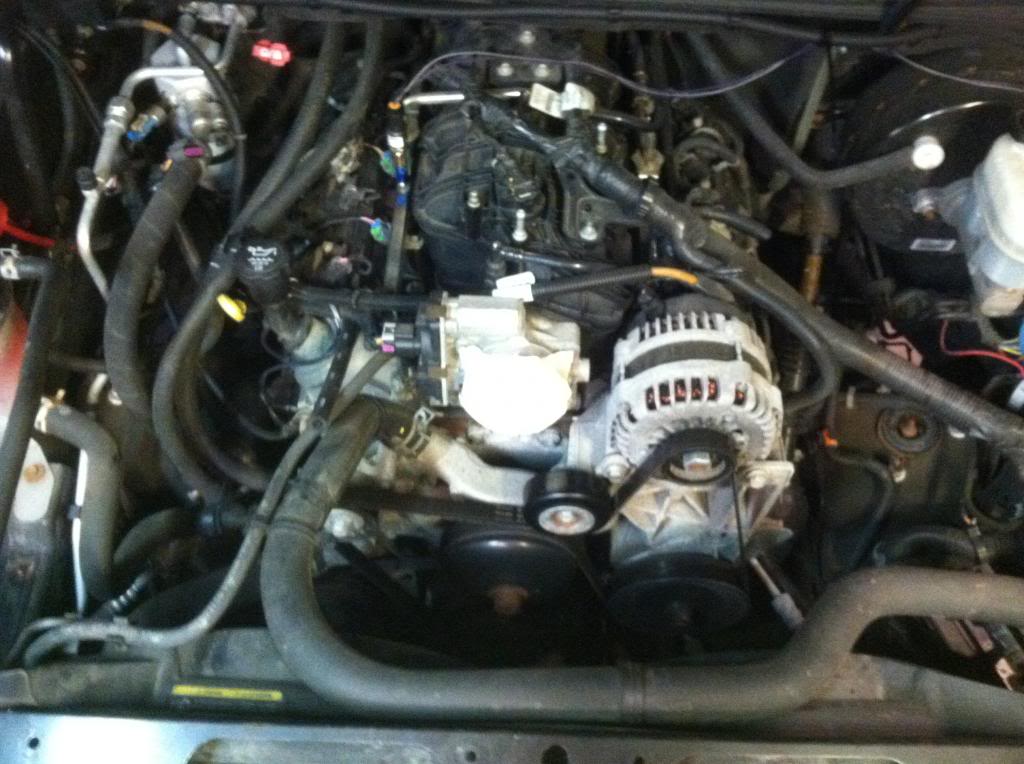
Intake tube and air box off
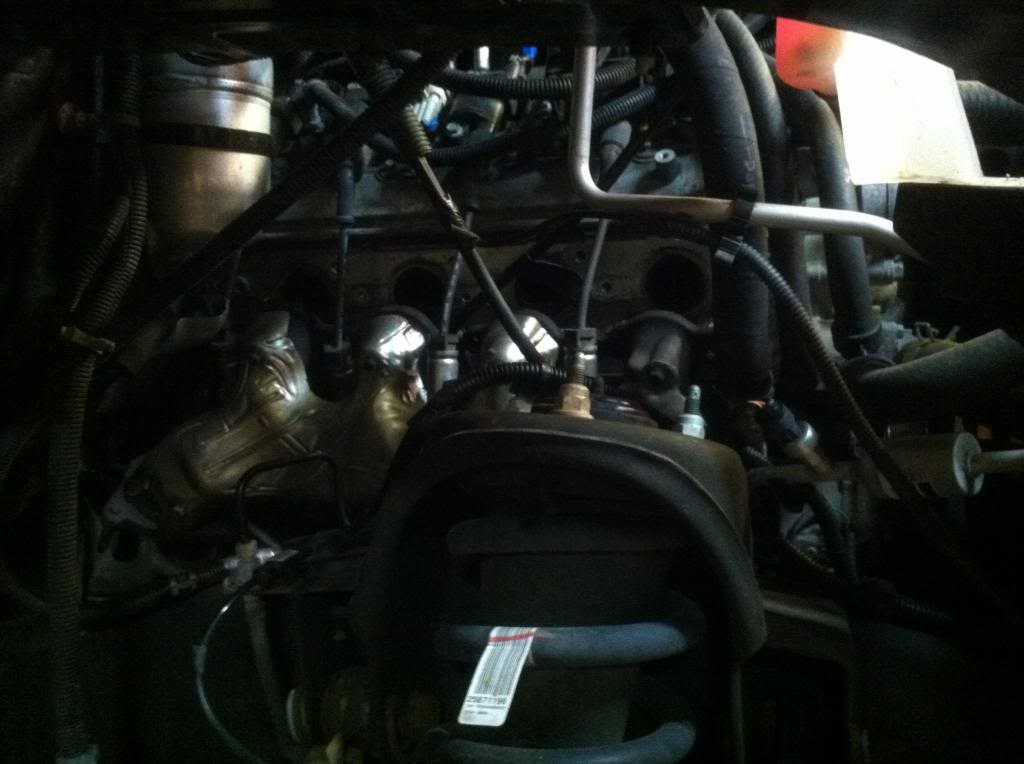
Passenger Side
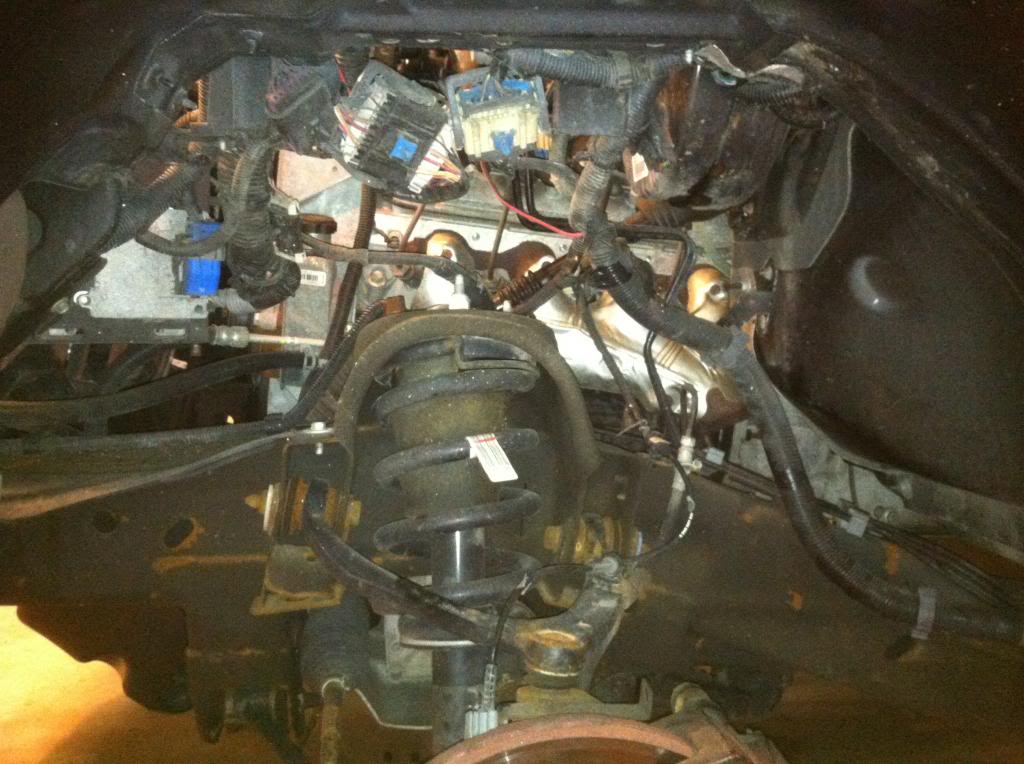
Here is the driverside
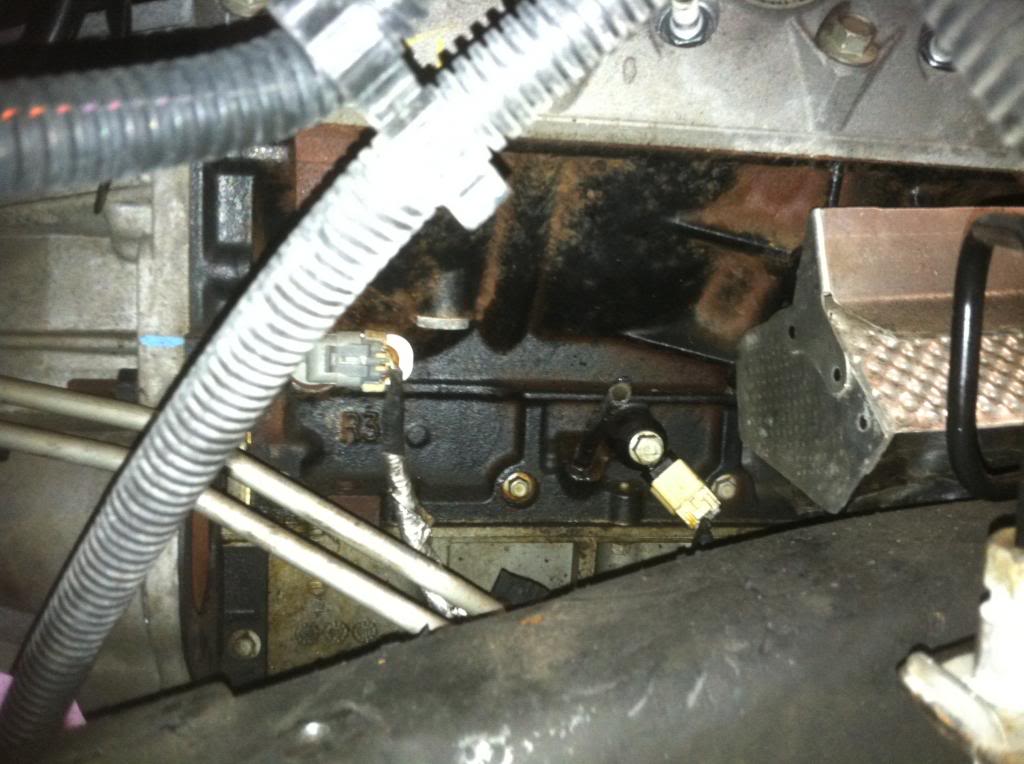
The passenger side has the oil tube, this has to be removed or cut to get the manifold off and the new log manifold on. Mine wouldn't budge outta the block so I cut it and used a piece of rubber hose as a coupler to hold it back together.
Here is the log wrapped and mounted. Notice I also used plug isolators on my new TR6 plugs gapped at 35 thou. I just recently decided to tighten my gap to 32 today because I am at 11psi.
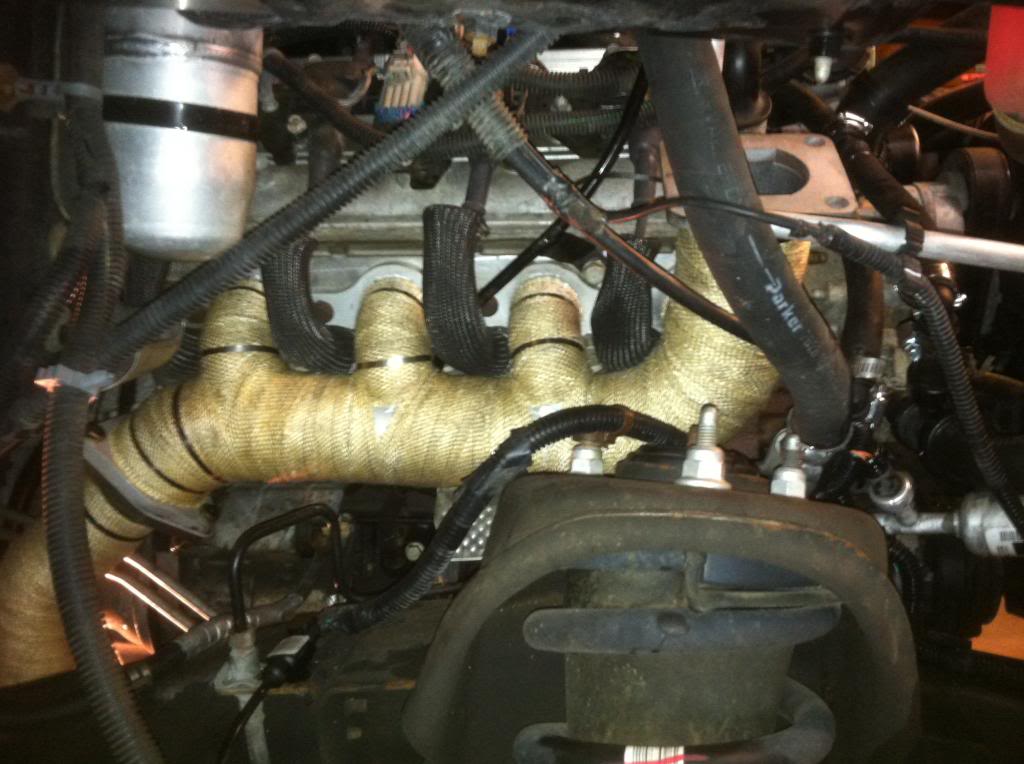
Here is the rubber section holding the oil tube on
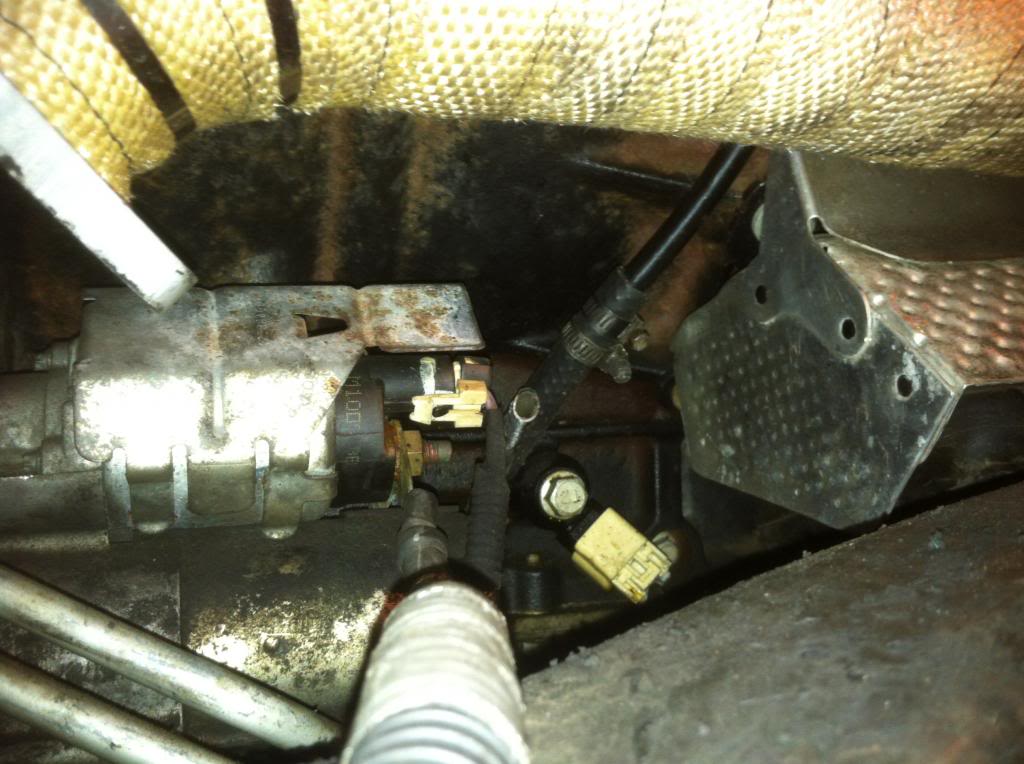
Now re route the water lines. I used 90* 5/8 heater hose elbows and a couple feet of heater hose. I ran the hoses up toward the intake and next to the fuel rail. What is not pictured is, I used wire loom to cover the hoses to keep the heat off the rail.
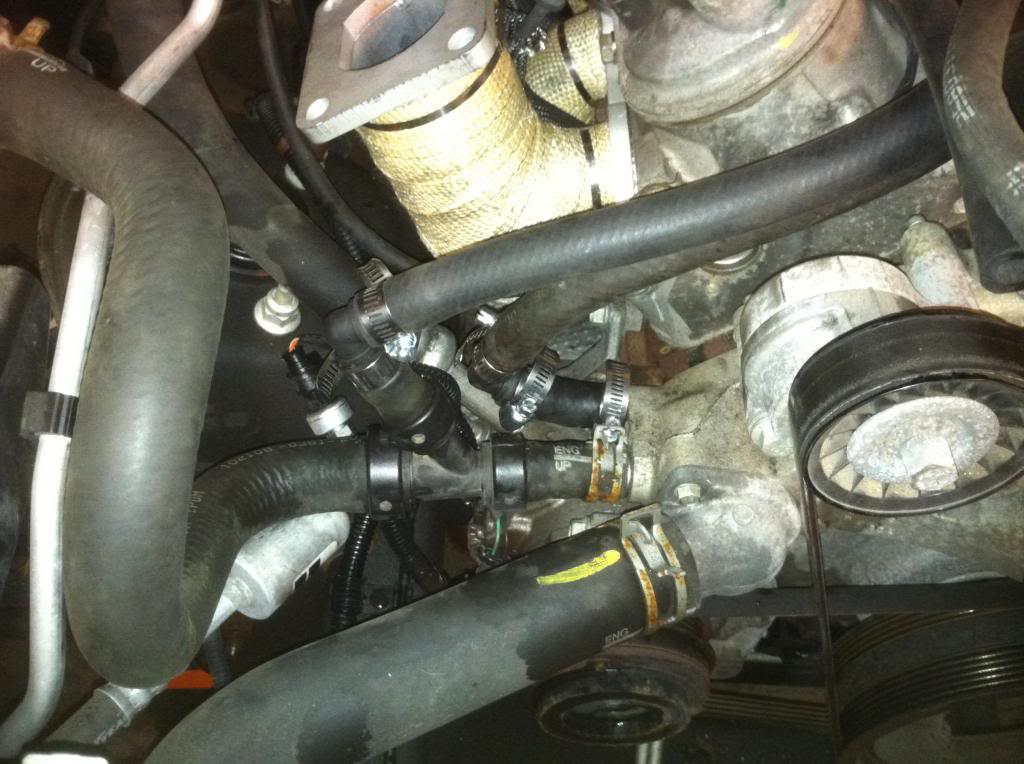
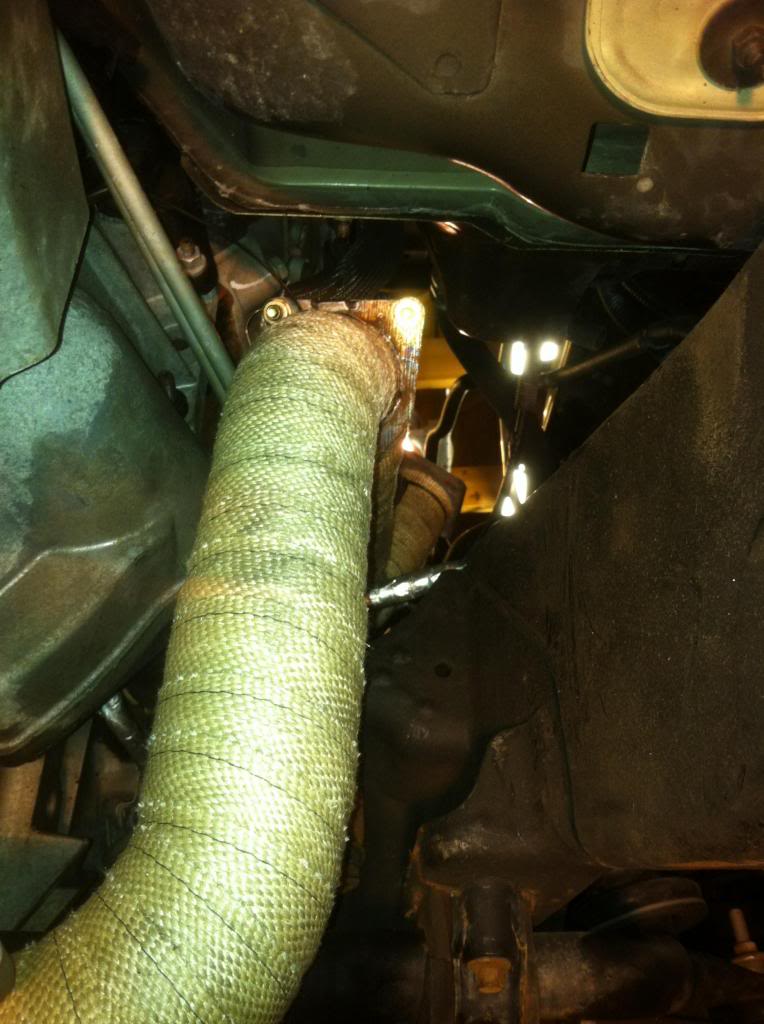
Toss up the cross over pipe with the 02s installed in it. I cleaned the driver side flange before and used red rtv on the supplied gaskets from Trick.
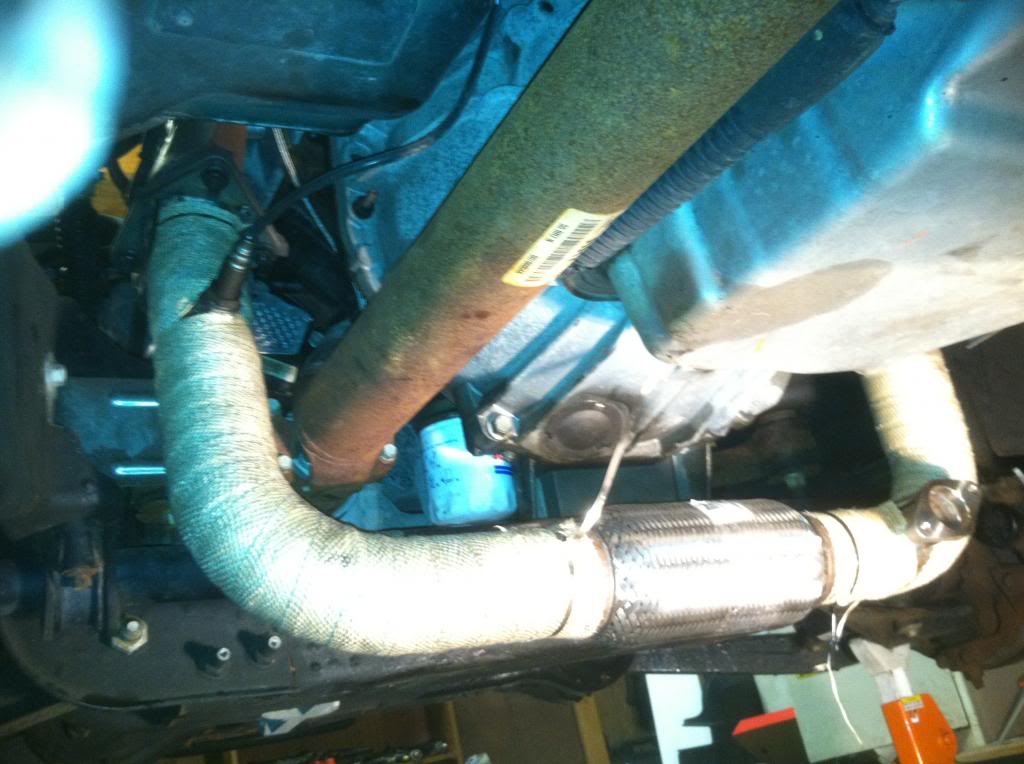
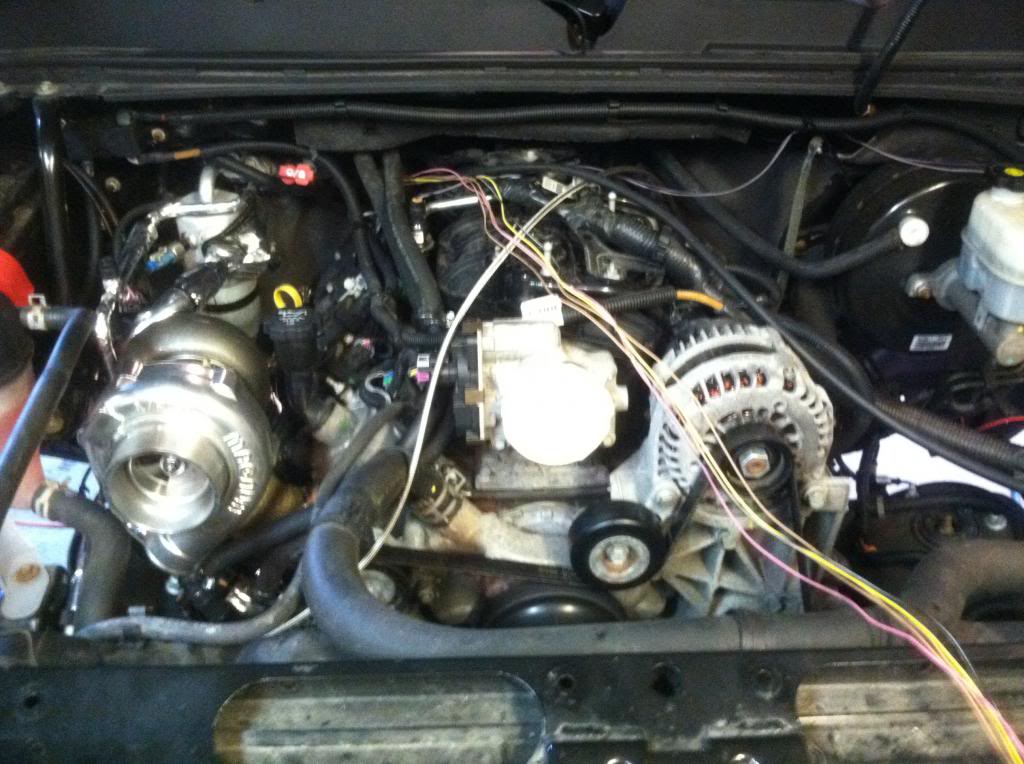
Dry mount the turbo w 2 bolts to start fitting other things like the feed line, drain line, ac hose. This is also where I pulled the MAF wires out of the original loom and over to the driver side. Also bend and wrap the AC line with heat protector.
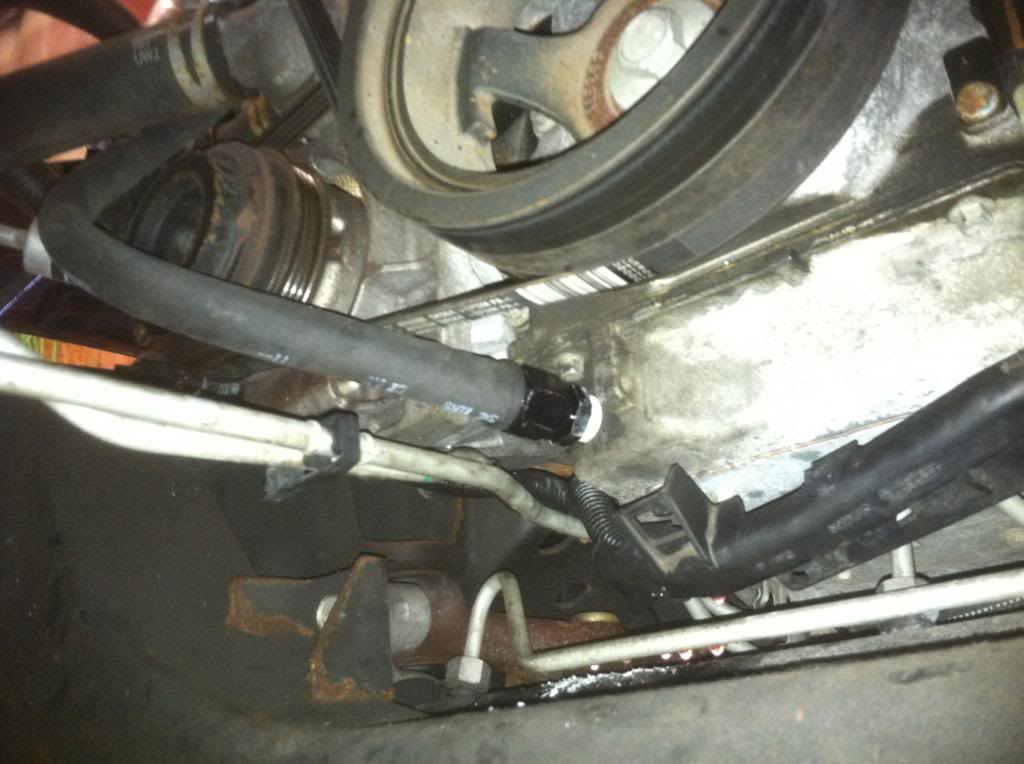
The feed line is pretty straight forward, use pipe dope on the NPT fittings and lay the line across the engine bay from the driver side to the passenger. The drain hose take a little time and patience. I put my drain on the front of the pan. Drill the hole, tap it, and clean it 3 times. lol. Take your time and make sure the tap has a lot of grease on it. I constantly threaded it in about 2 turns and removed the tap, cleaned it of all debris, put new grease on the tap and did it again until it was fully tapped. Mine was a little close to the belt, but it clears. I put zip ties on there just to make sure. Put the supplied fitting on the return side of the turbo and tighten it down, then tighten the drain hose on the drain fitting. Let the hose hang for now. I put red rtv on the turbo gasket and bolted it to the log. attach feed line to turbo.
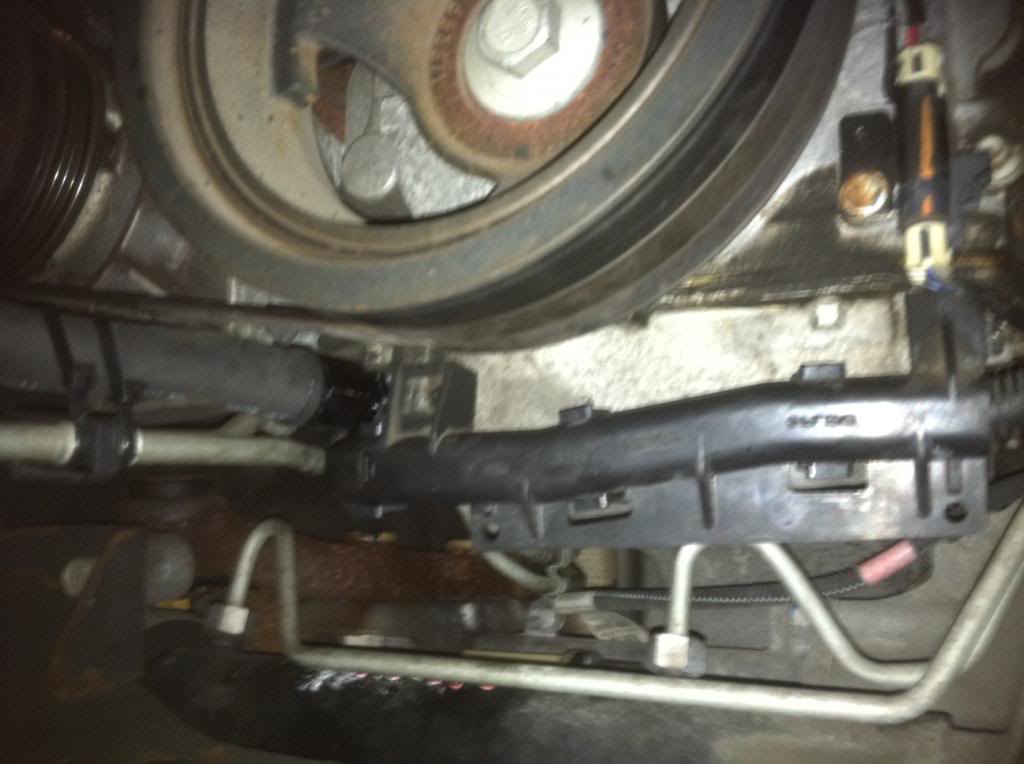
Put a small breather on the port on the pass side of the throttle body. This was bought at advance auto, 3/8 size rubber hose.
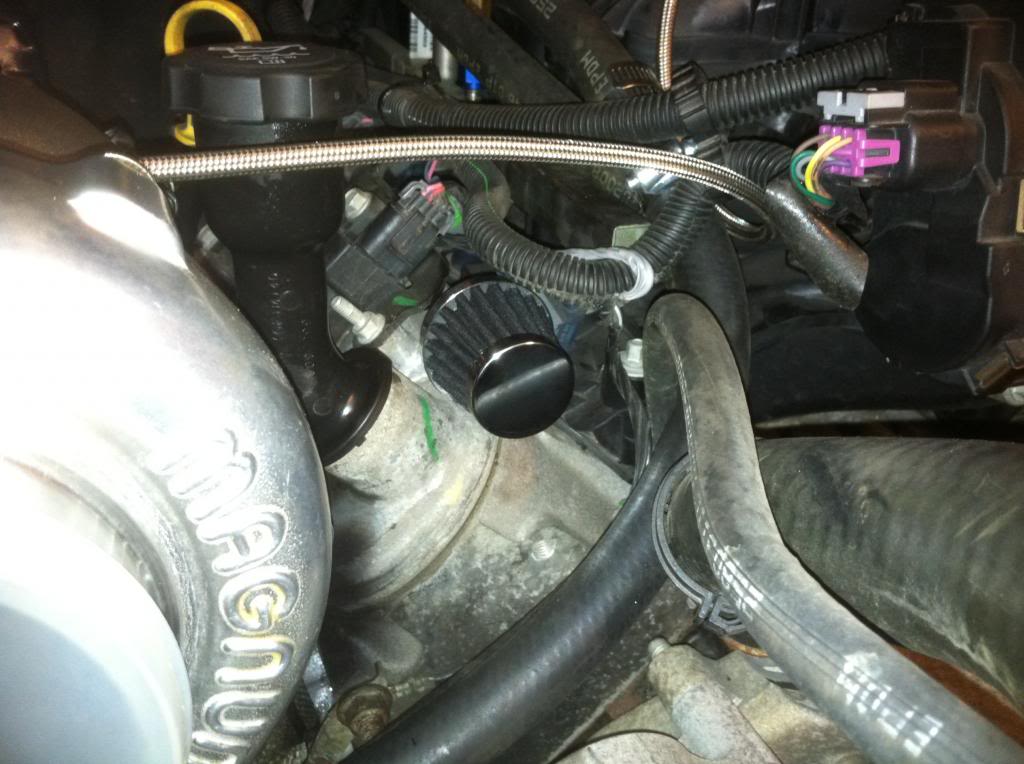
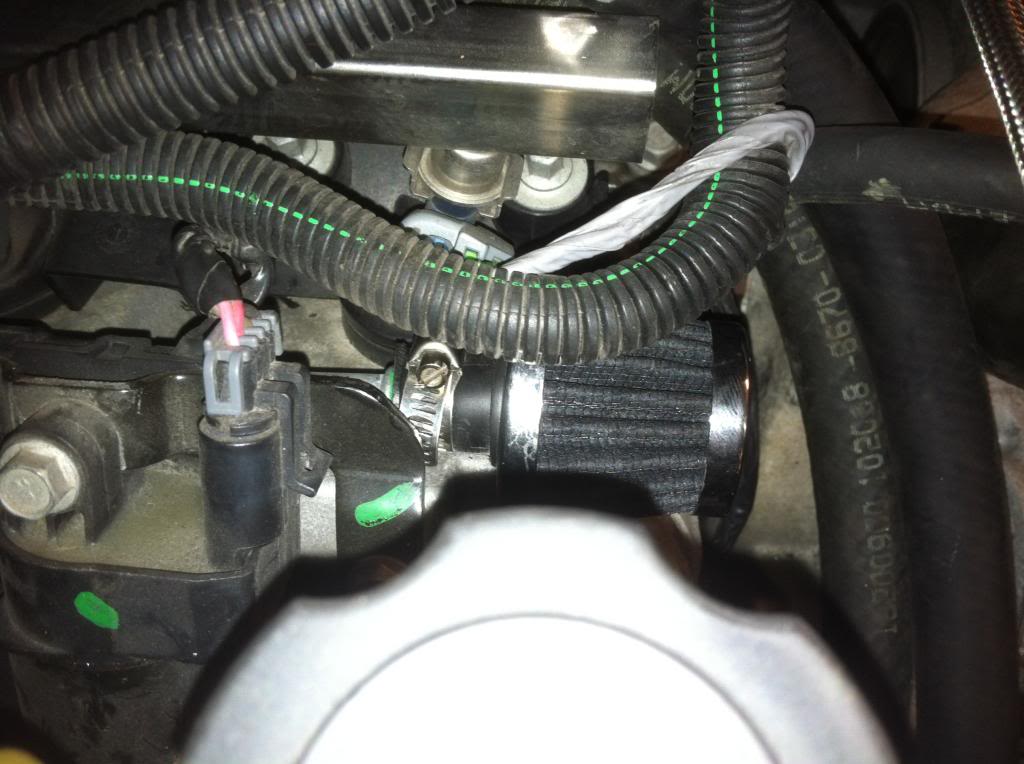
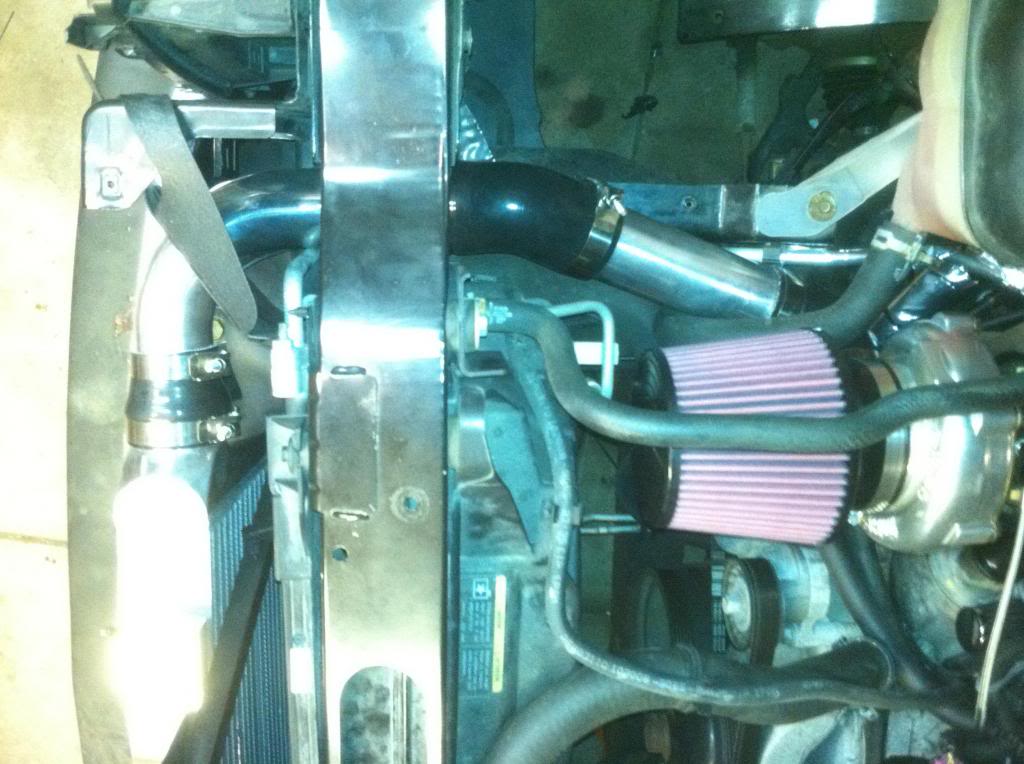
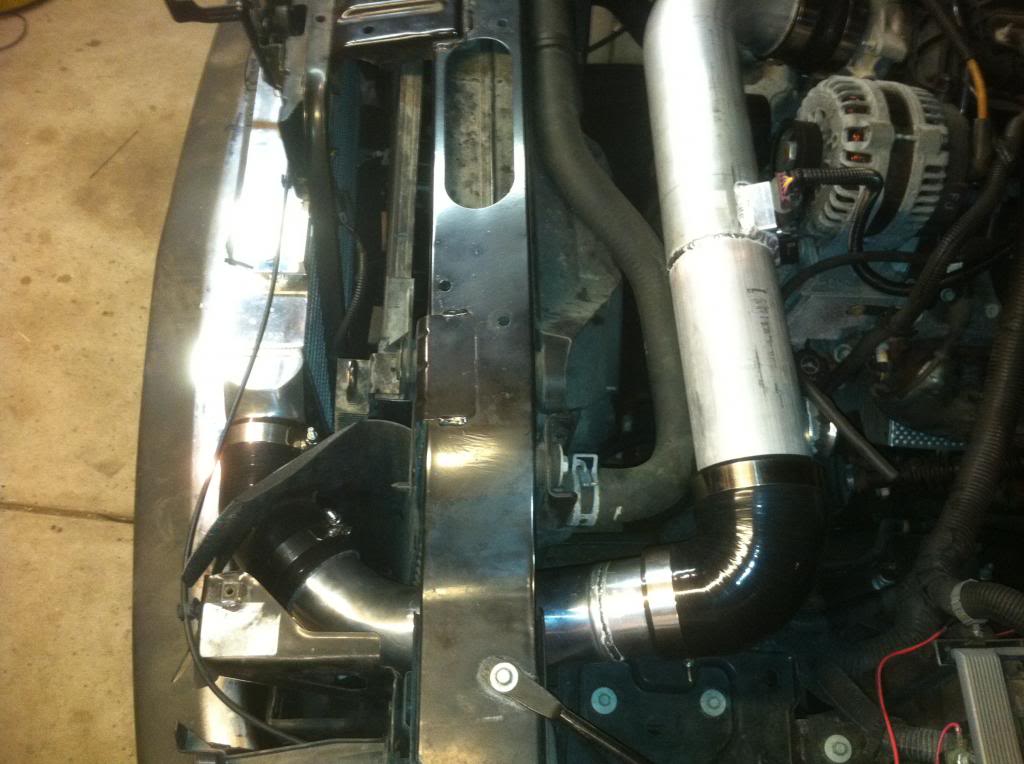
Now start routing your charge pipes from the turbo to the IC, and IC to the Throttle body. And install the MAF and turbo filter.
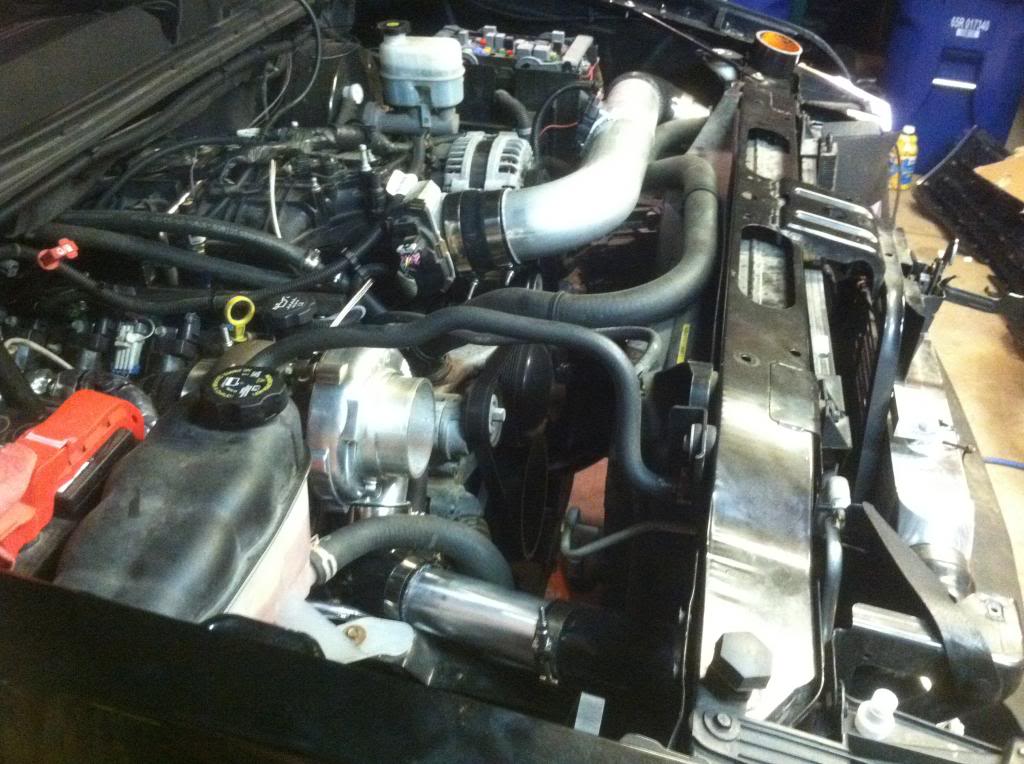
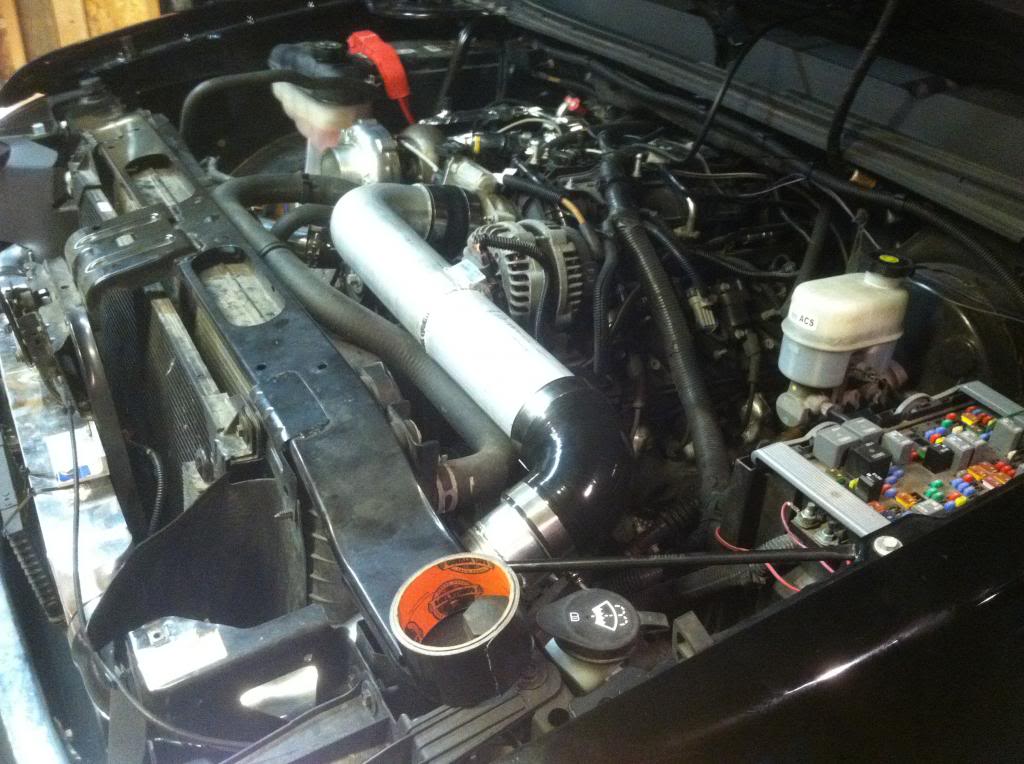
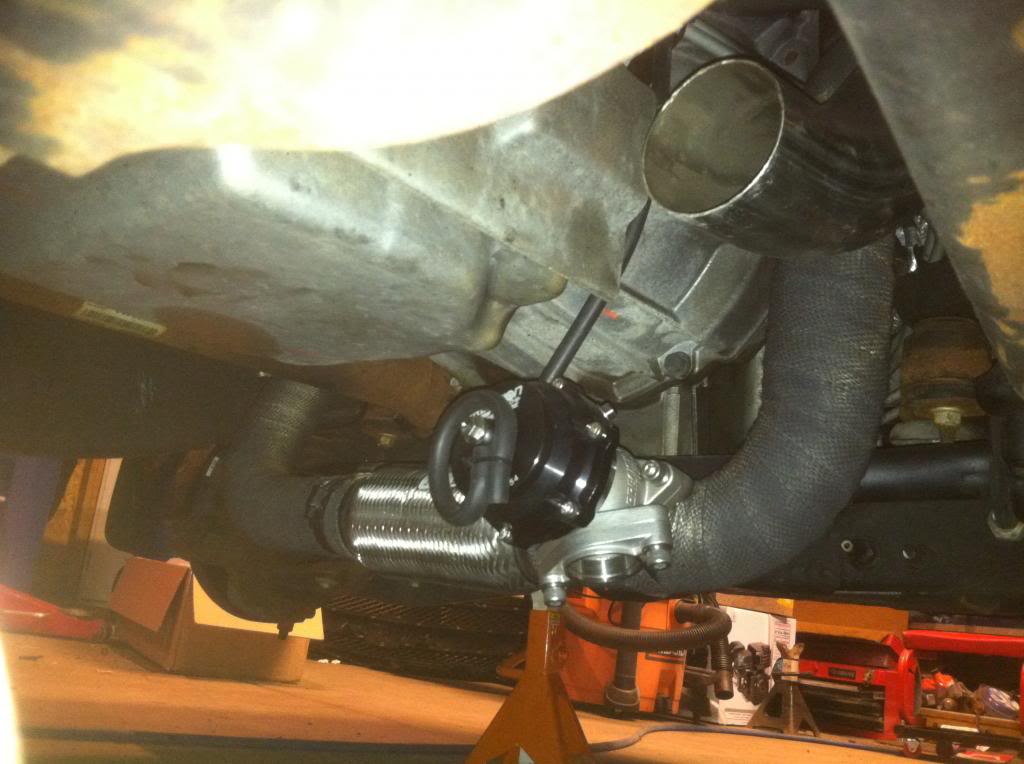
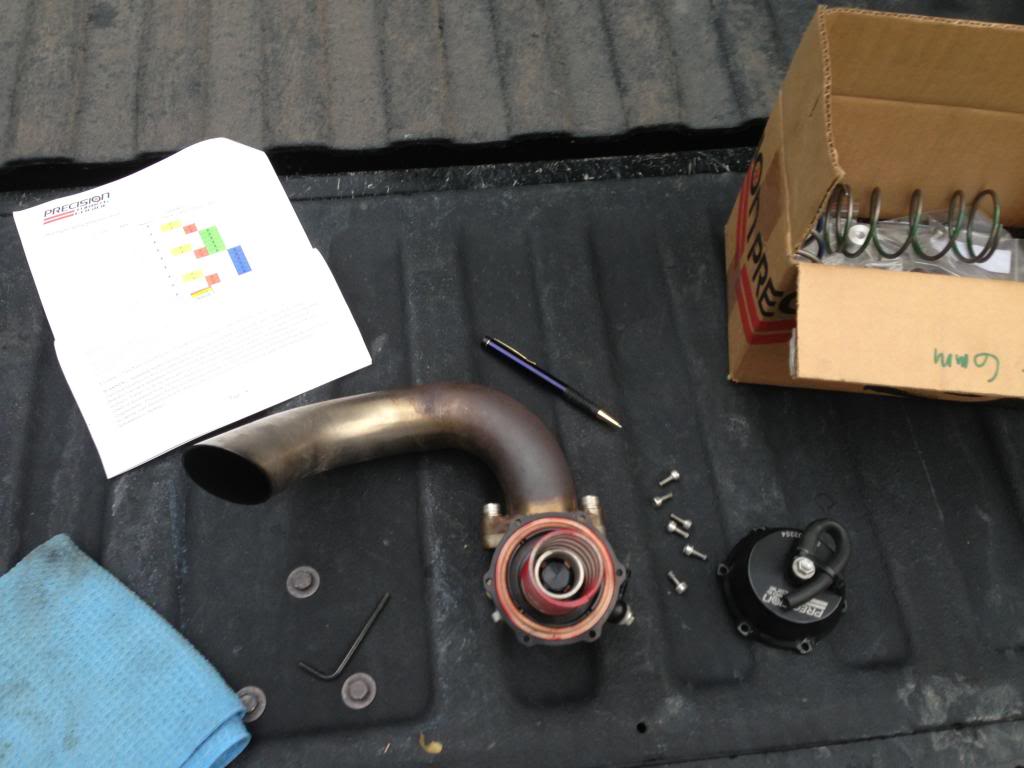
Toss on the down pipe and wastegate. I installed the 4lb spring first.
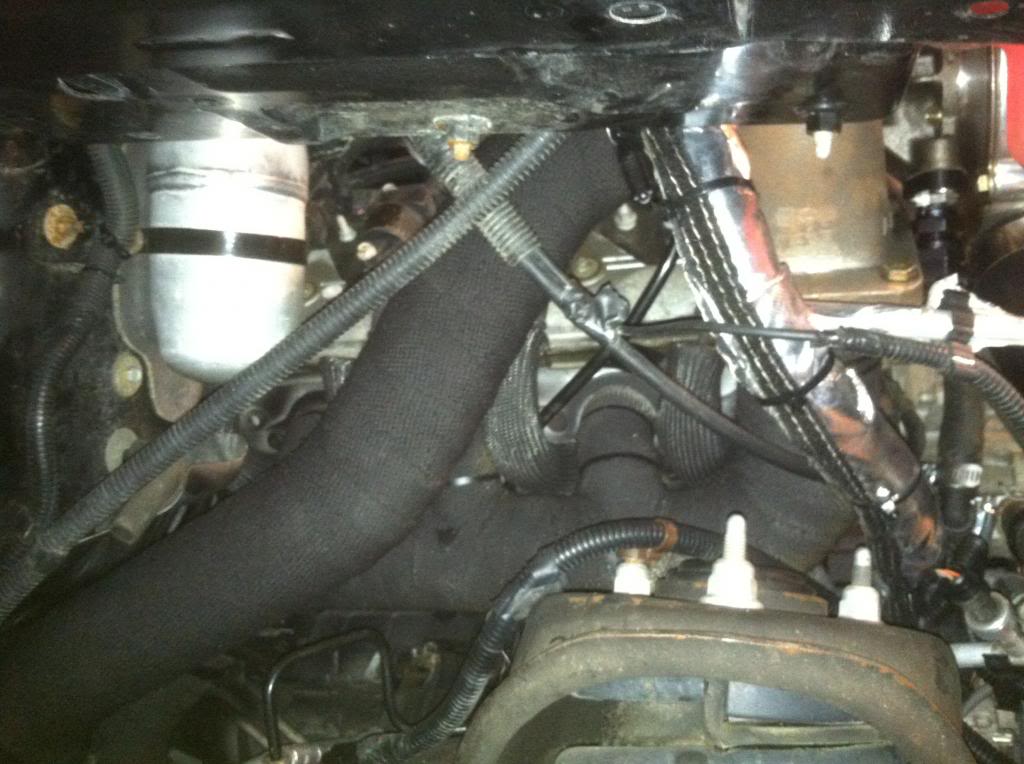
Intake tube and air box off
Passenger Side
Here is the driverside
The passenger side has the oil tube, this has to be removed or cut to get the manifold off and the new log manifold on. Mine wouldn't budge outta the block so I cut it and used a piece of rubber hose as a coupler to hold it back together.
Here is the log wrapped and mounted. Notice I also used plug isolators on my new TR6 plugs gapped at 35 thou. I just recently decided to tighten my gap to 32 today because I am at 11psi.
Here is the rubber section holding the oil tube on
Now re route the water lines. I used 90* 5/8 heater hose elbows and a couple feet of heater hose. I ran the hoses up toward the intake and next to the fuel rail. What is not pictured is, I used wire loom to cover the hoses to keep the heat off the rail.
Toss up the cross over pipe with the 02s installed in it. I cleaned the driver side flange before and used red rtv on the supplied gaskets from Trick.
Dry mount the turbo w 2 bolts to start fitting other things like the feed line, drain line, ac hose. This is also where I pulled the MAF wires out of the original loom and over to the driver side. Also bend and wrap the AC line with heat protector.
The feed line is pretty straight forward, use pipe dope on the NPT fittings and lay the line across the engine bay from the driver side to the passenger. The drain hose take a little time and patience. I put my drain on the front of the pan. Drill the hole, tap it, and clean it 3 times. lol. Take your time and make sure the tap has a lot of grease on it. I constantly threaded it in about 2 turns and removed the tap, cleaned it of all debris, put new grease on the tap and did it again until it was fully tapped. Mine was a little close to the belt, but it clears. I put zip ties on there just to make sure. Put the supplied fitting on the return side of the turbo and tighten it down, then tighten the drain hose on the drain fitting. Let the hose hang for now. I put red rtv on the turbo gasket and bolted it to the log. attach feed line to turbo.
Put a small breather on the port on the pass side of the throttle body. This was bought at advance auto, 3/8 size rubber hose.
Now start routing your charge pipes from the turbo to the IC, and IC to the Throttle body. And install the MAF and turbo filter.
Toss on the down pipe and wastegate. I installed the 4lb spring first.
Aug 19, 2013 | 11:26 PM
#5
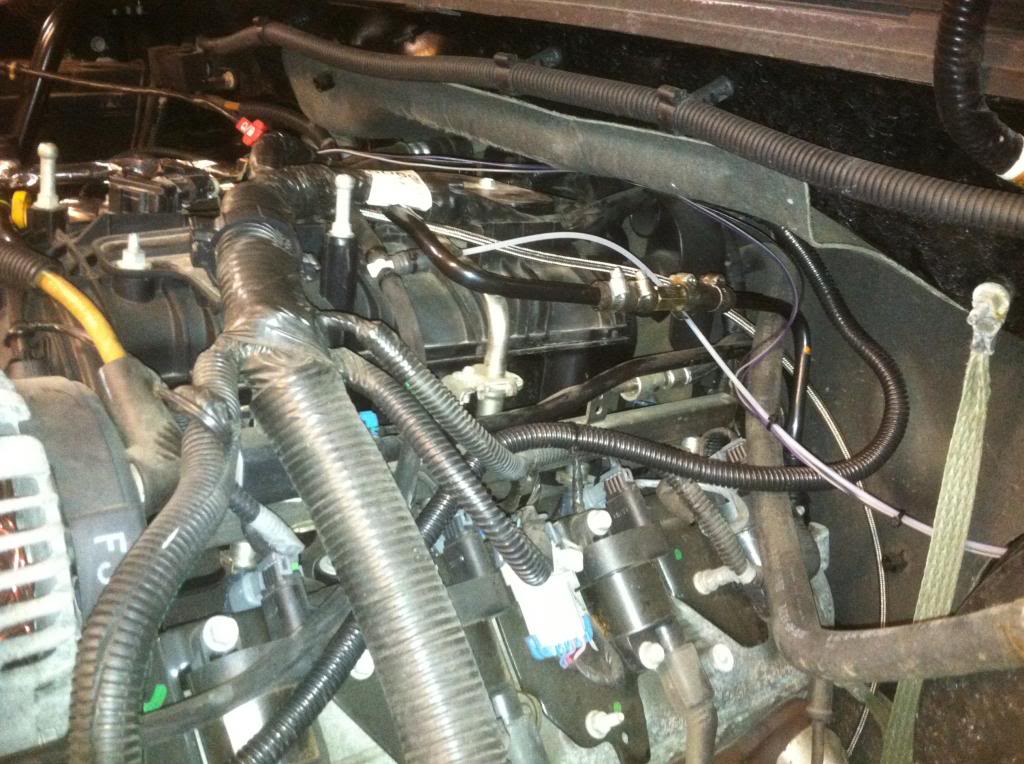
Now start running the hoses for the bov, wastegate, pcv system, boost gauge and intake port. On the passenger top side of the intake there is a port, twist the cap off and run a 6 in hose from there into a T fitting. set that t fitting ontop of the intake. Run one side of the T down to the wastegate and the other to another t fitting w a 2 inch piece of hose. With the 2nd t fitting run one side to the BOV and the other to the boost gauge. There all the vacuum and boost hoses are done. Now the PCV, run the line from the top of the intake into the side of the catch can with a one way valve. from the top of the can run it back into the driver side rear valve cover port. Here is the pic before the catch can but shows the one way valve. You can also see the little t fittings and boost line right on the intake.
The install is pretty much done now. Remove the coil or fuel pump fuse and crank it over letting oil pressure rise and prime the turbo. double check all the bolts and fittings and hoses. Toss a catch can under the drain hose from the turbo and fire the truck. let it run for 10-15 seconds and watch for oil to pour out of the drain hose into the catch can. shut the truck off and attach the drain hose to the fitting you put in the pan. Fire the truck again and climb around under it looking to leaks or problems. If its ok, I let mine get up to running temp at idle then changed the oil. I sprayed wd40 into the pan fitting to try to clean it as much as possible. re filled it with oil and fired it again. check coolant level, plug wires, vacuum hoses, air leaks in the pipes, dp to turbo seal with the v band... just give everything a look over.
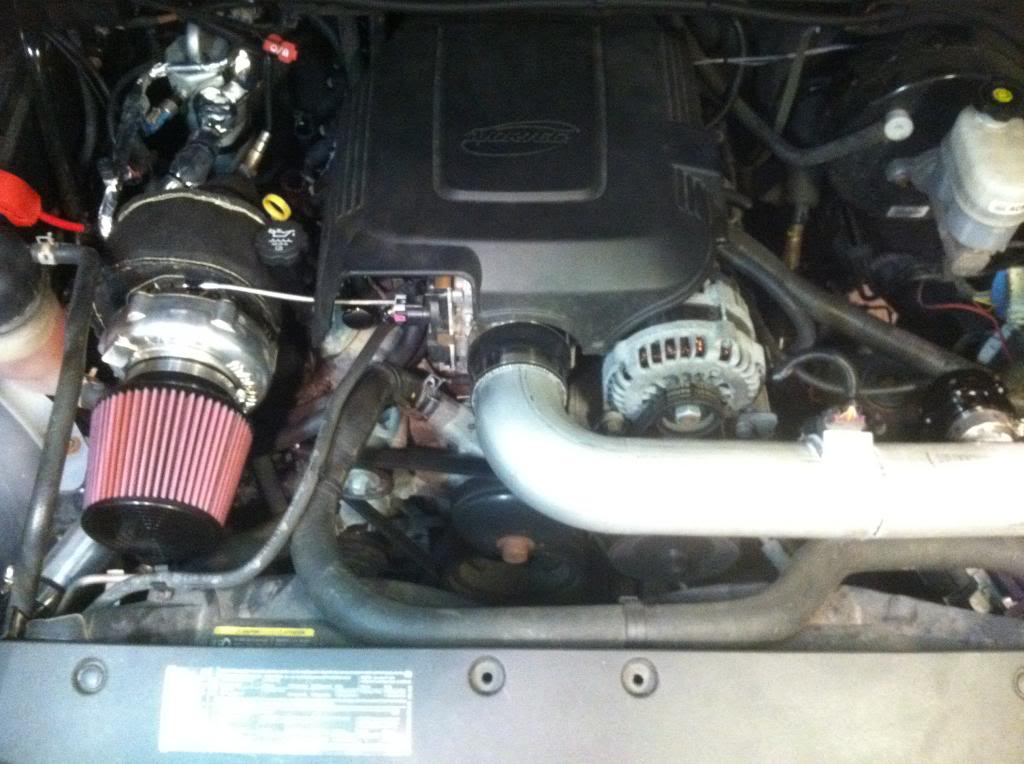
It should look something like this
Then put this on

and this
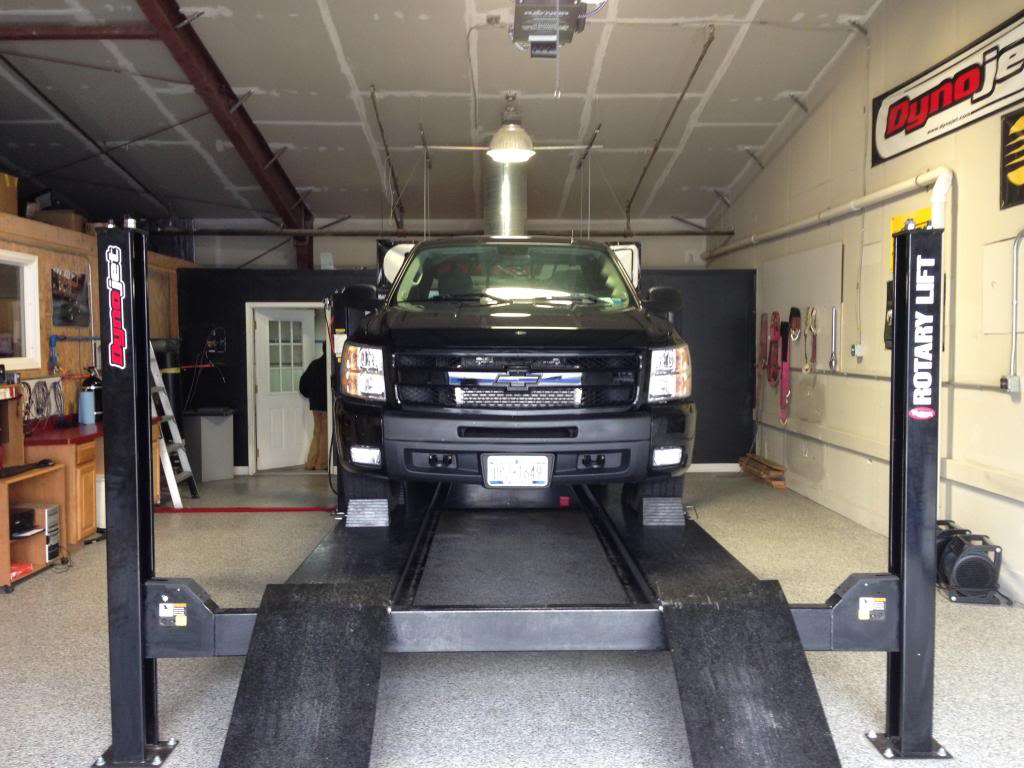
go here for a tune
then back home to change these
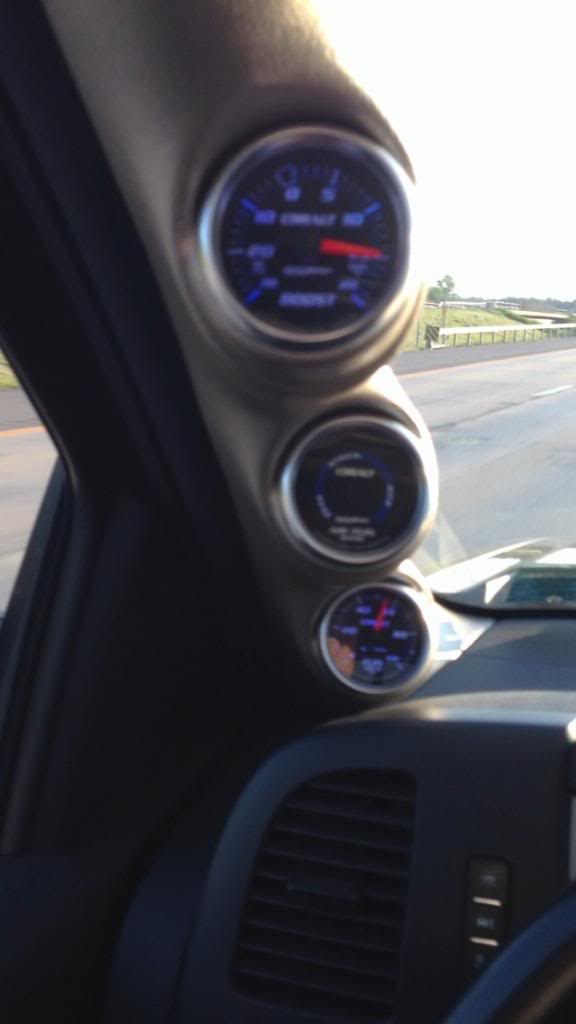
finally!!!
I hope you guys can read this and help yourselves with the installs. Mine took me a weekend. If Im missing anything or you guys want more pics let me know of what because I probably have them on my other phone.
The install is pretty much done now. Remove the coil or fuel pump fuse and crank it over letting oil pressure rise and prime the turbo. double check all the bolts and fittings and hoses. Toss a catch can under the drain hose from the turbo and fire the truck. let it run for 10-15 seconds and watch for oil to pour out of the drain hose into the catch can. shut the truck off and attach the drain hose to the fitting you put in the pan. Fire the truck again and climb around under it looking to leaks or problems. If its ok, I let mine get up to running temp at idle then changed the oil. I sprayed wd40 into the pan fitting to try to clean it as much as possible. re filled it with oil and fired it again. check coolant level, plug wires, vacuum hoses, air leaks in the pipes, dp to turbo seal with the v band... just give everything a look over.
It should look something like this
Then put this on
and this
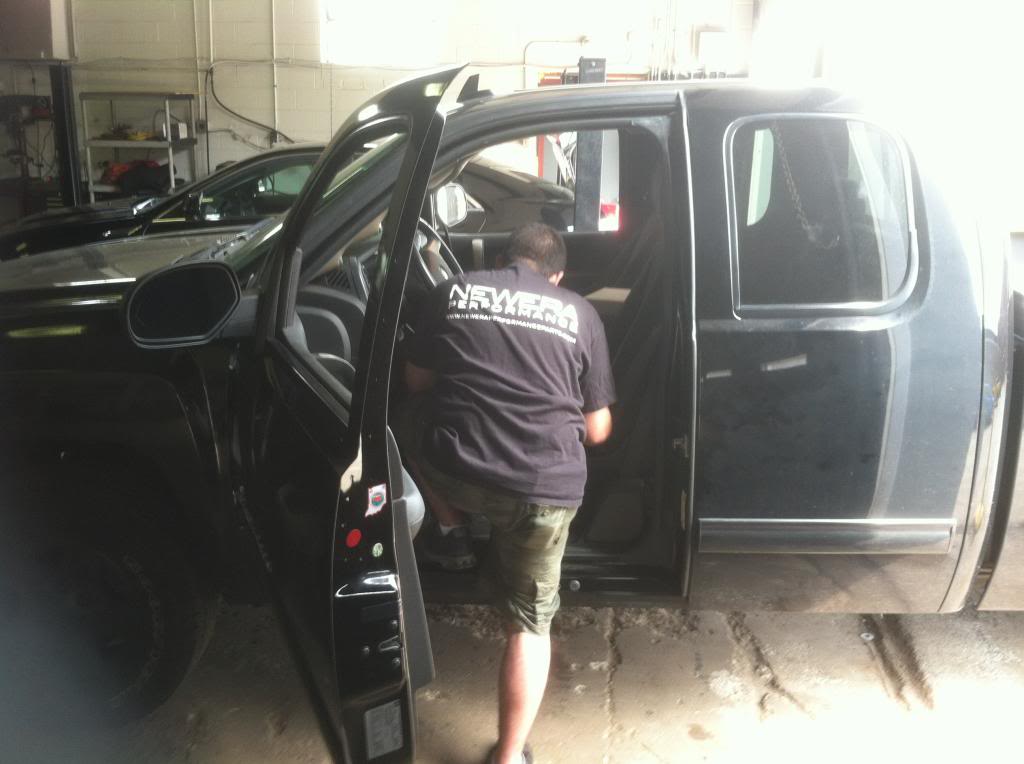
go here for a tune
then back home to change these
finally!!!
I hope you guys can read this and help yourselves with the installs. Mine took me a weekend. If Im missing anything or you guys want more pics let me know of what because I probably have them on my other phone.
Last edited by Choda; Aug 19, 2013 at 11:32 PM.



Trending Topics
 Aug 21, 2013 | 09:45 PM
#9
I just turned it up to 11 psi. Seems to be ok but I am going to tighten the gap on the plugs from 35 to 32. While I'm there prolly some new wires.
That 15 psi was a 100 mph pull w the cutout open. It kept building boost the longer I stayed in it. I had mike tune it to 10psi. I went up one more and gonna leave it there until I do the Stage III build. Stay tuned.
Next month I'll re dyno and get a good et for how it sits now
That 15 psi was a 100 mph pull w the cutout open. It kept building boost the longer I stayed in it. I had mike tune it to 10psi. I went up one more and gonna leave it there until I do the Stage III build. Stay tuned.
Next month I'll re dyno and get a good et for how it sits now
Last edited by Choda; Nov 5, 2013 at 08:52 PM.