

Work in progress
 Dec 11, 2014 | 10:27 AM
#31

Thread Starter
On The Tree
Joined: Mar 2013
Posts: 116
Likes: 0
From: Lincoln, NE
Hahaha!
Honestly I didn't measure before I started. The bars were cranked up I'm sure because it was pretty close to level.
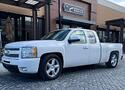
I'm thinking the front is 4.5-5 inches lower than stock. I get just a hair of tire to inner fender rub on a big dip. I can live with it.
The rear is the full 6" drop. I debated lifting it up a tad but I really like it the way it sits.
It looks odd when you look at the angles underneath but it drives pretty damn well. No shake or shimmy even in 4wd.
The passenger mud flap removed itself after playing in deep puddles on my way home one night so I removed the other to match.
Honestly I didn't measure before I started. The bars were cranked up I'm sure because it was pretty close to level.
I'm thinking the front is 4.5-5 inches lower than stock. I get just a hair of tire to inner fender rub on a big dip. I can live with it.
The rear is the full 6" drop. I debated lifting it up a tad but I really like it the way it sits.
It looks odd when you look at the angles underneath but it drives pretty damn well. No shake or shimmy even in 4wd.
The passenger mud flap removed itself after playing in deep puddles on my way home one night so I removed the other to match.
 Dec 22, 2014 | 01:21 PM
#34
Thread Starter
On The Tree
Joined: Mar 2013
Posts: 116
Likes: 0
From: Lincoln, NE
Just when you think it's all handled...parts are all bought...
The motor is in, the intake is on. What a beast this intake is.
The headers? Pacesetters...absolute junk. I know lots have had luck with these but for me the drivers side O2 sensor hits the floor. The matching y pipe doesn't fit over the headers without a bunch of screwing around and the headers are kind of going different directions. The passenger side seems to point down a hair and the driver side points up. So when you try to put the Y pipe on it Just doesn't seem right. Before I could get it all together the Y pipe was on the transmission pan...the drivers side header had to be flattened a bit. That was before I even had everything tight.I welded in a different bung and ground the coating off the drivers side and then had enough. Ordered a set of Kooks. Hoping they fit better!
The fuel rails on the Hi Ram are long enough that normal fittings won't clear the stock alternator the problem is even worse with the 250 amp unit I bought. So I have a $$$ low profile fitting on the way that will hopefully fit the stocker...probably won't use the high amp unit at all.
The harness on the driver side will have to be reworked. Nothing too drastic but someone might find that info helpful. The throttle cable isn't long enough so a Lokar cable is on the way. The cruise cable will also need reworked but that is a whole different problem.
The new radiator and electric fans are in... have a few wires to hook up for that harness but the parts all fit great. Also got the 40k cooler installed. I decided to not run the factory cooler at all. Our S10 is on its 3rd winter without the factory cooler inline and seems to be fine.
As if I'm not having enough fun already.... we decided to pick this up.
So now I really need to finish the truck because I need the garage space!
Dec 29, 2014 | 07:43 PM
#35
Thread Starter
On The Tree
Joined: Mar 2013
Posts: 116
Likes: 0
From: Lincoln, NE
Well the Malibu made it home in one piece. Paid for it...climbed in and drove it home 900 miles. Not sure I will ever drive it that far again. At least not without some upgrades like cruise and a better stereo!
AS for the truck...
Thanks to Three6GMC for the fitting info.
I ordered this fitting (90 Degree Non-Swivel AN Flare to AN O-Ring Boss ? Low Profile - CP Performance) from CP Performance. It is a perfect fit for the drivers side fuel rail on the Holley Hi Ram. I was also able to fit my large frame 240 amp alternator after trimming the plastic.
I still need to do some work to reroute the harness and figure out the repin for the blade type MAF.
Dec 30, 2014 | 05:30 PM
#36
Looking god! Do you have any pictures of how you mounted your MAP sensor to the back of the hi ram? I'm slowly figuring out the wiring, sensors, etc needed to finish my intake and TB swap and I'm not quite sure what to do about the map sensor yet. Also, for the IAT sensor did you just use a GM sensor screwed into the back of the hi ram and tap into the MAF's temperature wires? Thanks for the help and keep up the good work!
Dec 30, 2014 | 07:04 PM
#37
Thread Starter
On The Tree
Joined: Mar 2013
Posts: 116
Likes: 0
From: Lincoln, NE
Looking god! Do you have any pictures of how you mounted your MAP sensor to the back of the hi ram? I'm slowly figuring out the wiring, sensors, etc needed to finish my intake and TB swap and I'm not quite sure what to do about the map sensor yet. Also, for the IAT sensor did you just use a GM sensor screwed into the back of the hi ram and tap into the MAF's temperature wires? Thanks for the help and keep up the good work!
As for the IAT I am switching to the blade type MAF with a 4 inch tube. Looks like it's just a repin and changes to the tune. Not 100% on this yet. The stock maf and this blade maf have the IAT sensor built in. I don't think I need to change anything unless I go FI and Meth. I can alway break out the wiring and run a different IAT but for now I think this will work.
Dec 30, 2014 | 07:25 PM
#38
Thread Starter
On The Tree
Joined: Mar 2013
Posts: 116
Likes: 0
From: Lincoln, NE
Ok so today's progress... The belts referenced by the underdrive harmonic balancer fit fine even with the larger alternator. Front fuel rail crossover hose is on and alternator is setting in place.
I scratched my head for a minute over the throttle cable and cruise but I got creative and it looks like this will work.
I took the factory throttle cable bracket and cut the tabs off of it and redrilled to fit the intake. The angle was way better than the Holley POS bracket.
When I removed the factory throttle cable I didn't like the idea of using washers to mount the Lokar cable. My fix was to cut the factory cable end off and drill it out so the lokar cable would bolt thru it. So the lokar cable just snaps in place like the stock cable.
The cruise control cable also snapped into the bracket but the mounting point on the throttle body was the wrong size to fit the cruise cable. I took a grinder and cut the mount off and welded my stock piece in the same place. It looks like the cruise cable will fit perfect.
Hope the pics show it well. It actually turned out better than I thought it would.
Special thanks to Atomic for answering my throttle cable question. I'm trying to make good notes on this problem stuff so people might bug you less.
Last edited by Hulign; Dec 30, 2014 at 07:32 PM. Reason: props to atomic!
Dec 31, 2014 | 09:50 PM
#39
Thread Starter
On The Tree
Joined: Mar 2013
Posts: 116
Likes: 0
From: Lincoln, NE
Got the electric fans wired up all except the wires to the pcm. I did test the harness by grounding the wires and all works as it should.
All the hoses are on and my dumb *** forgot the plug on the passenger side head. So was a scramble to grab the one off the old motor.
Got the vacuum lines ran. Looks a little sad because I used brass fittings. Just couldn't find a vacuum block that would work the way I wanted it done.
Looking at my air filter setup...I need to stretch it over toward the original location a bit. Will be on the hunt tonight for some 4" tube.
Not much left to do until all that is left is the headers. I have no idea when they will show.
Getting impatient!
Jan 26, 2016 | 09:42 PM
#40
Thread Starter
On The Tree
Joined: Mar 2013
Posts: 116
Likes: 0
From: Lincoln, NE
So my wife lost her mind and decided to let me spend a few bucks on the truck.
I got ahold of Joe at Leftcoast32 and ordered a Maggie 2300 to go with my IW 8 rib setup I had already. I also went back to Joe for a different set of idlers and a matching pulley for the HD tensioner.
Also got a 1/2 spacer and injector spacers rolling from Super Street, an Alky Control setup, PRW waterpump, 5 inch intake tube, big Airaid filter,80# FIC injectors, a 1.5 gallon tank from Trick (used it for Maggie IC), a pair of aeroforce gauges, cubby mount from SoCal Diesel and a complete hydroboost setup.
In between the frustration of getting these parts in and assembled I also ended up adding a led lightbar, new headlights and turn signals.
It doesn't sound like much when you spell it out but it was.
So basically I bought most of these parts and then stared at them for a few months while I had this installed....SO while I was attempting to recover from the shoulder replacement, my wife decided I was being a wuss. She got tired of hearing me bitch about the parts collecting dust and said I should pull it in and install all that crap during Christmas break.
Since I don't like arguing with my wife, or being called a wuss by my wife I pulled it in and got to work.