

I hope I'm not late for work!
 Jun 3, 2014 | 06:23 PM
#381


The 700r4/4L60e is really the only one that requires any specialty "J" tools and even then, if you have a decent set of skills and an adequate toolbox there are ways around those specialty tools. The 4L80e is a snap, it's waaaay simpler than the 4L60e (one of the reasons it's more reliable than it's smaller sibling)..
If you are not having any weird issues with the transmission, like failure to shift or flaring etc., then you will most likely have no issues with the valve body and probably won't have to touch it. I elected to install a TRANSGO Shift kit for the 80e, it turns it into a beast, shortens shift times, ups pressures etc. The TRANSGO kit to be honest is one of the best rated kits for the 80e, but the last one I did, the instructions were a bit sketchy, that was a bunch of years ago.. I'm certain it's gotten better since then.
Seriously, get yourself a good manual, I recommend the ASTG manuals, they are reasonably priced and VERY VERY good manuals.
Here's what they look like

If you are starting with a transmission that has been previously been overhauled and upgraded, chances are your existing transmission may have some performance parts in it already, like upgraded sprags, billet shafts, and a transgo shift kit..
The 4L80e I built cost me around $620 for replacement parts and would hold an honest 700-750hp without upgrading any shafts. I upgraded the internals to KOLENE STEELS and ALTO RED Clutches/Frictions, there were a few other smaller parts like sprags etc. too. All the are internal parts of the transmission that can be easily upgraded just by parts swapping during the R&R of the clutches/steels.
Once you start getting into the level of HP that ATOMIC is running (and a few others on this board) things change a bit, but even then the parts are still readily available from a variety of retailers. Here's a few I used when I was shopping for parts:
- Sonnax
- 4L80E transmission parts 4L80E transmission kits
- 4L80E Performance Transmission from PATC ,4L80E
I'm not trying to preach here, just trying to share. I like tackling transmission rebuild, when the time comes for my project I will do it myself for sure ! Transmissions really are NOT all that much VOODOO as people make them out to be, the majority of the price tag on a 'performance transmission' is labor to actually complete the work. With the skills I see being displayed here in the various trucks on this board, I am confident there are quite a few people here that could successfully rebuild a transmission.
Most performance builders all follow the same routine/recipe they've found that works; they have a certain formula they install into each transmission and go on to the next one. Yes it will definitely take you (or me) longer to understand and execute the dimensions and instructions than someone who pumps out 4 or 5 of them a week, but it's not black magic if you have the right manual and attention to detail.
Jun 3, 2014 | 10:50 PM
#382

Thread Starter


Joined: Jan 2006
Posts: 16,282
Likes: 438
From: Huntsville, AL
I have thought about doing it myself, but its one of those things that would be a tough deal if I dont do it correctly. I hate pulling transmissions 
I finished wrapping everything today. Looks like I bought just enough to finish! Funny to think I bought 200ft and reused some of the old wrap haha
I reused some of the old wrap to put a layer on the crossover,

I then put another layer of the new stuff on top. So all pipes pre-turbo are double wrapped while the downpipe and dump tubes are single wrapped.
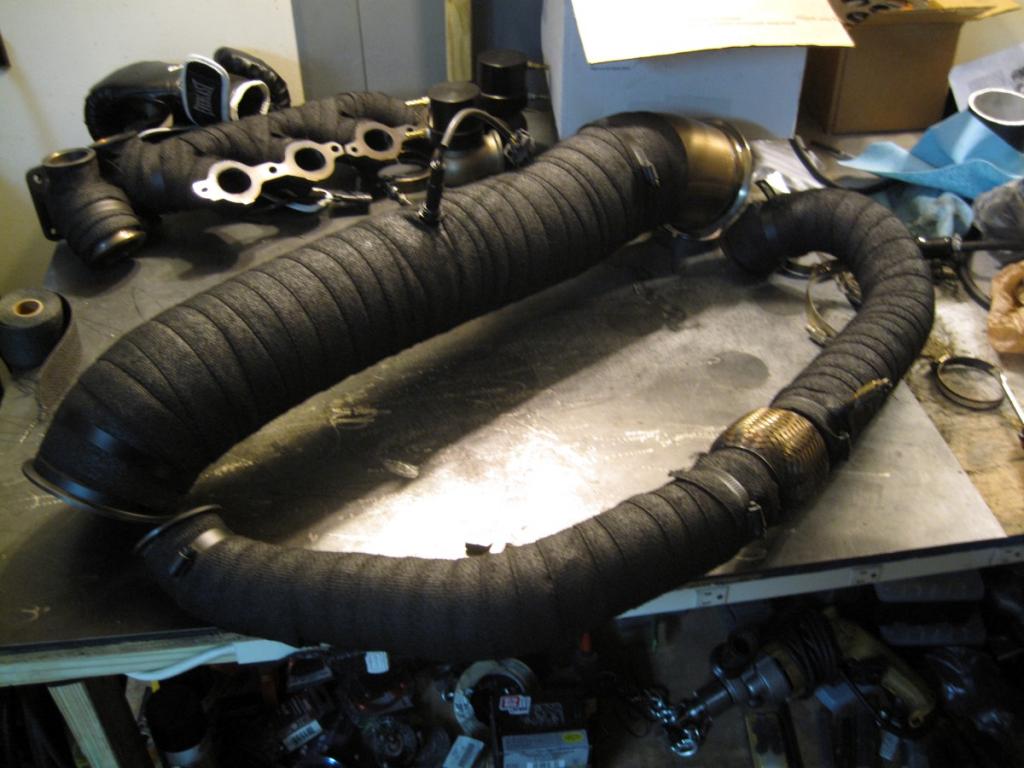
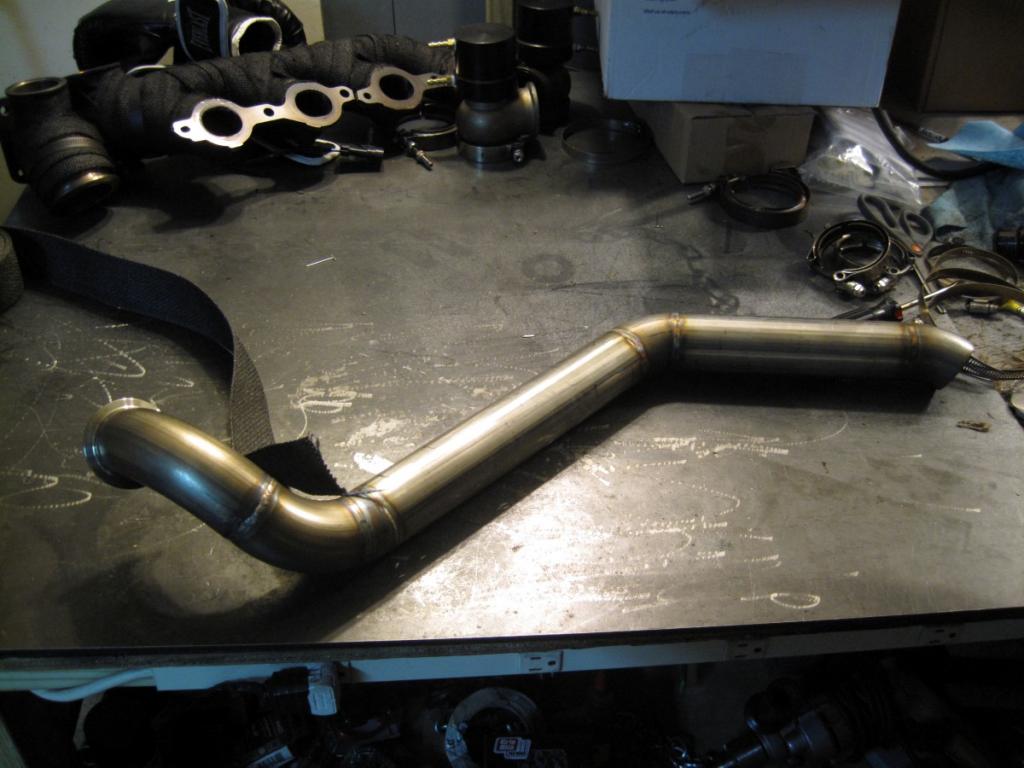
ALMOST a shame to cover them up...
But I digress,
All wrapping is complete, tomorrows project is the battery wiring. It would help if I havent worked 11 hours every day this week :/
I finished wrapping everything today. Looks like I bought just enough to finish! Funny to think I bought 200ft and reused some of the old wrap haha
I reused some of the old wrap to put a layer on the crossover,

I then put another layer of the new stuff on top. So all pipes pre-turbo are double wrapped while the downpipe and dump tubes are single wrapped.


ALMOST a shame to cover them up...

But I digress,

All wrapping is complete, tomorrows project is the battery wiring. It would help if I havent worked 11 hours every day this week :/
Jun 4, 2014 | 07:24 AM
#383
TECH Fanatic
iTrader: (38)
Joined: Oct 2005
Posts: 1,299
Likes: 2
From: cedar bluff,alabama
The new log looks awesome!! I have been in my 80e 3 times and I still cant figure out why I'm having low line pressure , The amount of money I have spent with WIT transmission redoing my f-up I could have paid a pro to build it right the first time. What's sad is I started with a brand new 01 model 80e and I have yet to put 6000 miles on it.
Jun 5, 2014 | 09:06 AM
#384
GFYS and STFU
iTrader: (8)
Joined: Jan 2007
Posts: 13,870
Likes: 4
From: Here and sometimes there too.
I got all super excited and double and triple wrapped my hot parts and then upon re-installation realized that adding that much wrap to some of the tight fitting pipes became an issue. It didn't like it very much! :/
You wrapped them up the same way I did, gold underneath, white on top followed by a heavy dose of Thermal spray-on gunk.
You wrapped them up the same way I did, gold underneath, white on top followed by a heavy dose of Thermal spray-on gunk.
 Jun 5, 2014 | 12:15 PM
#386
Thread Starter
Joined: Jan 2006
Posts: 16,282
Likes: 438
From: Huntsville, AL
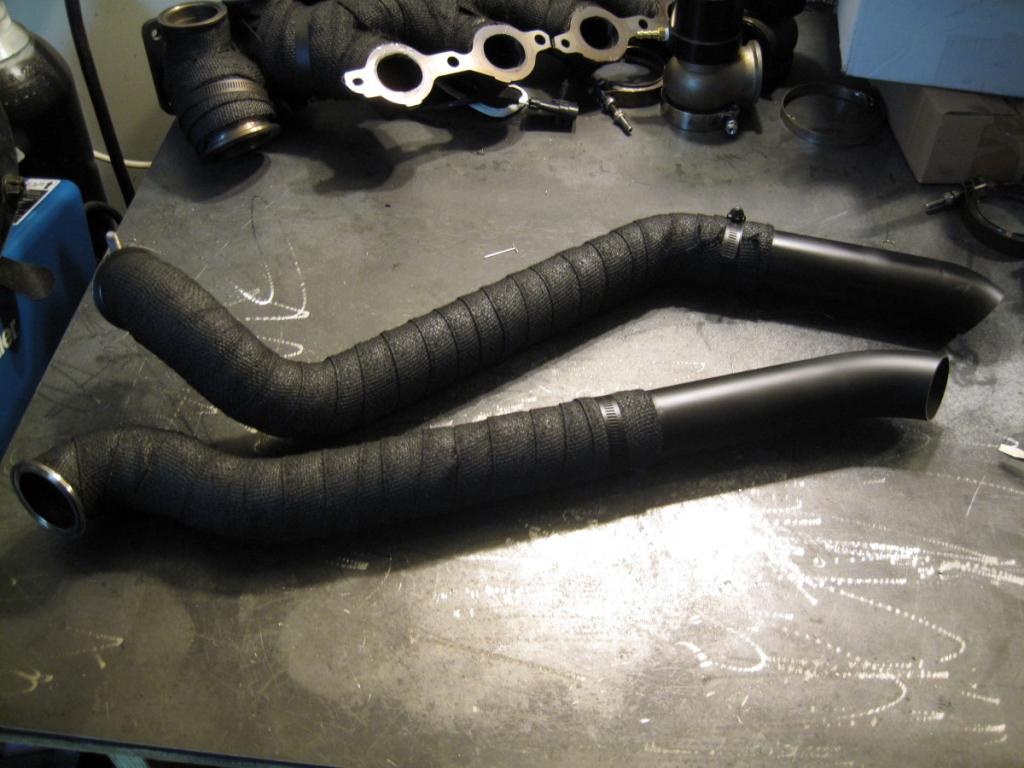
The gold stuff is DEI titanium wrap that I had left over and reused. It is more fabric like than typical wrap, and is softer and doesn’t seem to become as brittle as quickly, although it will shred fairly easily. Performance wise I kind of feel they are all the same. The black top layer is thermo-tec stuff I believe. I bought it because it was black and had the highest temperature rating. I Mainly just wanted the pipes to be black since everything else under the hood is black and the gold manifolds were kind of distracting. The spray I used is the thermo-tec 2000f coating stuff.
The wrap definitely increased the diameter of the pipes but I have put extensive effort into making sure everything in the engine bay is very far away from anything hot since I have spent so much time chasing burned wires. The closest spots are in the manifold to itself, so im not worried about it not fitting. The dump tubes may be tight since they go around the manifold, but they are single wrapped, not double.
The wrap definitely increased the diameter of the pipes but I have put extensive effort into making sure everything in the engine bay is very far away from anything hot since I have spent so much time chasing burned wires. The closest spots are in the manifold to itself, so im not worried about it not fitting. The dump tubes may be tight since they go around the manifold, but they are single wrapped, not double.
Jun 5, 2014 | 12:28 PM
#387
TECH Enthusiast
iTrader: (5)
Joined: Jan 2010
Posts: 669
Likes: 1
From: Huntsville, Alabama - SA, TX is home
The 700r4/4L60e is really the only one that requires any specialty "J" tools and even then, if you have a decent set of skills and an adequate toolbox there are ways around those specialty tools. The 4L80e is a snap, it's waaaay simpler than the 4L60e (one of the reasons it's more reliable than it's smaller sibling)..
If you are not having any weird issues with the transmission, like failure to shift or flaring etc., then you will most likely have no issues with the valve body and probably won't have to touch it. I elected to install a TRANSGO Shift kit for the 80e, it turns it into a beast, shortens shift times, ups pressures etc. The TRANSGO kit to be honest is one of the best rated kits for the 80e, but the last one I did, the instructions were a bit sketchy, that was a bunch of years ago.. I'm certain it's gotten better since then.
Seriously, get yourself a good manual, I recommend the ASTG manuals, they are reasonably priced and VERY VERY good manuals.
Here's what they look like
The 4L80e I built cost me around $620 for replacement parts and would hold an honest 700-750hp without upgrading any shafts. I upgraded the internals to KOLENE STEELS and ALTO RED Clutches/Frictions, there were a few other smaller parts like sprags etc. too. All the are internal parts of the transmission that can be easily upgraded just by parts swapping during the R&R of the clutches/steels.
Once you start getting into the level of HP that ATOMIC is running (and a few others on this board) things change a bit, but even then the parts are still readily available from a variety of retailers. Here's a few I used when I was shopping for parts:
Jun 23, 2014 | 09:21 PM
#389
Thread Starter
Joined: Jan 2006
Posts: 16,282
Likes: 438
From: Huntsville, AL
Some slow progress it feels like but I have finished some stuff this weekend.
Finally got around to upgrading my alternator. I had the stock 105amp one and am pretty sure it is the cause of some of the tuning headaches ive been having. It just doesnt have enough *** (even with an overdrive pulley) to keep up with 05 fans, 2 fuel pumps, meth pumps, and all kinds of other crap. I have had a 145amp alternator from the later trucks for a while, but it had the wrong connector so I didnt install it.
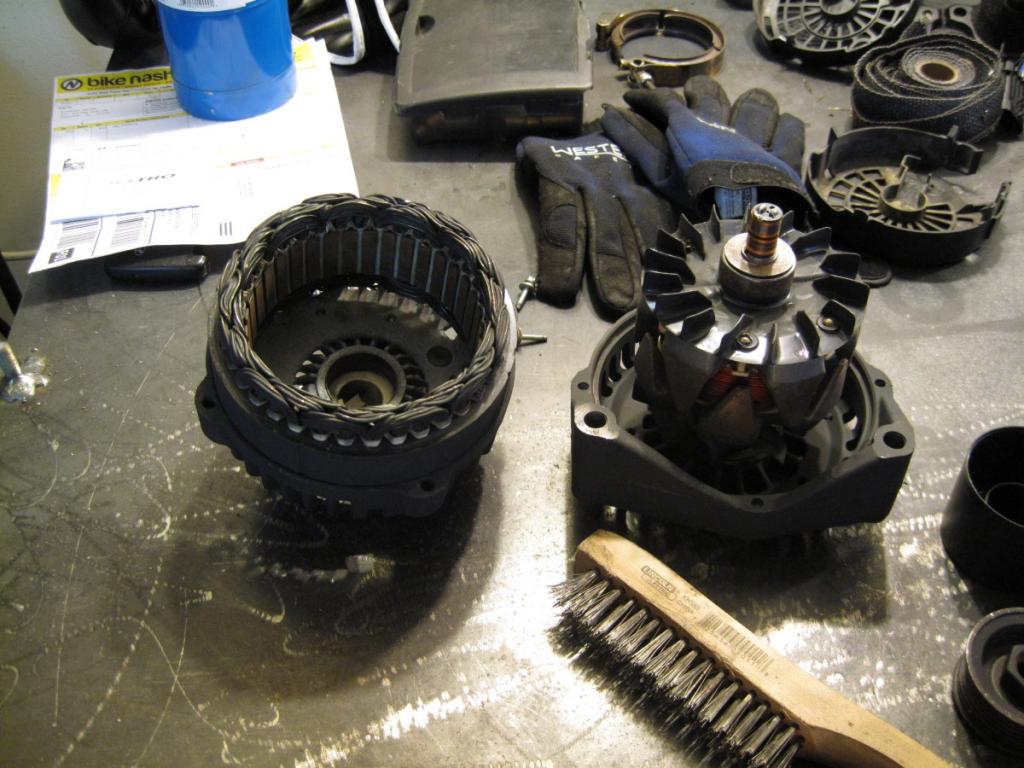
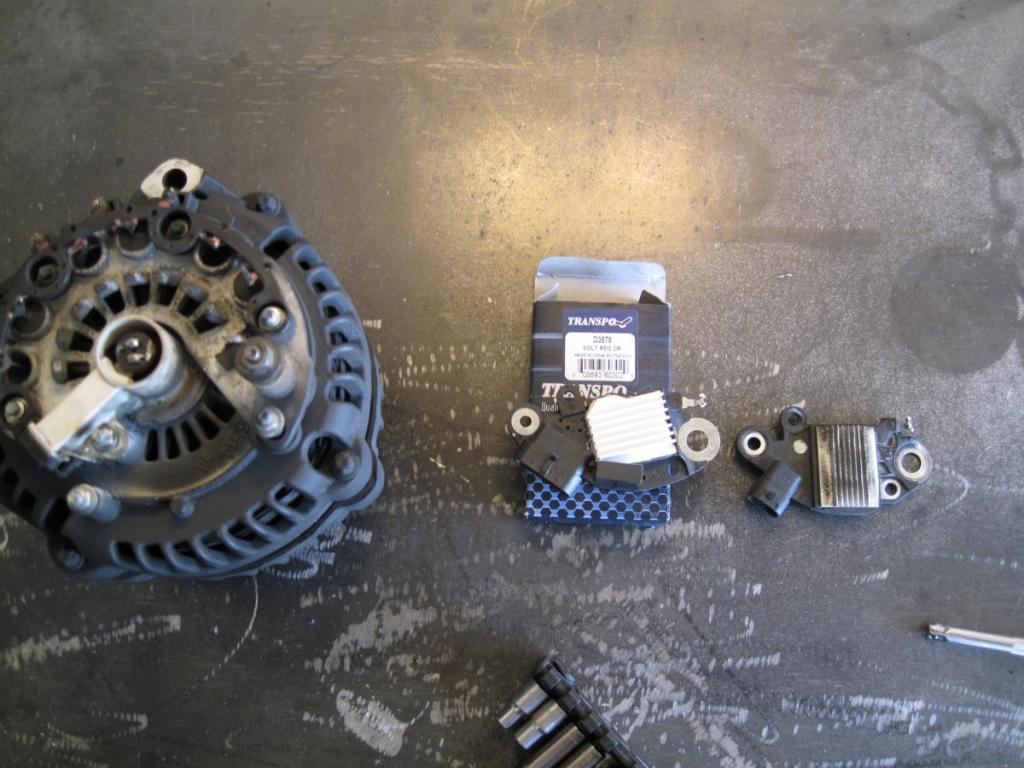
I found out you can just swap the regulator type on it and it should work perfectly. So it was either $45 for a regulator or $80 for a new alternator. I had never taken an alt apart before so I went that route.
DR44G (145a) on the left and two CS130D (105a) on the right,

I took the whole thing apart and cleaned it and used a wire brush on all the magnets to clean them up. I doubt it will make much difference but it makes me feel better and it doesnt squeak anymore.
Swapping the regulator was actually really easy, except the tap is soldered to the bridge rectifier on the back. My 100w soldering gun wouldnt get enough heat in it to melt the solder, but 2 seconds with the propane torch did the trick and it came right off.
All done and installed
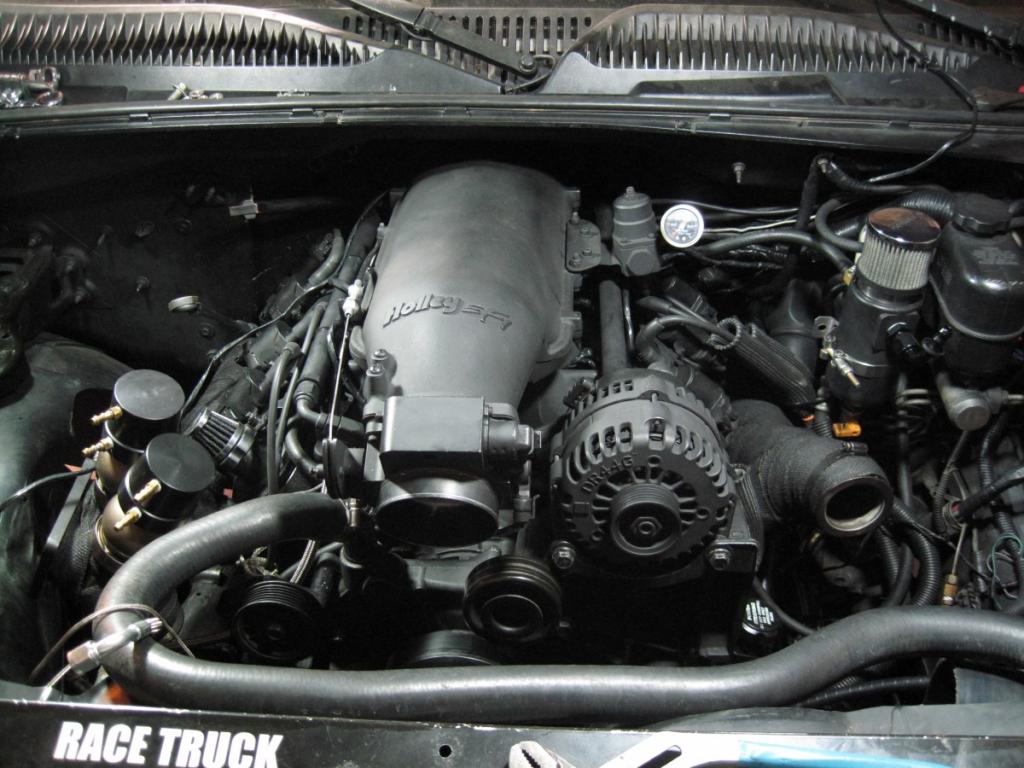
The Holley Hi-ram is nortorious for not having room for the alternator because of that fuel rail fitting right behind it, and its close as hell to the alternator. Just to show you how close...
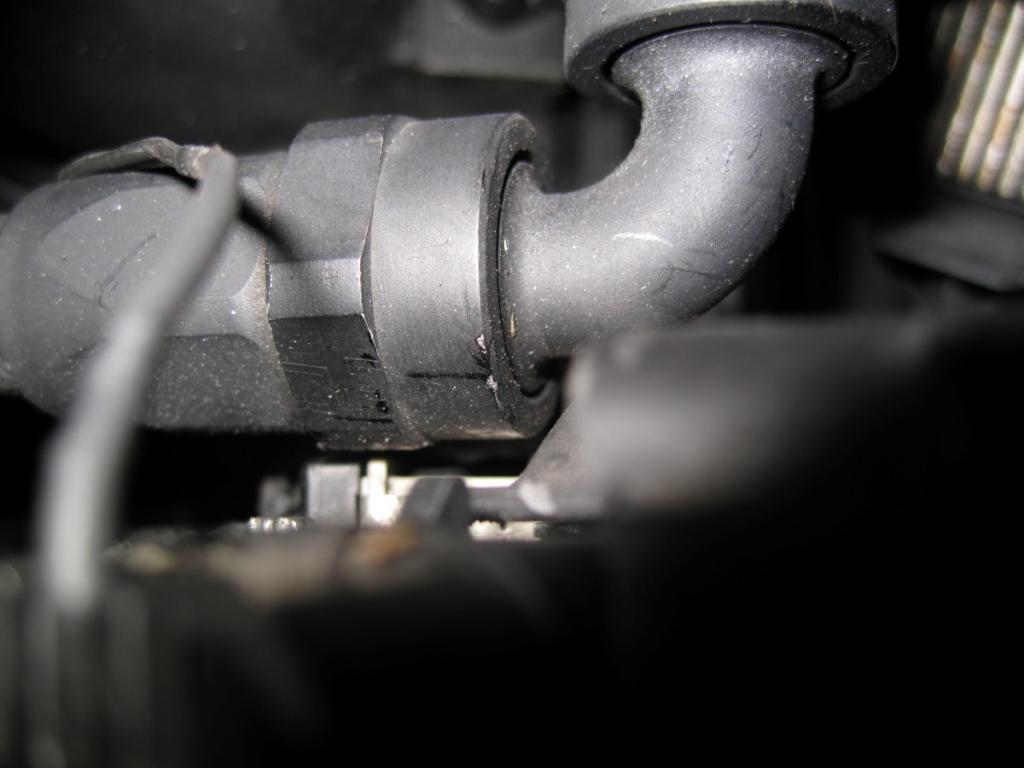
Looks like a good fit to me!! Now I just need a longer belt since even the factory 145a belt (93") doesnt fit oddly enough.
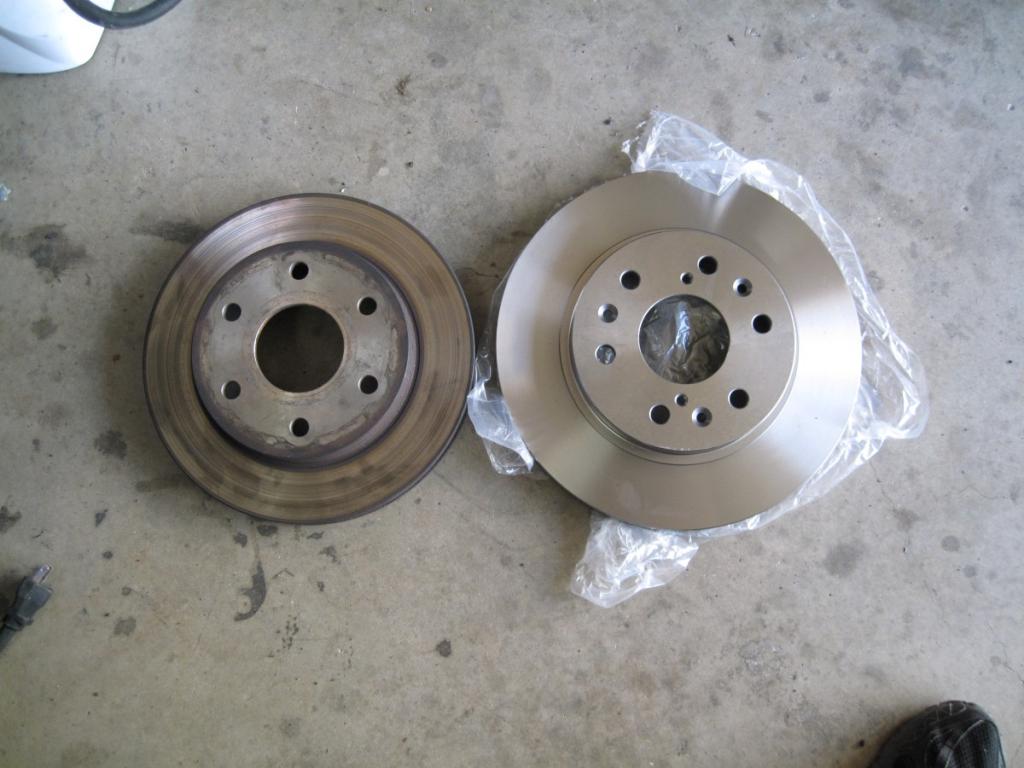
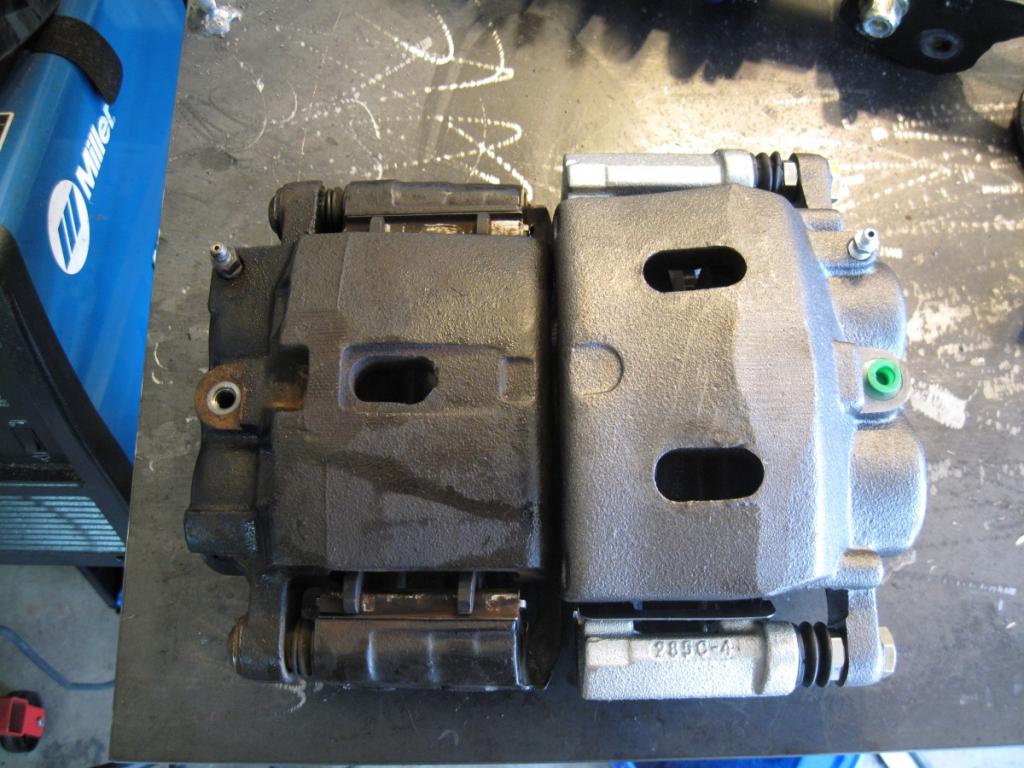
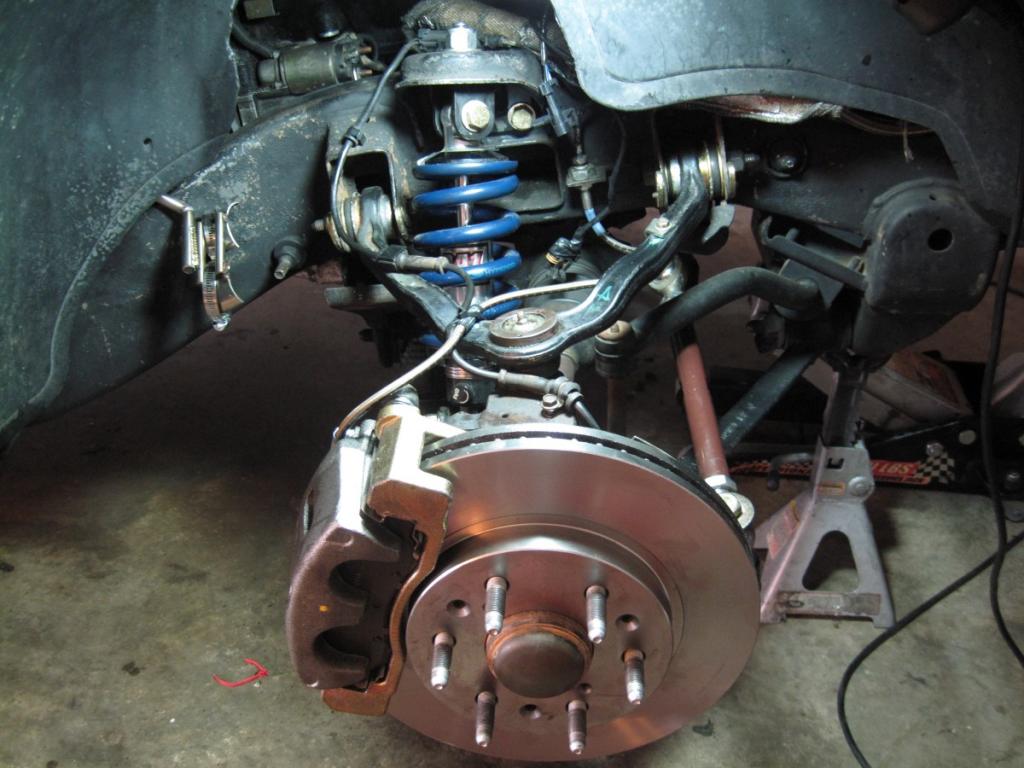
Also finally decided to upgrade the stock 99 brakes to 2005 13" rotors and calipers. Whole upgrade will only be about $200 from rockauto with new calipers, pads, rotors, and caliper brackets.
Working on getting the spark plug wires routed and putting the turbo pipes back on.
Also finished moving the battery back over to the stock spot. Have some big wiring on it. 0 gauge to the starter. 2 gauge from alternator to battery. 0 gauge from block to firewall. 4ga from block to frame. 4ga from firewall to battery, 4ga from block to battery, and another 0 gauge from block to battery.
Finally got around to upgrading my alternator. I had the stock 105amp one and am pretty sure it is the cause of some of the tuning headaches ive been having. It just doesnt have enough *** (even with an overdrive pulley) to keep up with 05 fans, 2 fuel pumps, meth pumps, and all kinds of other crap. I have had a 145amp alternator from the later trucks for a while, but it had the wrong connector so I didnt install it.
I found out you can just swap the regulator type on it and it should work perfectly. So it was either $45 for a regulator or $80 for a new alternator. I had never taken an alt apart before so I went that route.
DR44G (145a) on the left and two CS130D (105a) on the right,

I took the whole thing apart and cleaned it and used a wire brush on all the magnets to clean them up. I doubt it will make much difference but it makes me feel better and it doesnt squeak anymore.

Swapping the regulator was actually really easy, except the tap is soldered to the bridge rectifier on the back. My 100w soldering gun wouldnt get enough heat in it to melt the solder, but 2 seconds with the propane torch did the trick and it came right off.

All done and installed

The Holley Hi-ram is nortorious for not having room for the alternator because of that fuel rail fitting right behind it, and its close as hell to the alternator. Just to show you how close...

Looks like a good fit to me!! Now I just need a longer belt since even the factory 145a belt (93") doesnt fit oddly enough.
Also finally decided to upgrade the stock 99 brakes to 2005 13" rotors and calipers. Whole upgrade will only be about $200 from rockauto with new calipers, pads, rotors, and caliper brackets.


Working on getting the spark plug wires routed and putting the turbo pipes back on.
Also finished moving the battery back over to the stock spot. Have some big wiring on it. 0 gauge to the starter. 2 gauge from alternator to battery. 0 gauge from block to firewall. 4ga from block to frame. 4ga from firewall to battery, 4ga from block to battery, and another 0 gauge from block to battery.
