

Budget built turbo silverado for $1600. Complete build inside.
 Aug 29, 2014 | 10:04 PM
#1

Thread Starter
Teching In
Joined: Mar 2013
Posts: 25
Likes: 3
 Budget built turbo silverado for $1600. Complete build inside.
I've owned plenty of turbo vehicles but have never completely built one from scratch. Considering I'm a single dad on a single income with a house and plenty of other bills on a less than great income I had to do something somewhat realistic. I bought a 04' RCSB 2wd 5spd 4.8 because I can still haul stuff if I need to. After seeing much success on sloppy mechanics and several other sites I was convinced I could do a ebay built setup. I've seen very few builds 100% from scratch so I hope this helps give someone else the courage to do the same. You don't need to dump crazy money into something to have fun. The only thing not included in this price was tuning software or the tune. I chose to purchase hptuners and do all my tuning myself. For many people I recommend taking the money that would go toward hptuners and pay for a tune.
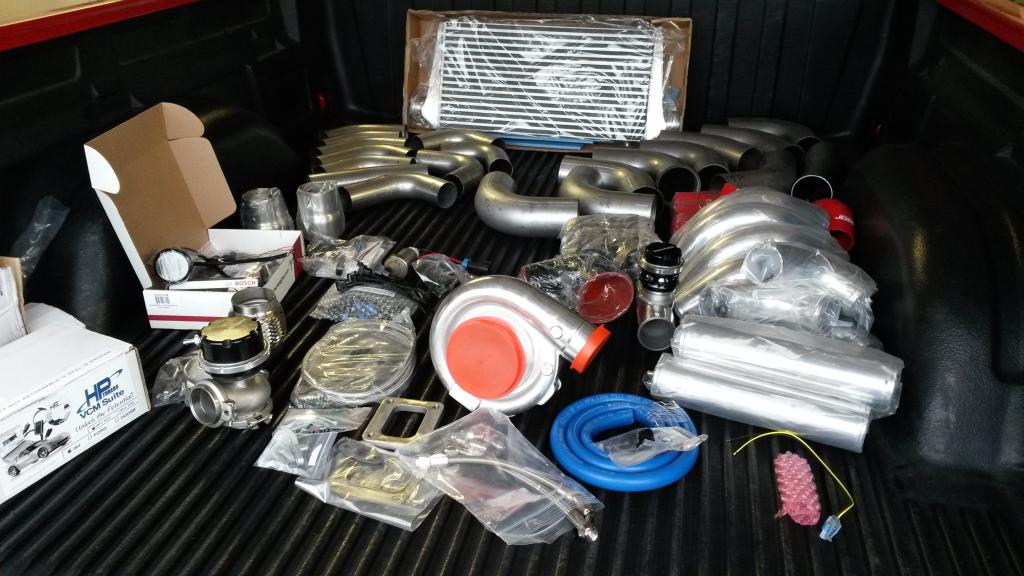
I chose a cxracing 72mm turbo because they're legitimately balanced and hotrod magazine had good luck with them. I went with a .68 a/r to help with spool considering my manual transmission. I got a godspeed 50mm wastegate, godspeed 50mm BOV, 80lb siemens deka injectors, walbro 450(e-85 rated) fuel pump, 3"x12"x24" core intercooler with 2.5" universal piping kit, AC delco plug and play 2bar map and I sorced the rest of my miscellaneous parts from e-bay or amazon. The most useful e-bay parts I got were my mandrel bends for my hotside and downpipe/exhaust. If you search "assorted mandrel bends" on ebay a guy in iowa sells 8-10 piece sets of random bends but all the same diameter for dirty cheap. I got 10 2.5" bends for $70 shipped and 10 3.5" bends for $60 shipped. Excellent quality and all legit mandrel bends. Here's everything I got:
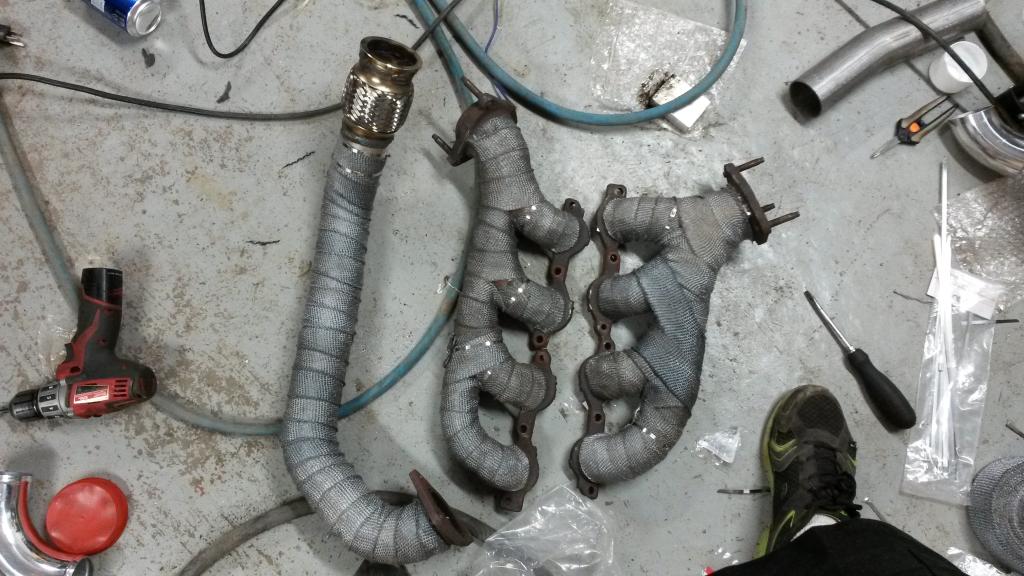
I started by flipping my manifolds, I'll tell you now that you cannot flip them to face down without considerable modifications to your power steering pump and waterpump. So I chose to flip them up, I originally didn't want to but it turned out a lot better than I expected. I was skeptical of the weird cone/tapered manifold flange on the passenger side but it's working great. I'll let the pictures explain the rest for the exhaust side.
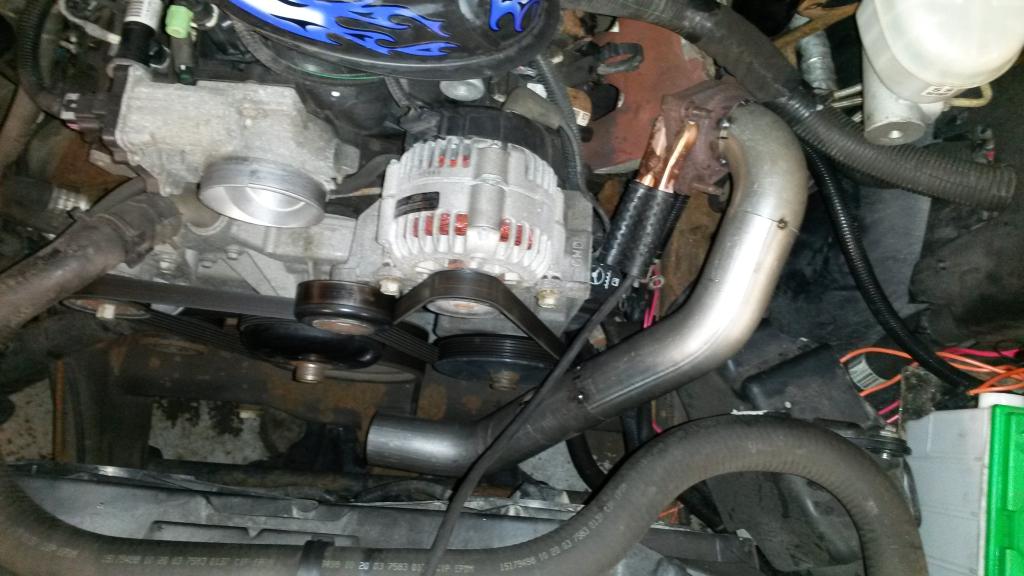
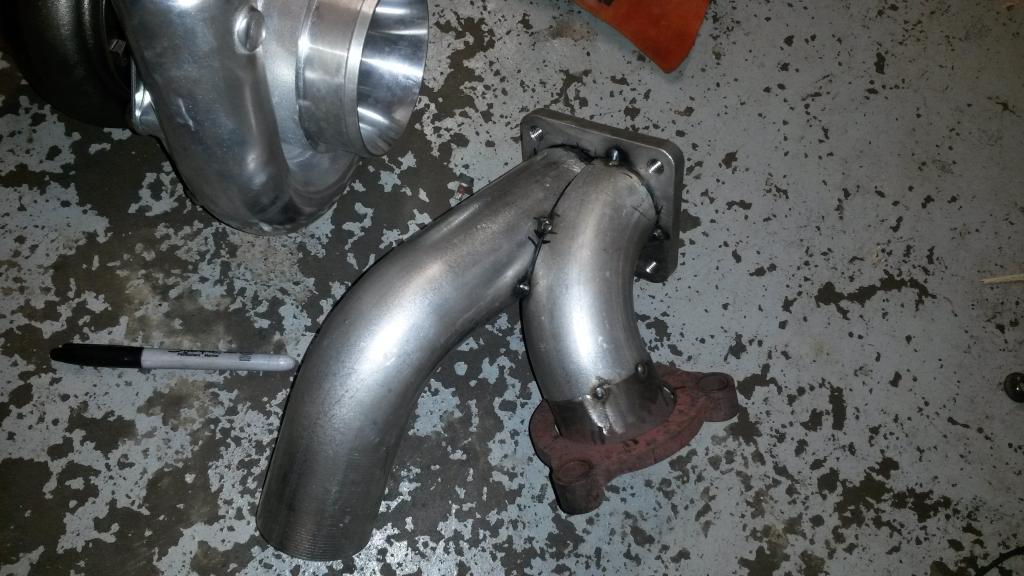
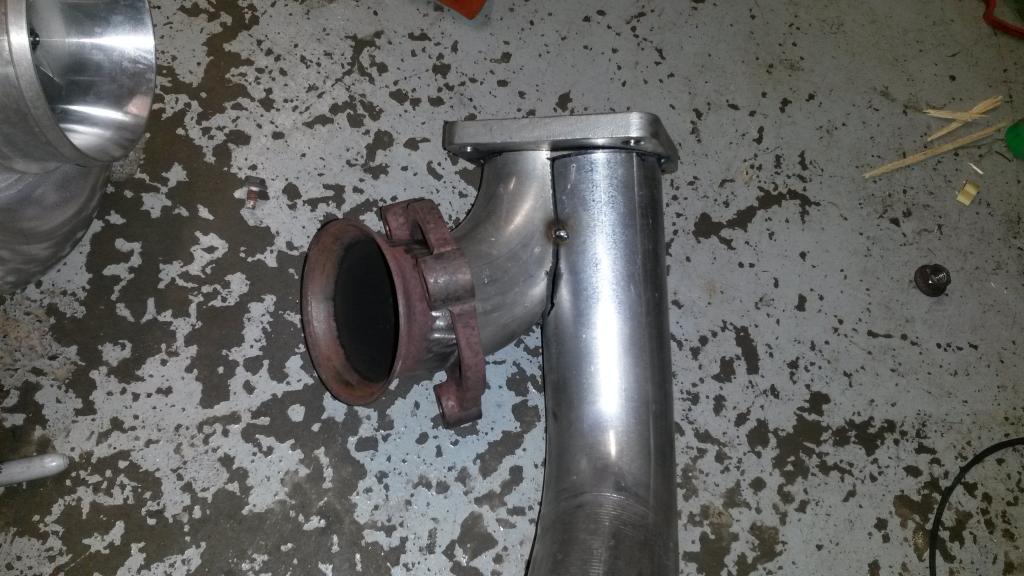
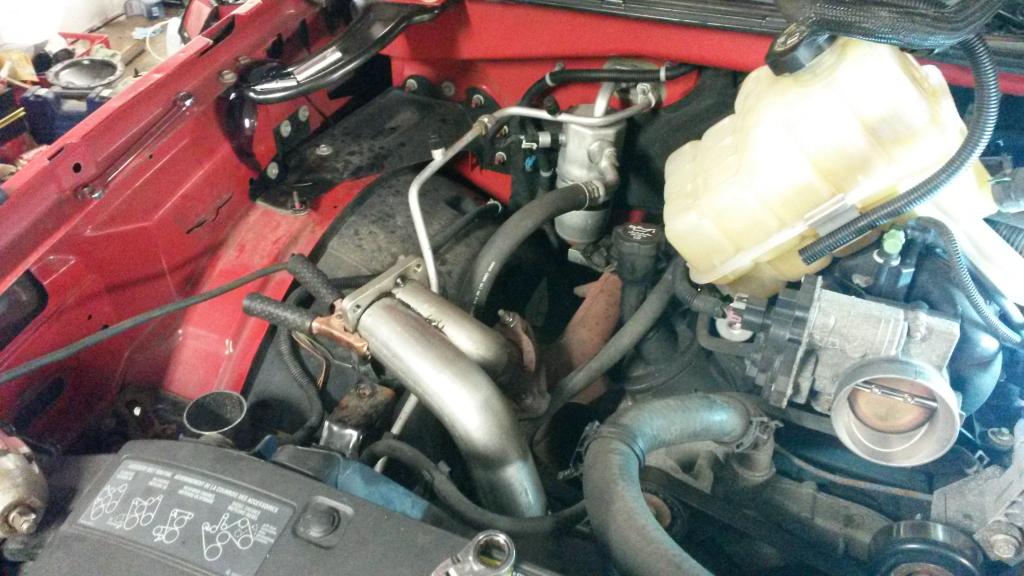
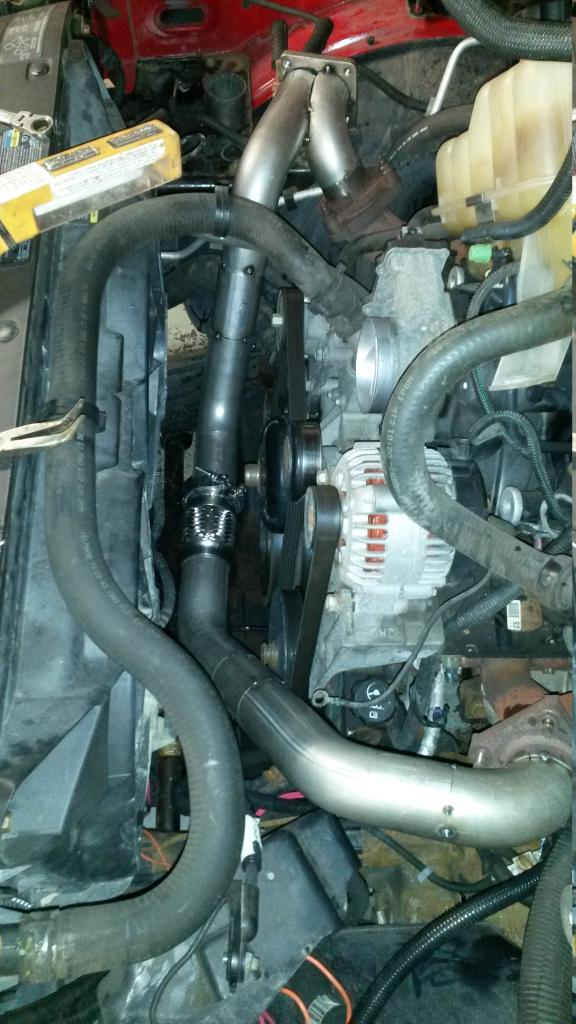
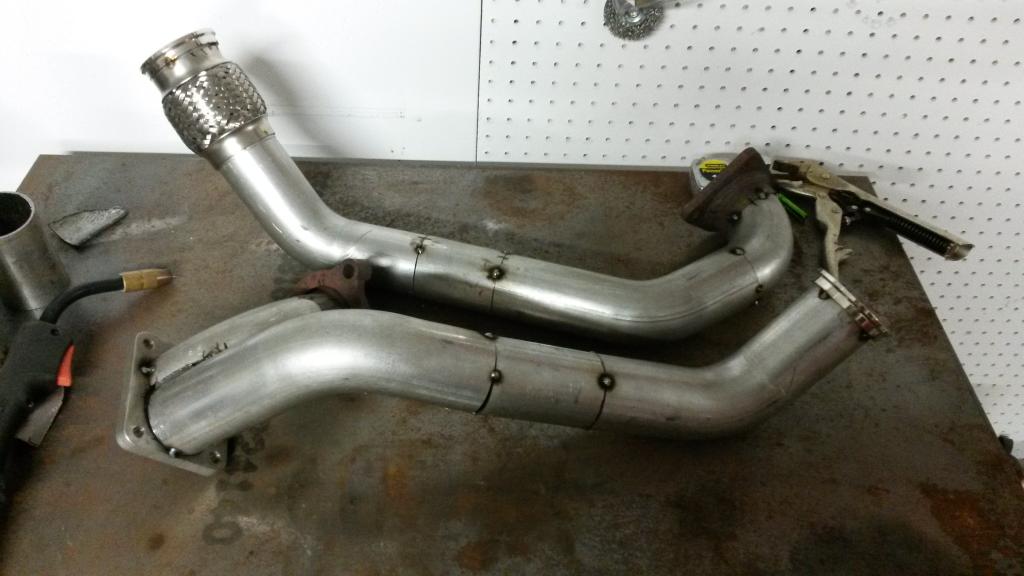
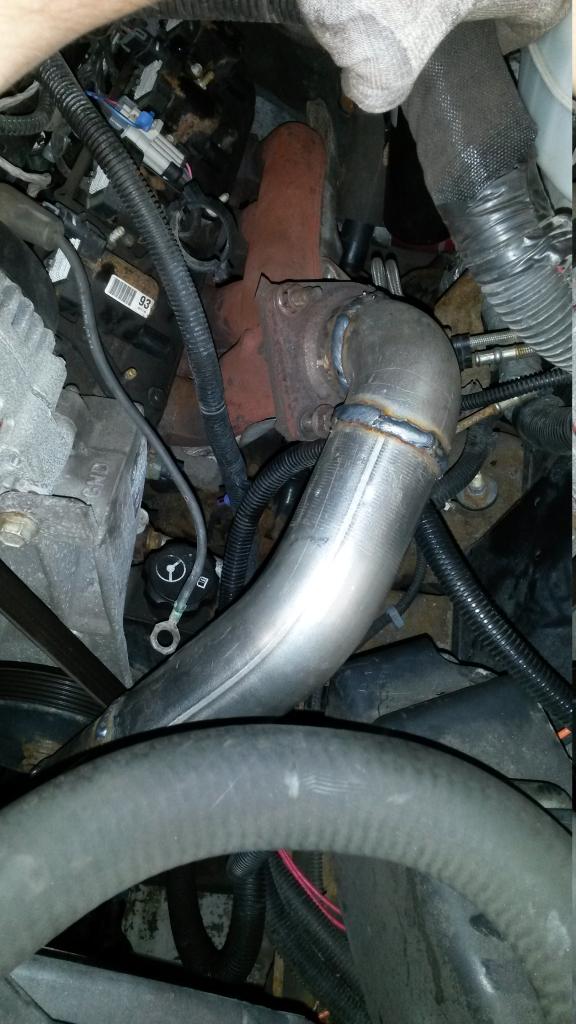
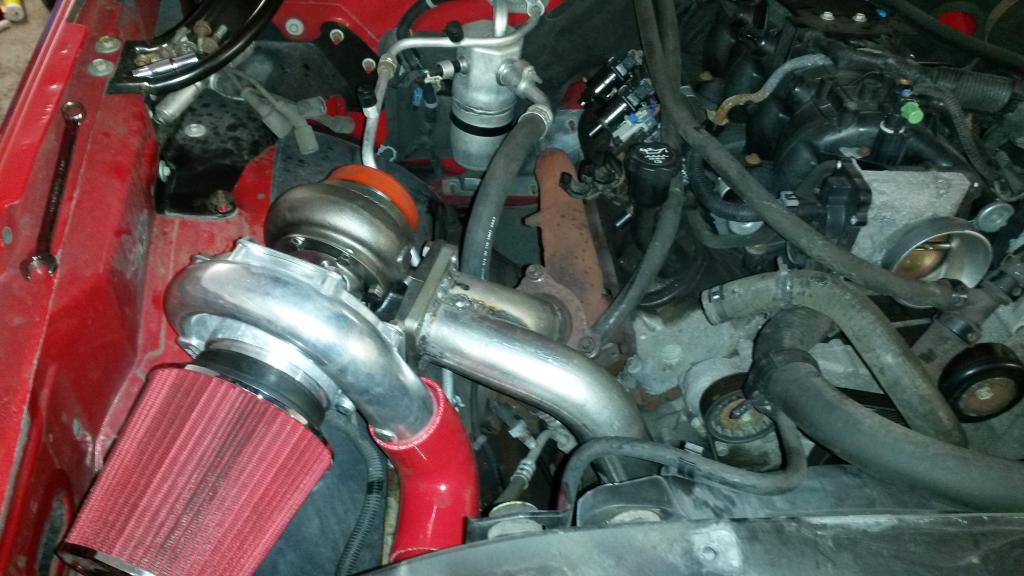
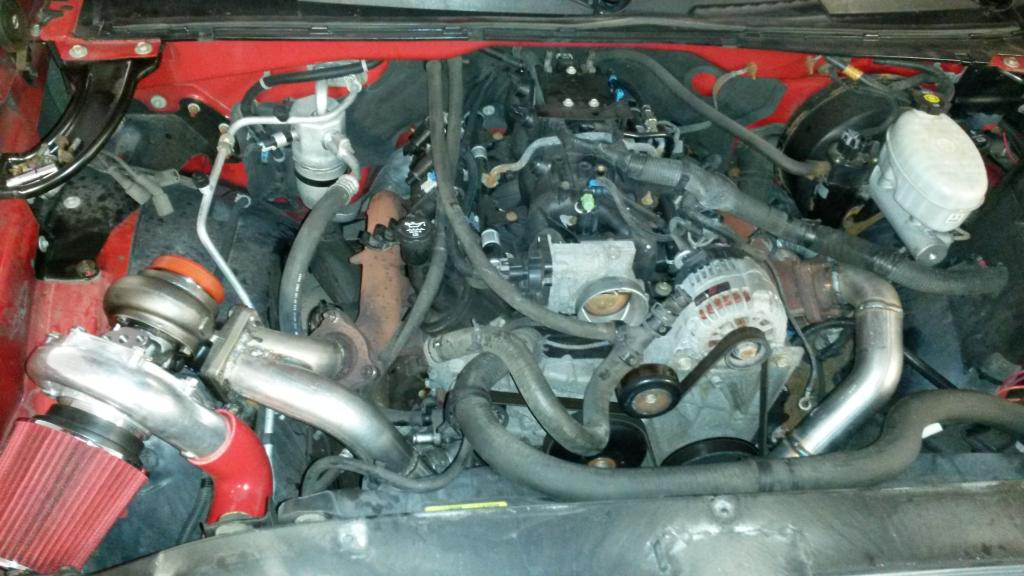
The 3.5" downpipe should fit without effecting any of the a/c system.
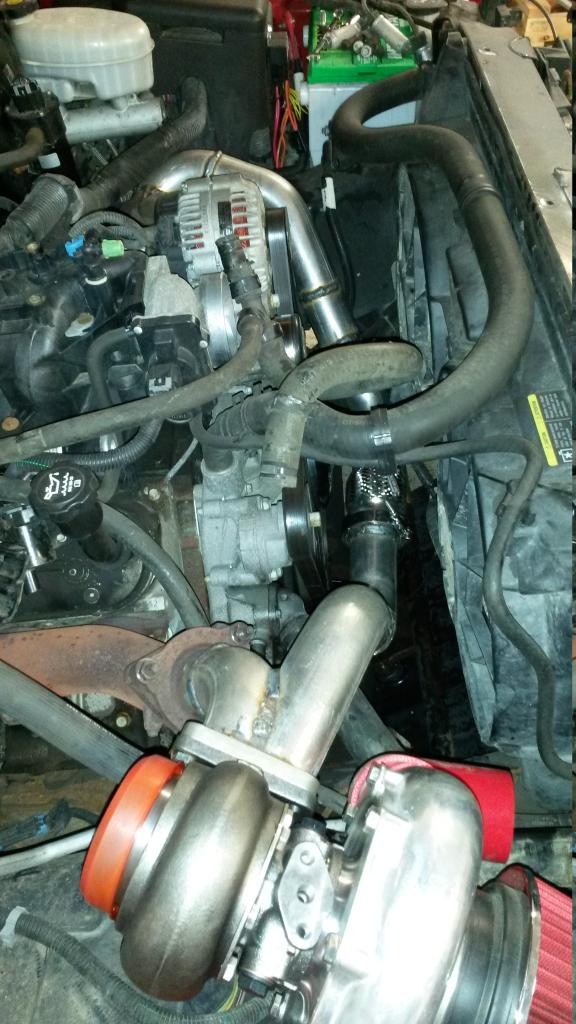
Sorry I'm a picture *****. Hope everyone doesn't mind.
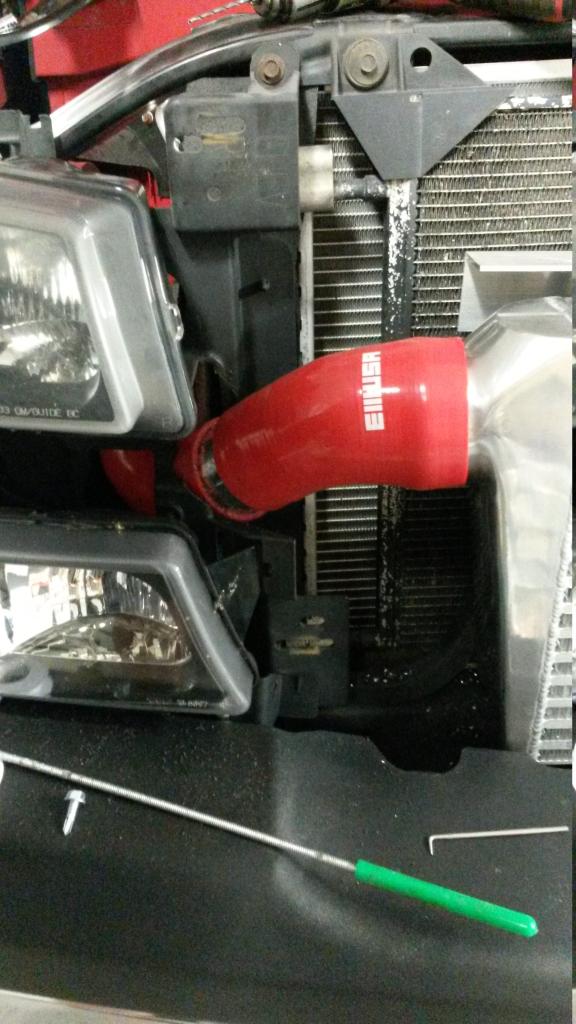
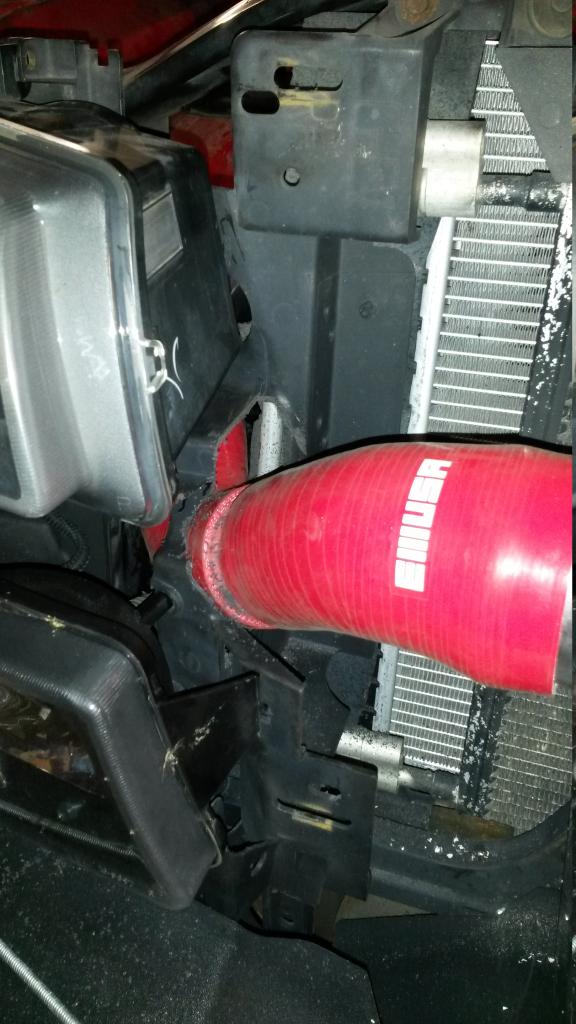
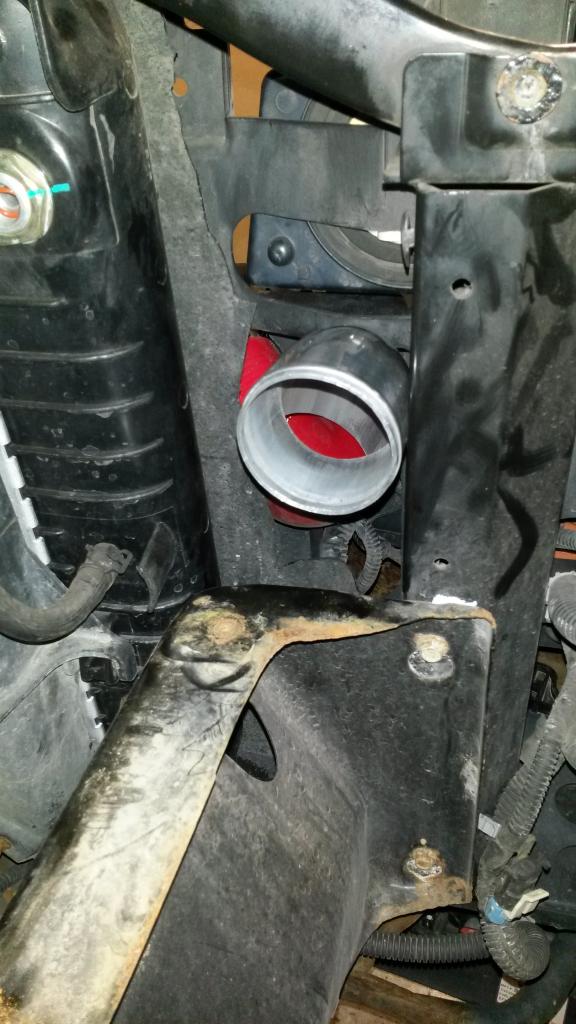
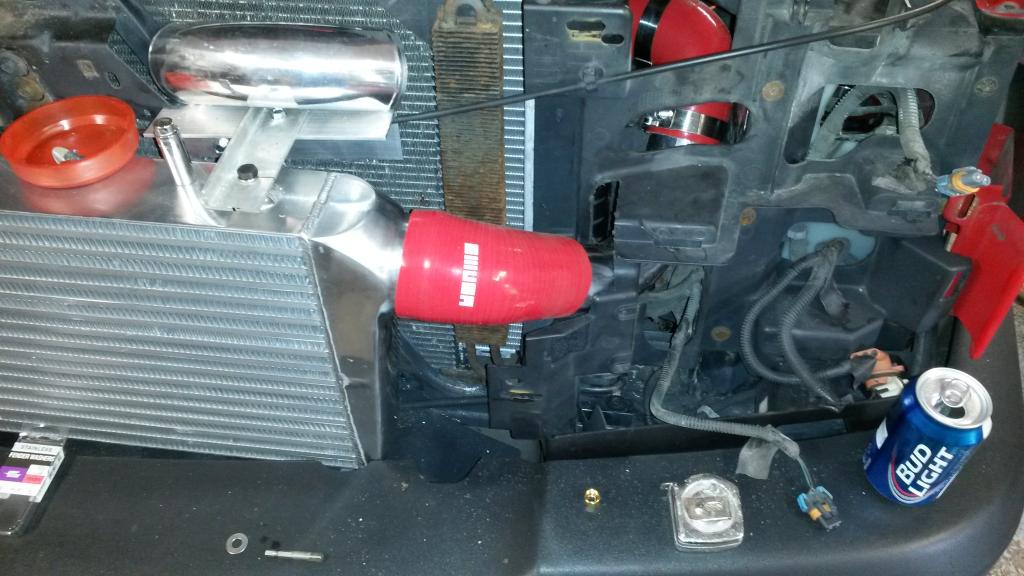
Now onto to ultra shitty routing of the intercooler piping. This was by far my least favorite part. And yeah I know the red couplers are goddy and ugly as sin but they were cheap and the name of this build is CHEAP!! With the 2.5" piping I was able to cut some of the headlight buckets but still leave enough that the strength wasn't effected. Everything cleared and worked well the only thing I had to do is get rid of the group 78 battery and replace it with a group 75 battery because it's not as long. (good thing I work at interstate batteries this wasn't included in the build price) Again I'll let the pictures do the rest of the talking.
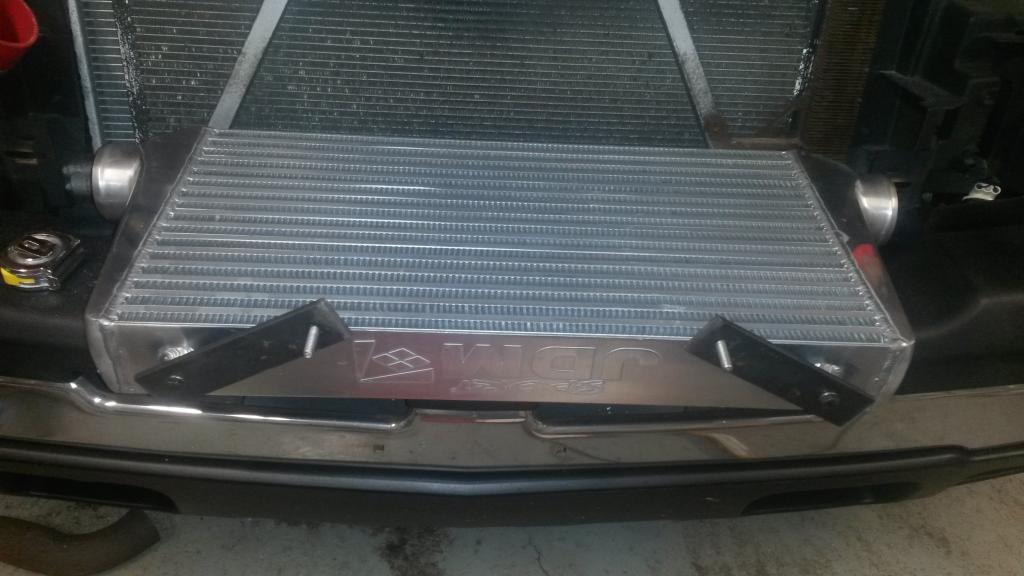
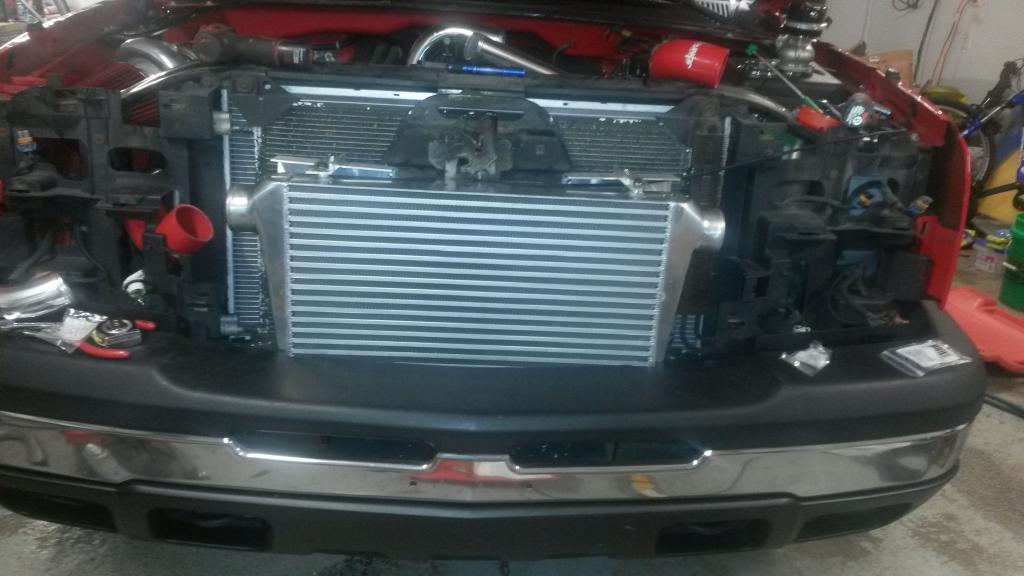
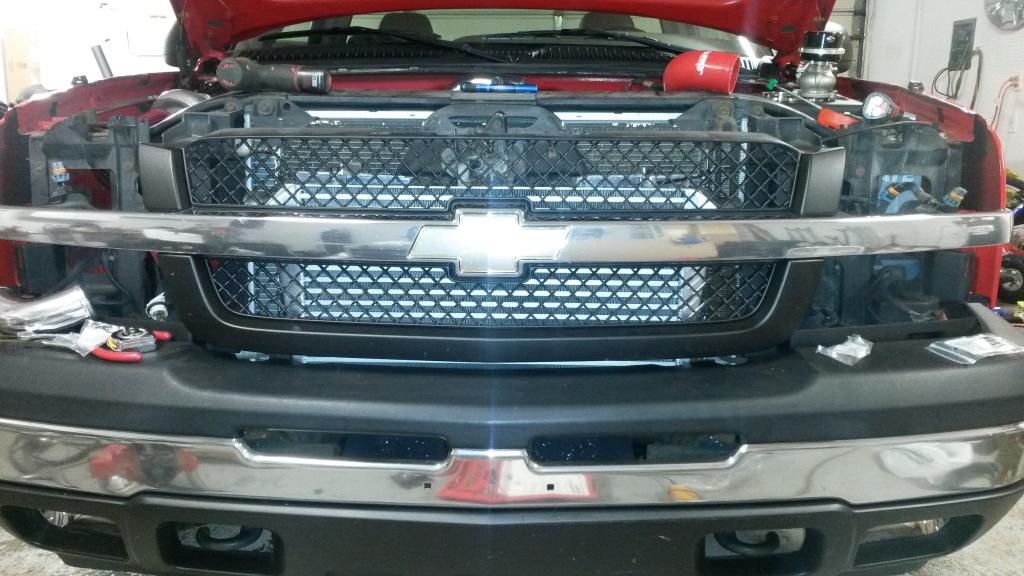
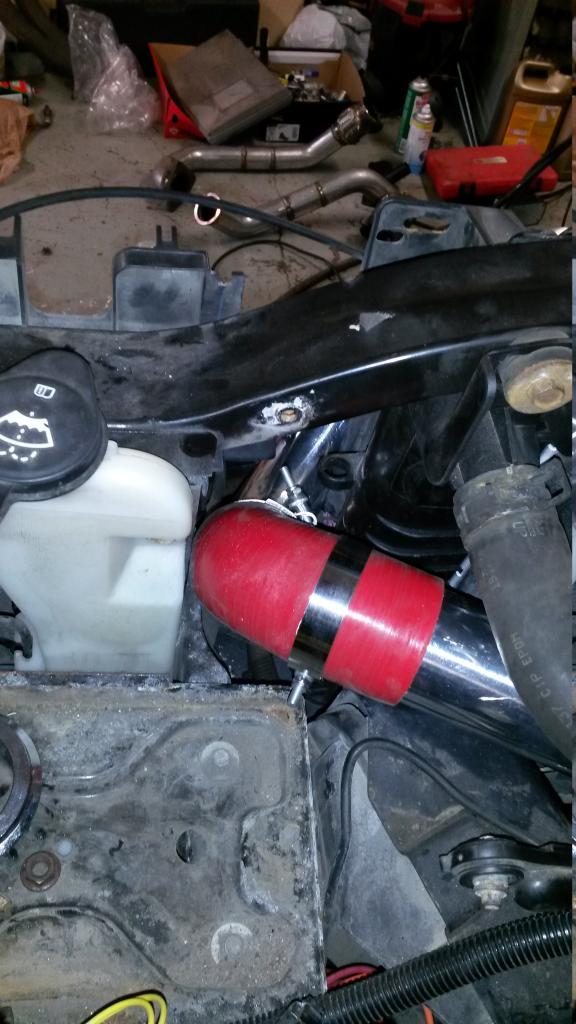
Apparently I didn't go crazy with intercooler pictures.
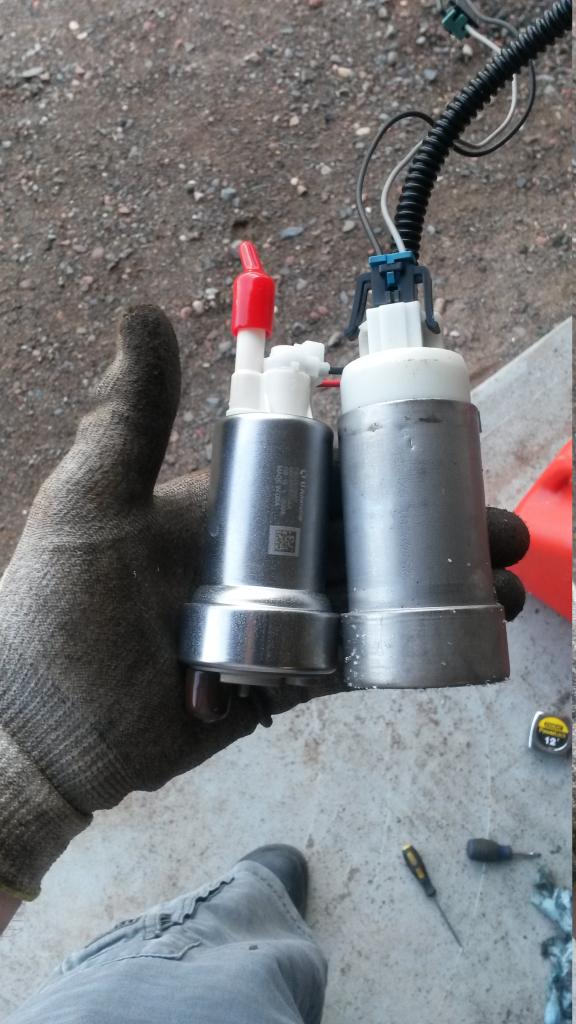
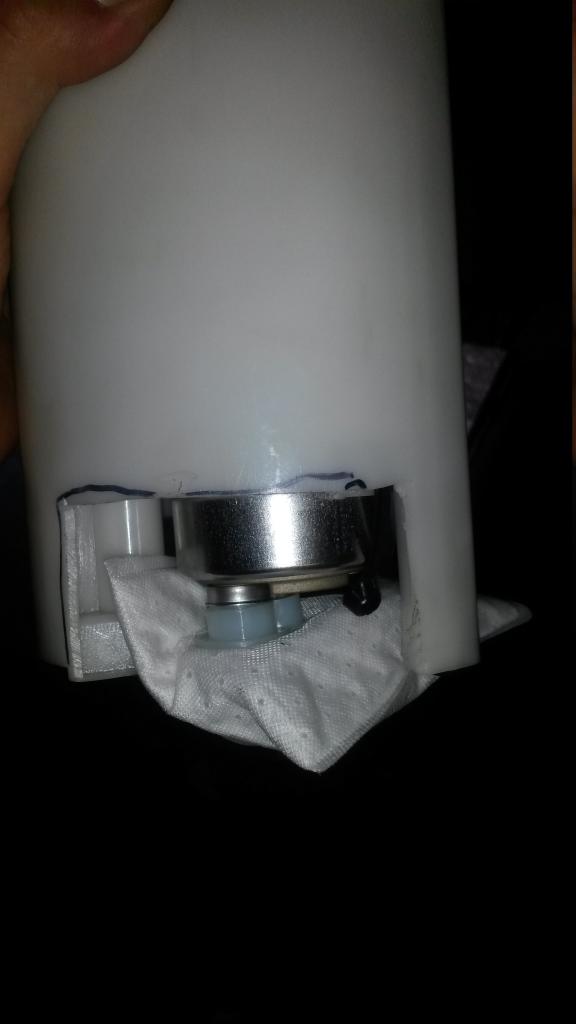
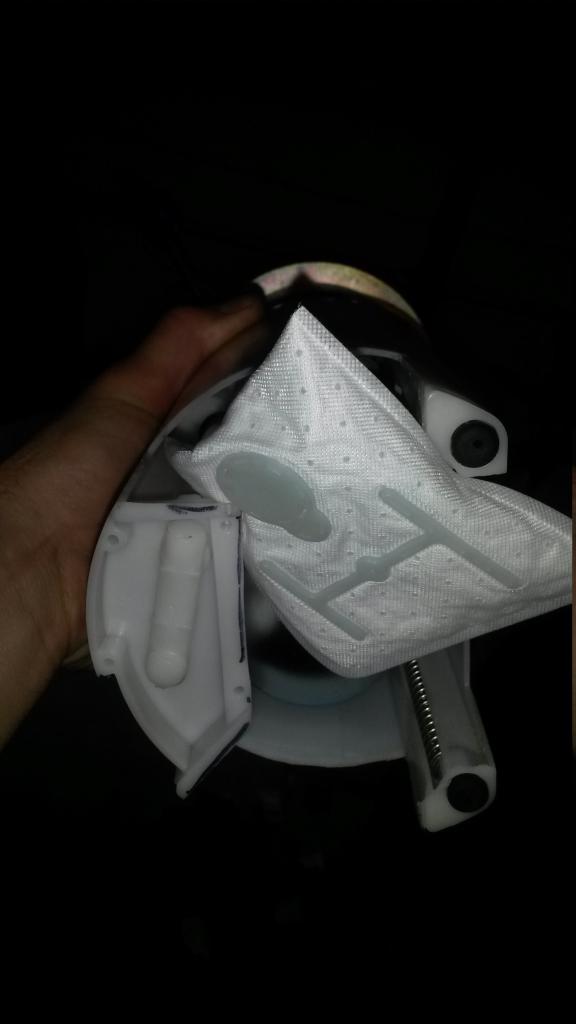
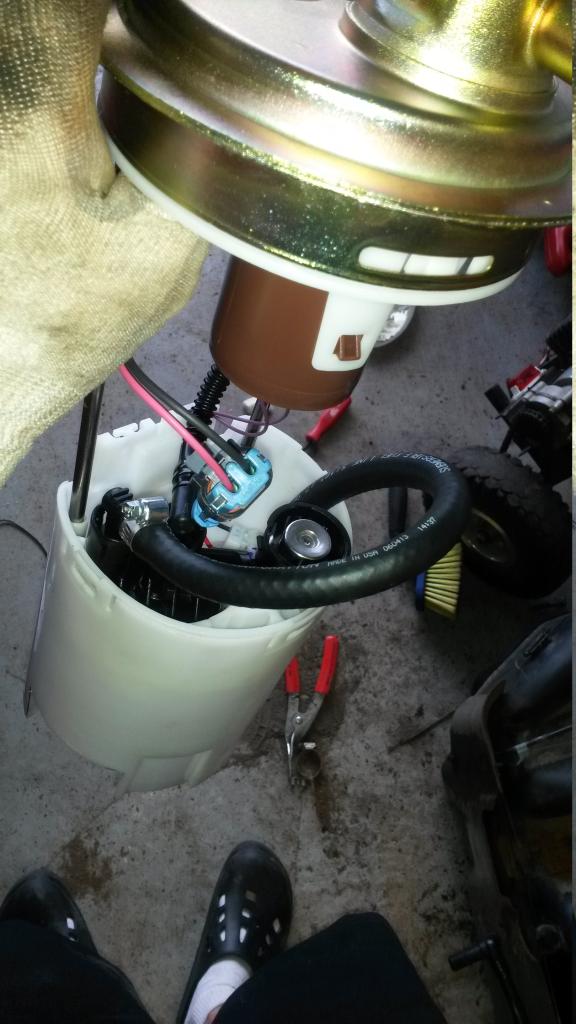
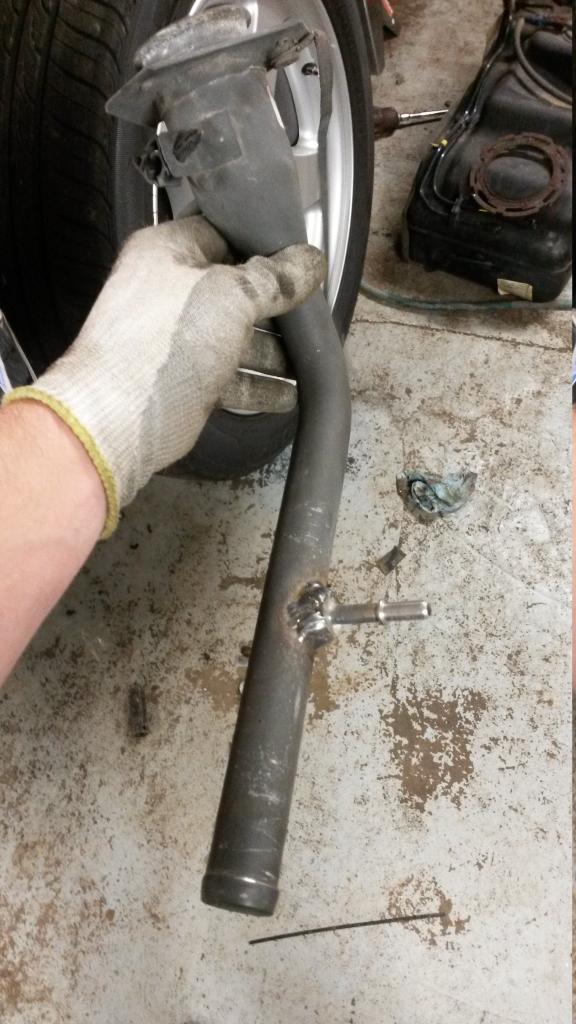
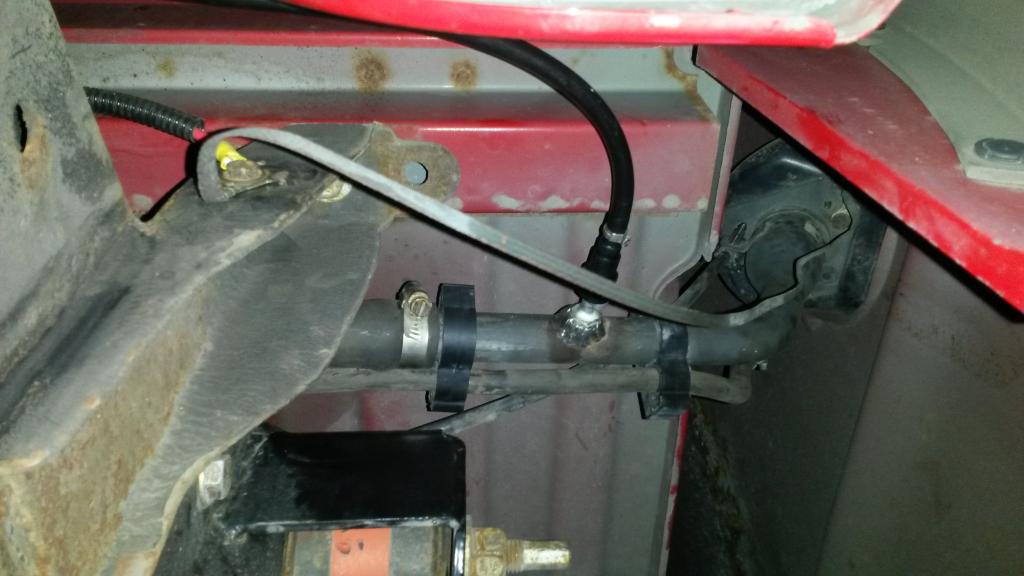
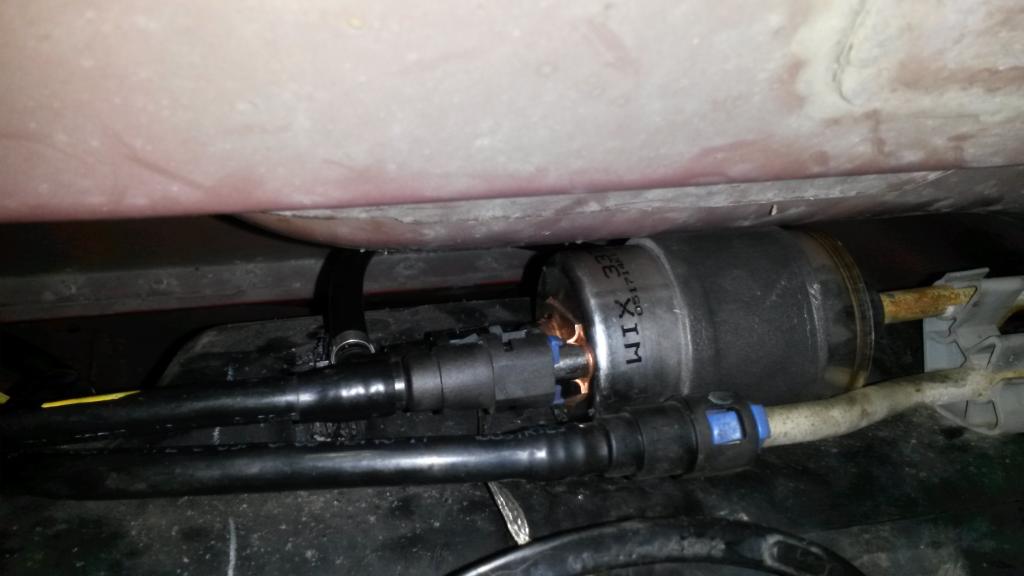
Now onto the fuel system. I found out my fuel hangar/module has a metal top which was rotted out so I found a new hangar assembly for $48 on amazon which worked great because my gauge was starting to act up anyways. Unfortunately I found out the regulator in it wasn't strong enough so some of these pictures don't show my bypassing the regulator. I ended up getting a corvette fuel filter because it has an internal regulator I just needed to find a place to put the return on back into the fuel tank. Again this is all budget built I got the filter for $30 and had a 5/16 male quick connect laying around so I welded it into the fuel filler neck. I ultimately found out the regulator in the filter wasn't much better but it was slightly. It went from 85psi running pressure to 73psi. Oh well just more fuel. Easy enough to tune out. Here are more pics.
I chose a cxracing 72mm turbo because they're legitimately balanced and hotrod magazine had good luck with them. I went with a .68 a/r to help with spool considering my manual transmission. I got a godspeed 50mm wastegate, godspeed 50mm BOV, 80lb siemens deka injectors, walbro 450(e-85 rated) fuel pump, 3"x12"x24" core intercooler with 2.5" universal piping kit, AC delco plug and play 2bar map and I sorced the rest of my miscellaneous parts from e-bay or amazon. The most useful e-bay parts I got were my mandrel bends for my hotside and downpipe/exhaust. If you search "assorted mandrel bends" on ebay a guy in iowa sells 8-10 piece sets of random bends but all the same diameter for dirty cheap. I got 10 2.5" bends for $70 shipped and 10 3.5" bends for $60 shipped. Excellent quality and all legit mandrel bends. Here's everything I got:

I started by flipping my manifolds, I'll tell you now that you cannot flip them to face down without considerable modifications to your power steering pump and waterpump. So I chose to flip them up, I originally didn't want to but it turned out a lot better than I expected. I was skeptical of the weird cone/tapered manifold flange on the passenger side but it's working great. I'll let the pictures explain the rest for the exhaust side.


The 3.5" downpipe should fit without effecting any of the a/c system.

Sorry I'm a picture *****. Hope everyone doesn't mind.
Now onto to ultra shitty routing of the intercooler piping. This was by far my least favorite part. And yeah I know the red couplers are goddy and ugly as sin but they were cheap and the name of this build is CHEAP!! With the 2.5" piping I was able to cut some of the headlight buckets but still leave enough that the strength wasn't effected. Everything cleared and worked well the only thing I had to do is get rid of the group 78 battery and replace it with a group 75 battery because it's not as long. (good thing I work at interstate batteries this wasn't included in the build price) Again I'll let the pictures do the rest of the talking.


Apparently I didn't go crazy with intercooler pictures.
Now onto the fuel system. I found out my fuel hangar/module has a metal top which was rotted out so I found a new hangar assembly for $48 on amazon which worked great because my gauge was starting to act up anyways. Unfortunately I found out the regulator in it wasn't strong enough so some of these pictures don't show my bypassing the regulator. I ended up getting a corvette fuel filter because it has an internal regulator I just needed to find a place to put the return on back into the fuel tank. Again this is all budget built I got the filter for $30 and had a 5/16 male quick connect laying around so I welded it into the fuel filler neck. I ultimately found out the regulator in the filter wasn't much better but it was slightly. It went from 85psi running pressure to 73psi. Oh well just more fuel. Easy enough to tune out. Here are more pics.
Aug 29, 2014 | 10:06 PM
#2
Thread Starter
Teching In
Joined: Mar 2013
Posts: 25
Likes: 3
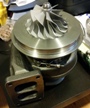
This pump is supposedly good for 750hp and it's so much smaller than stock!!
Now onto the exhaust/downpipe/wastegate. I've had plenty of open wastegates and don't care for them so I wanted to reroute this one. This is also my summer daily driver so I wanted it quiet. I already had a 3" in/out 24" case magnaflow muffler that I'm reusing until next year. More pictures to do the talking.
First time wrapping exhaust, it was cheap wrap and I paid for it in itchy *** skin and respiratory issures for the evening.
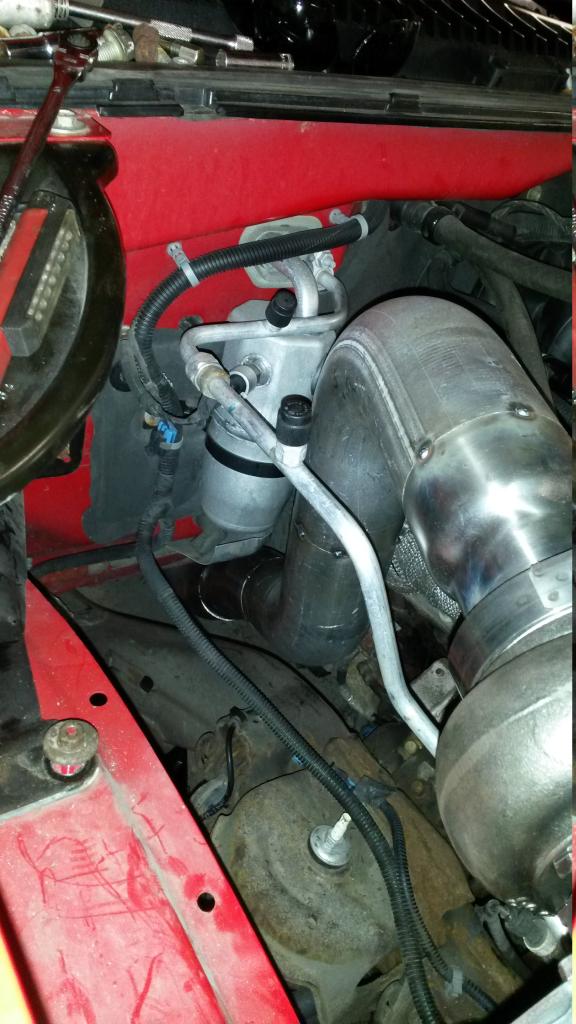
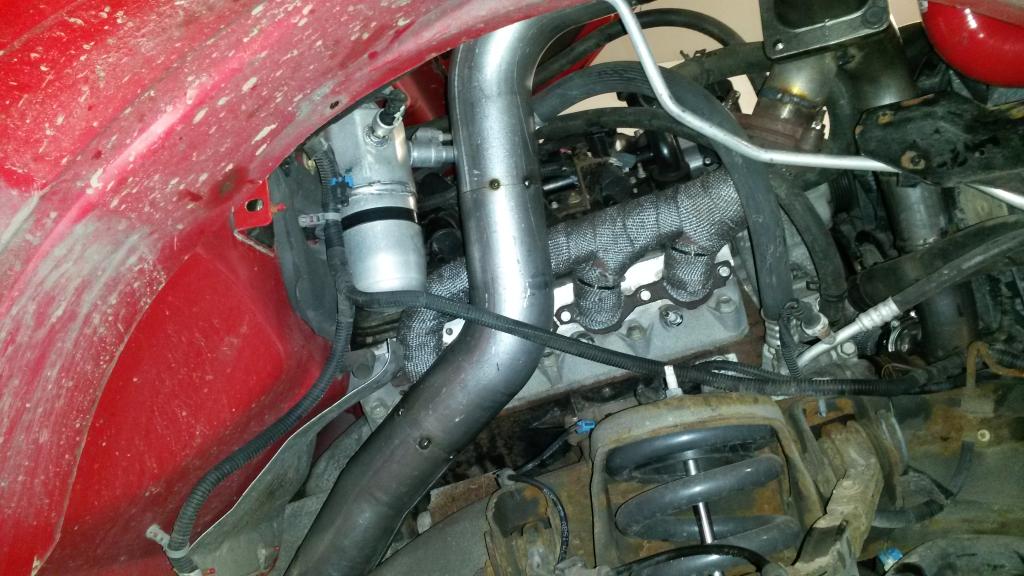
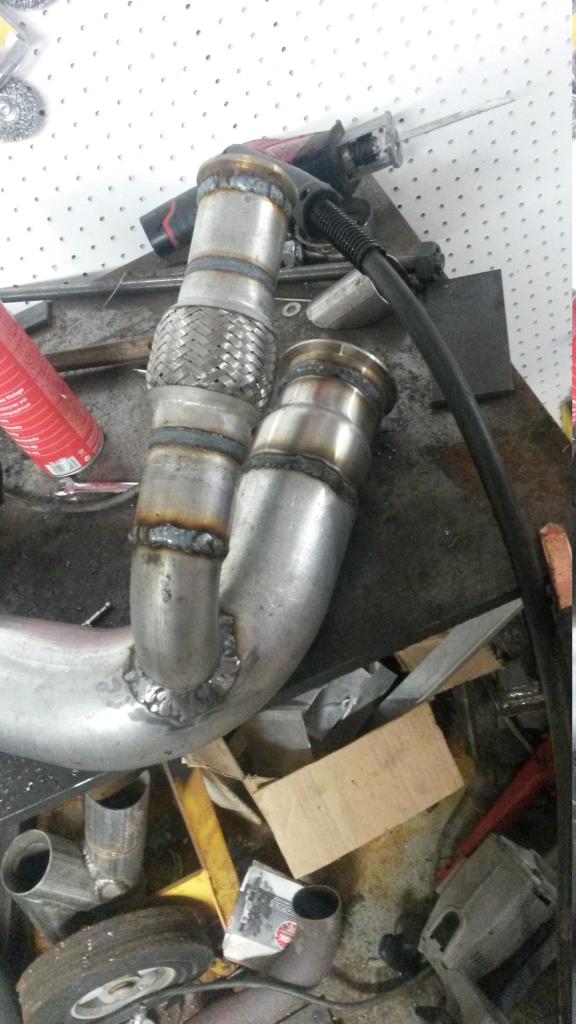
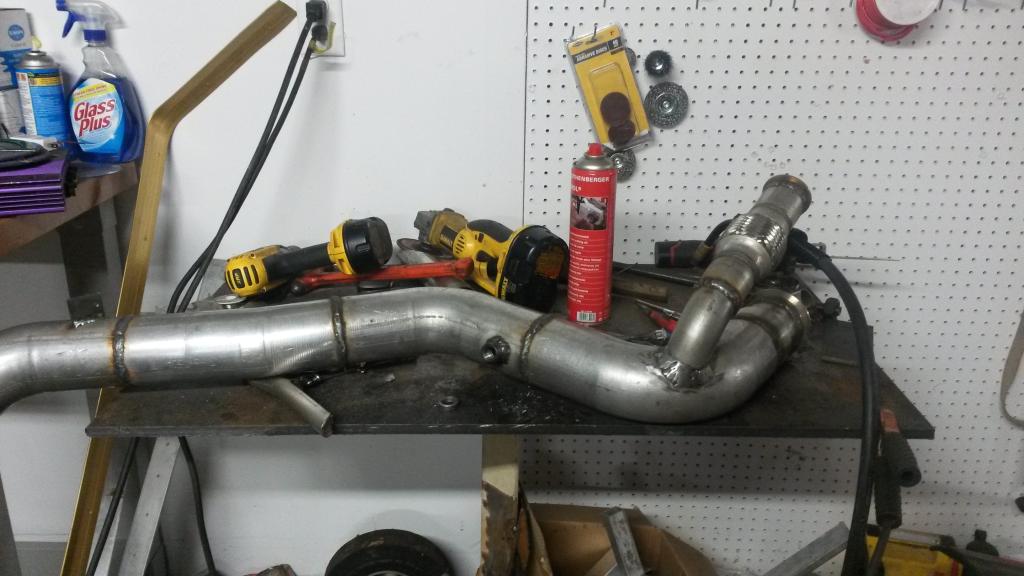
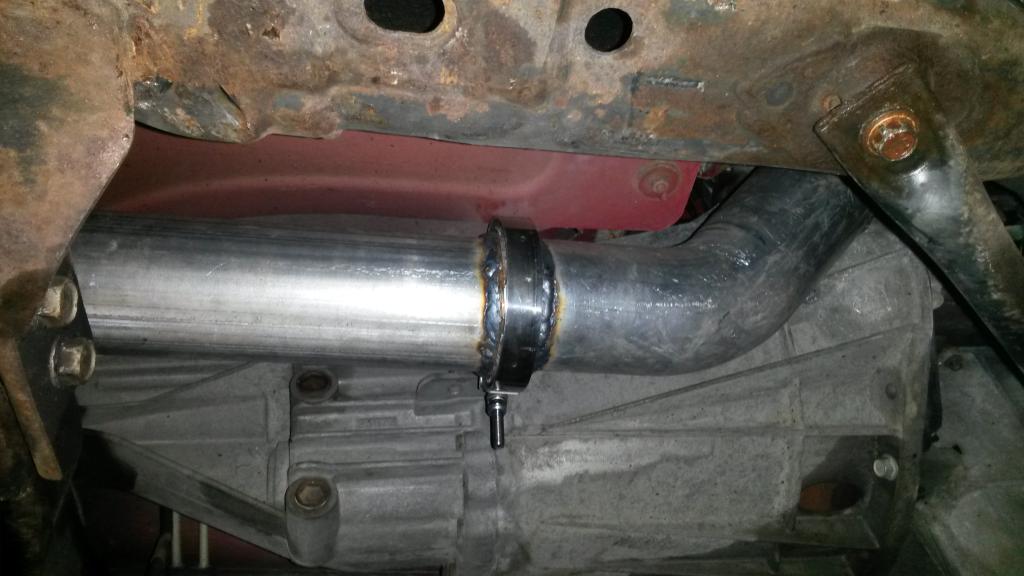
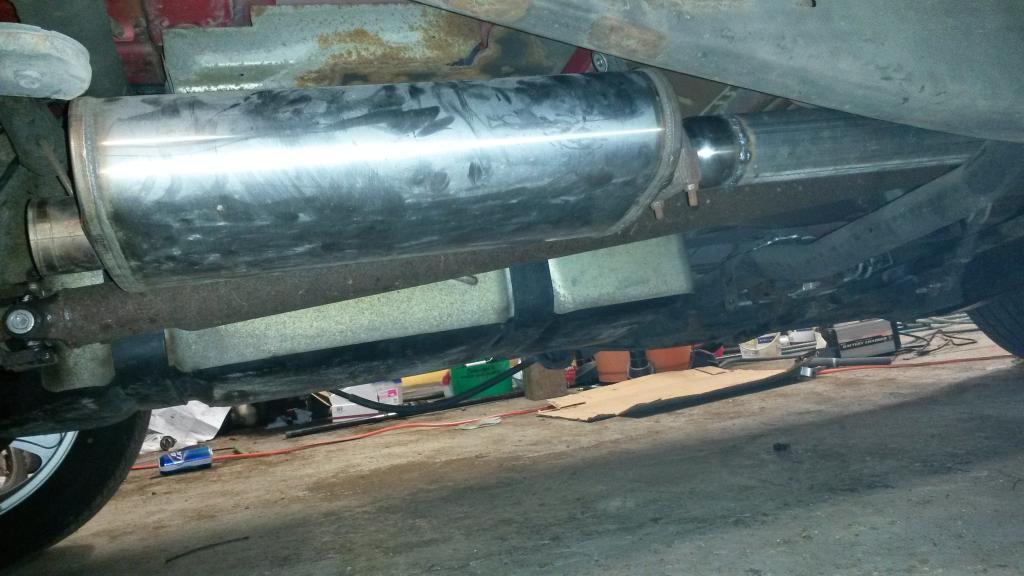
Apparently I didn't get any raw pictures of the wastegate on the but I have the finished pictures that'll help explain it. So that about sums it all up, here are the finished photos!
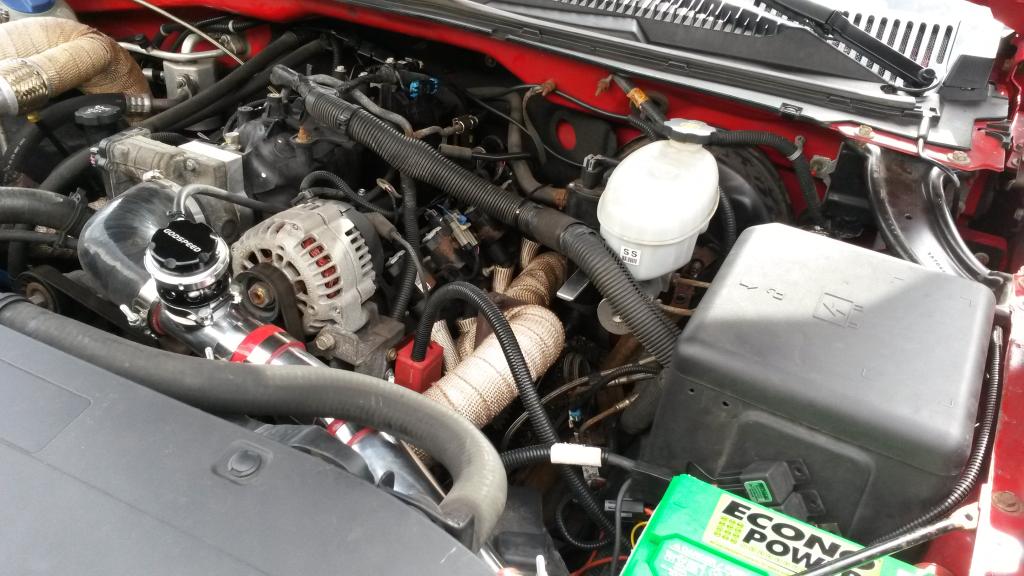
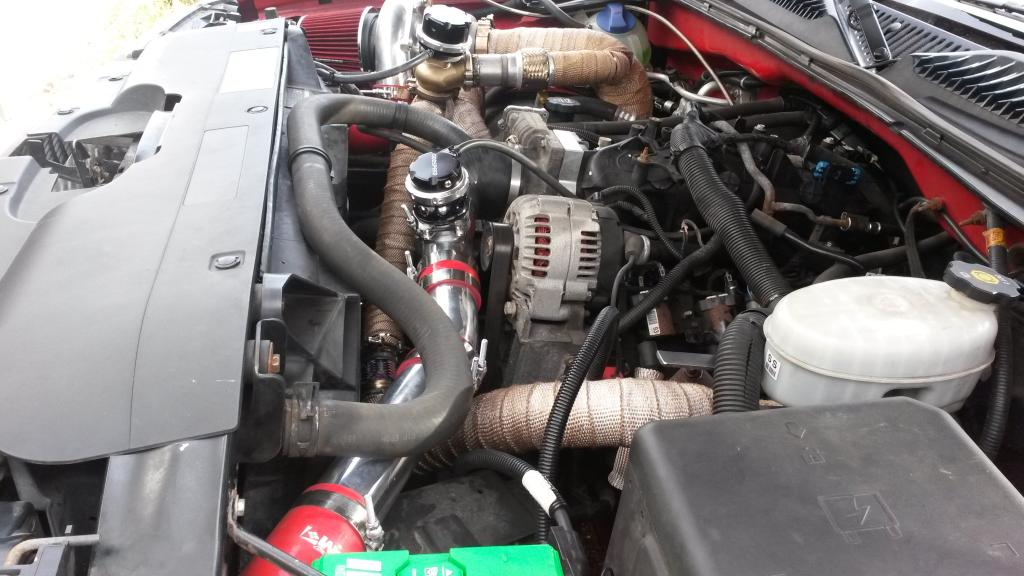
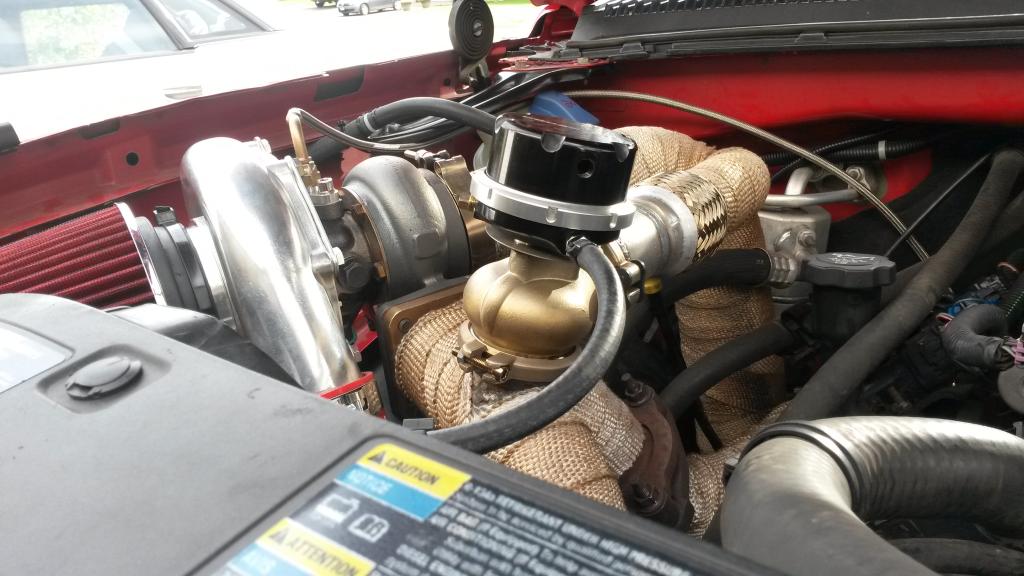
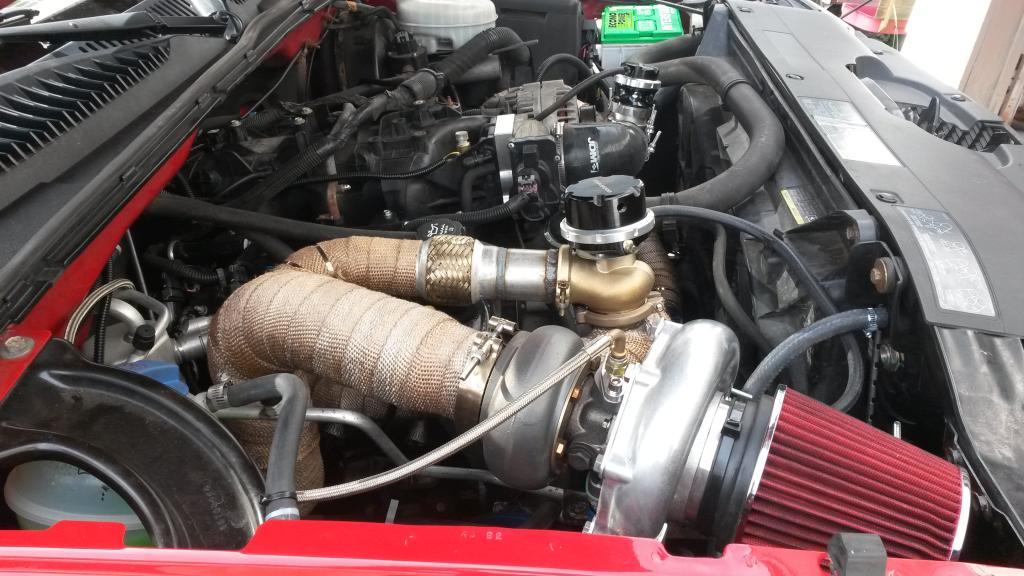
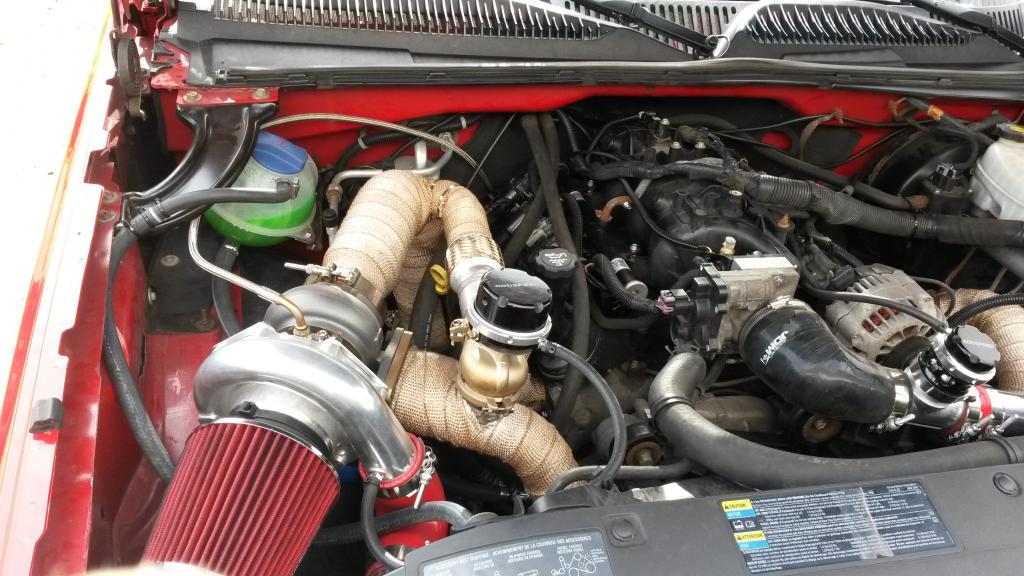
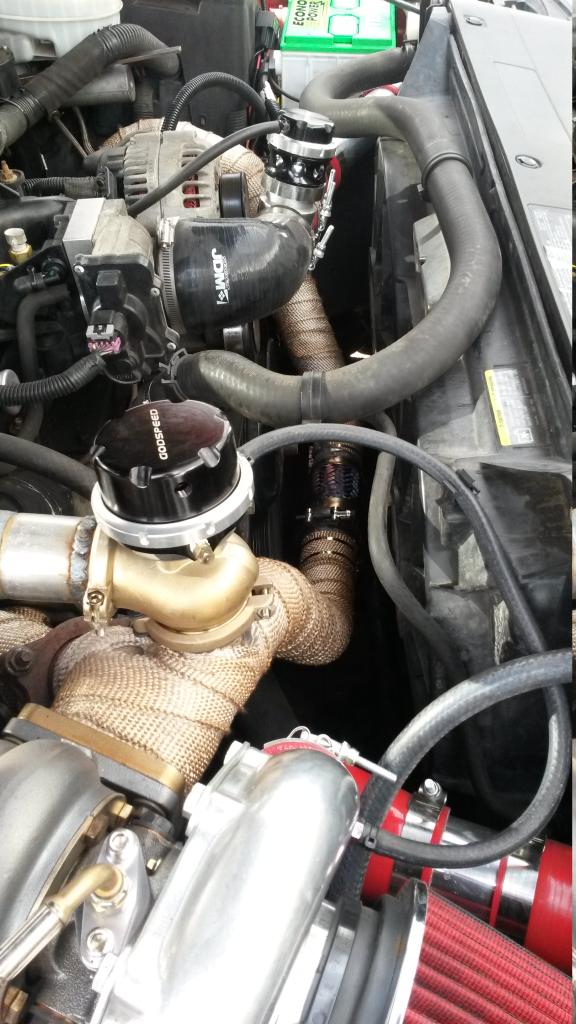


Now onto the exhaust/downpipe/wastegate. I've had plenty of open wastegates and don't care for them so I wanted to reroute this one. This is also my summer daily driver so I wanted it quiet. I already had a 3" in/out 24" case magnaflow muffler that I'm reusing until next year. More pictures to do the talking.
First time wrapping exhaust, it was cheap wrap and I paid for it in itchy *** skin and respiratory issures for the evening.


Apparently I didn't get any raw pictures of the wastegate on the but I have the finished pictures that'll help explain it. So that about sums it all up, here are the finished photos!


 Aug 29, 2014 | 10:06 PM
#3
Thread Starter
Teching In
Joined: Mar 2013
Posts: 25
Likes: 3


I've tuned the truck on E-85 but still have a some work to do with the tune. I just got it all done an running about a week ago. I started with 4psi bumped it to 6psi now I'm on 10psi and can't believe the stock clutch is holding the power the truck is an absolute blast on 10psi. I'm extremely happy with it! I already have a build thread on a small local forum that is a little more in depth but I feel this gives everyone a pretty good idea what has gone into it. Thanks for reading!! Feel free to ask questions if you have any.