

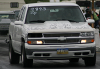
2000 Chevy Silverado project "Charlie Murphy"
 Sep 7, 2015 | 11:16 PM
#371


FYI, The OBS 4x4 14 bolt is 3/4 of an inch narrower per side. 1.5 overall and the leaf springs perches need to be moved. Brakes are also not a direct swap.
The AXN 14 bolt from 05-07 classic is the same width as the 10 bolt it is replacing.
The original drive shaft length between a 10 bolt and a 14 bolt is 5/8 of an inch shorter on the 14 bolt. The 14 bolt also uses a 1350 joint.
The AXN 14 bolt from 05-07 classic is the same width as the 10 bolt it is replacing.
The original drive shaft length between a 10 bolt and a 14 bolt is 5/8 of an inch shorter on the 14 bolt. The 14 bolt also uses a 1350 joint.
Sep 7, 2015 | 11:20 PM
#372

Joined: Jan 2006
Posts: 16,282
Likes: 438
From: Huntsville, AL
Those clips are there to protect the case from rubbing...they were instituted after all the "case pump rub" failures, but since you have the generic case saver thing you dont need them if you want.
Good luck getting that big snap ring back on when you put the case back together. It sucks.
Good luck getting that big snap ring back on when you put the case back together. It sucks.
Sep 8, 2015 | 09:49 AM
#373
Don't use the OEM style clips on the pump because you are using the case saver. Don't try to combine them.
G80 in the 9.5 14 bolt is still a weak point. They don't like burnouts. We replaced lots of them when I worked at the dealership.
The OP's truck is AWD. Probably won't see lots of big burnouts. G80 could probably live a long happy life in his truck.
Duramax trucks with a G80 are using an 11.5" 14 bolt. It's an entirely different animal. But the G80 still doesn't like big burnouts, and neither does the Allison.
Sep 8, 2015 | 12:49 PM
#374

Okay, thanks for all the info fellas. Looking at the clips, I was thinking that they help sling the oil. I didn't realize they acted as a spacer for the case. I won't install them.
As far as burnouts, right now I'm running 125 hp shot of nitrous and I still can't break the tires loose. LOL, not even on gravel. Haha. Well, actually I haven't tried a nitrous launch on gravel. That's the good and the bad of all-wheel-drive. Traction.
It's really a funny thing. When you have too little traction feels like you have an infinite amount of horsepower. When you have good traction it feels like you have no horsepower.
You've got 400 hp, a 3000 stall and can't burn out. What the...?
Sep 10, 2015 | 12:45 PM
#375
A while back I ordered replacement lenses. As you can see, my originals are a little worse for the wear.
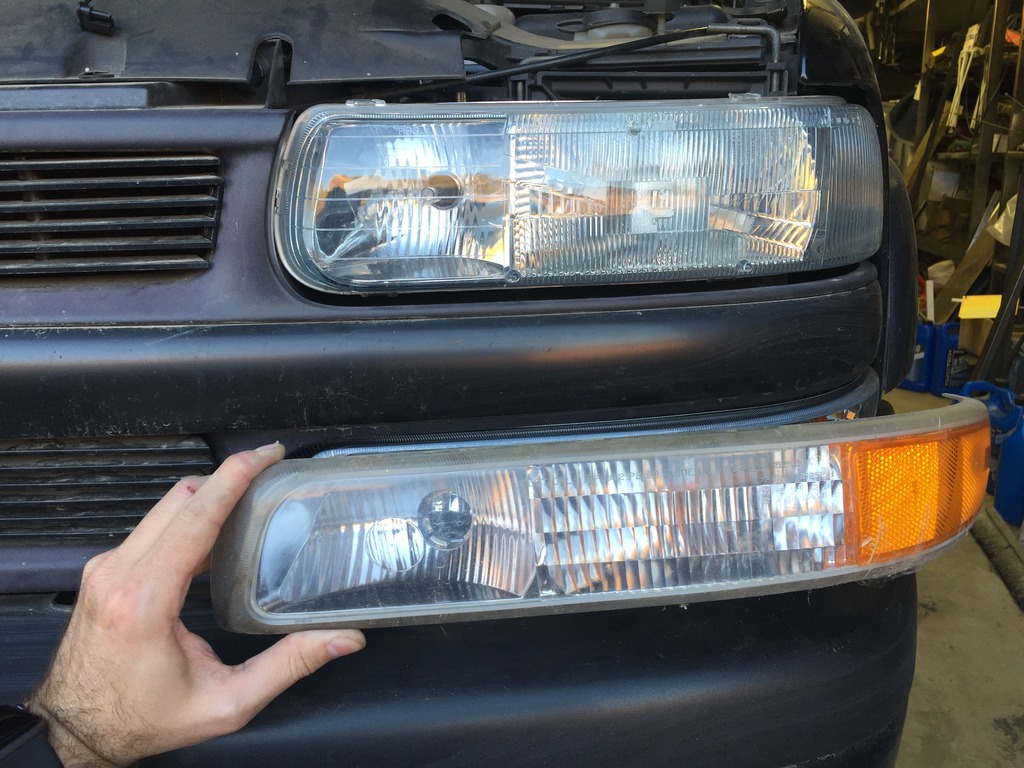
I'm not exactly a big fan of clear tail light covers or euro versions of whatever. I actually meant to order factory like replacements. These are very similar to the factory ones. I'm also not a big fan of blinding oncoming traffic or having a obnoxious led lighting everywhere. I tried to find something similar to stock. We'll see how these turn out.
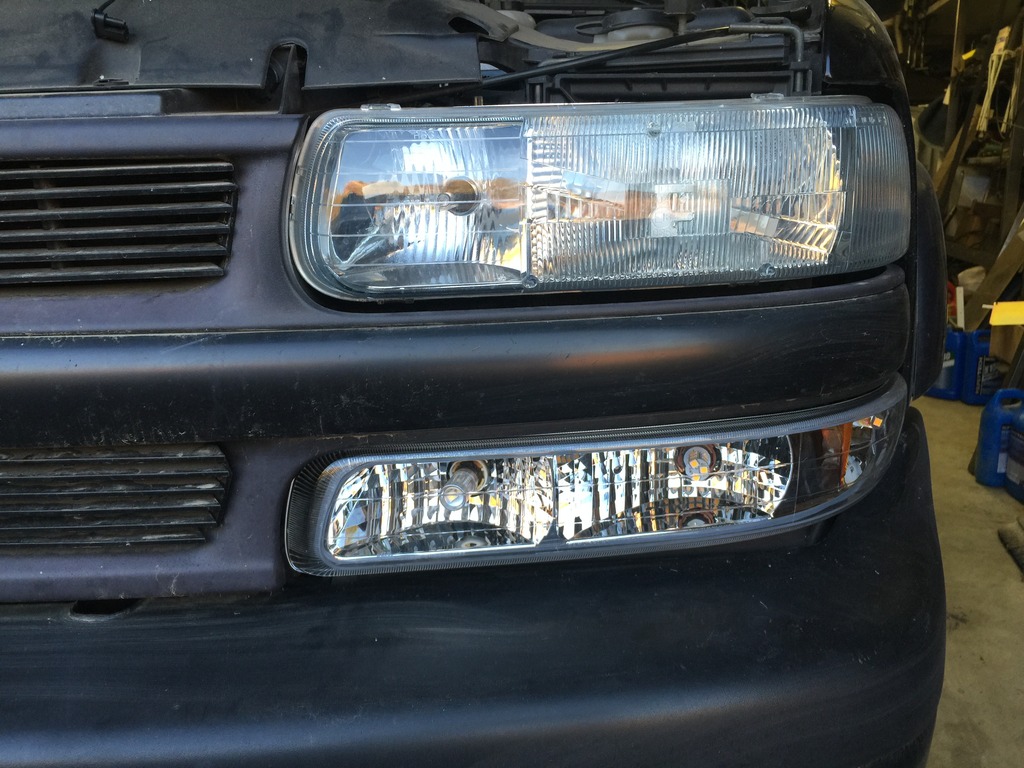
If you look closely you can see the LED lights in there. Unfortunately my battery was dead, so I couldn't test them.
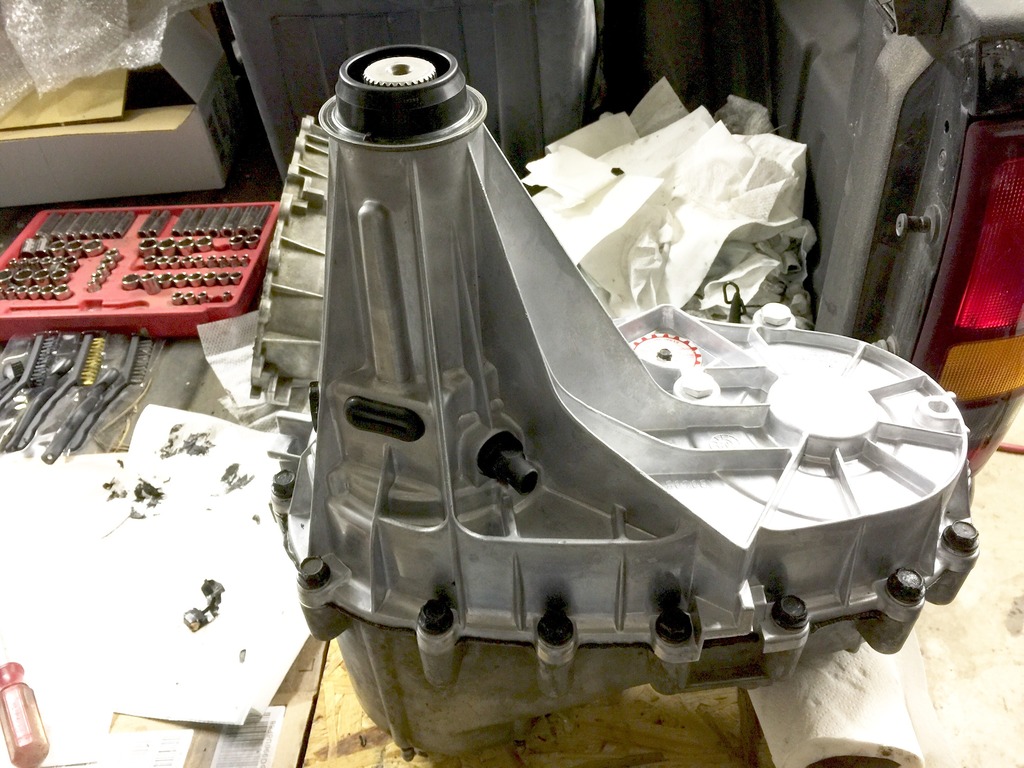
So I started putting everything back together.
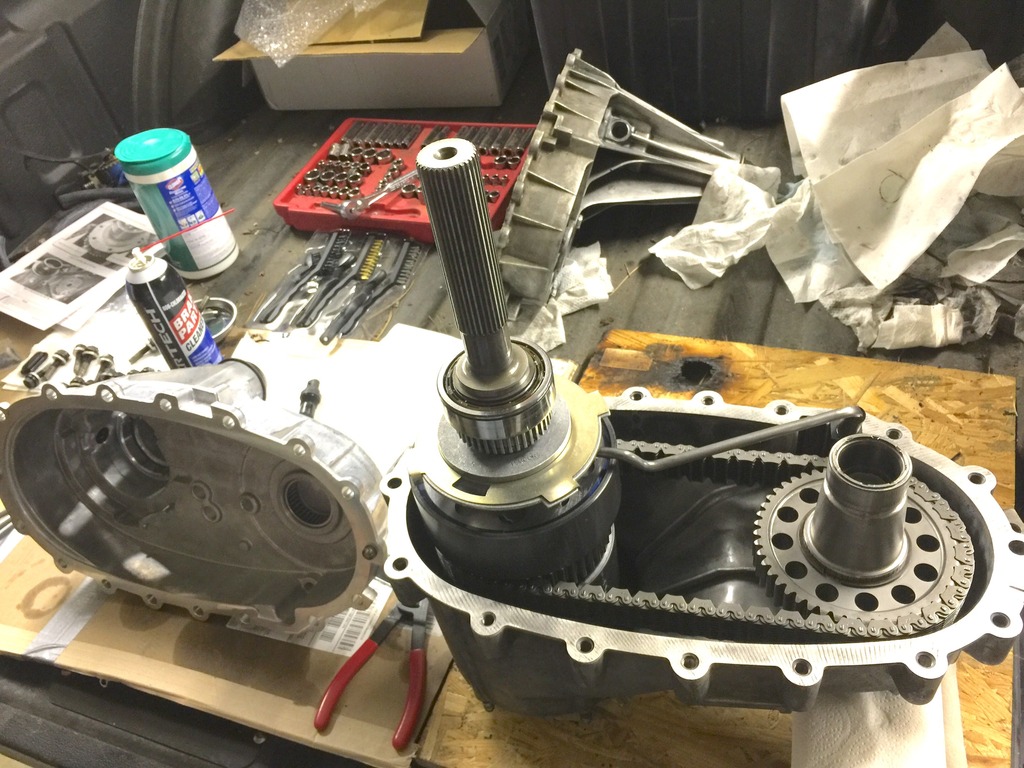
Now I have a transfercase that's half shiny. (And half aluminum)

I'm not exactly a big fan of clear tail light covers or euro versions of whatever. I actually meant to order factory like replacements. These are very similar to the factory ones. I'm also not a big fan of blinding oncoming traffic or having a obnoxious led lighting everywhere. I tried to find something similar to stock. We'll see how these turn out.

If you look closely you can see the LED lights in there. Unfortunately my battery was dead, so I couldn't test them.
So I started putting everything back together.

Now I have a transfercase that's half shiny. (And half aluminum)
 Sep 18, 2015 | 12:16 PM
#376
Ugh, that damn transfercase! I put RTV sealant on the transfer case where it mates to the transmission. Normally I would just run the paper gasket but the two surfaces are nicked and marred so much that I figured it would be better to seal it with some silicone. (I use the right stuff brand.)
Everything went sideways... The silicone has like a 10 minute window. I applied it and carefully balanced the transfercase on the jack, pumping it up towards the transmission a 1/4" at a time. I fought it. I turned it. I couldn't alight the studs and the splines. It wasn't clocked correctly. I didn't have enough room to be able to lift it up off of the ground and bench press it into place.
I got it close and then realized it wasn't going to go because of the angle of the transmission. So I lowered the transmission down a bit. FINALLY, it aligned, but as I lowered the transmission down I dumped a quart of trans fluid out. Of course this was dumped all through rtv silicone and a paper gasket.
At this point, I'm 30 minutes past the silicone drying. Now it's converted in trans fluid, but it's on there! I decided to say **** it. If I take it off to reseal it, I have to go through this process again. So I just tightened it down
Much to my surprise, it appears to be sealed. Of course I don't expect it to last, but I'm going to run it until it leaks. Either way I'm dropping that damn transfercase again.
Dealing with the transfercase is truly my least favorite part of this entire build. Ahhhhh!
/rant
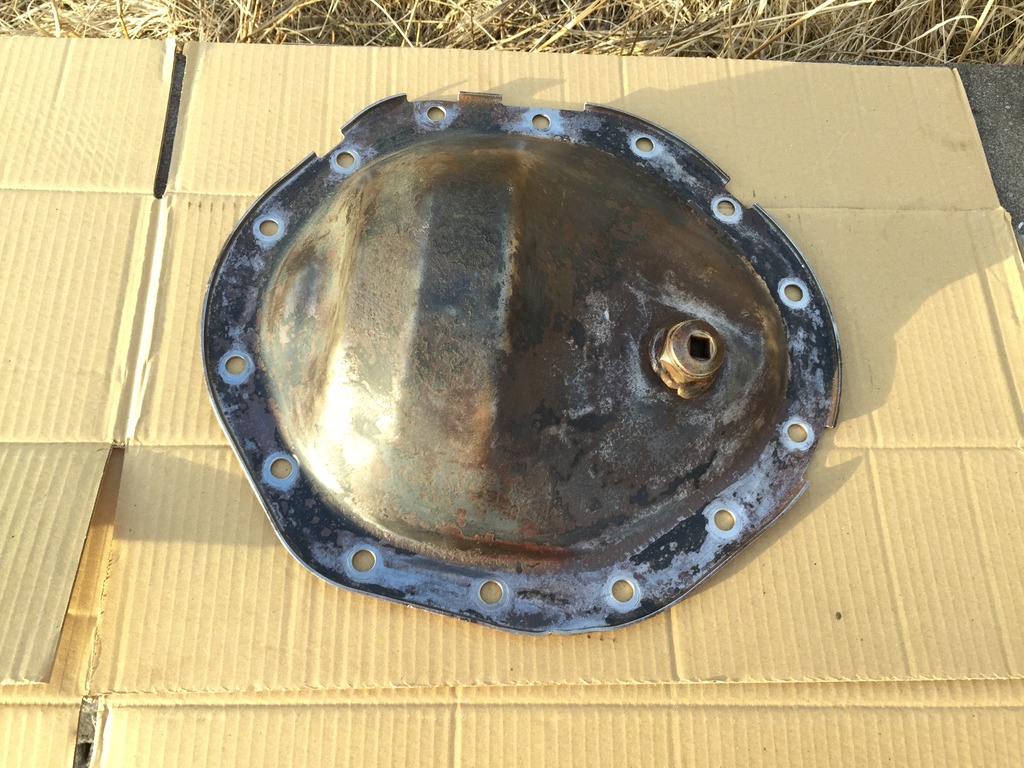
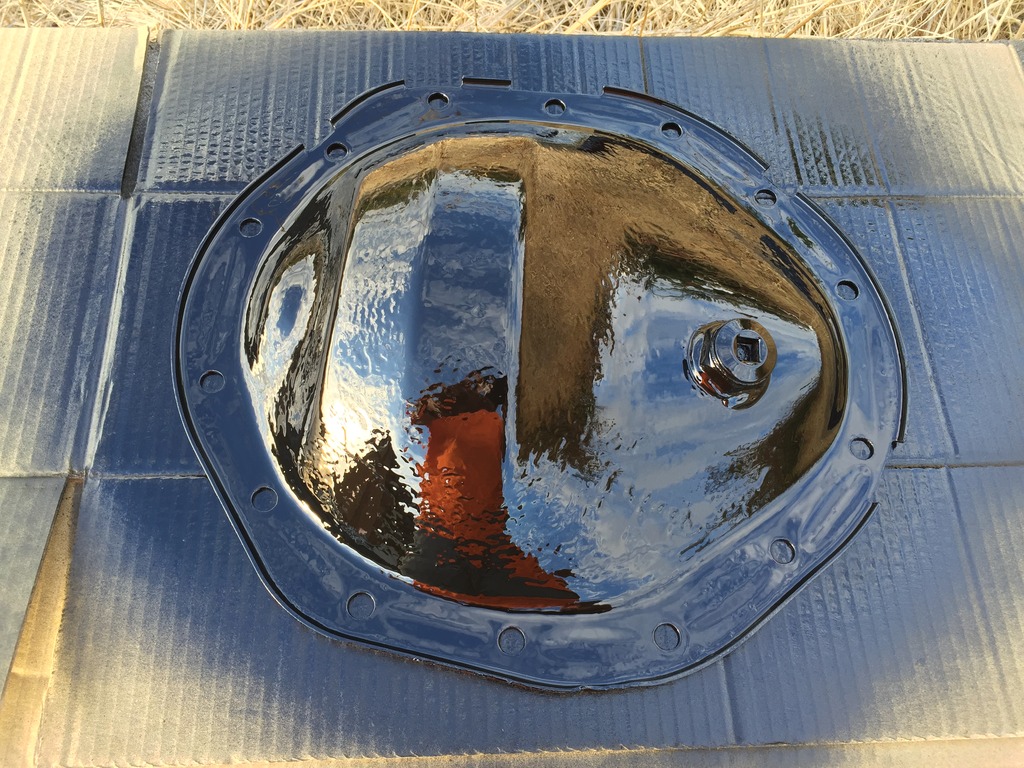
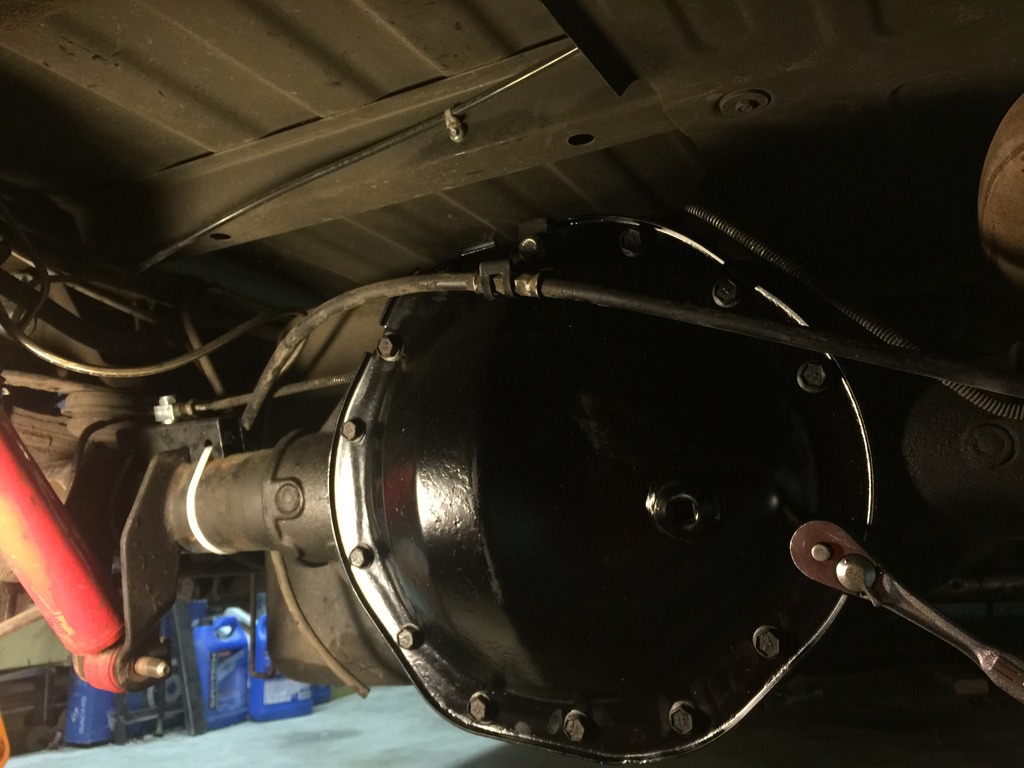
With that business out of the way, I wire wheeled the differential cover. I considered painting the entire rear before the swap but decided otherwise. The diff cover was pretty rough and had the wrecking yard's paint pen code on it.
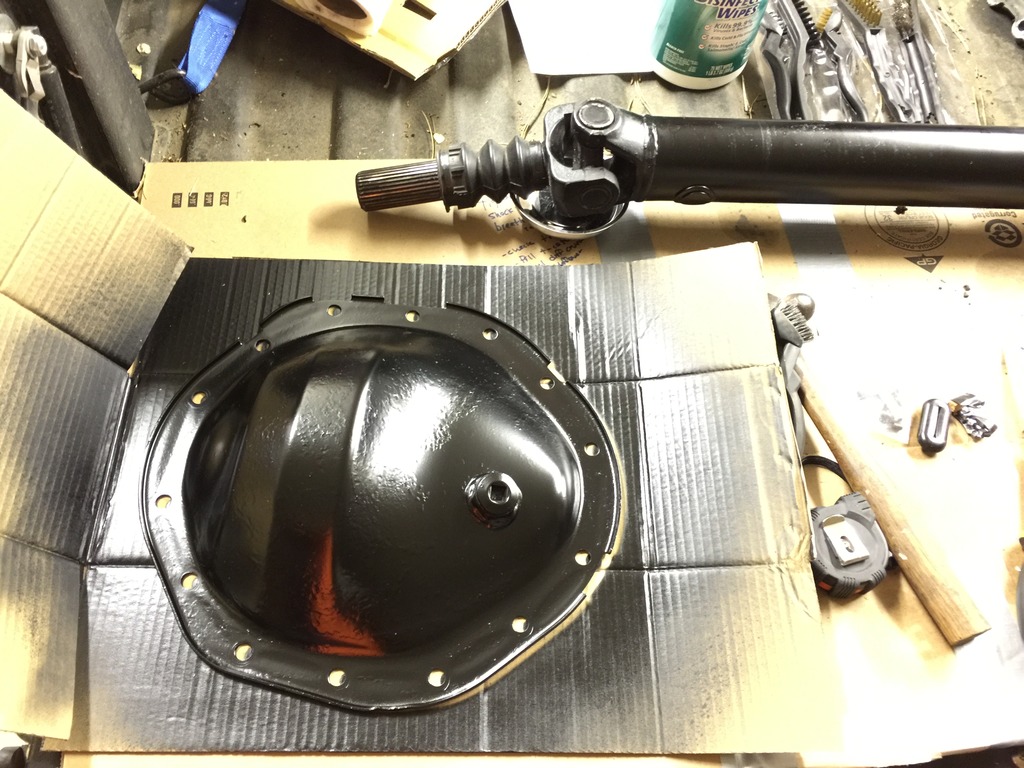
I also touched up my front driveline while I had it out. Previously, the transmission shifter bracket rubbed on it slightly. I figured since I had black paint out, why not?
I got my modified driveline back. Shortened it 5/8" and installed the larger 1350 driveline yoke and u-joint.
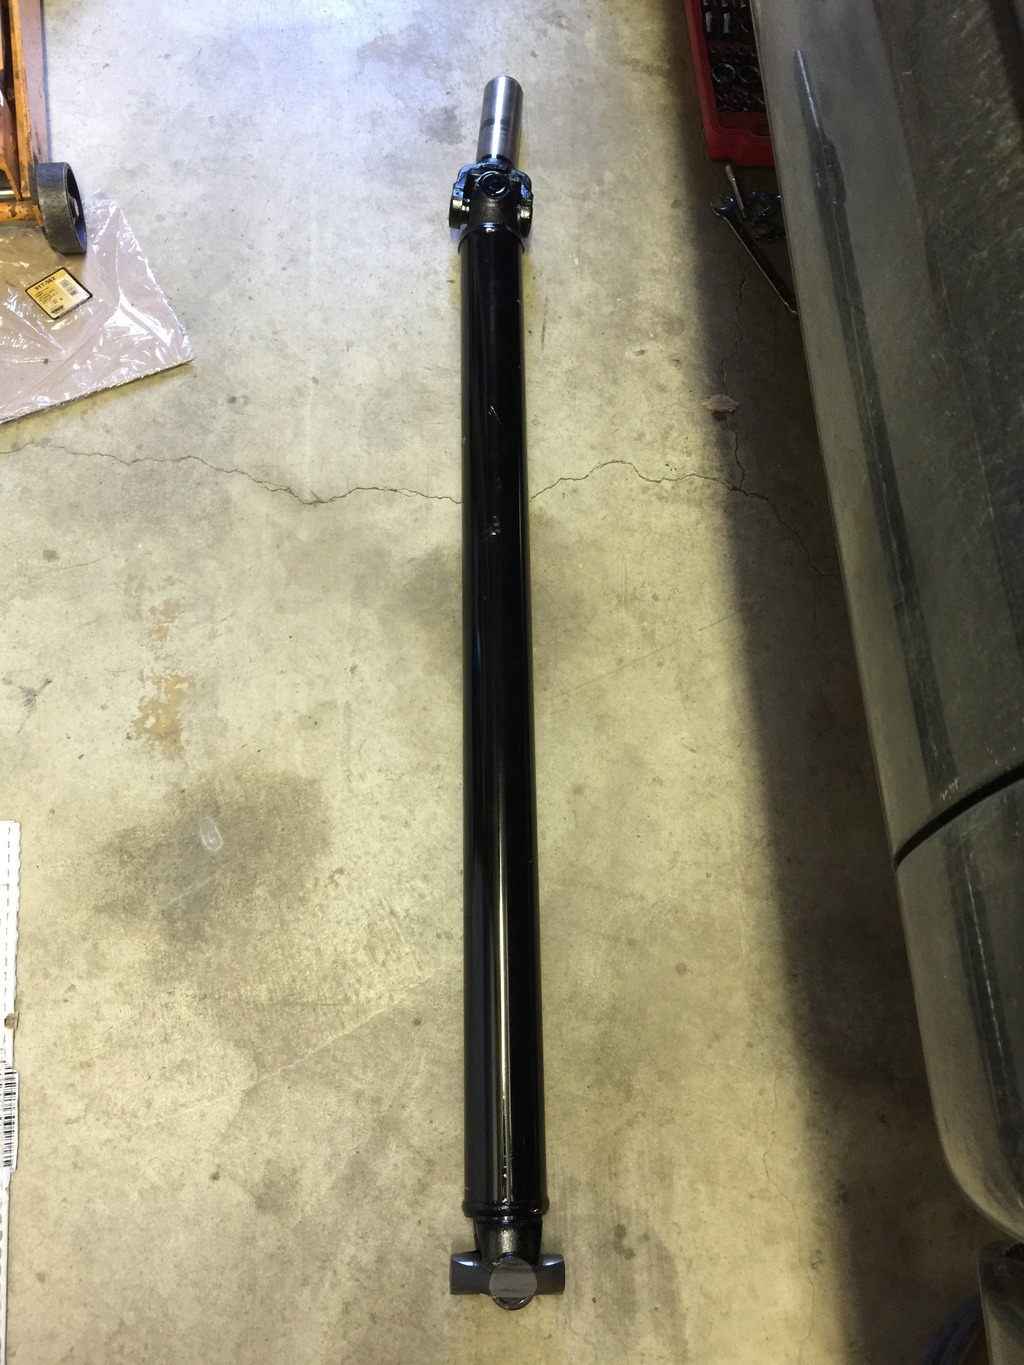

They ended up misquoting me on price and it cost more than I thought it would. I was pretty pissed about it, but oh well. It should be strong enough now and if I break the u-joint, I have a standard size. If I knew it would cost $200 I would have bought the driveline from the donor truck and modified that one instead.
So much rage and frustration in this update. LOL. It's because I'm pretty careful when I plan stuff. Spending $600 in drivelines over the course of the build kinda irks me. Haha.
Everything went sideways... The silicone has like a 10 minute window. I applied it and carefully balanced the transfercase on the jack, pumping it up towards the transmission a 1/4" at a time. I fought it. I turned it. I couldn't alight the studs and the splines. It wasn't clocked correctly. I didn't have enough room to be able to lift it up off of the ground and bench press it into place.
I got it close and then realized it wasn't going to go because of the angle of the transmission. So I lowered the transmission down a bit. FINALLY, it aligned, but as I lowered the transmission down I dumped a quart of trans fluid out. Of course this was dumped all through rtv silicone and a paper gasket.
At this point, I'm 30 minutes past the silicone drying. Now it's converted in trans fluid, but it's on there!
Much to my surprise, it appears to be sealed. Of course I don't expect it to last, but I'm going to run it until it leaks. Either way I'm dropping that damn transfercase again.
Dealing with the transfercase is truly my least favorite part of this entire build. Ahhhhh!
/rant
With that business out of the way, I wire wheeled the differential cover. I considered painting the entire rear before the swap but decided otherwise. The diff cover was pretty rough and had the wrecking yard's paint pen code on it.


I also touched up my front driveline while I had it out. Previously, the transmission shifter bracket rubbed on it slightly. I figured since I had black paint out, why not?

I got my modified driveline back. Shortened it 5/8" and installed the larger 1350 driveline yoke and u-joint.


They ended up misquoting me on price and it cost more than I thought it would. I was pretty pissed about it, but oh well. It should be strong enough now and if I break the u-joint, I have a standard size. If I knew it would cost $200 I would have bought the driveline from the donor truck and modified that one instead.
So much rage and frustration in this update. LOL. It's because I'm pretty careful when I plan stuff. Spending $600 in drivelines over the course of the build kinda irks me. Haha.
 Sep 18, 2015 | 04:19 PM
#378
Anyway, I'm not in this hobby because it's cheap. LOL.
Sep 20, 2015 | 02:37 AM
#380
Got a little bit done today.
I had to make a piece for the brake lines T to mount too. The 14 bolt axle meets above the center section and then goes to the master cylinder. The 10 bolt's brake lines meet above the driver's side shock mount. This means that the mounting point is missing on the 14 bolt housing.
So I cut a piece of scrap in half.
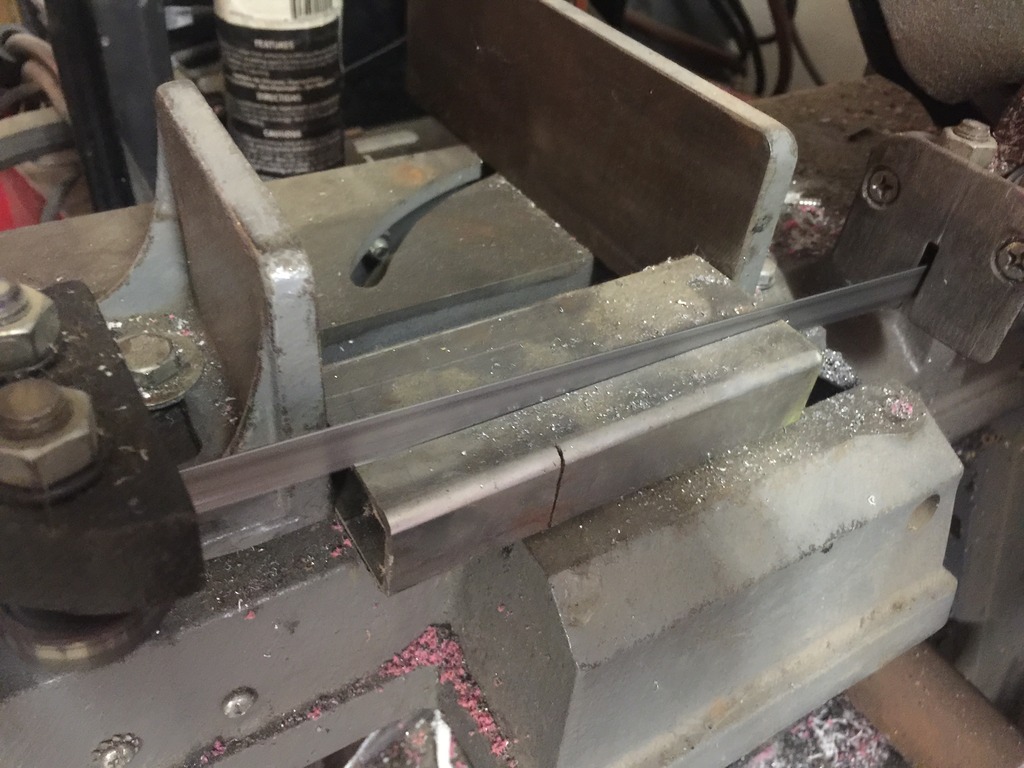
I drilled some holes in it, filed off the burrs and painted it black.
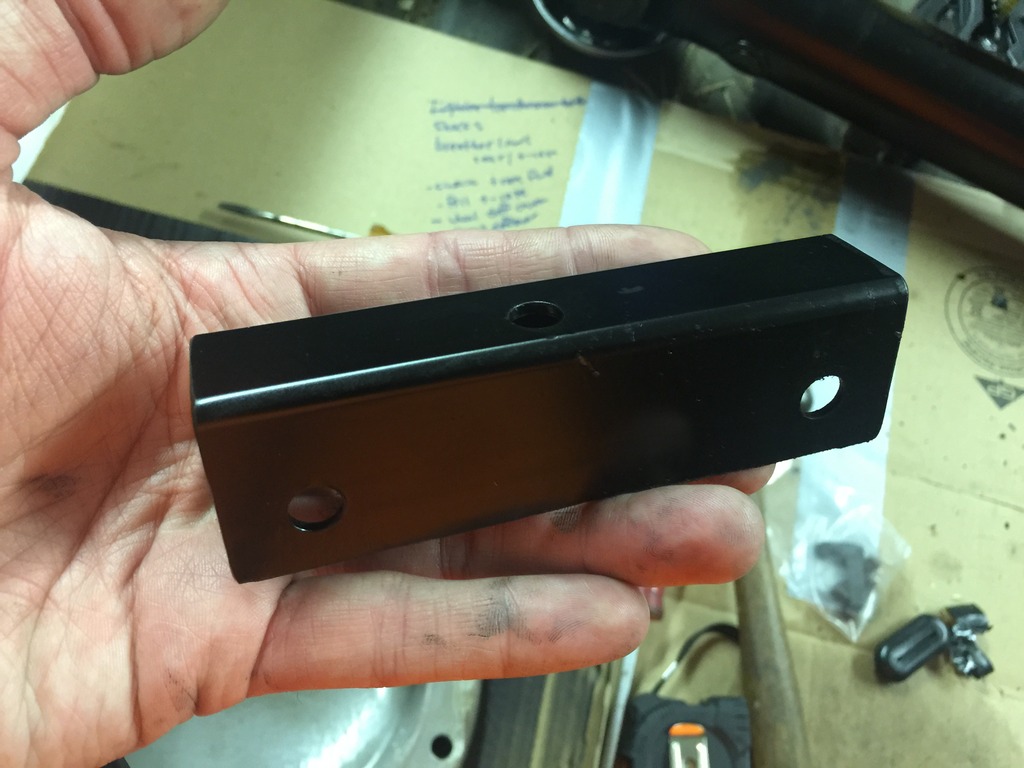
I reassembled the differential and put the gasket and cover on. You can see on the left where I zip tied the brake line mount to the tube.
I'm a little concerned about the zip ties holding up but these are industrial zip ties. They're reinforced with metal.
So I ran into a problem I was hoping to avoid. While I was installing the brake line mount and diff cover, I felt all around the top of the axle. One of my exhaust tubes was resting on the axle housing. I knew it was close before the swap, this larger rear end just takes up more room.
I didn't have a choice. I had to cut it out.
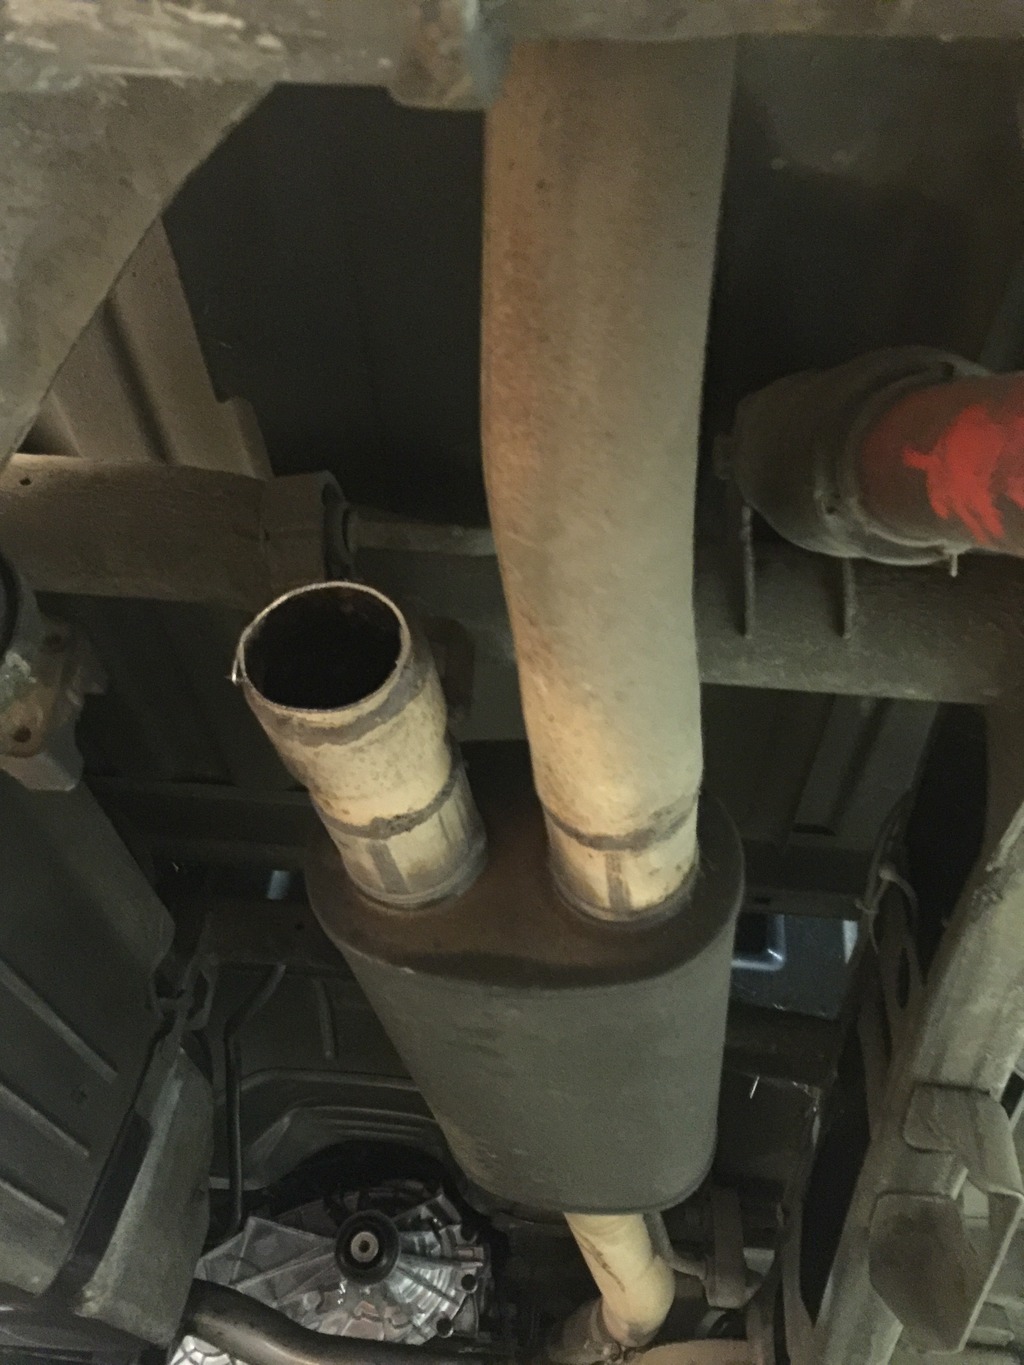
I actually took the above pictures after I cut out the exhaust. I forgot to take s pic showing how it was in the way.
Here's what I ended up cutting out.
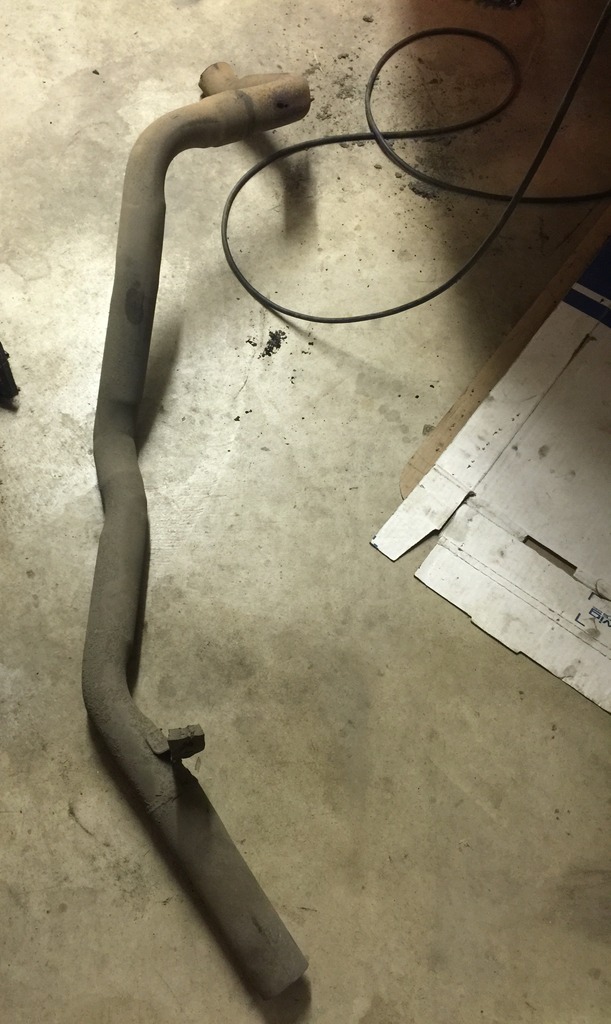
I guess for now I'll just buy a piece of exhaust tubing and angle it out in front of the passengers tire. The last thing I want is exhaust drone.
I had to make a piece for the brake lines T to mount too. The 14 bolt axle meets above the center section and then goes to the master cylinder. The 10 bolt's brake lines meet above the driver's side shock mount. This means that the mounting point is missing on the 14 bolt housing.
So I cut a piece of scrap in half.

I drilled some holes in it, filed off the burrs and painted it black.

I reassembled the differential and put the gasket and cover on. You can see on the left where I zip tied the brake line mount to the tube.

I'm a little concerned about the zip ties holding up but these are industrial zip ties. They're reinforced with metal.
So I ran into a problem I was hoping to avoid. While I was installing the brake line mount and diff cover, I felt all around the top of the axle. One of my exhaust tubes was resting on the axle housing. I knew it was close before the swap, this larger rear end just takes up more room.
I didn't have a choice. I had to cut it out.

I actually took the above pictures after I cut out the exhaust. I forgot to take s pic showing how it was in the way.
Here's what I ended up cutting out.

I guess for now I'll just buy a piece of exhaust tubing and angle it out in front of the passengers tire. The last thing I want is exhaust drone.