
Hydroboost Conversion Install
 May 6, 2008 | 06:54 PM
#1
This is a step-by-step process for replacing your vacuum brake booster with a hydroboost system. In case you are unaware of what a hydroboost system is, it is a system that utilizes the power steering pump rather than the vacuum system. Common reasons for changing to this system include, large cams that do not create vacuum at low rpm, FI applications where you need you brakes when just coming out of boost, or for bagged trucks needing clearance for wheels in the engine compartment.
The parts you need include:
-Hydroboost (off of HD truck, Hummers, Suburbans, Tahoe, and Escalades) I got mine off a 2003 HD truck
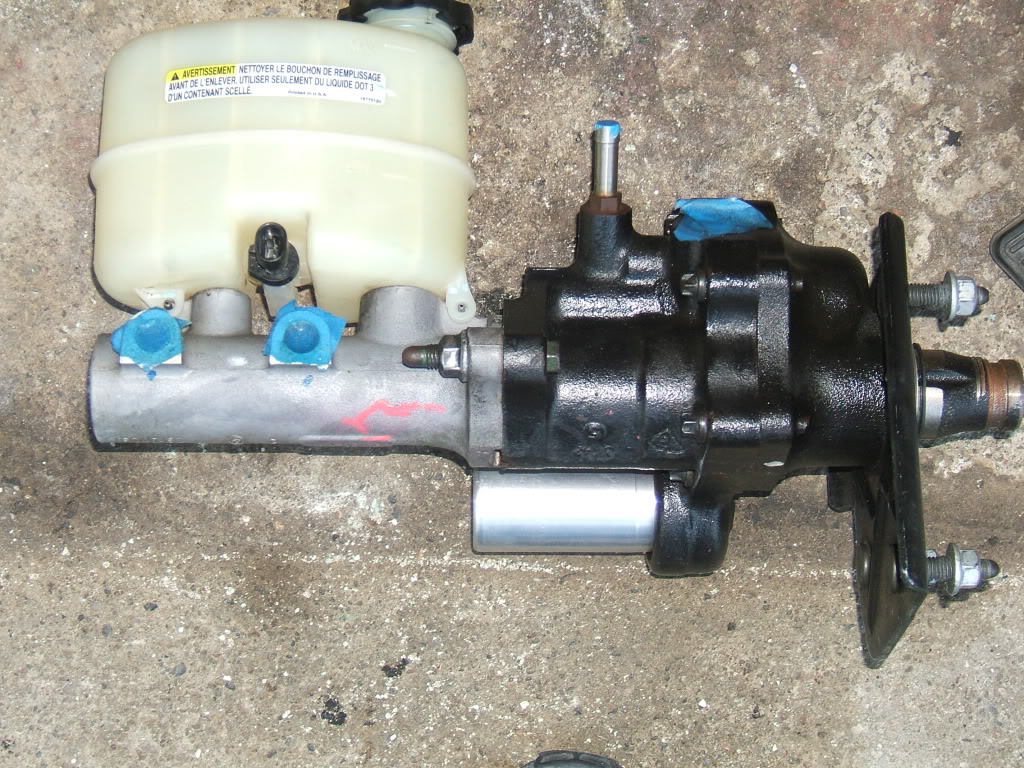
-Master cylinder - the one I had was still bolted to the hydroboost
-Brake pedal - I will explain and show you why.
-3 hoses that go to and from hydroboost (2 pressure lins and 1 low pressure line)
-Power steering pump from HD truck or a T-fitting - I chose the T to see if there was any downfall.
-Vacuum cap for the intake where brake booster rubber line goes to.
- 3-4 clamps if you are using the T fitting
-Power steering fluid and brake fluid
Step 1: Disassembly
Remove brake pedal from inside of truck.
Remove vacuum brake booster, and unbolt brake lines from master cylinder. Remove power steering pump, it's okay to remove the lines from the pump, as it will be need to be done anyway.
Step 2: Run 2 pressure lines.
The line on the left runs from the power steering pump to the hydroboost. Once this line is attached to the powersteering, you can bolt the power steering back up to the motor. The line on the right goes from the hydroboost to the power steering gear. The line I had may have been bent where it attached to the PS gear. You may have to adjust the hose accordingly so it does not hit the frame or steering gear boot.
Step 3: Mount Hydroboost to firewall
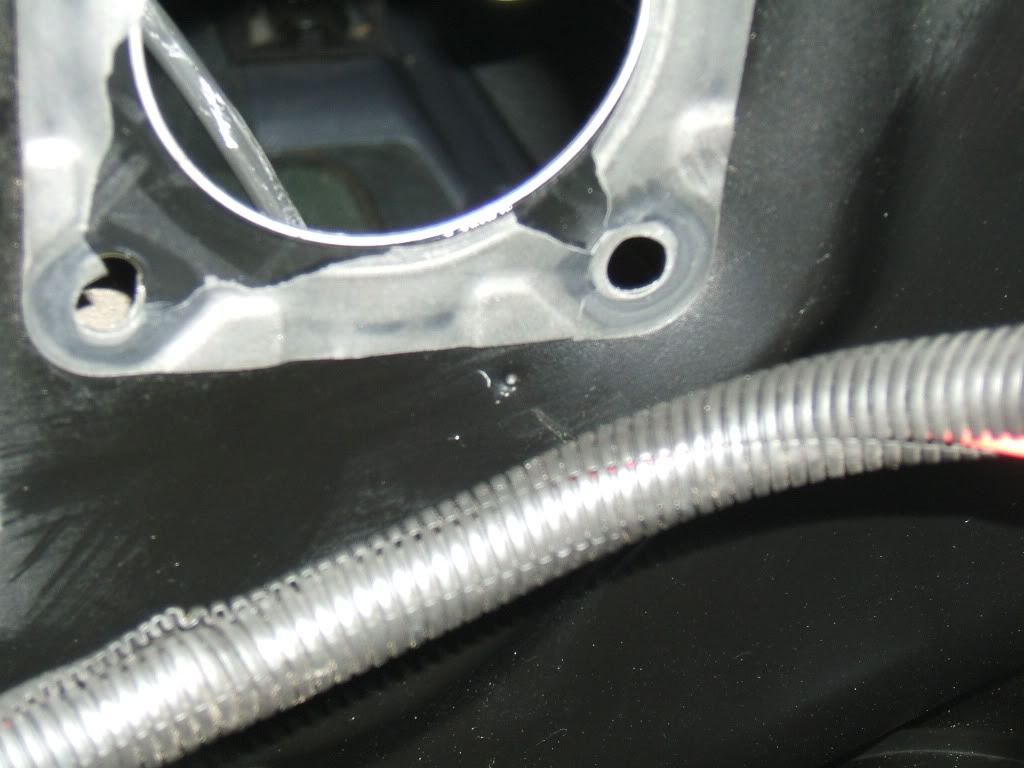
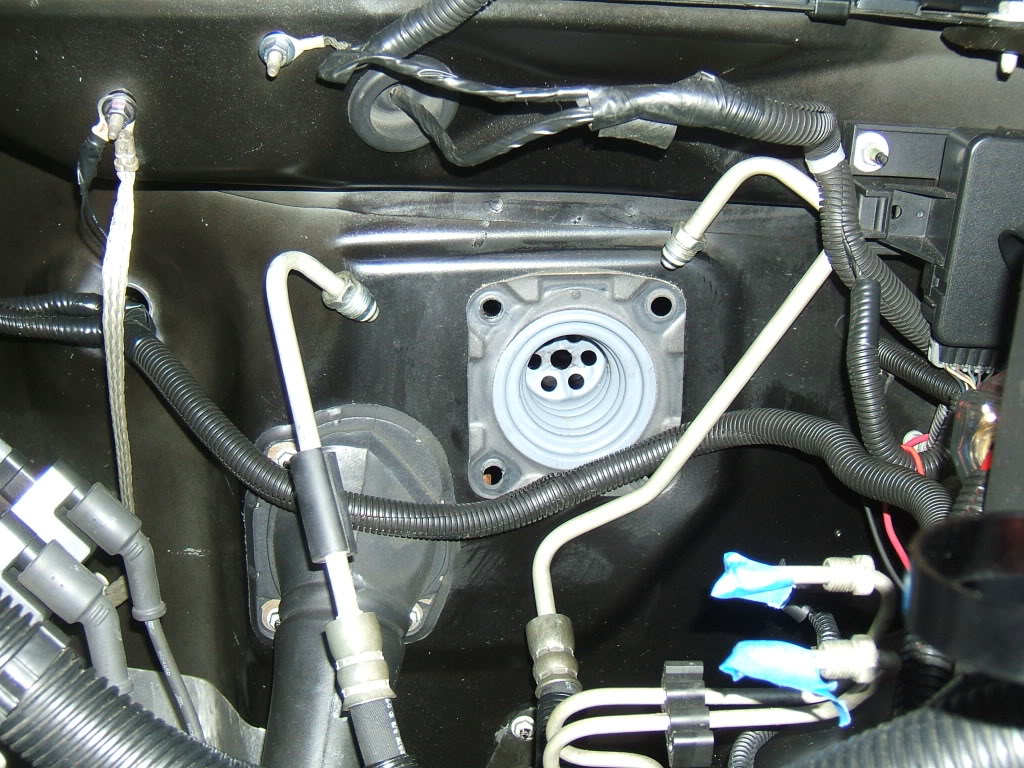
You are going to need to drill a hole in the fire wall to accomidate the different bolt pattern of the hydroboost. Luckily, GM put a divet in the approximate place to drill. You still need to check and see if the divet and bolt line up before you drill.
Step 4: Bolt in Hydroboost and other lines
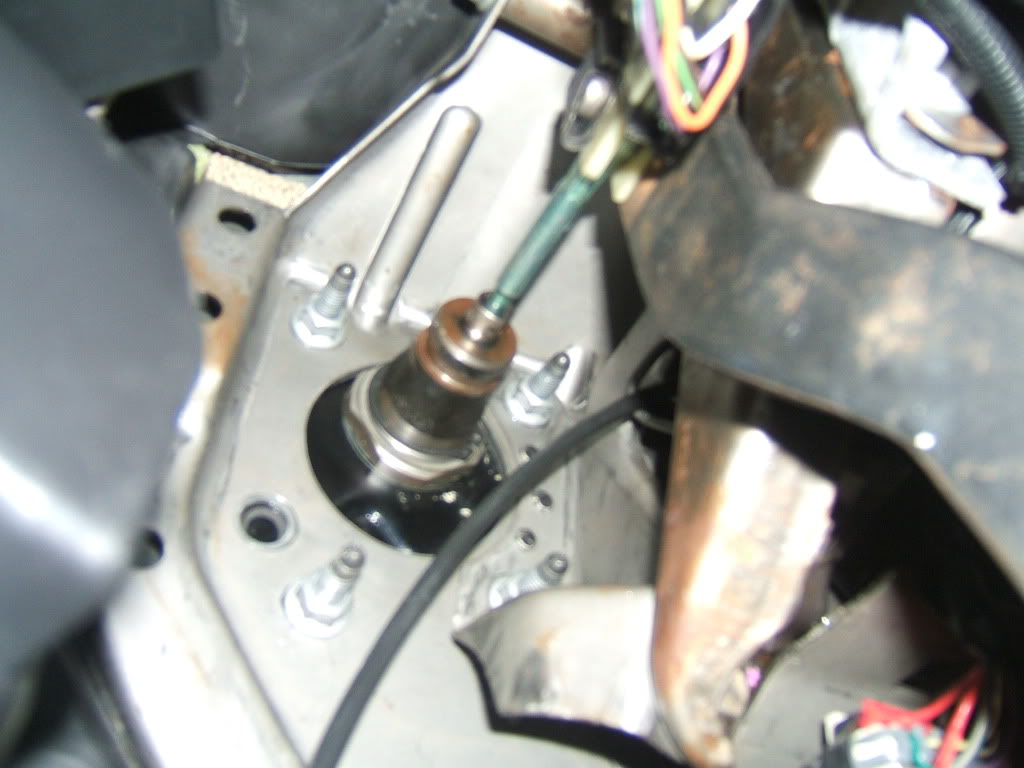
Tighten down the 4 bolts on the inside of the truck to bolt in hydroboost.
Attach and snug down power steering pressure lines to hydroboost. I put a dab of PS fluid on the o-ring to help prevent leaks. Not really sure if it matters, but I did it. No leaks yet.
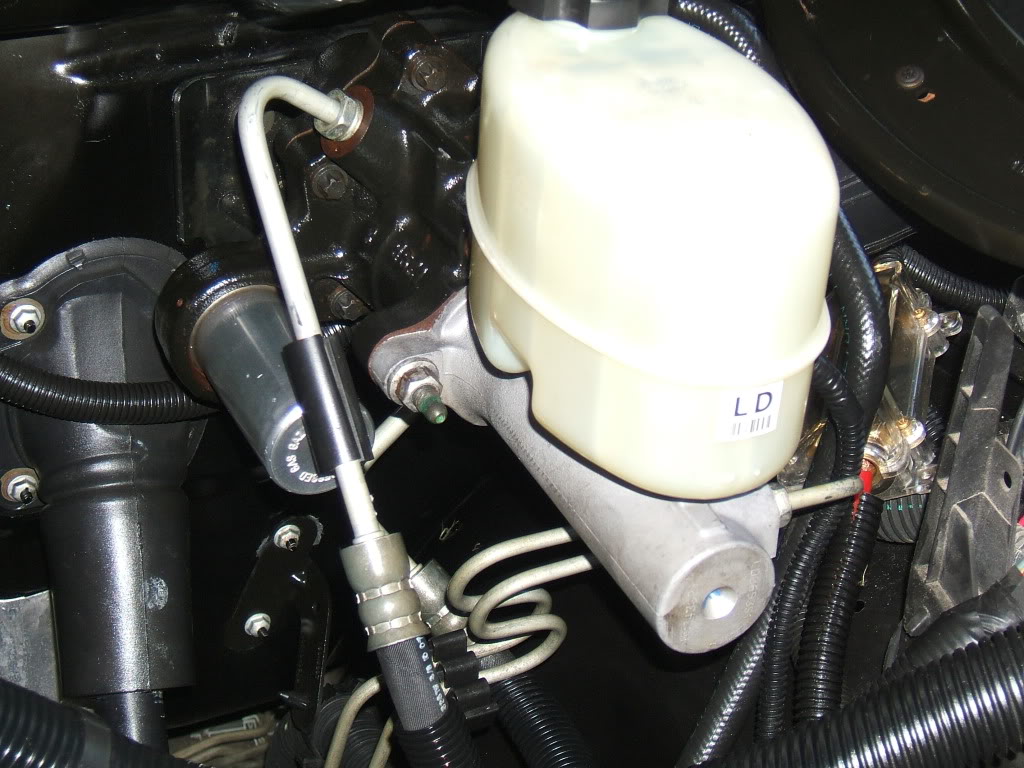
Attach brake lines.
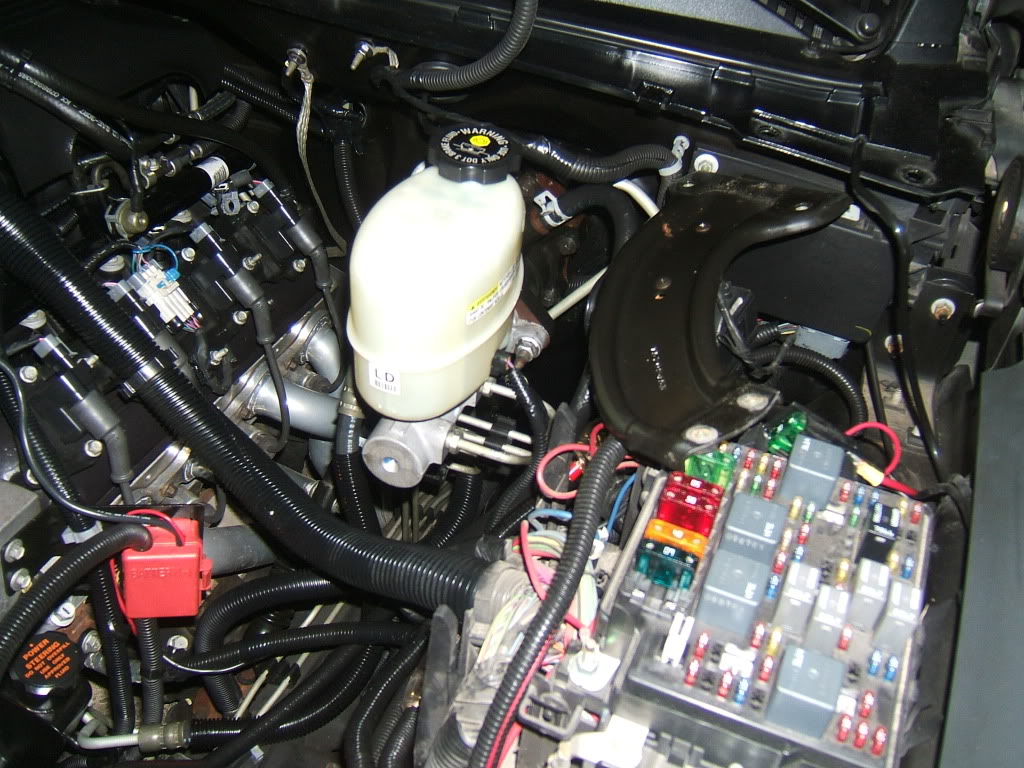
Step 5: Run low pressure line and T into rubber return line
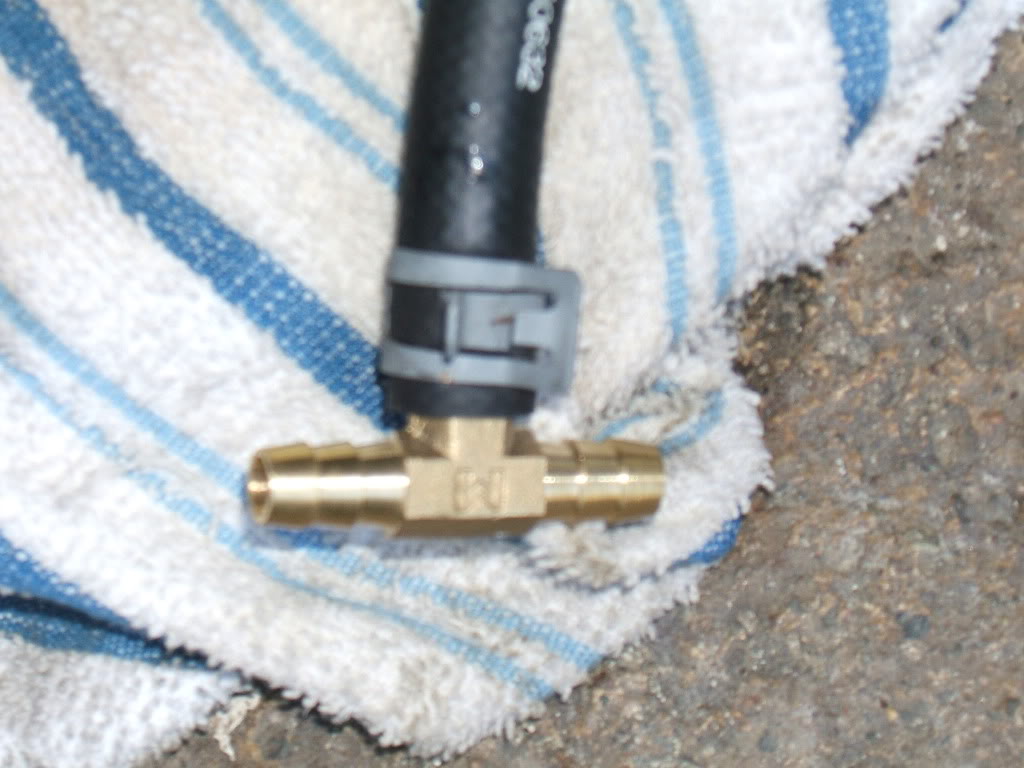
Just get a regular 3/8" brass T fitting from your local auto parts store. The line attached is coming from the Hydroboost.
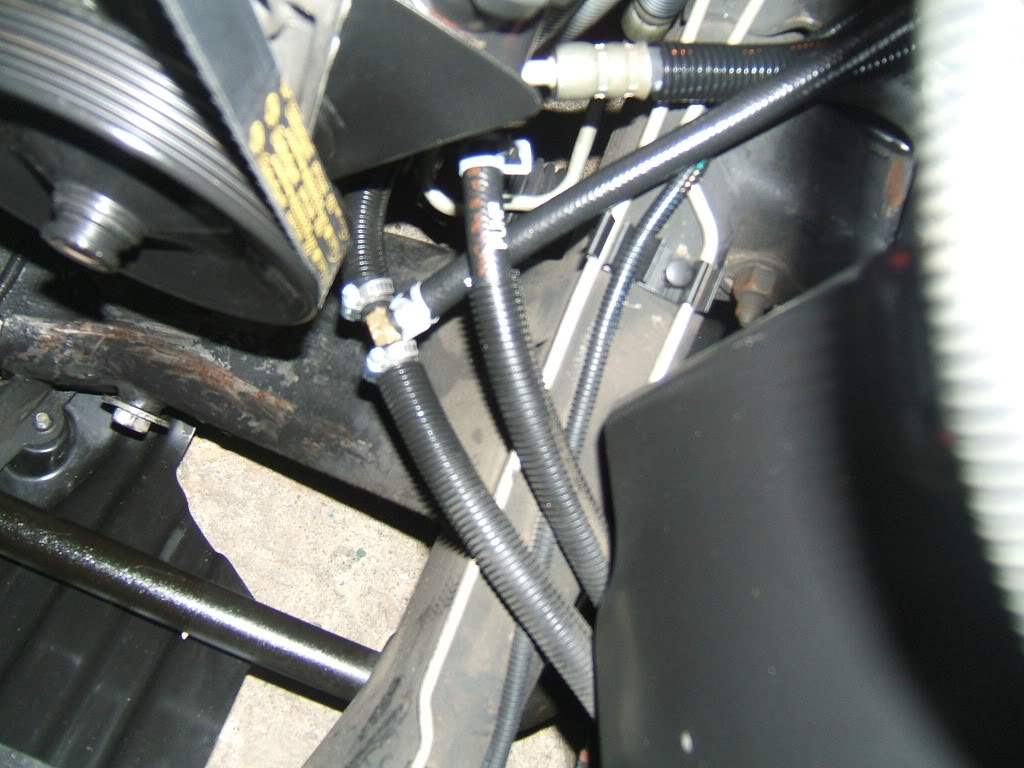
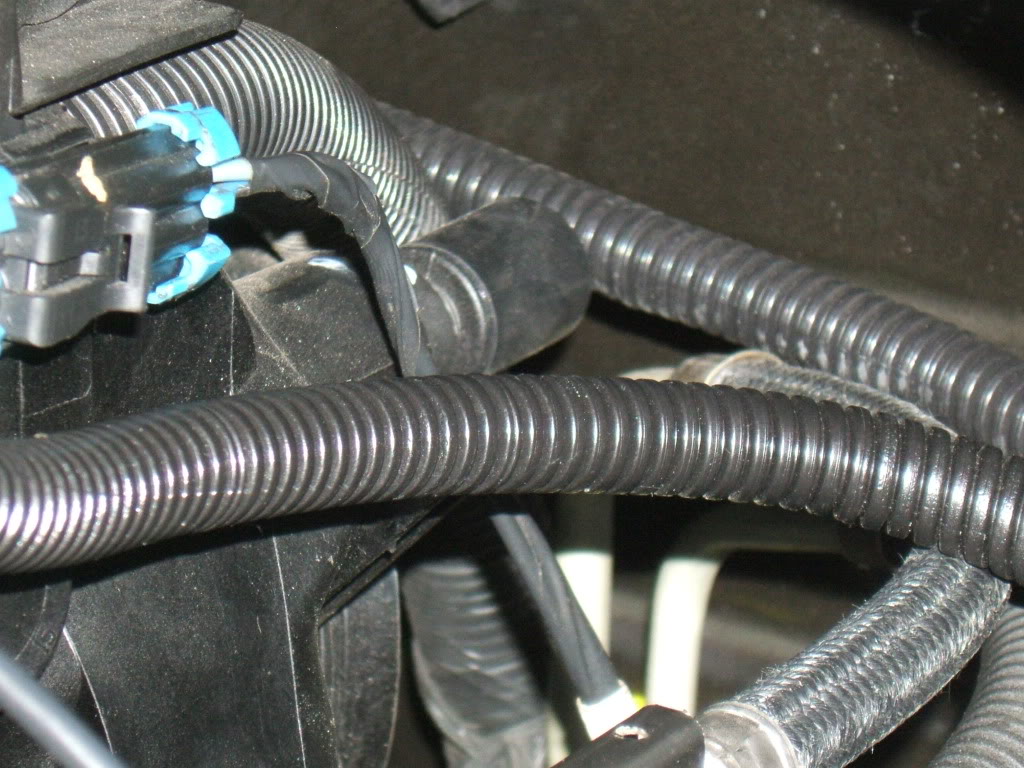
You can see in the picture there are 2 lines labeled power steering. On my truck I have a PS cooler. I ran the line in a way so the fluid would go from the hydroboost, through the cooler, and to the PS pump.
Attach the other end of the hose to the hydroboost and place clamps on each side of T fitting.
Step 6: Install new brake pedal

In this picture, the top pedal is the one for the vacuum system and the bottom pedal is for the hydroboost. Notice the point where the rod attaches. The hydroboost has a higher mounting point because it actually sit higher on the firewall.
Notice the large circular opening and how the hydroboost sits in the top portion of the opening. That is why you need a brake pedal.
Step 7: Loose ends
Place vacuum cap on back of intake.
Bleed PS system.
Bleed brake system.
Check for leaks!
Enjoy, and feel free to ask any questions!
The parts you need include:
-Hydroboost (off of HD truck, Hummers, Suburbans, Tahoe, and Escalades) I got mine off a 2003 HD truck
-Master cylinder - the one I had was still bolted to the hydroboost
-Brake pedal - I will explain and show you why.
-3 hoses that go to and from hydroboost (2 pressure lins and 1 low pressure line)
-Power steering pump from HD truck or a T-fitting - I chose the T to see if there was any downfall.
-Vacuum cap for the intake where brake booster rubber line goes to.
- 3-4 clamps if you are using the T fitting
-Power steering fluid and brake fluid
Step 1: Disassembly
Remove brake pedal from inside of truck.
Remove vacuum brake booster, and unbolt brake lines from master cylinder. Remove power steering pump, it's okay to remove the lines from the pump, as it will be need to be done anyway.
Step 2: Run 2 pressure lines.
The line on the left runs from the power steering pump to the hydroboost. Once this line is attached to the powersteering, you can bolt the power steering back up to the motor. The line on the right goes from the hydroboost to the power steering gear. The line I had may have been bent where it attached to the PS gear. You may have to adjust the hose accordingly so it does not hit the frame or steering gear boot.
Step 3: Mount Hydroboost to firewall
You are going to need to drill a hole in the fire wall to accomidate the different bolt pattern of the hydroboost. Luckily, GM put a divet in the approximate place to drill. You still need to check and see if the divet and bolt line up before you drill.
Step 4: Bolt in Hydroboost and other lines
Tighten down the 4 bolts on the inside of the truck to bolt in hydroboost.
Attach and snug down power steering pressure lines to hydroboost. I put a dab of PS fluid on the o-ring to help prevent leaks. Not really sure if it matters, but I did it. No leaks yet.
Attach brake lines.
Step 5: Run low pressure line and T into rubber return line
Just get a regular 3/8" brass T fitting from your local auto parts store. The line attached is coming from the Hydroboost.
You can see in the picture there are 2 lines labeled power steering. On my truck I have a PS cooler. I ran the line in a way so the fluid would go from the hydroboost, through the cooler, and to the PS pump.
Attach the other end of the hose to the hydroboost and place clamps on each side of T fitting.
Step 6: Install new brake pedal
In this picture, the top pedal is the one for the vacuum system and the bottom pedal is for the hydroboost. Notice the point where the rod attaches. The hydroboost has a higher mounting point because it actually sit higher on the firewall.
Notice the large circular opening and how the hydroboost sits in the top portion of the opening. That is why you need a brake pedal.
Step 7: Loose ends
Place vacuum cap on back of intake.
Bleed PS system.
Bleed brake system.
Check for leaks!
Enjoy, and feel free to ask any questions!
Last edited by sleek silverado; Jan 8, 2011 at 07:28 AM.
May 6, 2008 | 07:09 PM
#2
Did your vacuum booster have the assist pump sitting on the front of it? If so any codes or anything from unplugging it?
Nice write up and you saved me a snafu of the truck being down a bit until I came up with the brake pedal.
Nice write up and you saved me a snafu of the truck being down a bit until I came up with the brake pedal.
May 6, 2008 | 07:20 PM
#3
No assist on mine. I have heard that codes will be thrown. Might need to get it tuned out???

 May 7, 2008 | 10:06 AM
#6
A lot more touchy. I tap them and it stops on a dime. I haven't actually driven my truck on the street because it doesn't have insurance, registration or inspection. Definately a huge difference from a vacuum system that only makes 5 in Hg at idle. I also have Bear 14" Eradispeeds in front, decelarotors in the rear, with stainless steel brake lines. No problems stopping here.
May 7, 2008 | 11:43 AM
#7

Fantastic! I was thinking about doing this when I got to my install since there doesn't seem to be a step-by-step writeup anywhere. Thank you, this will help a lot! I'm picking up parts for this today. How long did the install take you?
Trending Topics
May 7, 2008 | 11:47 AM
#8
I have done enough research on other forums to peice it all together. I really hope this makes this project easier to do for everyone. It is really not all that difficult. The install I did after work during the week. I would say 5-6 hours taking my time.
Last edited by sleek silverado; May 7, 2008 at 11:52 AM.
May 7, 2008 | 11:54 AM
#9
GFYS and STFU
iTrader: (8)
Joined: Jan 2007
Posts: 13,870
Likes: 4
From: Here and sometimes there too.
My 5 inches of vacume at idle thank you...soon to be more I hope!
Thanks bro, gonna be helpful.
Question why did you pick a Hydroboost setup rather than a vacuum assist system?
Thanks bro, gonna be helpful.
Question why did you pick a Hydroboost setup rather than a vacuum assist system?
May 7, 2008 | 12:07 PM
#10
 Just give me some time.