
4L80E Shift Kit?
 Jan 23, 2008 | 02:09 PM
#11

Thread Starter


Joined: Dec 2001
Posts: 4,955
Likes: 243
From: Panama City, Fl
I forget all that it was, the instructions are fairly clear though as far as that goes. The only thing about the kit that sucks are two plugs that go into separator plate. The instructions say to lay the plugs in on a flat surface, and hit them with a hammer to expand them. Well that never worked for me and they ended up falling out, luckily i found them both in the pan. I would recommend soldering or brazing them into the plate in addition to expanding them with the hammer.


 Jan 23, 2008 | 11:02 PM
#15

TECH Regular
Joined: Apr 2004
Posts: 470
Likes: 0
From: Virginia
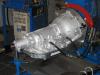
i'll post some pics from my HD2 install. I didn't install the internal parts. Here are some links from my install and problems, and solutions.. ha
Install
https://www.performancetrucks.net/fo...d.php?t=357815
Problem
https://www.performancetrucks.net/fo...d.php?t=378314
https://www.performancetrucks.net/fo...87&postcount=4
https://www.performancetrucks.net/fo...d.php?t=378805
Problem Solved
https://www.performancetrucks.net/fo...d.php?t=379215
I installed it in January. Forgot to install one plate, reinstalled and was problem free until November. Found two chamfer plates had blown out, abnormal wear on sep. plate from stock *****, and loose valve body.
I originally installed the transgo hd separator plate (thinking bigger is better) After having the problems, I got with vince at FLT and he advised me that he prefers the stock VB because it's thinner and excepts the chamfer plugs better. Also he likes the Torlon ***** over the metal as they do save from failures. I had Vince send me a stock plate that he chamfered the plugs for me and a set of torlon *****. Reinstalled, and have been running without a glitch.
Install wasn't bad, drilling so many holes was kind of nerve racking but definitely a learning experience.
There are lots of good people here with tons of info. Hope i've given a little insight!
Justin
Jan 24, 2008 | 06:15 AM
#16
Just a heads up fellas. Transgo has finally released a new hd2 kit that comes with a separator plate ready to install. No more stupid plugs! The first time I opened the box I was like where are the dam plugs. I then as most men do not do.....had to pick up and read the directions!!!! After further viewing it mention drilling the supplied plate.
 Looked in the bottom of the box and there was the plate. Whoops! I will tell you that not all of the kits out there come this way as the ones I have been getting have been hit or miss. Also they have eliminated some of the drilling that has to take place in the valve body housing itself. I have to tell you the old kid works but the new kit is way easier to install. Good luck BigKid. Vince
After further viewing it mention drilling the supplied plate.Looked in the bottom of the box and there was the plate. Whoops! I will tell you that not all of the kits out there come this way as the ones I have been getting have been hit or miss. Also they have eliminated some of the drilling that has to take place in the valve body housing itself. I have to tell you the old kid works but the new kit is way easier to install. Good luck BigKid. Vince
Jan 24, 2008 | 10:42 AM
#17
hey vince you dont happen to have a new style hd-2 in the shop do ya? one that is forsale. 
there are three different kits for the 80E and everyone recomends the hd-2 but many are just doing the valve body changes. does anyone know if one of the other kits are just the valvebody kit. i mean why pay for more parts then your going to use. im sure the price difference isn't much but still a buck is a buck.
there are three different kits for the 80E and everyone recomends the hd-2 but many are just doing the valve body changes. does anyone know if one of the other kits are just the valvebody kit. i mean why pay for more parts then your going to use. im sure the price difference isn't much but still a buck is a buck.

