
Cluster boost gauge mount
 Sep 11, 2010 | 08:07 PM
#11

Hey guys, check out my boost gauge mounting location. It was a bit of work, I had to separate the glass with a hot razor blade, hole drill from behind through three layers of plastic and circuit board, insert the gauge and secure it, solder the lighting wires to the circuit board and run the hose to a tee in the vacuum line. I then glued the glass back on, reassembled it all, and to my surprise, it worked perfectly. The picture speaks for itself. I am more than happy with it. Having the cluster apart allowed me to clean up all the dust that had accumulated in there over the years. Running around 8.5psi.

I wish I would have done a step-by-step with pics. Of course, if you have tranny temp in this location, then it won't work for you.
I wish I would have done a step-by-step with pics. Of course, if you have tranny temp in this location, then it won't work for you.

Original or not, doesn't matter. Looks really good & clean.
Swift, Autometer does have a gauge that only goes up to 15 or 20. I think I have it at home. I may have in my photobucket. Autometerhas them in a different series gauge tho, but it prolly has the vac gauge.
Myself, I won't ever will over 15#, so I wanted those hash marks & numbers as large as I could.

Also, I forgot if it's electric or mech. BTW, got a pic of your hot razor?
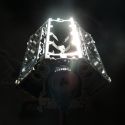
I'd still like to see some night pics.
Last edited by fastnblu; Sep 11, 2010 at 08:13 PM.
Sep 13, 2010 | 10:05 PM
#12
I just used a utility knife blade held with Vice-grips and heated with a torch.
Here is a night pic. The camera makes the boost guage look a bit brighter than it is. Definitely different lighting than the rest but the contrast is OK.

Here is a night pic. The camera makes the boost guage look a bit brighter than it is. Definitely different lighting than the rest but the contrast is OK.
Last edited by swift700; Sep 13, 2010 at 10:23 PM.

Thread
Thread Starter
Forum
Replies
Last Post

