When you click on links to various merchants on this site and make a purchase, this can result in this site earning a commission. Affiliate programs and affiliations include, but are not limited to, the eBay Partner Network.
Probably didn't quite need 24" but I didn't want to order twice. Traced the MAF back to the firewall and pulled it off all of its mounting points, ran it under the intake cover to the throttle body, then the extension got me right to where the MAF needs to be. The alternative was extending and soldering 8 wires so we saved some time there. O2 will be installed soon after I get the rest of the heat wrap around everything else.
All of the primary electrical leads from the battery run right at the turbo on this truck. Wish GM had just left the battery in the front/left; it would have eliminated a lot of heat wrapping.
Wrapped up any wiring or pipes that run near the turbo/downpipe with "lava rock" woven sleeving. Not sure if it's any better than the usual ceramic stuff but it is neat looking. Shows less dirt perhaps?
Went ahead and wrapped wastegate dump tube as it ran very close to a few wiring intersections as well as the lower rad hose.
I bought the tool for the stainless ties and it is worth every bit of the $80. I feel silly that I did not buy one previously.
Had some aluminum sheet lying around and some scraps of heat shield material so I made a couple of heat shield(two aluminum sheets sandwiched around a layer of header wrap and wrapped with reflective sheet.
Pulled plugs out and checked gap. Guys at On3 recommended no more than .028. I checked the factory plugs and they were north of .040. The plugs I bought were what Autolite called for in a 2015 LT4 Vette. Gap was somewhere even larger. Gapped down to .028.
I will suggest taking that manifold off and wrapping it with lava wrap, I also suggest taking your old stock heat shield and making "mini" heat shields for the wires so they don't get heat soaked dry out and crack (personal experience). I made the mistake of wrapping my manifold in regular dei wrap, it lasted a week before it became brittle and broke apart. The lava wrap has currently held up and feel just the same as the day i put it on. I even used the same stuff for plug wires, phenomenal stuff. I trusted the guys at ON3 at first, then realized that when I had to remake my manifold, down pipe and intercooler piping they were really out to just sell kits and not offer much help. New Era Performance and Choda were awesome for help and tech. But hey, my tig welding skills improved
Last edited by RySmDPT14; Dec 10, 2017 at 07:38 PM.
The On3 solution to removing the coolant reservoir is to insert a fill fitting inline in the top rad hose and running an aftermarket overflow. I'm sure it works fine but I decided to keep the factory piece.
There is a large tee in the bottom rad hose(that runs to the bottom of the reservoir) that they have you replace with a straight section of pipe. I inserted that into the vertical section of the upper hose and placed the factory reservoir in the second battery location on the driver's side. Cut the factory hose a little shorter and it fit pretty well. I swapped the long and short coolant vent lines around and need to extend the short one a little now.
finish it up man .. you will coat hot side soon after that's a fact
if that wrap not good enough it will melt very fast
I KNOW. I've been working in Knoxville for a week but back today. And we had SNOW the week before in south Louisiana. A good bit, too(see pic below). About to lay my hands back on it now. Aside from finding one of the new plugs is cracked(probably due to my own previous impatience), I have everything in front of me to get it back together now.
The wrap I used on the wires is pretty good stuff; at least a name brand that BTR sells. It actually has the reflective layer on the inside which is pretty sweet IMO. That layer is always the thinnest and the first thing to fall off so I figured it might last longer this way. Still I'm using a ridiculous amount of the metal ties on it as I don't trust it to not pop open at the stitched seams.
I am fairly convinced that round 2 will see some ceramic coating. I may even see if I can talk On3 into selling me just another manifold and have that coated while driving the truck.
I've worked myself into a decent enough paranoia that I expect I'll be under there more than I should be poking at things checking for heat damage.
Got it started up and ran for 5-8 mins with no major explosions. Exhaust doesn't line up properly and plug wires are a mess; with turbo manifold on I can't get the wires confidently seated. Lots of loud ticks which I assume is spark grounding to block/head/etc.
I'm going to go back to short Taylor wires. Will have their version of the ceramic boots in tomorrow then can basically run it with open exhaust. If they melt at some point, so be it but I can get them on and off without removing anything. If they last a year I'll be happy and the Taylor guys seem confident they will last longer than that.
Also hoping today/tonight to get my band saw over to the shop and wire up an outlet for my TIG I've never used. I've got the old exhaust off and the Magnaflow on but the main pipe (from previous cat to inlet of MF Muffler) of course is ~3' too long due to short cab truck.
Short version, with downpipe and exhaust extension from the kit bolted up, the exhaust extension sits right on top of the frame mount for the trans crossmember. Would eventually vibrate through so going to fix that also while getting that connected to the muffler inlet.
I'll get pics of that stuff once I figure it all out.
Damn, I would also think that maybe the ticking you are hearing is exhaust leaks
I would agree save for the randomness and sharpness of it. It's really more of a SNAP than anything. Pretty unmistakably similar to the arcing out of a burned-through plug wire boot. The reality is that once I got everything in there, including my heat shielding, engine mounts, etc., its almost impossible to run the 90 degree boots underneath. I think a couple of them aren't on all the way. Just going to go simple as the 135 degree boot wires can be fairly easily manipulated with everything in place.
So basically just have to get the exhaust squared away. Band saw is in my trunk so hopefully after work I can get the TIG wired up and see how much practice I need. This round, I don't care what it looks like as long as it doesn't leak. I've done some MIG on mild steel exhaust before as well as some very basic aluminum TIG and nothing exploded so hopefully I can make a decent leap to stainless.

 Dec 3, 2017 | 06:18 PM


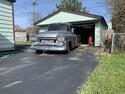


 I've been working in Knoxville for a week but back today. And we had SNOW the week before in south Louisiana. A good bit, too(see pic below). About to lay my hands back on it now. Aside from finding one of the new plugs is cracked(probably due to my own previous impatience), I have everything in front of me to get it back together now.