

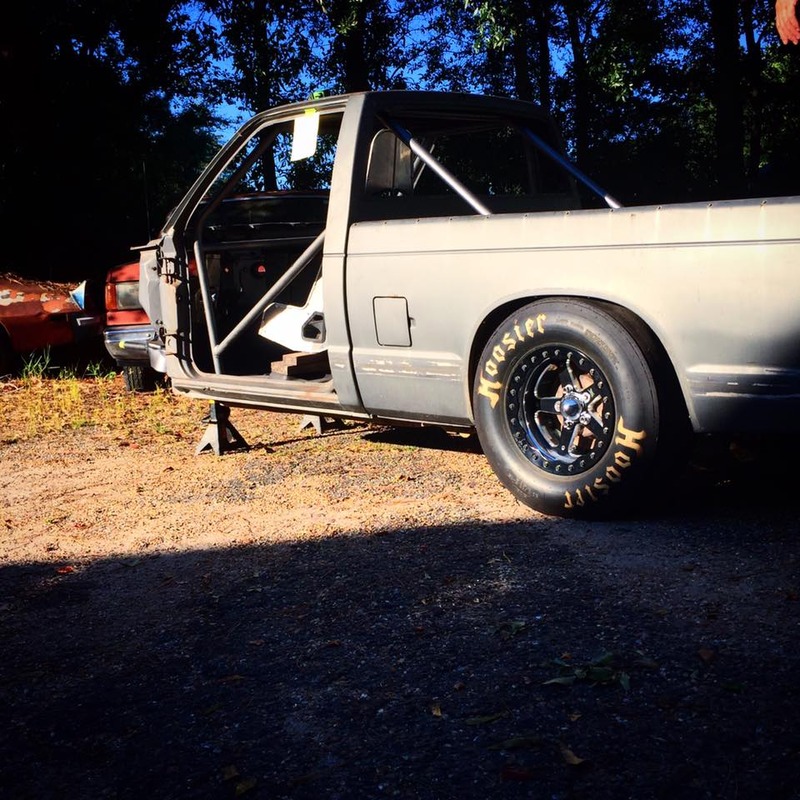
Project "Featherweight" LS swap S10
 Nov 12, 2016 | 09:14 PM
#11
Thread Starter
TECH Fanatic
iTrader: (8)
Joined: Jun 2009
Posts: 1,037
Likes: 1
From: pascagoula, mississippi
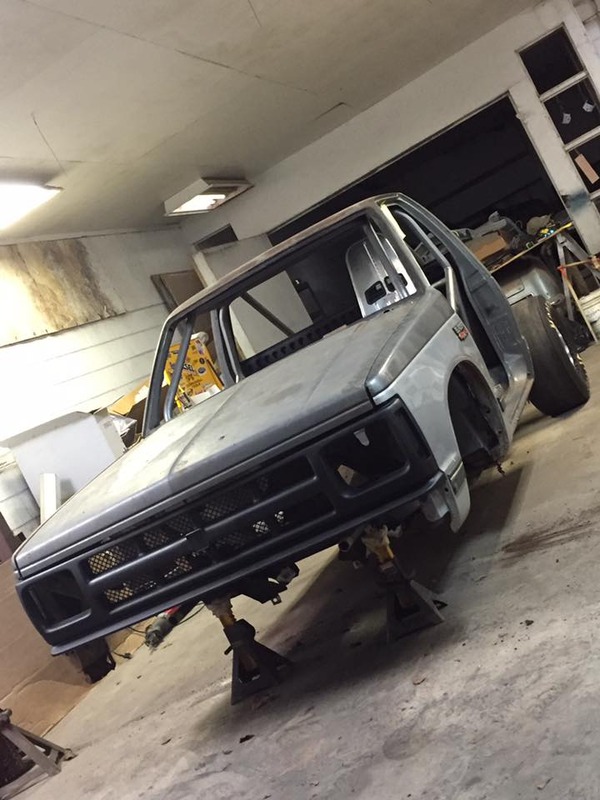
spent a hour or two in the shop today while it was raining an somewhat cool......
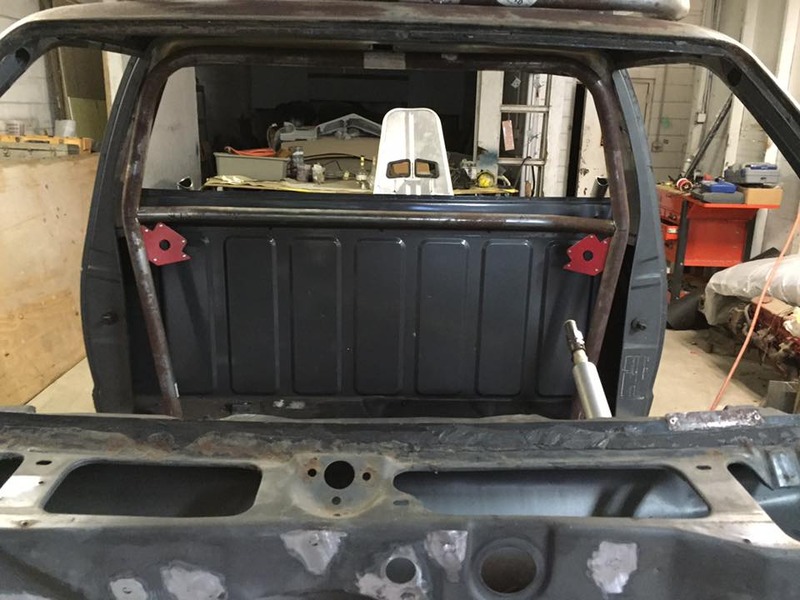
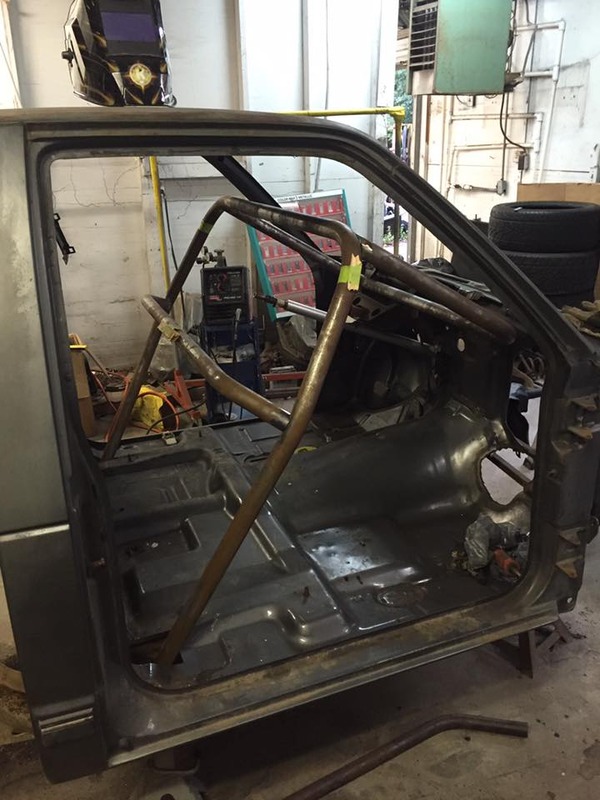
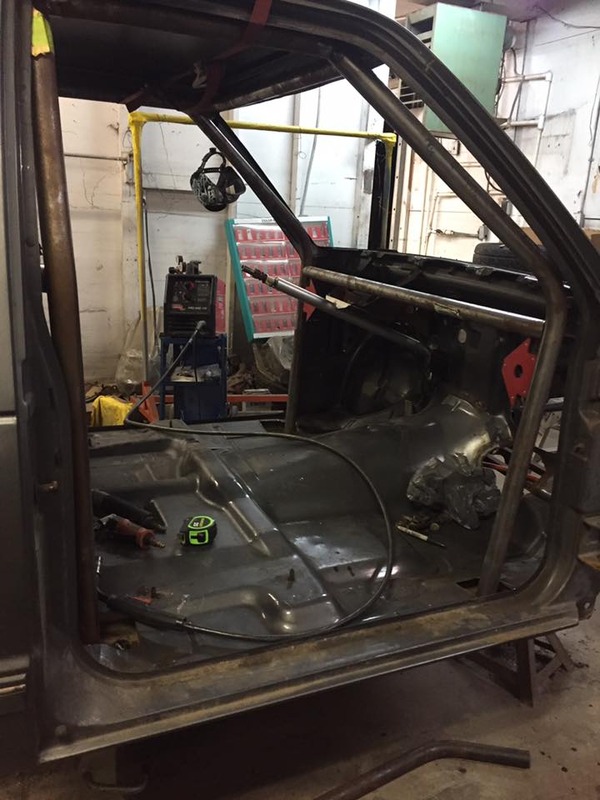
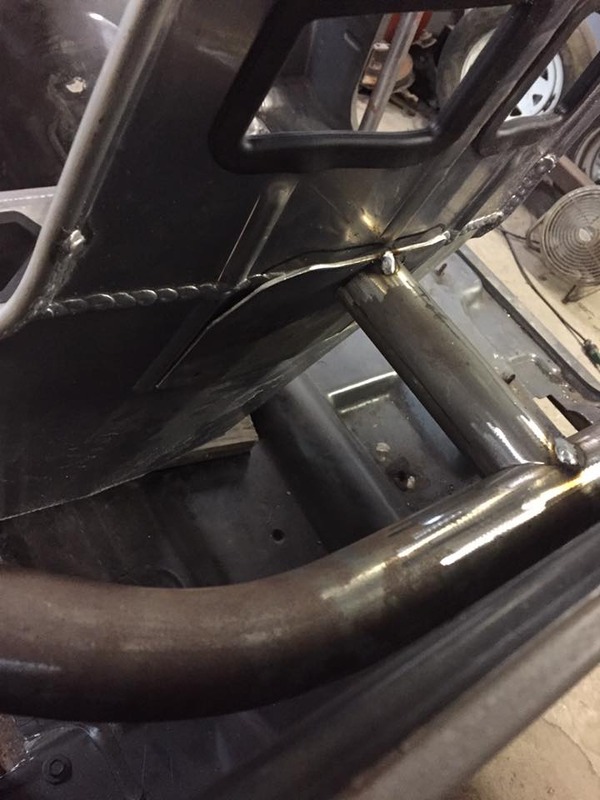
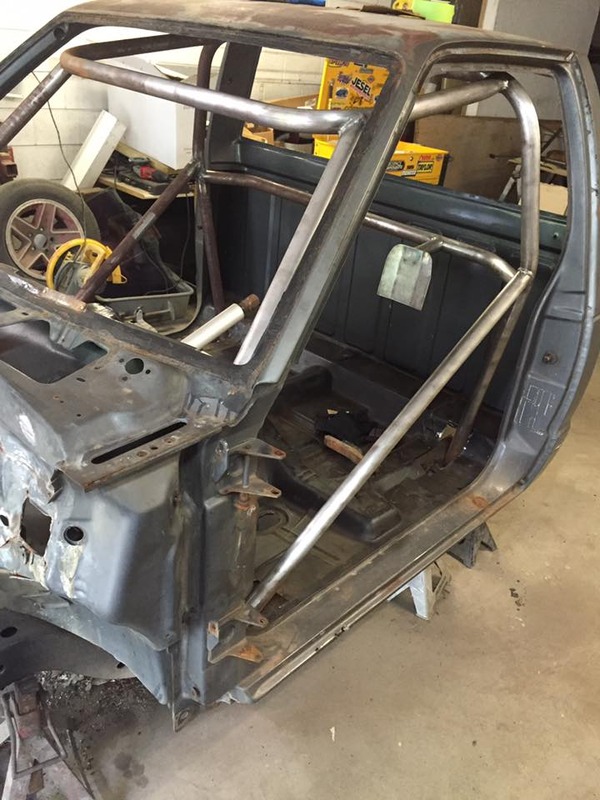
fit the main hoop up and rear cross bar
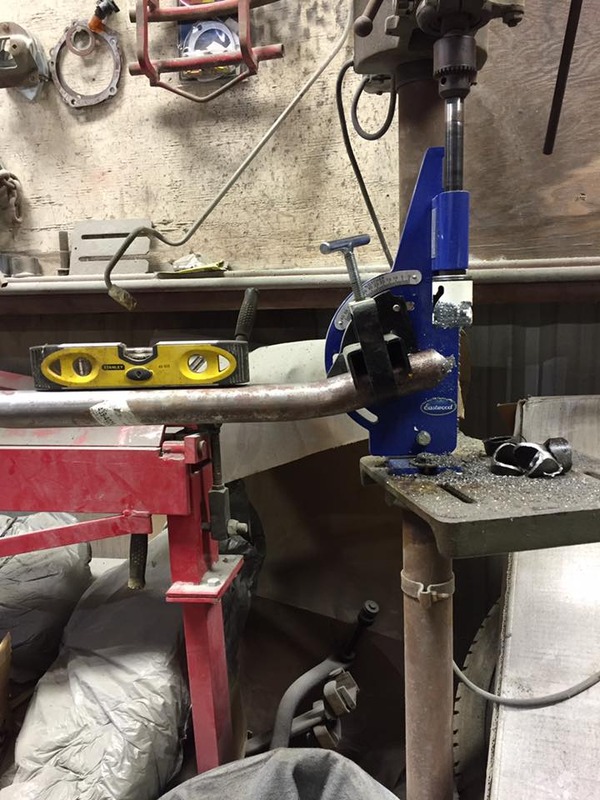
Eastwood notcher holds its own for the price!
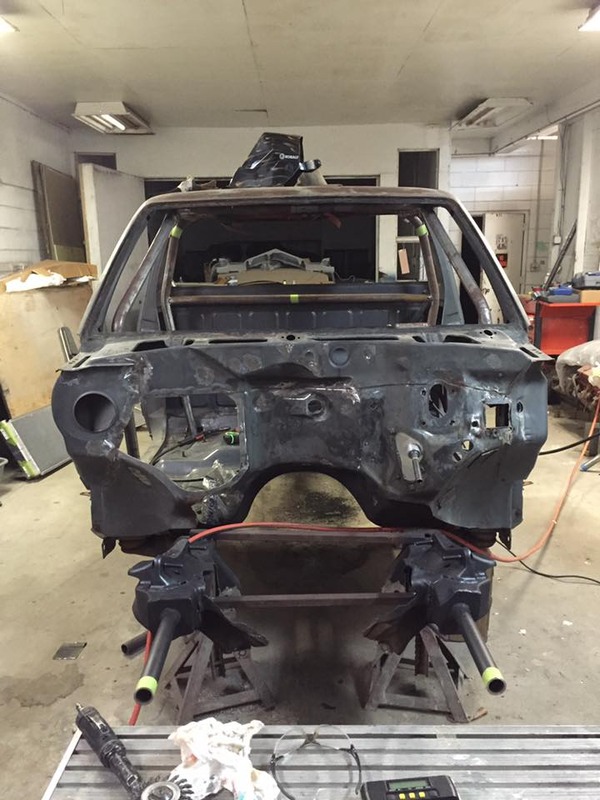
Decided to make the front radiator support removable for easier engine access when installing or swapping motor. marked out where i wanted to make the split an some bolt holes where it will slide in an bolt back up.
ill use a smaller tube to fit the inner of the main frame tube an make it slide in and ill thru bolt it back on....simple enough
Also spent a little time welding up some more little holes on the firewall an smoothing it out. cut out majority of the pass side where my patch panel will go. also cut more of the stock lower control arm mounts off an started getting idea on my tubular lower k member. i got some tabs made and looks like they are just a tad to short and the control arm will come in contact with the tube. so im either going to get some more cut.......or save little more an get some trz lowers. i know what i want but the pocket book says other wise
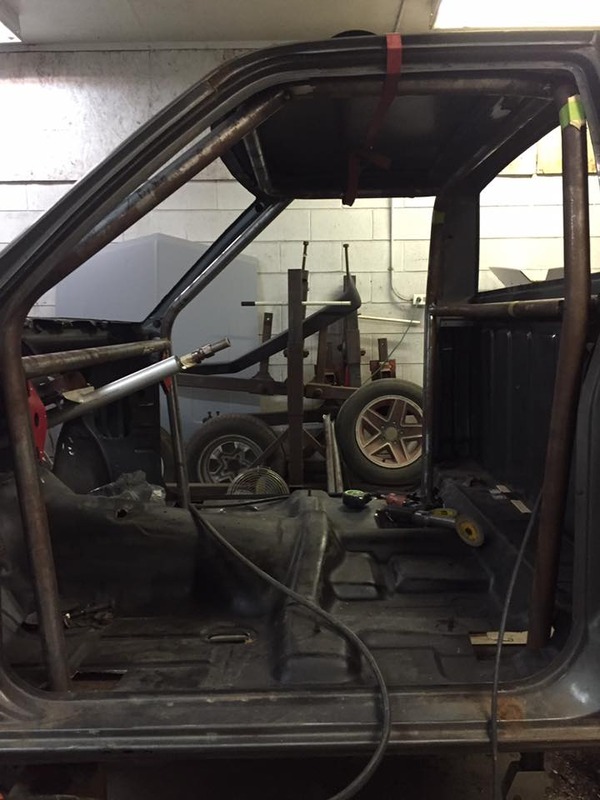
i need to pull the halo an main hoop down and give them a good clean up since they have surface rusted some, figure before i cant get em out the truck it be easier to clean up now. also need to clean the notches up on the halo some more with a hand file. i like the joints nice and tight with a good bevel, i seem to get a much "prettier" weld that way. im still not confident in my tig skills to do my full cage, exspecially in some the tighter out of posisition areas.
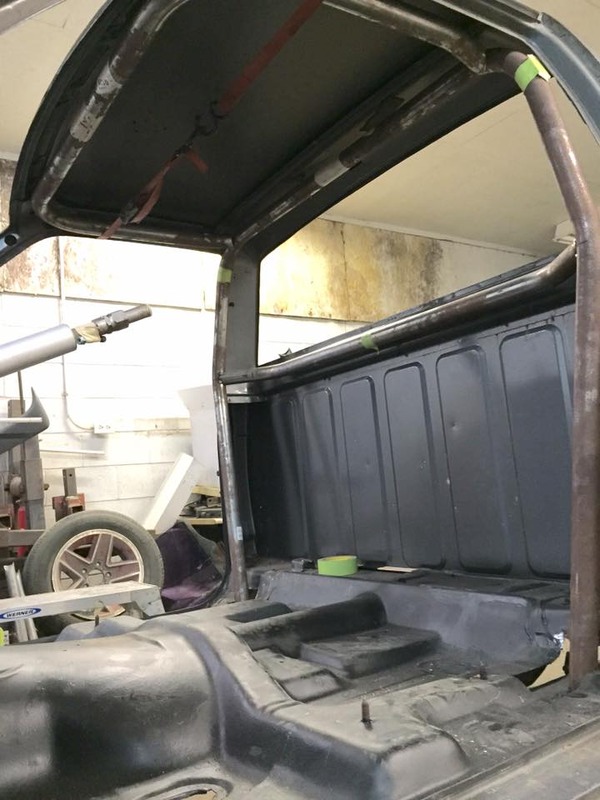
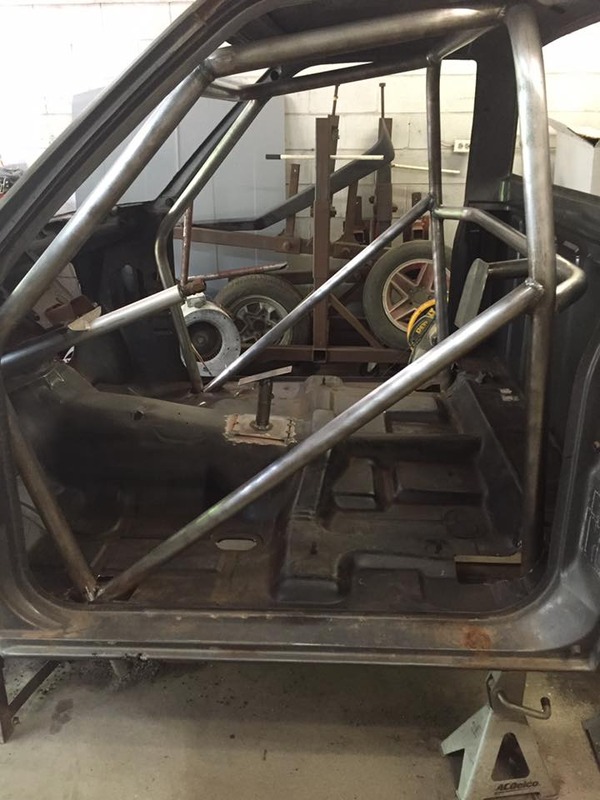
Worked some more last night an got some decent progress done on the cage....
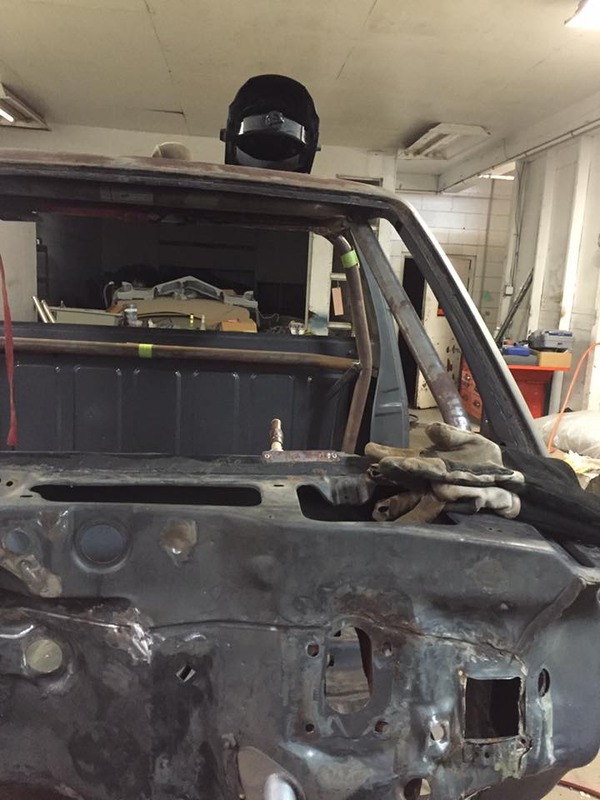
Got more stuff done tonight.....
slid down an leveling it back out before tacking it back up
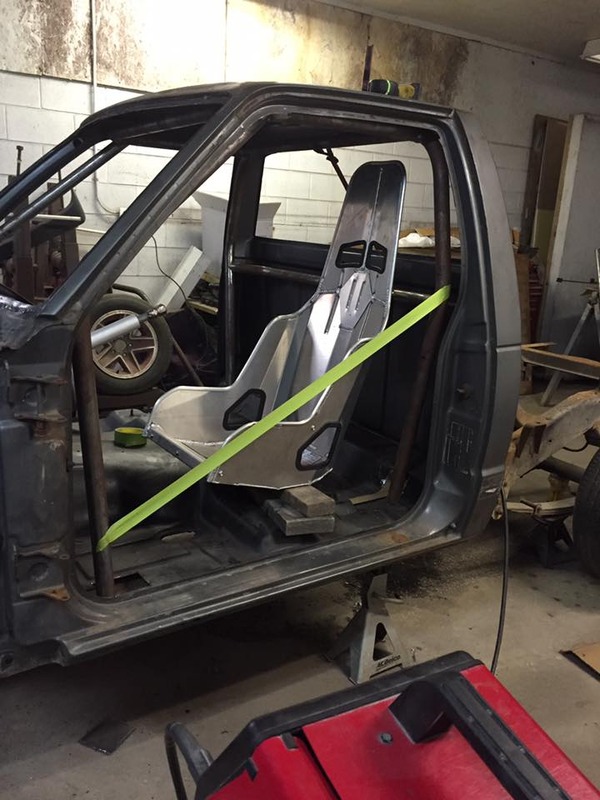
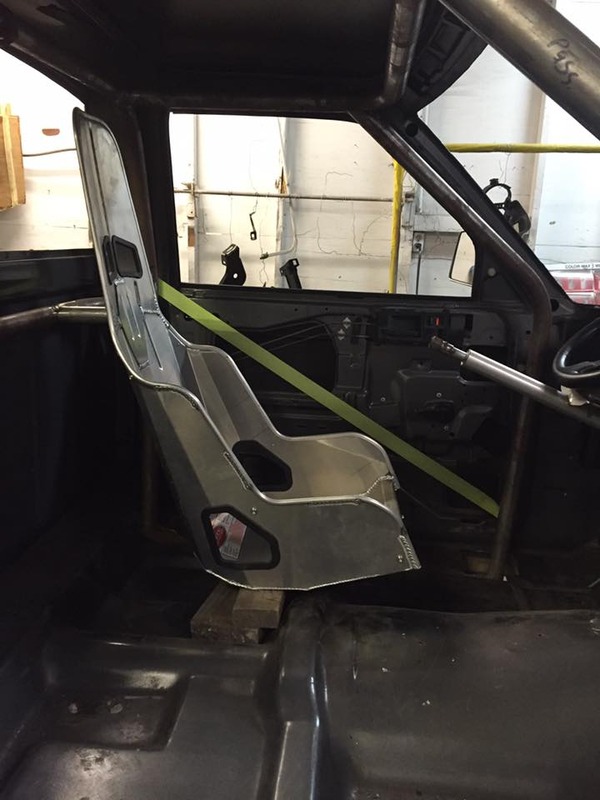
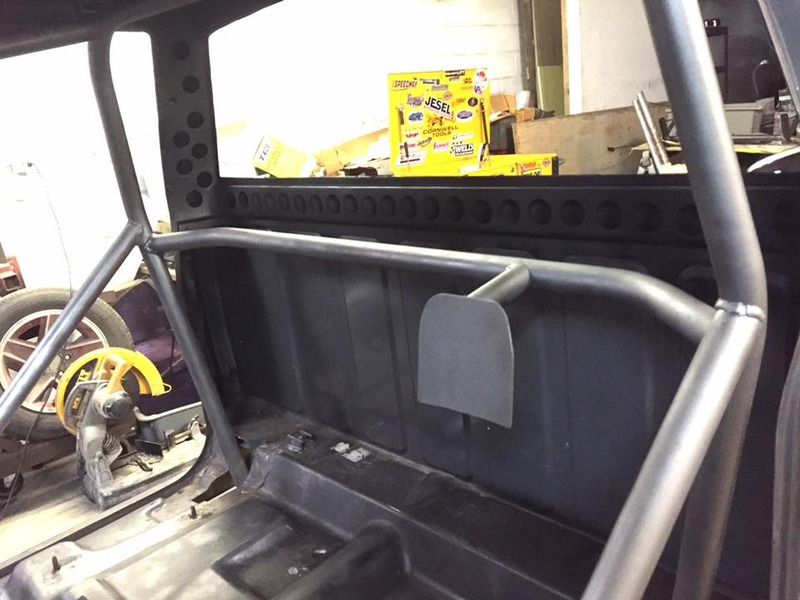
made a mount for the back of the seat out of some 1/8'' plate....bent it to match the seat bends
used a scrap piece of 1.5'' and fit it to the cross brace an seat mount
turned out pretty good, just got to drill holes and get some grade 8 bolts...also build the bottom mounts for seat.
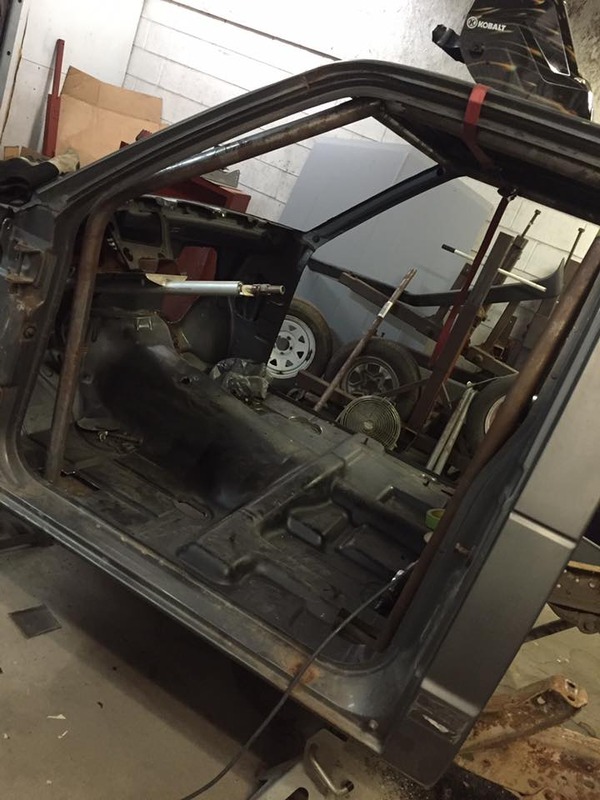
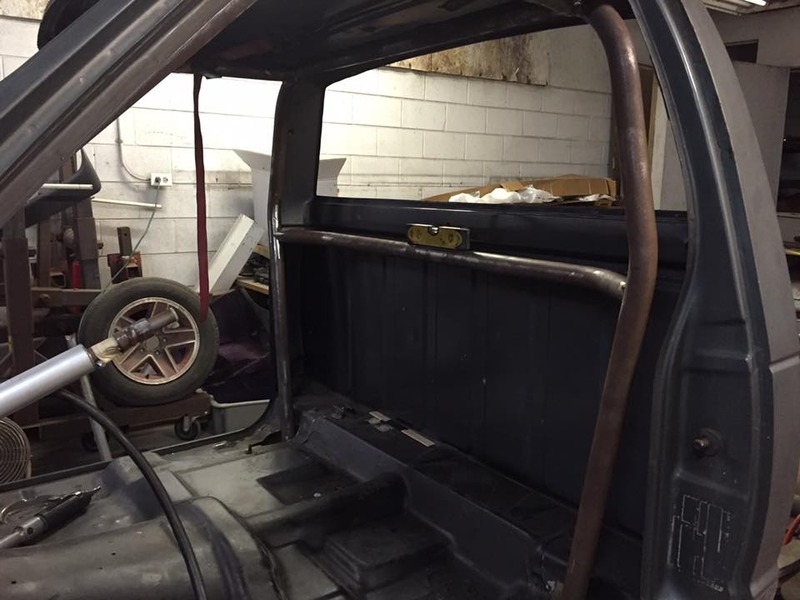
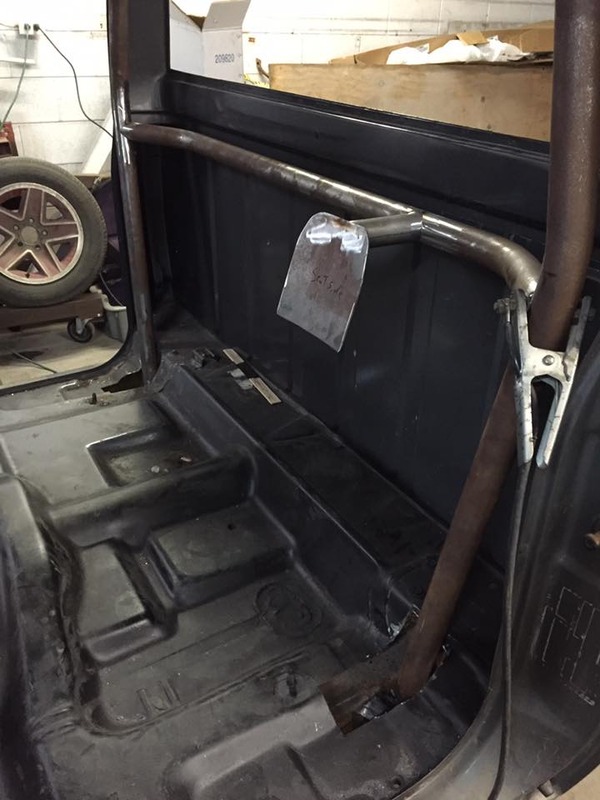
getting a idea on angle for door bars an hung the door to check clearance
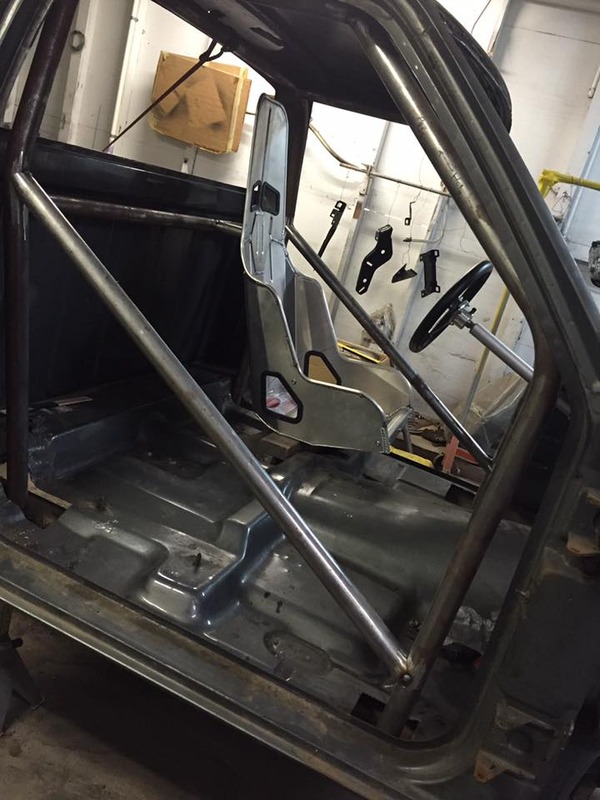
cut em down an notched em then tacked em in place
Not much done lately, been really busy and its been so hot an humid i can only stand to work a few hours before it gets miserable an i can feel myself rushing to get stuff done....

fit the main hoop up and rear cross bar

Eastwood notcher holds its own for the price!


Decided to make the front radiator support removable for easier engine access when installing or swapping motor. marked out where i wanted to make the split an some bolt holes where it will slide in an bolt back up.

ill use a smaller tube to fit the inner of the main frame tube an make it slide in and ill thru bolt it back on....simple enough

Also spent a little time welding up some more little holes on the firewall an smoothing it out. cut out majority of the pass side where my patch panel will go. also cut more of the stock lower control arm mounts off an started getting idea on my tubular lower k member. i got some tabs made and looks like they are just a tad to short and the control arm will come in contact with the tube. so im either going to get some more cut.......or save little more an get some trz lowers. i know what i want but the pocket book says other wise

i need to pull the halo an main hoop down and give them a good clean up since they have surface rusted some, figure before i cant get em out the truck it be easier to clean up now. also need to clean the notches up on the halo some more with a hand file. i like the joints nice and tight with a good bevel, i seem to get a much "prettier" weld that way. im still not confident in my tig skills to do my full cage, exspecially in some the tighter out of posisition areas.
Worked some more last night an got some decent progress done on the cage....


Got more stuff done tonight.....

slid down an leveling it back out before tacking it back up

made a mount for the back of the seat out of some 1/8'' plate....bent it to match the seat bends

used a scrap piece of 1.5'' and fit it to the cross brace an seat mount

turned out pretty good, just got to drill holes and get some grade 8 bolts...also build the bottom mounts for seat.


getting a idea on angle for door bars an hung the door to check clearance

cut em down an notched em then tacked em in place
Not much done lately, been really busy and its been so hot an humid i can only stand to work a few hours before it gets miserable an i can feel myself rushing to get stuff done....
Last edited by Black'Rado; Nov 12, 2016 at 10:09 PM.
Nov 12, 2016 | 09:15 PM
#12
Thread Starter
TECH Fanatic
iTrader: (8)
Joined: Jun 2009
Posts: 1,037
Likes: 1
From: pascagoula, mississippi
Basically all i did tonight was build a shifter mount and pull the rest of the rear suspension apart.

while i got the cage dropped down for the last time to square up all the ends of the tubes to go to the outriggers im going to paint the top portion of the cage. raise it back up and start fitting the out riggers. weld in dash bar and rear braces. still need to order the rest of the DOM needed for bottom seat cradle and k member. as well as some for new rear crossmembers, etc
Worked on the cage some more today.....
sanded all the surface rust off, what a pain! good ole southern humidity
got about half of it done an was already pouring sweat
finished it up, left some places at the bottom bare an i still have to finish out the foward lower door bar joints.
used some metalic graphite wheel paint, seemed to be pretty nice stuff. i think im going to do a dark flat or semi gloss charcoal color
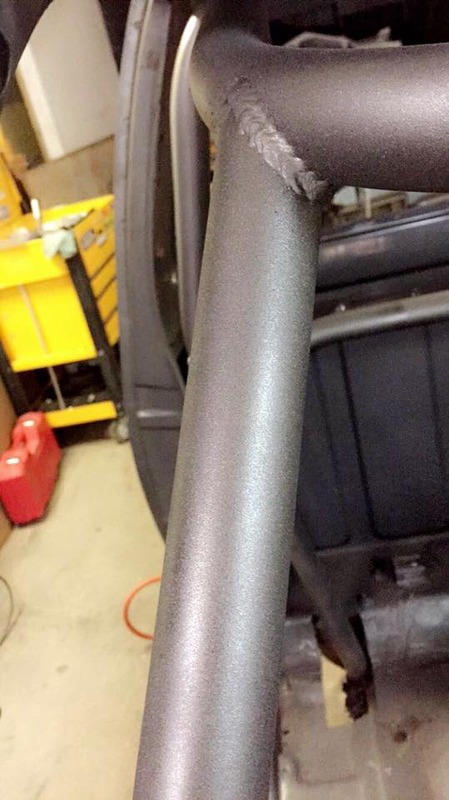
color turned out pretty good, little more goldish then i thought it was gona be
also i went a little crazy with the hole saw, figured if i could shed some pounds here an there it will all add up.
next ill get the cage lifted back up and fit it to the out riggers, weld in dash bar, rear down braces, front strut bars, and a few other braces and build the seat cradle.
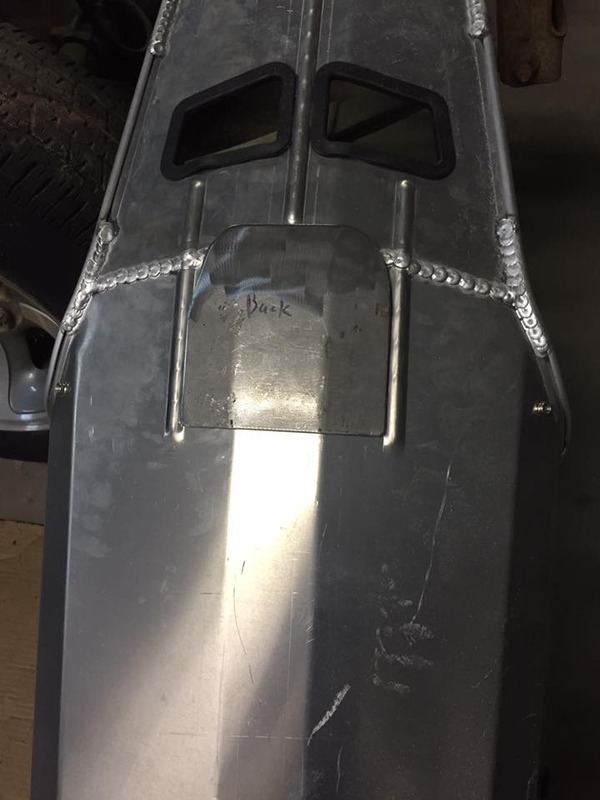
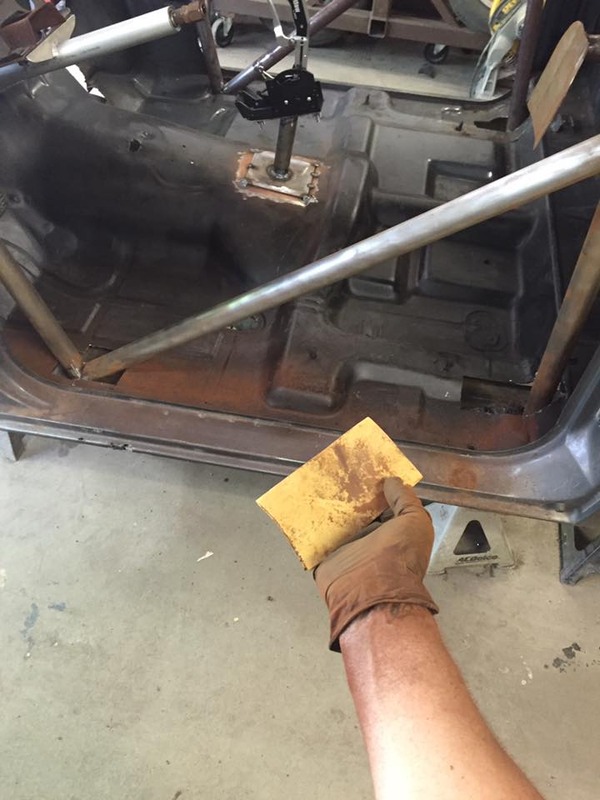
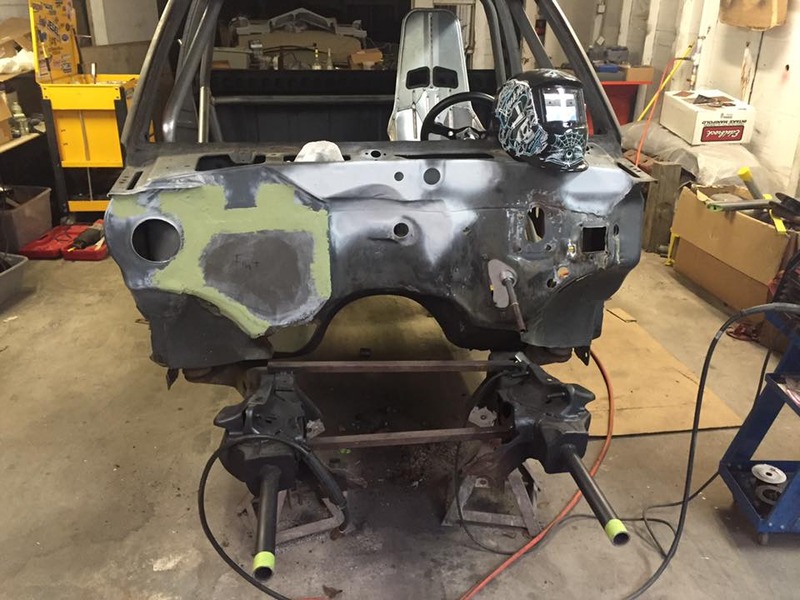
Spent a few hours today just piddling around, got the cage fully welded to the out riggers and out riggers fully welded to the frame, also fit the rear downward bars and welded them in. gona make the front section of my bed removable and probly just hang the bed sides from some frame work then build a alluminum bed cover. also wiped some filler on the firewall and quick sanded it but i hate body work so i lost interest real quick and moved on ha


while i got the cage dropped down for the last time to square up all the ends of the tubes to go to the outriggers im going to paint the top portion of the cage. raise it back up and start fitting the out riggers. weld in dash bar and rear braces. still need to order the rest of the DOM needed for bottom seat cradle and k member. as well as some for new rear crossmembers, etc
Worked on the cage some more today.....

sanded all the surface rust off, what a pain! good ole southern humidity

got about half of it done an was already pouring sweat

finished it up, left some places at the bottom bare an i still have to finish out the foward lower door bar joints.

used some metalic graphite wheel paint, seemed to be pretty nice stuff. i think im going to do a dark flat or semi gloss charcoal color

color turned out pretty good, little more goldish then i thought it was gona be

also i went a little crazy with the hole saw, figured if i could shed some pounds here an there it will all add up.
next ill get the cage lifted back up and fit it to the out riggers, weld in dash bar, rear down braces, front strut bars, and a few other braces and build the seat cradle.
Spent a few hours today just piddling around, got the cage fully welded to the out riggers and out riggers fully welded to the frame, also fit the rear downward bars and welded them in. gona make the front section of my bed removable and probly just hang the bed sides from some frame work then build a alluminum bed cover. also wiped some filler on the firewall and quick sanded it but i hate body work so i lost interest real quick and moved on ha


Last edited by Black'Rado; Nov 12, 2016 at 10:13 PM.
Nov 12, 2016 | 09:16 PM
#13
Thread Starter
TECH Fanatic
iTrader: (8)
Joined: Jun 2009
Posts: 1,037
Likes: 1
From: pascagoula, mississippi
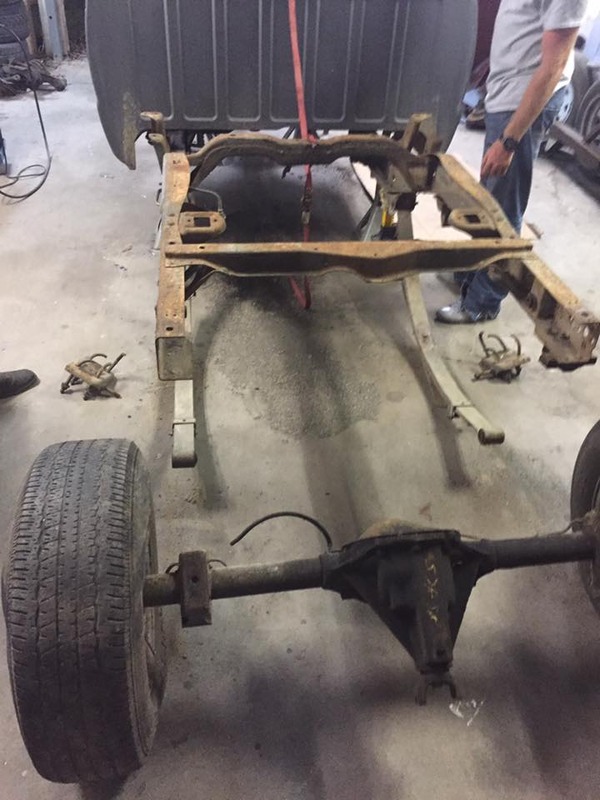
Played around in the shop a few hours....gona run my stock leafs for time being so i took the overload and 3rd leaf out. also torched and cut the old bushings out the springs and measured to see how much the new slider bushings need to be turned down.
I think im going to have a set of alluminum bushings made for the front....i rather not put rubber back in.
hung them in place just getting an idea....still need to put weight on them to mount sliders
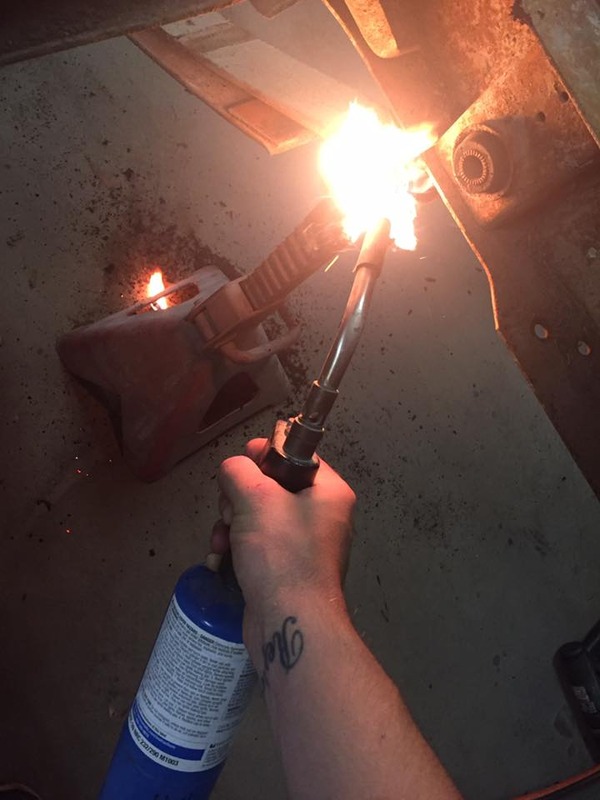
drilled as much the rubber out i could then torched the rest an just pushed the metal sleeve out then cut the outer shell with a sawzall
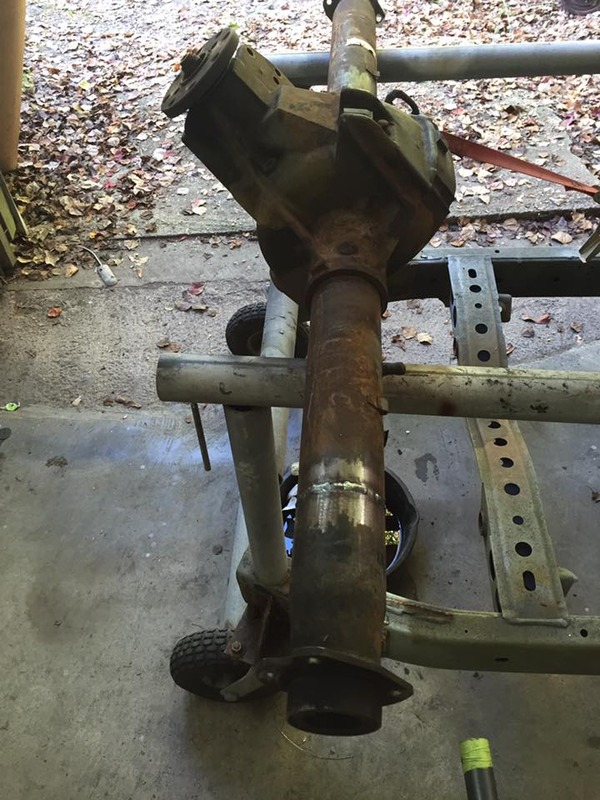
tore down the 8.8 getting ready to do the one side cut an narrow.
made the first cut...

clamed it all up and test fit the axle back in after setting carrier in...nice an straight so i layed 4 tacks on it and left it to cool completly before going back and re clamping an putting 4 more.... lost some of the pics so ill try and get them uploaded again soon.
here is some more progress.....
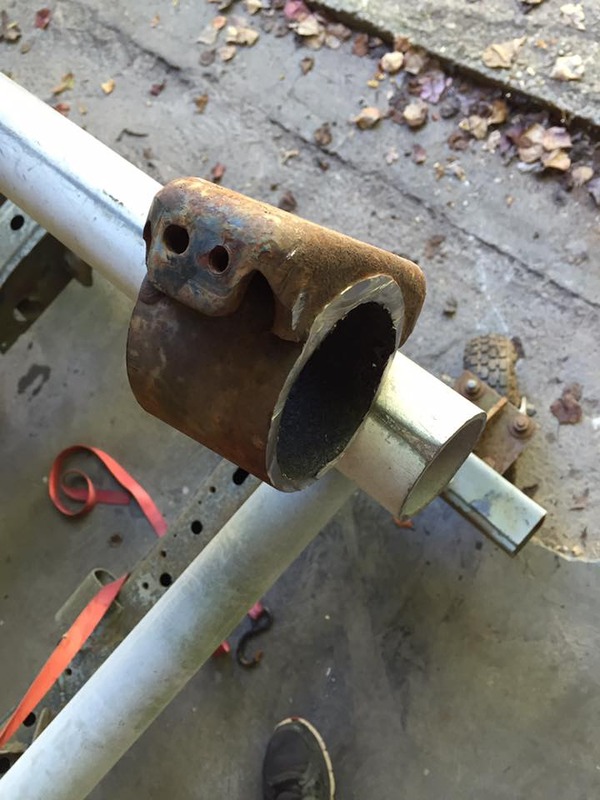
the piece cut out, the perch is almost exactly the width that needs to be removed.
hung the axle in place to get an idea where i needed to grind some of the weld down on the tube...you can see the perch boxes almost 60% the axle tube so strength in the joint should be no issue
all sewed up!
of course had to do a fit check!
looking good!
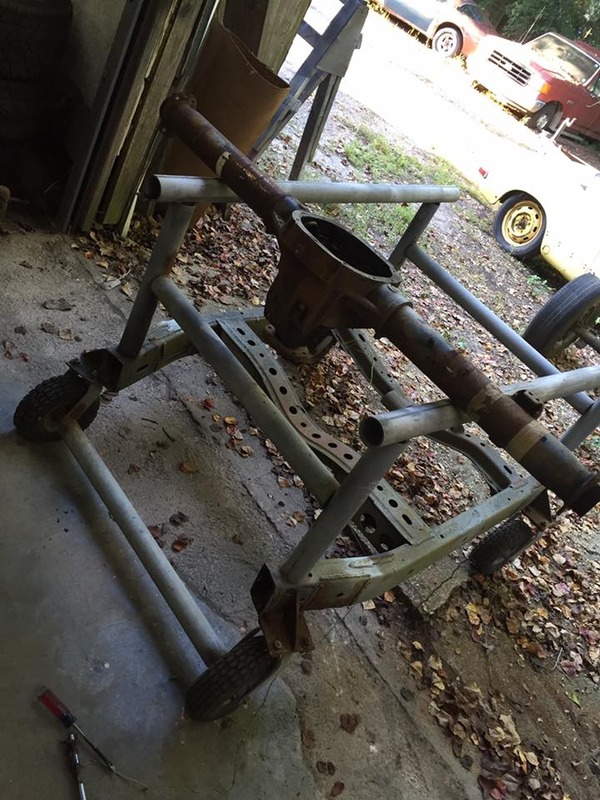
tacked the perches on so i could put weight on the truck and see aprox ride height, im still waiting on my alum slider bushings so springs are just resting on the frame in these pics....and of course lot more weight has to go back on the truck still
hung the front cap just to gawk ha
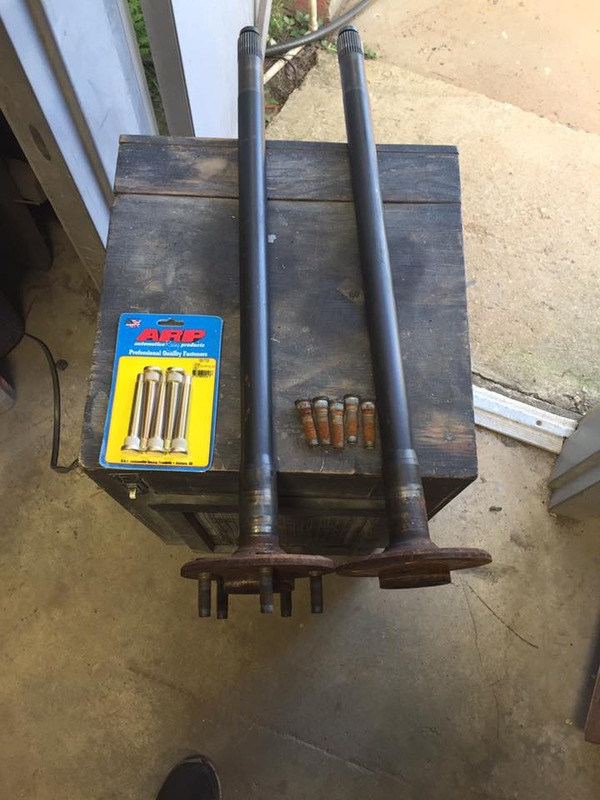
next chore is to get these ARP long studs installed, i got the .625 knurl replacements and the factory ones are .617 i think. i need a 39/64ths bit to open up the holes some then have em pressed in.
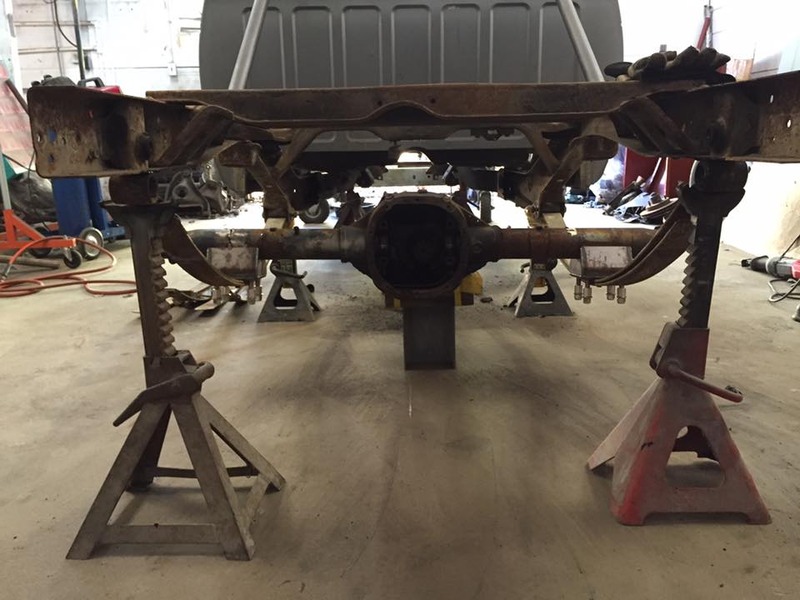
Im very happy to finally get at least the rear kinda on the ground, i will still have to set pinion angle once i get motor trans set in and some weight on the truck. my next step is to hang the bedsides, im going to skin them and build a tubular skeleton mount kinda how i did the front fender mounts and kinda taking Mad Marks idea as well
I think im going to have a set of alluminum bushings made for the front....i rather not put rubber back in.

hung them in place just getting an idea....still need to put weight on them to mount sliders

drilled as much the rubber out i could then torched the rest an just pushed the metal sleeve out then cut the outer shell with a sawzall
tore down the 8.8 getting ready to do the one side cut an narrow.

made the first cut...

clamed it all up and test fit the axle back in after setting carrier in...nice an straight so i layed 4 tacks on it and left it to cool completly before going back and re clamping an putting 4 more.... lost some of the pics so ill try and get them uploaded again soon.
here is some more progress.....

the piece cut out, the perch is almost exactly the width that needs to be removed.

hung the axle in place to get an idea where i needed to grind some of the weld down on the tube...you can see the perch boxes almost 60% the axle tube so strength in the joint should be no issue

all sewed up!

of course had to do a fit check!

looking good!

tacked the perches on so i could put weight on the truck and see aprox ride height, im still waiting on my alum slider bushings so springs are just resting on the frame in these pics....and of course lot more weight has to go back on the truck still

hung the front cap just to gawk ha

next chore is to get these ARP long studs installed, i got the .625 knurl replacements and the factory ones are .617 i think. i need a 39/64ths bit to open up the holes some then have em pressed in.
Im very happy to finally get at least the rear kinda on the ground, i will still have to set pinion angle once i get motor trans set in and some weight on the truck. my next step is to hang the bedsides, im going to skin them and build a tubular skeleton mount kinda how i did the front fender mounts and kinda taking Mad Marks idea as well
Last edited by Black'Rado; Nov 12, 2016 at 10:18 PM.
Nov 12, 2016 | 09:17 PM
#14
Thread Starter
TECH Fanatic
iTrader: (8)
Joined: Jun 2009
Posts: 1,037
Likes: 1
From: pascagoula, mississippi
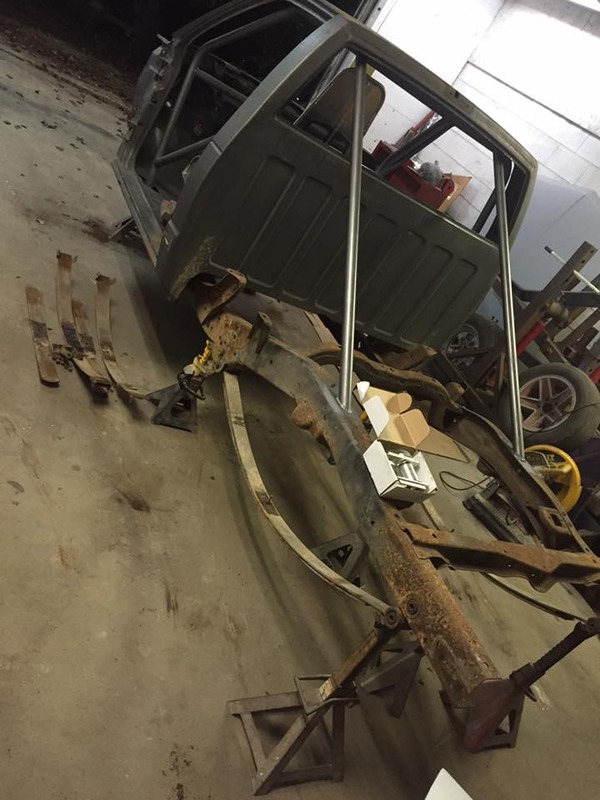
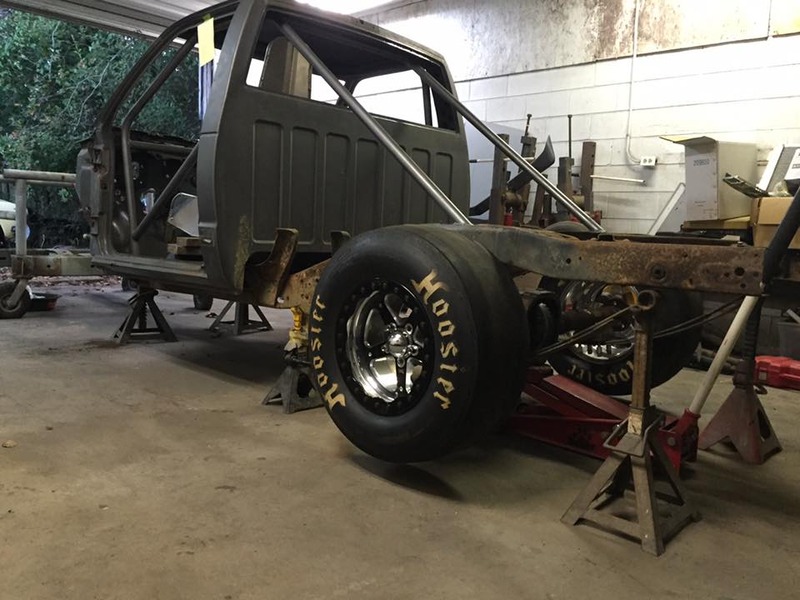
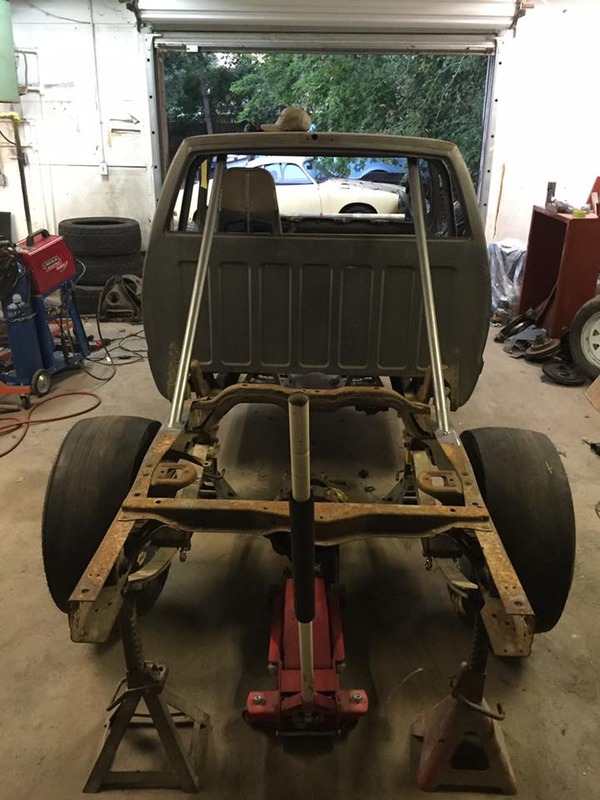
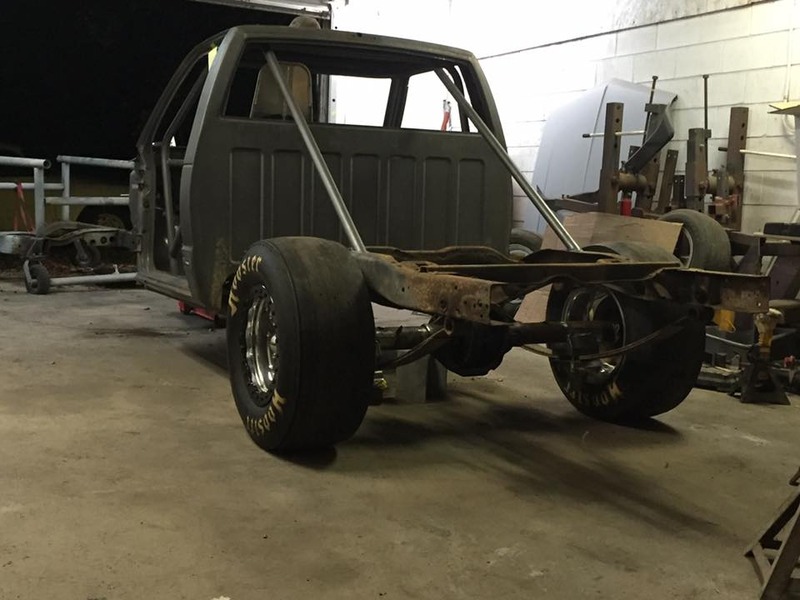
Rolled it outside today to clean up some and to move the bed in and get it cut up...
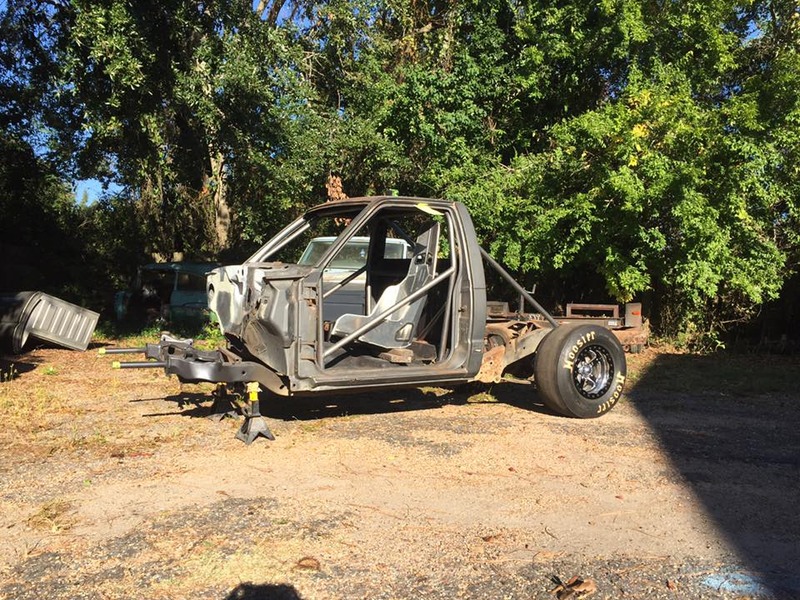
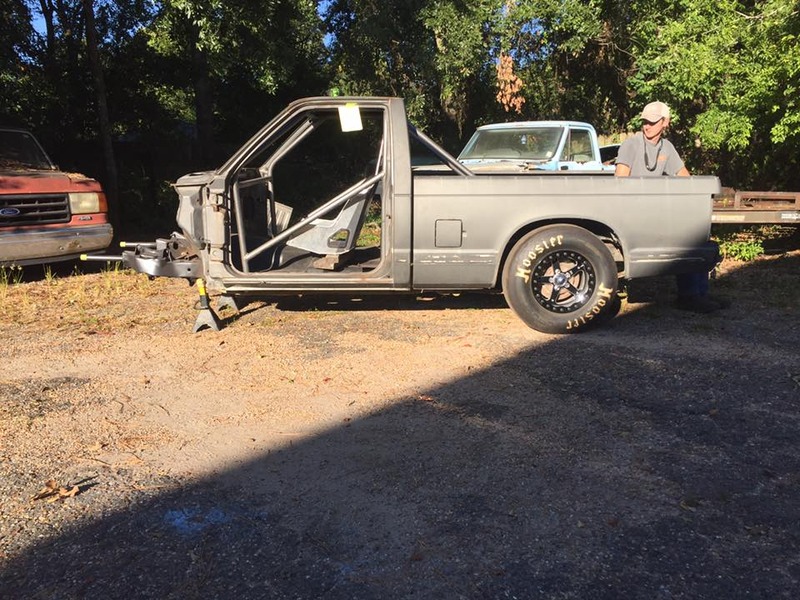
made a quick cut on the bed to clear the down bars and set it up there, had a buddy sit on it to simulate some weight ha
i thought it needed more weight so added some and i really like how it sits here, but the bedsides may catch the tire.....i was thinking a 28x10 would tuck. its maybe 1/2-3/4'' from touching the frame. so ill just live with that

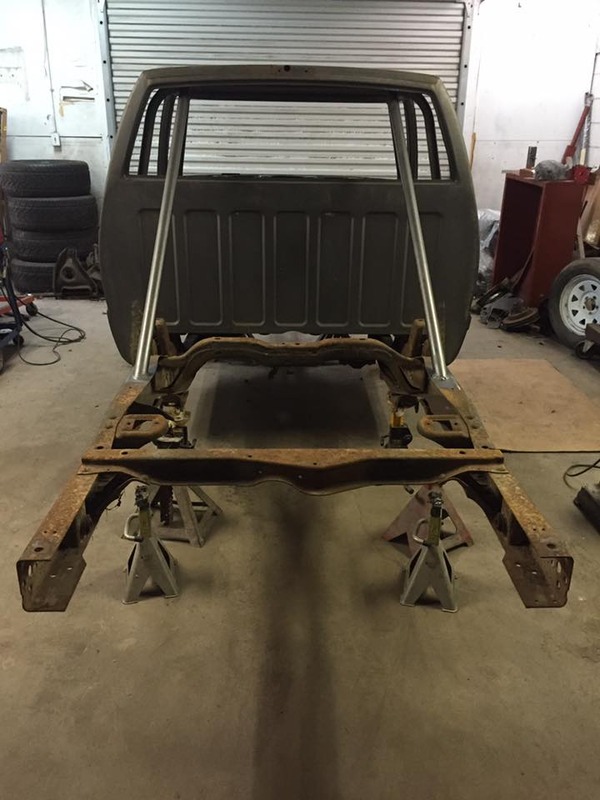
decided the stock rear frame crossmembers wasnt going to cut it.....so i cut them!
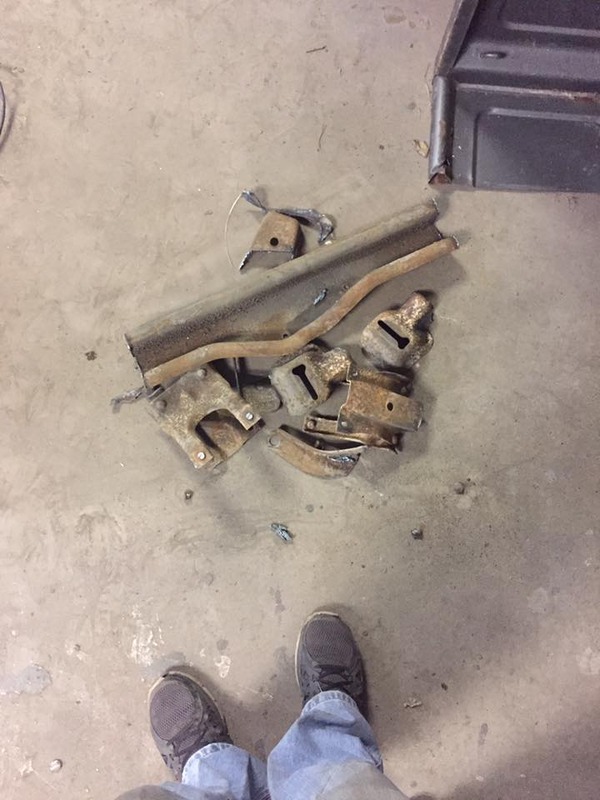
rear crossmember, bump stop pads, bed mount brackets and some other unnecessary weight was removed.
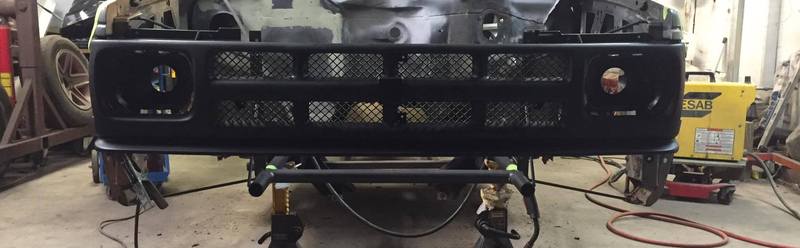
then just made some quick tabs to mount the grille and headlight buckets...still need to finish them up but got a good idea on what i want to do with them


made a quick cut on the bed to clear the down bars and set it up there, had a buddy sit on it to simulate some weight ha

i thought it needed more weight so added some and i really like how it sits here, but the bedsides may catch the tire.....i was thinking a 28x10 would tuck. its maybe 1/2-3/4'' from touching the frame. so ill just live with that

decided the stock rear frame crossmembers wasnt going to cut it.....so i cut them!

rear crossmember, bump stop pads, bed mount brackets and some other unnecessary weight was removed.

then just made some quick tabs to mount the grille and headlight buckets...still need to finish them up but got a good idea on what i want to do with them
Last edited by Black'Rado; Nov 12, 2016 at 10:19 PM.
Nov 12, 2016 | 09:18 PM
#15
Thread Starter
TECH Fanatic
iTrader: (8)
Joined: Jun 2009
Posts: 1,037
Likes: 1
From: pascagoula, mississippi

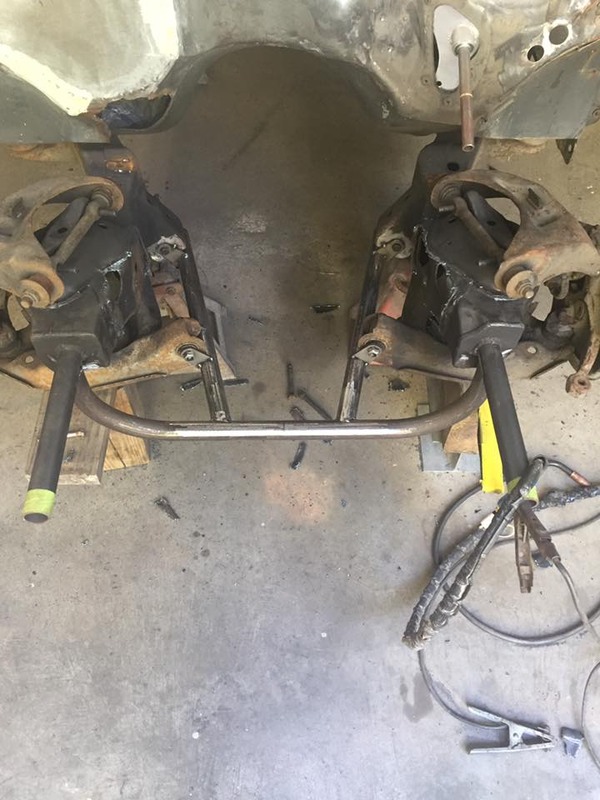
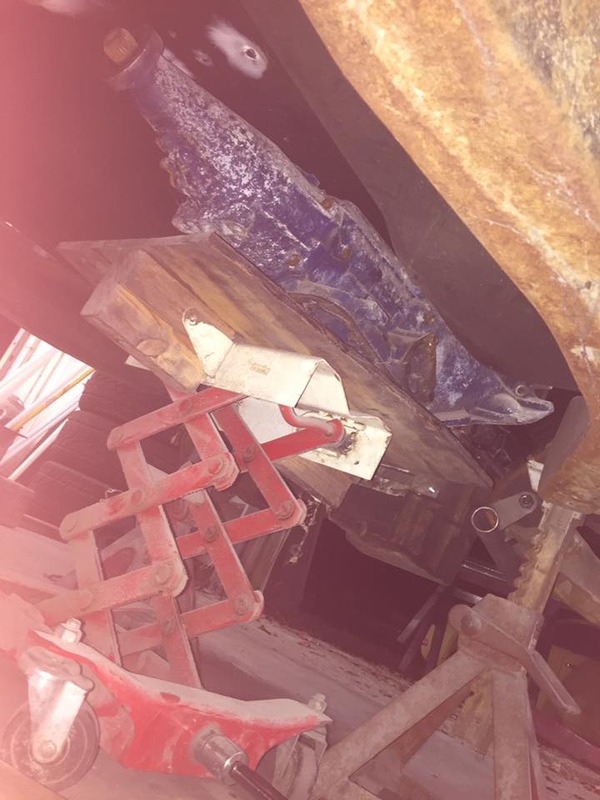
boxxed a short section in right above and behind the front spring hangers, put a tube crossmember in place and cut the old factory one out.
Going to box the rest back and once i get the rear end hung and set with weight on it i plan on adding a ARB so there will be another tube across the frame rails about where the rear down bars tie in. i think that should keep it from twisting up and be pretty solid.
Been trying to spend a few hours here and there in the shop.....made a little progress.
What yall think of this idea, you can see in the pic the 2 bars running off the crossmember to the frame rails, the rails will be boxed in keep in mind. as well as a ARB tied in close to where the down bars tie to the top of frame.....question is, will those 2 bars be plenty of strength or should i try and get a full X brace in there some where?

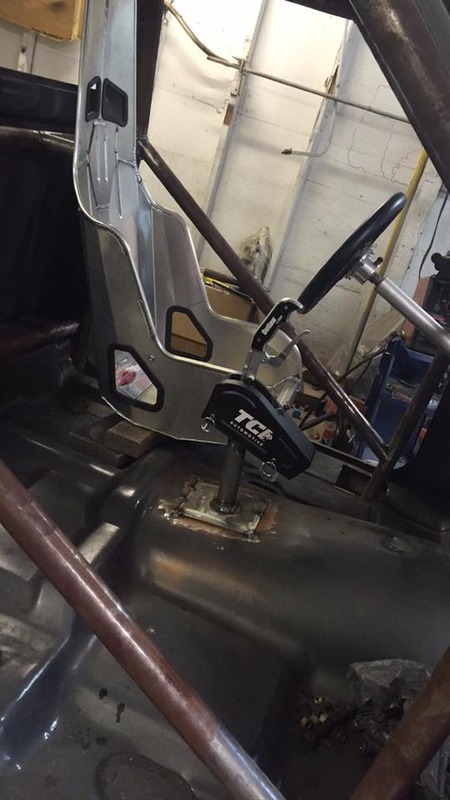
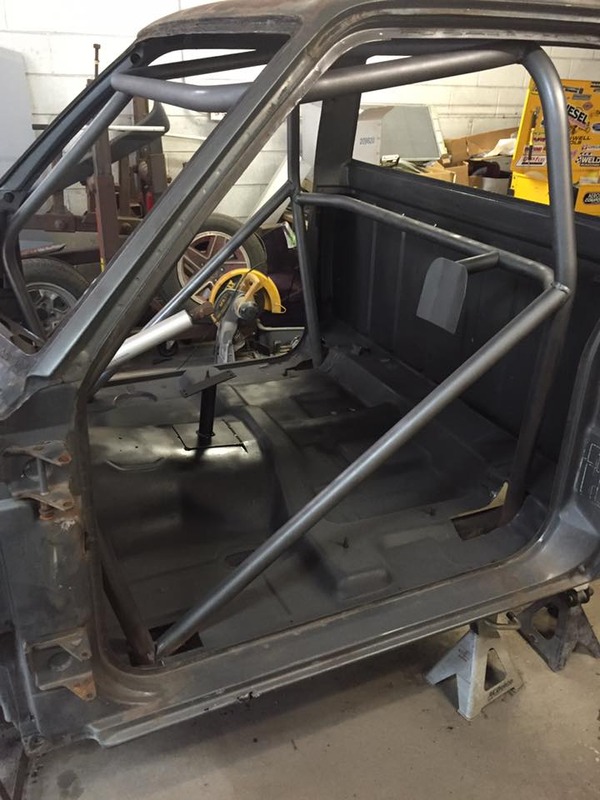
I kind of skewed from my tubular seat cradle for some more simple lighter brackets....i think they are still plenty strong and certainly lighter then the tube idea. If i was going 25.5 or something i would no doubt have done the cradle an tied into the floor bars etc.... i made triangle gussets on the inside under the seat as well so its not just a flat plate. Used some stainless button head bolts and i think it come out decent...dont look as "trick" as the tube style but it functions right! ha


Also got my brake master cylinder mounted up, just need to make a push rod. also used some stainless hardware, looks very clean in my opinon.


ran out of gas as i was tacking the last piece in....so next week ill get both my bottles filled and finish it up.
Last edited by Black'Rado; Nov 12, 2016 at 09:35 PM.
Nov 14, 2016 | 08:16 PM
#16
Thread Starter
TECH Fanatic
iTrader: (8)
Joined: Jun 2009
Posts: 1,037
Likes: 1
From: pascagoula, mississippi
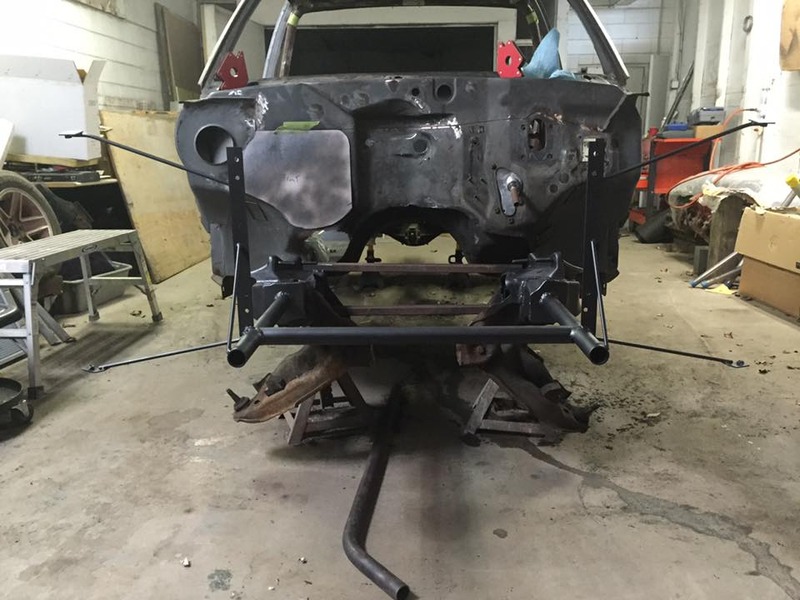
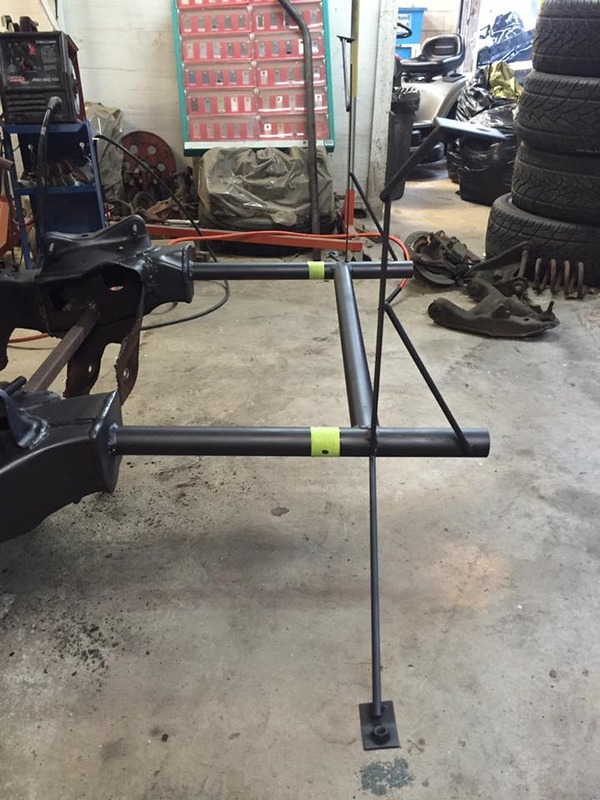
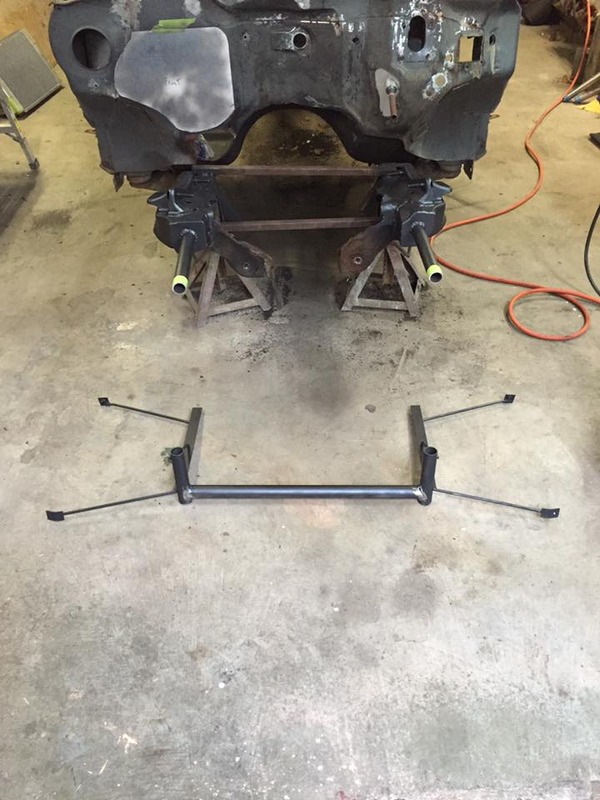
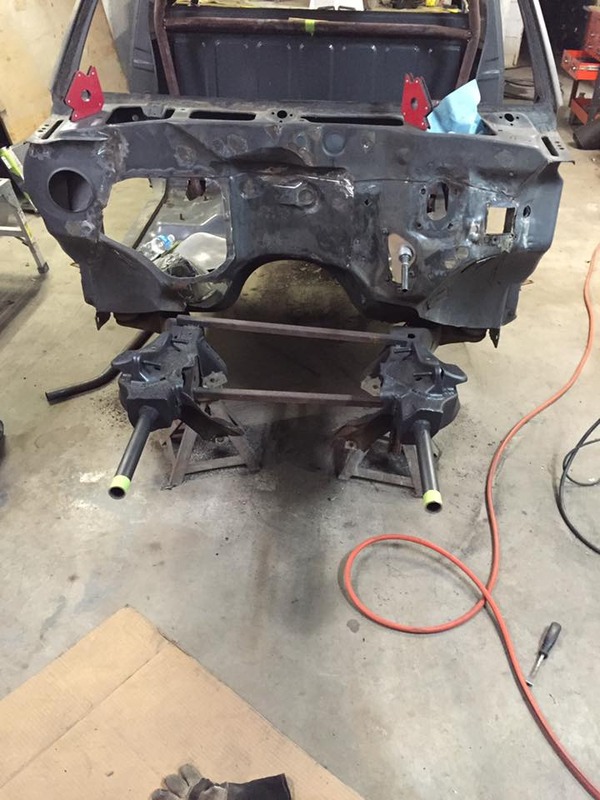
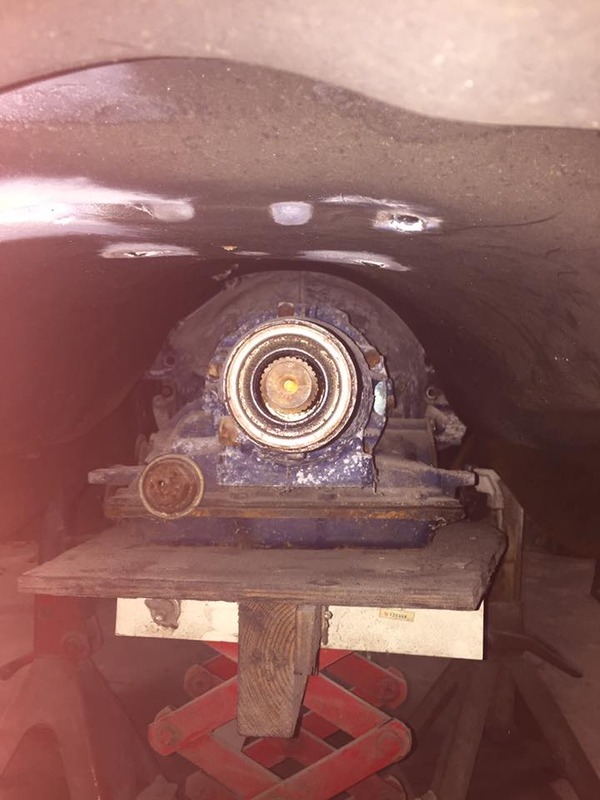
Got the k member finished up for the most part....
so i decided to set my mock up block in and get an idea on steering clearance an headers....
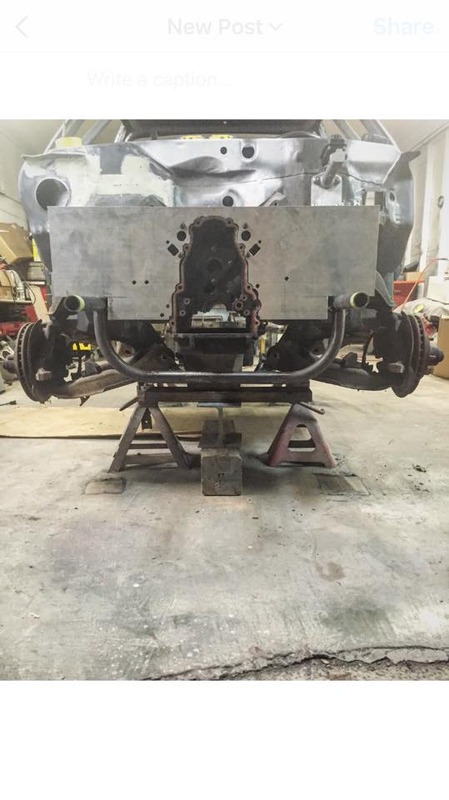
stuck my mock up glide in as well and all looks good with plenty room
Next ill fit the mid plate an build a trans cross member....i also think im going to look for a F body oil pan to gain a little more ground clearance...the truck pan hangs down about 3'' below the front cross tube. im going to put my coil overs on and wheels and set it on the ground an see where my ride height will be an go from there.

so i decided to set my mock up block in and get an idea on steering clearance an headers....

stuck my mock up glide in as well and all looks good with plenty room


Next ill fit the mid plate an build a trans cross member....i also think im going to look for a F body oil pan to gain a little more ground clearance...the truck pan hangs down about 3'' below the front cross tube. im going to put my coil overs on and wheels and set it on the ground an see where my ride height will be an go from there.

 Nov 14, 2016 | 09:12 PM
#19
Thread Starter
TECH Fanatic
iTrader: (8)
Joined: Jun 2009
Posts: 1,037
Likes: 1
From: pascagoula, mississippi
Ha well there is just some satisfaction to building each an every piece yourself...i still got a long way to go but its coming along. Stay tuned after this build im building my 95 single cab 1500, big tire turbo setup.
I figured the build would get some attention on the forum, i been around the board since 08-09 and used to know lot of the members, like a small brotherhood. i got into the diesel world and strayed away for awhile while i built my current daily dmax, makes bout 650hp with a small S366 single turbo setup. Just couldnt stay away from LSx stuff.
I figured the build would get some attention on the forum, i been around the board since 08-09 and used to know lot of the members, like a small brotherhood. i got into the diesel world and strayed away for awhile while i built my current daily dmax, makes bout 650hp with a small S366 single turbo setup. Just couldnt stay away from LSx stuff.
Nov 14, 2016 | 09:47 PM
#20
Build looks awesome keep up the good work! And I know how you feel about can't staying away from the lsx life! I have an twinned lmm and still came back to the lsx life!!! And you made me want to build an s10 now lol!