

4.3 to Turbo 5.3 Build
 Jun 16, 2014 | 05:56 PM
#1

Thread Starter
On The Tree
Joined: Sep 2005
Posts: 154
Likes: 3
From: Houston
Hello everyone.. I decided to put a swap thread together and catalog my progress. Maybe even help out others that have or are planning on doing the same that I have.
Long story short.. I've grown tired of Ford trucks. Anyone that has put a engine in a newer model F150 can sympathize with me. I've wanted to build something LS powered for quite a while and be able to enjoy working on it while doing so.
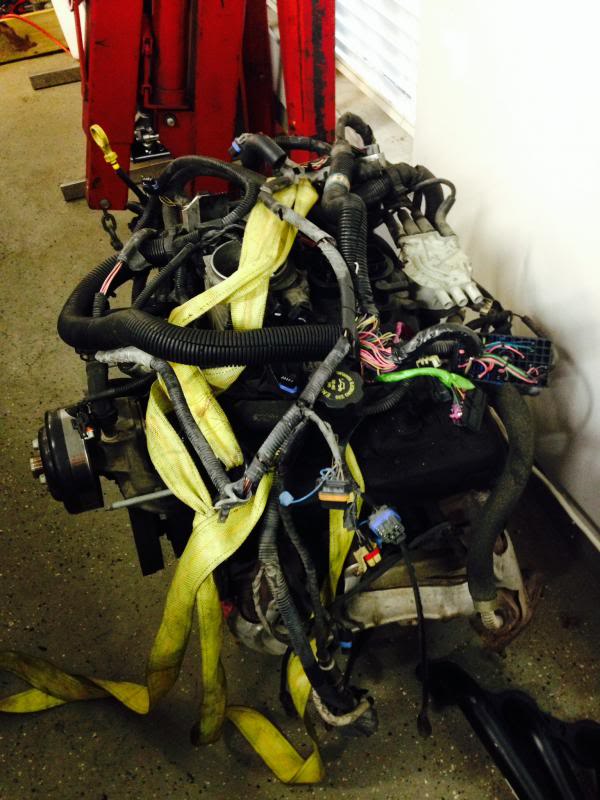
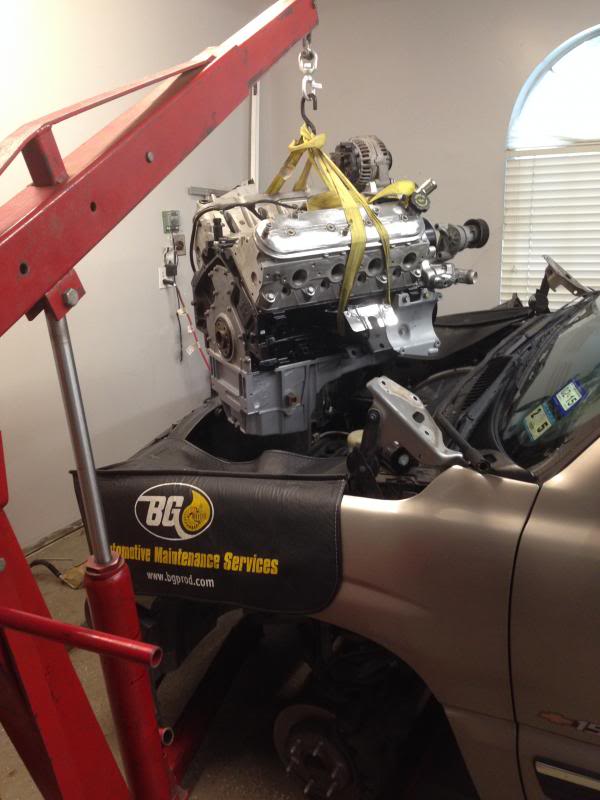
I originally started with a '95 4th gen FBody that was "LT1less". Purchased a longblock 5.3 out of a 00 Suburban from a local salvage yard with harness, ecu, and all accessories. 1 BMR K-member later, had the 5.3 dropped in and ready to put the finishing touches on. With the idea of the car needing new paint and missing all of it's interior, I decided to scrap that idea. Out came the 5.3. Given my fondness of fast trucks, I figured I'd pickup a RCSB for the swap. Living in Houston, that didn't prove to be a large feat.. more so was finding a truck that was in good condition (not conditions).
I found a 2002 Pewter regular cab short bed reasonably close to the house for a fair price and drove it home.

Let the parts list begin..
Progress...
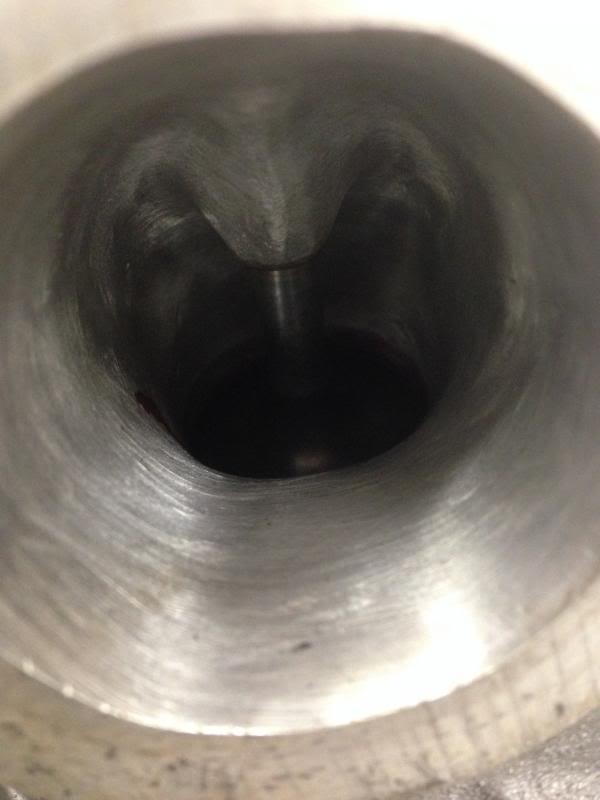
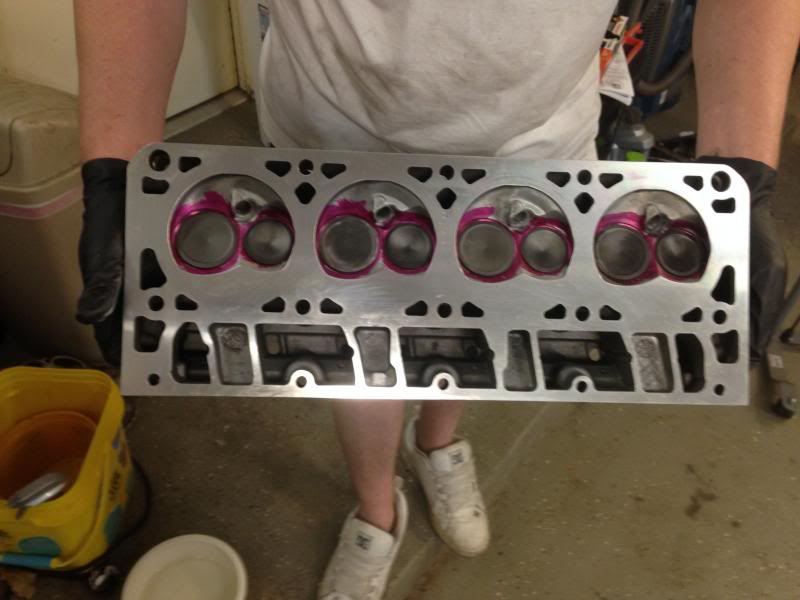
Ported, polished, milled, 706's
Z06 springs... they are cheap and will do with the stocker cam.
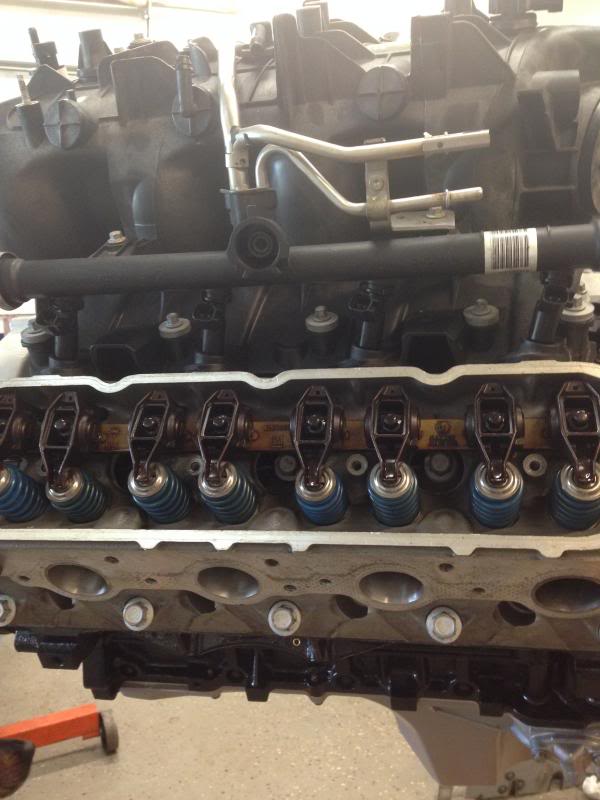
Pulled the whole rotating assembly apart and re-ringed, re-bearinged, dipped the block, and painted / cleaned everything.

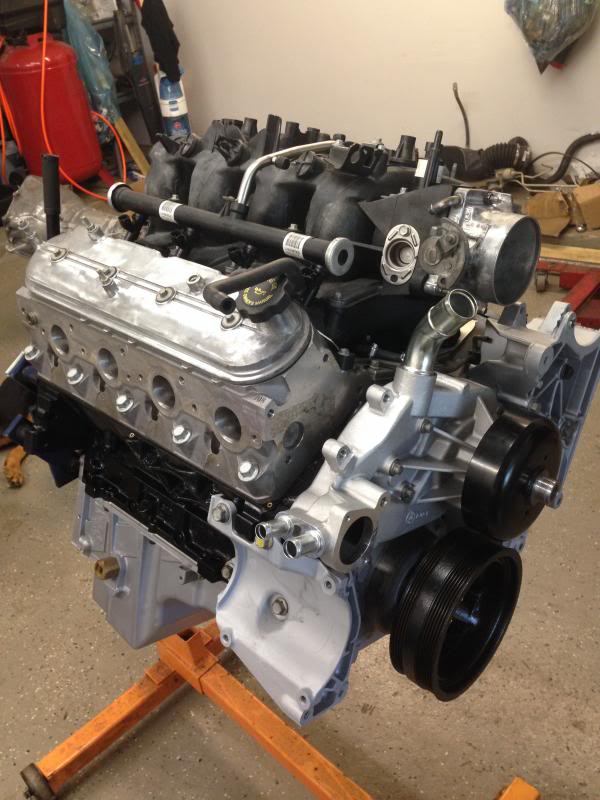
Out with the old and in with the new..
Pacesetter 1 7/8" longtubes and 3" ORY mated to the factory exhaust.
Long story short.. I've grown tired of Ford trucks. Anyone that has put a engine in a newer model F150 can sympathize with me. I've wanted to build something LS powered for quite a while and be able to enjoy working on it while doing so.
I originally started with a '95 4th gen FBody that was "LT1less". Purchased a longblock 5.3 out of a 00 Suburban from a local salvage yard with harness, ecu, and all accessories. 1 BMR K-member later, had the 5.3 dropped in and ready to put the finishing touches on. With the idea of the car needing new paint and missing all of it's interior, I decided to scrap that idea. Out came the 5.3. Given my fondness of fast trucks, I figured I'd pickup a RCSB for the swap. Living in Houston, that didn't prove to be a large feat.. more so was finding a truck that was in good condition (not conditions).
I found a 2002 Pewter regular cab short bed reasonably close to the house for a fair price and drove it home.

Let the parts list begin..

Progress...
Ported, polished, milled, 706's

Z06 springs... they are cheap and will do with the stocker cam.


Pulled the whole rotating assembly apart and re-ringed, re-bearinged, dipped the block, and painted / cleaned everything.


Out with the old and in with the new..


Pacesetter 1 7/8" longtubes and 3" ORY mated to the factory exhaust.

Last edited by slvrram; May 26, 2016 at 02:11 AM.
Jun 16, 2014 | 05:57 PM
#2
Thread Starter
On The Tree
Joined: Sep 2005
Posts: 154
Likes: 3
From: Houston
Things to note for others performing this swap:
-you need V8 frame to engine mounts... the 6 cylinder ones are not the same
-PS pmp is the same but the brackets are not
-the fuel lines from the cab to intake manifold / rail need to be changed
-the ac compressor and lines are different
-the V6 4l60 and convertor will bolt right up... longevity is another thing entirely
I'll update as time permits. Thanks all for looking.
-stan
 Jun 17, 2014 | 08:38 AM
#4
Thread Starter
On The Tree
Joined: Sep 2005
Posts: 154
Likes: 3
From: Houston
Thank you. So far, everything has gone off without a hitch. The only two things I'm not 100 percent content with are 1) the pacesetter y hits the trans crossmember a bit and 2) I caught the firewall insulator with a valve cover bolt and tore it a bit. I guess that's just me be critical though.
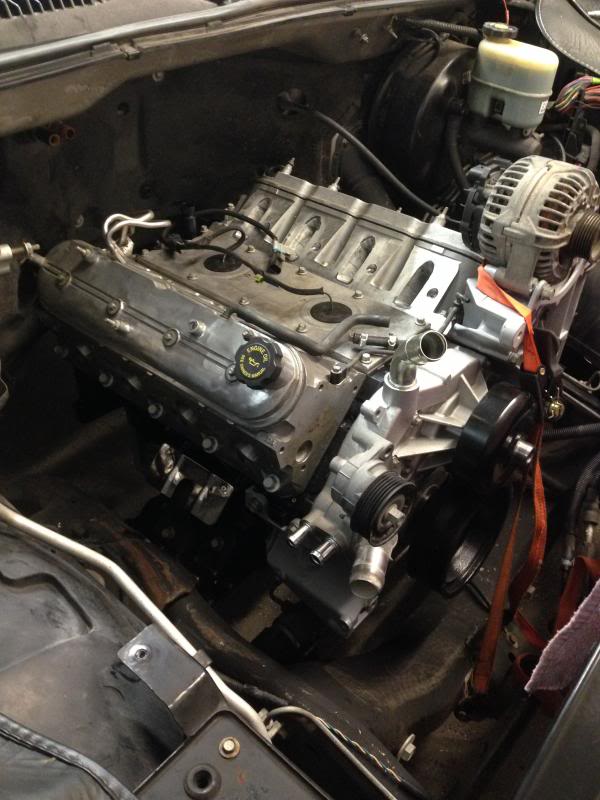
As for color.. It's just a silver or aluminum. Really I did it just for ease of cleanup and handling. The motor looks spotless as it sits now. Well, everything except the alternator. The block got a hit of vht high temp semigloss black. I truly dislike flashy colors in the engine bay. A purple -an fitting here and there... Okay.. A monster green engine block... Not so much.
Thanks Stan
Last edited by slvrram; Jun 18, 2014 at 10:20 PM.
Jun 18, 2014 | 10:20 PM
#5
Thread Starter
On The Tree
Joined: Sep 2005
Posts: 154
Likes: 3
From: Houston
Mods, just noticed that this is probably in the wrong section.... could you please move this thread to the builds section?
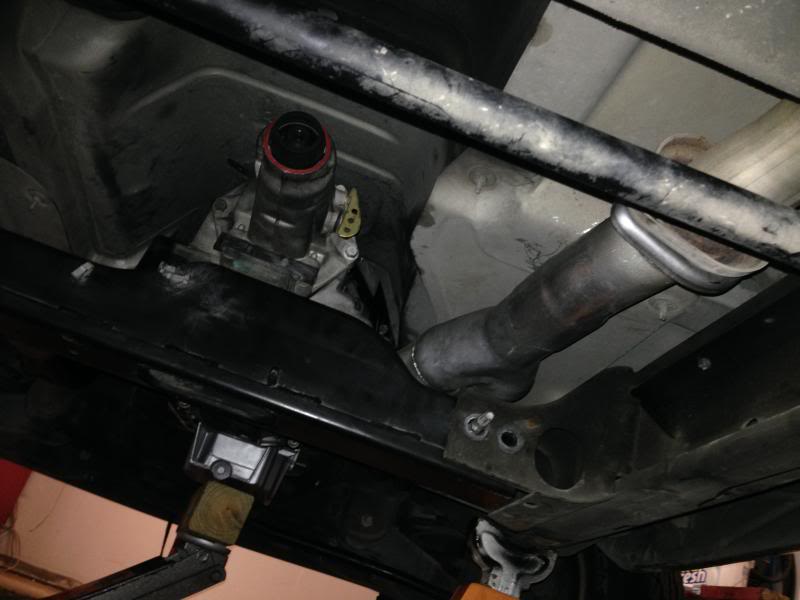
On for some progress... removed the freshly installed Pacesetter ORY today. It crosses over the trans pan that until tomorrow has remained filterless since I drained the fluid on the tear down. Good thing I realized this now and not after clamps and final tightening.
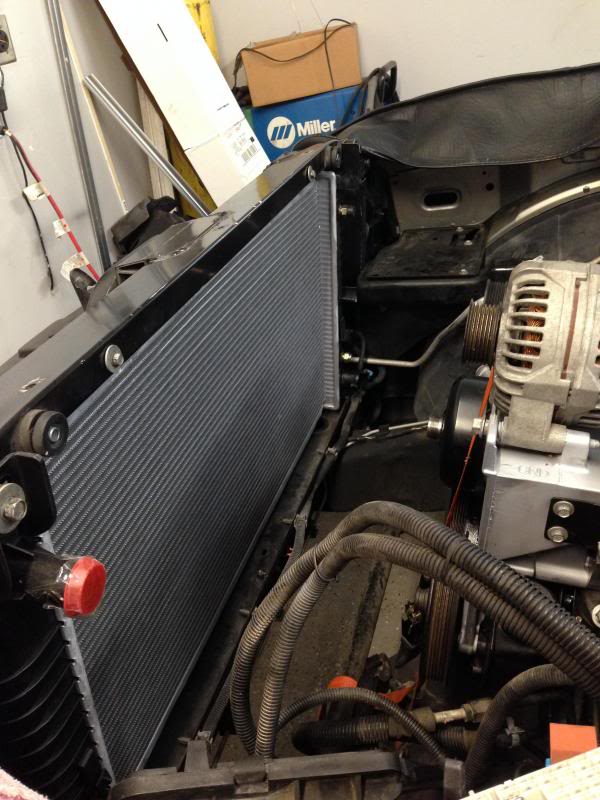
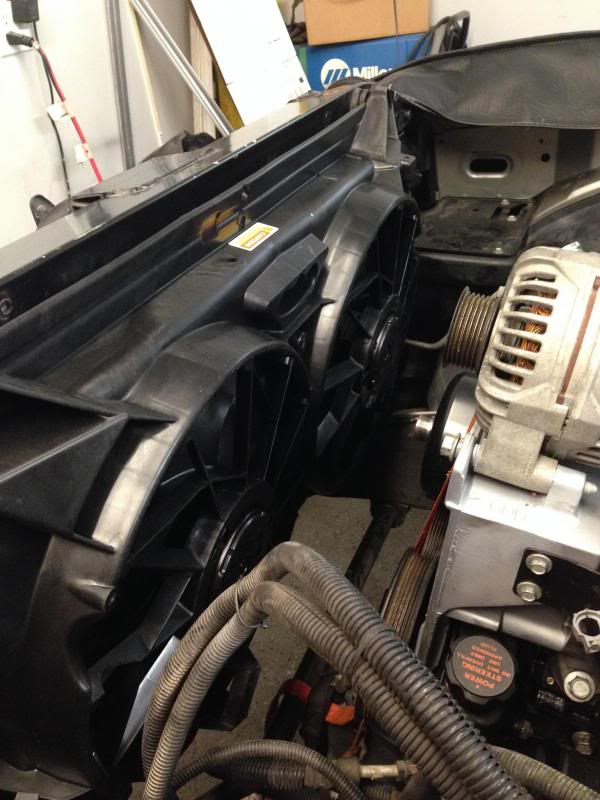
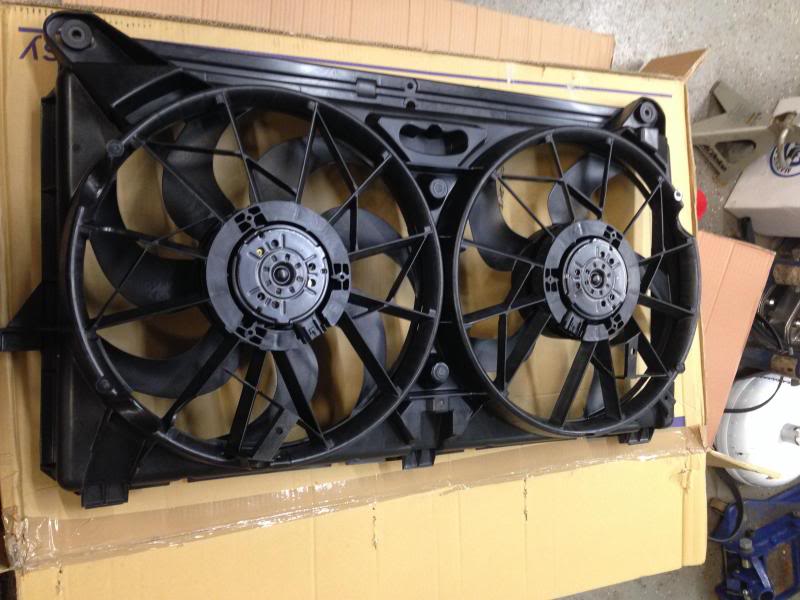
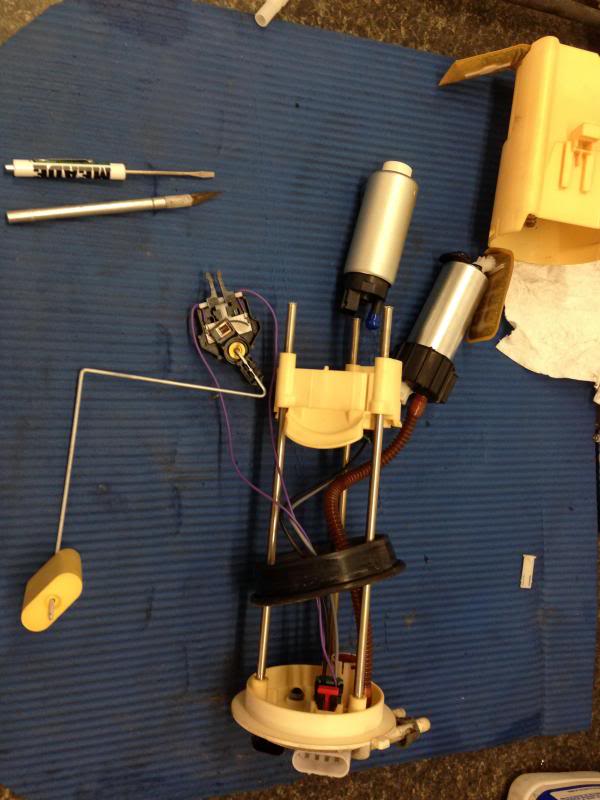
Also installed a 34" V8 radiator, 06+ efans, pressed on the ps pump pulley, and a 255 fuel pump.
Pics:
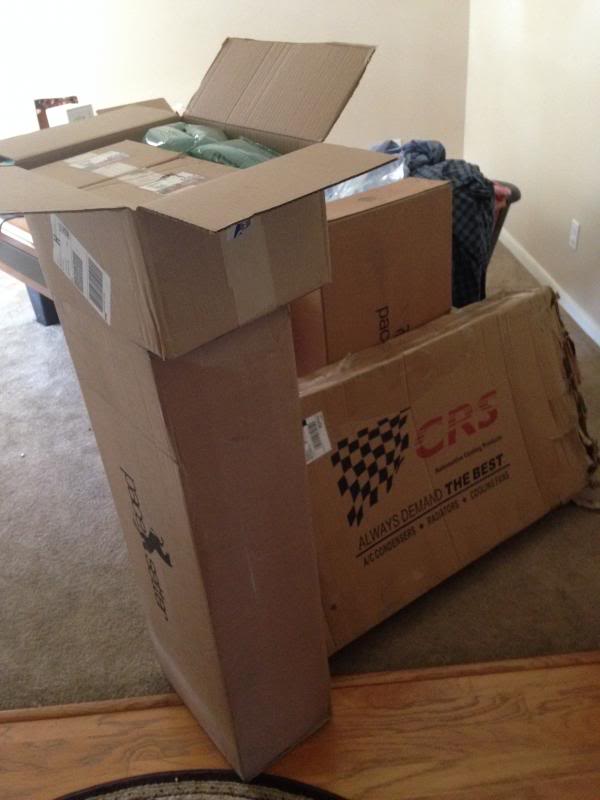
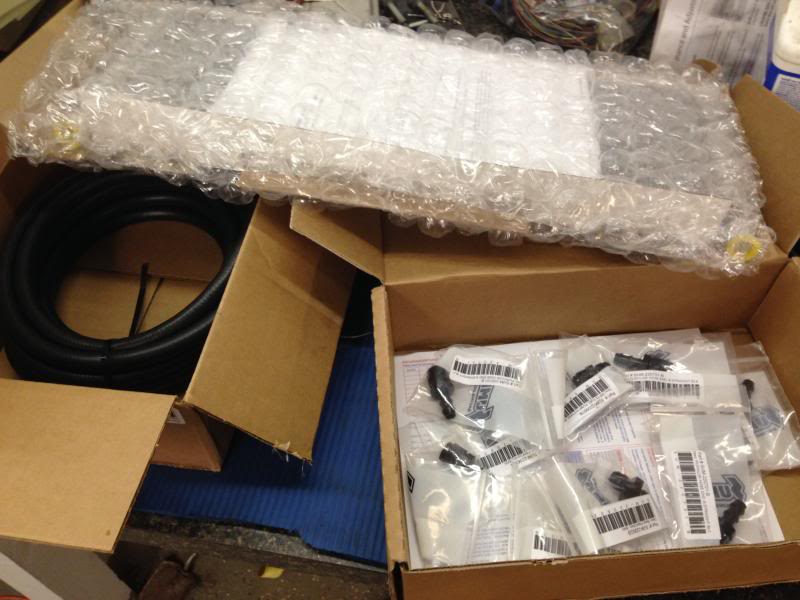
Summit / Amazon sent me more goodies.. Tru-Cool 40k GVW trans cooler, trans fluid line, and a whole assortment of push-loc -an fittings!
More to follow... tomorrow includes another ~$30 run to the dealer for bolts.
Thanks
Stan
On for some progress... removed the freshly installed Pacesetter ORY today. It crosses over the trans pan that until tomorrow has remained filterless since I drained the fluid on the tear down. Good thing I realized this now and not after clamps and final tightening.
Also installed a 34" V8 radiator, 06+ efans, pressed on the ps pump pulley, and a 255 fuel pump.
Pics:


Summit / Amazon sent me more goodies.. Tru-Cool 40k GVW trans cooler, trans fluid line, and a whole assortment of push-loc -an fittings!

More to follow... tomorrow includes another ~$30 run to the dealer for bolts.
Thanks
Stan
Last edited by slvrram; Jun 18, 2014 at 10:25 PM.
 Jul 24, 2014 | 10:49 PM
#7
Thread Starter
On The Tree
Joined: Sep 2005
Posts: 154
Likes: 3
From: Houston
Modifying the V6 harness to me, would be a horrible job. I used the 5.3 harness and 5.3 computer (which actually turned out to be a 4.8 computer). Get the whole harness and fuse box. Body harness plugs right into the engine compartment from the V6 truck like it was meant to be.
It was literally as easy as that. The most difficult part was getting the aftermarket fan harness intergrated to the computer. Even that was a walk in the park after I found the appropriate pinout on the computer for fan control.
Thanks
Stan
It was literally as easy as that. The most difficult part was getting the aftermarket fan harness intergrated to the computer. Even that was a walk in the park after I found the appropriate pinout on the computer for fan control.
Thanks
Stan
Trending Topics
Mar 4, 2016 | 12:23 PM
#8

Teching In
Joined: Mar 2016
Posts: 3
Likes: 0
Things to note for others performing this swap:
-you need V8 frame to engine mounts... the 6 cylinder ones are not the same
-PS pmp is the same but the brackets are not
-the fuel lines from the cab to intake manifold / rail need to be changed
-the ac compressor and lines are different
-the V6 4l60 and convertor will bolt right up... longevity is another thing entirely
I'll update as time permits. Thanks all for looking.
-stan
-you need V8 frame to engine mounts... the 6 cylinder ones are not the same
-PS pmp is the same but the brackets are not
-the fuel lines from the cab to intake manifold / rail need to be changed
-the ac compressor and lines are different
-the V6 4l60 and convertor will bolt right up... longevity is another thing entirely
I'll update as time permits. Thanks all for looking.
-stan
The motor is complete just no ac lines. Im already over budget (thanks arp) haha. The compressor is in good shape and i just need some guidance on hopefully not buying all of the ac components as they are always expensive. Before y'all laugh I live in South Texas and a little ac while in my daily is a necessity.

I cant find any info on this except here Please haaaaalp
Apr 17, 2016 | 04:06 AM
#9

I am having a hard time wrapping my head on how to use the stock AC compressor that came on my complete junkyard 5.3
The motor is complete just no ac lines. Im already over budget (thanks arp) haha. The compressor is in good shape and i just need some guidance on hopefully not buying all of the ac components as they are always expensive. Before y'all laugh I live in South Texas and a little ac while in my daily is a necessity.
I cant find any info on this except here Please haaaaalp
I ended up having to replace the dryer, and the lines. I bought the dryer new from rockauto and the lines from a local salvage yard. The V6 condenser, V6 evaporator, and 5.3 compressor all fit together with the above replacements.
Hope this helps. slvrram is my other sn to eliminate any confusion.
Apr 25, 2016 | 04:24 PM
#10
Teching In
Joined: Mar 2016
Posts: 3
Likes: 0
Sorry for such a delayed rely. Just saw your post.
I ended up having to replace the dryer, and the lines. I bought the dryer new from rockauto and the lines from a local salvage yard. The V6 condenser, V6 evaporator, and 5.3 compressor all fit together with the above replacements.
Hope this helps. slvrram is my other sn to eliminate any
confusion.
I ended up having to replace the dryer, and the lines. I bought the dryer new from rockauto and the lines from a local salvage yard. The V6 condenser, V6 evaporator, and 5.3 compressor all fit together with the above replacements.
Hope this helps. slvrram is my other sn to eliminate any
confusion.
I was thinkin too far into it tryin to save a hundred bucks F#$$ it, it's only money right?