

1932 Ford pro street....re-build


 May 16, 2014 | 05:15 PM
#147
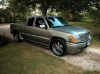
I'm no help there either  i actually like the look of the painted steel wheels with a large chrome center cap on classic cars/trucks. not as expensive, not as blingy....but look nice to me for some reason. with whitewalls
i actually like the look of the painted steel wheels with a large chrome center cap on classic cars/trucks. not as expensive, not as blingy....but look nice to me for some reason. with whitewalls
May 16, 2014 | 05:19 PM
#148
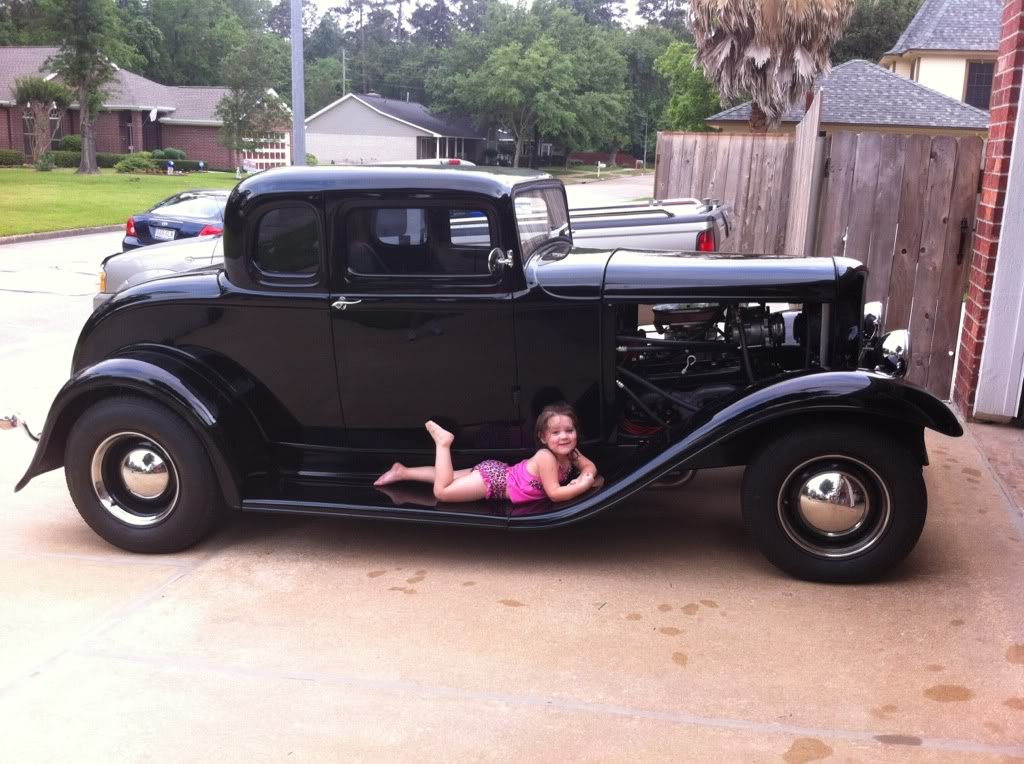
like this...there is nothing special about them. i just think they look nice and fit the generation of old school cars/trucks. this was a 32 that my dad and i built. we let it down a lot once it was finished but he sold it less than a year ofter completion and thinks i'm going to help with another. nope! i'm just not a flasy wheel guy i guess. i usually like the simple look.
 May 16, 2014 | 05:24 PM
#149
Update*
Truck will be hauled back to my home garage on Sunday. The list above and then some has been knocked out. Now it is time to finish about 4-5 hours of small crap and then pulled apart to start on the paint process.
I see a few sharpie markers and a case of zip-lock bags in my future
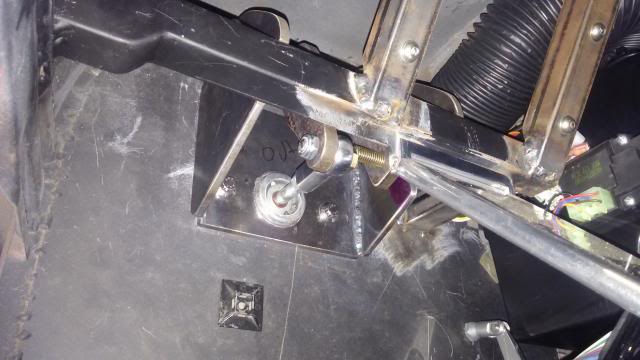
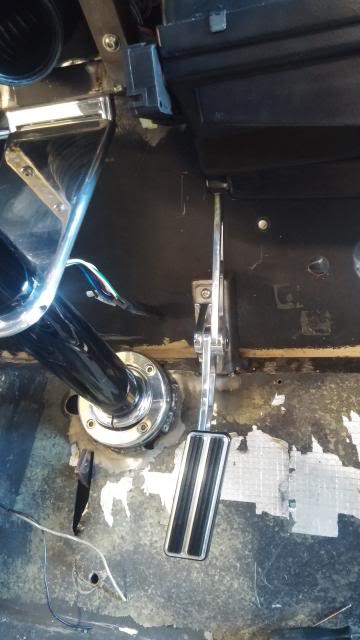
Now for those that were interested in the process of the under dash brake pedal assembly. Below are a few pictures. Yes, it is way over built but we are dealing with one of the most important parts of the truck...Brakes.
It all started with paper and a pen. It saved me a good bit of material in the end.

Next I cut the base plate and side plates out of .250 plate and the pivot bolt is .625"
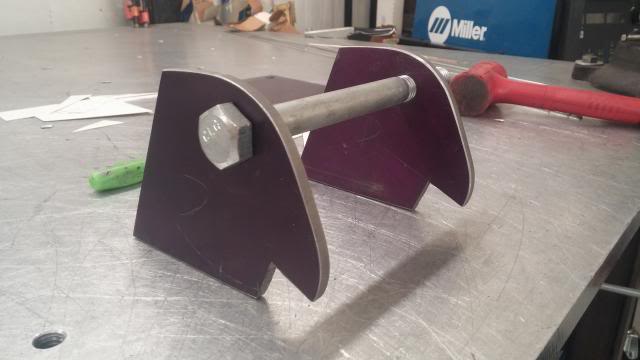
Test Fit
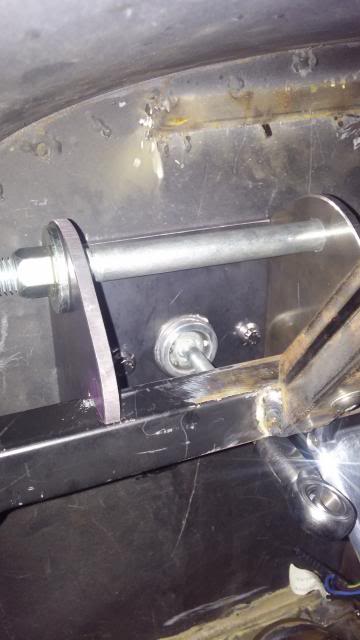
Pivot tube is 1" OD chromoly that is bored .750" for the .625" bronze bushings. I cut the master arm and pedal attachment out of .375". All welded up!
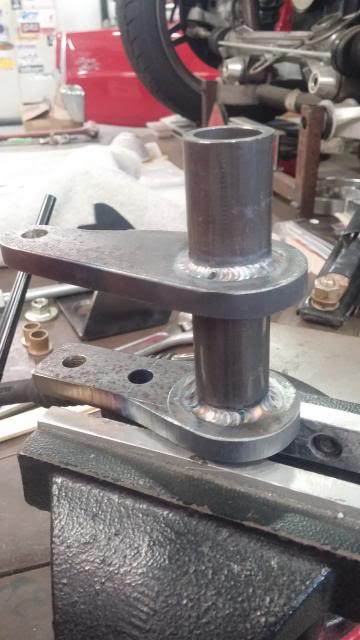
Final test fit. I'm waiting on my water jet guy to cut out the pedal arm that I drew in CAD earlier today.

The suggested pedal ratio from Wilwood was 5.5:1 for their 7/8" bore tandem master and their disc brakes. Final finished pedal ratio is 5.48:1 so I think I did ok. I also managed to keep the pedal at a decent resting height from the floor and the pedal does completely compress the master without contacting the floor. I have about .300" to accommodate for sound deadening and carpet.
DXF. File of the pedal

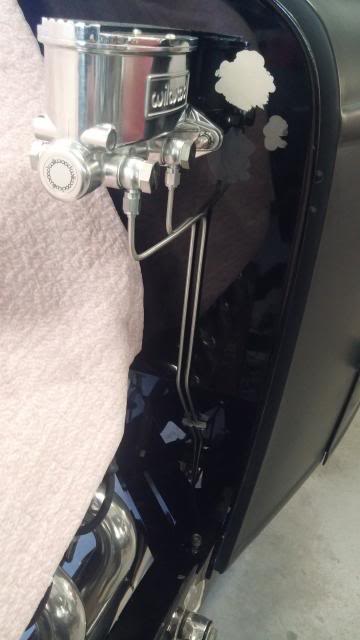
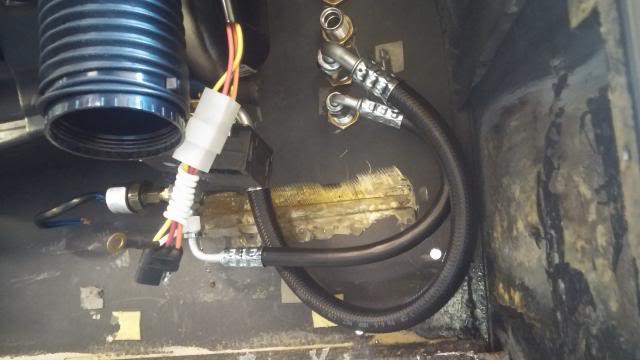
I also managed to get the brake lines made and the braided line tabs welded on the frame.
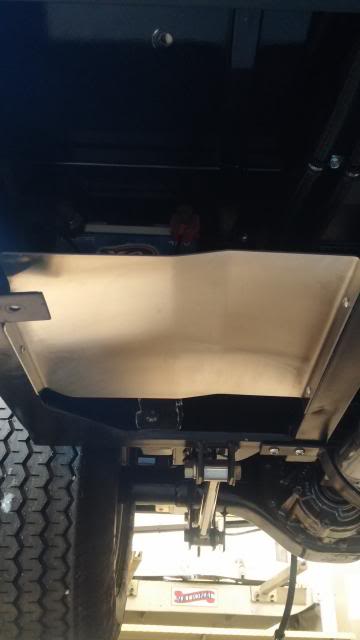
Stainless heat shields made and installed.
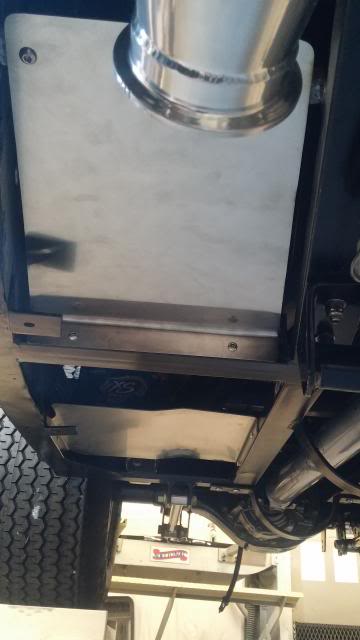
Throttle cable and pedal done (Pedal will be changing to a black version)
Inside A/C Lines and heater hoses are also done.
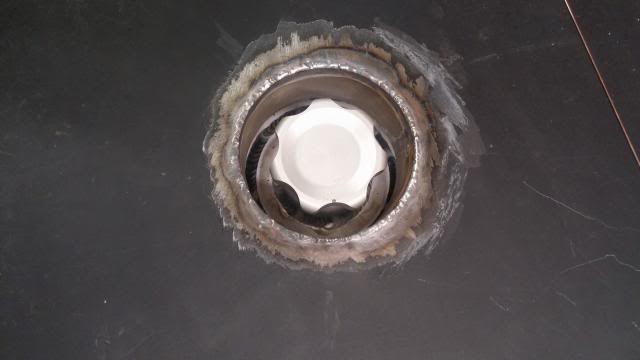
Bed to filler neck tube was also welded in. This will be ground down and welded several time to create a nice rounded edge. ( Dont mind the arch on the cap some idiot hit the pedal while the torch was laying in the bed... Yeah that would be me )
)
Truck will be hauled back to my home garage on Sunday. The list above and then some has been knocked out. Now it is time to finish about 4-5 hours of small crap and then pulled apart to start on the paint process.
I see a few sharpie markers and a case of zip-lock bags in my future
Now for those that were interested in the process of the under dash brake pedal assembly. Below are a few pictures. Yes, it is way over built but we are dealing with one of the most important parts of the truck...Brakes.
It all started with paper and a pen. It saved me a good bit of material in the end.

Next I cut the base plate and side plates out of .250 plate and the pivot bolt is .625"

Test Fit

Pivot tube is 1" OD chromoly that is bored .750" for the .625" bronze bushings. I cut the master arm and pedal attachment out of .375". All welded up!

Final test fit. I'm waiting on my water jet guy to cut out the pedal arm that I drew in CAD earlier today.


The suggested pedal ratio from Wilwood was 5.5:1 for their 7/8" bore tandem master and their disc brakes. Final finished pedal ratio is 5.48:1 so I think I did ok. I also managed to keep the pedal at a decent resting height from the floor and the pedal does completely compress the master without contacting the floor. I have about .300" to accommodate for sound deadening and carpet.
DXF. File of the pedal

I also managed to get the brake lines made and the braided line tabs welded on the frame.

Stainless heat shields made and installed.


Throttle cable and pedal done (Pedal will be changing to a black version)


Inside A/C Lines and heater hoses are also done.

Bed to filler neck tube was also welded in. This will be ground down and welded several time to create a nice rounded edge. ( Dont mind the arch on the cap some idiot hit the pedal while the torch was laying in the bed... Yeah that would be me
) May 16, 2014 | 05:26 PM
#150
like this...there is nothing special about them. i just think they look nice and fit the generation of old school cars/trucks. this was a 32 that my dad and i built. we let it down a lot once it was finished but he sold it less than a year ofter completion and thinks i'm going to help with another. nope! i'm just not a flasy wheel guy i guess. i usually like the simple look.

Now I would have sold a lot of others things before I sold that 32. Nice job and I don't blame you one bit for not wanting to help. The pre-war fords are fun, but also a pain in the *** to build.
Besides, the tolerances of those steel wheels and huge tires are a total bitch to balance.
Last edited by sprayed99; May 16, 2014 at 05:49 PM.