**Three6GMC Official Build Thread**
 Apr 11, 2016 | 10:04 PM
#321

Thread Starter


Joined: Mar 2010
Posts: 2,165
Likes: 27
From: Corpus Christi
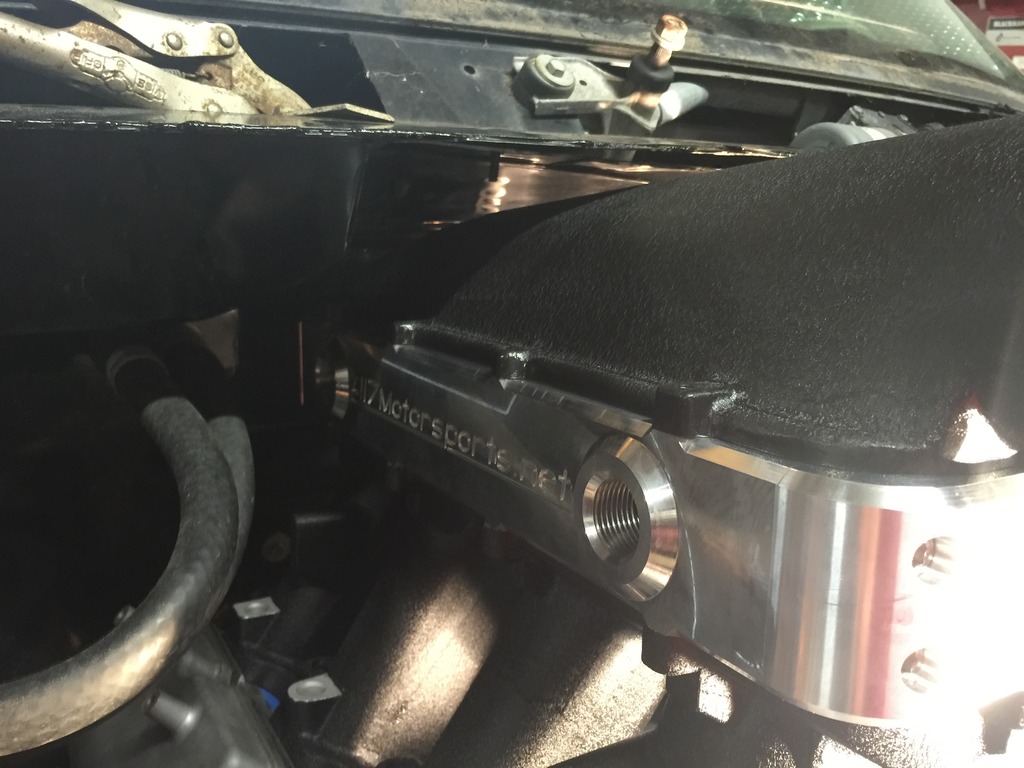
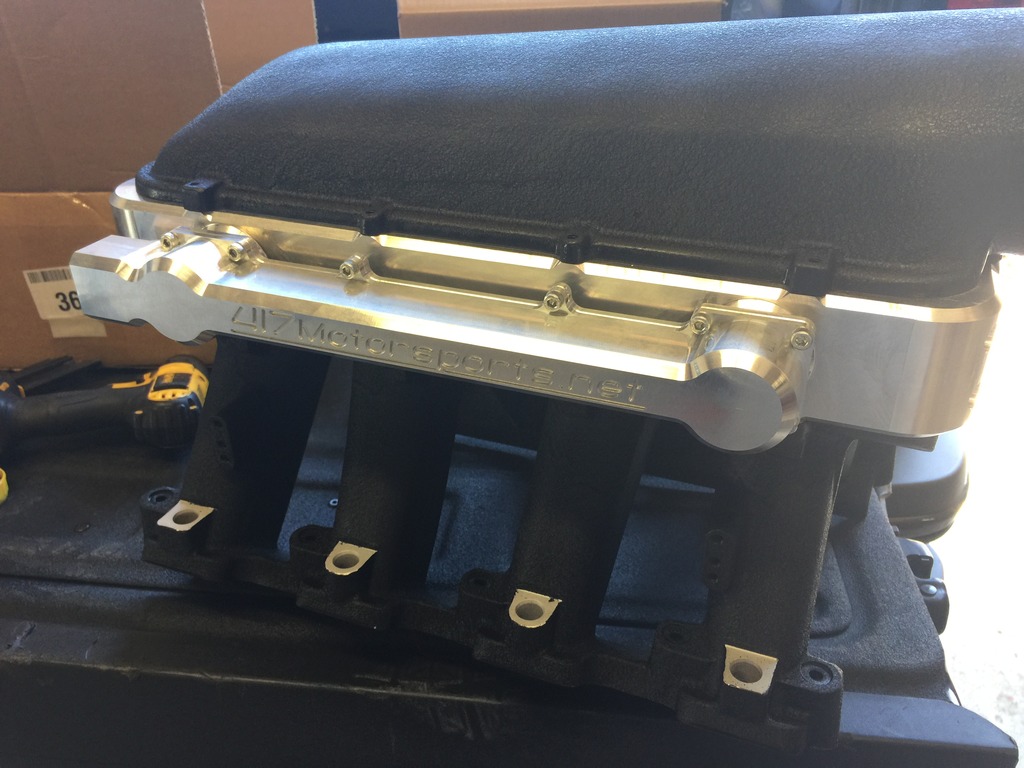
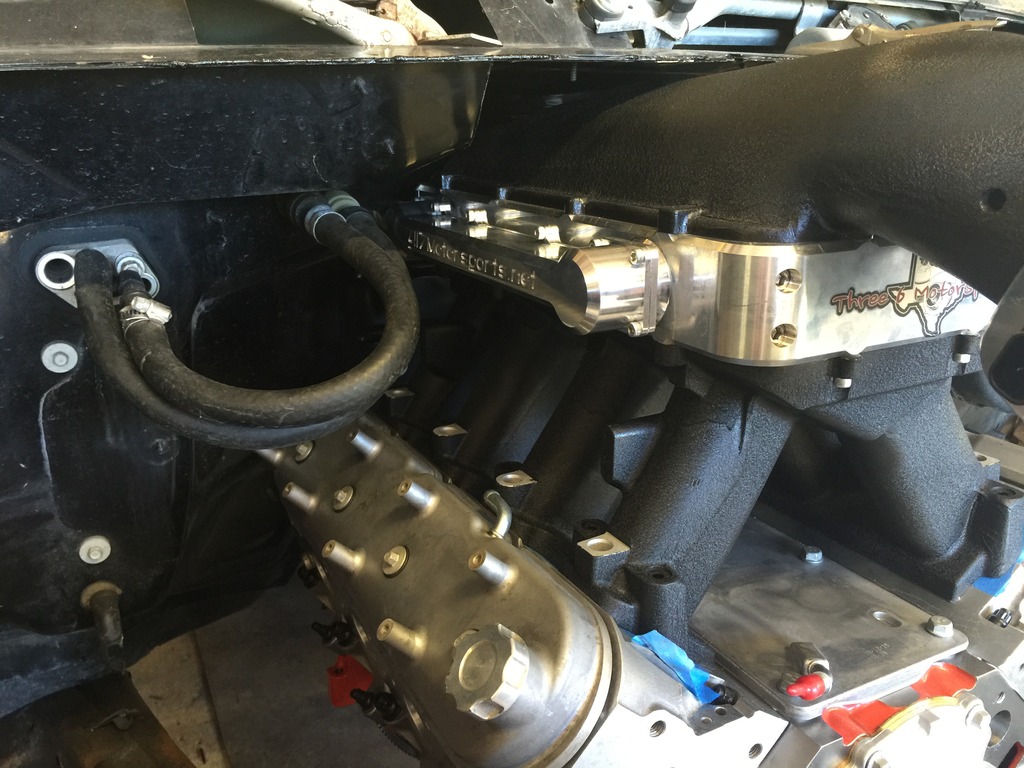
Intake looked ugly as F**K after I shaved it smooth so had to do something with it. Decided to paint it myself and try out that VHT wrinkle black. Came out pretty good surprisingly so I might keep it like this for awhile. Its not perfect but good enough...


Last edited by Three6GMC; Apr 11, 2016 at 11:41 PM.
Apr 11, 2016 | 10:07 PM
#322
Thread Starter
Joined: Mar 2010
Posts: 2,165
Likes: 27
From: Corpus Christi
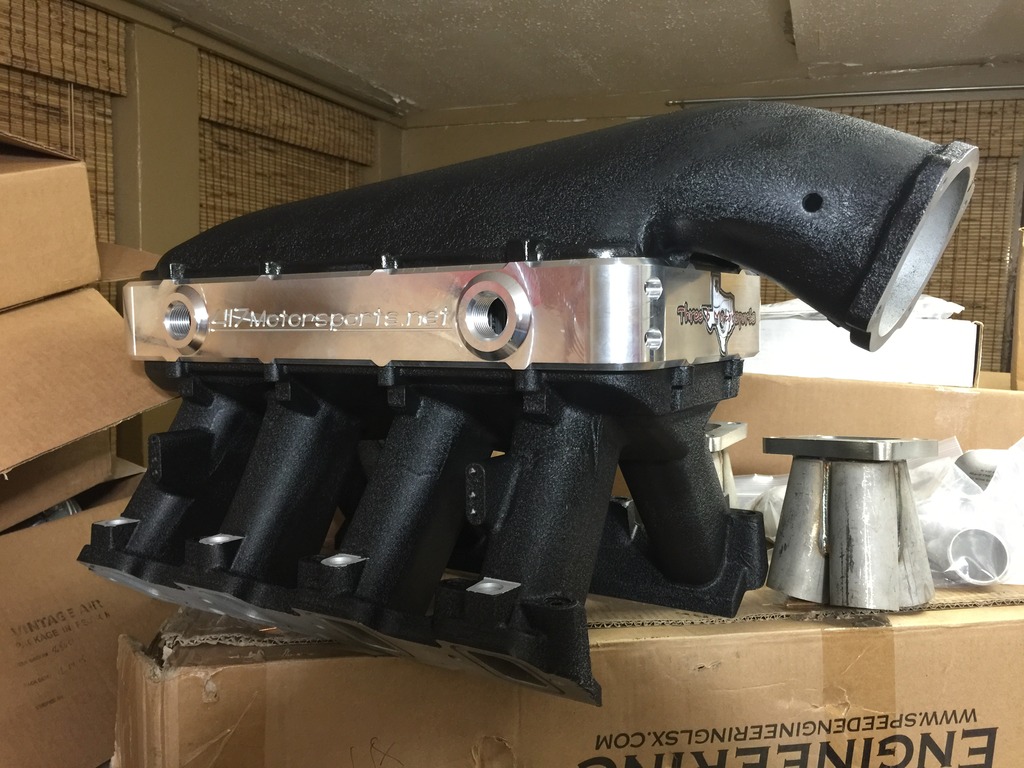
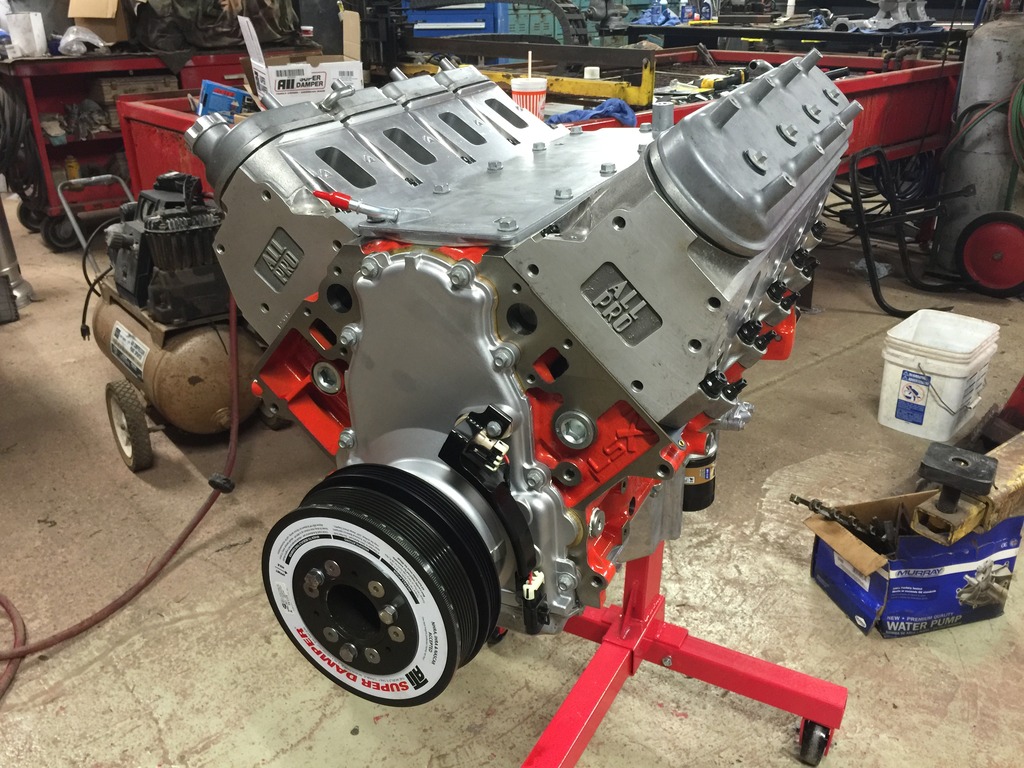
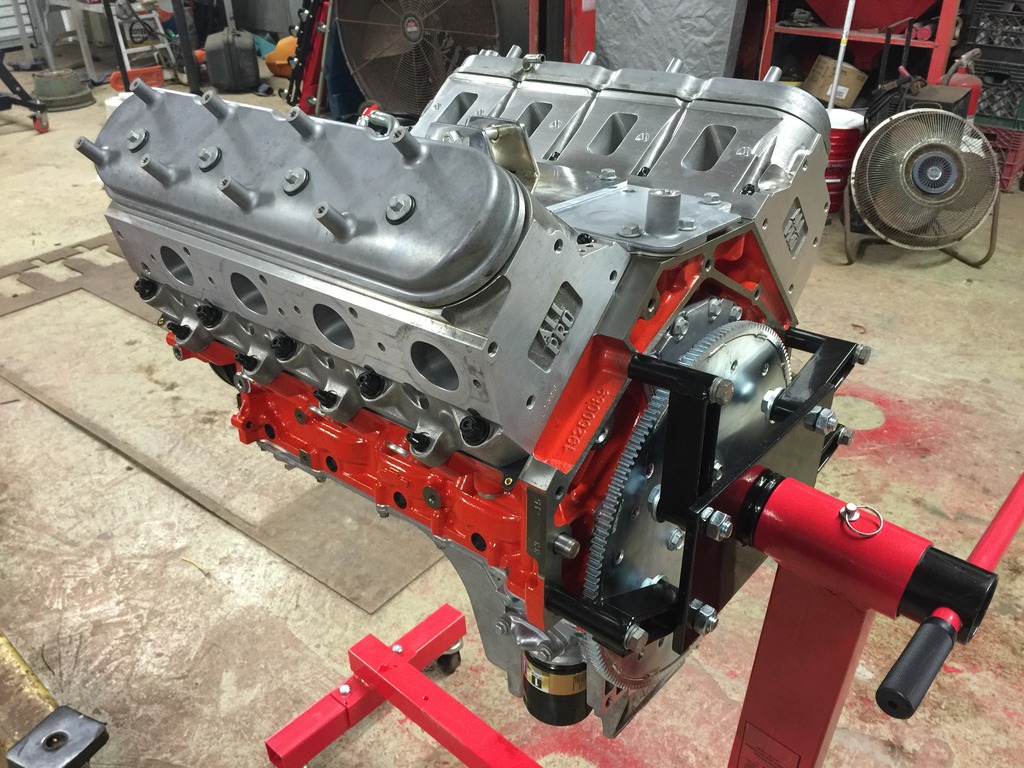
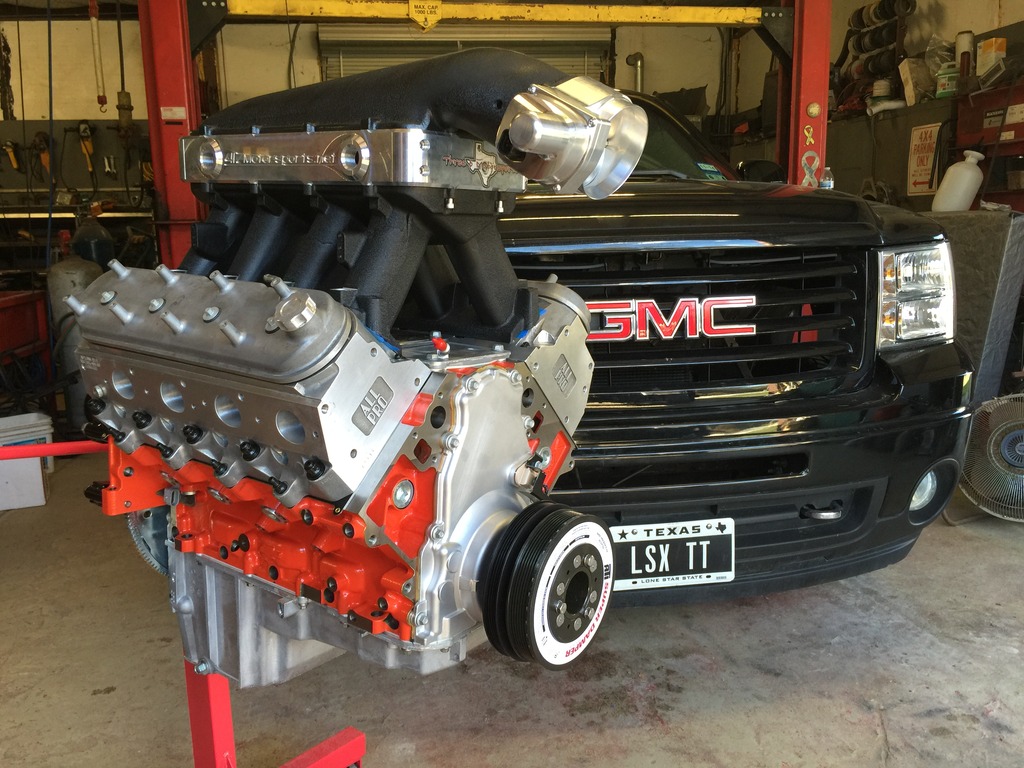
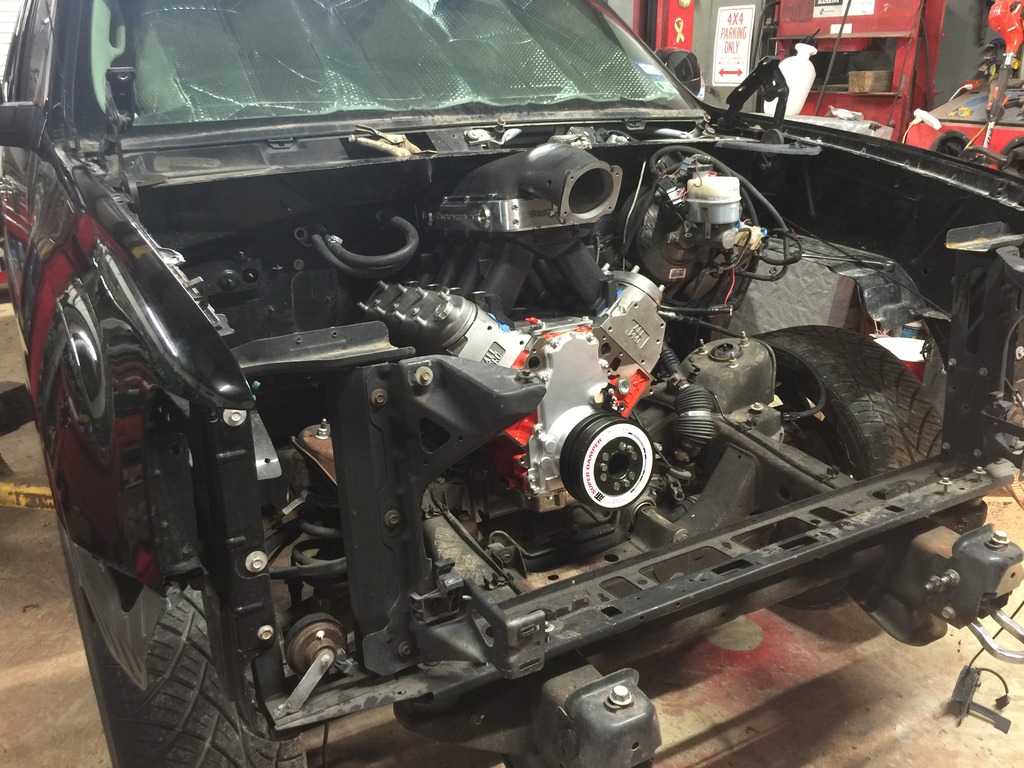
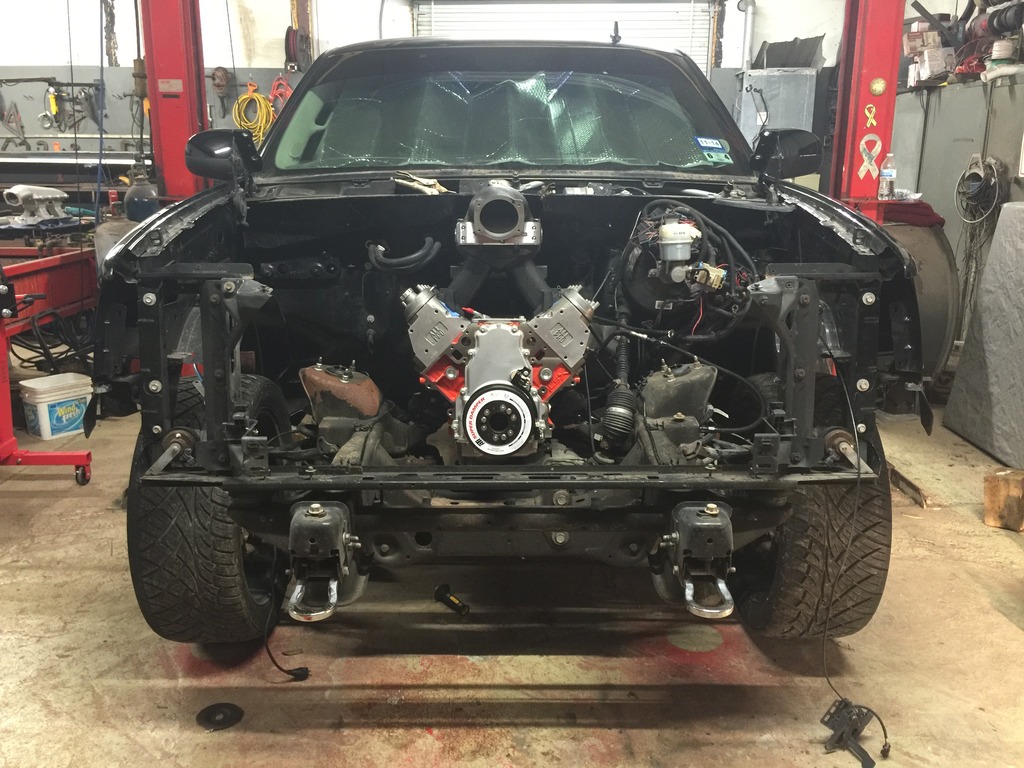
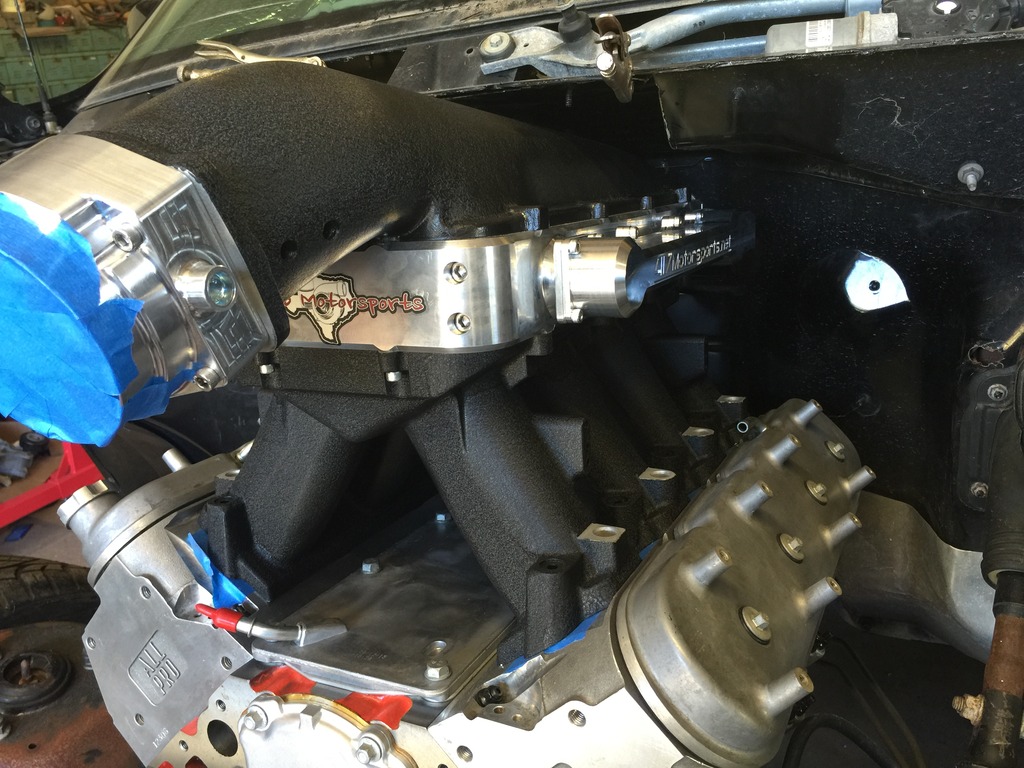
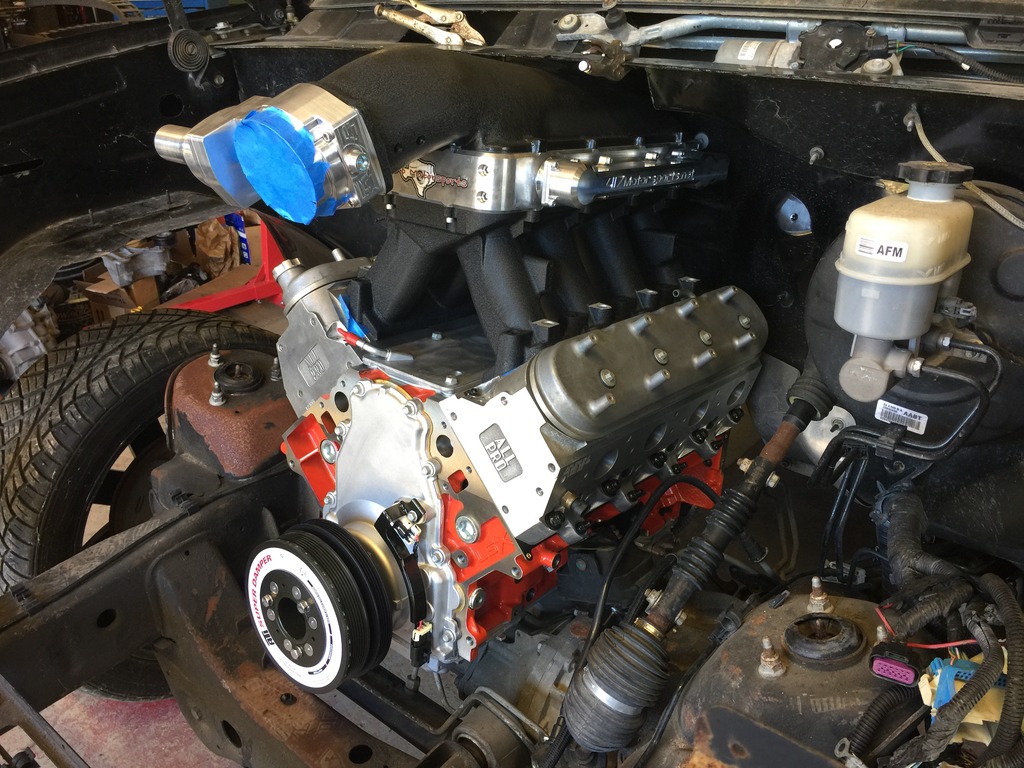
Some how I lost most of the ARP studs needed to bolt the heads on so had to order a new set from Brian Tooley and wait a few days. Once they came in though got the heads bolted up and put the intake on to see how tall this thing is going to be....


 Apr 11, 2016 | 10:13 PM
#323
Thread Starter
Joined: Mar 2010
Posts: 2,165
Likes: 27
From: Corpus Christi
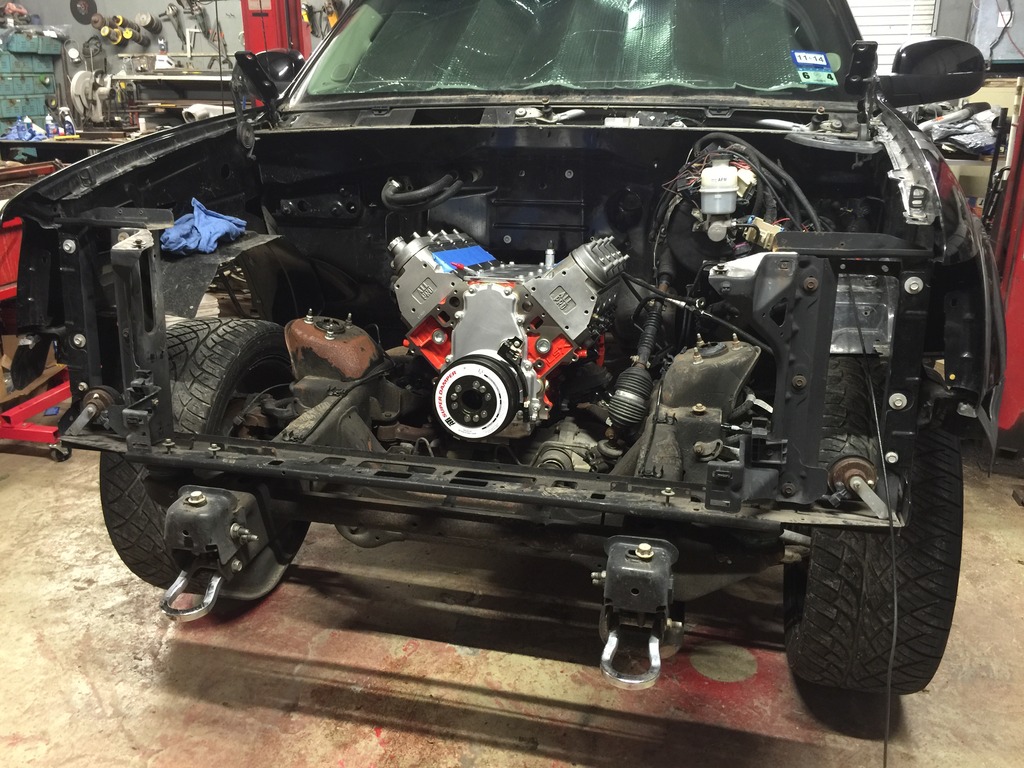
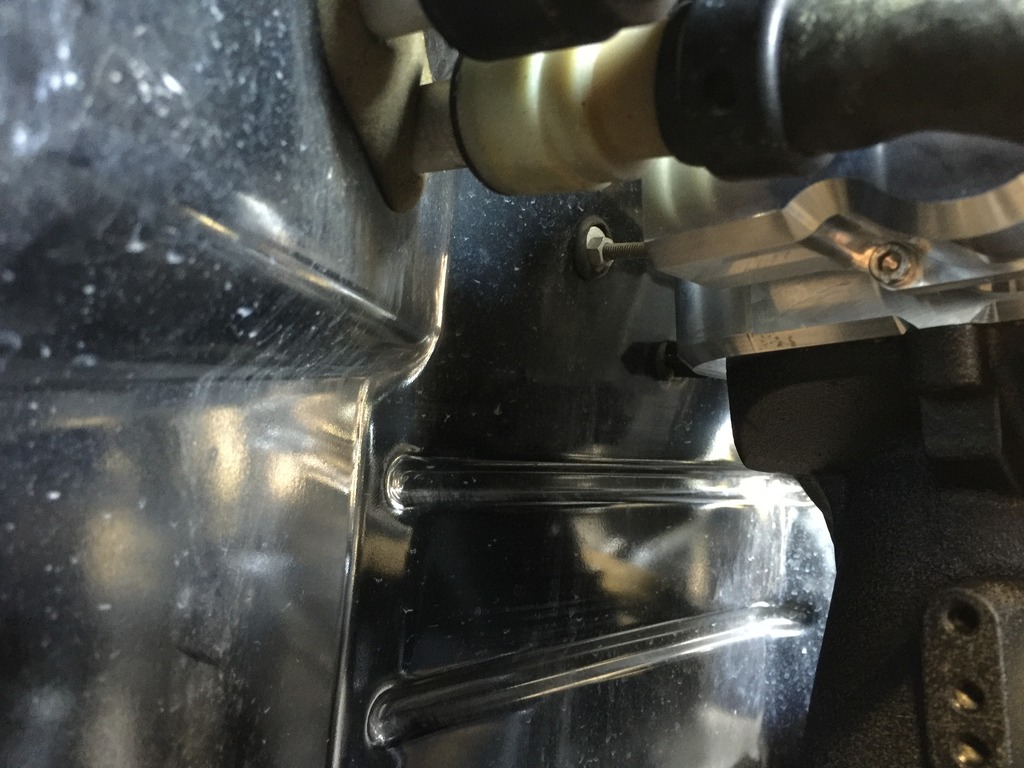
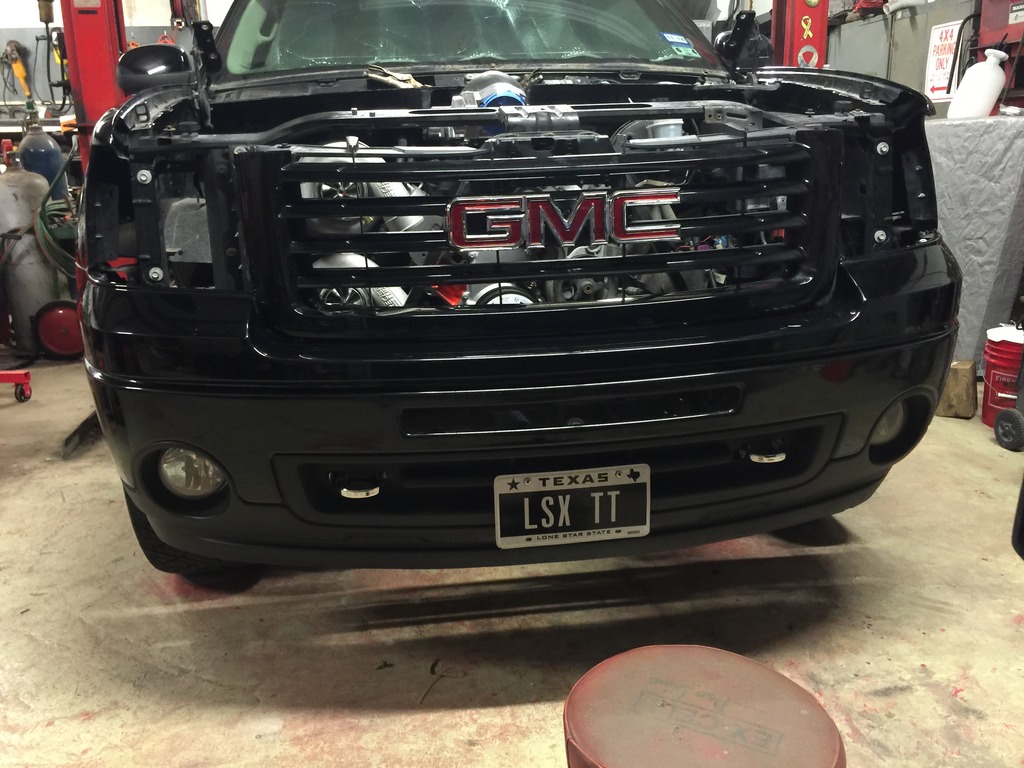
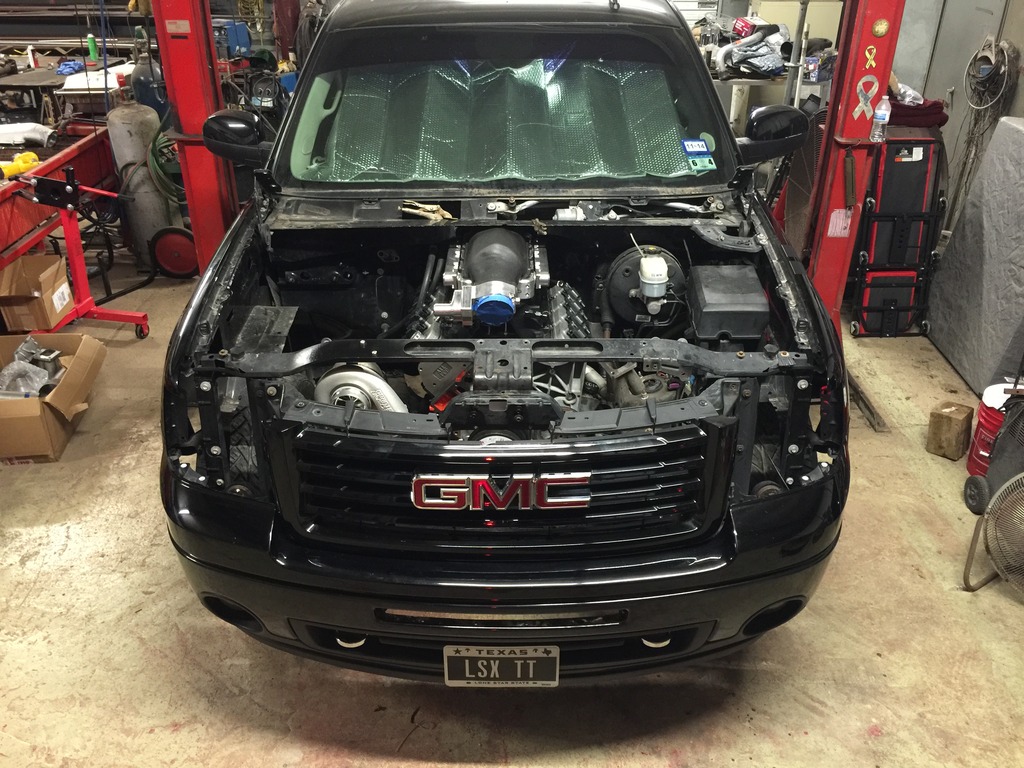
Next came the fun part. Fitting all this under the cowl. Wasn't worried about cutting the cowl but was kinda worried about loosing the passenger side wiper. I know sounds kinda stupid but I like to keep the factory look as much as I can. Im simple lol. Good thing though has a � inch clearance from the new modified cowl and the wiper arm. I know the NBS trucks don't have this much room so they have to lose the wiper arm. NNBS though good to go! Excuse me and my marshmallow body in the 4th pic lol 


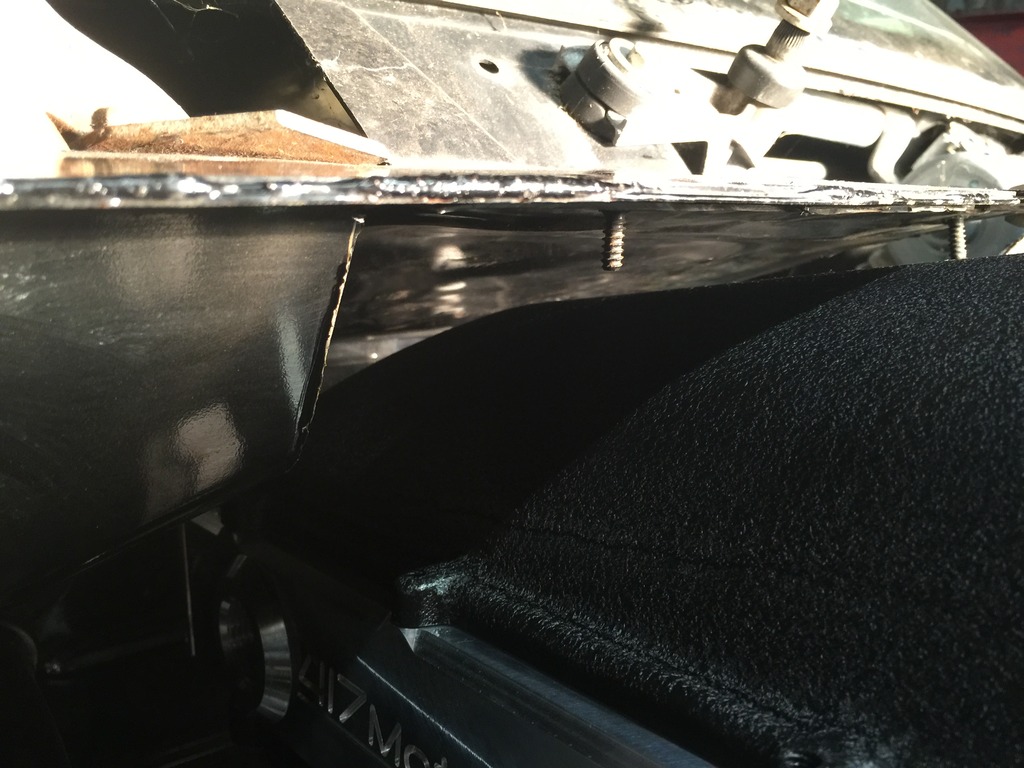
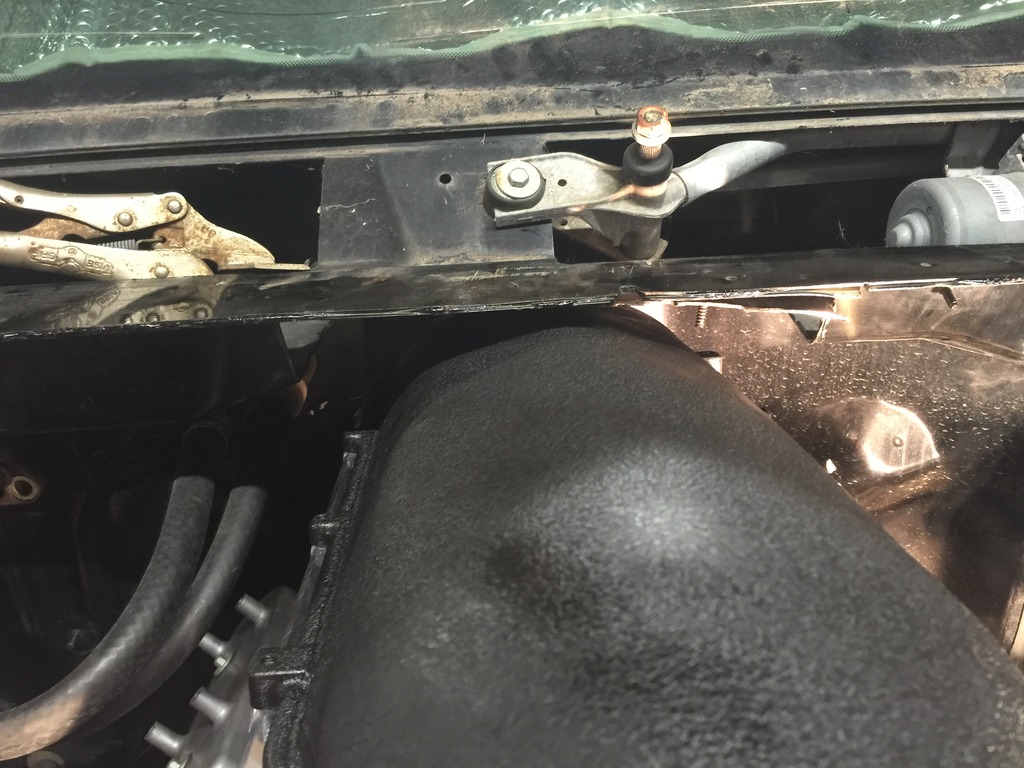
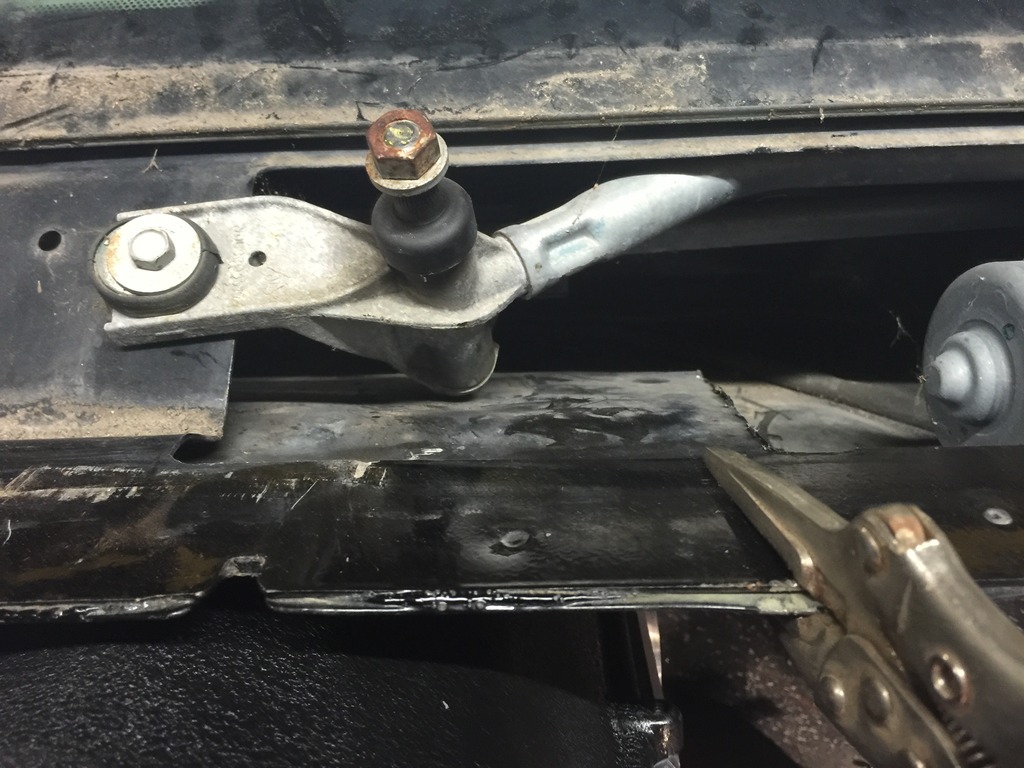
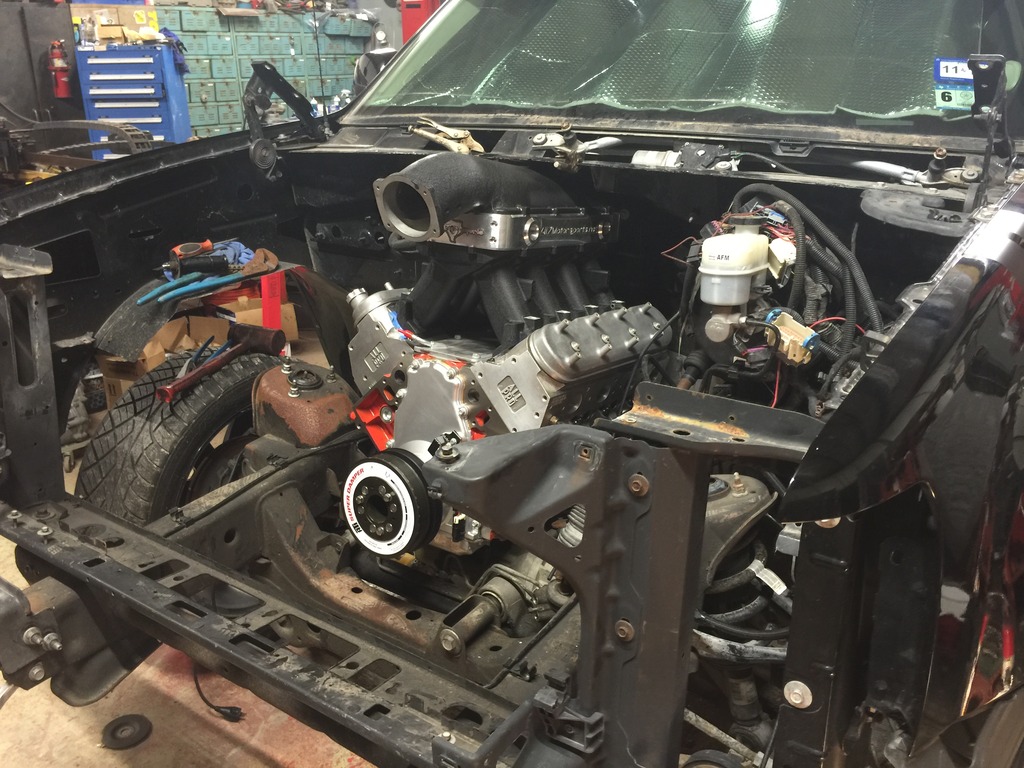


Last edited by Three6GMC; Apr 11, 2016 at 11:44 PM.
Apr 11, 2016 | 10:19 PM
#324
Thread Starter
Joined: Mar 2010
Posts: 2,165
Likes: 27
From: Corpus Christi
Now that I got the intake to fit time to see how I wanted to run the water manifolds. Ended up having enough room to be able to run them from the back. Really keeps the look nice and clean...


 Apr 11, 2016 | 10:27 PM
#325
Thread Starter
Joined: Mar 2010
Posts: 2,165
Likes: 27
From: Corpus Christi
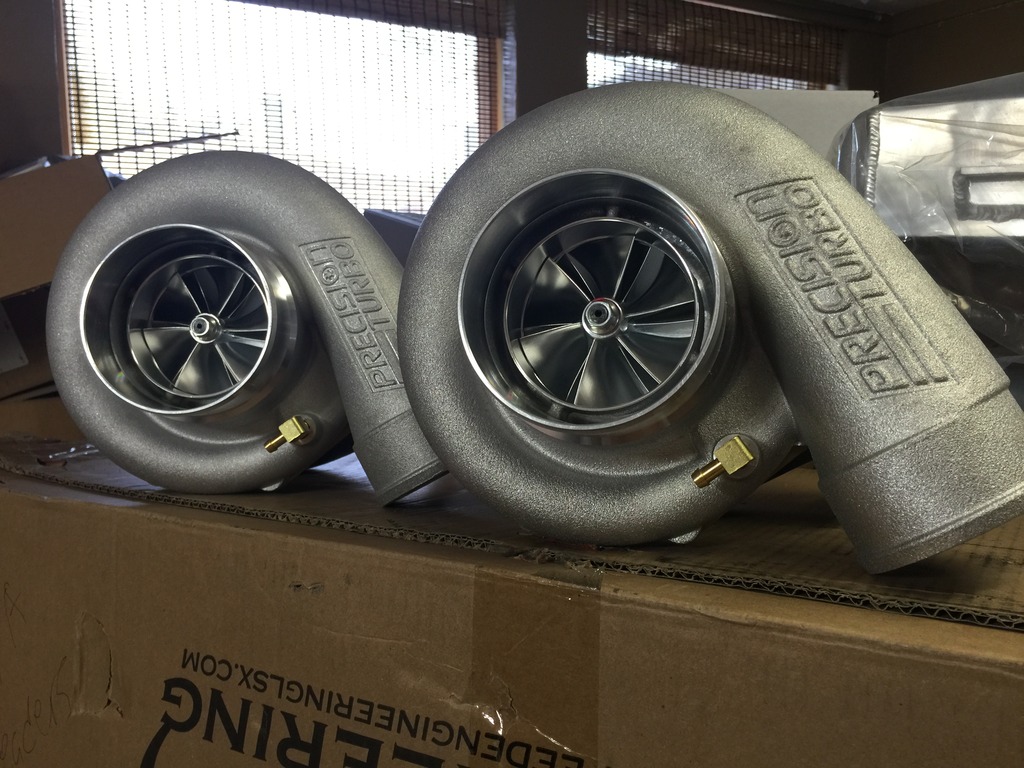
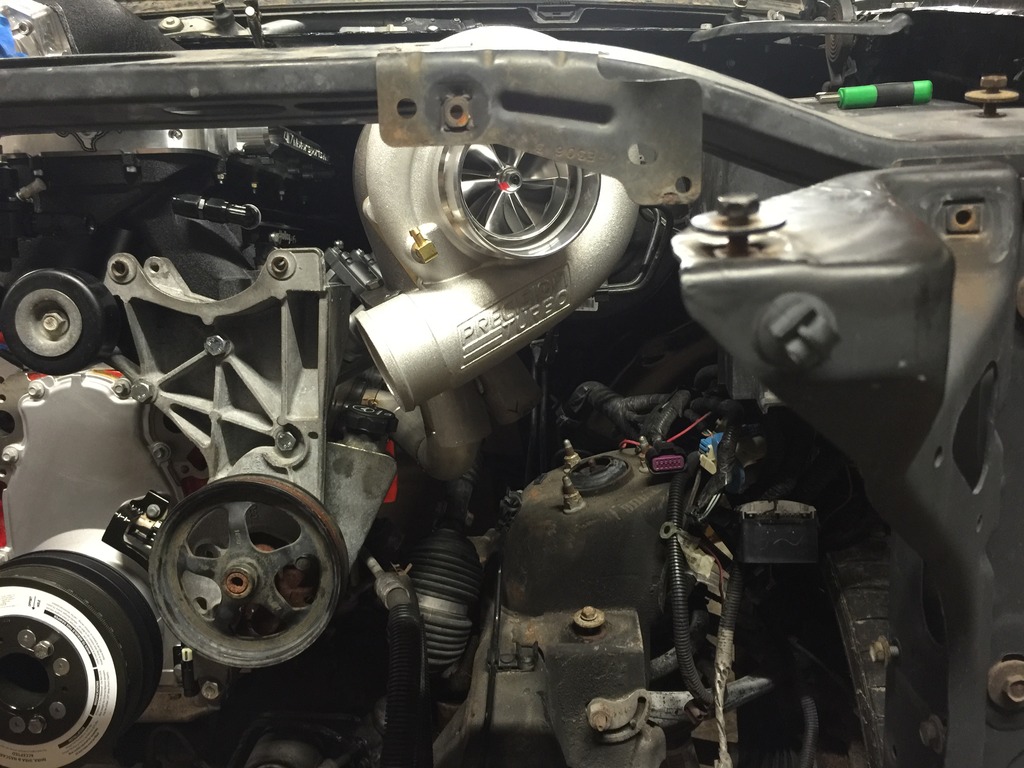
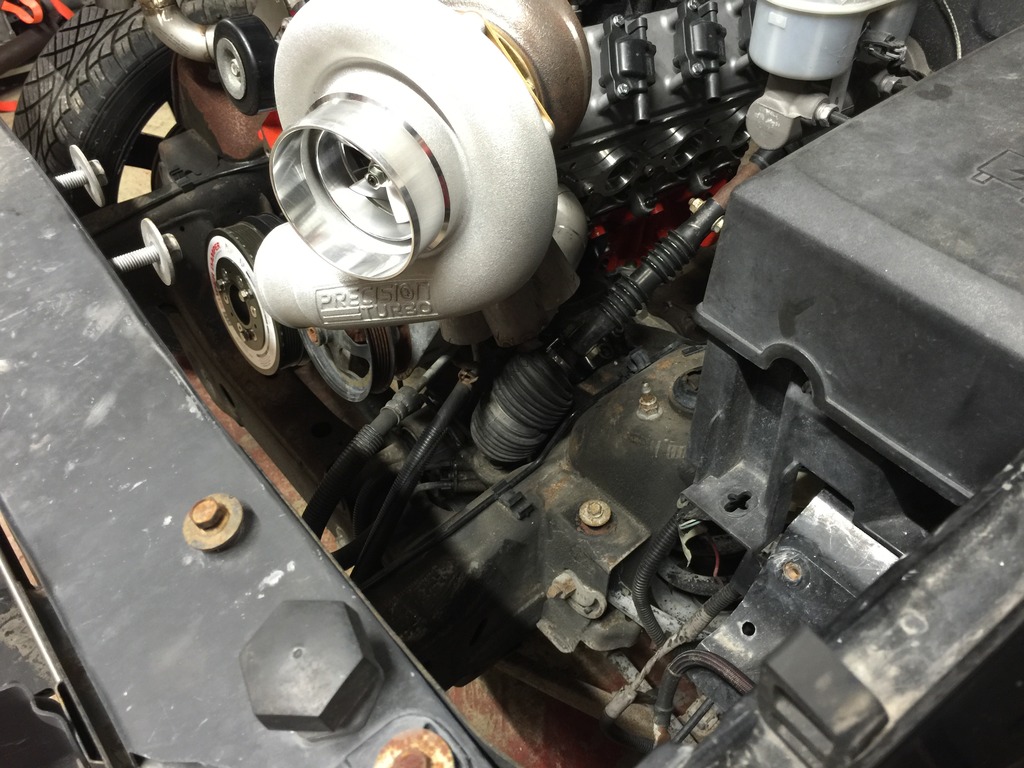
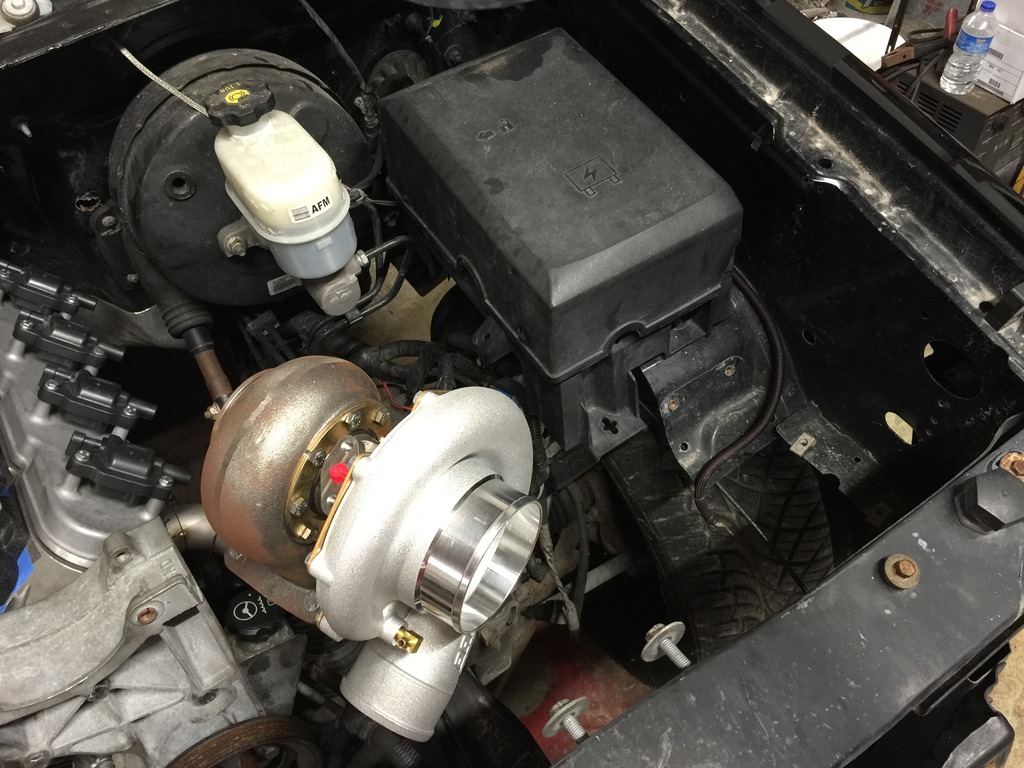
New turbos came in... Twin 76/75 CEA Precision turbos with T4 .96A/R exhaust housings. Should provide plenty of air for my little motor. Also Tial wastegates and blow off valves came in as well...


 Apr 11, 2016 | 10:37 PM
#326
Thread Starter
Joined: Mar 2010
Posts: 2,165
Likes: 27
From: Corpus Christi
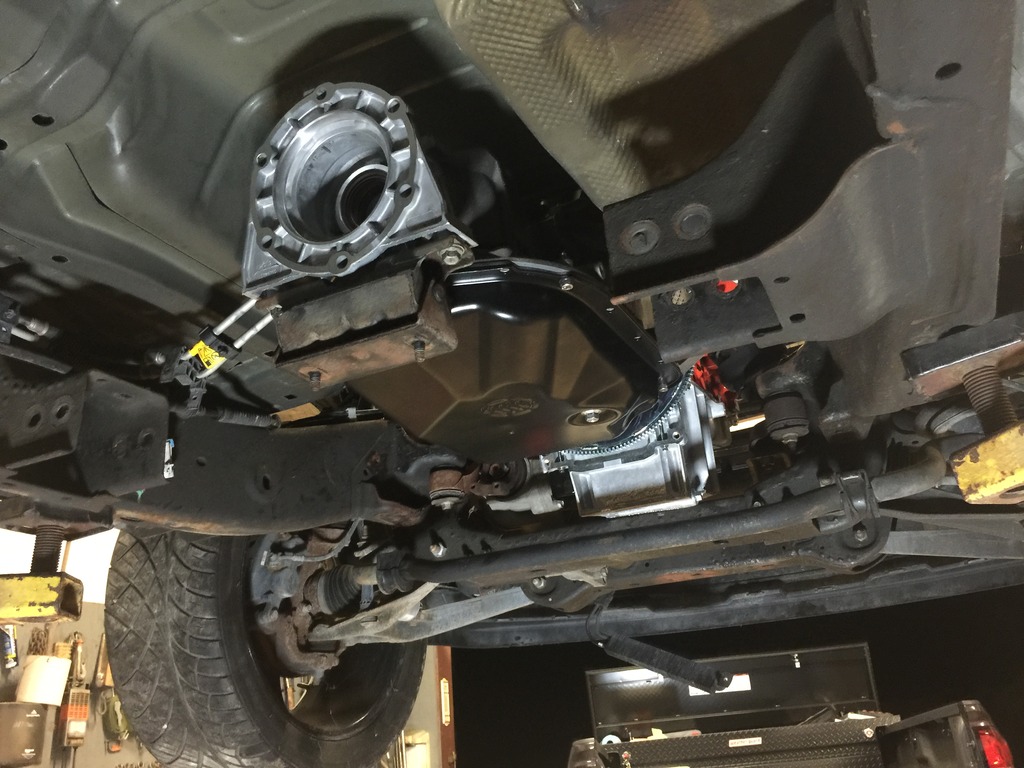
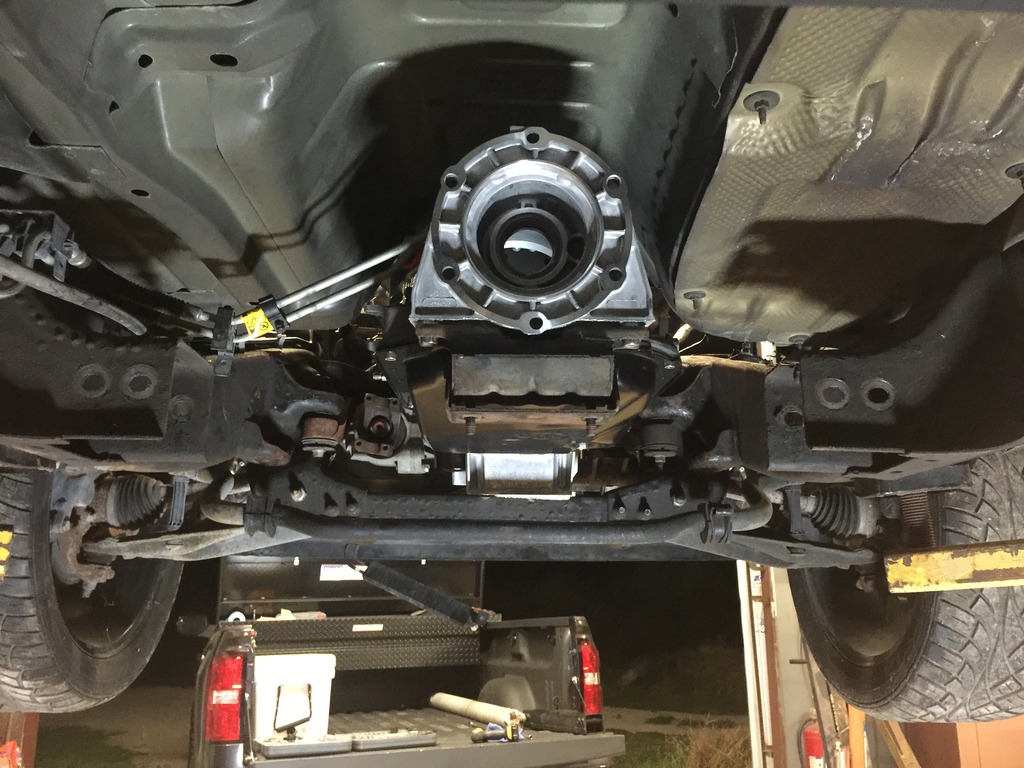
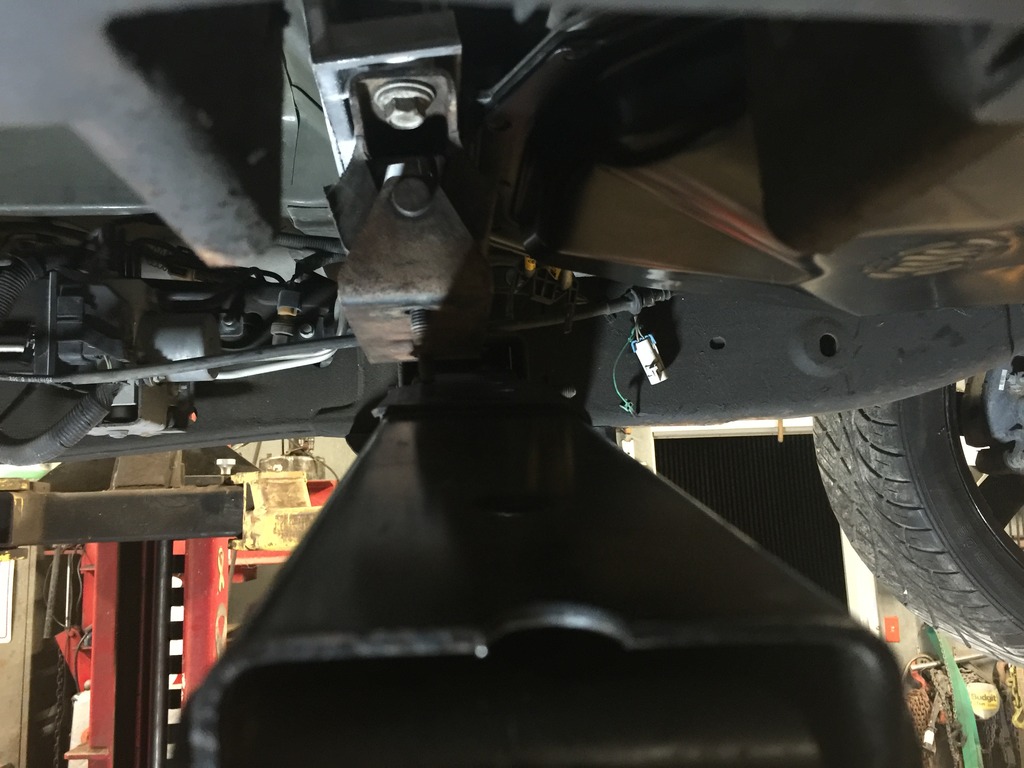
Before I could start fabbing up the hot side for the turbos had to get the motor to sit where it normally would with the trans bolted up. Was leaning back on the mounts. Since I'm doing the 4l80 swap and waiting on Rossler to send out my new transmission, I purchased a bare case...
Made the modifications needed to fit the 4l80 in there. Not much to this that hasn't been done a hundred times before. Surprisingly though the 4l80 is only about � of an inch longer then a 6l80 so not much modification to the trans crossmember was needed. Cut off the old mount plate and welded on a new plate that sits further back, painted it, and done....
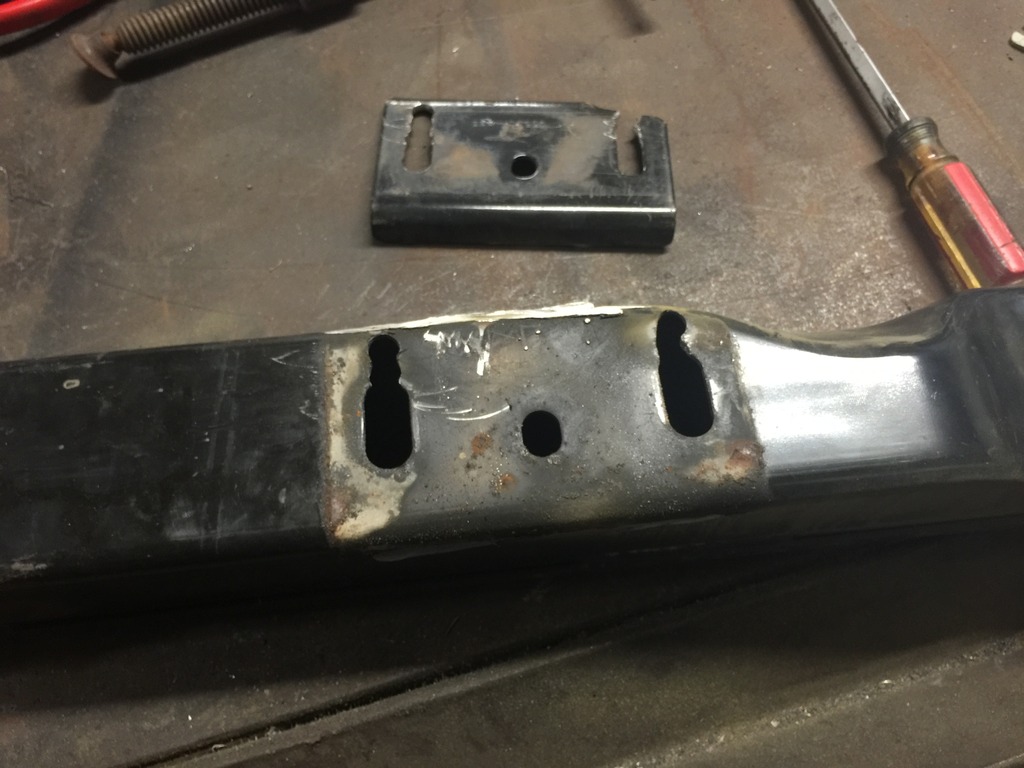
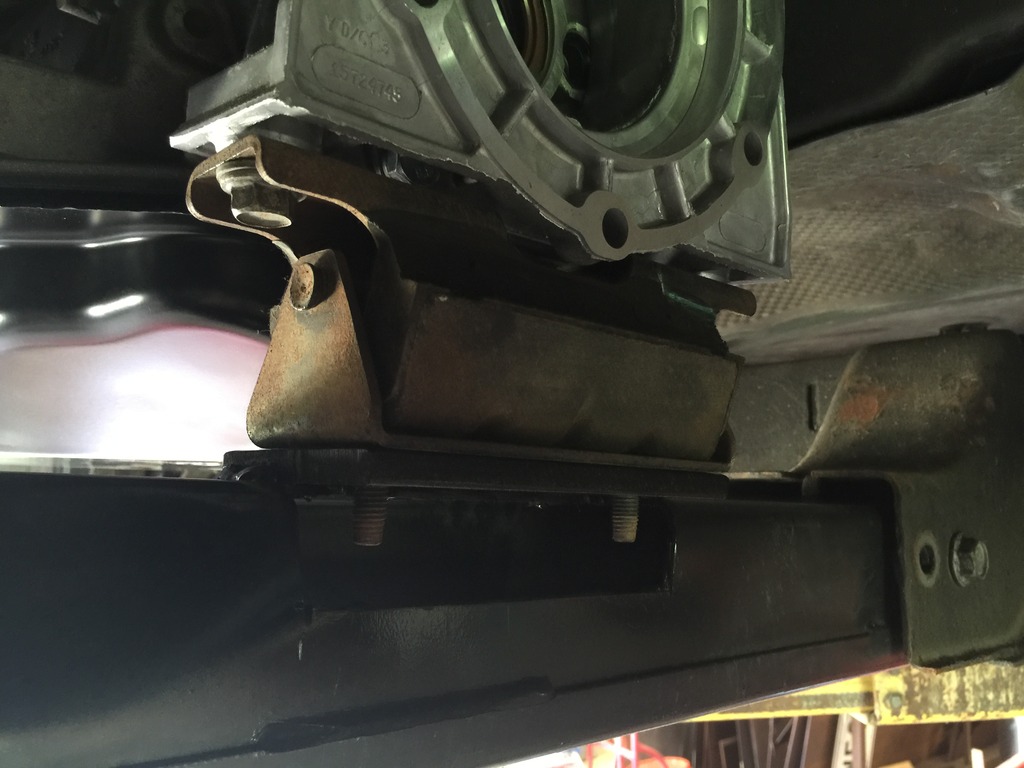
Made the modifications needed to fit the 4l80 in there. Not much to this that hasn't been done a hundred times before. Surprisingly though the 4l80 is only about � of an inch longer then a 6l80 so not much modification to the trans crossmember was needed. Cut off the old mount plate and welded on a new plate that sits further back, painted it, and done....


 Apr 11, 2016 | 10:42 PM
#327
Thread Starter
Joined: Mar 2010
Posts: 2,165
Likes: 27
From: Corpus Christi
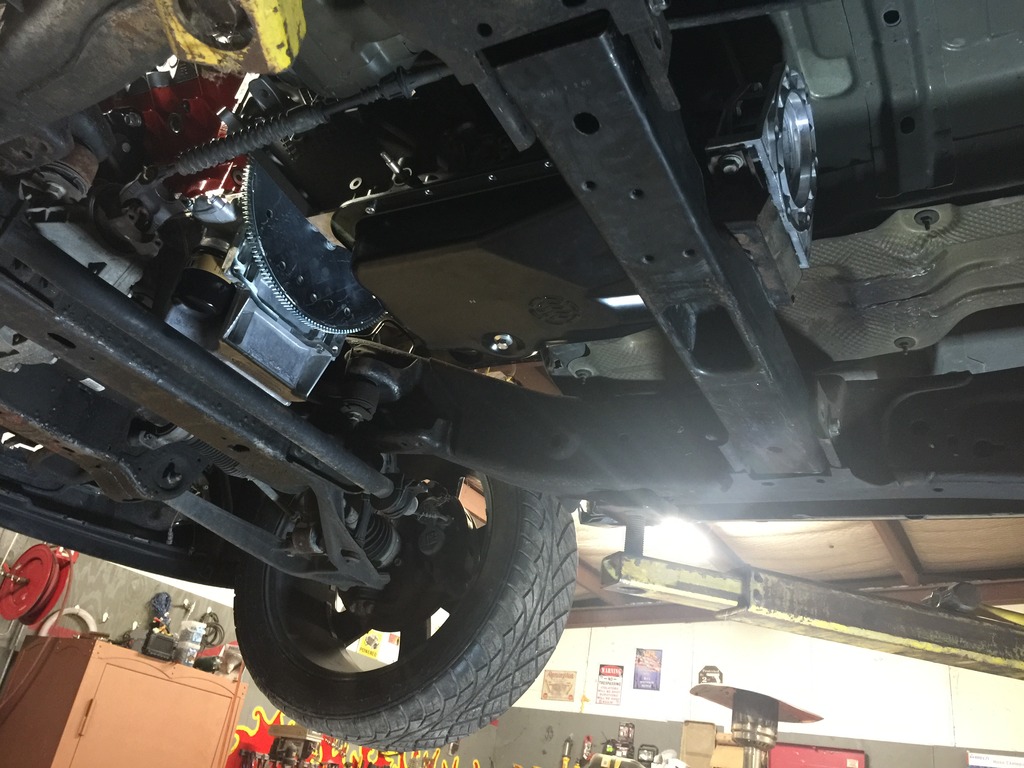
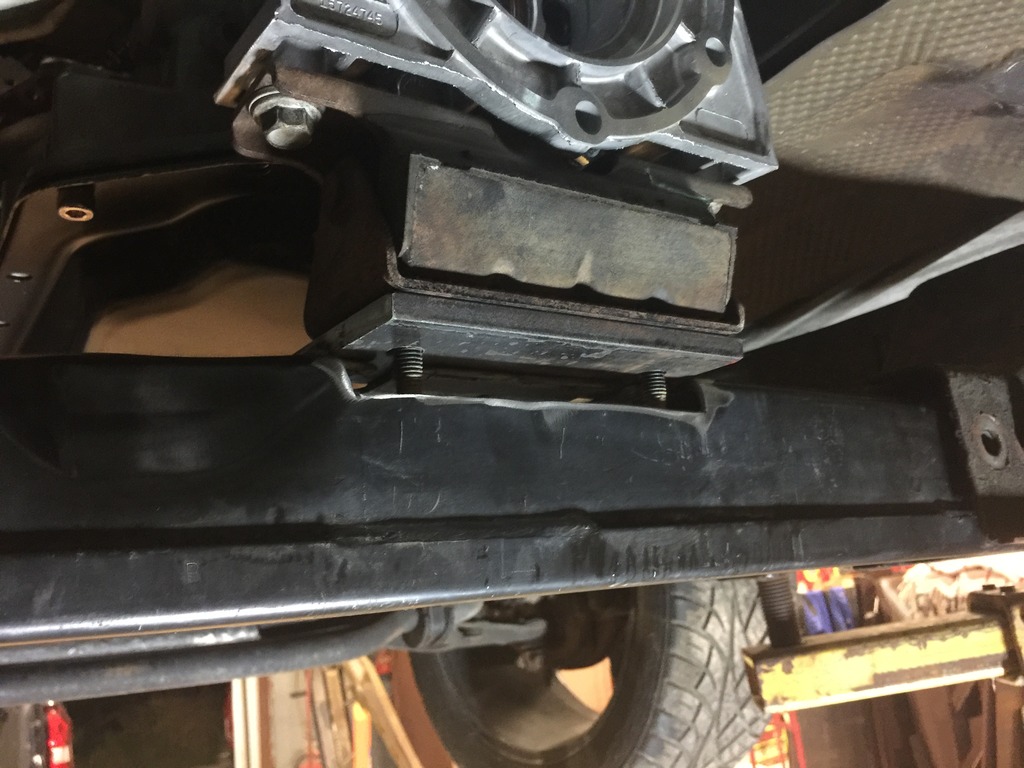
Oh and for those curious, yes a 6l80 transfer case bolts right up to a 4l80 transfer case mount. Bolt pattern is exactly the same and clocked the same. Everything matched up just fine with no modification. Only thing is just make sure your output shaft length is checked. I ended up needing a 2 � inch output shaft length from the case end to the tip of the shaft. Also since the transfer case mount on the 6l80 is around ⅞ of an inch thicker then the 4l80 one I think the driveshaft lengths should be good. Haven't been able to verify but should be damn close. Ill post up about the driveshaft length when the new transmission comes in and have everything bolted together and in the truck for good. Either way getting new driveshafts from Mark Williams but for those doing this swap would be good to know...


Last edited by Three6GMC; Apr 11, 2016 at 10:47 PM.
Apr 11, 2016 | 10:58 PM
#328
Thread Starter
Joined: Mar 2010
Posts: 2,165
Likes: 27
From: Corpus Christi
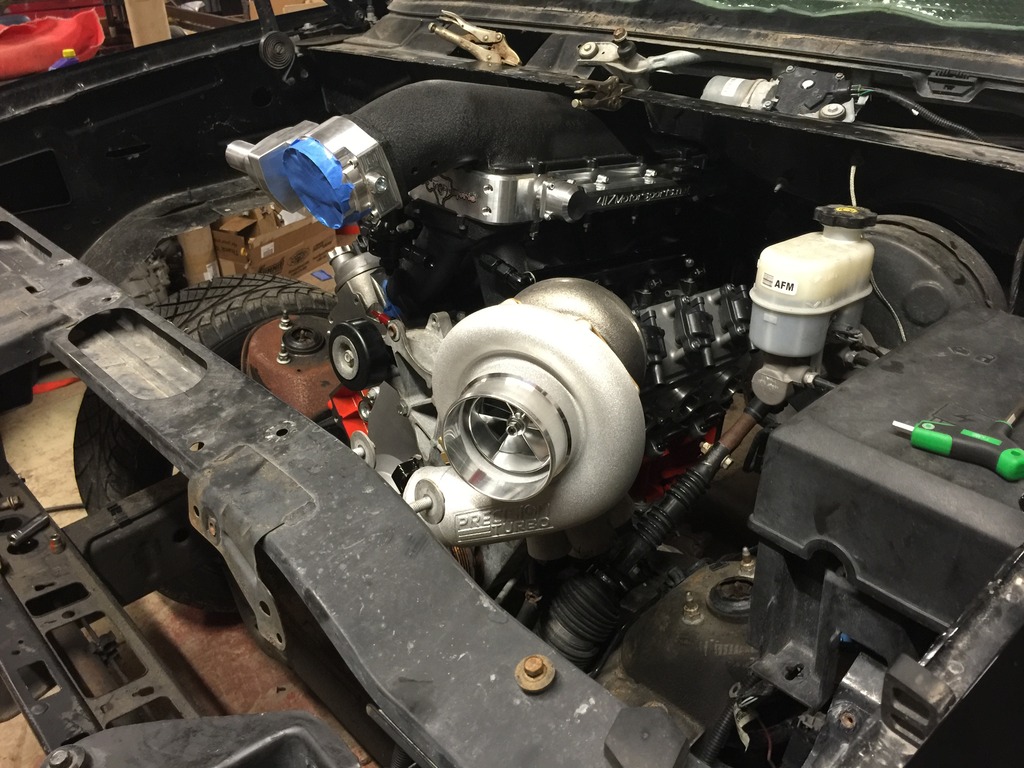
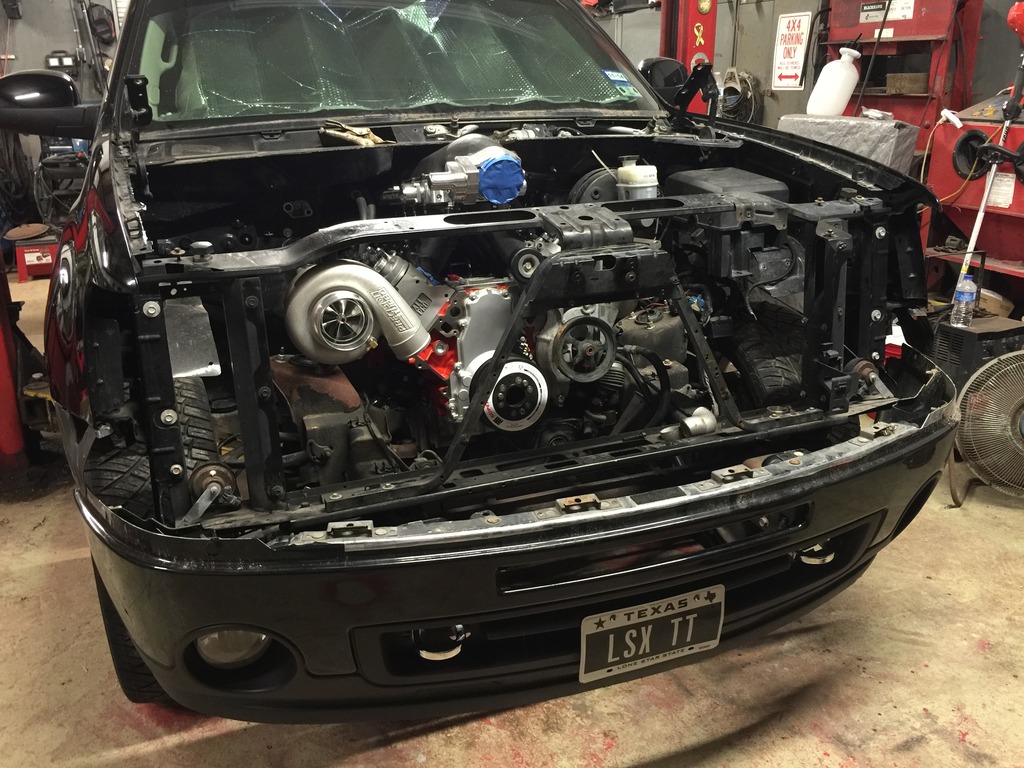
Now that I got the mock up transmission and motor sitting where it needs to be I was able to mock up the new turbos. I spent damn near all night getting them as close to perfect as I could get them but for some reason I just didn't like the "traditional" one on each side look. Was bugging the **** out of me. Since I deleted the expansion tank and moved the battery over to the driver side the passenger side was just empty. Seemed kinda stupid for me to try and fit a turbo on the side that was packed with wires and vital stuff when I had all that room on the other side. Sooooo I decided to mount them a little different then what I have seen. Really takes advantage of the space I have....
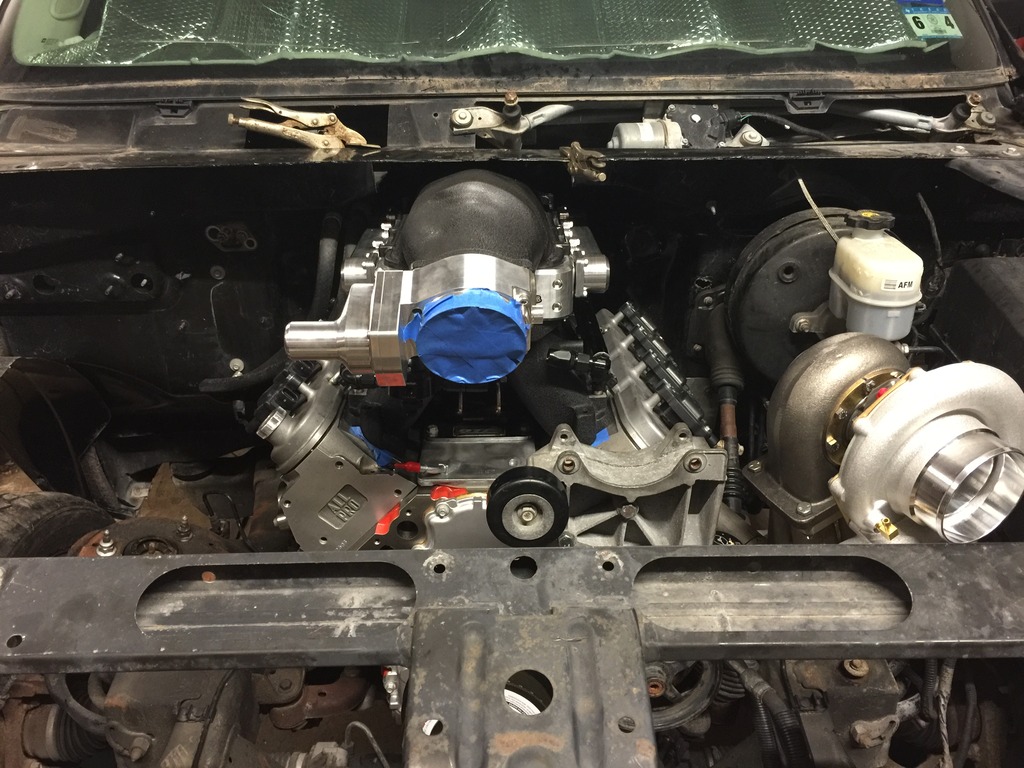

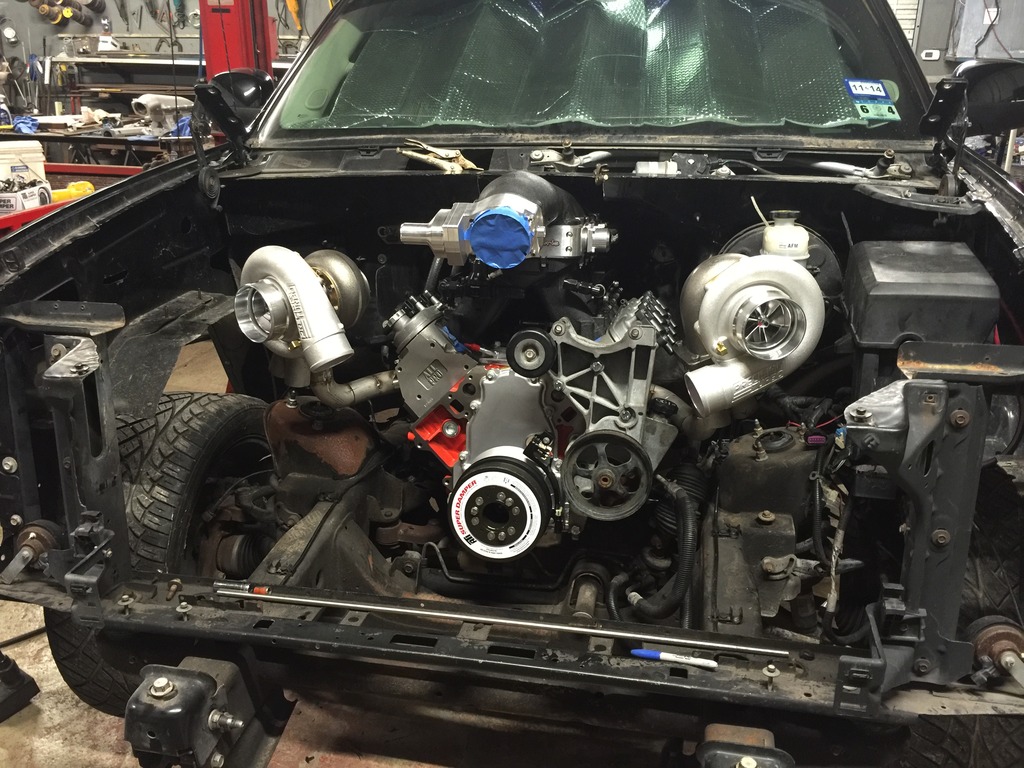
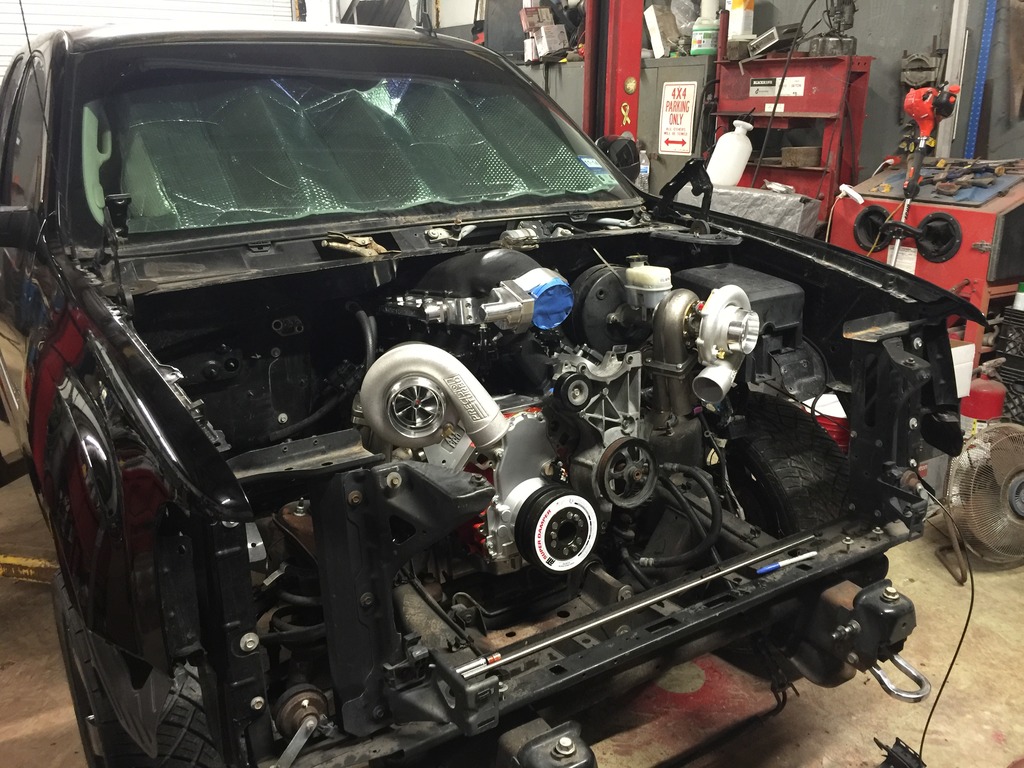


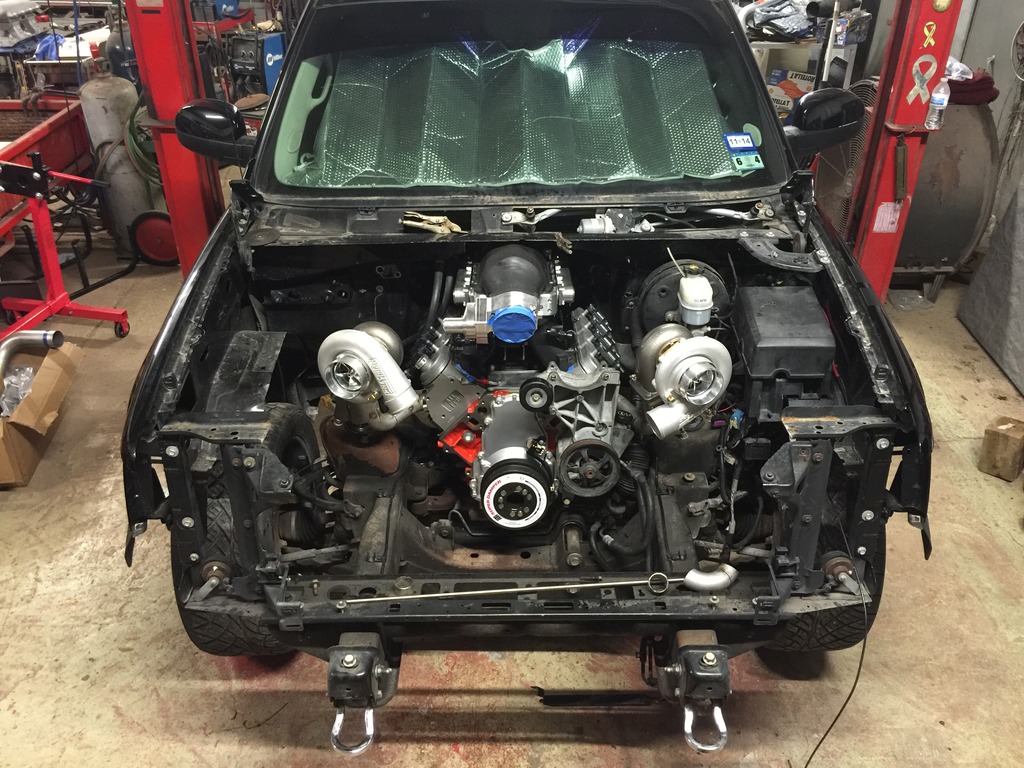
Changed to this....

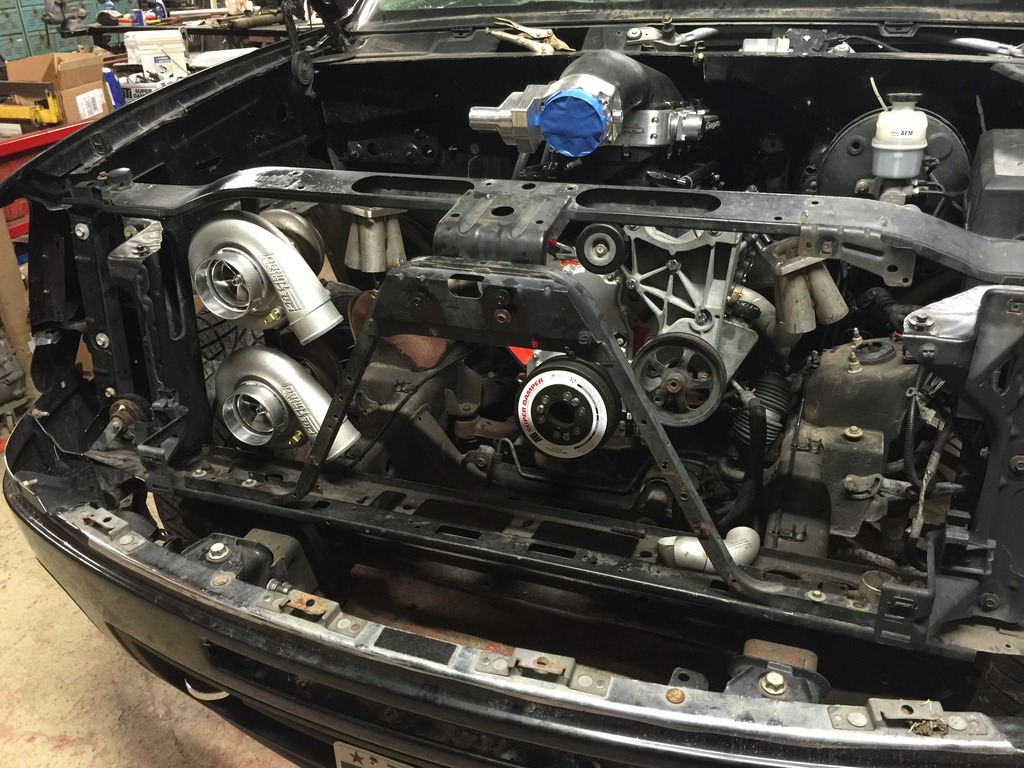


Changed to this....


 Apr 11, 2016 | 11:06 PM
#329
Thread Starter
Joined: Mar 2010
Posts: 2,165
Likes: 27
From: Corpus Christi
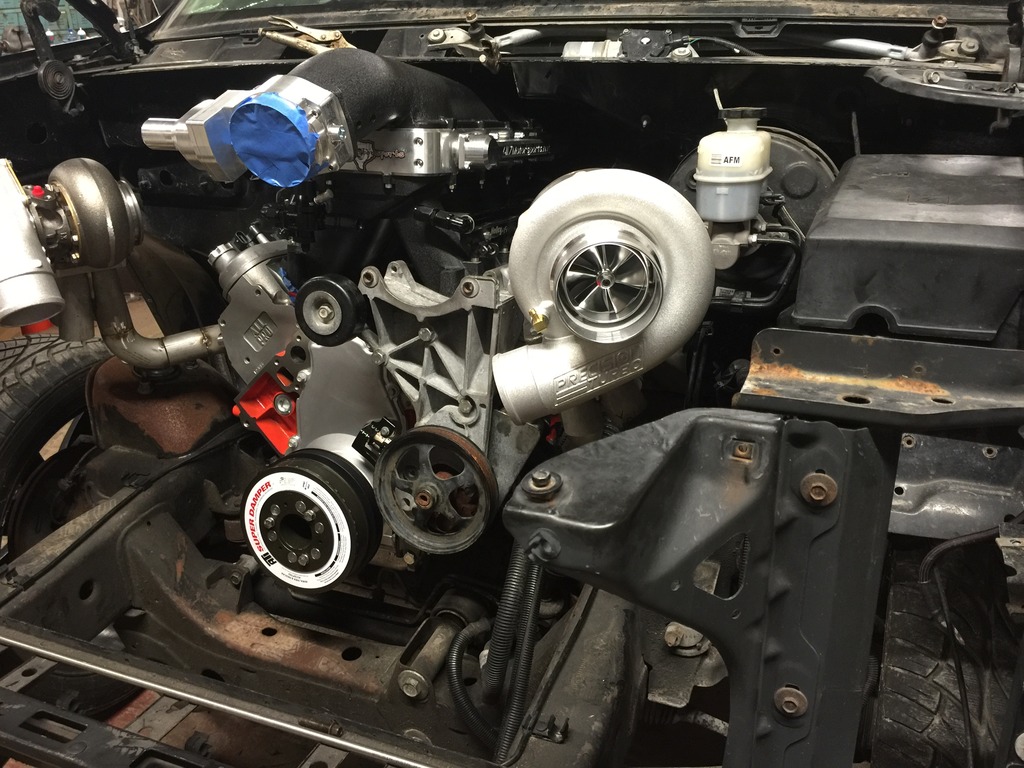
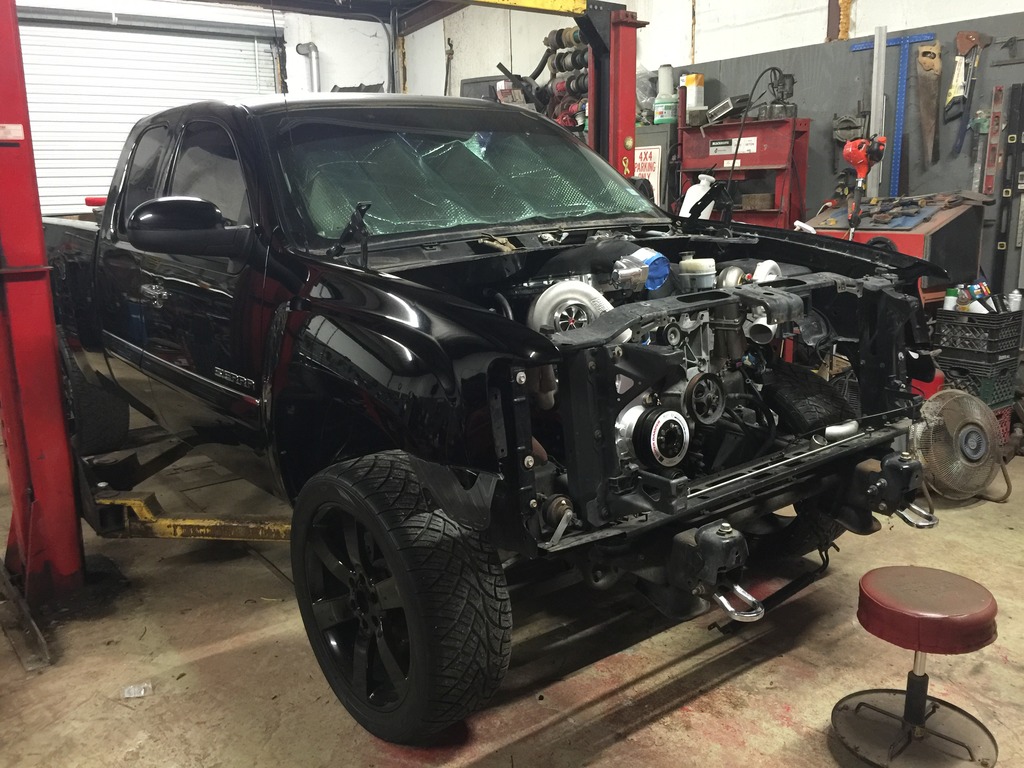
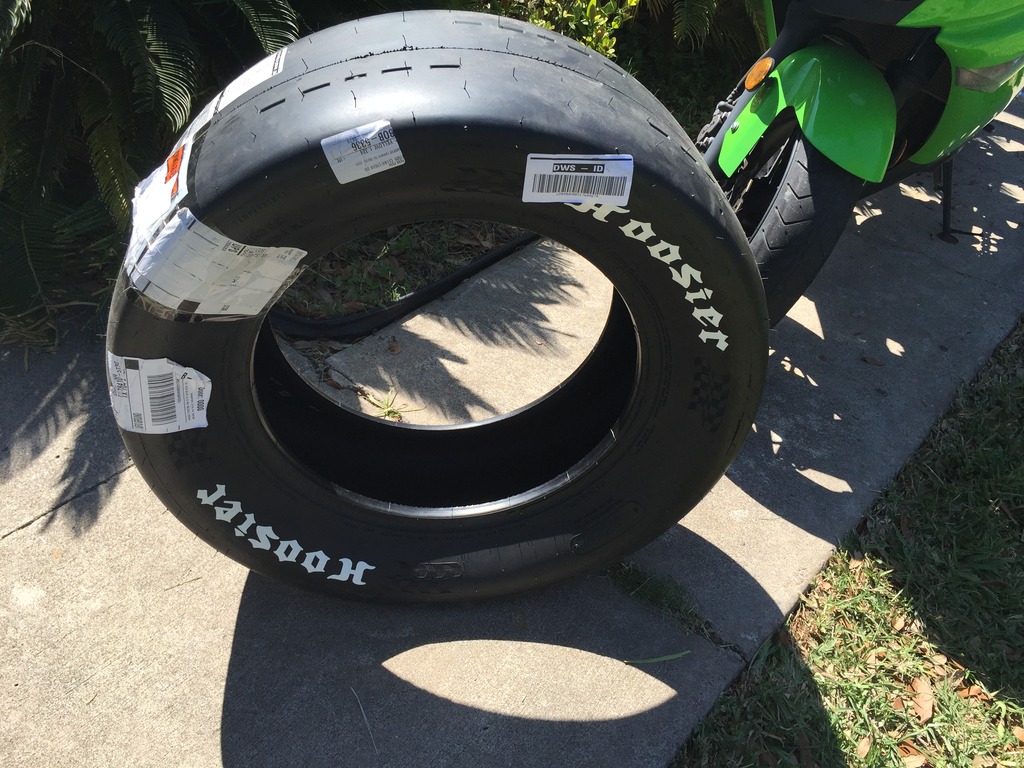
The turbos will be brought over about an inch and back a couple inches to better fit in the grille opening. Also a little higher to bring the opening of the lower turbo more into the grille area. Work in progress but I like the two on the left setup more then how I originally had it. Some won't agree but will look nice when done. While I was waiting on material for the new hot side I did get my new tires in for the drag pack. Went with Hoosier 325/45R18 Drag Radial 2s all the way around. Once I make it back out to the shop Ill test fit them with the measuring tool I got from 1320 wheels and get those measurements out to Bogart for a new set of either D10s or Eliminators in black...
 Apr 11, 2016 | 11:09 PM
#330
Thread Starter
Joined: Mar 2010
Posts: 2,165
Likes: 27
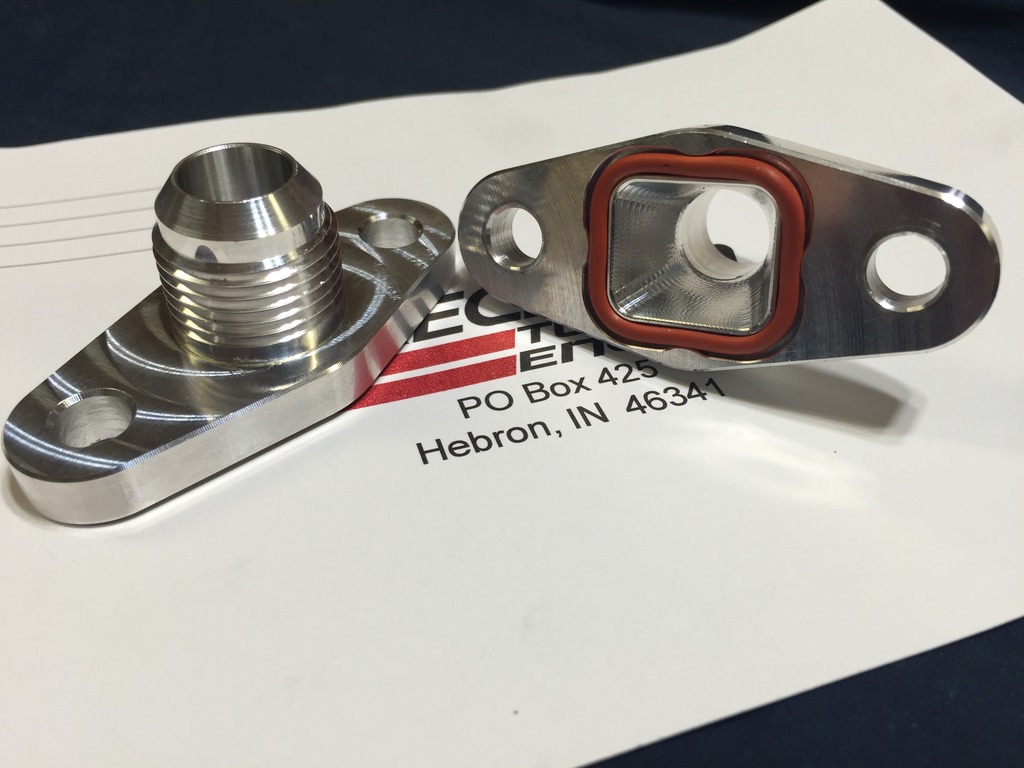
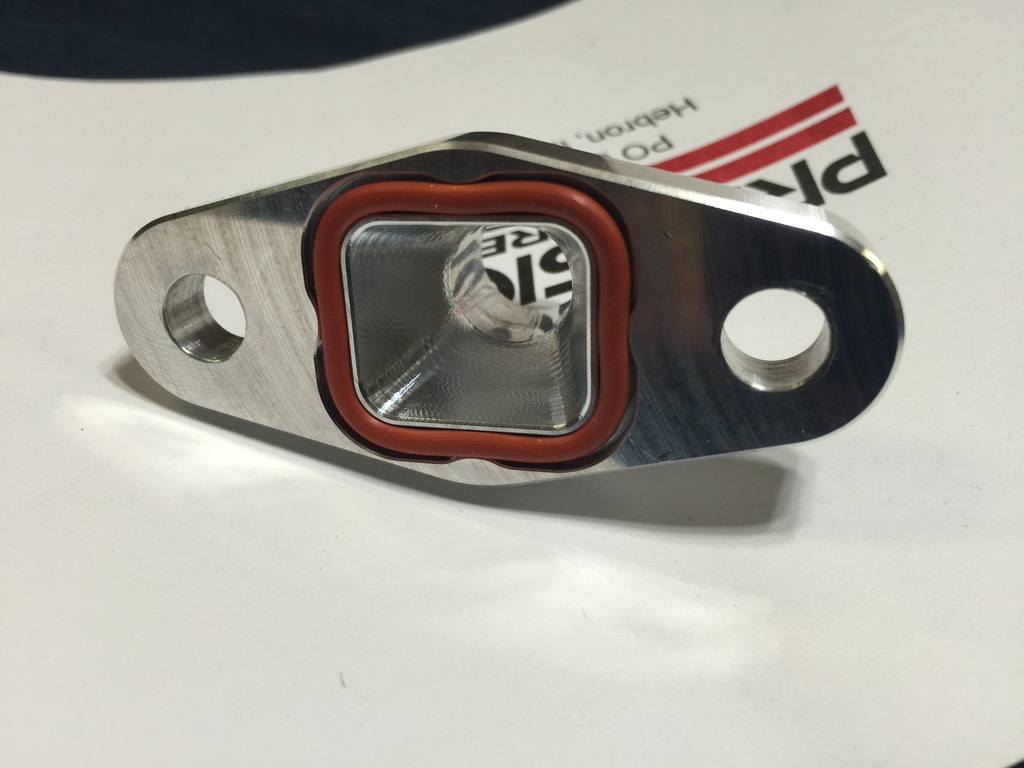
From: Corpus Christi
Got these little guys in the other day. Found these online and ordered up a pair for the drains on the turbos. Pretty neat since they use O-Rings instead of paper gaskets that leak. About the same price as a normal AN turbo drain flange...