
Video of me replacing my injector seals.
 Apr 10, 2018 | 04:24 PM
#1


I looked up what was necessary to change the injector seals (where they go into the heads) and Alldata showed several tools that were required to do them and they are pretty expensive. Depending if you got all the tools or just the seal installer tools it's roughly $300 to $1k for the tools (clip pliers, fuel rail puller, seal installer and shaper).
I did mine last week and they came out great. The fuel rails can be removed by carefully prying up on them, I got that tip from a shop that does a lot of late model vette and caddy DI stuff.
I took a pen tip and ground it down a little and sanded it smooth. As you can see in the video its hard to hold it still on the tip of the injector but this worked out just fine and everything is doing good.
It's a massive pain pushing the seals down, they're nylon and tough, it'll kick the **** out of your finger tips but you can do these seals without special multi hundred dollar tools.
Last edited by 00pooterSS; Jul 27, 2018 at 05:33 PM.
 May 2, 2018 | 10:34 AM
#5
They go bad over time like any other seal.
I replaced mine because I'd heard that sometimes they go bad and make a little noise, similar to an exhaust leak. And also that there was an updated design on them. I heard a little noise and was curious if it was from them, plus I wanted to learn how to install them and there isn't much info out there on these yet and the repair system here at the shop says it requires multiple specialty tools to do it. After talking to the guys at AMP they said it could be done without tools so I took a shot at it and made a video in case anyone ran into what I did. I replaced mine with the updated set just to see if it helped and what it was all about. I'm a tech and we were slow at work so I also just kinda wanted to dig around in there and learn.
I replaced mine because I'd heard that sometimes they go bad and make a little noise, similar to an exhaust leak. And also that there was an updated design on them. I heard a little noise and was curious if it was from them, plus I wanted to learn how to install them and there isn't much info out there on these yet and the repair system here at the shop says it requires multiple specialty tools to do it. After talking to the guys at AMP they said it could be done without tools so I took a shot at it and made a video in case anyone ran into what I did. I replaced mine with the updated set just to see if it helped and what it was all about. I'm a tech and we were slow at work so I also just kinda wanted to dig around in there and learn.
Last edited by 00pooterSS; May 3, 2018 at 10:09 PM.
Jul 27, 2018 | 03:21 PM
#7
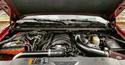
As far as pulling the rails. Obviously pull the intake first. Unbolt the stainless lines that come off of the high pressure pump and the distribution block first. Remove wiring from the fuel rails themselves, then you can use a pry bar to pry the fuel rail up and out. I was worried about high pressure fuel being in the rails/pipes, but I waited about an hour after the truck last ran and slowly backed off one of the high pressure line nuts and fuel just dripped out, wasn't under pressure.
The fuel rails are super thick on these DI motors since the system runs up to around 2000 pounds of pressure, so they are very strong and unlikely to bend. I used the pry bar method on the rails and it still required a good amount of force to pull them up and out, but I saw no bending of the rails and they didn't seem like they were on the verge of bending either. I'm rattling on about this because I was worried I would bend or dent one. But go slow and easy or put a rag between the rail and the pry bar and you'll be fine. I left the wiring on my rails and did it, but I wouldn't recommend that, I kept getting real close to pinching a wire so next time I do this I pull the wiring off the rails.
The rest of the stuff is just like an LS motor, nothing too crazy.
Trending Topics

Thread
Thread Starter
Forum
Replies
Last Post
2000SSilver
GM Engine & Exhaust Performance
1
Nov 15, 2003 12:07 AM
LeesSilverado
GM Engine & Exhaust Performance
8
Nov 2, 2002 08:54 PM
LeesSilverado
GM Engine & Exhaust Performance
6
Sep 28, 2002 12:10 AM