
Fuel Pump Wiring Upgrade How-To
 Aug 7, 2010 | 03:13 PM
#1

Thread Starter


Joined: Jan 2006
Posts: 16,282
Likes: 438
From: Huntsville, AL
I bought one of the 10ga wiring kits from Jayracing mentioned in another thread on here. I decided to simply add this wiring system in addition to the stock wiring instead of replacing it. This way if the larger wire relay ever fails, the stock wiring is still there, and not to mention it will lower resistance even more to the pump. I only have a single walbro 255 but may need to get a larger bosch 044 soon, hence the upgrade.
Ok so since we are keeping the stock wiring, we need to tap the signal wire to the stock relay for the signal for our new relay. This is a green and white wire under the fuse box. I used a clamp wire tap.

The other parts of the relay, 30 is a fused link to the battery, 85 is a constant ground, and 87 goes to the pump.
Now you get to pull the tank and remove the bucket. Once you get the bucket out, pull out the connector to the fuel pump and remove the female spades on the pump end since you will replace them with bigger ones.
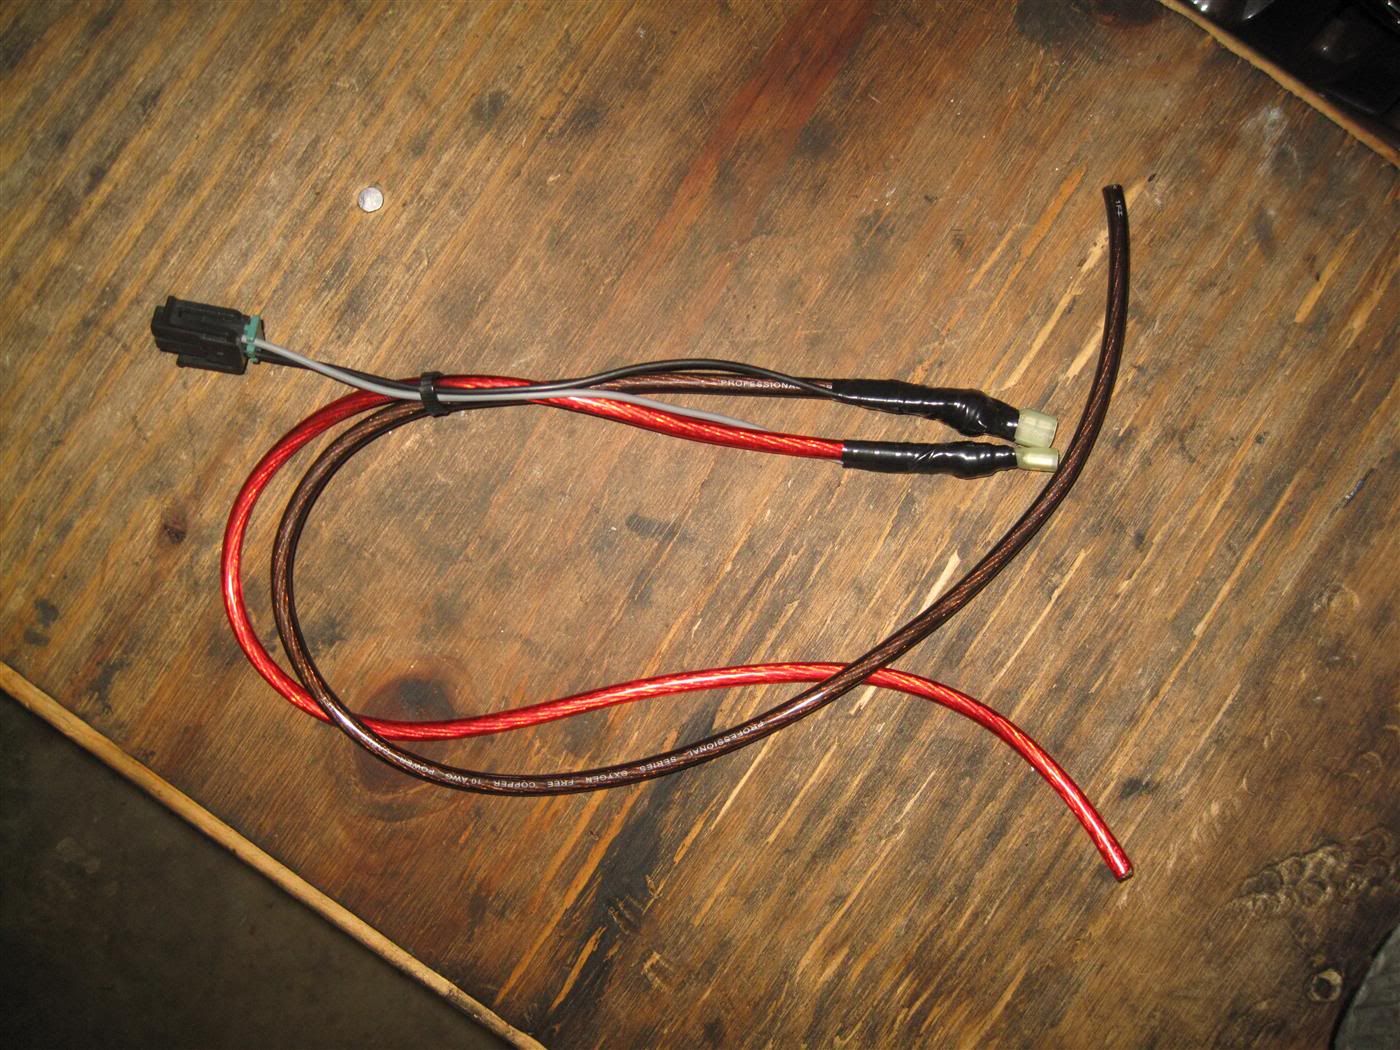
Cut about 16" (just guessing) from the red and black wires and add it to the stock wiring like this,
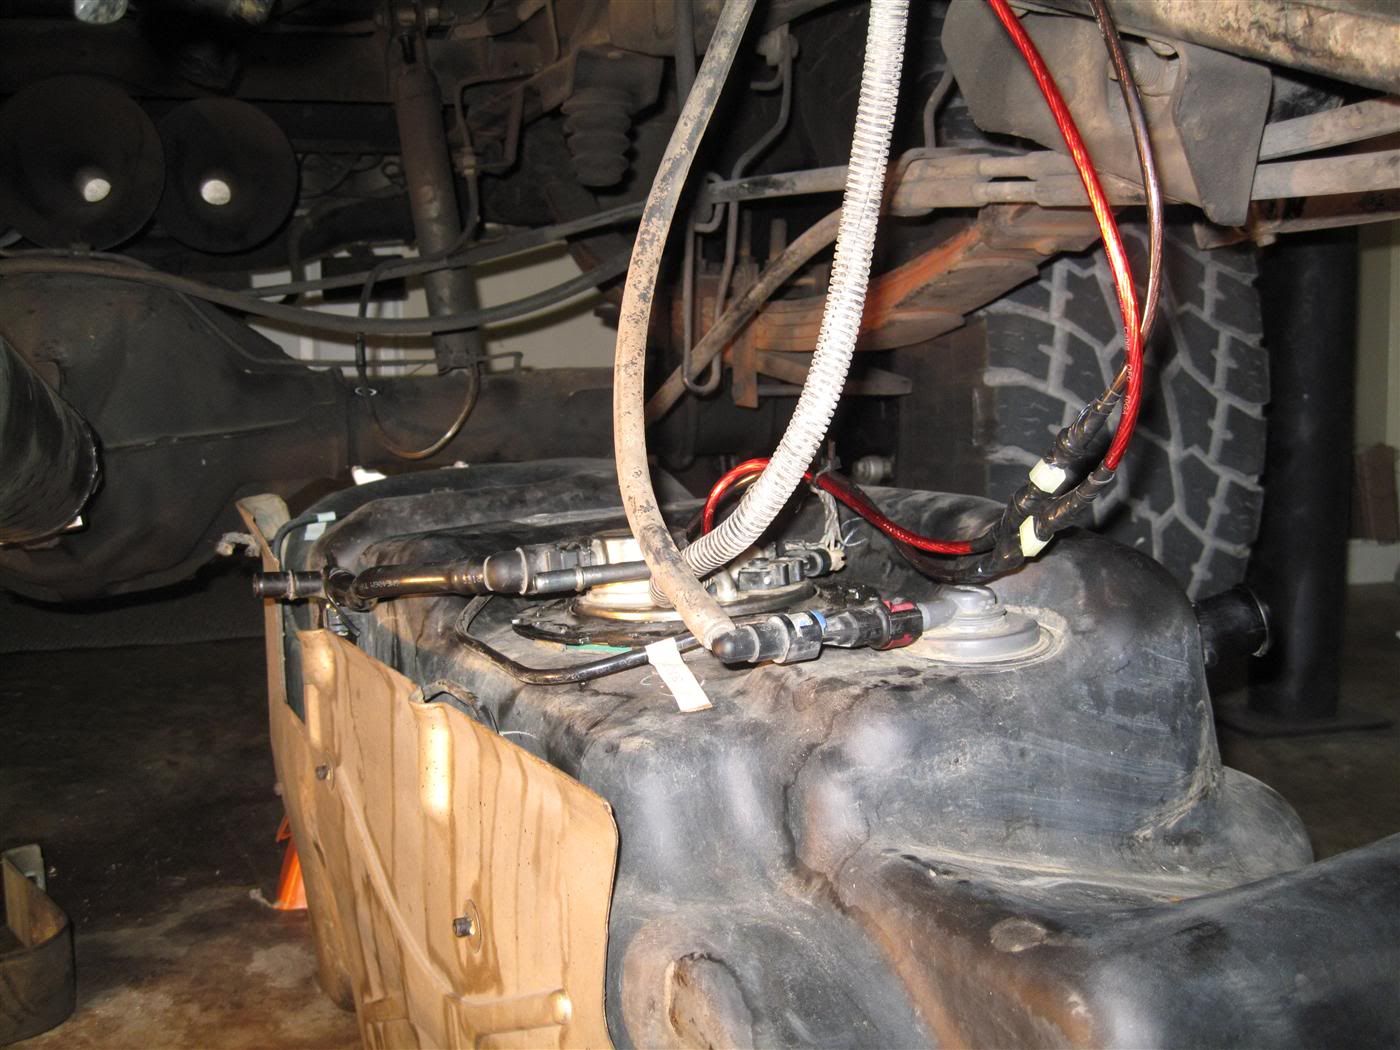
Now drill 2 holes in the top of the bucket for the wires to pass through. I used grommets and some silicone on top of that to seal it from the outside. There are 2 areas on the top where there is not any plastic underneath, use these spots to drill. When you are done installing the grommets, pass the red and black wires through the bottom a few inches, then connect the other end to the pump. You may have to trim the female spades slightly since its a tight fit in there. Connect the stock wiring connector to the top of the bucket and pull the red and black wires so there is only enough slack for the bucket to move up and down. When you get it reinstalled it should look like this,

I left some extra slack so I could remove the tank and disconnect the additional wiring using male and female spades instead of having it a continuous wire, like this
important: Ok kids, this is why you dont work on your truck late and night when you are tired. The red wire should connect to the red wire, and black to black, not red to black and black to red
Take the rest of the black wire and put a ring terminal on one end and drill a small hole in the frame to pass a bolt through and clamp the ring terminal. I used a dremel and cutting disc to clean off the crap on the frame where the ring terminal would make contact. The thin piece at the end of the cab where the ebrake cable is is a good spot.
After you hook everything up, you should be good to go!
Ok so since we are keeping the stock wiring, we need to tap the signal wire to the stock relay for the signal for our new relay. This is a green and white wire under the fuse box. I used a clamp wire tap.
The other parts of the relay, 30 is a fused link to the battery, 85 is a constant ground, and 87 goes to the pump.
Now you get to pull the tank and remove the bucket. Once you get the bucket out, pull out the connector to the fuel pump and remove the female spades on the pump end since you will replace them with bigger ones.
Cut about 16" (just guessing) from the red and black wires and add it to the stock wiring like this,
Now drill 2 holes in the top of the bucket for the wires to pass through. I used grommets and some silicone on top of that to seal it from the outside. There are 2 areas on the top where there is not any plastic underneath, use these spots to drill. When you are done installing the grommets, pass the red and black wires through the bottom a few inches, then connect the other end to the pump. You may have to trim the female spades slightly since its a tight fit in there. Connect the stock wiring connector to the top of the bucket and pull the red and black wires so there is only enough slack for the bucket to move up and down. When you get it reinstalled it should look like this,
I left some extra slack so I could remove the tank and disconnect the additional wiring using male and female spades instead of having it a continuous wire, like this
important: Ok kids, this is why you dont work on your truck late and night when you are tired. The red wire should connect to the red wire, and black to black, not red to black and black to red
Take the rest of the black wire and put a ring terminal on one end and drill a small hole in the frame to pass a bolt through and clamp the ring terminal. I used a dremel and cutting disc to clean off the crap on the frame where the ring terminal would make contact. The thin piece at the end of the cab where the ebrake cable is is a good spot.
After you hook everything up, you should be good to go!
Last edited by Atomic; Aug 7, 2010 at 03:20 PM.
 Aug 7, 2010 | 06:21 PM
#3

...and, silicone RTV will attack electrical components, the gasses from the silicone will cause fast corrosion, you don't want the two near each other whenever possible. (I obtained this information directly from a Lexus engineer)
Aug 7, 2010 | 06:33 PM
#5
 Aug 8, 2010 | 08:05 PM
#6

TECH Resident
Joined: Dec 2006
Posts: 870
Likes: 0
From: Enid, OK
When I had my walbro 255 I did something similar to this. What I did was tag into the stock 12 volt supply to the pump (gray wire on the frame rail harness on my 95) and use that to turn a relay on. I put the relay right down there on the frame rail as well, grounded it, and then ran a 10 gauge wire to from the aux post on the fuse block to the relay, and 10 gauge to the tank. I drilled two holes in the top of the sender like you did but I used JB weld to seal the wires off. After the Walbro died I did away with the added on 10 gauge stuff and went back to the stock wiring as I'm just using a 350 vortec pump now. Seems to be sufficient but I still wonder about it sometimes.
Aug 8, 2010 | 08:31 PM
#7
Just a quick tip. I grounded the black wire on the same bolt that the filler neck is grounded to. It just saves you from drilling another hole in the frame and using another bolt. Either way works though.
Trending Topics
Aug 8, 2010 | 08:58 PM
#9
That's cool, not a big deal either way. Nice pictures, by the way! I always say I'm going to do that when I do a project, but when the time comes, I'm too lazy and more concerned with just getting it done.


Thread
Thread Starter
Forum
Replies
Last Post
InsaneDomestics
Tuning, Diagnostics, Electronics, and Wiring
5
Jul 27, 2015 02:42 PM
Mossyoakglock
GMT 900 Trucks General Discussion
0
Jul 17, 2015 08:30 AM