


Inner tie rod replacement
 Apr 26, 2010 | 09:06 AM
#1

Thread Starter
Staging Lane
Joined: Jul 2004
Posts: 92
Likes: 1
 Inner tie rod replacement
So I took my truck to Firestone on Saturday, got the lifetime alignment (a must, highly recommended), and they told me I needed to replace my inner tie rods (of course). I knew they had to be done but did not want to come off the $400 they were asking to replace the pieces. So, after plenty of research on here and youtube, I decided I could tackle this task.
I went to O’Reilly rented the removal tool, picked up the inner tie rods and the tie rod ends (outer tie rods). It was pretty straight forward but I decided to document some of the things that gave me the square-eye in hopes that it may help someone else.
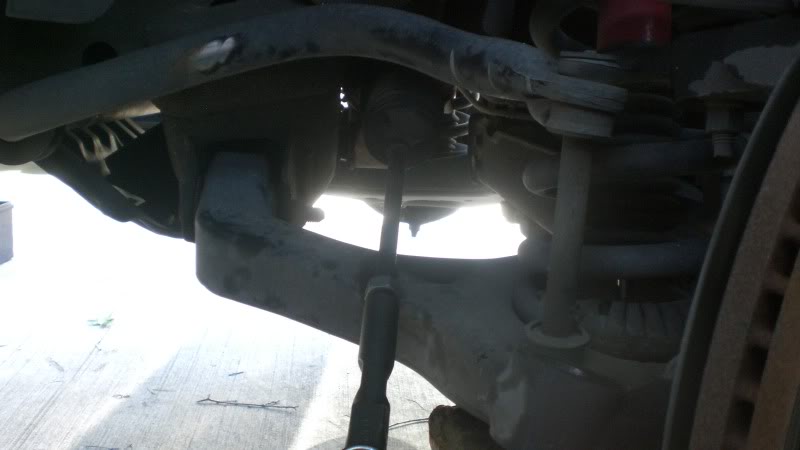
If your tie rod hangs down like this, it is time to be replaced:
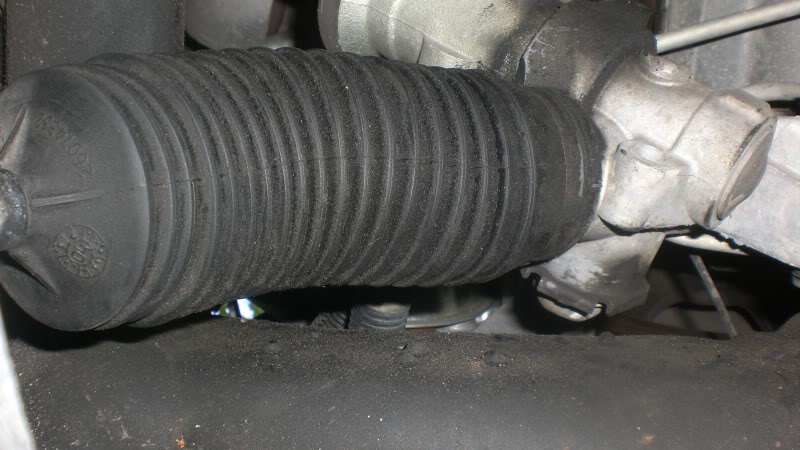
Boot should not be this filthy. The clamp closer to the rack and pinion set-up is going to have to be cut off:
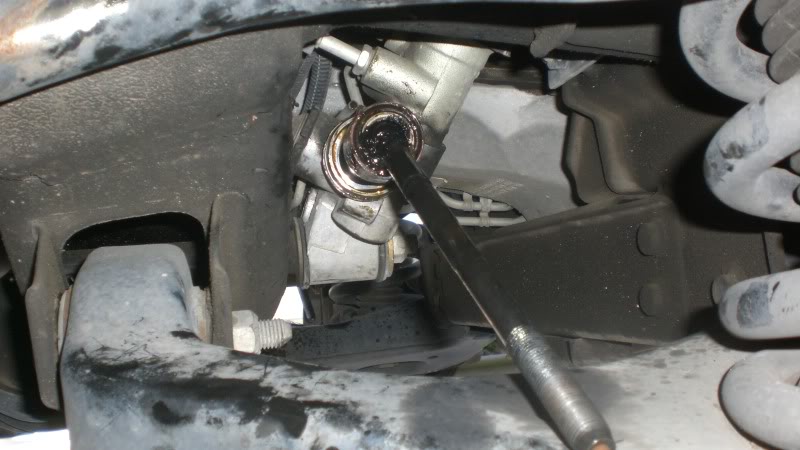
Boot off. This thing was BAD:
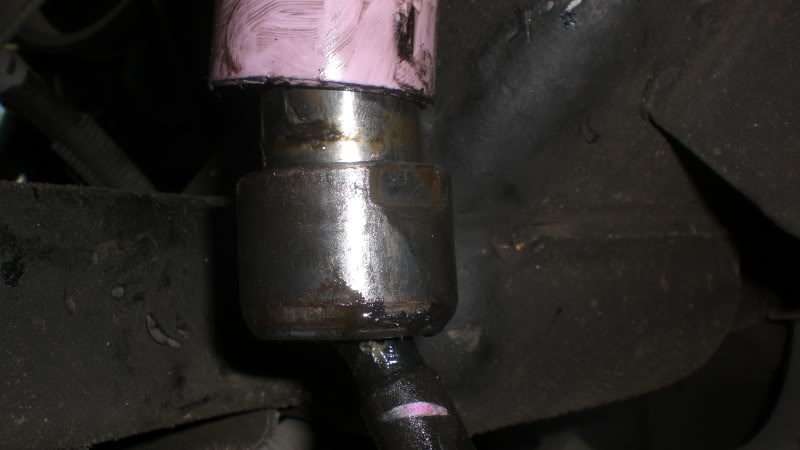
Pushed the sleeve back with a flat head screw driver so I could get at the inner tie rod so I could get the wrench around it:
The tool I rented from O’Reilly did not fit so I had to use a pipe wrench to undo the inner tie rod. No worries, they refunded the cost and credited towards the pieces:
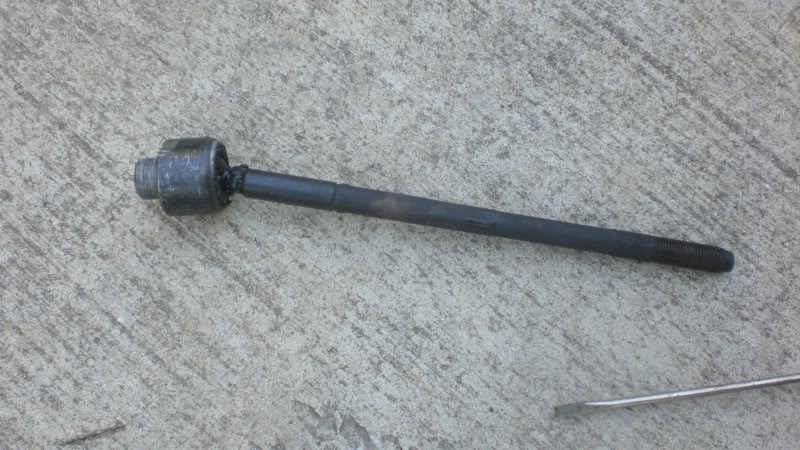
Went to Home Depot and picked up a 36.5mm crescent wrench to fit the 36mm Moog tie rod, applied the provided lock-tite that came with the replacement part, and re-installed:
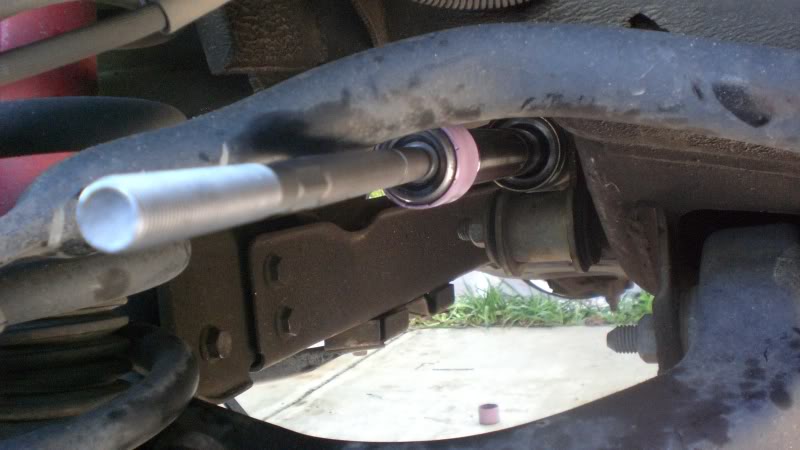
Used a zip-tie and the original clamp to secure the dust boot:
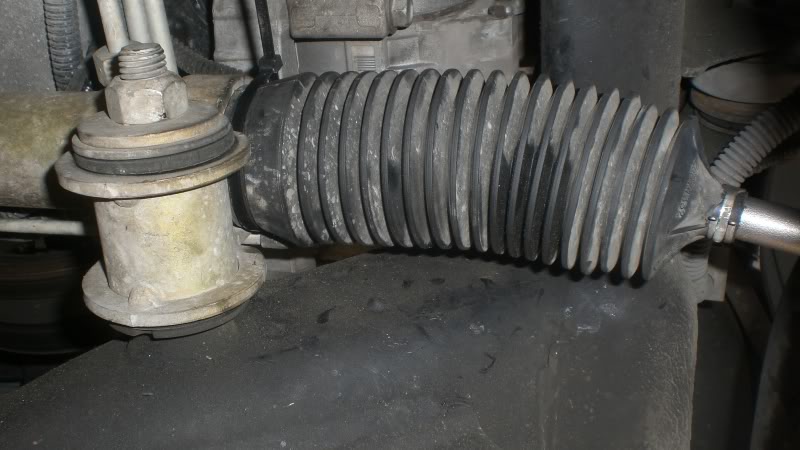
Installed the outer tie rod ends with the same number of rotations I counted when removing the original, and then began buttoning everything up:
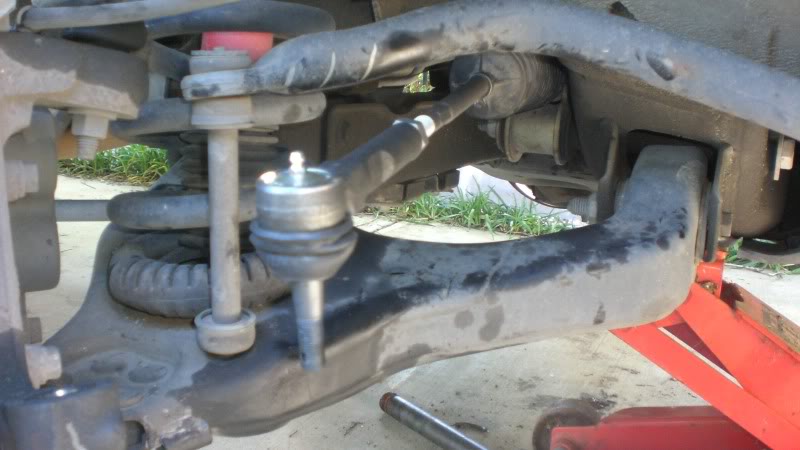
You have to make an alignment a priority after installing new inner tie rods. It’s like driving a wood-wheel wagon if you don’t.
Took it to the alignment shop this morning and now it drives WAY better than it did before the first alignment.
This video was also a huge help in the process:
http://www.youtube.com/watch?v=5MJOtr-vj6M
I’m sure there are better ways to do this, I hope there are easier ways to do this; this is just the way I did it. I wanted to help save a headache and some money for anybody who may have the same problem.
I went to O’Reilly rented the removal tool, picked up the inner tie rods and the tie rod ends (outer tie rods). It was pretty straight forward but I decided to document some of the things that gave me the square-eye in hopes that it may help someone else.
If your tie rod hangs down like this, it is time to be replaced:
Boot should not be this filthy. The clamp closer to the rack and pinion set-up is going to have to be cut off:
Boot off. This thing was BAD:
Pushed the sleeve back with a flat head screw driver so I could get at the inner tie rod so I could get the wrench around it:
The tool I rented from O’Reilly did not fit so I had to use a pipe wrench to undo the inner tie rod. No worries, they refunded the cost and credited towards the pieces:
Went to Home Depot and picked up a 36.5mm crescent wrench to fit the 36mm Moog tie rod, applied the provided lock-tite that came with the replacement part, and re-installed:
Used a zip-tie and the original clamp to secure the dust boot:
Installed the outer tie rod ends with the same number of rotations I counted when removing the original, and then began buttoning everything up:
You have to make an alignment a priority after installing new inner tie rods. It’s like driving a wood-wheel wagon if you don’t.
Took it to the alignment shop this morning and now it drives WAY better than it did before the first alignment.
This video was also a huge help in the process:
http://www.youtube.com/watch?v=5MJOtr-vj6M
I’m sure there are better ways to do this, I hope there are easier ways to do this; this is just the way I did it. I wanted to help save a headache and some money for anybody who may have the same problem.


 Apr 26, 2010 | 11:56 AM
#4

Nice write up, just a few notes...
Keep your eye on that zip tie, sometimes they're not strong enough to hold the boot and and the boot may pop off. They sell universal metal clamps, but you need a special tool to get them really tight. I've secured them without the tool though and they've held just fine.
To check your tie rods, jack up the front of the vehicle
Grab the tire/wheel assembly at 3 and 6 o'clock
Rock wheel from side to side
There should be no play, if there is, check the tie rod. This is best done with a helper rocking the wheel while you put your hand on the tie rod in the boot, you will be able to feel the play
Again, nice write up and great clear pics, good job
Keep your eye on that zip tie, sometimes they're not strong enough to hold the boot and and the boot may pop off. They sell universal metal clamps, but you need a special tool to get them really tight. I've secured them without the tool though and they've held just fine.
To check your tie rods, jack up the front of the vehicle
Grab the tire/wheel assembly at 3 and 6 o'clock
Rock wheel from side to side
There should be no play, if there is, check the tie rod. This is best done with a helper rocking the wheel while you put your hand on the tie rod in the boot, you will be able to feel the play
Again, nice write up and great clear pics, good job


Trending Topics
 Jul 5, 2010 | 08:26 AM
#10

I'm planning to do my inner tie rods today. 2001 Suburban 1500. This looks to be pretty straightforward ..... un-bolt the old ones and install the new ones. Right? I know that I have to take several measurements in order to get the new one installed to the correct length, and that I will need the truck aligned once I'm done. But it doesn't appear that I need any special tools to disassemble the tie rod ... right?
Insight is always appreciated !!!
Thanks
Bill
Insight is always appreciated !!!
Thanks
Bill