
high rev clutch spring kit from transgo?
 Jun 26, 2008 | 05:54 PM
#1

Thread Starter
Staging Lane
Joined: Jun 2006
Posts: 70
Likes: 0
From: az
i got my transgo HD2 shift kit in today and i notice another little box that wasnt in there last time i installed this kit a couple years ago. the box says its a clutch spring kit; prevents centrifugal apply heavy duty and high performance. the instructions say it reduces 3-4 clutch burnup caused by crossleaks and slow KD release. i have no clue what this is or where it goes. its just a box w/ i large steel washer and a bunch of springs. anyone have any info on this and how hard would it be to get to?
Jun 27, 2008 | 07:52 AM
#2
The transmission has to be taken out and disassembled for those springs to be installed. They just replace the stock springs for the apply pistons. They are mostly needed when your making hi rpm shifts like 6700.
Jun 29, 2008 | 08:37 PM
#4
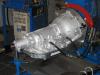
Here is a little info from a build up thread that I have been working on. Link in my sig!!!!! These next photo's will be of the internal pistons, retainers, modified spring cages, seals and 3-4 clutch apply ring being installed.
This first picture is of the sleeved drum ready for the assembly of the internal components.


The first steps that we take are to install the internal seals of the drum. Here are the ones that I am referring to. The top one is the new 3-4 steel bonded apply piston. Bottom left is a oring that seals the forward clutch housing and also the new 3-4 clutch piston. Bottom right seal is a seal used for lube oil from the input shaft to the output shaft. Here is a photo of the seals.

Here is a photo of the lube seal for the two shafts. It gets installed in the input drum here.


The next seal that I will install is the green oring. Here is where it will be installed.

The new 3-4 clutch apply piston is the next to be installed. Here are a couple of photo's.


Next we will install a modified seal installer. This installer has been bored to accommodate for the steel sleeve that we have installed.

Here is a line up of the components that will be assembled into the input drum.

The next step that I will do is to get our spring cages ready to be installed. These are the cages that we will modify with the use of springs from transgo. The idea with these springs is that they are heavier and also will greatly reduce any centrifugal apply at high rpms with the 3-4 clutch/overrun clutch. Here are the factory cages.

As you can see in this photo the 3-4 return spring cage is held together with little hooks. They will need to be bent out of the way in order to get it apart and remove the factory springs. Here are a few photo's.


Here is a photo of the overrun/forward return spring cage. I will first remove the bottom of the cage using a small screw driver. Then I will use a pair of wire cutters to remove the springs from the top portion of the cage.

Here is a photo of both cages fully apart with the new springs that we are going to install.

Here are photos of the 3-4 cage and it's new springs. Note the first picture the springs are tapered and will snap in place.


This first picture is of the sleeved drum ready for the assembly of the internal components.
The first steps that we take are to install the internal seals of the drum. Here are the ones that I am referring to. The top one is the new 3-4 steel bonded apply piston. Bottom left is a oring that seals the forward clutch housing and also the new 3-4 clutch piston. Bottom right seal is a seal used for lube oil from the input shaft to the output shaft. Here is a photo of the seals.
Here is a photo of the lube seal for the two shafts. It gets installed in the input drum here.
The next seal that I will install is the green oring. Here is where it will be installed.
The new 3-4 clutch apply piston is the next to be installed. Here are a couple of photo's.
Next we will install a modified seal installer. This installer has been bored to accommodate for the steel sleeve that we have installed.
Here is a line up of the components that will be assembled into the input drum.
The next step that I will do is to get our spring cages ready to be installed. These are the cages that we will modify with the use of springs from transgo. The idea with these springs is that they are heavier and also will greatly reduce any centrifugal apply at high rpms with the 3-4 clutch/overrun clutch. Here are the factory cages.
As you can see in this photo the 3-4 return spring cage is held together with little hooks. They will need to be bent out of the way in order to get it apart and remove the factory springs. Here are a few photo's.
Here is a photo of the overrun/forward return spring cage. I will first remove the bottom of the cage using a small screw driver. Then I will use a pair of wire cutters to remove the springs from the top portion of the cage.
Here is a photo of both cages fully apart with the new springs that we are going to install.
Here are photos of the 3-4 cage and it's new springs. Note the first picture the springs are tapered and will snap in place.
Jun 29, 2008 | 08:38 PM
#5
The next step is to get the forward piston, forward piston housing, the modified 3-4 clutch spring cage and the 3-4 apply ring ready to be installed. Here are a few pictures of how I stack them up. Disregard the overrun piston and it's cage in the bottom right of this photo.


This next set of photo's are of the install of these parts.


Next we will install the modified overrun piston and the spring cage.


With the new modified spring cages transgo supplies us with a larger washer that will be used to compress the spring cage. It is needed so that the overrun cage does not get bent when it is compressed and the snap ring is installed.


I will remove the washer supplied from transgo and the drum is now ready for the overrun, 3-4, and forward clutch assemblies to be installed.

This next set of photo's are of the install of these parts.
Next we will install the modified overrun piston and the spring cage.
With the new modified spring cages transgo supplies us with a larger washer that will be used to compress the spring cage. It is needed so that the overrun cage does not get bent when it is compressed and the snap ring is installed.
I will remove the washer supplied from transgo and the drum is now ready for the overrun, 3-4, and forward clutch assemblies to be installed.
Jun 29, 2008 | 10:04 PM
#6

On The Tree
Joined: May 2006
Posts: 197
Likes: 0
From: Zimmerman, MN
This looks like it may be kind of hard to do, having never worked inside a tranny before. It looks like you have a compressor for compressing the 3-4 assembly. How hard is it to do with out that? Also is this whole assembly right there behind the torque converter? Any other special tools that would be needed?
Thanks for the info Vince.
Thanks for the info Vince.
Jun 29, 2008 | 10:19 PM
#7
This looks like it may be kind of hard to do, having never worked inside a tranny before. It looks like you have a compressor for compressing the 3-4 assembly. How hard is it to do with out that? Also is this whole assembly right there behind the torque converter? Any other special tools that would be needed?
Thanks for the info Vince.
Thanks for the info Vince.
To be honest it would be best to have a shop do this part of the install. As you can see I use speciality tools. If you look at the picture link in my sig, you will see how far you need to go to get at the input drum. I have not finished the thread yet due to lack of time. The pump assembly, band, reverse input drum and the input drum need to be removed in order to install these springs. A spring compressor/press is required in order to remove the spring cage and then to reverse the procedure. Most guy's will skip this step and save the springs for when the trans needs to be built. Vince
Trending Topics
Jun 29, 2008 | 11:58 PM
#8

This looks like it may be kind of hard to do, having never worked inside a tranny before. It looks like you have a compressor for compressing the 3-4 assembly. How hard is it to do with out that? Also is this whole assembly right there behind the torque converter? Any other special tools that would be needed?
Thanks for the info Vince.
Thanks for the info Vince.
this would be basically impossible to do without some sort of press, there is limited space to get around that snap ring and compress the springs, and if you dont have any snap ring pliers you will probably rip your hair out trying to get it out

Thread
Thread Starter
Forum
Replies
Last Post
07NBSChevy
GM Engine & Exhaust Performance
20
Jul 8, 2015 07:27 PM