


Help! My front axle housing is cracked! What years are swappable? (AWD front end)
 Jun 25, 2013 | 12:33 PM
#1

 Help! My front axle housing is cracked! What years are swappable? (AWD front end)
I recently converted my 2000 Silverado RCSB to 4L89E/NP149. I discovered my front end has an oil leak.

The CV joint side seemed fine and where the passengers axle housing joined the differential seemed okay, but was oily.
I jacked the front end up so I could turn the tires.
I discovered a crack.
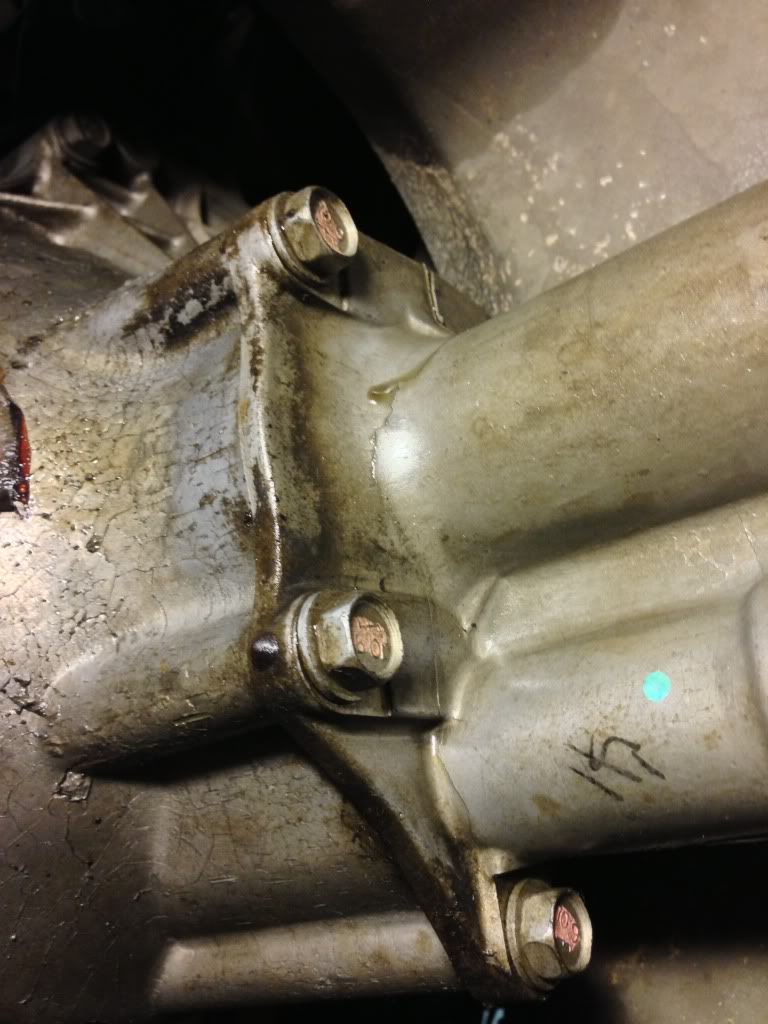
I couldn't really get a good pic of it but if you look closely you can see a crack. It's about 4 inches long and goes from where that drip is to the bolt on the other side.
So now I need to replace that axle housing. Since I went AWD, I no longer need the selectable front end.
What years Escalades had AWD? Would it be anything 99-06? If I remember correctly, they had AWD and were 3.73 ratio. That should be a bolt in deal right?
If I can't find an AWD front end, any 1500 silverado from 99-06 should work right?
Thanks!
The CV joint side seemed fine and where the passengers axle housing joined the differential seemed okay, but was oily.
I jacked the front end up so I could turn the tires.
I discovered a crack.
I couldn't really get a good pic of it but if you look closely you can see a crack. It's about 4 inches long and goes from where that drip is to the bolt on the other side.
So now I need to replace that axle housing. Since I went AWD, I no longer need the selectable front end.
What years Escalades had AWD? Would it be anything 99-06? If I remember correctly, they had AWD and were 3.73 ratio. That should be a bolt in deal right?
If I can't find an AWD front end, any 1500 silverado from 99-06 should work right?
Thanks!

 Jun 25, 2013 | 03:29 PM
#4
How do I tell what gear ratio I have from the factory in my silverado? Is there a code in the glovebox?
Jun 26, 2013 | 10:54 PM
#5
Check out what I found on Craigslist today.

Oddly enough, I found both of these from the same guy. Both are 3.73 ratio. The one on the left is a good runner the one on the right needs bearings.
I'm going to see if I can hybrid them together. I'm hoping I can just pull the longer axle and housing off and bolt it onto the 4wd version.
Oddly enough, I found both of these from the same guy. Both are 3.73 ratio. The one on the left is a good runner the one on the right needs bearings.
I'm going to see if I can hybrid them together. I'm hoping I can just pull the longer axle and housing off and bolt it onto the 4wd version.
Jun 28, 2013 | 05:22 PM
#6
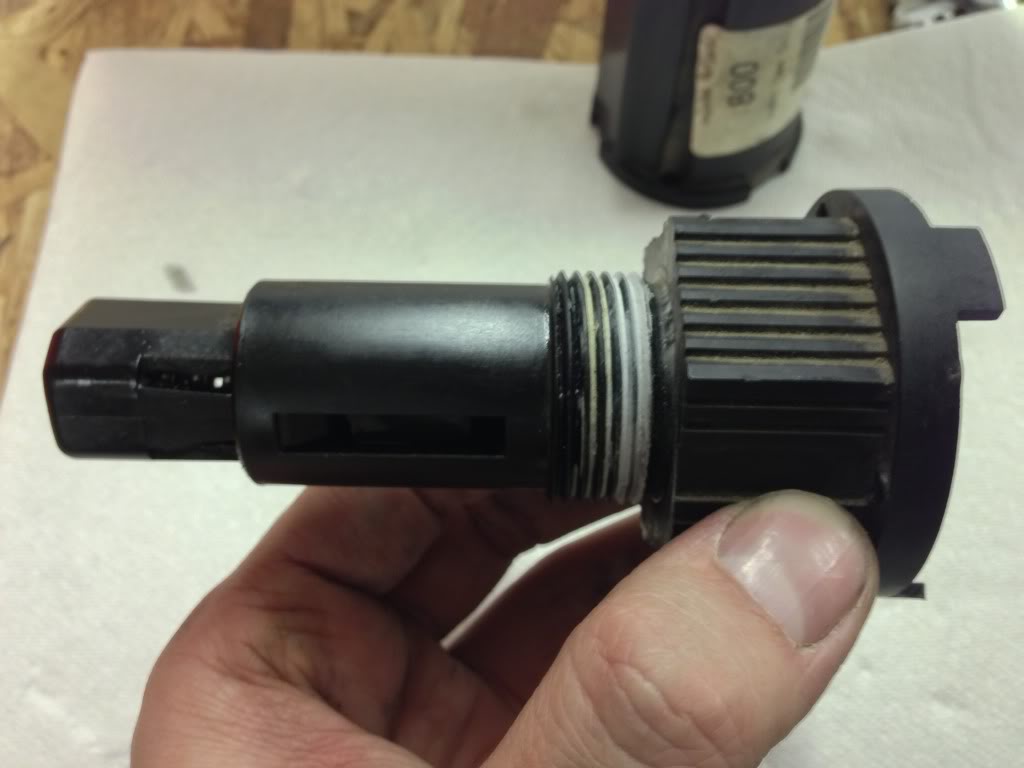
I wondered how the 4x4 actuator actually worked. So I took it apart.
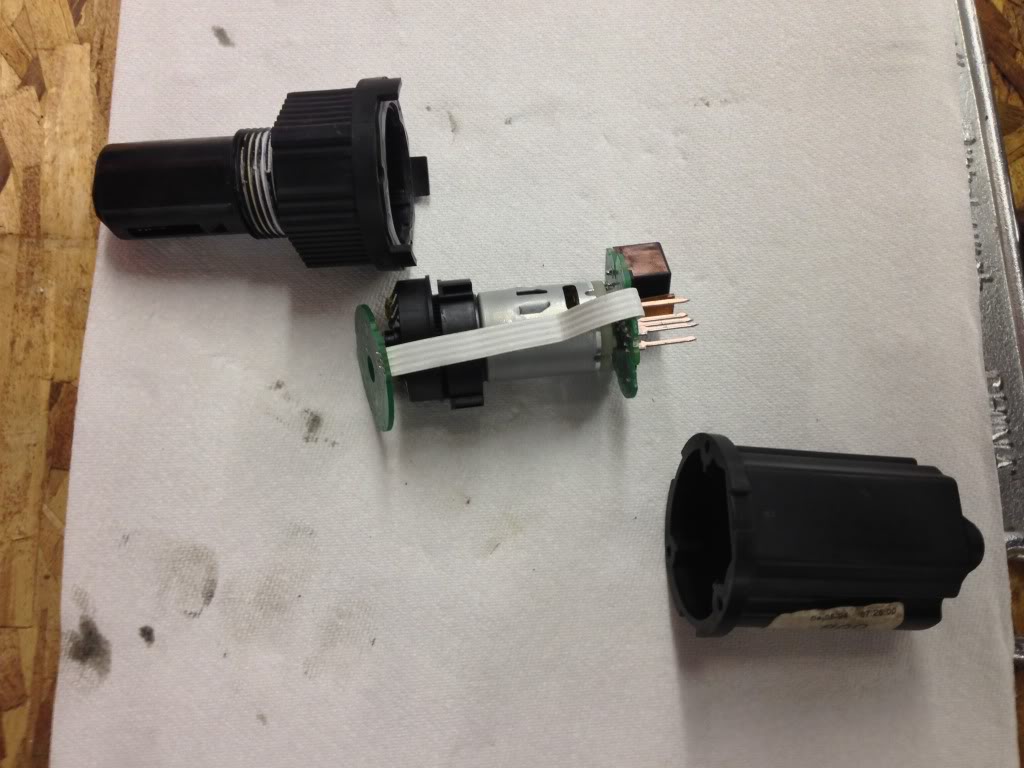
It's a lot more complicated than I assumed.
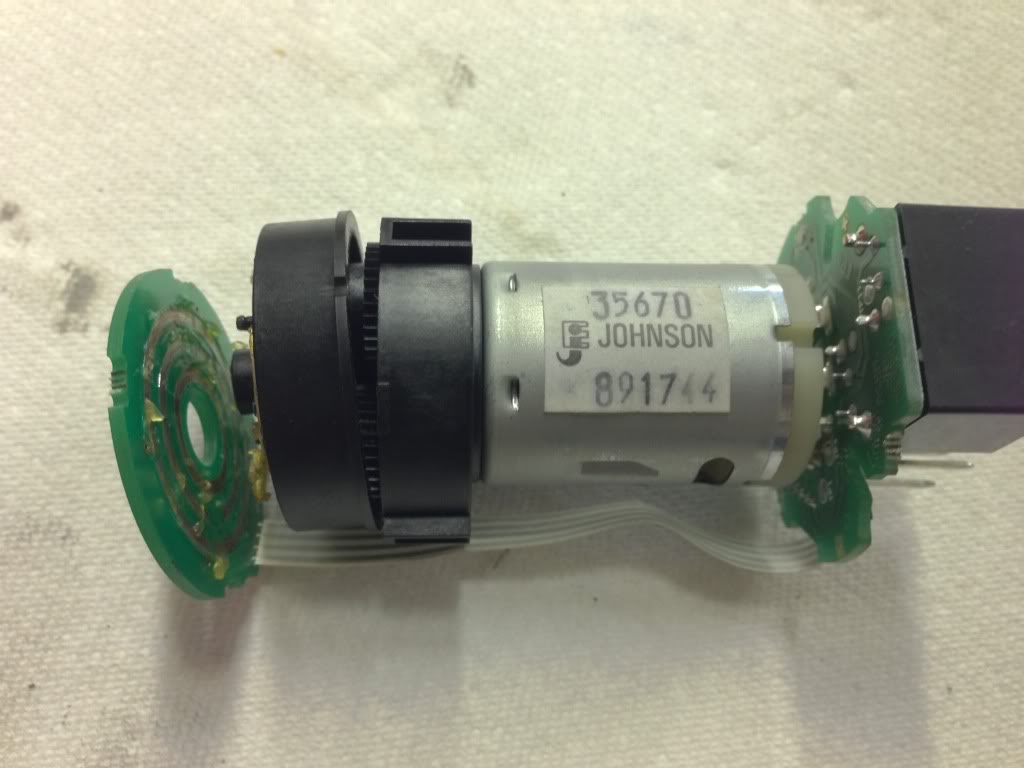
The poor man's way of engaging 4WD without having the transfer case and all of the appropriate wiring still connected, would be to turn this until the actuator is fully extended.
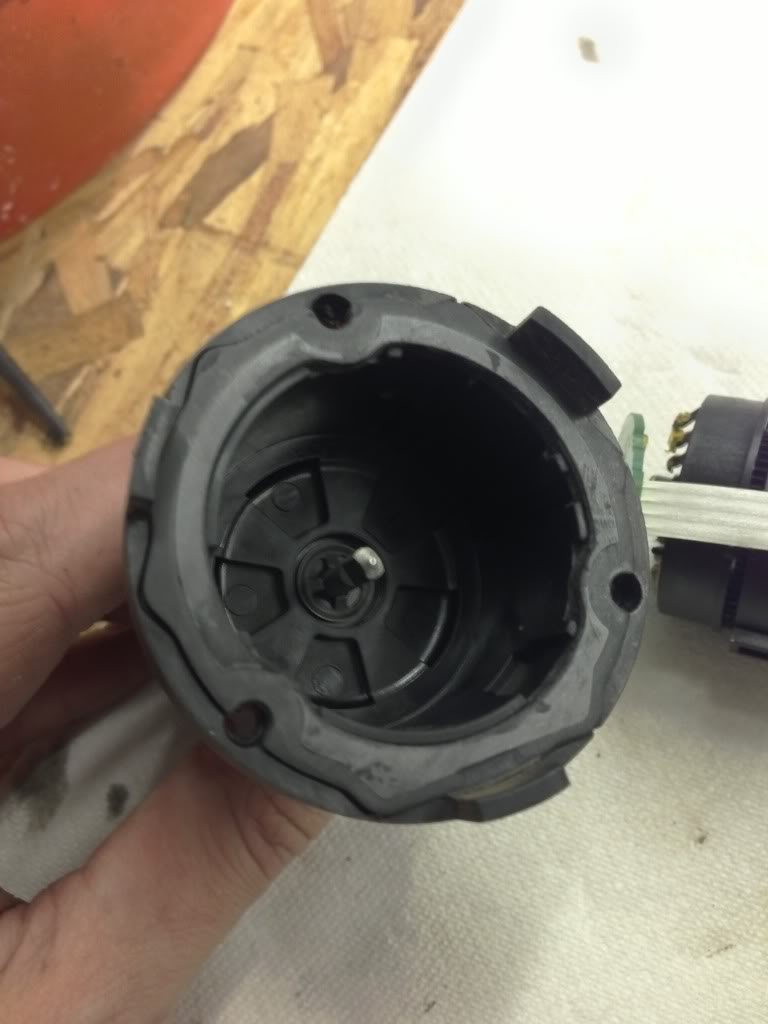
Like so.
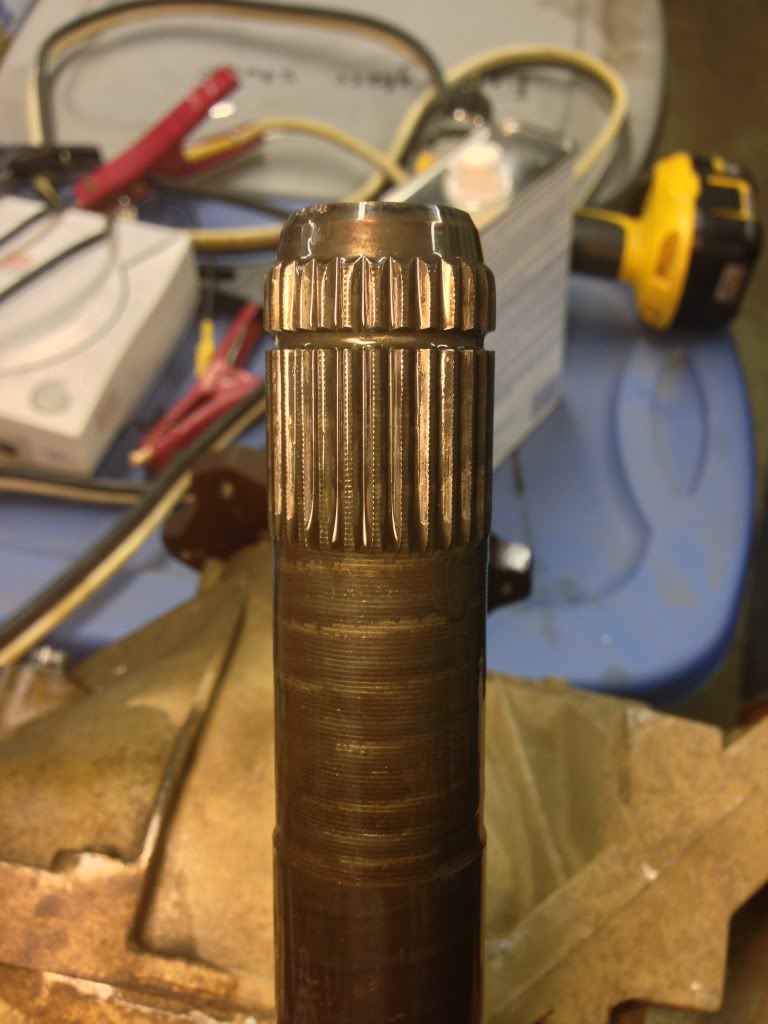
So I took the long axle and housing off of the AWD unit. I used a combination of a slide hammer and a dead blow hammer to pop the axle free.
You can see here there is a groove in the axle. There is a detent in the spider gear that locks it into place.
In case you were wondering how the 4x4 actually engaged. You can see how it pushes that fork over causing the fork to slide that collar over, joining the two axle halves.
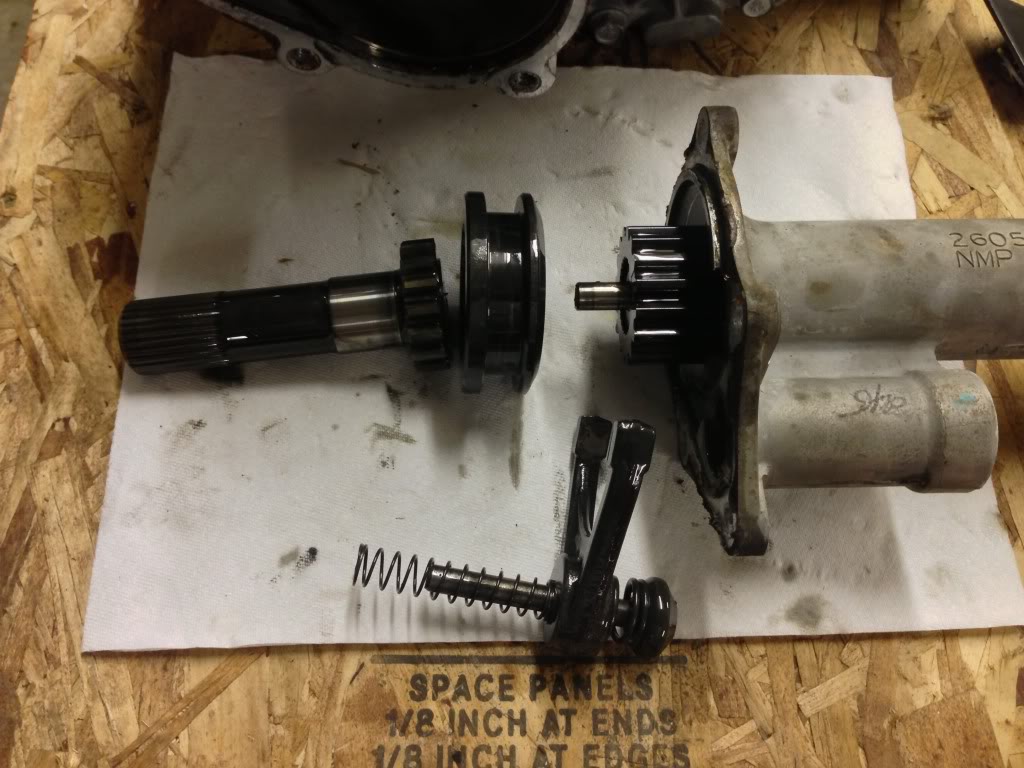
This is looking down into the 4WD unit.
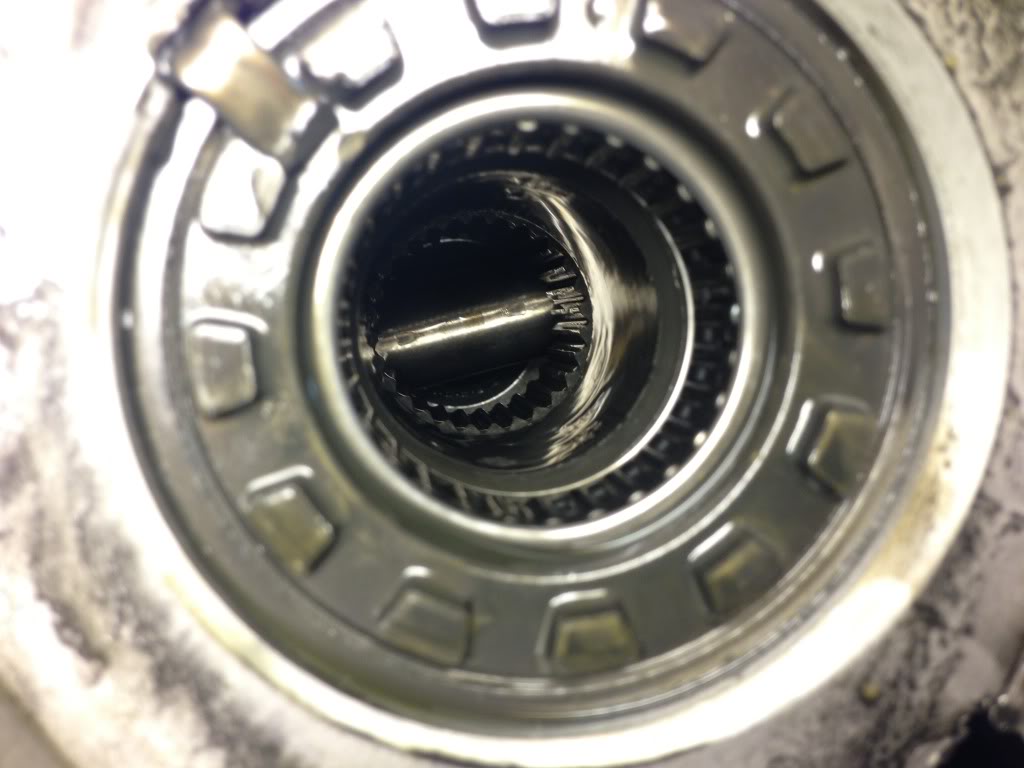
This is down into the AWD unit.
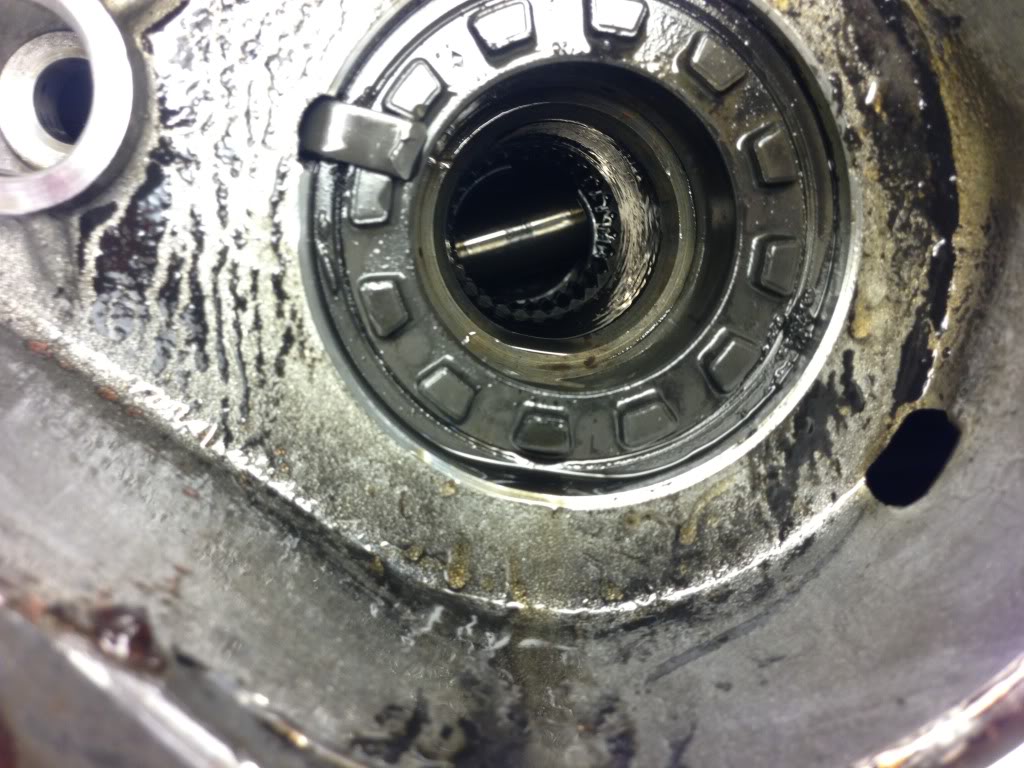
You can barely make it out, but there is a silver clip in there that snaps the long axle half into there.
So this means that it's not as simple as just unbolting the longer axle and tube, and then bolt that onto a 4WD front end.
For grins, I did see if it would fit, and it does. There's just no way for the longer axle to lock into place. The spline count is the same, and it's the correct length.
Now, I could bolt it in. The CV's would probably keep that front axle where it needs to be. What I'm going to do through, is just lock the 4WD unit into 4WD, then replace my cracked factory one.
In the coming months, I'll tear apart my AWD unit and rebuild it.
It's a lot more complicated than I assumed.
The poor man's way of engaging 4WD without having the transfer case and all of the appropriate wiring still connected, would be to turn this until the actuator is fully extended.
Like so.
So I took the long axle and housing off of the AWD unit. I used a combination of a slide hammer and a dead blow hammer to pop the axle free.
You can see here there is a groove in the axle. There is a detent in the spider gear that locks it into place.
In case you were wondering how the 4x4 actually engaged. You can see how it pushes that fork over causing the fork to slide that collar over, joining the two axle halves.
This is looking down into the 4WD unit.
This is down into the AWD unit.
You can barely make it out, but there is a silver clip in there that snaps the long axle half into there.
So this means that it's not as simple as just unbolting the longer axle and tube, and then bolt that onto a 4WD front end.
For grins, I did see if it would fit, and it does. There's just no way for the longer axle to lock into place. The spline count is the same, and it's the correct length.
Now, I could bolt it in. The CV's would probably keep that front axle where it needs to be. What I'm going to do through, is just lock the 4WD unit into 4WD, then replace my cracked factory one.
In the coming months, I'll tear apart my AWD unit and rebuild it.
Jun 29, 2013 | 03:08 AM
#7
Here are both axle assemblies side by side. The overall length of the housing and axle are the same.
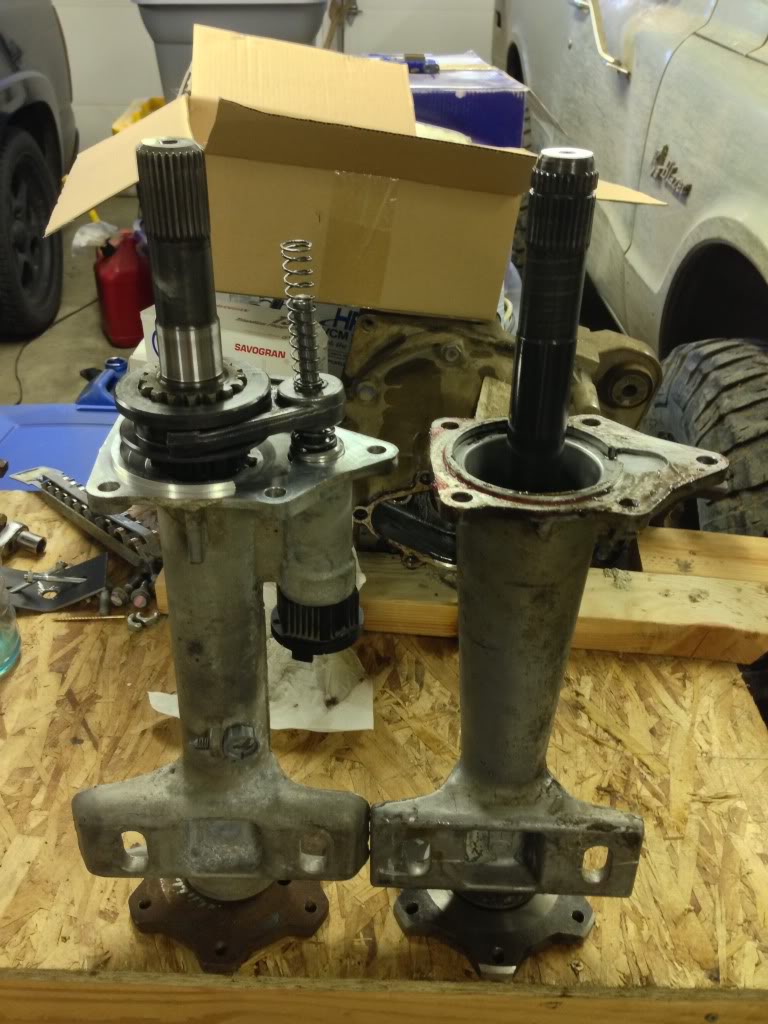
What I think I'm going to do is put the AWD one piece axle and housing onto the 4WD unit. I know there's a difference in the spider gears between the two. I've considered it, and I don't think it matters. After thinking about it, I think that the only reason there a detent holding in the AWD one piece axle is for the assembly plant. There's enough force from the CV joints to keep it in place.
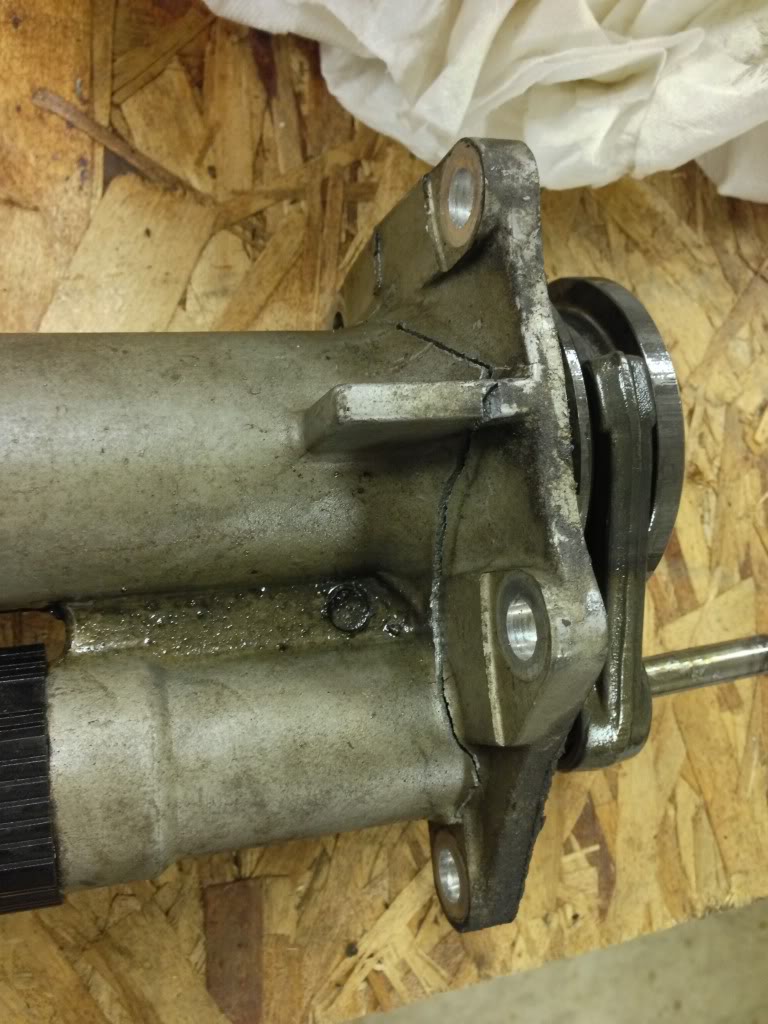
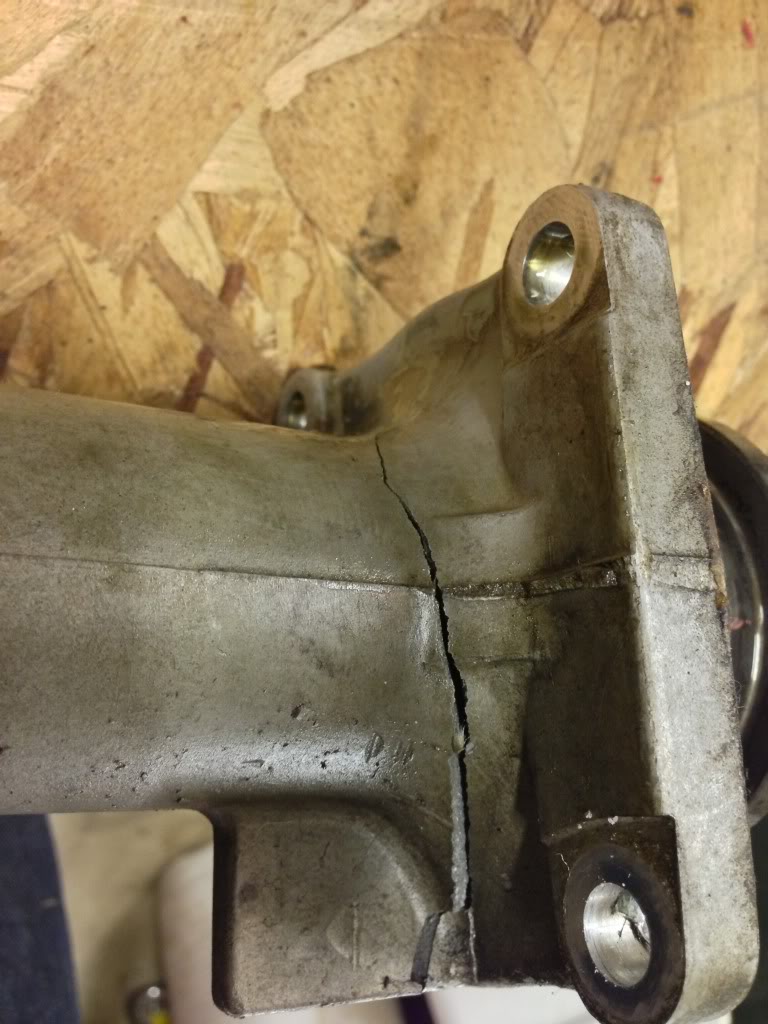
I found out where my front end was leaking. LOL.
What I think I'm going to do is put the AWD one piece axle and housing onto the 4WD unit. I know there's a difference in the spider gears between the two. I've considered it, and I don't think it matters. After thinking about it, I think that the only reason there a detent holding in the AWD one piece axle is for the assembly plant. There's enough force from the CV joints to keep it in place.
I found out where my front end was leaking. LOL.
Trending Topics
Jun 29, 2013 | 07:59 PM
#8
I know I'm kind of talking to myself here, but...
I cleaned off the mating surfaces really well with brake cleaner.
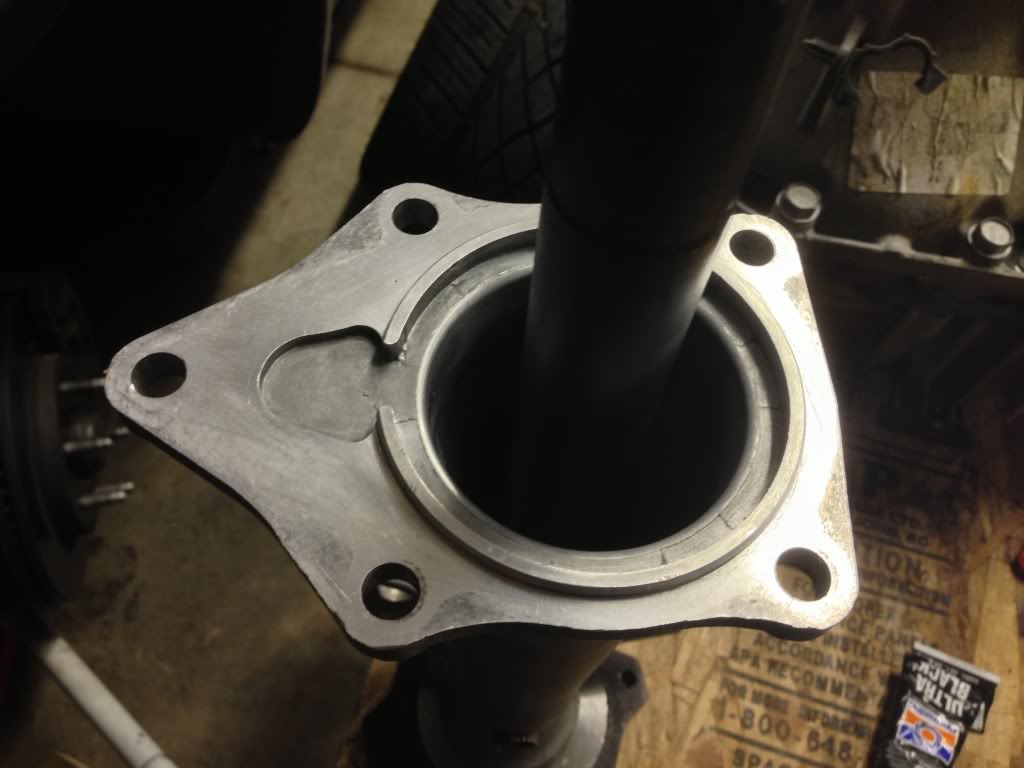
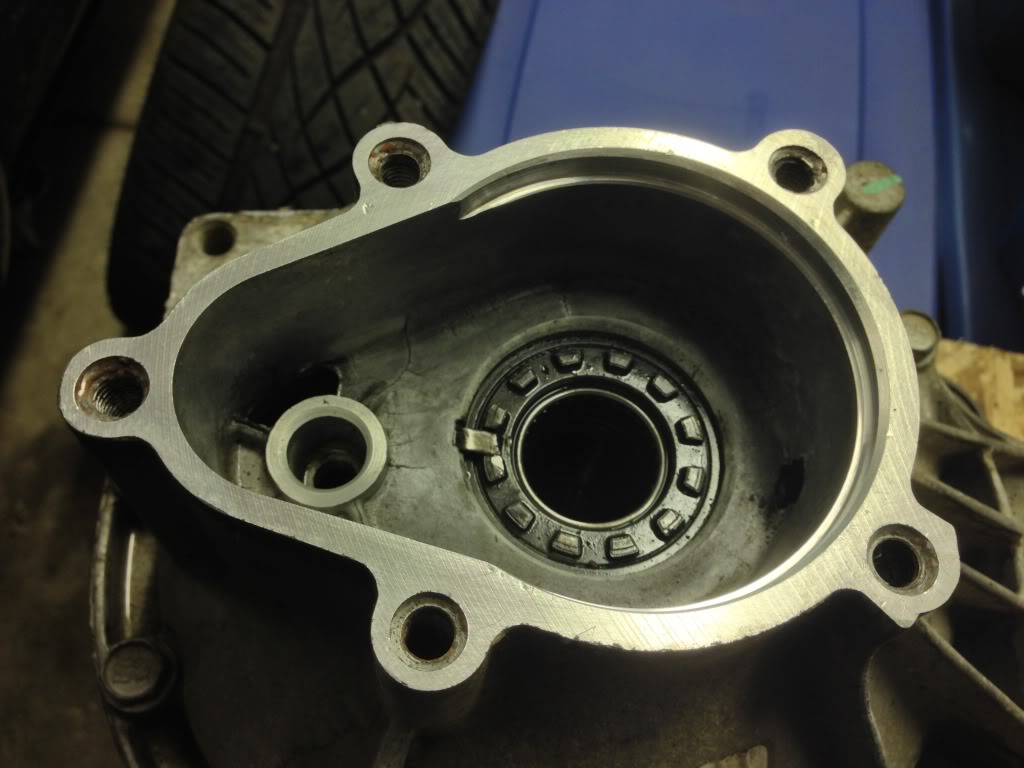
I applied some RTV black and put the two pieces together. Then I put the bolts on finger tight. Then I let it set up for about 20 to 30 minutes. Then I tightened everything down.
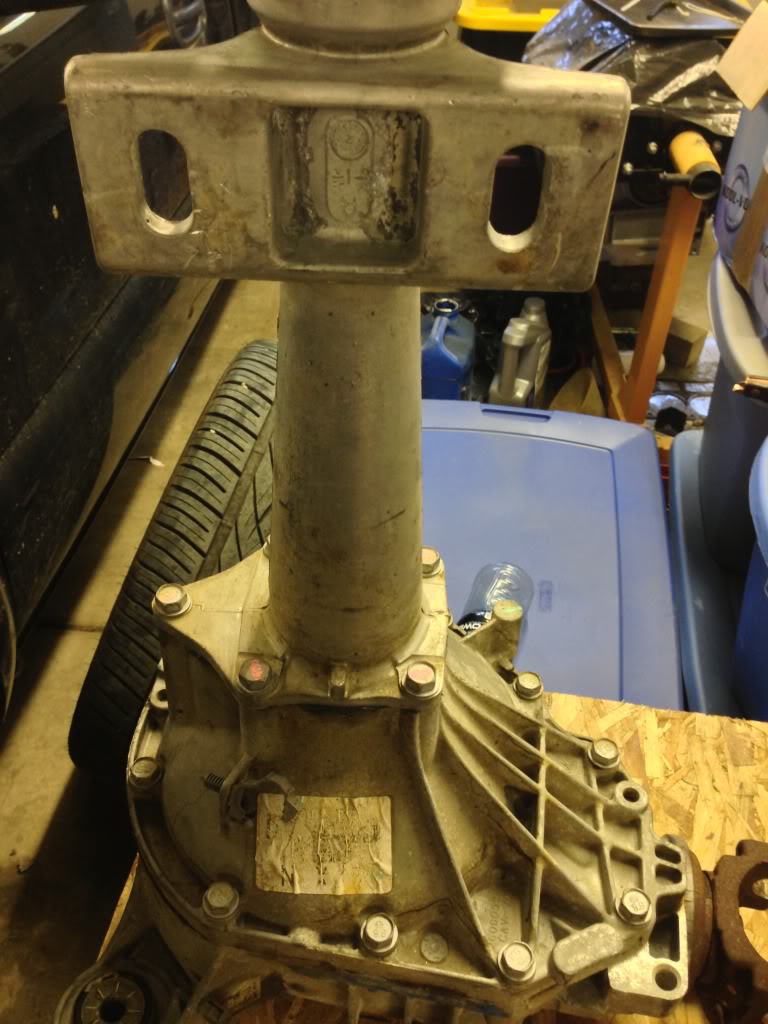
So now all I have to do is figure out how to get the center link to come free. I have to work tonight so I didn't have anymore time to mess with it.
I cleaned off the mating surfaces really well with brake cleaner.
I applied some RTV black and put the two pieces together. Then I put the bolts on finger tight. Then I let it set up for about 20 to 30 minutes. Then I tightened everything down.
So now all I have to do is figure out how to get the center link to come free. I have to work tonight so I didn't have anymore time to mess with it.
 Jun 30, 2013 | 01:17 PM
#10


Did the original tube have a gasket or just sealer??? Gm used an Anaerobic sealer on some of the mating surfaces... In the past I have found the RTV will eventually leak...
You can get the anaerobic sealer through the dealer or the parts store. Gm has a private Label on there's but companies like permatex sale it over the counter at the parts stores.
I believe Loctite brand also as similar products for sealing up cases like this.
Some parts stores my not stock it because it has a shelf life and doesn't sell as fast as silicone does. but they can order it.
You can get the anaerobic sealer through the dealer or the parts store. Gm has a private Label on there's but companies like permatex sale it over the counter at the parts stores.
I believe Loctite brand also as similar products for sealing up cases like this.
Some parts stores my not stock it because it has a shelf life and doesn't sell as fast as silicone does. but they can order it.

