
ECSB 4WD 4l60E to 4l80E
 Nov 3, 2008 | 09:29 AM
#82
Thread Starter
TECH Senior Member
iTrader: (7)
Joined: Jun 2004
Posts: 5,446
Likes: 7
From: Central Kentucky
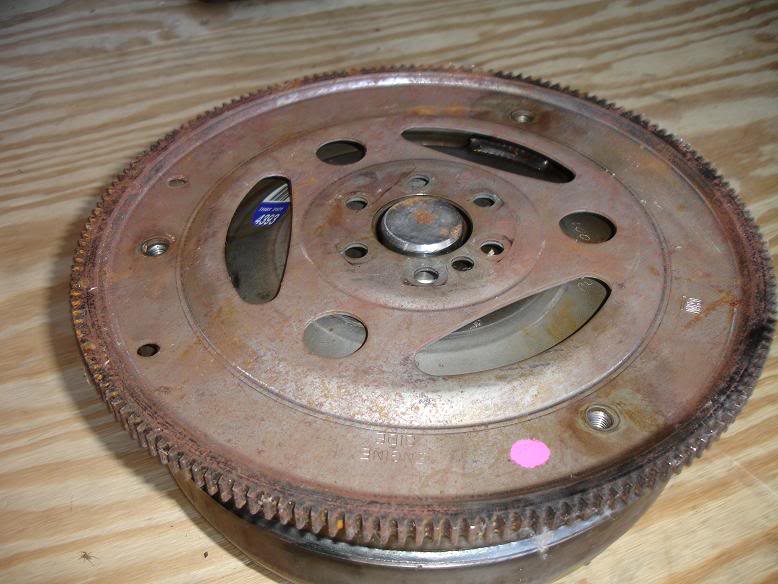
Double checking the converter to flexplate. I've been burnt before, better to find anything wrong now instead of later. One of my PI converters was cut to the wrong bolt pattern.
It's nice that I have an assortment of parts to check things. I now own 5 converters. 3 flexplates and 3 transmissions.
5.3L flexplate on the new PI 80E converter. Compare the bolt pattern to the flexplate and the snout into the crank.

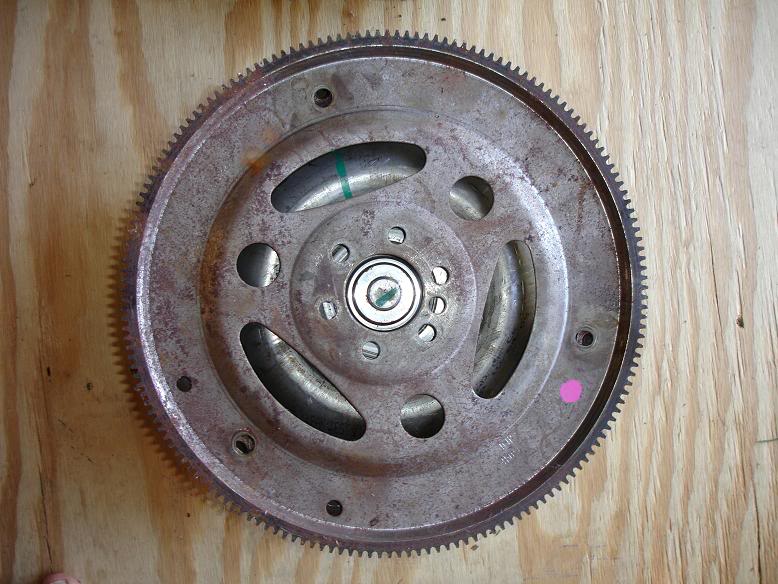
5.3L flexplate on a stock 60e converter. Looks like above
5.3L flexplate on a stock 4l80e for compare. Note the snout not engaged.
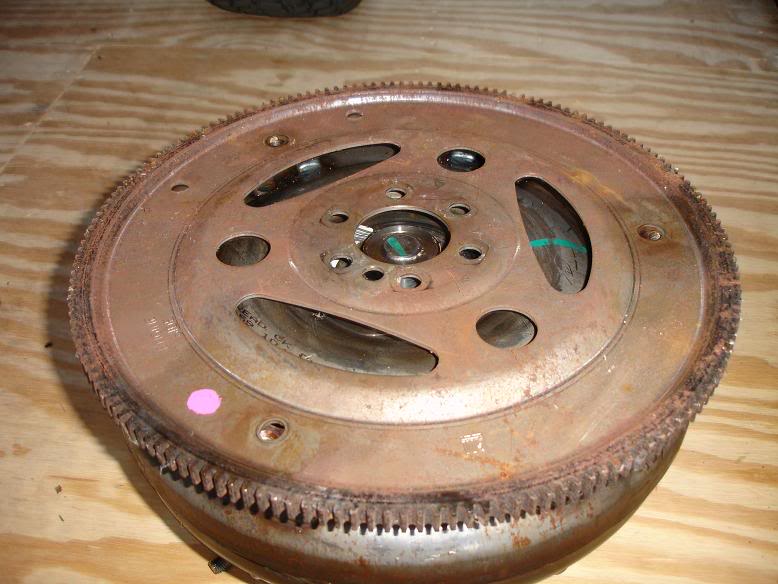
5.3L flexplate on stock 80e converter. Note the different bolt pattern. Of course 6 vs 3 and its also larger diameter.
80E converter left 60/65e converter right. Hate wasting a nice picture

It's nice that I have an assortment of parts to check things. I now own 5 converters. 3 flexplates and 3 transmissions.
5.3L flexplate on the new PI 80E converter. Compare the bolt pattern to the flexplate and the snout into the crank.
5.3L flexplate on a stock 60e converter. Looks like above
5.3L flexplate on a stock 4l80e for compare. Note the snout not engaged.
5.3L flexplate on stock 80e converter. Note the different bolt pattern. Of course 6 vs 3 and its also larger diameter.
80E converter left 60/65e converter right. Hate wasting a nice picture


 Nov 18, 2008 | 11:57 PM
#87

Yes the circled sensor is where pins 22 and 23 are run to. Pin A (RED/Black) wire goes to pin 22 and Pin B (Blue/White) to Pin 23 of the PCM.
The main harness is going to be gravy. I'll document it when I get there. But dismantle the connector. Move the brown wire to another spot and move the white wire to a location that isn't used in the connector.
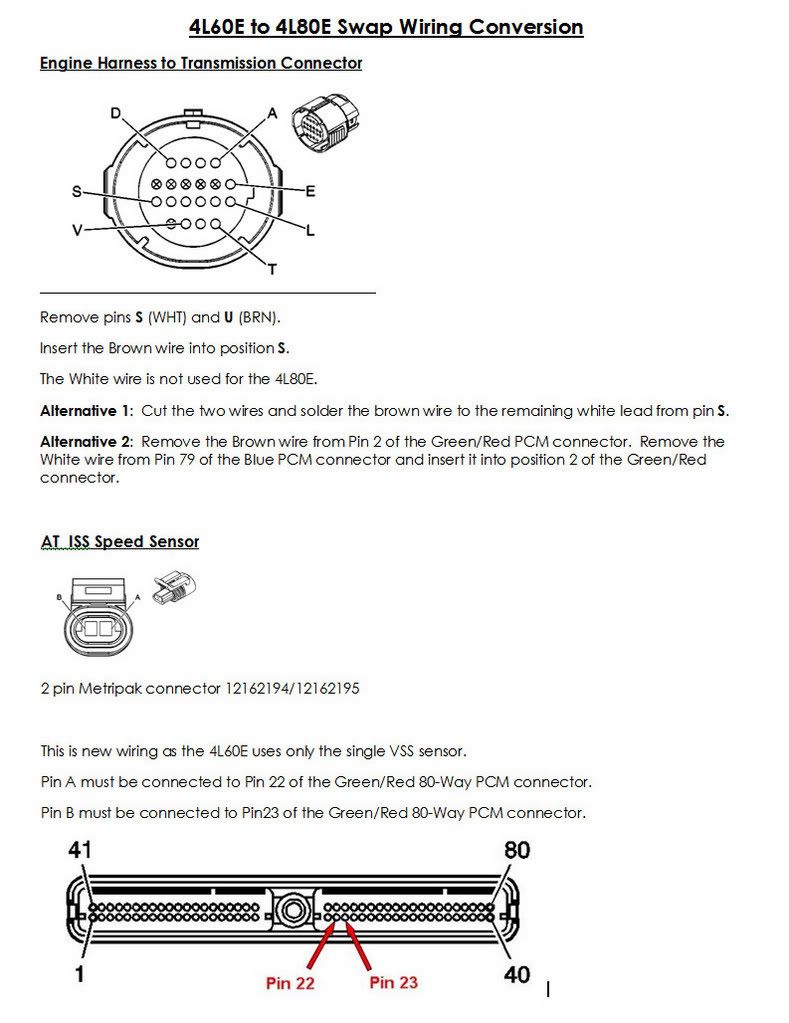
The main harness is going to be gravy. I'll document it when I get there. But dismantle the connector. Move the brown wire to another spot and move the white wire to a location that isn't used in the connector.
Nov 19, 2008 | 03:30 PM
#88
TECH Resident
iTrader: (36)
Joined: Mar 2004
Posts: 869
Likes: 1
From: somewhere in the sticks.
you dont cut anything on the plug take it apart and take the white and brown pin out and and put the brown pin where the white wire was and leave the white wire it's not that difficult then run your wires for the speed sensor cut your crossmember and move the center back 6" for a 2wd truck the 2wd and 4 wd is different.
Nov 19, 2008 | 03:42 PM
#89
you dont cut anything on the plug take it apart and take the white and brown pin out and and put the brown pin where the white wire was and leave the white wire it's not that difficult then run your wires for the speed sensor cut your crossmember and move the center back 6" for a 2wd truck the 2wd and 4 wd is different.
The crossmember I mean what size of plate how thick or thickness like 1/4?
Nov 19, 2008 | 03:53 PM
#90
Thread Starter
TECH Senior Member
iTrader: (7)
Joined: Jun 2004
Posts: 5,446
Likes: 7
From: Central Kentucky
I don't believe they are the same for 2wd. I think you move the section much further back on a 2wd.
Last edited by KySilverado; Nov 19, 2008 at 04:01 PM.