4L80E Build
 Apr 14, 2013 | 08:51 PM
#1

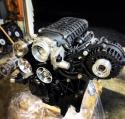
Here are a bunch of pictures of the build, basically a bunch of random ones through the build. First off I have to thank a good friend of mine Mark ( Mark Buck on here) for building it for me, he built my 65E that kicked *** behind my setup and I have no doubt this 80E will also. I would also like to thank Vince B for all the tips he provided, as well as Corey, Roger and Tim. What started out as a basic build turned into a one thing here and another there and next thing you know this trans is getting allot of cool parts. It ended up being built allot more then initially planned. For the PCM I did a segment swap and I did the wiring for the ISS a bit different, Mark came up with the idea and I really like it. Once I get the diagrams scanned into my computer I will add the info in this thread and into the sticky. Its all done with the factory wiring by using two unused wires in the trans connector to run the ISS.
Here is a basic list that I can think of, I am sure when Mark sees this he will chime in.
CK Performance 300m Billet Input Shaft
Ck Performance Billet Fwd. Clutch Hub W/ Bushing Stabilizer
Transgo HD-2 Kit
New Seals and Gaskets
Precision Industries Pump Spring
Sonnax boost valve
Sonnax AFL valve
Borg Warner Hi-energy clutches
Modified steel direct clutch drum (34 element)
Dual Feed Mod
Improved lube circuits
New Bushing and Bearings
Rollerized
Precision Industries 2600-2800 10.5" Triple Disk Converter
TCI Flexplate
EAD Adapter to run the NVG 149 AWD Tcase with the 80E
Here are some cleanup and prep pictures.
Day 1

Driveshaft, Zero mile take out.

Painted up

Being stripped down to clean up

Tabs removed

Mine and Mark's(Who is building my trans) Before media blasting. Trans are case only with old pump in place to block off.

After media Blast

Clear coated


Couple Random Pics
Low Reverse Band


Checking Low Reverse Pin Length

Low Reverse Pin Chart- Mine was a A2 We ran a pin with a 3.331 measurement, I took another pin and shortened it a bit so I could get a measurement I was happy with.


Center Support Bolted in and Tq'd

Lower half is in, endplay is at .010 Spec is .005-.025 IIRC
Flexplate.

Note the bushing
Direct drum with bushing

Rollerized forward hub

Forward hub in place on direct drum

Here is a basic list that I can think of, I am sure when Mark sees this he will chime in.
CK Performance 300m Billet Input Shaft
Ck Performance Billet Fwd. Clutch Hub W/ Bushing Stabilizer
Transgo HD-2 Kit
New Seals and Gaskets
Precision Industries Pump Spring
Sonnax boost valve
Sonnax AFL valve
Borg Warner Hi-energy clutches
Modified steel direct clutch drum (34 element)
Dual Feed Mod
Improved lube circuits
New Bushing and Bearings
Rollerized
Precision Industries 2600-2800 10.5" Triple Disk Converter
TCI Flexplate
EAD Adapter to run the NVG 149 AWD Tcase with the 80E
Here are some cleanup and prep pictures.
Day 1
Driveshaft, Zero mile take out.
Painted up
Being stripped down to clean up
Tabs removed
Mine and Mark's(Who is building my trans) Before media blasting. Trans are case only with old pump in place to block off.
After media Blast
Clear coated
Couple Random Pics
Low Reverse Band
Checking Low Reverse Pin Length
Low Reverse Pin Chart- Mine was a A2 We ran a pin with a 3.331 measurement, I took another pin and shortened it a bit so I could get a measurement I was happy with.
Center Support Bolted in and Tq'd
Lower half is in, endplay is at .010 Spec is .005-.025 IIRC
Flexplate.
Note the bushing
Direct drum with bushing
Rollerized forward hub
Forward hub in place on direct drum
Last edited by 03sierraslt; Apr 15, 2013 at 08:52 PM.
Apr 14, 2013 | 09:04 PM
#2
Bottom of direct drum, you can see intermediate sprag slightly in picture.

The bushing is installed in the Direct drum, the forward hub basically floats in the middle of the direct drum ( the clutches keep it centered) The added bushing stabilizes the two of them. On the bottom of the direct drum is the intermediate sprag, this setup adds the bushing and also the forward hub is a billet piece that has been setup so that it is now rollerized. If you look in the bottom picture you can see a little bit of the bushing (Tan color in picture) in the center of the two assemblies.
Dislaimer- This is all based off of my understanding, I am learning this as I go..... haha
Pictures TimZ took of me when I was welding up my crossmember.


Forward Drum Assembled


CK Performance Billet 300m Input shaft. For those familiar with 80e input shafts pay close attention to the splines where it engages the converter. No reduction in size to accommodate tooling so should be stronger in that area. Not all billet shafts are this way.


End play worked out to .012 with a .075 shim. Spec is .004 to .022 The seal is in now but was not in the picture.

Well its in and running, got it done earlier today. I have not drove it a whole lot as I had other stuff that I needed to get done but I did drive it enough to get a feel for it. I like it, the shift is allot different as its a very fast shift but yet smooth at the same time. It feels like it just clicks into gear instantly, the downshifts is what caught me off guard. The downshifts are so smooth compared to the 65E, on the 65E there was no mistake when it downshifted even at part throttle where as the 80E seems more seemless. I can feel the taller 1st gear and the closer ratios but I have not went WO yet as I want to break it in a bit before beating on it. I only have maybe 10 miles on it, I am off tom and the weather is going to be nice so I hope to put some miles on it and get some WO pulls in.


The bushing is installed in the Direct drum, the forward hub basically floats in the middle of the direct drum ( the clutches keep it centered) The added bushing stabilizes the two of them. On the bottom of the direct drum is the intermediate sprag, this setup adds the bushing and also the forward hub is a billet piece that has been setup so that it is now rollerized. If you look in the bottom picture you can see a little bit of the bushing (Tan color in picture) in the center of the two assemblies.
Dislaimer- This is all based off of my understanding, I am learning this as I go..... haha
Pictures TimZ took of me when I was welding up my crossmember.
Forward Drum Assembled
CK Performance Billet 300m Input shaft. For those familiar with 80e input shafts pay close attention to the splines where it engages the converter. No reduction in size to accommodate tooling so should be stronger in that area. Not all billet shafts are this way.


End play worked out to .012 with a .075 shim. Spec is .004 to .022 The seal is in now but was not in the picture.

Well its in and running, got it done earlier today. I have not drove it a whole lot as I had other stuff that I needed to get done but I did drive it enough to get a feel for it. I like it, the shift is allot different as its a very fast shift but yet smooth at the same time. It feels like it just clicks into gear instantly, the downshifts is what caught me off guard. The downshifts are so smooth compared to the 65E, on the 65E there was no mistake when it downshifted even at part throttle where as the 80E seems more seemless. I can feel the taller 1st gear and the closer ratios but I have not went WO yet as I want to break it in a bit before beating on it. I only have maybe 10 miles on it, I am off tom and the weather is going to be nice so I hope to put some miles on it and get some WO pulls in.


 Apr 14, 2013 | 09:20 PM
#4
When you go from a 4L60E / 4L65E to a 4L80E there are two unused pins in the Trans connector. Part of the wire swap that everyone does is below.
By doing it this way you can utilize all factory wiring, all you have to do is add a plug at the trans end and move the pins at the PCM end. Credit for this method is due to Mark (Mark Buck).

You take the white wire that is no longer used ( Was pin S ) and you also take Tan/Blk Wire ( T ) and remove them both from the vehicle trans plug, pull the wires out of the loom about a foot and separate them from the main harness as they will now be used for your Input Speed Sensor ( ISS) You will need the proper plug and terminal ends to use on the wires to attach to your ISS. You will also need the appropriate crimper for those terminals.
At the PCM end, you will have to remove the loom and tape going to the PCM harness. The main harness divides into two and splits for each PCM connector. You remove the White Wire from the Blue connector ( Pin 79) and move it so that it can be run to the Green connector.
The Tan/Blk wire (pin 42) is already in the Green connector so all you have to do is remove it from Pin 42 and move it to its new location.
Myself I used the White wire as Pin A / Green Connector Pin 22
Tan/Blk wire as Pin B / Breen Connector Pin 23
Trans connector


Last edited by 03sierraslt; Apr 15, 2013 at 04:13 PM.

 Apr 15, 2013 | 07:07 AM
#6
Apr 15, 2013 | 02:12 PM
#7
Put some miles on it today, and finally did a couple WO pulls. I LIKE IT, the shifts are super fast and smooth and the shift extensions between gears is much better then the 65e.
Trending Topics
 Apr 16, 2013 | 12:05 PM
#9
I notice it when starting out, but once cruising I dont notice. WO is nice because before it seemed that I no more then got on the throttle and I was in 2nd gear where as now 1st gear doesnt feel so useless. The shift extensions are very nice, the RPM does not fall off as much between gears. I dont really notice the lower 4th gear on the highway, it turns another 100 RPM or so at cruise. I have not went WO enough from a dead stop to be able to say as far as coming out of the hole.