
got the d-max ic install......finally
 Jul 16, 2006 | 08:26 AM
#1
Thread Starter
12 Second Truck Club
iTrader: (4)
Joined: Nov 2004
Posts: 6,318
Likes: 2
From: Jacksonville FL.
well i got off my *** and did it yesterday. after over a year i installed the ic. went pretty good after i cut the ic down about two inches. i'll take pics in a few i got to go get a few things to finish it up and register my boy for football.

 Jul 16, 2006 | 11:22 AM
#3
Thread Starter
12 Second Truck Club
iTrader: (4)
Joined: Nov 2004
Posts: 6,318
Likes: 2
From: Jacksonville FL.
ok well i didn't know how well this was going to go so i didn't take pics along the way but i took some of what i could and i'll explain the rest.
first pic..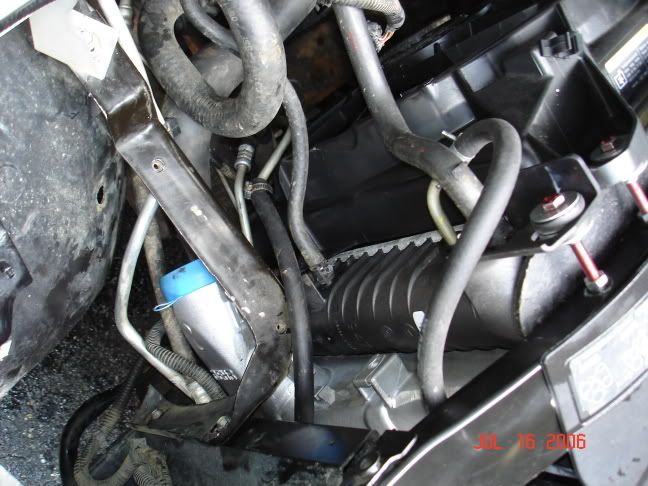
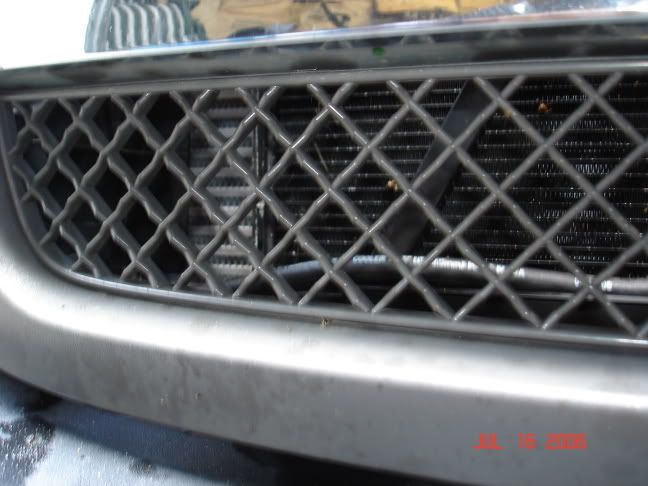
ok in this one you can see where i had to cut the brace where the air box goes so i can use the air box for now. also it shows where the input goes around the radiator.
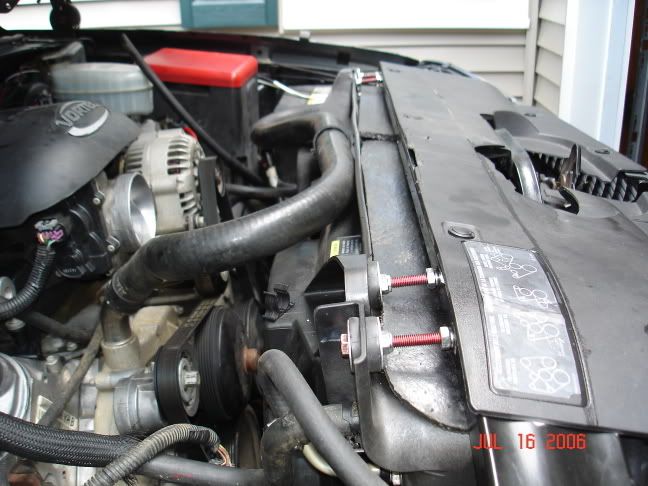
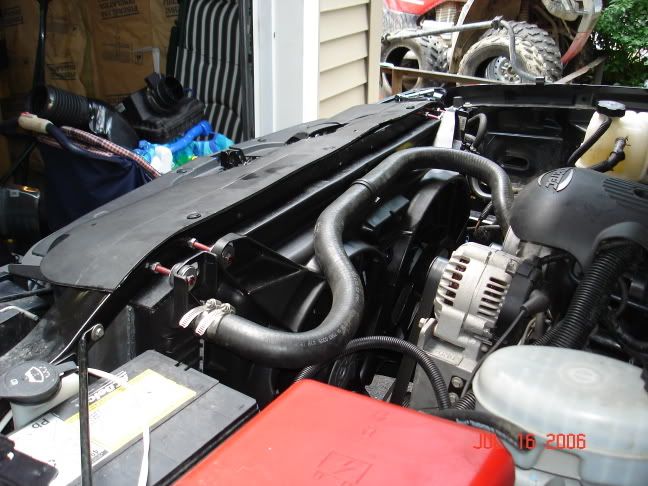
ok in this one you can see where i had to get longer bolts to fit. i used lock nuts to hold the rad in place and put on the other end against the core support to keep from over tightening you could use spacers but this way i can get it just right. i also used a nappa mud flap to cut and put on top of the rad and ic to make a shroud there was a gap and i wanted to make sure it puuled air through it all not from around. the rad push the ic against the core to hold it in place.
ok this one is the driver side nothing real special just a pic.

this is showing the fans sit on the frame to hold them up and there bolted at the top.
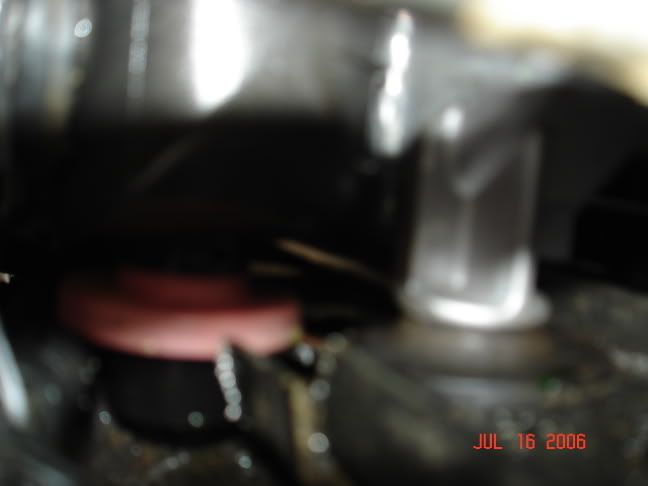
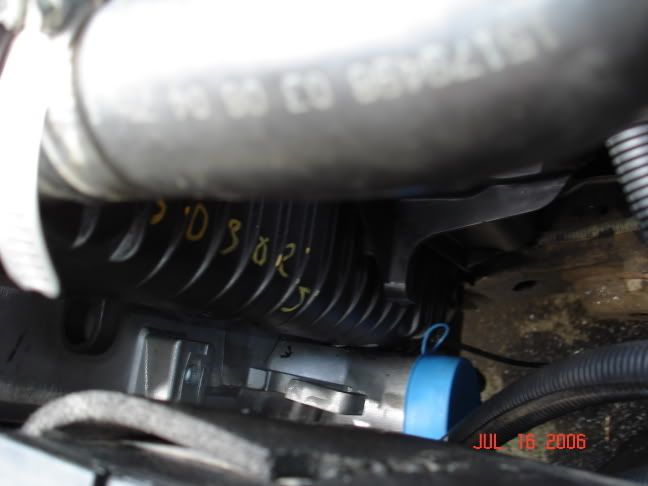
ok the good one. i used a hole saw and cut a new hole in the cor support beside the old rad ones this way the feet of the ic could sit in and be supported. you can see this its the alluminum leg you see there with the black thing at the end. now it just so happen the i set the ic back far enought that when i sqeezed the rad down between the in and out on the ic that the feet of the rad hit the core support. this was good because it allowed me to use the holw saw on the core support to make a half holw for the rad feet to sit on this is the pink thing you see. it worked out rather nice i thought.
this was just a pretty sight.
first pic..
ok in this one you can see where i had to cut the brace where the air box goes so i can use the air box for now. also it shows where the input goes around the radiator.
ok in this one you can see where i had to get longer bolts to fit. i used lock nuts to hold the rad in place and put on the other end against the core support to keep from over tightening you could use spacers but this way i can get it just right. i also used a nappa mud flap to cut and put on top of the rad and ic to make a shroud there was a gap and i wanted to make sure it puuled air through it all not from around. the rad push the ic against the core to hold it in place.
ok this one is the driver side nothing real special just a pic.
this is showing the fans sit on the frame to hold them up and there bolted at the top.
ok the good one. i used a hole saw and cut a new hole in the cor support beside the old rad ones this way the feet of the ic could sit in and be supported. you can see this its the alluminum leg you see there with the black thing at the end. now it just so happen the i set the ic back far enought that when i sqeezed the rad down between the in and out on the ic that the feet of the rad hit the core support. this was good because it allowed me to use the holw saw on the core support to make a half holw for the rad feet to sit on this is the pink thing you see. it worked out rather nice i thought.
this was just a pretty sight.
Jul 16, 2006 | 11:31 AM
#4
Thread Starter
12 Second Truck Club
iTrader: (4)
Joined: Nov 2004
Posts: 6,318
Likes: 2
From: Jacksonville FL.
now for some more info. i had to make the power stearing (spelling) cooling lines longer to fit around. i need to figure out a way to make the a/c line a little longer too but it works for now. i also had to make the trans cooler line longer to fit around. the ic has to be cut about 2" down and be recapped its easy if you can weld alluminum. if not find some one who can. and if you have the bigger 34" core rad like mine you have to dent in the driver side out put a little (be careful) i kinda broke my end cap free just a little so i jb welded it back up. if that don't work i'll take it out and have some one weld it up for me. it great that its all aluminum not plstic end caps like the newer one i saw. but when it broke free it made it fit perfect. i would say use a press slowley to dent in the pipe some. it needs very little. like i said before you could use spacers for the bolts on top but with the lock nut you can make very small adjustment without have to recut. sorry i didn't have more pics but after i get started its hard for me to stop. i had about 10-15 diffrent ideas on how to do this but actualy doing it was much easier.
Jul 16, 2006 | 01:43 PM
#5
Thread Starter
12 Second Truck Club
iTrader: (4)
Joined: Nov 2004
Posts: 6,318
Likes: 2
From: Jacksonville FL.
ok went for a test drive to check coolant temps and they were same. i think i have a 180 stat not a 160 because it will warm up past 160 and nothing will happen then when it hit about 183 the coolant bubbled and the temp droped to 178 then after a couple second it would start to rise. it took like 30mins befor the fans would ever come on and its hella hot outside. now just to get the turbo on and i'll be good lol.
Jul 16, 2006 | 08:33 PM
#6
Lookin good. You got quite a job in front of you too. I lost a lot of time F'ing with the trany. oil, and coolant lines. Looks like you will (have had) your share of time invested with them as well. I also had some very minor issues with the A/C condensor line, but like i mentioned in my thread, i just cut out a little bit of metal from the airbox pedistal and it sunk in fine with no rubbing at all. Glad to hear your ECT's are down, mine were a little higher when i first buttoned everything up, but now they seem to have went down a few degree's after the fluid had cycled through a few times. I think its due to the fact that any air that may have been trapped in there has worked its way out. Temps here have been in the mid 90's and my ECT's continue to be in the mid 180's to 190. I wont dwell on this and jack your thread, but i saw a difference in ECT's after i replaced my (trash) autozone spin on tranny filter with an (expensive $39) OEM allison tranny filter. Tranny temps came down 10* and ECT's came down too.
Good luck on the install dude. I know we dont have exact setups, but if you run into a bind, dont hesitate to give me a shout.
Good luck on the install dude. I know we dont have exact setups, but if you run into a bind, dont hesitate to give me a shout.
Jul 17, 2006 | 07:29 AM
#7
Thread Starter
12 Second Truck Club
iTrader: (4)
Joined: Nov 2004
Posts: 6,318
Likes: 2
From: Jacksonville FL.
i think every thing is done for now until i get the turbo install going. i just did this first so i wouldn't get the turbo almost installed and then run into the ic not working. i may give you a shout though but hope fully it will all go smooth.
Trending Topics


Thread
Thread Starter
Forum
Replies
Last Post
gmforlife
Tuning, Diagnostics, Electronics, and Wiring
1
Jan 17, 2008 04:24 PM
Nine Ball
GMT 800 & Older GM General Discussion
41
Jul 5, 2004 04:45 PM