Project "Rebel Yell"
 12-02-2018, 07:11 AM
#71
On The Tree

Thanks!
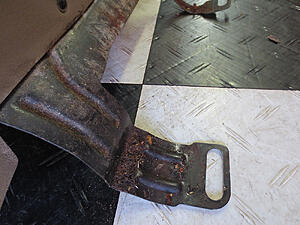
I'm a paint, body, collision guy done some wrenching along the way but always ended back in the primer and bondo dust. I now have the utmost respect for guys that specialize in gears. Just driving the pinion yoke off was a job in itself. From knocking the races out/in to test fitting the carrier over half a dozen times is very physical work while using jack stands. Then the grease OMG when I was finished I was greasier than the underside of the truck! I didn't even think about washing the work jeans, just tossed um in the trash.
I think I'll stick to mangled sheet metal and deadly paint fumes
 12-17-2018, 11:31 PM
#72
100% Redneck
Thread Starter

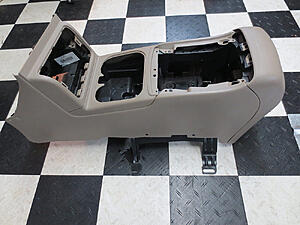
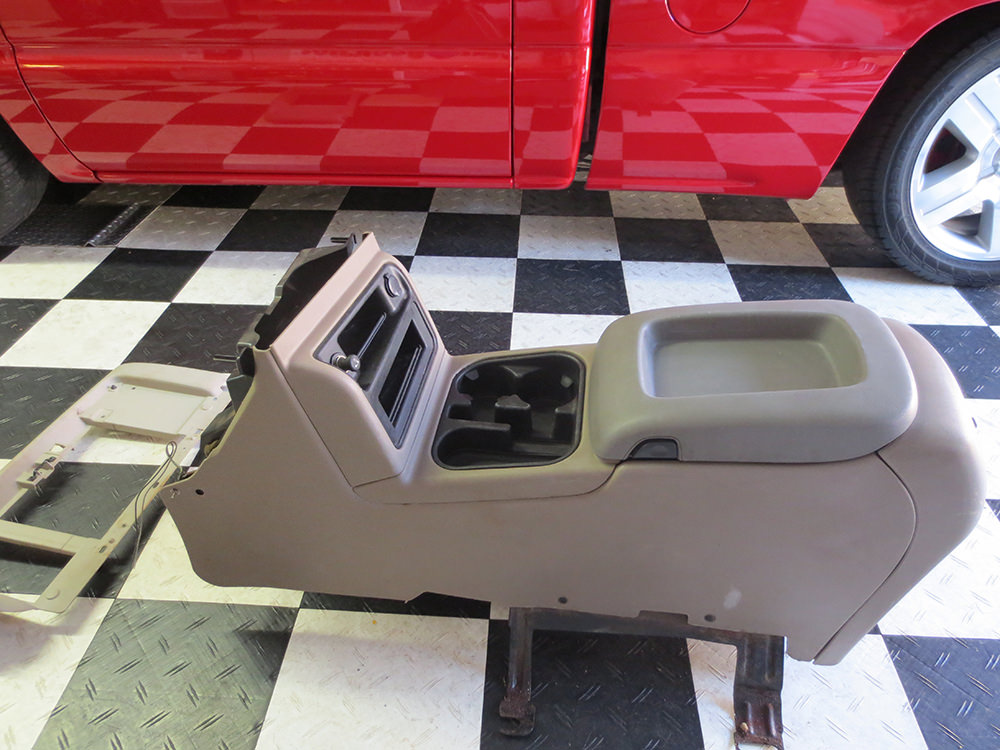
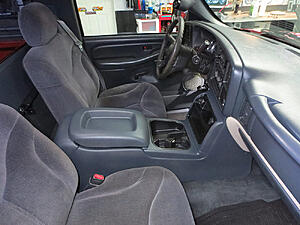
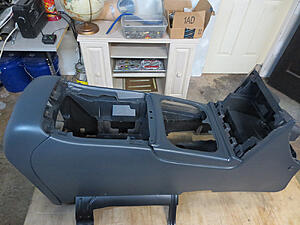
Found a console today at LKQ. They had four 2003+ two tan and two dark graphite but someone had destroyed both the graphite consoles. The two tans were about the same... filthy but in good shape. I chose a 2004 Suburban because it had the drivers seat already out. The console bolts under the seat brackets and with the seats being electric you can't move them to uncover the front mounting bolts. I had to dismantle the passenger seat from the cushion down, foam springs etc.
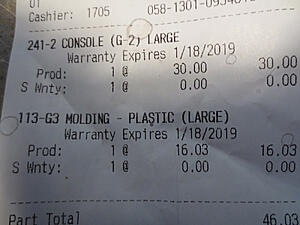
Looking on ebay the nice consoles sell for $400+ with the required dash trim. The nasty ones that have all the parts are $200+ those are scuffed up and need to be re-dyed. LKQ charged $30 for the console and $16 for the glove box surround
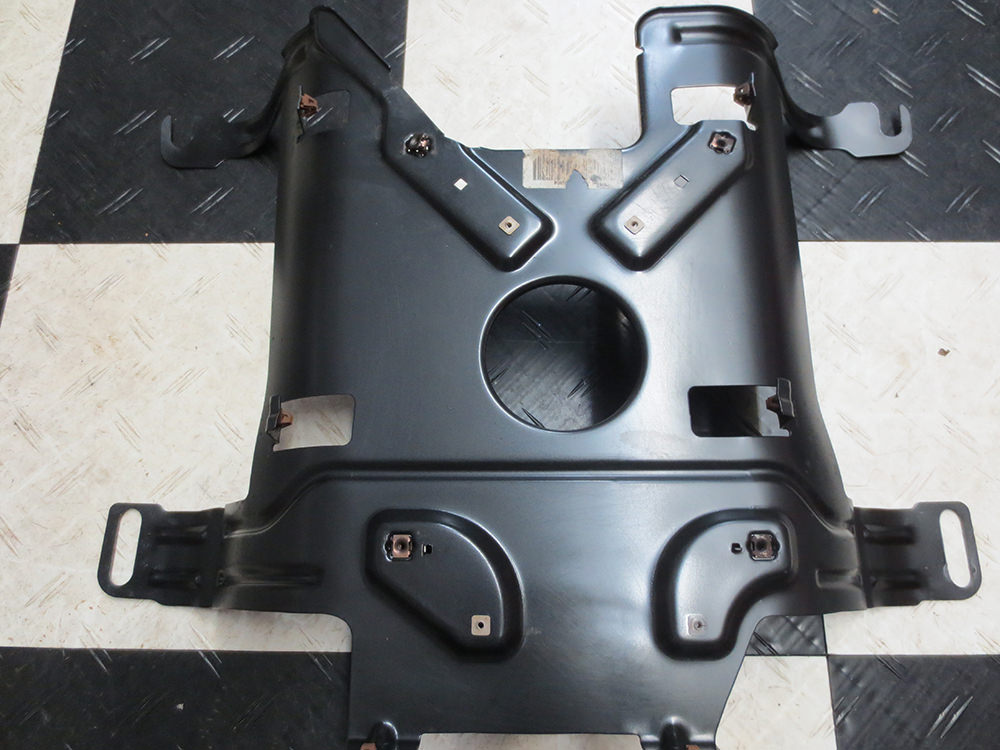
Got it home and took it apart to clean and to remove the Bose amp, speaker and harness. Man was it filthy especially the mounting bracket. It had years of coffee, beer, soda on the bracket even a crusty old french fry stuck to it... how can people be so nasty lol.
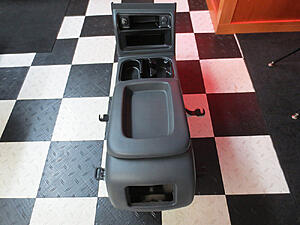
Dyed the black plastic pieces, painted the mounting bracket and dyed the console to match the interior. Ran out of color on the 3rd coat so it's not 100% covered. Ordered another can of dye $17
 I'm going to install the console while I decide on which shifter and get it in hand. The shifter install will need cutting of some plastic pieces to fit. After all the hacking and test fitting I'll shoot the final dye coats so I can repair any scuffs during the shifter install.
Dirty dirty dirty !

Clean clean clean !

Stripped, washed, scuffed then cleaned with prepsol, plastics and bracket re-attached.
Plastics cleaned and dyed black.

Looking good but needs another coat.
$30
Looking for the cubbie insert to replace the Bose unit. I ordered the rubber mat for the arm rest so now just trying to make up my mind on which shifter I want... any suggestions?
Looking on ebay the nice consoles sell for $400+ with the required dash trim. The nasty ones that have all the parts are $200+ those are scuffed up and need to be re-dyed. LKQ charged $30 for the console and $16 for the glove box surround
Got it home and took it apart to clean and to remove the Bose amp, speaker and harness. Man was it filthy especially the mounting bracket. It had years of coffee, beer, soda on the bracket even a crusty old french fry stuck to it... how can people be so nasty lol.
Dyed the black plastic pieces, painted the mounting bracket and dyed the console to match the interior. Ran out of color on the 3rd coat so it's not 100% covered. Ordered another can of dye $17
Dirty dirty dirty !

Clean clean clean !
Stripped, washed, scuffed then cleaned with prepsol, plastics and bracket re-attached.

Plastics cleaned and dyed black.

Looking good but needs another coat.


$30

Looking for the cubbie insert to replace the Bose unit. I ordered the rubber mat for the arm rest so now just trying to make up my mind on which shifter I want... any suggestions?
12-18-2018, 08:26 AM
#73

Nice work on that console!
The following users liked this post:
RedXray (12-18-2018)
12-18-2018, 05:04 PM
#74
100% Redneck
Thread Starter
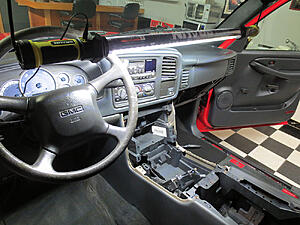
Well everything installed and lined up, no rattles, squeaks or big surprises except the panel under the column needs to be cut to fit. I saw a good graphite panel at LKQ may scoop it up tomorrow so I won't have to cut mine.
I was concerned about the height of the arm rest. I lock my elbow on the arm rest holding the wheel with my right hand while cruising. It's lower but It feels the same as before.
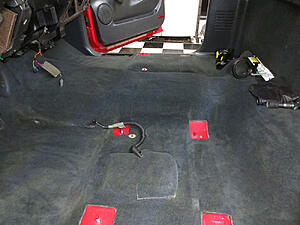
Seats removed, vacuumed and found .86 cents for my trouble
Looks odd with the tan dash bezel but no worries the dye will be here Thursday.
I was concerned about the height of the arm rest. I lock my elbow on the arm rest holding the wheel with my right hand while cruising. It's lower but It feels the same as before.
Seats removed, vacuumed and found .86 cents for my trouble

Looks odd with the tan dash bezel but no worries the dye will be here Thursday.
 12-24-2018, 06:15 PM
#75
100% Redneck
Thread Starter
Truck snaps hard to the right during the end of a burnout. So much that it crosses into the other lane wanting to jump the curb if I stay in the throttle. Need a set of Caltrac's to keep the rear from steering the truck. The good news is no wheel hop and it leaves two black marks now
Trans in 3rd, no brakes, just hitting the throttle...
Trans in 3rd, no brakes, just hitting the throttle...
01-05-2019, 11:57 AM
#76
100% Redneck
Thread Starter
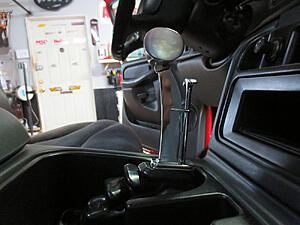
So I was going to do the B&M Quicksilver shifter but decided to go with the B&M Megashifter for light trucks (part# 80680). The job wasn't to physical but it was long and tedious fitting, grinding, fitting etc. until you find the sweet spot to mount the shifter.
Most of the "how to's" I read had issues with very little clearance with the shift **** and the consoles lid. I worked on the placement with that in mind. I jacked up the rear of the mounting bracket tweaking it until I couldn't get anymore forward movement. This gave me the clearance for the lid but it left little room for the boot and the front of the cup holder. In PARK it would lift the boot on the opposite end. I used a zip tie sewn through the bottom of the boot and through the cup holder to hold it down.
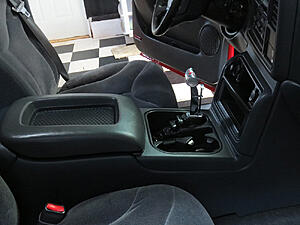
I'm loving the way this thing shifts now plus the cool factor of the way it looks is great too! It just feels right a very comfortable and natural feel. I'm going to replace the T-Handle with the B&M T-Handle that has the button for engage/disengaging a line lock.
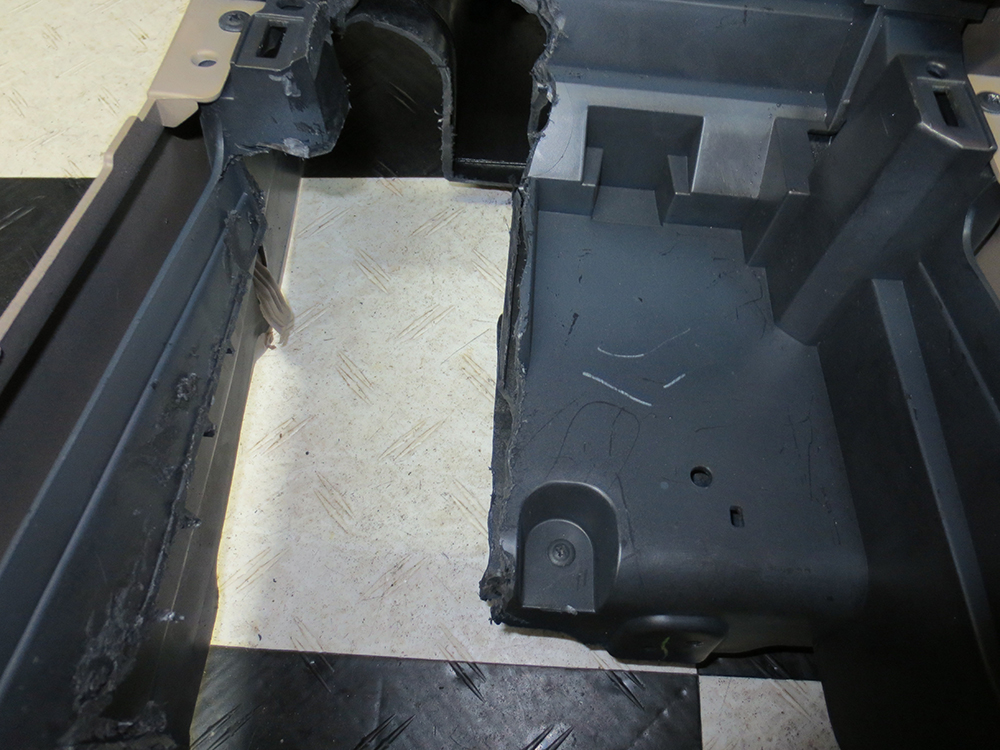
I gutted out clearance using a die grinder with a 3" cutoff wheel and a diamond carbide cutting bit. It aint pretty but it's tight inside so you do the best you can... the butchery

First test fit before any adjustments, you can see it's very low and already hitting the lid area. Good lighting is a must have!
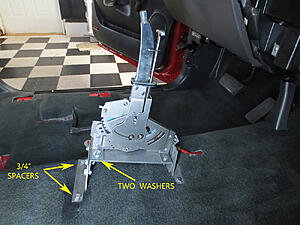
To get the forward placement I needed I adjusted the rear bracket up maxing it out, opposite for the front, 3/4" spacers between the floor and the bracket, two additional washers between the bracket and the shifter base.
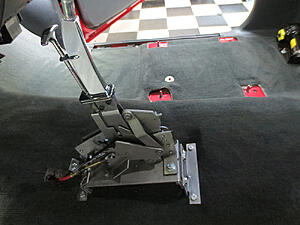
You can see just how high the rear is jacked up forcing the handle forward giving the shifter T-Handle to lid clearance.
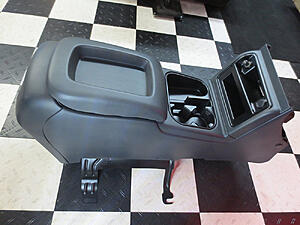
Shot a couple more coats of graphite on the console.
All finished!
Most of the "how to's" I read had issues with very little clearance with the shift **** and the consoles lid. I worked on the placement with that in mind. I jacked up the rear of the mounting bracket tweaking it until I couldn't get anymore forward movement. This gave me the clearance for the lid but it left little room for the boot and the front of the cup holder. In PARK it would lift the boot on the opposite end. I used a zip tie sewn through the bottom of the boot and through the cup holder to hold it down.
I'm loving the way this thing shifts now plus the cool factor of the way it looks is great too! It just feels right a very comfortable and natural feel. I'm going to replace the T-Handle with the B&M T-Handle that has the button for engage/disengaging a line lock.
I gutted out clearance using a die grinder with a 3" cutoff wheel and a diamond carbide cutting bit. It aint pretty but it's tight inside so you do the best you can... the butchery
First test fit before any adjustments, you can see it's very low and already hitting the lid area. Good lighting is a must have!

To get the forward placement I needed I adjusted the rear bracket up maxing it out, opposite for the front, 3/4" spacers between the floor and the bracket, two additional washers between the bracket and the shifter base.

You can see just how high the rear is jacked up forcing the handle forward giving the shifter T-Handle to lid clearance.

Shot a couple more coats of graphite on the console.

All finished!


The following users liked this post:
RedXray (01-08-2019)
01-25-2019, 10:04 PM
#79
100% Redneck
Thread Starter

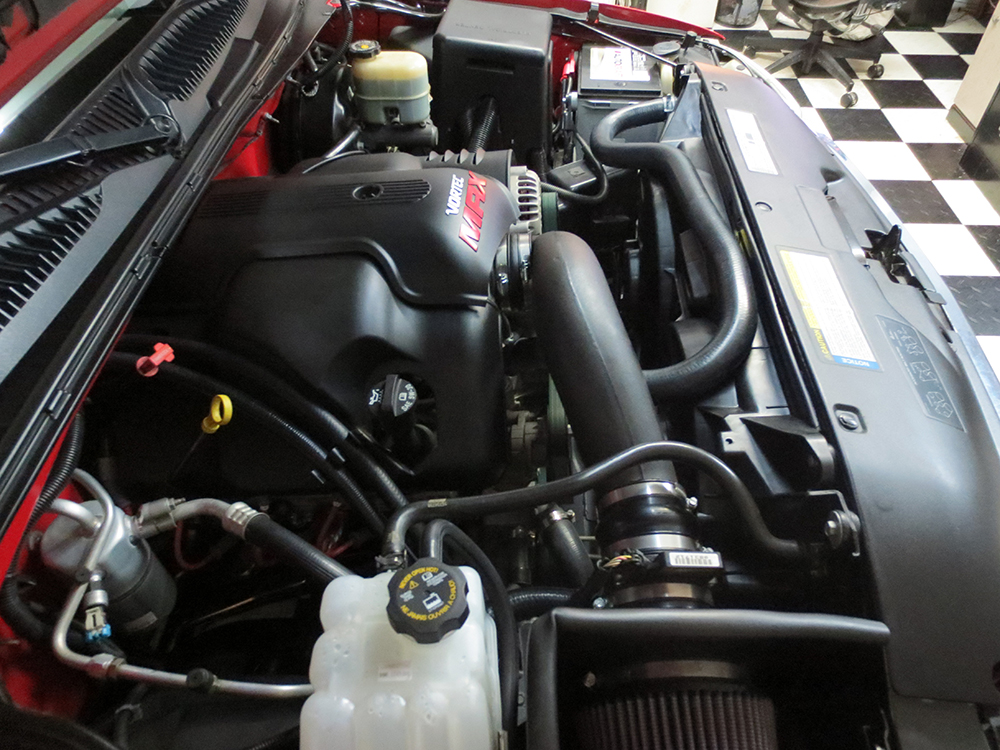
Upgrading from the mechanical fan to electric...
Turned the fans on in HP Tuners and everything is working correctly, both fans on high with the A/C on. Test drive tonight, turned on defrost (a/c cycle) and volts dropped below 14v a few seconds with the lights on. Doing the 130 Amp alternator next with a 4 AWG charge wire.


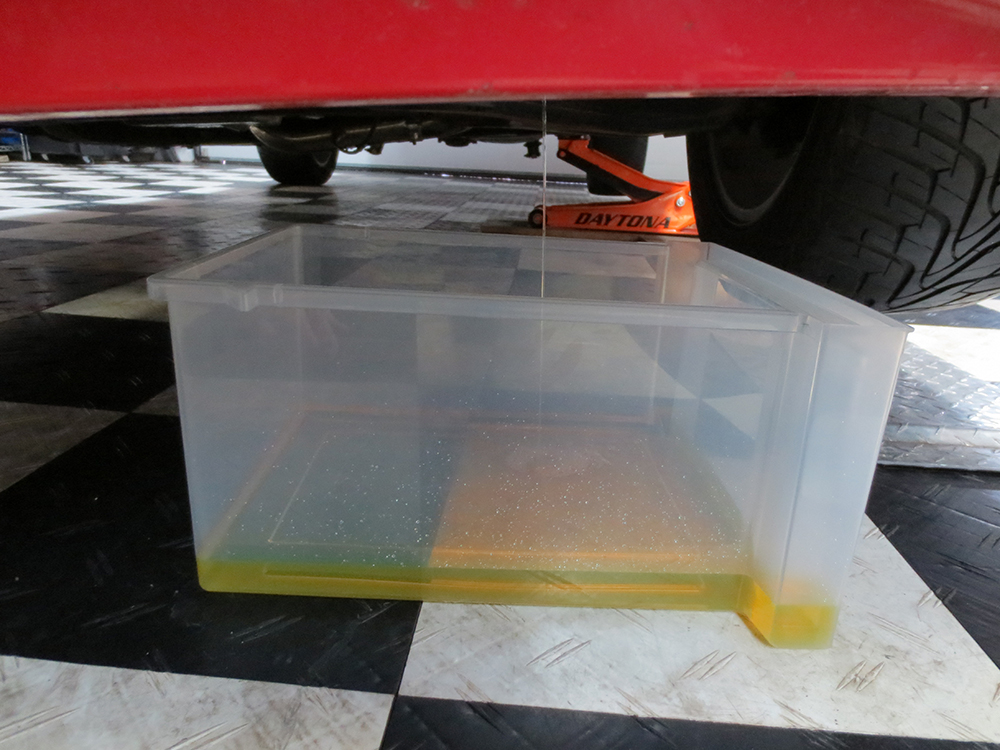
While the coolant is slowly draining I started wiring up the harness.
So much more room to work, with the mechanical shroud gone


The following users liked this post:
Jeff71 (01-28-2019)
01-26-2019, 10:51 AM
#80
i swapped my 04 over to ls1 efans but i picked up a 34" radiator and stock fans going to swap them in when i change the engine, like you the first thing i noticed was all the room it made then how the truck felt a little more snappy when i cracked the throttle blade
your missing a the upper radiator hose support clamp, it go's in a hole in the fan housing (top center) then clamps around the hose to hold it in place, i wouldn't of mentioned it but your truck it so nicely detailed felt i had to
how are you liking the 4.10 gear? my last truck was lq4/4l80e/4.10 power wise i liked it but for a daily driver with a 29" tire it sucked down fuel and expressway driving the rpms was always over 2800. im thinking of leaving the 3.42's in this truck
The following users liked this post:
RedXray (01-29-2019)