2001 Frame up build
 Oct 14, 2007 | 11:25 PM
#1
Thread Starter
TECH Fanatic
iTrader: (12)
Joined: Mar 2005
Posts: 1,513
Likes: 6
From: Massachussetts
So most of you have seen my truck go through its growth over the couple years, lowered 4wd 6.0, then I decided to swap to shock waves and get rid of the 4wd. Well 50miles later my transmission blew for the 4th time and I made a whole thread about that *******.
April 2007
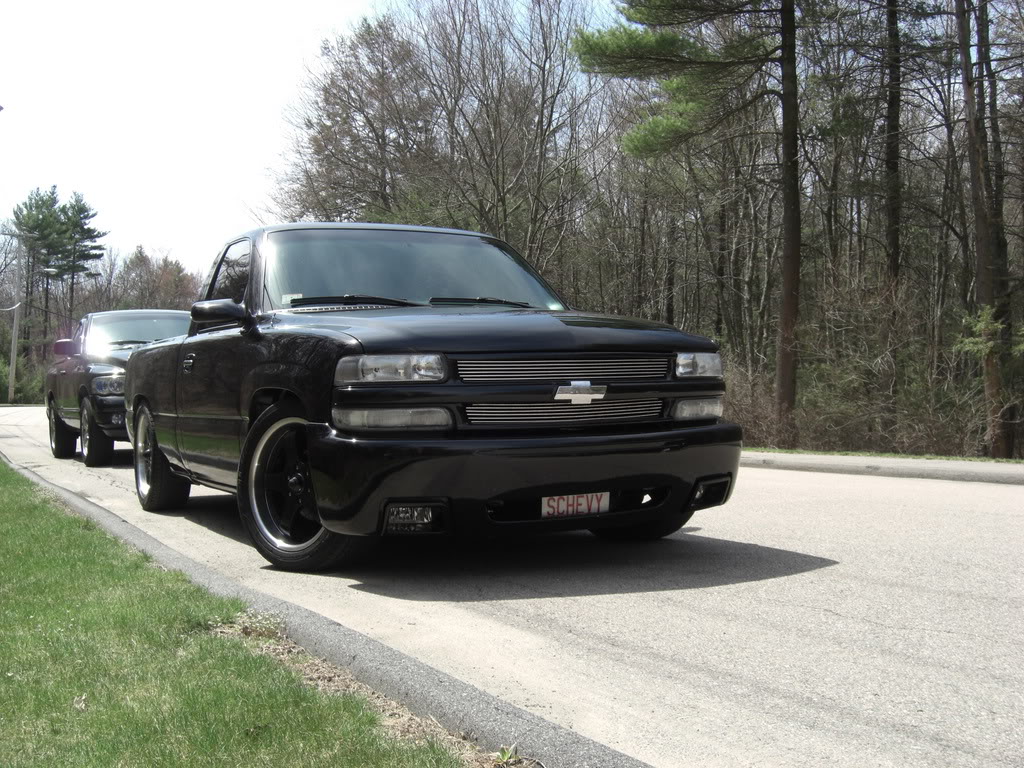
Well I made the decision to put it in the garage and build it to exactly what I wanted... which is where I stand now. I bought a 1999 RCSB for a daily drive, I own the black one so Im not building any credit there so this way I build a little credit and have a reliable truck. So the tear down begins...
A couple months have gone by and I have torn down my truck into every possible piece imaginable... I have decided that if Im going to do it, then Im going to do it right and do it ALL.
This truck I want to build to be simple and aggressive, my goal is to make it look like it was supposed to be like that, ie: instead of cups to space in a coil pocket, run a torsion setup so it looks like the truck was built for air.
Currently my plans are vaguely as followed...
From now till Spring 2010:
Rolling Chassis
- To be designed and fabricated by myself
- Factory suspension moved upwards to accommodate lower ride height
- Motor moved back and up to transfer weight and clear steering
- McGaughys Spindles, RideTech Control arms, and double adjustable shockwaves, Muscle Bar up front
- F9100s, double adjustable billet shocks, Satchell adjustable 4-link out back
- GM 14bolt 9.5” SF narrowed rearend
- Converted to 5x5 Lug Pattern
- Powder coated Hammered Black Satin finish, all components gloss black
- Custom Fuel Cell Behind rear end
- All fuel, air, and brake lines to be hard stainless, with braided to moving parts
- Intro Wheels GT Sports 20x8.5 Front w/ Toyo Proxy STII 275/40/R20
- Intro Wheels GT Sports 20x15 Rear w/ MT Sportsman SR 29x18x20
- Wilwood 16” Front Rotors 6 piston calipers
- Wilwood 14” Rear Rotors 4 piston calipers
- GM HD Hydroboost Brake System
Exterior
- Water based True Black w/ blue toner
- Ceramic Clear Coat (same as new Mercedes)
- Body dropped bed 5.5” to hide all suspension components and appear “stock”
- Stock Wheel tubs widened to accommodate 20x15s, again to appear “stock”
- Rear tailgate will close and open to appear "stock"
- Shaved tailgate, license plate, candied and smoked tail lights
- Exhaust tips through the roll pan to mimic the front bumper
- Escalade Handles
- Cal-Vu Mirrors
- Front bumper is a modified SS bumper
- Hood will be raised across the whole back
- Xenarc Headlights with 4300k HIDs
- Clear Marker Lenses
Interior
- All plastic panels will be dyed black, factory satin finish.
- Escalade top dash pad, wood grain on passenger side to be painted black, and “Cadillac” replaced by “SCHEVY”
- Escalade Dash Bezel
- 03 Console w/ T56 shifter while retaining cup holders.
- Black headliner, and visors to match
- Black Carpeting
- Modified Stock Bucket seats, reworked into more of a “race bucket”
- Denali Gauges, all interior dash lights to be orange (only color on whole truck, while the rest is black and billet)
- Sounds system is TBA, but amp will be hidden along with two 10”shallow mount subwoofers behind each seat.
Drivetrain
- 402 CI LQ4 Specs TBA Est. HP 750rwhp
- Custom Turbo Kit by TurboDan Single S85mm all stainless tubular headers, complete one off kit.
- T56 6 Speed Transmission
- 4.88 gears w/ Detroit Locker in the 14-bolt
- Exact Specs TBA on complete drivetrain
Now for pictures...
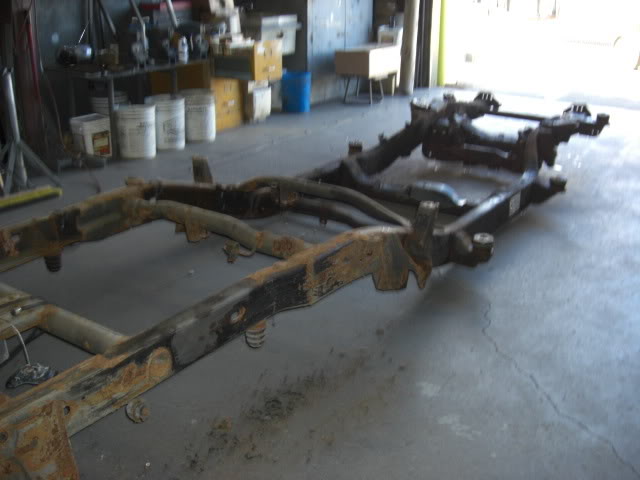
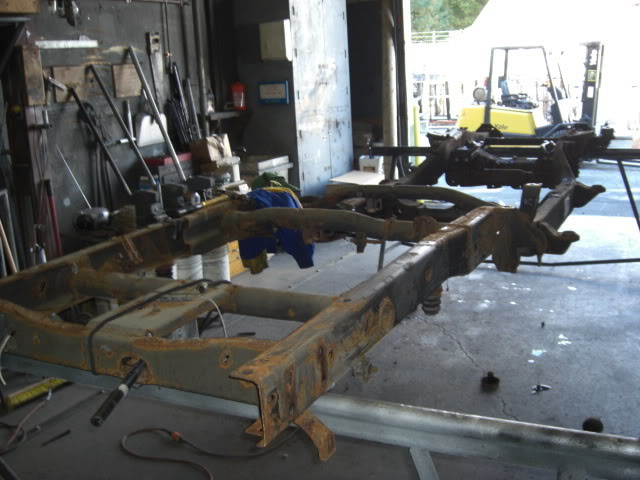
2WD Frame $400 buck from a Salvage yard in NY, made for a nice roadtrip, little rust compared to my 4wd, but nothing a sandblast wont take care of.
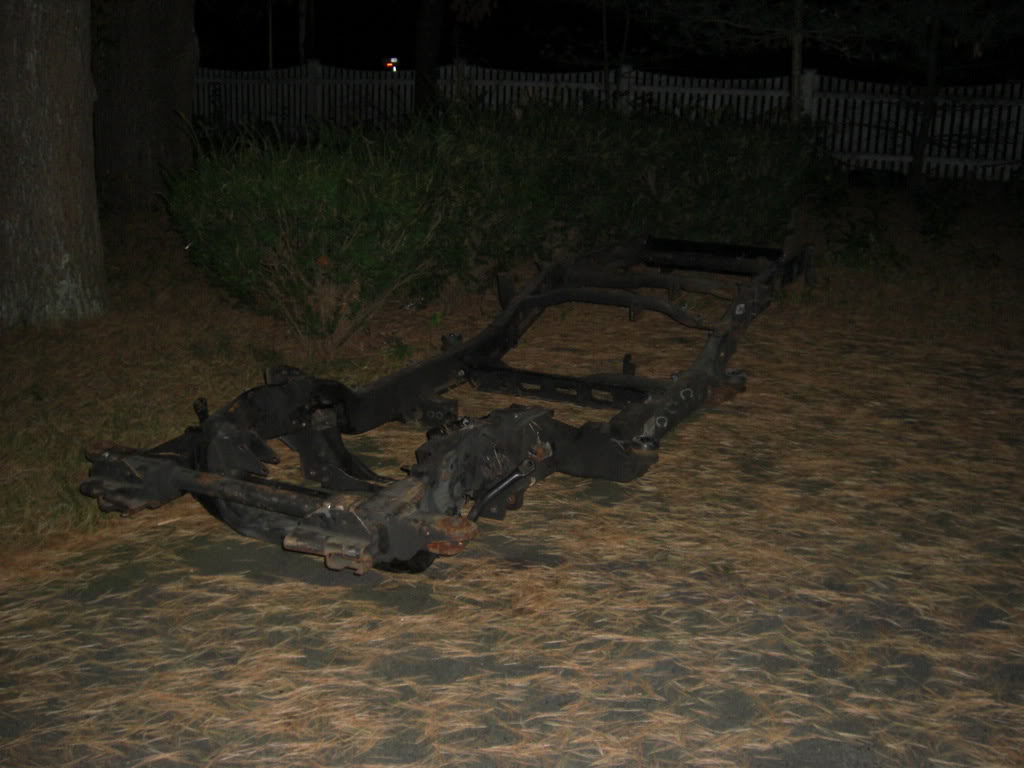
my 4wd frame currently
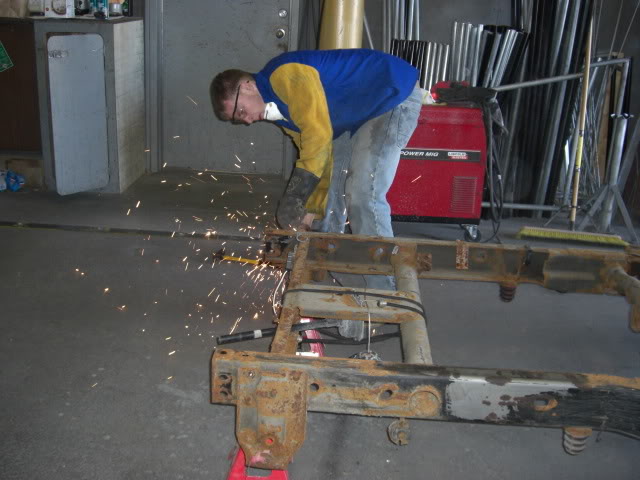
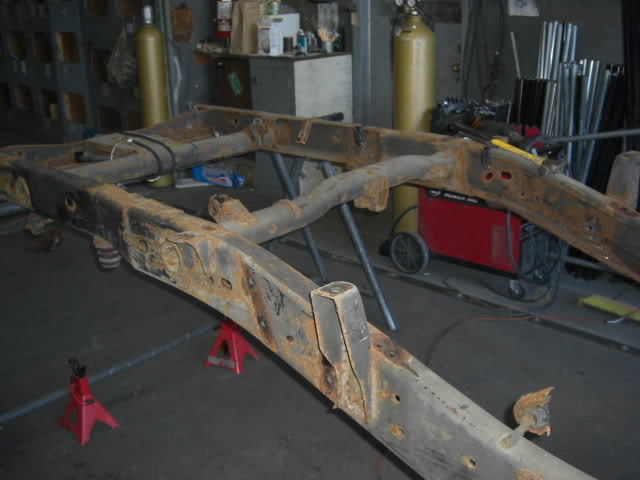
Started to cut off what I dont need on the new frame
Got it at a better working height, figured Id start cleaning it see how much I can get done before its blasted
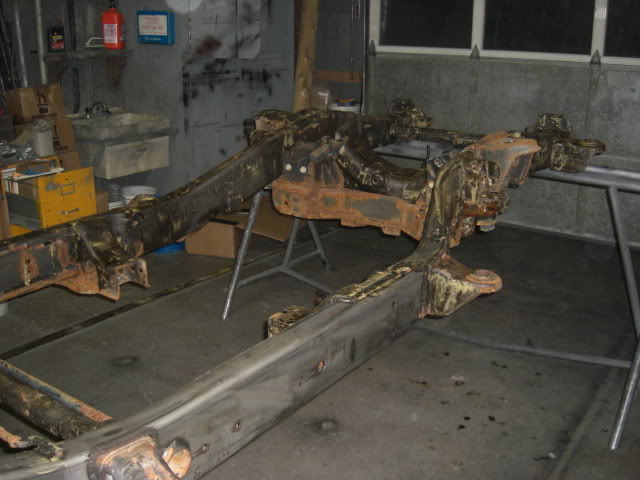
Brushed on some aircraft stripper to help loosen it up, god damn does that stuff burn
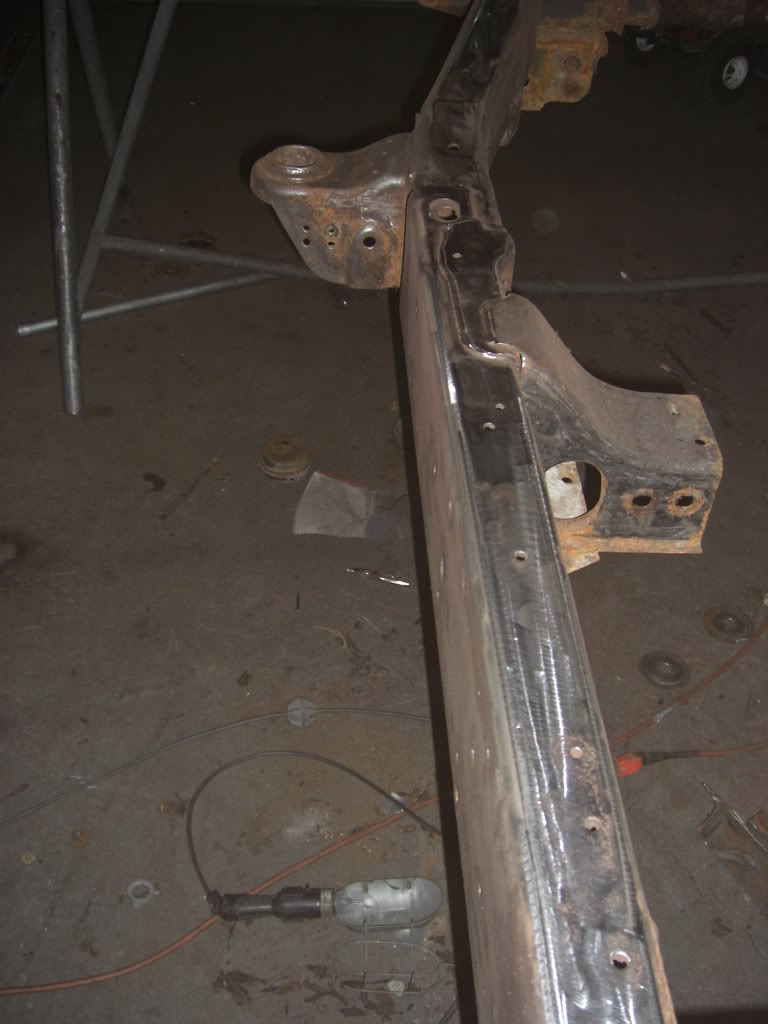
Its coming clean but still alot of work to go, hopefully I get a good price and have it blasted so its mint before paint and PC
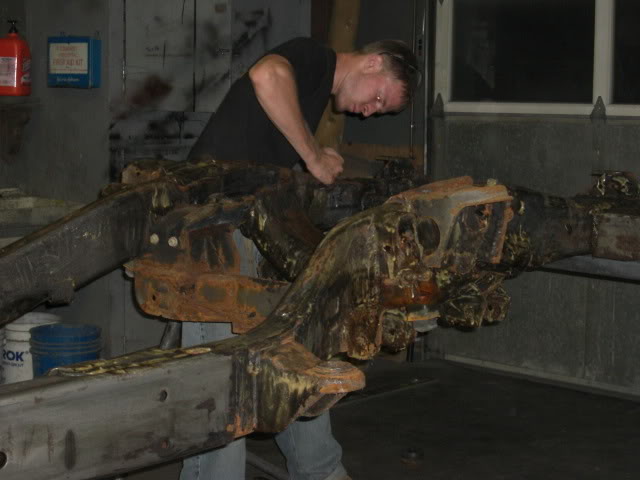
No more coil pockets, who needs those anyway.
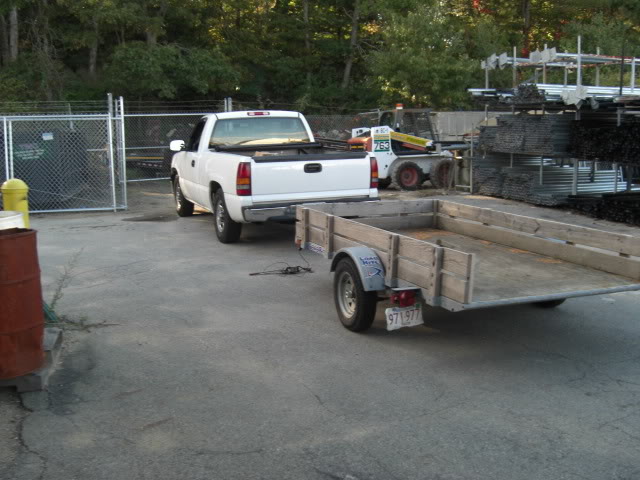
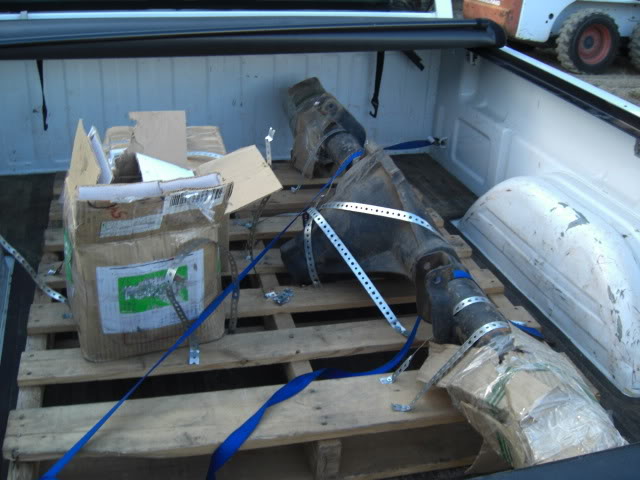
The daily driver, the transmission hated pulling that trailer with a frame on it
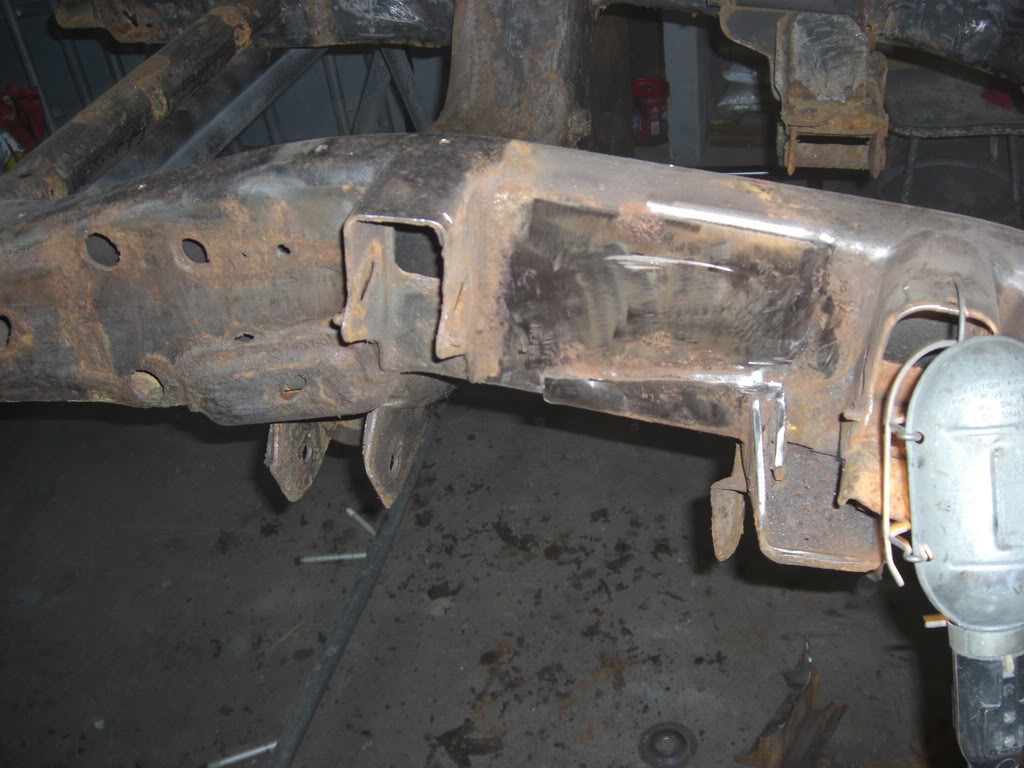
What do we have here?
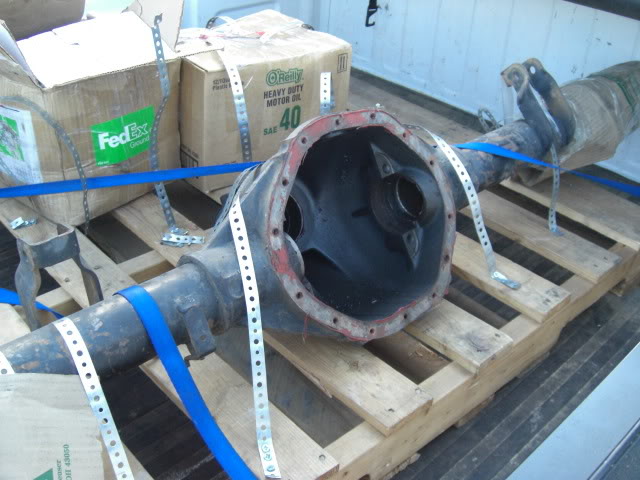
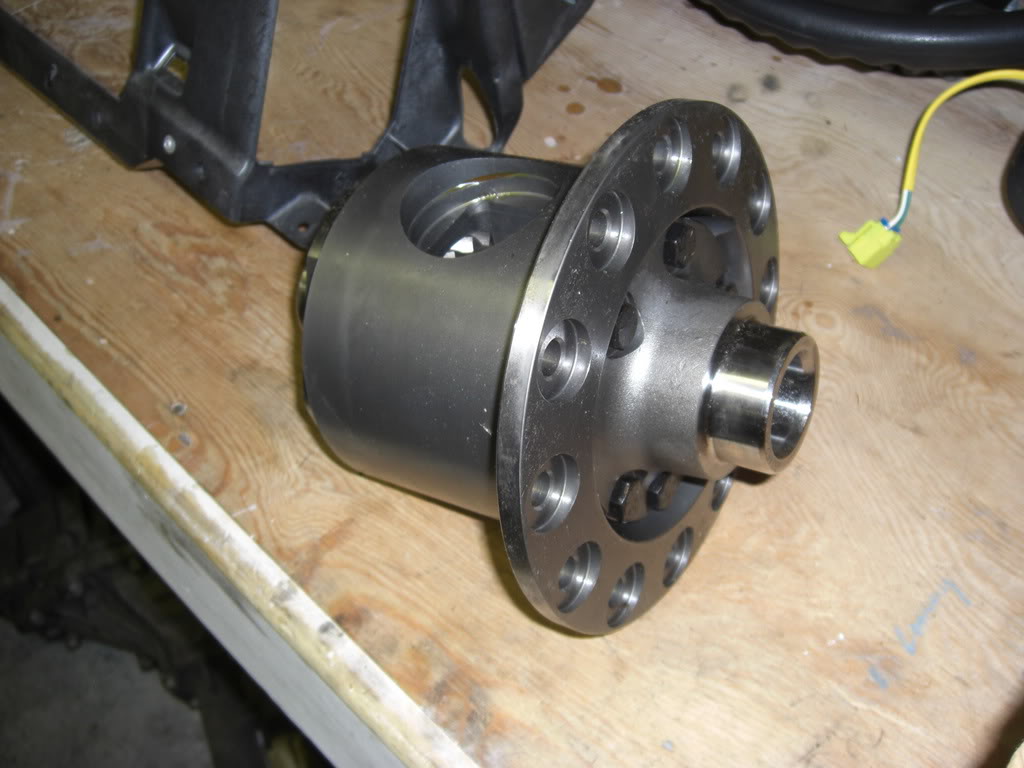
Ahh... must be the 9.5" 14bolt
Street friendly?
April 2007
Well I made the decision to put it in the garage and build it to exactly what I wanted... which is where I stand now. I bought a 1999 RCSB for a daily drive, I own the black one so Im not building any credit there so this way I build a little credit and have a reliable truck. So the tear down begins...
A couple months have gone by and I have torn down my truck into every possible piece imaginable... I have decided that if Im going to do it, then Im going to do it right and do it ALL.
This truck I want to build to be simple and aggressive, my goal is to make it look like it was supposed to be like that, ie: instead of cups to space in a coil pocket, run a torsion setup so it looks like the truck was built for air.
Currently my plans are vaguely as followed...
From now till Spring 2010:
Rolling Chassis
- To be designed and fabricated by myself
- Factory suspension moved upwards to accommodate lower ride height
- Motor moved back and up to transfer weight and clear steering
- McGaughys Spindles, RideTech Control arms, and double adjustable shockwaves, Muscle Bar up front
- F9100s, double adjustable billet shocks, Satchell adjustable 4-link out back
- GM 14bolt 9.5” SF narrowed rearend
- Converted to 5x5 Lug Pattern
- Powder coated Hammered Black Satin finish, all components gloss black
- Custom Fuel Cell Behind rear end
- All fuel, air, and brake lines to be hard stainless, with braided to moving parts
- Intro Wheels GT Sports 20x8.5 Front w/ Toyo Proxy STII 275/40/R20
- Intro Wheels GT Sports 20x15 Rear w/ MT Sportsman SR 29x18x20
- Wilwood 16” Front Rotors 6 piston calipers
- Wilwood 14” Rear Rotors 4 piston calipers
- GM HD Hydroboost Brake System
Exterior
- Water based True Black w/ blue toner
- Ceramic Clear Coat (same as new Mercedes)
- Body dropped bed 5.5” to hide all suspension components and appear “stock”
- Stock Wheel tubs widened to accommodate 20x15s, again to appear “stock”
- Rear tailgate will close and open to appear "stock"
- Shaved tailgate, license plate, candied and smoked tail lights
- Exhaust tips through the roll pan to mimic the front bumper
- Escalade Handles
- Cal-Vu Mirrors
- Front bumper is a modified SS bumper
- Hood will be raised across the whole back
- Xenarc Headlights with 4300k HIDs
- Clear Marker Lenses
Interior
- All plastic panels will be dyed black, factory satin finish.
- Escalade top dash pad, wood grain on passenger side to be painted black, and “Cadillac” replaced by “SCHEVY”
- Escalade Dash Bezel
- 03 Console w/ T56 shifter while retaining cup holders.
- Black headliner, and visors to match
- Black Carpeting
- Modified Stock Bucket seats, reworked into more of a “race bucket”
- Denali Gauges, all interior dash lights to be orange (only color on whole truck, while the rest is black and billet)
- Sounds system is TBA, but amp will be hidden along with two 10”shallow mount subwoofers behind each seat.
Drivetrain
- 402 CI LQ4 Specs TBA Est. HP 750rwhp
- Custom Turbo Kit by TurboDan Single S85mm all stainless tubular headers, complete one off kit.
- T56 6 Speed Transmission
- 4.88 gears w/ Detroit Locker in the 14-bolt
- Exact Specs TBA on complete drivetrain
Now for pictures...
2WD Frame $400 buck from a Salvage yard in NY, made for a nice roadtrip, little rust compared to my 4wd, but nothing a sandblast wont take care of.
my 4wd frame currently
Started to cut off what I dont need on the new frame
Got it at a better working height, figured Id start cleaning it see how much I can get done before its blasted
Brushed on some aircraft stripper to help loosen it up, god damn does that stuff burn
Its coming clean but still alot of work to go, hopefully I get a good price and have it blasted so its mint before paint and PC
No more coil pockets, who needs those anyway.
The daily driver, the transmission hated pulling that trailer with a frame on it
What do we have here?
Ahh... must be the 9.5" 14bolt
Street friendly?
Last edited by GMracer; Dec 29, 2011 at 09:54 AM.
Oct 14, 2007 | 11:25 PM
#2
Thread Starter
TECH Fanatic
iTrader: (12)
Joined: Mar 2005
Posts: 1,513
Likes: 6
From: Massachussetts
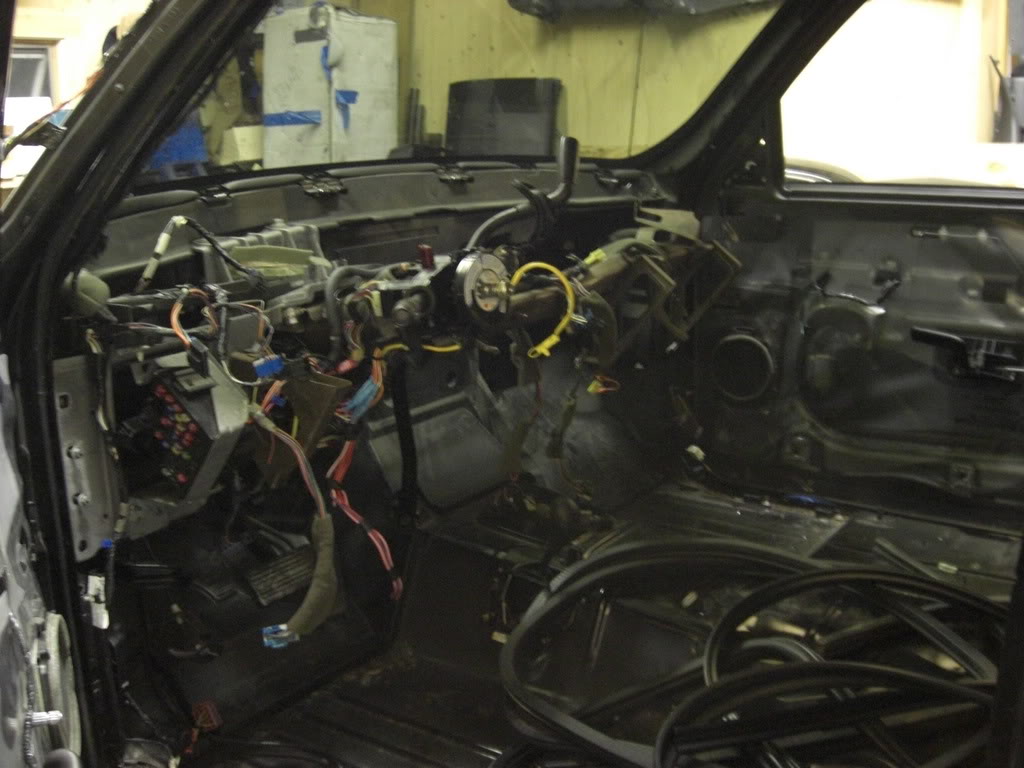
Inside of my cab, ready for wires to be worked, ALL of them :flame:
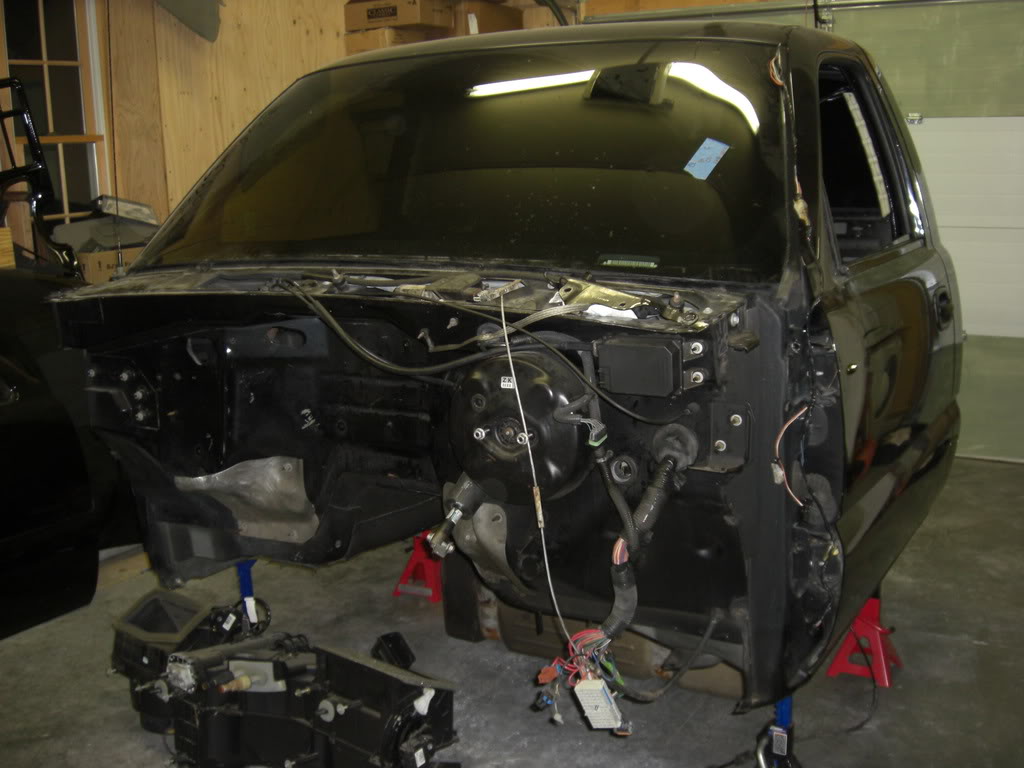
Cab with 15% on shield haha, not staying tho.

Some parts
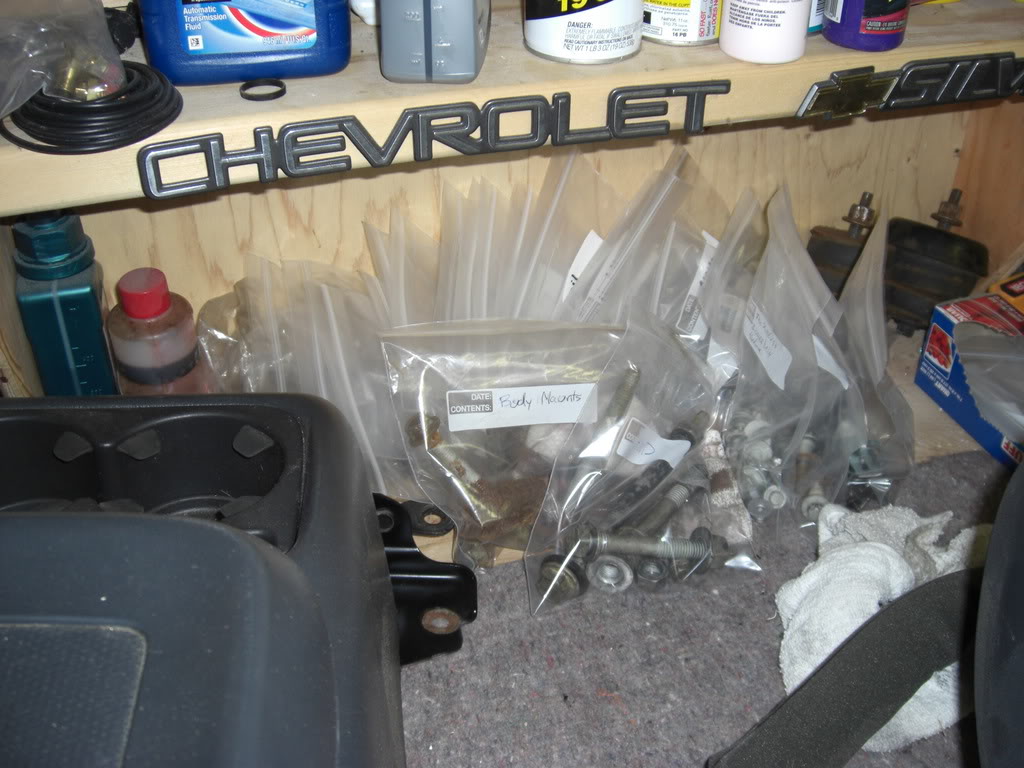
All the nuts and bolts, most likely being replaced with new.
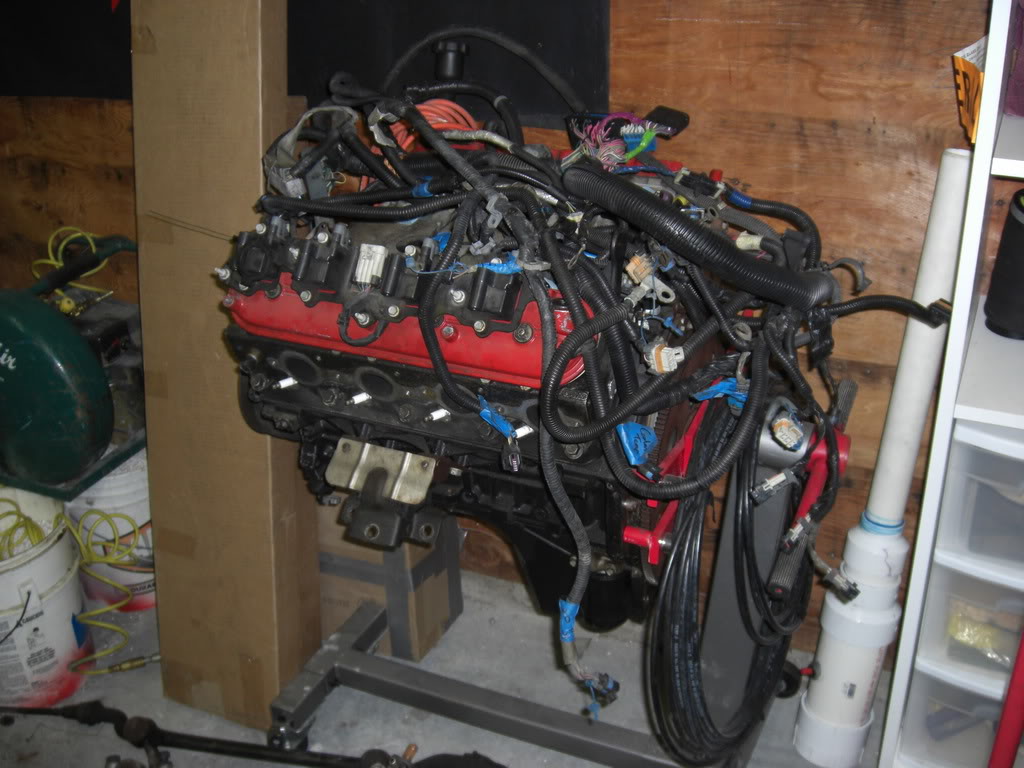
6.0 with the harness that needs to be stripped down and reworked also
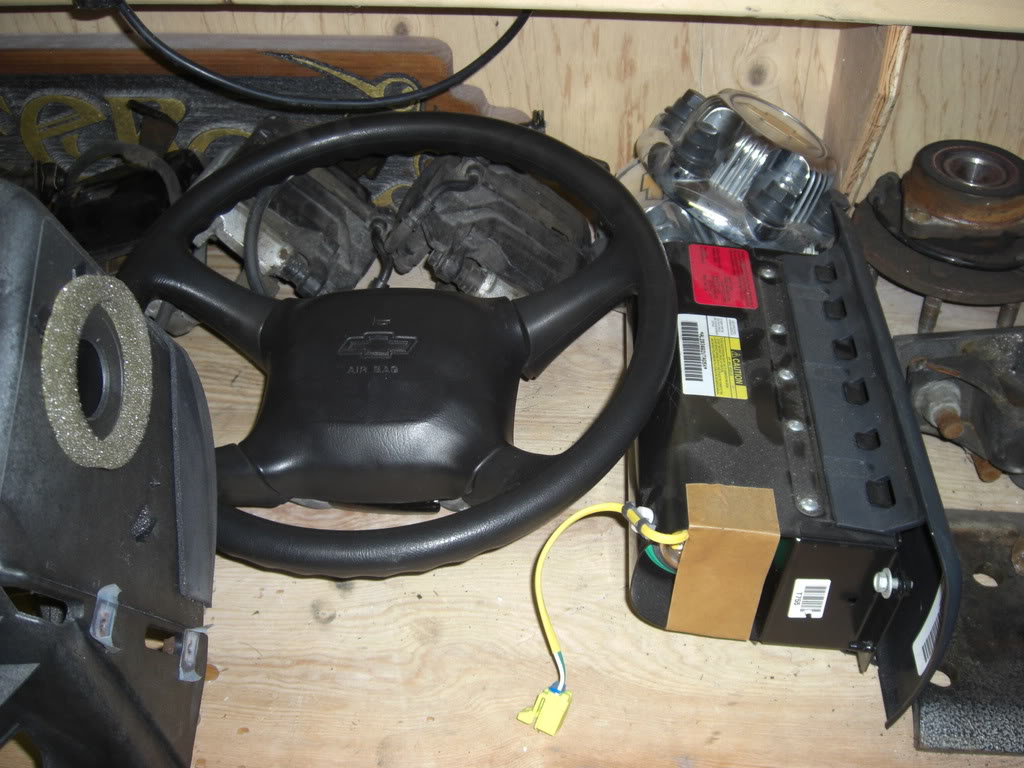
No airbags? 5pt harness then...
Cando smoothie pan
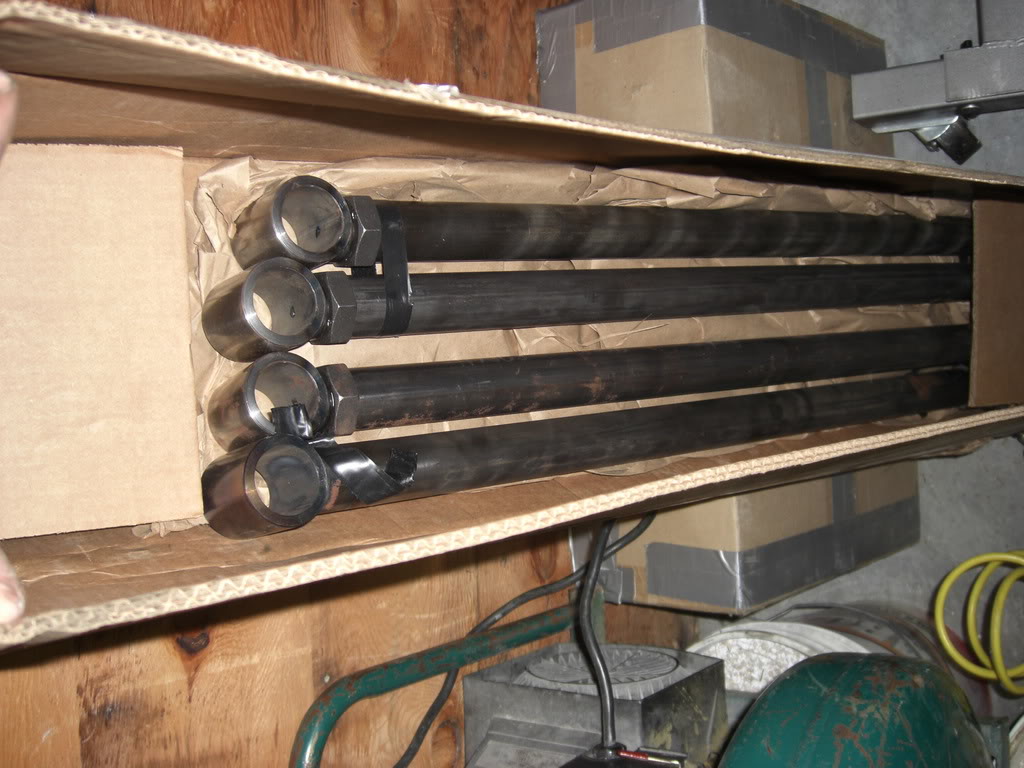
SD 4link, 33" long
Oct 14, 2007 | 11:30 PM
#3

What are you going to use to coat/seal the frame? POR 15?? IMO I would use eastwoods products and undercoating setup. That is what I am using on my stang and on a previous build and after 4 years the rust never came back.
 Oct 14, 2007 | 11:33 PM
#6
Oct 14, 2007 | 11:48 PM
#7
Thread Starter
TECH Fanatic
iTrader: (12)
Joined: Mar 2005
Posts: 1,513
Likes: 6
From: Massachussetts
Yes I was planning on using it.