

2000 Chevy Silverado project "Charlie Murphy"


 Oct 12, 2012 | 05:21 PM
#102

Nothing much really. I bought a 2005 LQ4 with 115K on it. I'm going to swap in an LS6 cam, valve springs and oil pump. Put in new lifter guides and LS7 lifters. I still need to buy pushrods. I haven't found a deal on any yet. I'm going with LS9 head gaskets and eBay head studs.
I think it's your typical LQ4 freshen up for boost.
I'm going to try to install my SC3000 stall converter, 4L80E with HD2 shift kit and NP149 on my next vacation. After that I have to start messing around with tuning. It should be an interesting learning experience.
I think it's your typical LQ4 freshen up for boost.
I'm going to try to install my SC3000 stall converter, 4L80E with HD2 shift kit and NP149 on my next vacation. After that I have to start messing around with tuning. It should be an interesting learning experience.
 Oct 12, 2012 | 09:06 PM
#104
Oct 12, 2012 | 09:09 PM
#105
This thread should have all the brake swap answers in it:
https://www.performancetrucks.net/fo...v-rear-497499/
https://www.performancetrucks.net/fo...v-rear-497499/
Oct 19, 2012 | 11:21 PM
#106
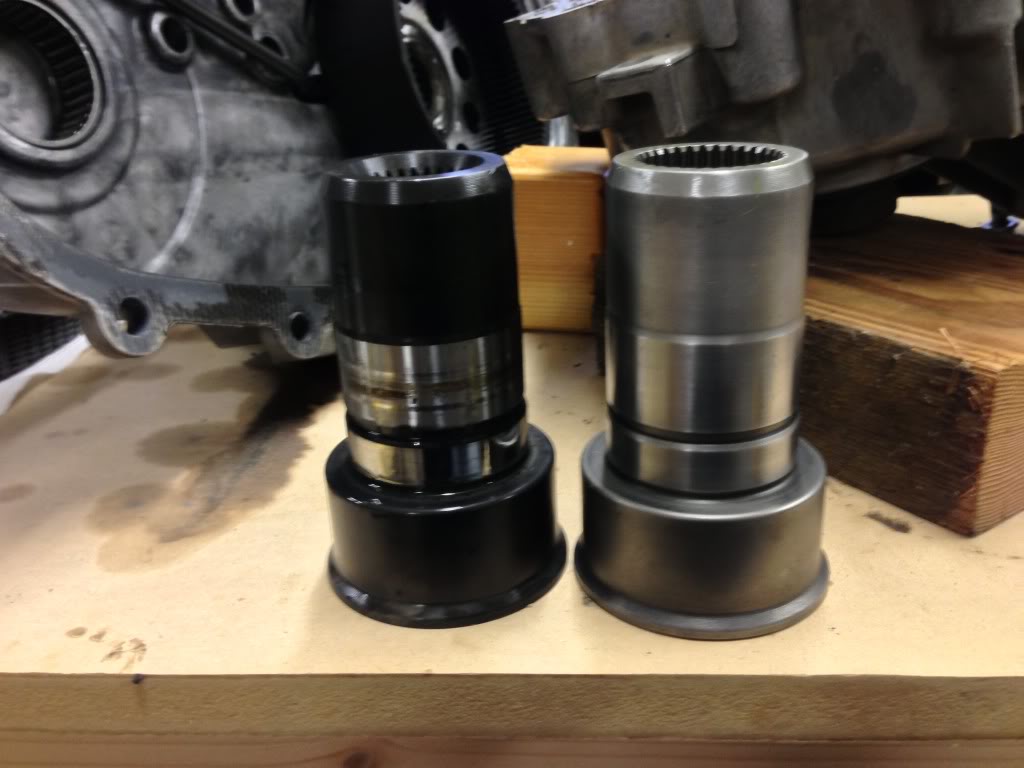
So today I installed my modified 4L80E input shaft. I couldn't find a write up, but I did find this site that has assembly and disassembly instructions.
DenaliTrucks Document Index
First thing I did was get the case apart. There are two spots on the sides to place screw drivers to pry the halves apart.
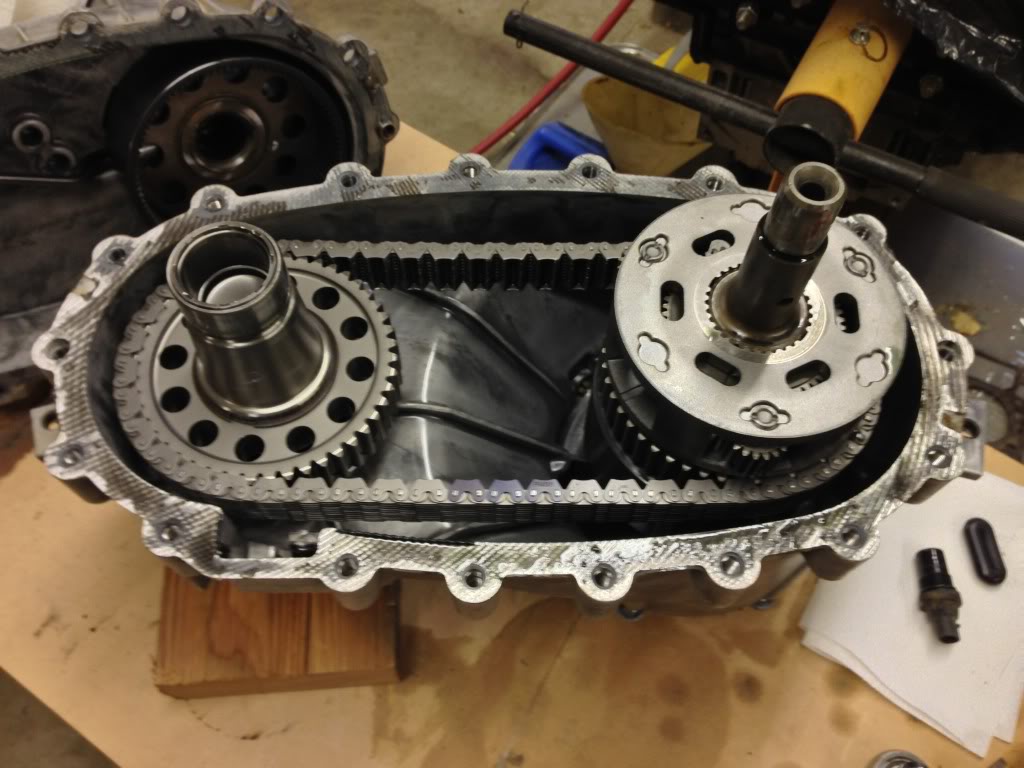
Check out the buildup of silicone bits in the oil pump pickup.
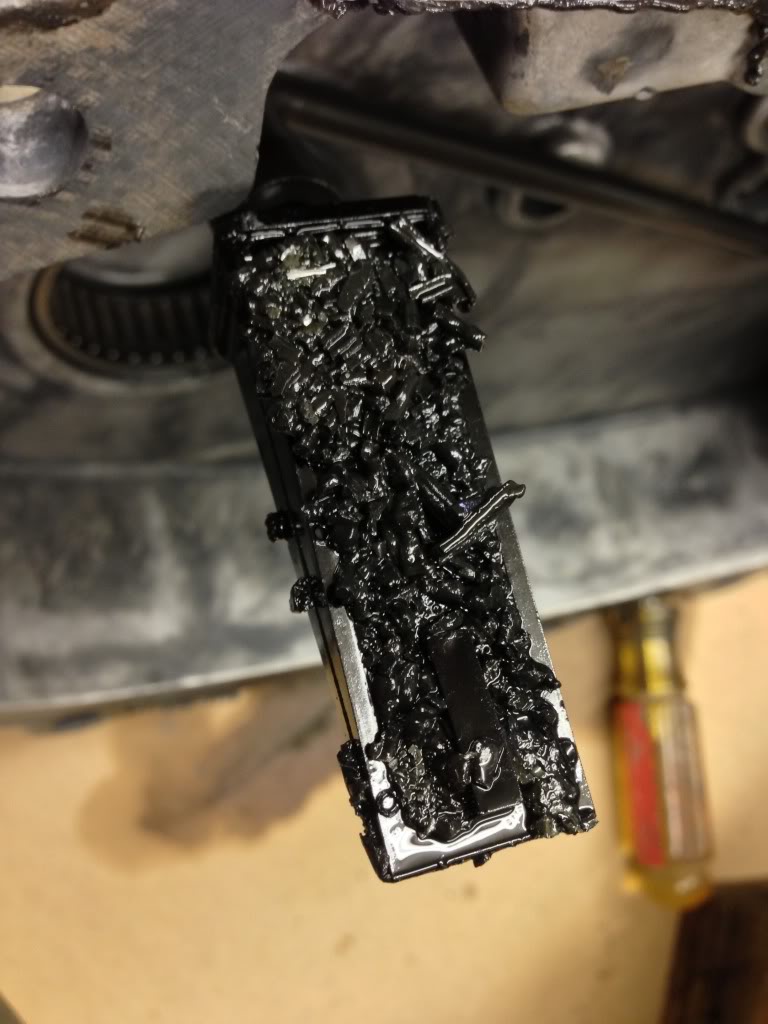
Here's the magnet full of metal shavings.

First I removed this.
Then I removed the sprocket and viscous coupler.
It's hard to see, but there's a clip that needs removed by using a screw driver.

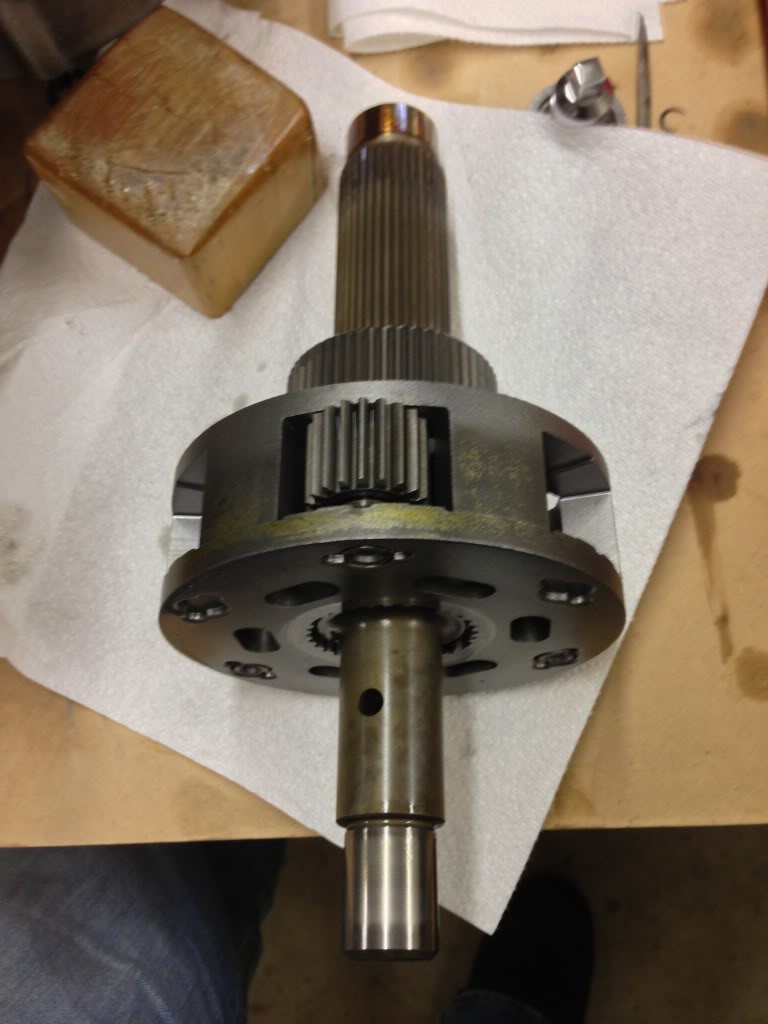
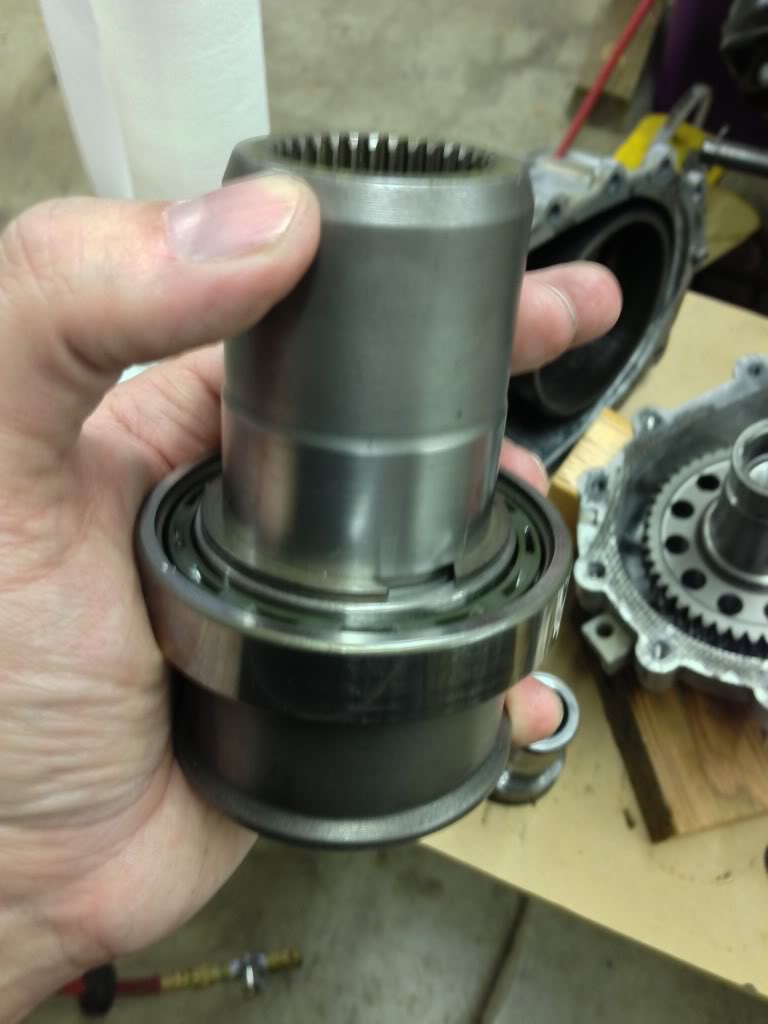
Once you remove that clip the input shaft assembly comes right out.
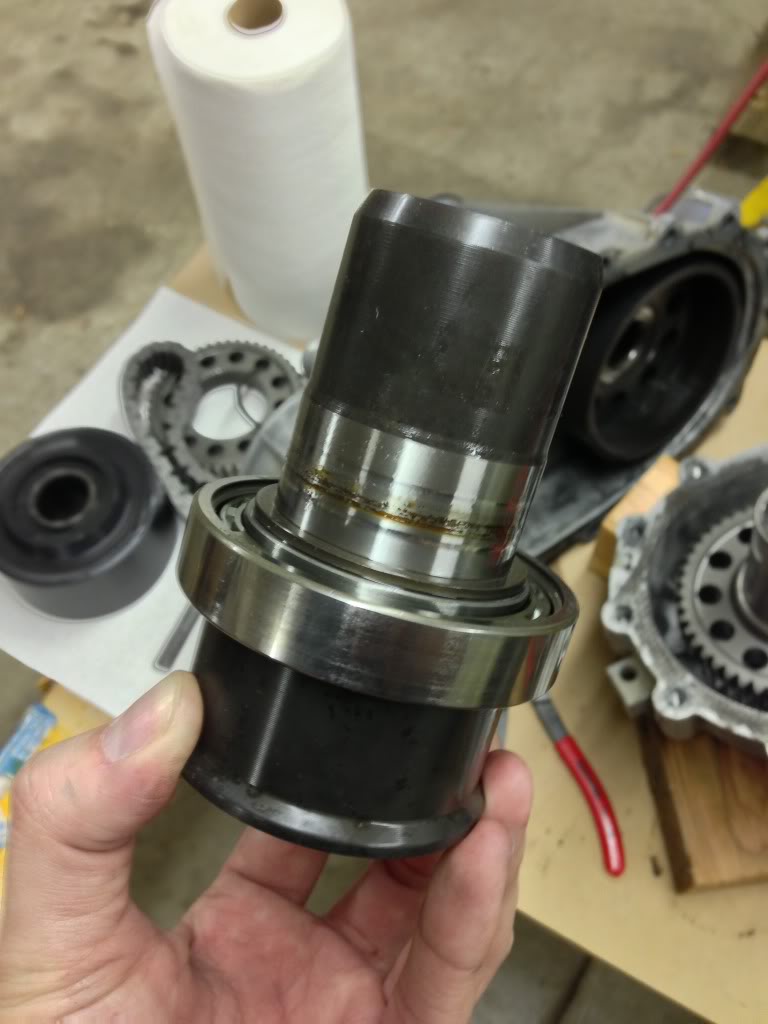
Remove the clip holding the bearing in place.
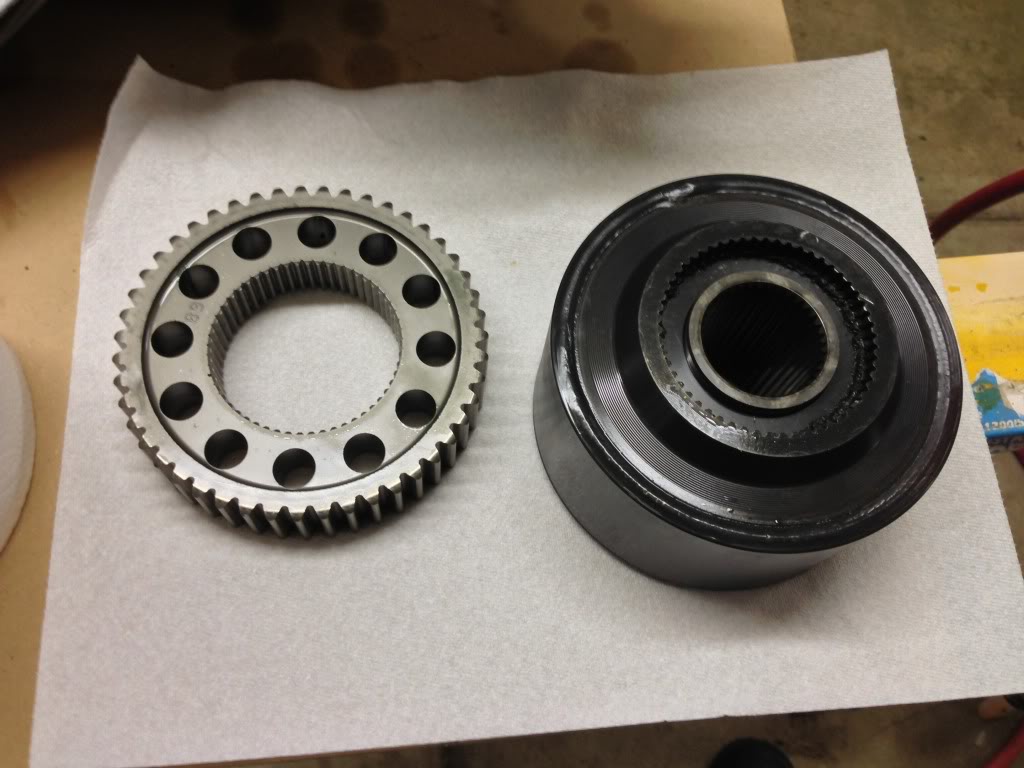
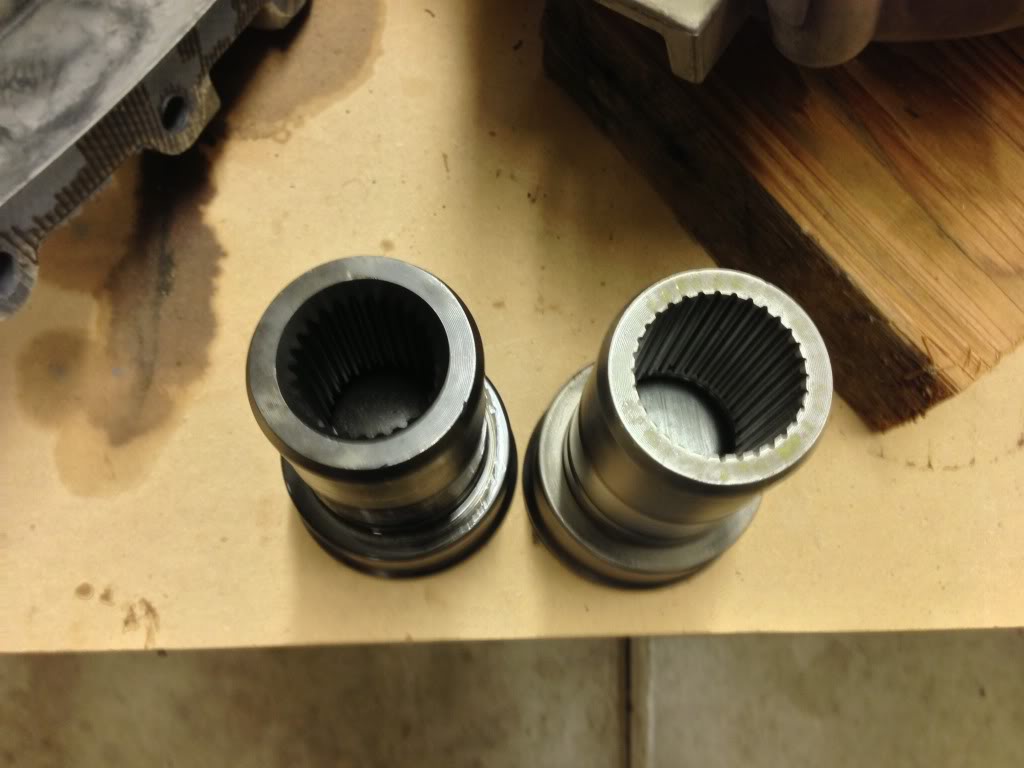
4L60E on the left. 4L80E on the right.
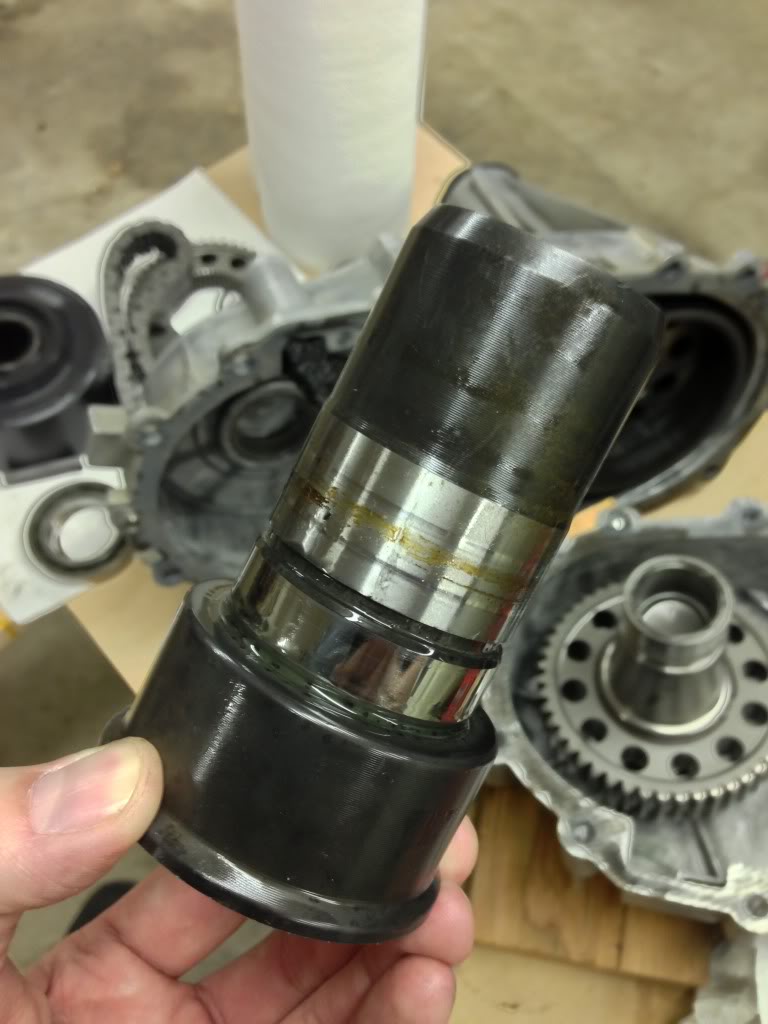
Reinstall on new input shaft.
When you put it back together it helps to keep pressure on the chain like this. Make sure all the splines are lined up as best you can.

I cleaned up the oil pickup tube and magnet.

I cleaned all the silicone off of the surface and then wiped it down with brake cleaner. I reinstalled the magnet and oil pickup tube. Test fit it back together. Then took it apart and laid a bead of silicone on the case halves.
I put it back together and lightly installed all the bolts, waited an hour then torqued them all down to 23ft/lbs.
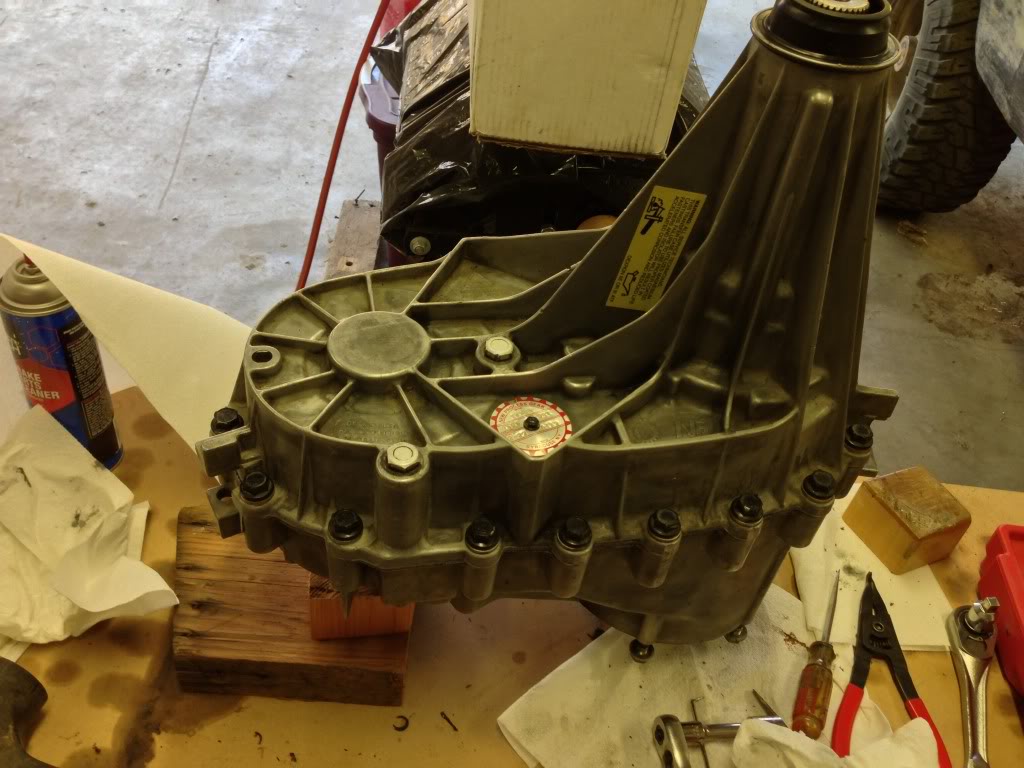
About this time I'm high fiving myself for a job well done. I'm pretty stoked that it went so smoothly. All in all, it was pretty easy. It only took around and hour and a half.
Then it hits me...
I didn't install the pump rub saver plate.
Soooo, it looks like I get to take it all apart one more time. LOL.
Does anyone know what this gasket is called or where to get it?

DenaliTrucks Document Index
First thing I did was get the case apart. There are two spots on the sides to place screw drivers to pry the halves apart.
Check out the buildup of silicone bits in the oil pump pickup.
Here's the magnet full of metal shavings.
First I removed this.
Then I removed the sprocket and viscous coupler.
It's hard to see, but there's a clip that needs removed by using a screw driver.
Once you remove that clip the input shaft assembly comes right out.
Remove the clip holding the bearing in place.
4L60E on the left. 4L80E on the right.
Reinstall on new input shaft.
When you put it back together it helps to keep pressure on the chain like this. Make sure all the splines are lined up as best you can.
I cleaned up the oil pickup tube and magnet.
I cleaned all the silicone off of the surface and then wiped it down with brake cleaner. I reinstalled the magnet and oil pickup tube. Test fit it back together. Then took it apart and laid a bead of silicone on the case halves.
I put it back together and lightly installed all the bolts, waited an hour then torqued them all down to 23ft/lbs.
About this time I'm high fiving myself for a job well done. I'm pretty stoked that it went so smoothly. All in all, it was pretty easy. It only took around and hour and a half.
Then it hits me...
I didn't install the pump rub saver plate.
Soooo, it looks like I get to take it all apart one more time. LOL.
Does anyone know what this gasket is called or where to get it?
Oct 20, 2012 | 12:56 AM
#107


Gasket should be Gm part number 24245110. Double check that, should be able to get from a parts store or transmission parts supply store.
You said there was silicone in the pick up tube??? Was the case sealed with the same type of silicone before you opened it up??? If not, I am curious if this is an indication of a bad viscous coupler.
You said there was silicone in the pick up tube??? Was the case sealed with the same type of silicone before you opened it up??? If not, I am curious if this is an indication of a bad viscous coupler.

 Oct 20, 2012 | 01:12 AM
#109
Gasket should be Gm part number 24245110. Double check that, should be able to get from a parts store or transmission parts supply store.
You said there was silicone in the pick up tube??? Was the case sealed with the same type of silicone before you opened it up??? If not, I am curious if this is an indication of a bad viscous coupler.
You said there was silicone in the pick up tube??? Was the case sealed with the same type of silicone before you opened it up??? If not, I am curious if this is an indication of a bad viscous coupler.
There was little bits of buildup from silicone all over the place.
Sure. I was actually planning on PMing you about it.
Last edited by iregret; Oct 25, 2012 at 01:24 AM.
Oct 25, 2012 | 01:22 AM
#110
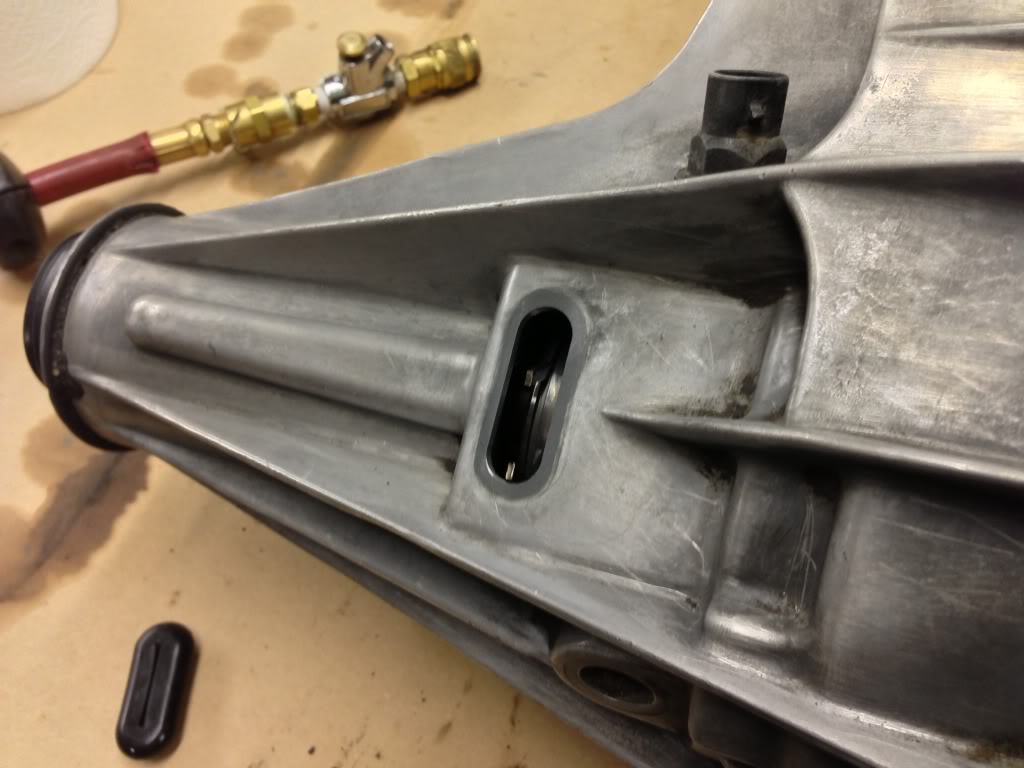
So I took it apart to install the pump rub saver plate. It went faster than I expected.
You split the halves just like before. Take the half that has the oil slinger in it and remove the plug and speed sensor.
Now, I had bought these snap ring pliers just for this. The problem is, they just don't open the snap ring up wide enough. So I took some scrap wood and temporarily taped them on there.
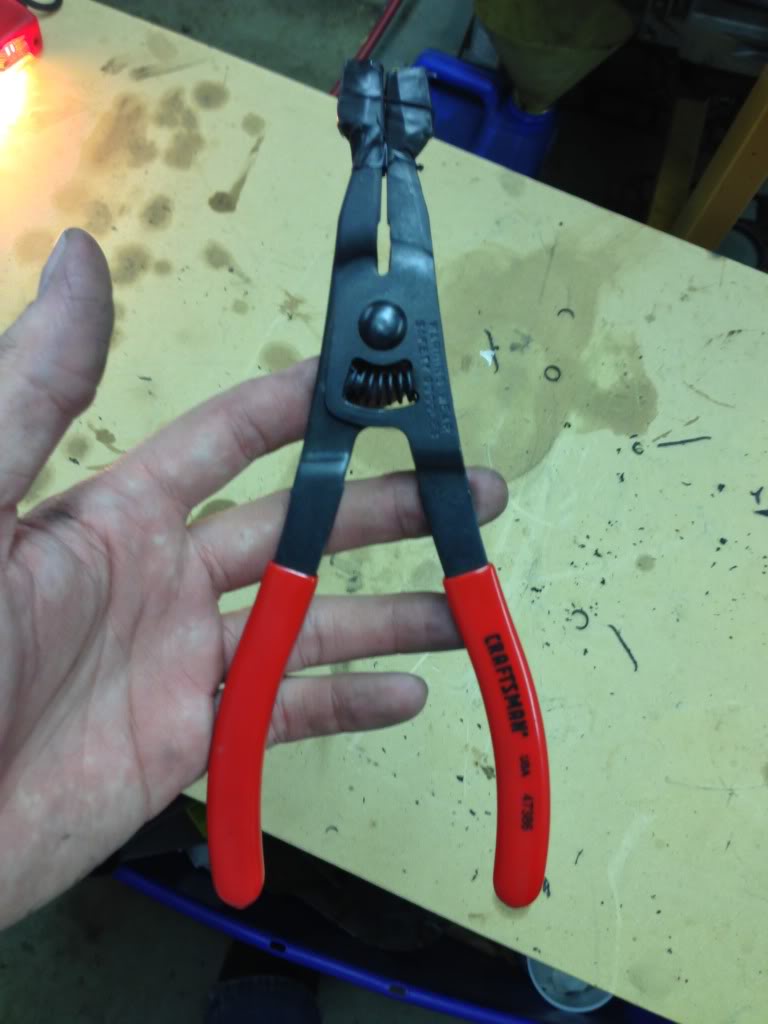
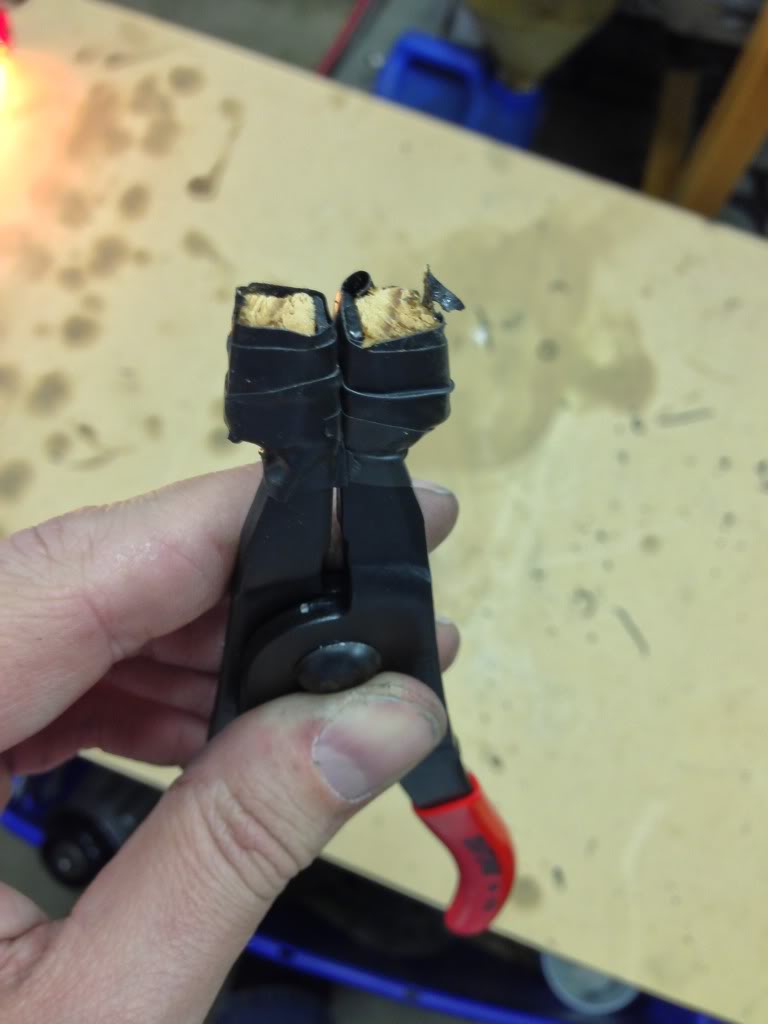
Kind of ghetto I know, but it worked.
Here's the clip Chevy put in. Often times its broken. I guess I really lucked out.
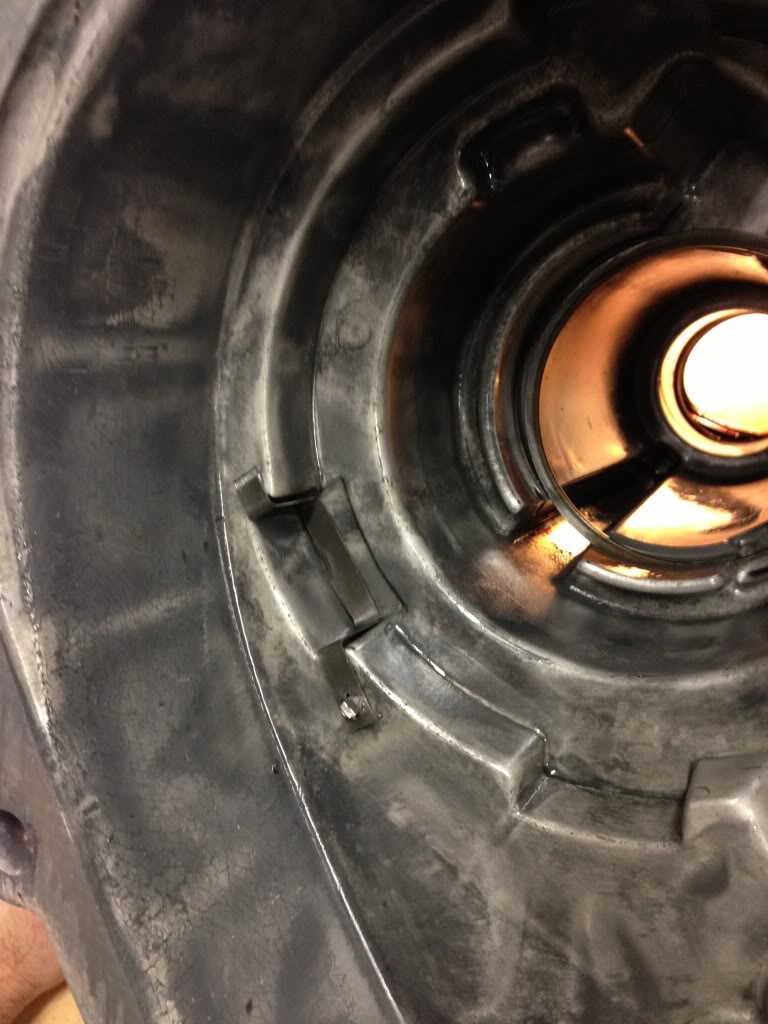
Even though the clip was there and not broken, you can see where it's rubbing through.
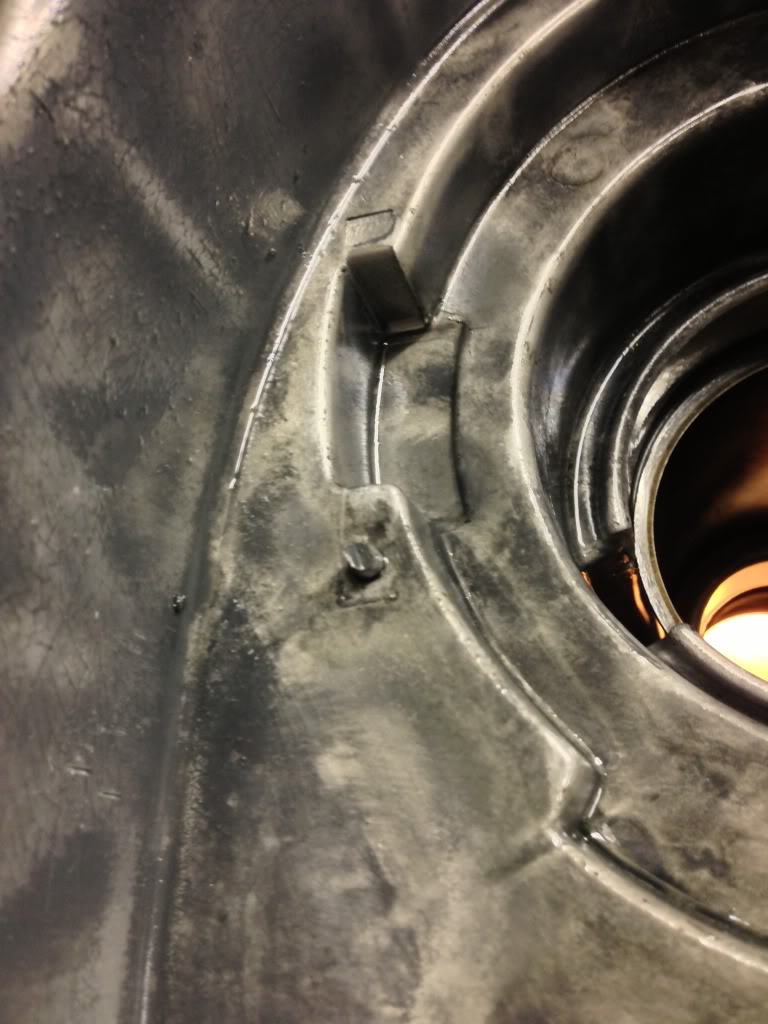
Here's the case saver in its place.
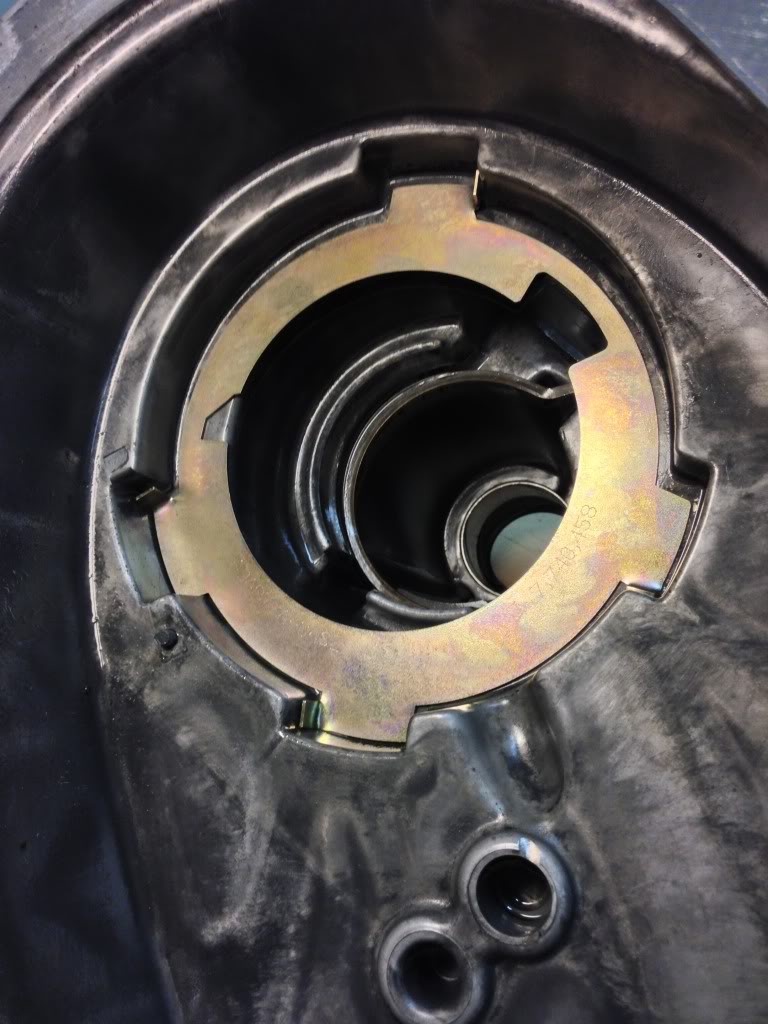
After that, I put it all back together. The transfer case is done for real this time. LOL.
Up next, 4L80E shift kit.
You split the halves just like before. Take the half that has the oil slinger in it and remove the plug and speed sensor.
Now, I had bought these snap ring pliers just for this. The problem is, they just don't open the snap ring up wide enough. So I took some scrap wood and temporarily taped them on there.
Kind of ghetto I know, but it worked.
Here's the clip Chevy put in. Often times its broken. I guess I really lucked out.
Even though the clip was there and not broken, you can see where it's rubbing through.
Here's the case saver in its place.
After that, I put it all back together. The transfer case is done for real this time. LOL.
Up next, 4L80E shift kit.