
DIY: COMP Trunion kit aka TSB 02-06-01-029 Fix
 Jun 10, 2013 | 11:18 AM
#1

Thread Starter
On The Tree
Joined: Jul 2012
Posts: 117
Likes: 0
From: Austin,TX
TSB 02-06-01-029 details the solution for when you do an oil change and find needle bearings in your oil.
Long story short, the needle bearings in the original GM rocker arms for the OBS and NBS 4.8, 5.3, 5.7 and other engines is not up to snuff. I recently drove 1400 miles to Dearborn, MI and it was time to change my oil (5000 mile interval) and I found a crap ton of needle bearings attached to my magnetic drain plug.
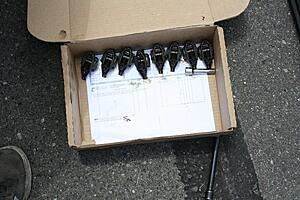
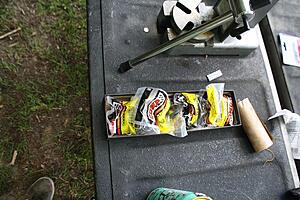
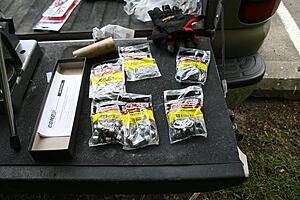
Supposedly you can buy "updated" rocker arms from GM for about $9/piece. I bought 2 just in case, as well as the Comp trunion kit.
The comp kit replaces all the needle bearings with upgraded units along with larger surface area trunions for increased performance. Price wise buying the kit and buying new rocker arms was a wash, so for peace of mind I went with the updated design. This DIY will walk you through the installation.
Tools:
8mm socket / wrench
10mm socket/wrench
22mm socket
1 ton arbor press or similar
Snap ring pliers
6mm Hex head socket
NOTE: I bought those snap ring pliers from HF. I had to file down the nubs to get them to fit in the snap rings. However after that was done everything went smooth.
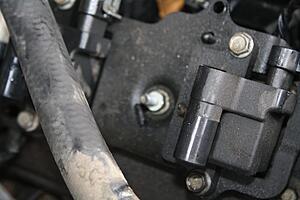
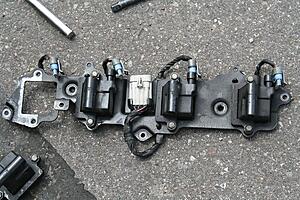
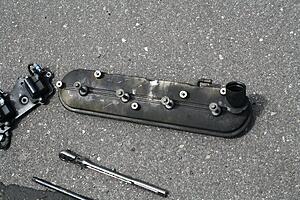
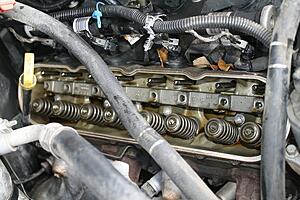
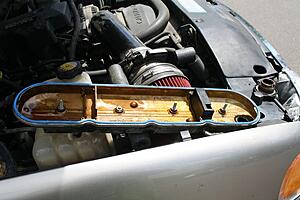
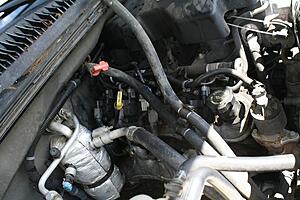
1. Starting with the passenger side remove the valve cover:
-5 x 10mm through bolts holding the coil packs in place
-1 x plug on coil packs
-1 x 10mm nut holding cooling hose holder
--I removed the rear most coil pack to get better access to the last stud
-Remove coil pack from car
-4 x 8mm bolts holding valve cover in place

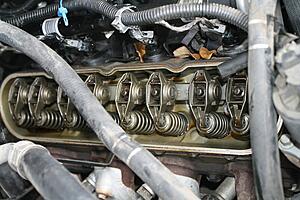
2. Remove all the rocker arms
-8 x 8mm bolts
3. Do the driver side. Same procedure, but its even easier.
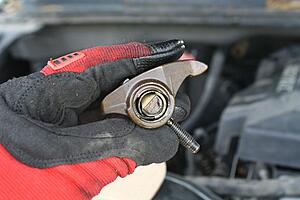
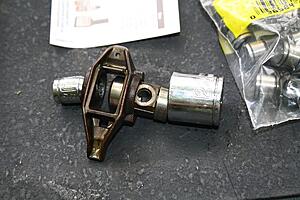
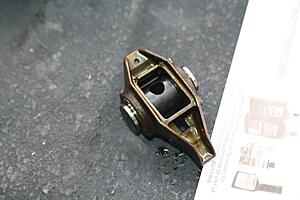
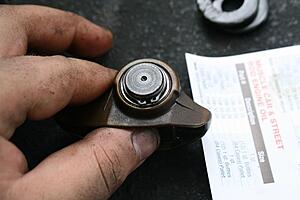
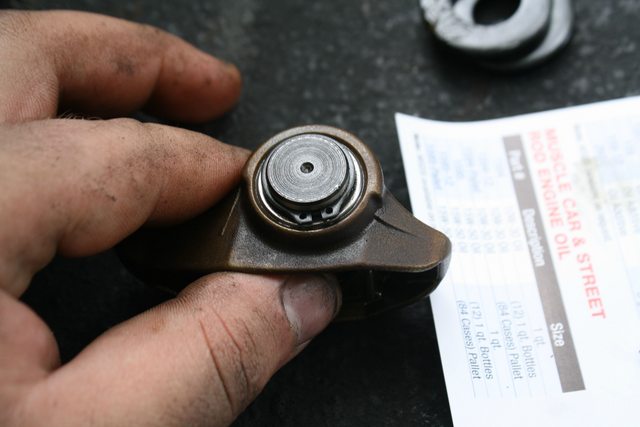
4. Inspect rocker arms. I had one broken unit. Here it is:
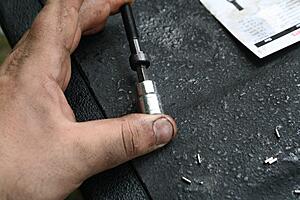
5. Lets start pressing
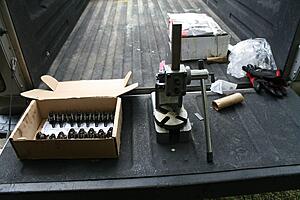
6. Press the old units out. The way this works is set the 22mm socket hole up on the chuck. Place the rocker arm "wings down" on the socket. Use a 10mm socket to press down on the other side. Then it should come apart.
7. Press in the new bearing - LETTERS OUT!!!!!!

8. Slip in the Trunion, set up the second bearing, use the included washers to press it all in.
9. Clip Snap rings on both sides.
10. Repeat this 15 more times, put it all back together in the same order.
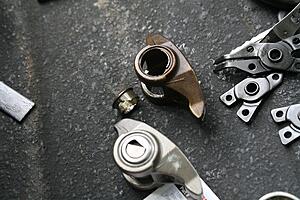
Here is a brand new unit compared to the broken one.
11. Once you have done all 16 units. Use the new bolts (6mm hex) and torque to 22ftlbts

12. I chose to install new gaskets.
All in all pretty straight forward. My only causualty was that the plastic piece on the heater core snapped the minute I touched that hose, but I managed to resolve that with some more hose.
Long story short, the needle bearings in the original GM rocker arms for the OBS and NBS 4.8, 5.3, 5.7 and other engines is not up to snuff. I recently drove 1400 miles to Dearborn, MI and it was time to change my oil (5000 mile interval) and I found a crap ton of needle bearings attached to my magnetic drain plug.
Supposedly you can buy "updated" rocker arms from GM for about $9/piece. I bought 2 just in case, as well as the Comp trunion kit.
The comp kit replaces all the needle bearings with upgraded units along with larger surface area trunions for increased performance. Price wise buying the kit and buying new rocker arms was a wash, so for peace of mind I went with the updated design. This DIY will walk you through the installation.
Tools:
8mm socket / wrench
10mm socket/wrench
22mm socket
1 ton arbor press or similar
Snap ring pliers
6mm Hex head socket
NOTE: I bought those snap ring pliers from HF. I had to file down the nubs to get them to fit in the snap rings. However after that was done everything went smooth.
1. Starting with the passenger side remove the valve cover:
-5 x 10mm through bolts holding the coil packs in place
-1 x plug on coil packs
-1 x 10mm nut holding cooling hose holder
--I removed the rear most coil pack to get better access to the last stud
-Remove coil pack from car
-4 x 8mm bolts holding valve cover in place


2. Remove all the rocker arms
-8 x 8mm bolts


3. Do the driver side. Same procedure, but its even easier.
4. Inspect rocker arms. I had one broken unit. Here it is:

5. Lets start pressing


6. Press the old units out. The way this works is set the 22mm socket hole up on the chuck. Place the rocker arm "wings down" on the socket. Use a 10mm socket to press down on the other side. Then it should come apart.

7. Press in the new bearing - LETTERS OUT!!!!!!

8. Slip in the Trunion, set up the second bearing, use the included washers to press it all in.

9. Clip Snap rings on both sides.
10. Repeat this 15 more times, put it all back together in the same order.
Here is a brand new unit compared to the broken one.

11. Once you have done all 16 units. Use the new bolts (6mm hex) and torque to 22ftlbts


12. I chose to install new gaskets.


All in all pretty straight forward. My only causualty was that the plastic piece on the heater core snapped the minute I touched that hose, but I managed to resolve that with some more hose.

Thread
Thread Starter
Forum
Replies
Last Post