INTERNAL ENGINE MODIFICATIONS Valvetrain |Heads | Strokers | Design | Assembly

Assembly on forged lq4

Thread Tools
 
Search this Thread
 
Old 05-21-2013, 05:30 PM
  #11  
121
TECH Regular
Thread Starter
iTrader: (5)
 
121's Avatar
 
Join Date: Mar 2011
Location: Cheyenne, WY
Posts: 435
Received 0 Likes on 0 Posts
Default

I will prep and clean good
Old 05-21-2013, 07:22 PM
  #12  
121
TECH Regular
Thread Starter
iTrader: (5)
 
121's Avatar
 
Join Date: Mar 2011
Location: Cheyenne, WY
Posts: 435
Received 0 Likes on 0 Posts
Default

Originally Posted by Gadgetized


Make sure you seat the thrust bearing in properly for the center cap. The caps will have numbers 1-4 stamped on one side and 5 will be stamped on the other side. Make sure the deck is very clean. I scrape it with a razor blade and hit it with fine sandpaper on a metal block if the engine block is bare. Clean clean clean, and clean some more.
I understand 1-4 is different than 5 on main caps. Can't really be put in backwards can they? I don't have motor back or id be able to find out... what exactly are you talking about on setting the thrust bearing properly?
Old 05-22-2013, 12:57 PM
  #13  
TECH Junkie
iTrader: (9)
 
Gadgetized's Avatar
 
Join Date: Jan 2010
Location: Rochester, NY
Posts: 3,095
Likes: 0
Received 3 Likes on 3 Posts
Default

The thrust bearing is the center bearing in an LS engine. The thrust bearing keeps the crank from moving forward or backward. When you tighten down a cap that does not have a locating pin locating it to the proper place on the block it will not be lined up properly. You could check this by installing the center bearing and cap without the crank in the block. When you tighten it down, place a flat straight edge on the thrust bearing area, and you will see that it is not flat unless you got lucky. Here is how I do it, and other may choose a different method. install the center cap, and tighten it down to set the cap flat to the block. Loosen the bolts, and install them finger tight. I use a plastic dead blow hammer, and tap the crank forward and backward. If you notice on the crank there is a machined area on the throw before and after the center journal. That is where the thrust rides. Moving the crank forward and backward will force the bearing to be centered so it can be torqued down. It is easiest if you can have a friend pry the crank backwards while you torque it properly. Torque it down and check the thrust clearance with a dial indicator to make sure it is within spec. The thrust clearance is checked with the bearing dry. Assemble it finally with lube.
Old 05-23-2013, 01:44 AM
  #14  
9 Second Truck Club
iTrader: (16)
 
stock48's Avatar
 
Join Date: Sep 2006
Location: Colorado Springs, Co/ Central, Ca
Posts: 3,655
Received 5 Likes on 5 Posts
Default

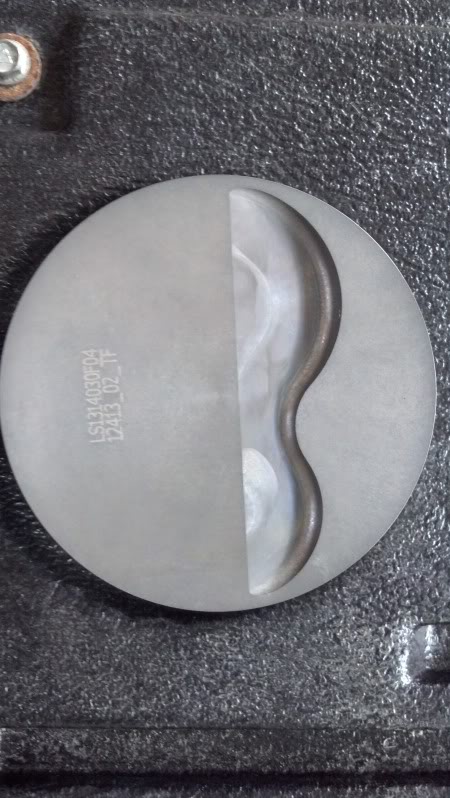
Like I told you in text the larger relief goes under intake valve. Install the rods with tang facing pan rail if aftermarket rod.
Old 05-23-2013, 08:34 AM
  #15  
121
TECH Regular
Thread Starter
iTrader: (5)
 
121's Avatar
 
Join Date: Mar 2011
Location: Cheyenne, WY
Posts: 435
Received 0 Likes on 0 Posts
Default

Originally Posted by stock48
Like I told you in text the larger relief goes under intake valve. Install the rods with tang facing pan rail if aftermarket rod.
Lol!! This was before I sent that text. Everything is good now. Gotta put rings on then she will be assembled
Old 05-23-2013, 07:26 PM
  #16  
121
TECH Regular
Thread Starter
iTrader: (5)
 
121's Avatar
 
Join Date: Mar 2011
Location: Cheyenne, WY
Posts: 435
Received 0 Likes on 0 Posts
Default

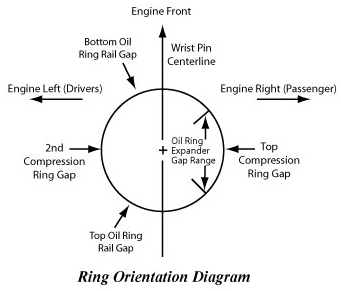
Wrist pin direction? What's your input?
Old 05-30-2013, 07:23 PM
  #17  
121
TECH Regular
Thread Starter
iTrader: (5)
 
121's Avatar
 
Join Date: Mar 2011
Location: Cheyenne, WY
Posts: 435
Received 0 Likes on 0 Posts
Default

Name:  IMG_20130530_151021_279_zpsadc6add8.jpg
Views: 2642
Size:  54.8 KB
Old 05-30-2013, 07:25 PM
  #18  
121
TECH Regular
Thread Starter
iTrader: (5)
 
121's Avatar
 
Join Date: Mar 2011
Location: Cheyenne, WY
Posts: 435
Received 0 Likes on 0 Posts
Default

Name:  IMG_20130521_152001_525_zps1845e041.jpg
Views: 605
Size:  77.6 KB

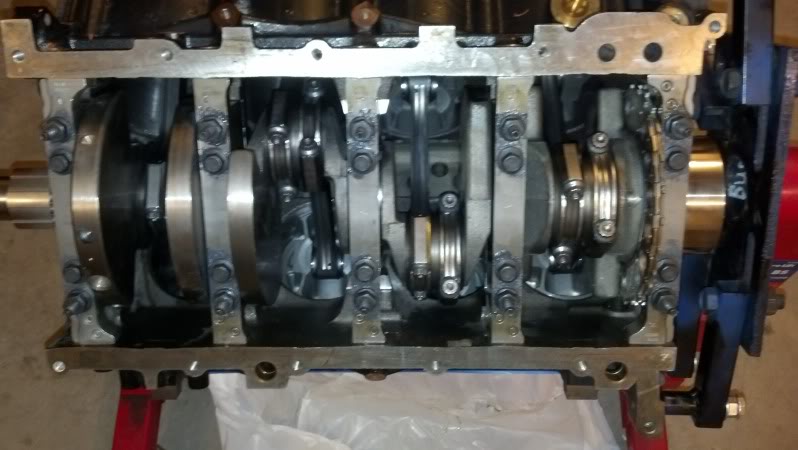
Short block done!
Old 05-30-2013, 07:38 PM
  #19  
TECH Resident
iTrader: (26)
 
brandon6.0's Avatar
 
Join Date: Dec 2009
Location: Glennville GA
Posts: 938
Likes: 0
Received 8 Likes on 8 Posts
Default

Bet it Feels good to say u Built it yourself!
Old 05-30-2013, 10:40 PM
  #20  
121
TECH Regular
Thread Starter
iTrader: (5)
 
121's Avatar
 
Join Date: Mar 2011
Location: Cheyenne, WY
Posts: 435
Received 0 Likes on 0 Posts
Default

It is nice ! Just enjoy building and fabricating anything I can!


Quick Reply: Assembly on forged lq4


All times are GMT -5. The time now is 10:11 AM.