
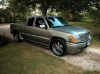
HOW TO awd/4wd strapping front suspension for less front wheel spin
 Mar 27, 2008 | 09:07 PM
#1
Thread Starter
TECH Addict
iTrader: (25)
Joined: Dec 2004
Posts: 2,913
Likes: 0
From: southern california
well ive seen a few members on other boards who made bumpstops so to speak but worked backwards. limited upward travel of your front suspension.
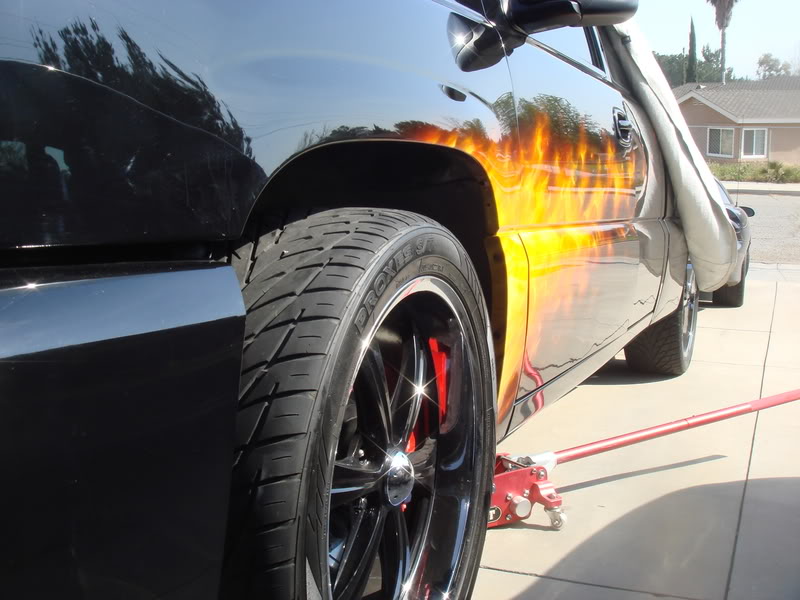
with my current set up , awd dropped suspension, making in the ball park of 600 awhp with a forged 370 (9.25-1 cr) and 16-17 psi with a centrifgal blower , i have wheel spin badly through first gear, i also have a pretty aggressive 3000 stall that will flash in the ball park of 4000-4500.
so my thoughts were why make bump stop brackets you cant adjust nor remove.
im also a off road enthusiast and thought of what they use, travel straps , which limit your downward suspension travel which in their cases is 15-30 inches, where i have some where in the ball park of 6-8
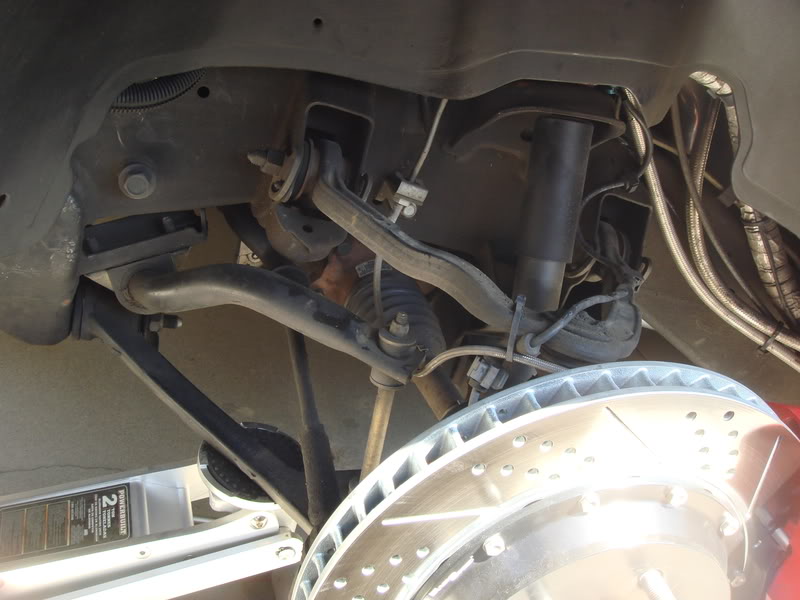
so i removed my front wheels and peeped things out and here is what i found
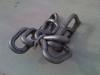
so after measuring i discovered i needed 10 inch straps , so i went to this local offroad shop that has all this stuff
here is what i came home with
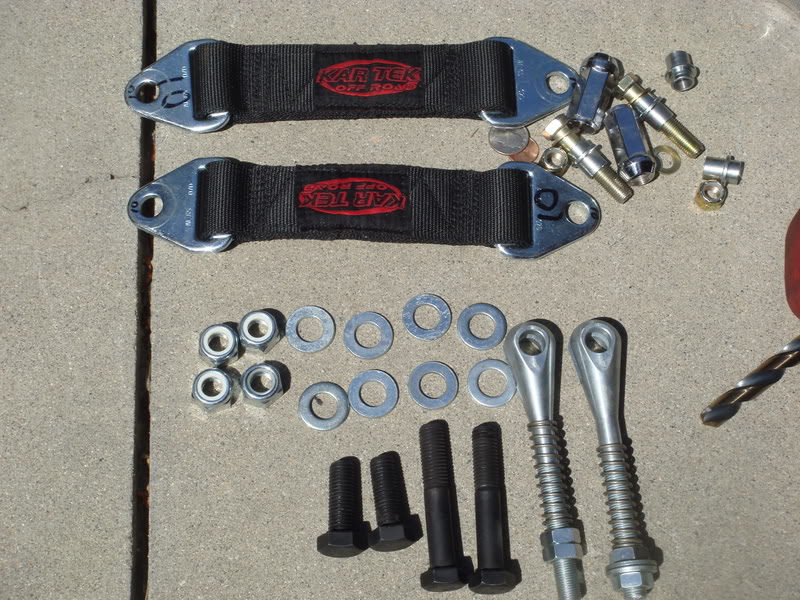
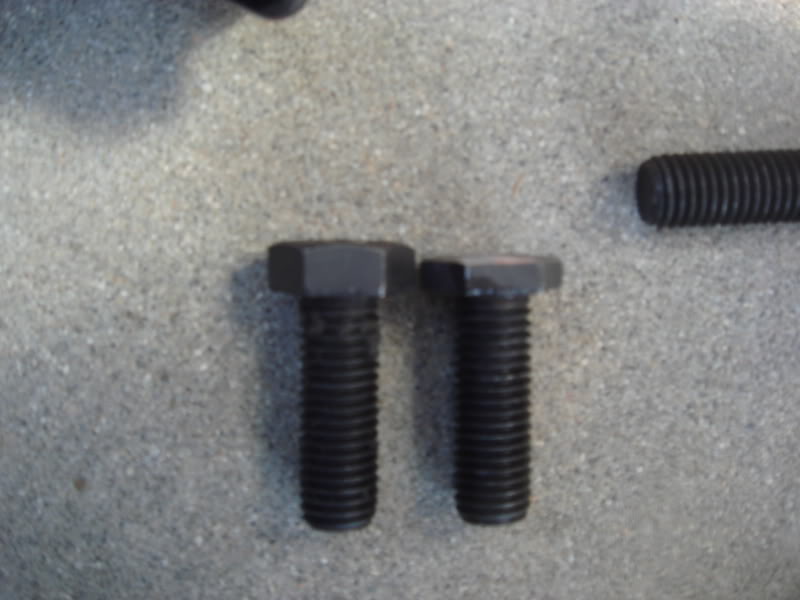
10 inch limit straps, 2 clevis bolts with springs , grade 10.9 (2) 14 mmx 2 inches and (2) 14mm x 4 inches( they were metric but im giving standard legnth :wtf: . i used nylocks on each one , but opted to use the stock nut on the bottom of the shaock mount, you will also need 14 washers in this size( i only had 8 because this was first time run and i only did one side) . a 1/2 inch drill bit i think it was i needed to drill the hole out on the top shock mount( just get one the same size as the clevis). youll need a 1/2 inch drill for this and be careful i have bloody knuckles.
Dont mind the extra bolts and nuts on the top right i didnt use those .
ok now juack up your truck on the a arm to keep your suspension loaded so you can get the straps on , it is impossible to get it fully loaded without having the wheels on .
install:
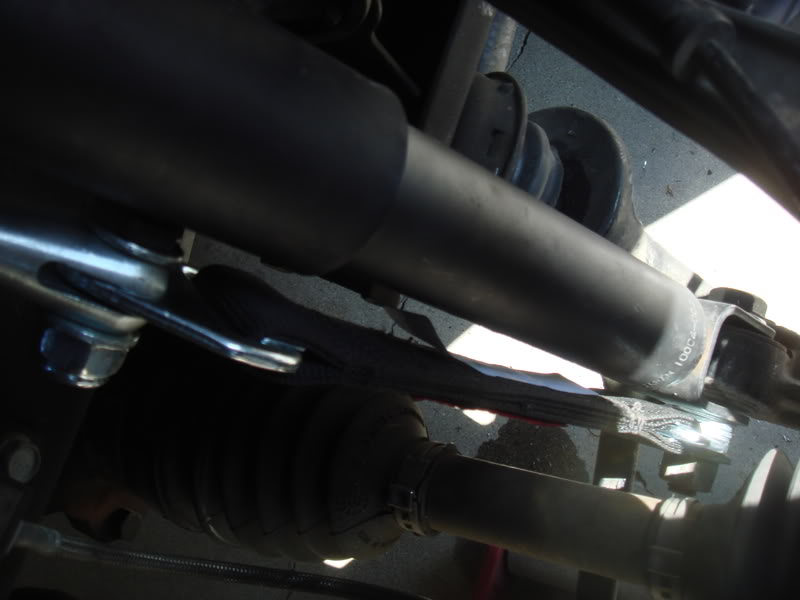
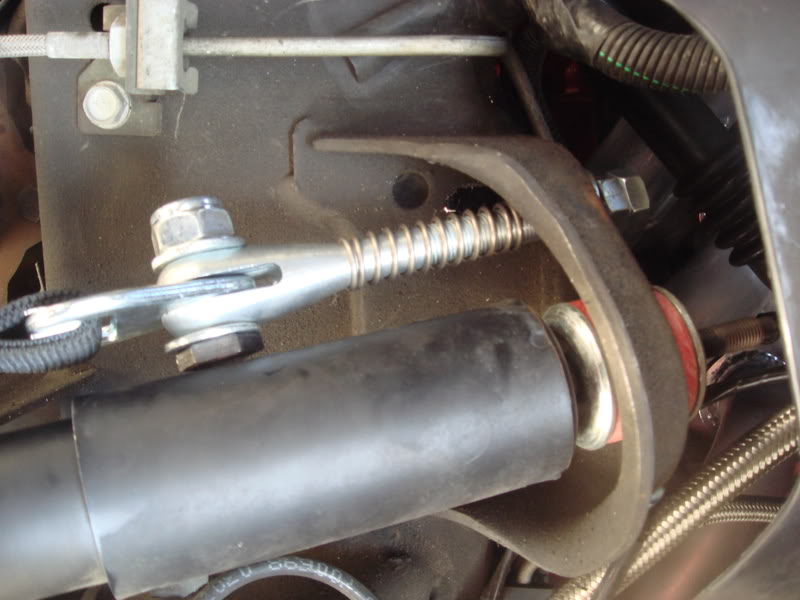
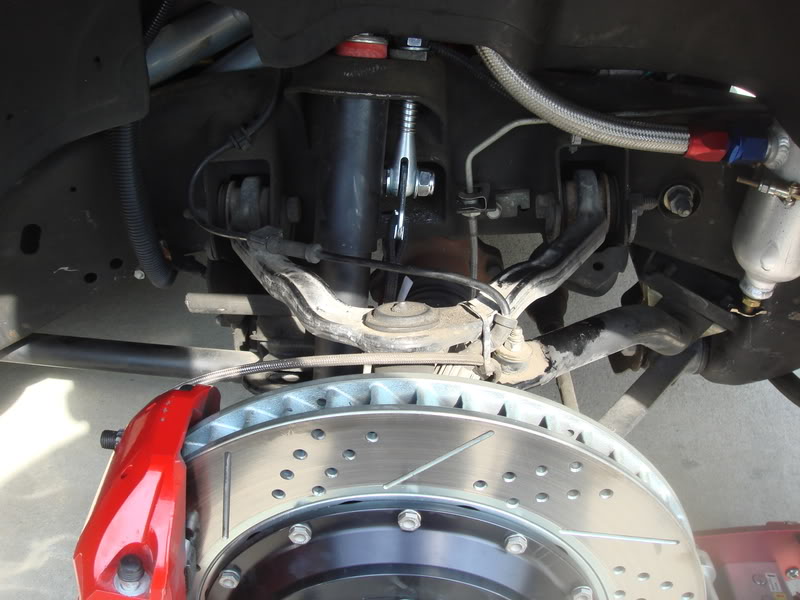
notice that pretty bottom shock mount? looks nice for a spot to mount a limit strap
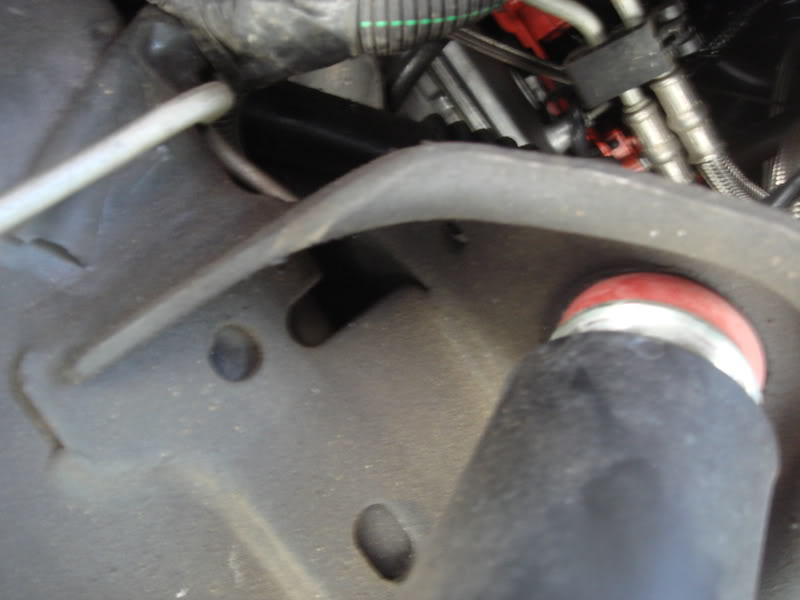
now to find the top strap mount, see the little hole next to the shock mount , it looks almost perfect if we de virginize it a bit
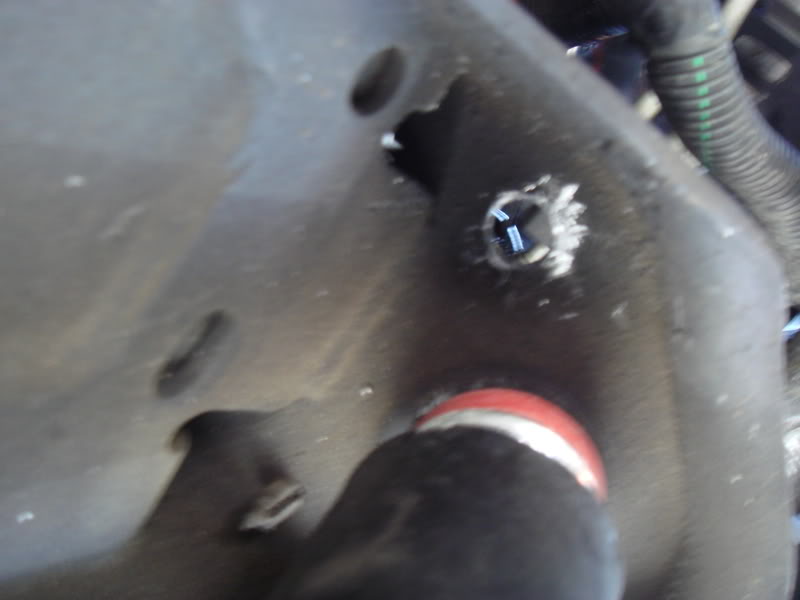

ok so got the hole all drilled out and ths clevis fits in there just fine
now i had to modify the bolt that joins the clevis and strapso it wouldnt rub on the shock.
now pull the bottom shock mount bolt out , and let the shock extend out of th emount off to the side.( id recommend to do this before drilling the top hole in the shock mount)
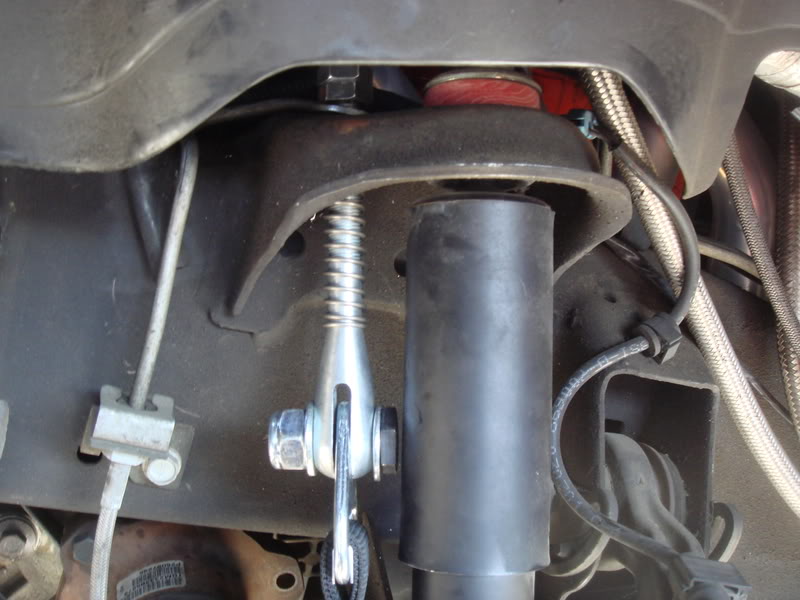
now replace the shock bolt with the longer one you got with a washers on the head side , now install 3-4 washers on the other side of the bolt opposite side of the shock, put the strap on after that , then re use the stock bolt that incorperates a washer to lock it in place like pictured below, its going to be tough to get the strap on the bolt on the bottom but just loosen theclevis bolt enough to get it on , but not to loose you dont want it to come off. after the straps are on the bolt and the clevis tighten the top clevis nut up a bit.
it should now look like this
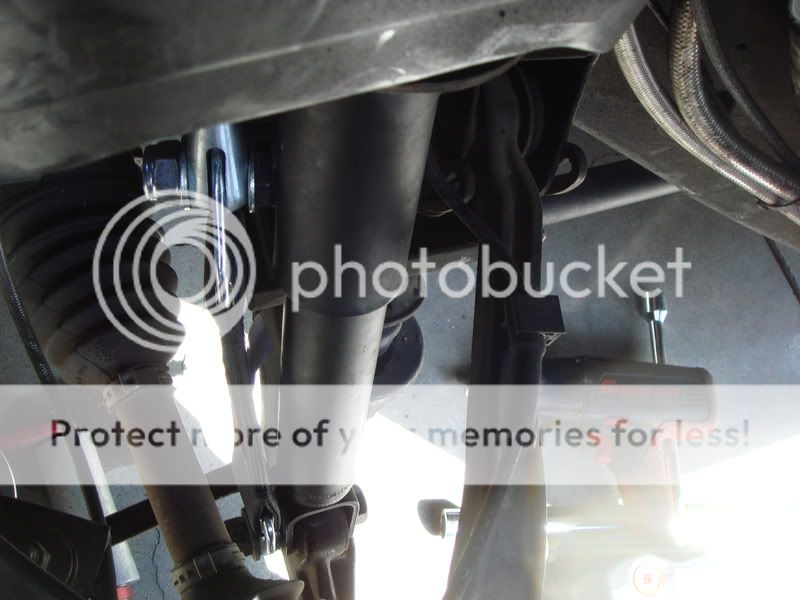
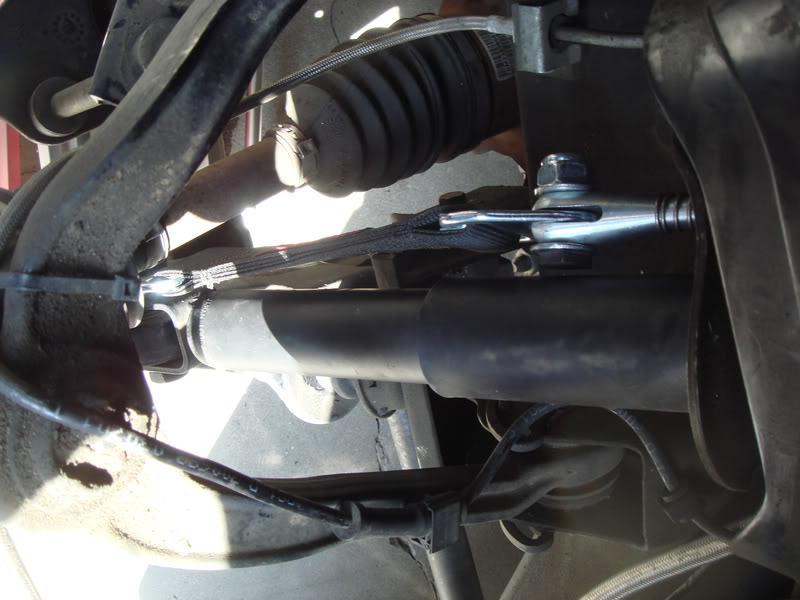
now put the wheel back drop the truck down and see the strap loose all tension , now crawl under the truck and wedge your arm under there and hand tighten the bottom bolt on the top of the shocks mount ( top of the clevis) to where its snug . now crawl out , jack it back up ( loaded this time)
tighten the top clevis bolt up about three turns, and use the jam nut to snug it up .( you want it to where the strap has a little bit of tension on it so it wont move around )
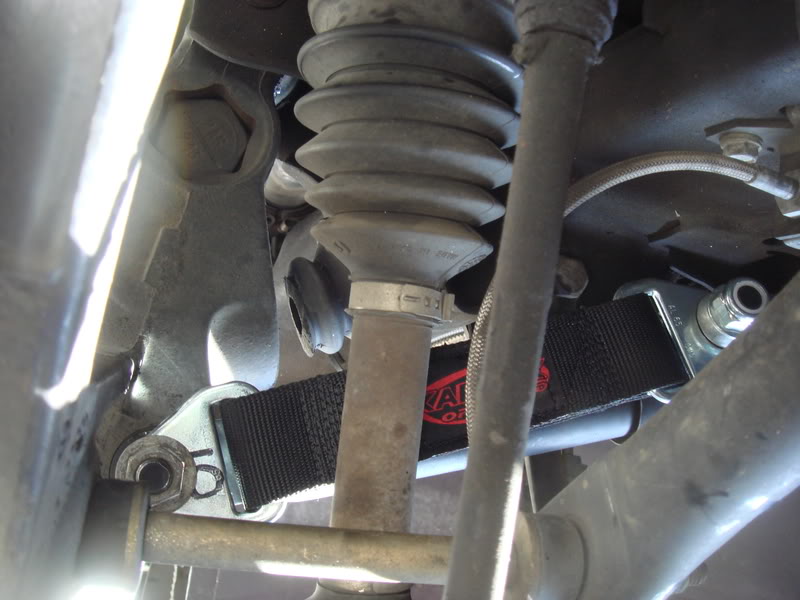
this will allow you to drive around and not even notice them , it will also have enough tension on it to where the spring will suck up all tension when the trucks suspension unloads.
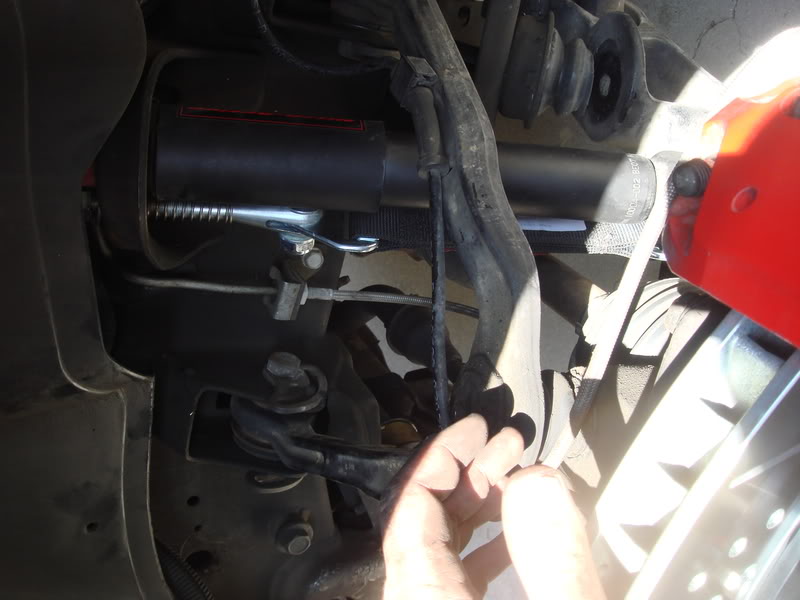
now for track time , you need to pull the wheel off , and i highly suggest investing in a ratcheting 3/4 inch wrench.
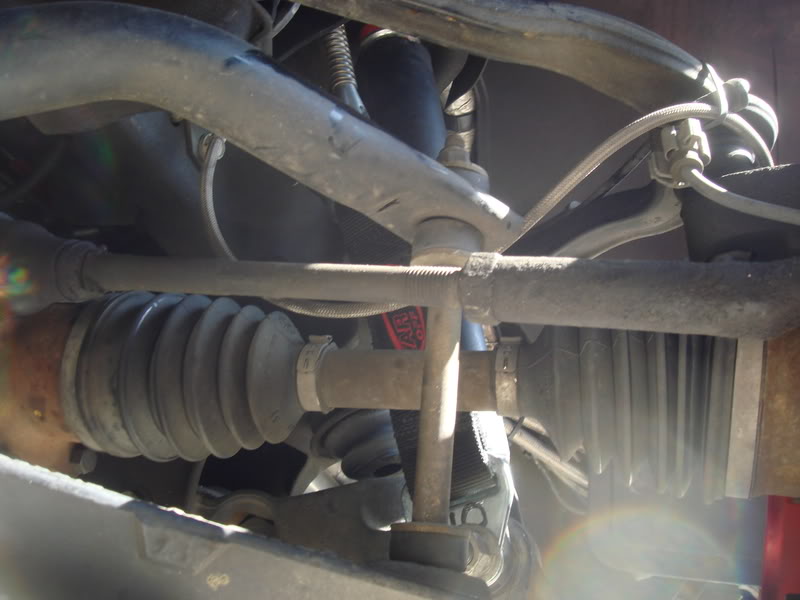
you want to tighten up the bottom nut about 2 inchs, so youll have about 2 inchs of thread above the nut, maybe more just have to test it out and see what works best. below is where i tightend it up to about 2 inches of thread out the top and this is jacking the truck up by the frame , notice the droop is almost gone in the suspension , i still had quite a bit left i could have tightened.
if there is any interest in these i can supply them but im trying to find a good source so i can provide them for a decent price.
i paid about 135 for the parts but hope to sell them for that .
with my current set up , awd dropped suspension, making in the ball park of 600 awhp with a forged 370 (9.25-1 cr) and 16-17 psi with a centrifgal blower , i have wheel spin badly through first gear, i also have a pretty aggressive 3000 stall that will flash in the ball park of 4000-4500.
so my thoughts were why make bump stop brackets you cant adjust nor remove.
im also a off road enthusiast and thought of what they use, travel straps , which limit your downward suspension travel which in their cases is 15-30 inches, where i have some where in the ball park of 6-8
so i removed my front wheels and peeped things out and here is what i found
so after measuring i discovered i needed 10 inch straps , so i went to this local offroad shop that has all this stuff
here is what i came home with
10 inch limit straps, 2 clevis bolts with springs , grade 10.9 (2) 14 mmx 2 inches and (2) 14mm x 4 inches( they were metric but im giving standard legnth :wtf: . i used nylocks on each one , but opted to use the stock nut on the bottom of the shaock mount, you will also need 14 washers in this size( i only had 8 because this was first time run and i only did one side) . a 1/2 inch drill bit i think it was i needed to drill the hole out on the top shock mount( just get one the same size as the clevis). youll need a 1/2 inch drill for this and be careful i have bloody knuckles.
Dont mind the extra bolts and nuts on the top right i didnt use those .
ok now juack up your truck on the a arm to keep your suspension loaded so you can get the straps on , it is impossible to get it fully loaded without having the wheels on .
install:
notice that pretty bottom shock mount? looks nice for a spot to mount a limit strap
now to find the top strap mount, see the little hole next to the shock mount , it looks almost perfect if we de virginize it a bit
ok so got the hole all drilled out and ths clevis fits in there just fine
now i had to modify the bolt that joins the clevis and strapso it wouldnt rub on the shock.
now pull the bottom shock mount bolt out , and let the shock extend out of th emount off to the side.( id recommend to do this before drilling the top hole in the shock mount)
now replace the shock bolt with the longer one you got with a washers on the head side , now install 3-4 washers on the other side of the bolt opposite side of the shock, put the strap on after that , then re use the stock bolt that incorperates a washer to lock it in place like pictured below, its going to be tough to get the strap on the bolt on the bottom but just loosen theclevis bolt enough to get it on , but not to loose you dont want it to come off. after the straps are on the bolt and the clevis tighten the top clevis nut up a bit.
it should now look like this
now put the wheel back drop the truck down and see the strap loose all tension , now crawl under the truck and wedge your arm under there and hand tighten the bottom bolt on the top of the shocks mount ( top of the clevis) to where its snug . now crawl out , jack it back up ( loaded this time)
tighten the top clevis bolt up about three turns, and use the jam nut to snug it up .( you want it to where the strap has a little bit of tension on it so it wont move around )
this will allow you to drive around and not even notice them , it will also have enough tension on it to where the spring will suck up all tension when the trucks suspension unloads.
now for track time , you need to pull the wheel off , and i highly suggest investing in a ratcheting 3/4 inch wrench.
you want to tighten up the bottom nut about 2 inchs, so youll have about 2 inchs of thread above the nut, maybe more just have to test it out and see what works best. below is where i tightend it up to about 2 inches of thread out the top and this is jacking the truck up by the frame , notice the droop is almost gone in the suspension , i still had quite a bit left i could have tightened.
if there is any interest in these i can supply them but im trying to find a good source so i can provide them for a decent price.
i paid about 135 for the parts but hope to sell them for that .
Last edited by 03sierraslt; Feb 11, 2015 at 04:10 PM.
Mar 28, 2008 | 12:31 AM
#2
TECH Addict
Joined: Jul 2005
Posts: 2,060
Likes: 0
From: Stockton, CA
looking good Chase, I will keep watch on your progress and see how it works, right now I don't have traction problems at all but when I start pushing it closer to the 1000 hp mark I am sure I will.
Mark
Mark
 Apr 3, 2008 | 10:07 PM
#5
Thread Starter
TECH Addict
iTrader: (25)
Joined: Dec 2004
Posts: 2,913
Likes: 0
From: southern california
well since no one care here is the rest
i finished up the passenger side yesterday and it was much tougher. just glad i had already done one side so i knew exactly what to do so it took about the same amount of time. there is no hole on the shock cup so you have to drill a brand new one, which is a bitch becasue you cant start at a perfectly square angle so i had to use the 90 degree drill with a tiny bit to start the hole . after unloading the suspension it made it alot easier.
and i ddint almost break my hand from the drill catching and smashing my fingers between the drill and big *** caliper.
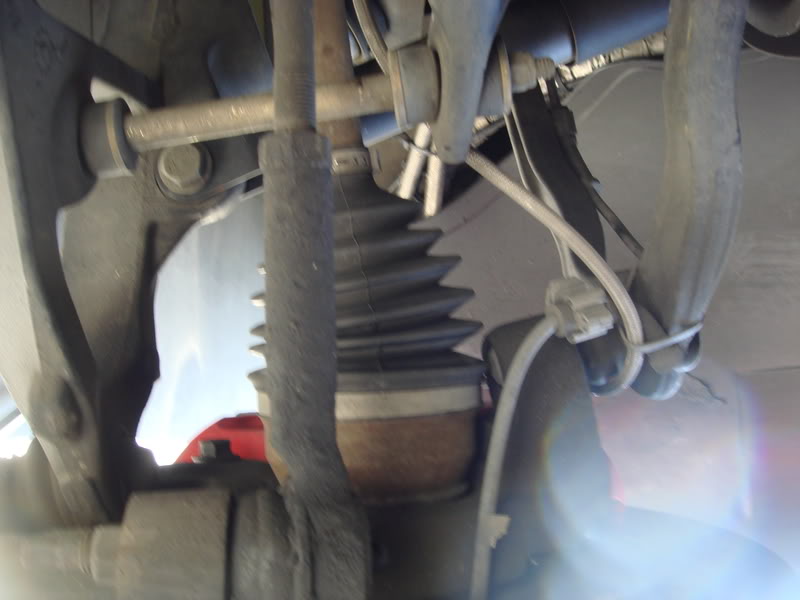
i also added some sqare 20' degree washers since the clevis pin angles down at the shock mount bolt the top nut wont sit level on the top of the top shock mount , so these would make it so it would sit even on the washer , it works like a shim so it wont put stress on on side of the nut and be more likely to break. you can see in the pic the special washer i used. (top of shock hoop below two nuts)
so like i said i will put some kits together for those who are interested but i think testing is in order to see if they are worth it.
i will also be installing cal tracs and some 18 ' centerline with nitto drag radials . i will test the straps first by them selves to see how they help then will try with tires then caltracs.
i also orded some tir rod sleeves . which are what the diesel guys use and is all i should need. there is also some other stuff like a new centerlink but its like 300 bucks so im waiting on that.
i will report back after testing is complete.
i finished up the passenger side yesterday and it was much tougher. just glad i had already done one side so i knew exactly what to do so it took about the same amount of time. there is no hole on the shock cup so you have to drill a brand new one, which is a bitch becasue you cant start at a perfectly square angle so i had to use the 90 degree drill with a tiny bit to start the hole . after unloading the suspension it made it alot easier.
and i ddint almost break my hand from the drill catching and smashing my fingers between the drill and big *** caliper.
i also added some sqare 20' degree washers since the clevis pin angles down at the shock mount bolt the top nut wont sit level on the top of the top shock mount , so these would make it so it would sit even on the washer , it works like a shim so it wont put stress on on side of the nut and be more likely to break. you can see in the pic the special washer i used. (top of shock hoop below two nuts)
so like i said i will put some kits together for those who are interested but i think testing is in order to see if they are worth it.
i will also be installing cal tracs and some 18 ' centerline with nitto drag radials . i will test the straps first by them selves to see how they help then will try with tires then caltracs.
i also orded some tir rod sleeves . which are what the diesel guys use and is all i should need. there is also some other stuff like a new centerlink but its like 300 bucks so im waiting on that.
i will report back after testing is complete.

Trending Topics


 Jun 23, 2008 | 04:54 PM
#10
Thread Starter
TECH Addict
iTrader: (25)
Joined: Dec 2004
Posts: 2,913
Likes: 0
From: southern california
well i ran the times in my sig ,
however i had some converter issues, as well as some shift point/rev limiter issues which hurt my 60 ft bad and my over all et and mph , my goal is consistant 1.5 60 ft's and with these , drag radials on all four and cal tracs i should be able to do that as long as the billet output shaft holds up.
ill be trying again here with the new converter in a month or so.