Corvette Servo Install W ALOT of pics
 Jan 23, 2011 | 02:11 PM
#1

Well I figured while I'm waiting on the converter to come back from Yank, I would go ahead and install the vette servo. I see people have been going to GMFullsize to view their sticky and thought we needed one of our own over here! I took alot of pics, and here we go....
Parts Needed:
Vette Servo Kit (about 17 bucks from oregon perfromance)
Tools needed:
Small flat blade screwdriver
Medium sized pry bar (to press in the servo cover)
C-clamp (or something to compress with)
Optional:
Pliers
Picks
Jack
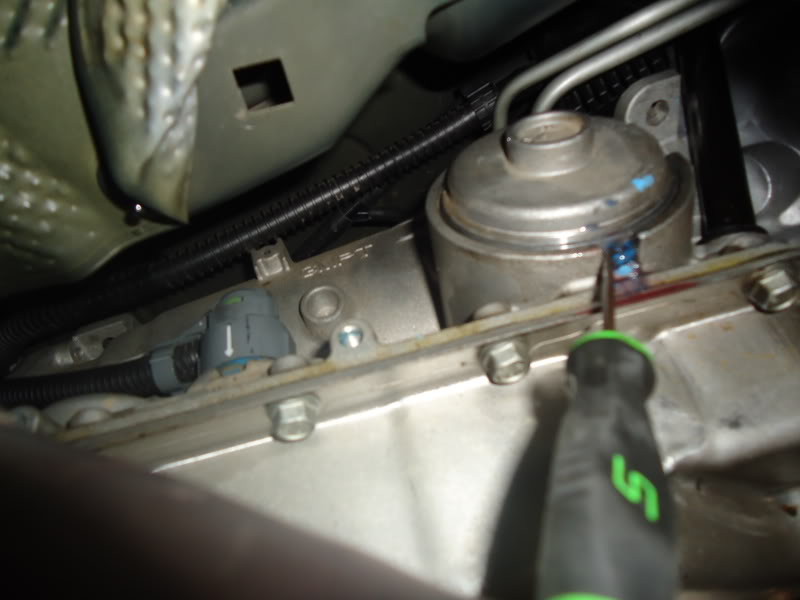
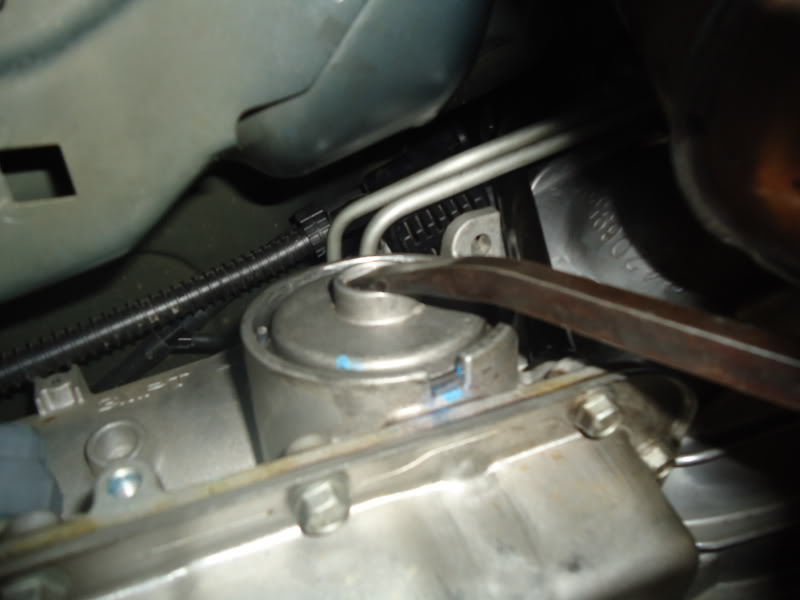
On the passenger side of the transmission locate the round servo cover. I was able to insert my pry bar between the y-pipe and get the end on the center of the cover.
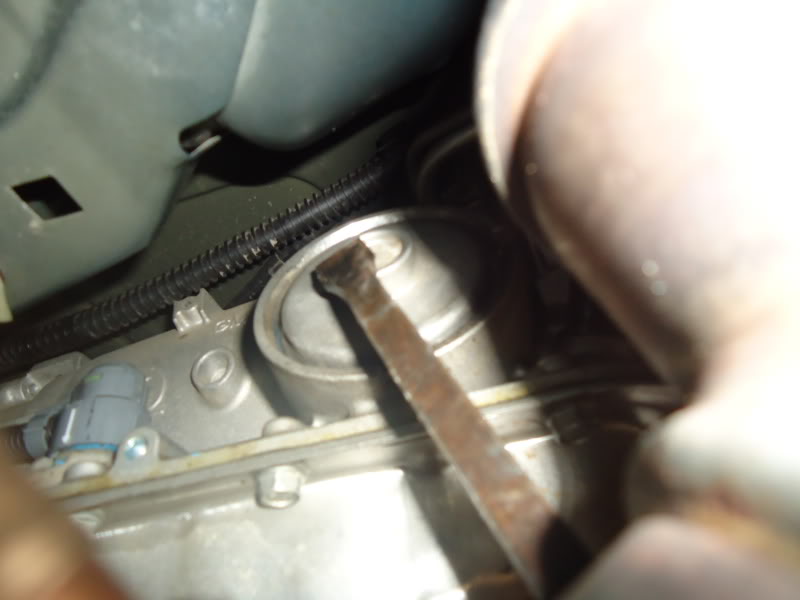
Push the cover in until it stops and remove the locking ring, it's just a round clip shaped like a "c" that locks just inside the lip of the transmission case around the cover. Use a small flat blade or pick to remove it.
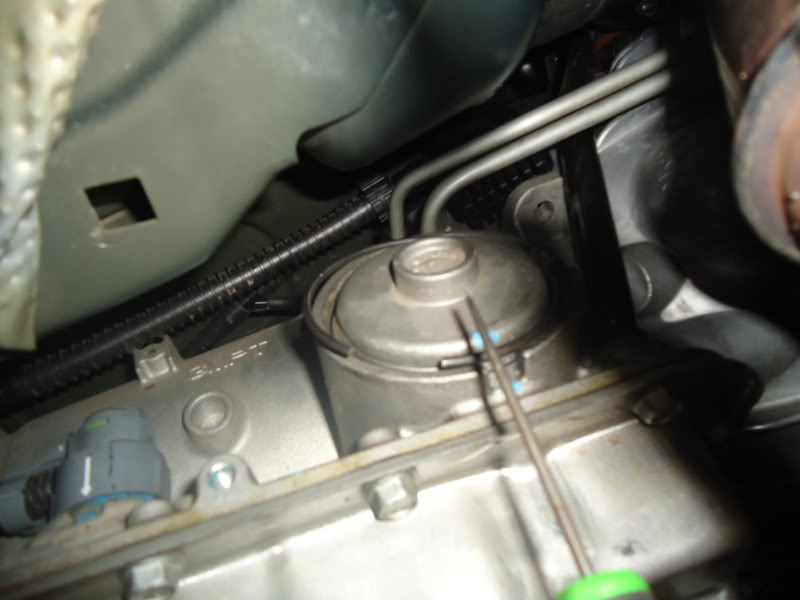
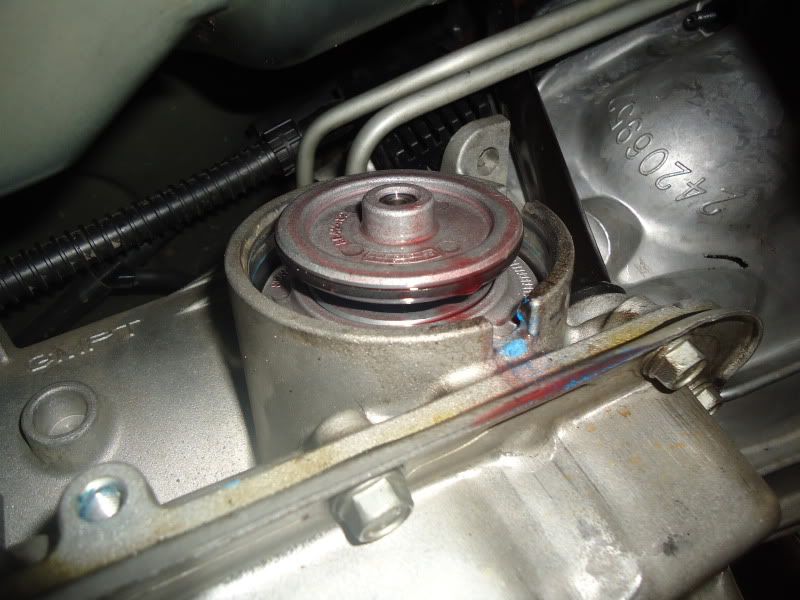
You can now release the pressure from the servo cover. Pull the cover out until it stops, pliers may be needed to grip the center snout of the cover to pull it out. Use your small flat blade or pick to pull the blue o-ring out of the slot enough to cut it and remove it. This will make the cover removal much easier.
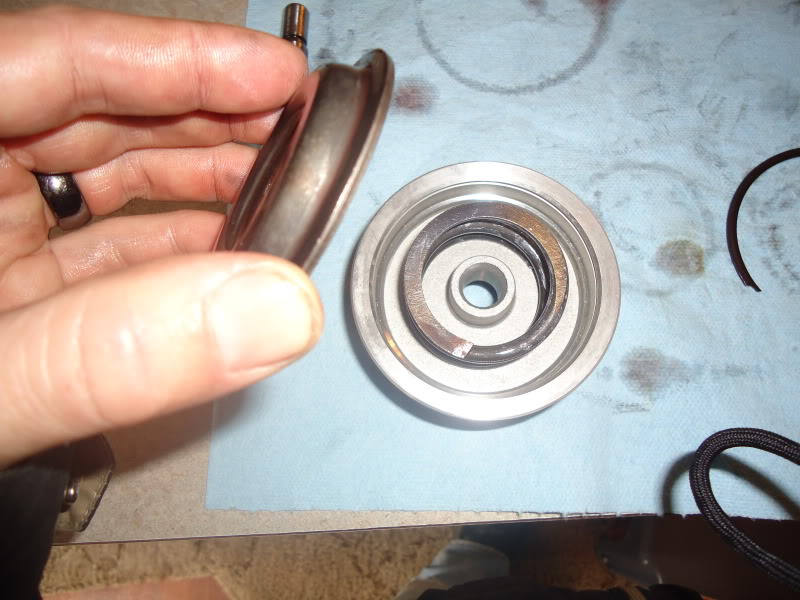
You can now completely remove the servo cover and set aside. At this point you can see the 4th apply piston. Slide it off the pin ***pay attention to the way it is turned***. Set it aside with the servo cover. Both of these components will not be needed until the reassembly.
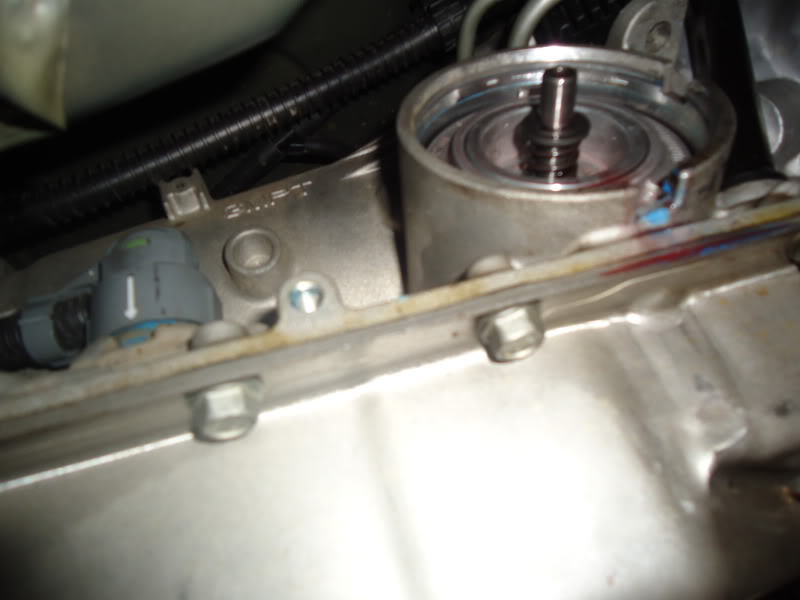
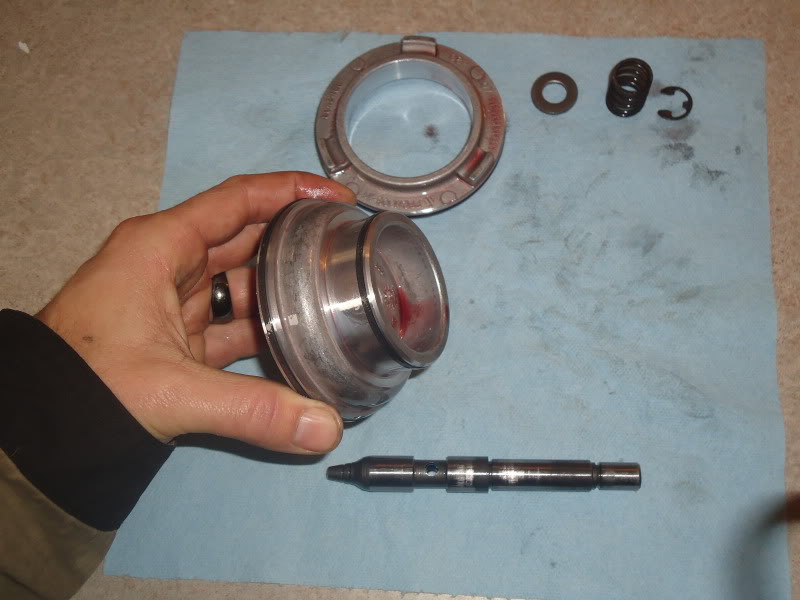
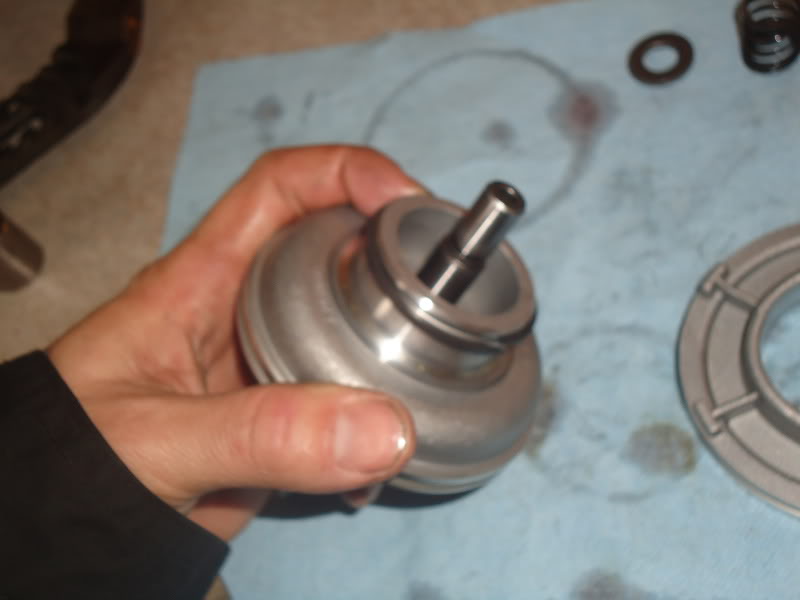
Now you can slide the entire servo assembly out.
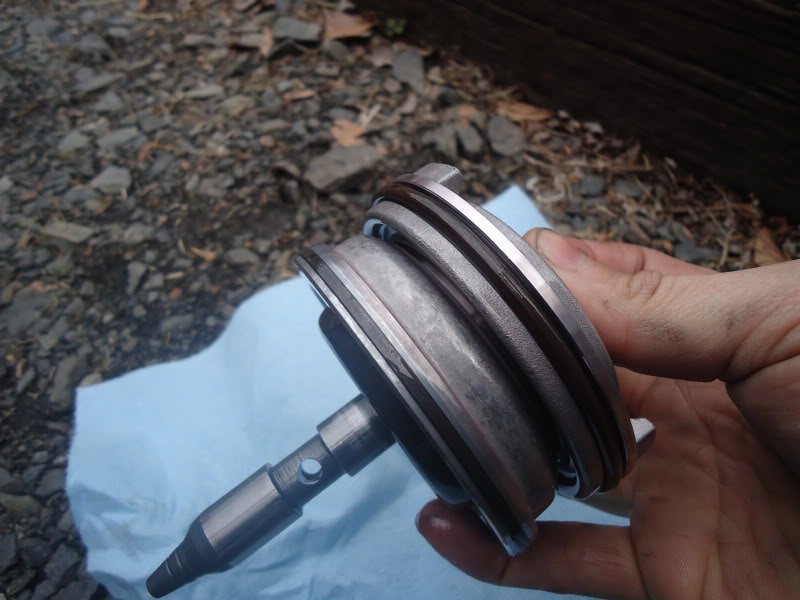
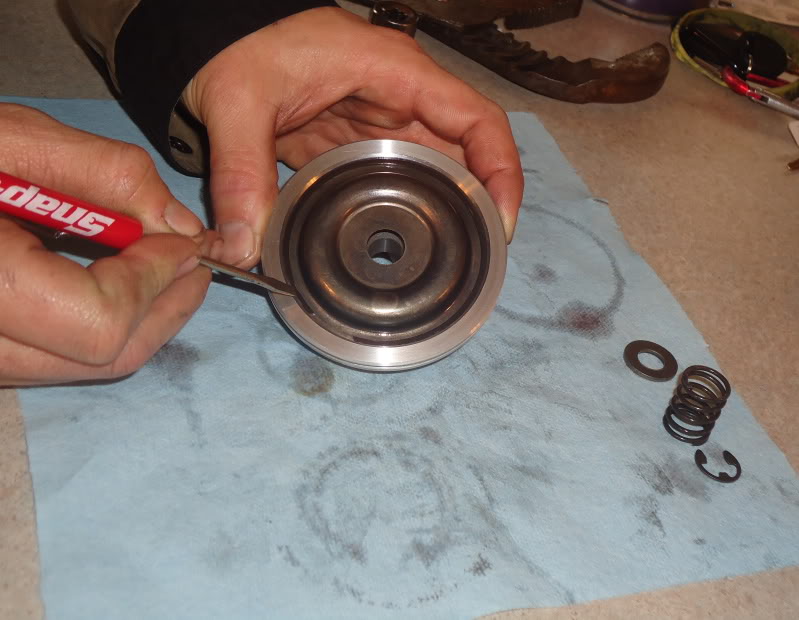
Now we can start the disassembly of the pin/2nd apply servo setup. There is a "E" clip located on the end of the shaft with a washer and the servo apply spring beneath it. Using one hand, compress the washer/spring and with the other, use your small flat blade screwdriver to remove the clip, the washer, and spring. Set them aside.
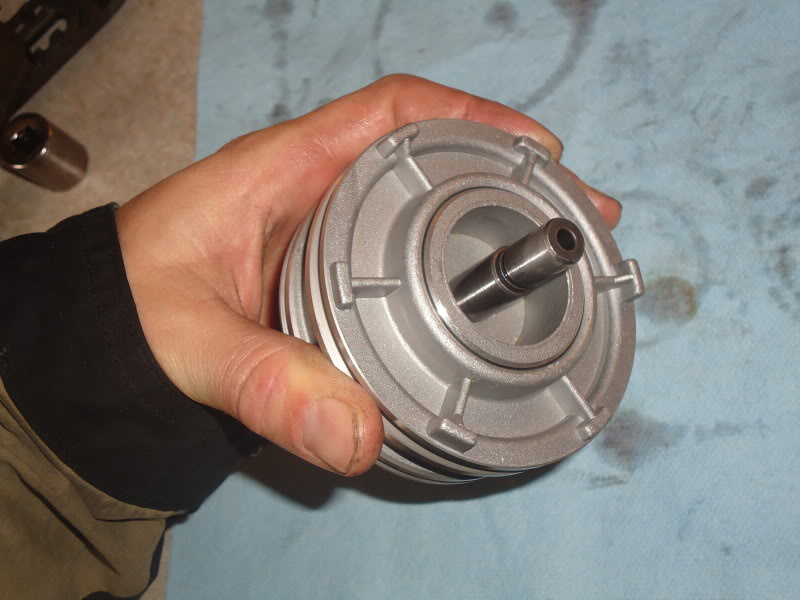
Now we can disassemble the servo piston housing, the 2nd apply piston, and the pin.
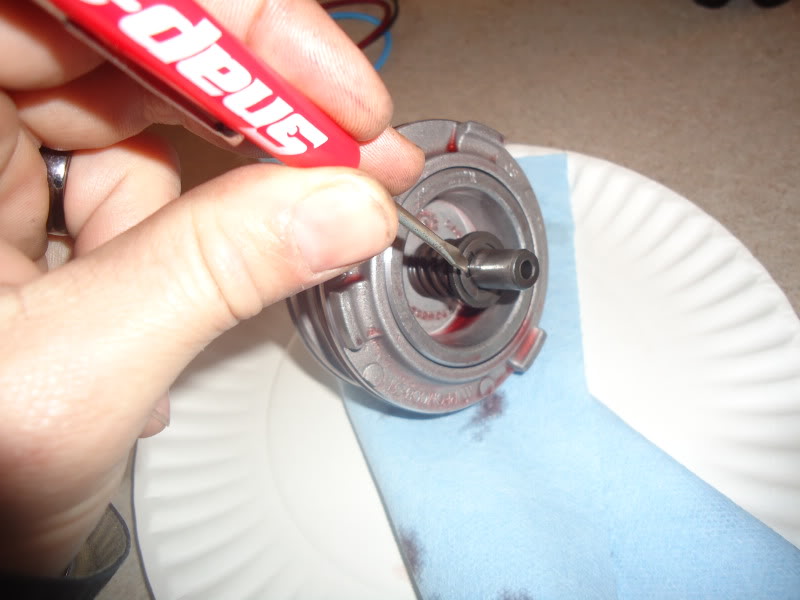
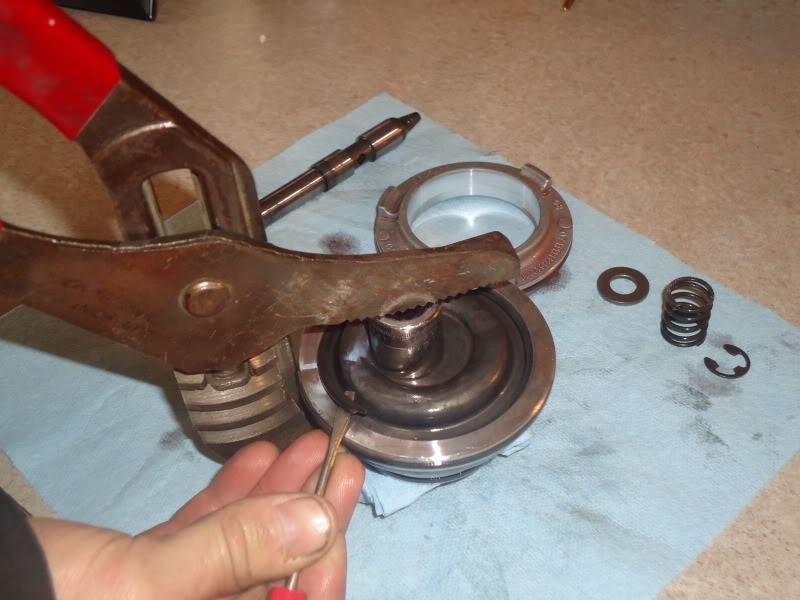
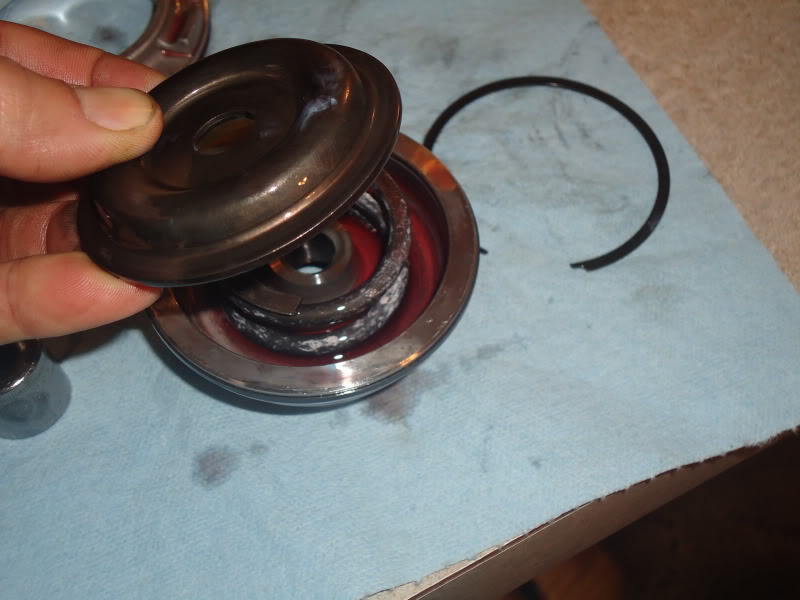
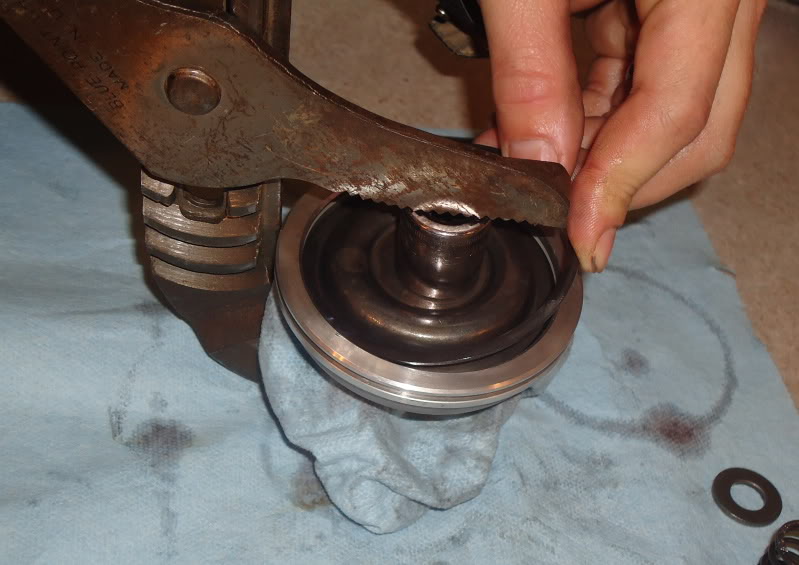
On the back side of the 2nd apply piston, there is a circlip, spring, and cover that needs to be disassembled. Use your c-clamp (or equivilant...my c-clamps were at work). Compress the cover and remove the circlip. Now you can remove the cover and spring from the original 2nd apply piston.
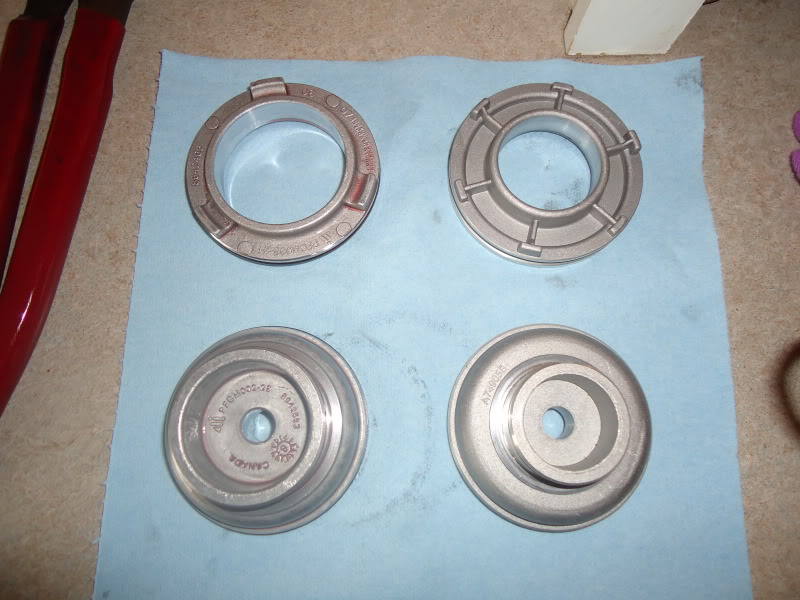
In the next photo, the original servo piston and housing are on the left. The corvette servo piston and housing are on the right.
.
Parts Needed:
Vette Servo Kit (about 17 bucks from oregon perfromance)
Tools needed:
Small flat blade screwdriver
Medium sized pry bar (to press in the servo cover)
C-clamp (or something to compress with)
Optional:
Pliers
Picks
Jack
On the passenger side of the transmission locate the round servo cover. I was able to insert my pry bar between the y-pipe and get the end on the center of the cover.
Push the cover in until it stops and remove the locking ring, it's just a round clip shaped like a "c" that locks just inside the lip of the transmission case around the cover. Use a small flat blade or pick to remove it.
You can now release the pressure from the servo cover. Pull the cover out until it stops, pliers may be needed to grip the center snout of the cover to pull it out. Use your small flat blade or pick to pull the blue o-ring out of the slot enough to cut it and remove it. This will make the cover removal much easier.
You can now completely remove the servo cover and set aside. At this point you can see the 4th apply piston. Slide it off the pin ***pay attention to the way it is turned***. Set it aside with the servo cover. Both of these components will not be needed until the reassembly.
Now you can slide the entire servo assembly out.
Now we can start the disassembly of the pin/2nd apply servo setup. There is a "E" clip located on the end of the shaft with a washer and the servo apply spring beneath it. Using one hand, compress the washer/spring and with the other, use your small flat blade screwdriver to remove the clip, the washer, and spring. Set them aside.
Now we can disassemble the servo piston housing, the 2nd apply piston, and the pin.
On the back side of the 2nd apply piston, there is a circlip, spring, and cover that needs to be disassembled. Use your c-clamp (or equivilant...my c-clamps were at work). Compress the cover and remove the circlip. Now you can remove the cover and spring from the original 2nd apply piston.
In the next photo, the original servo piston and housing are on the left. The corvette servo piston and housing are on the right.
.
Last edited by Rhino79; Jan 23, 2011 at 02:22 PM.
Jan 23, 2011 | 02:12 PM
#2
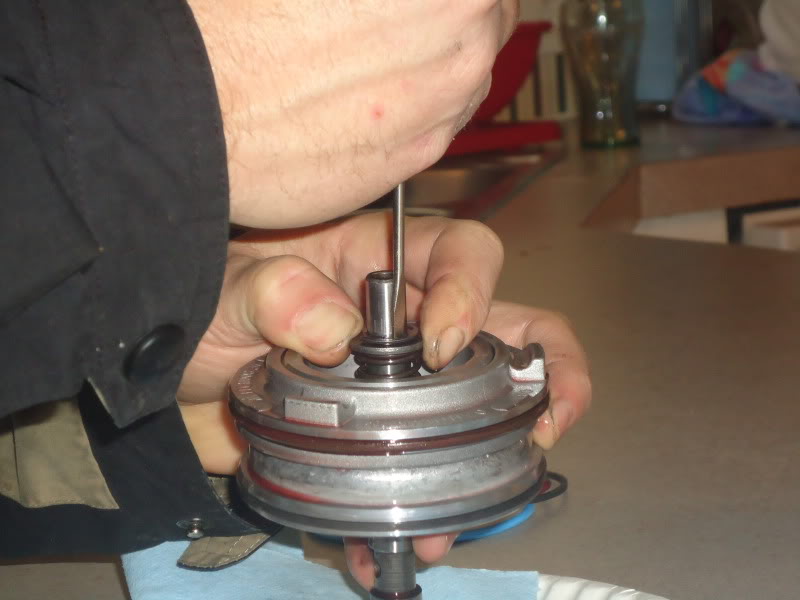
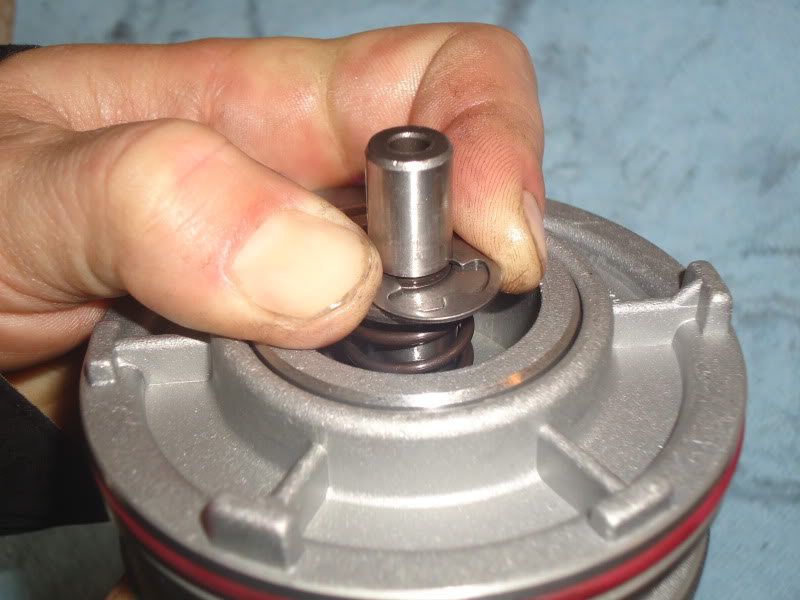
Now that we are completely disassembled, lets clean up the parts and reassemble. In the next photo we are putting the cushion spring and cover back into the vette 2nd apply piston. MAKE SURE THE CIRCLIP IS FULLY SEATED IN IT'S GROOVE. You will need your c-clamp or equivilant device to compress the spring enough to put the circlip in.
Slide the pin back in the 2nd apply piston, install the NEW oil seal ring on the small end of the 2nd apply piston. Make sure to lube all the o-rings with a dab of transmission fluid when assembling. On the 2nd apply piston, these rings are "cut" . Make sure they are squeezed together fully, it should look as if it isn't cut when its installed properly. Once you have the oil seal ring on the small end of the 2nd apply piston, slide the 2nd apply housing over the 2nd apply piston making sure the housing is turned the right way. You can also install the Brown O-ring on the servo housing and the Oil seal ring on the big end of the 2nd apply piston.
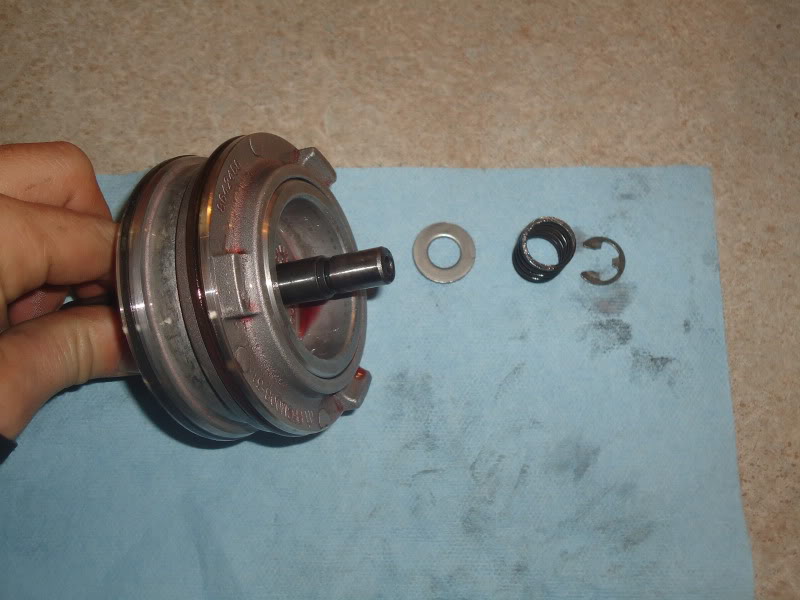
Now install the small spring, washer and "e" clip. MAKE SURE THE CLIP IS FULLY SEATED IN THE GROVE!
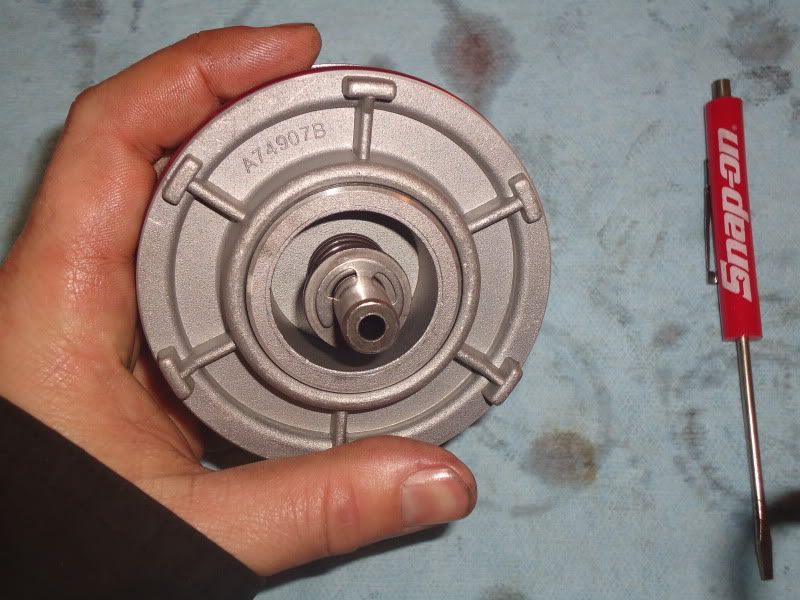
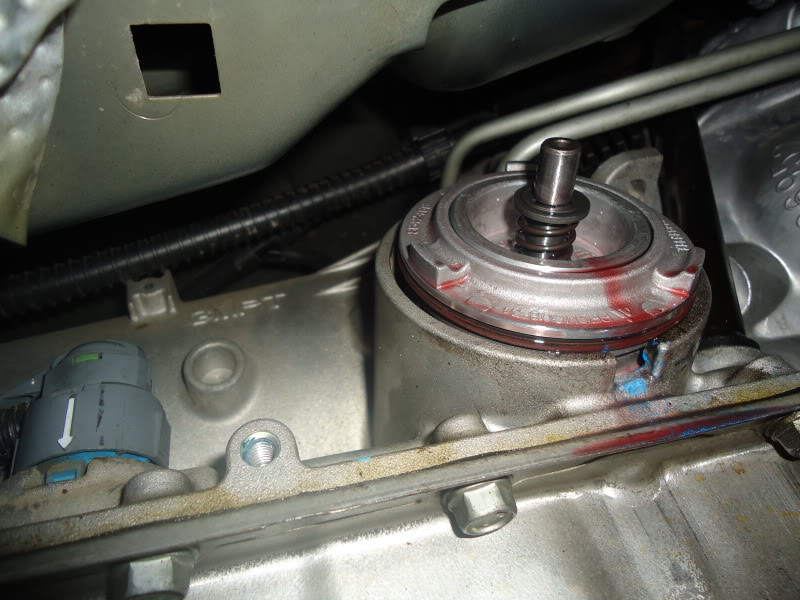
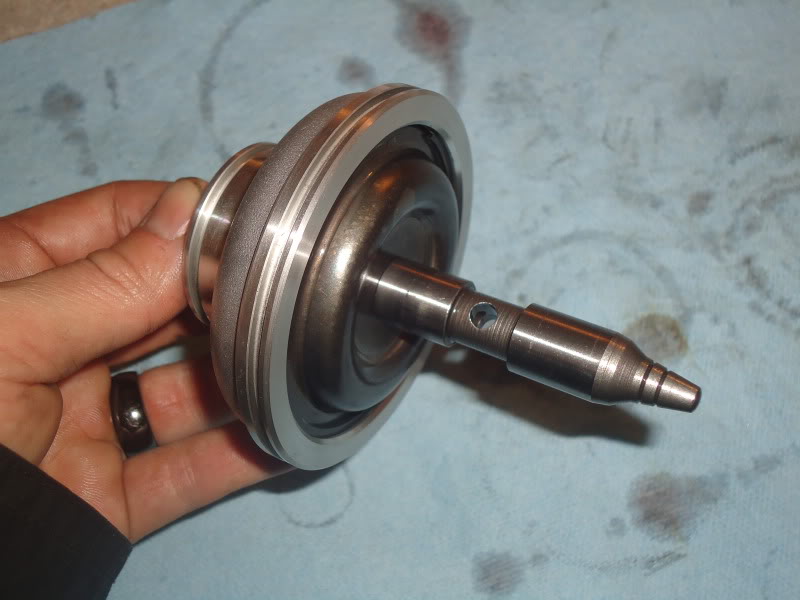
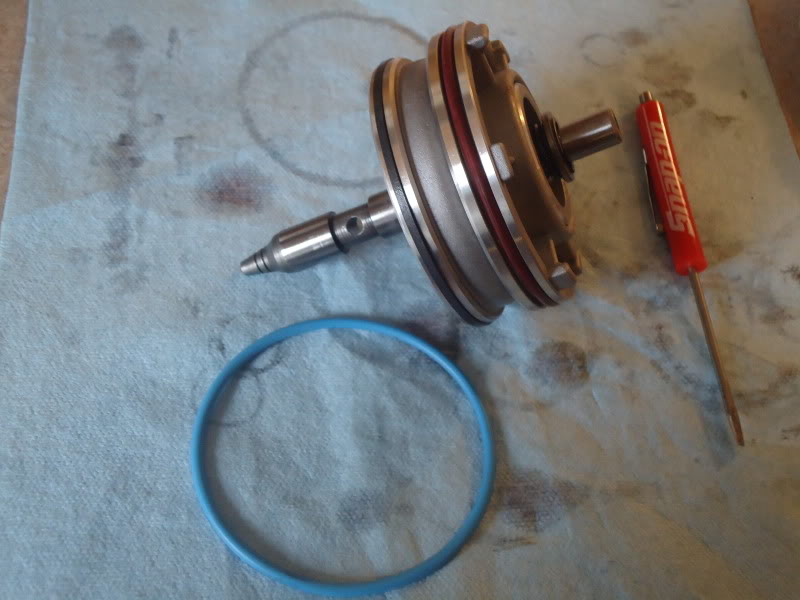
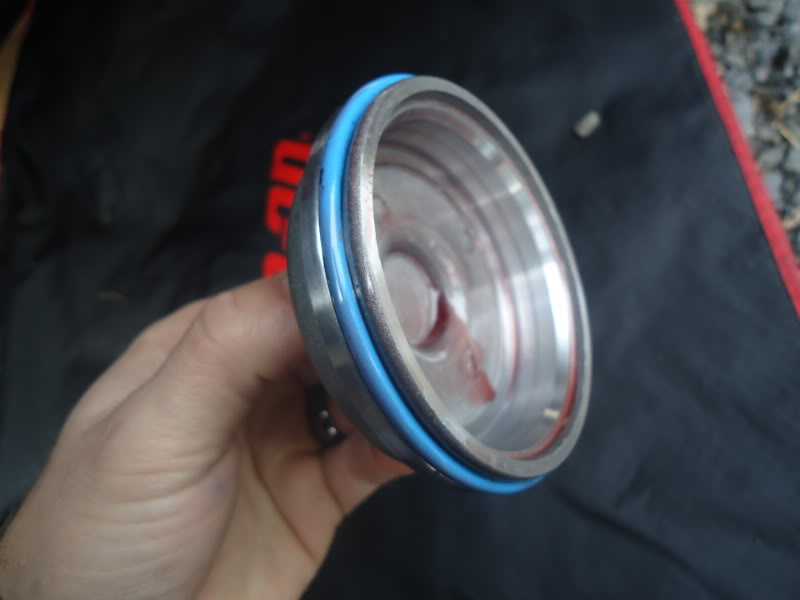
Here is the assembly, ready to go back in. The blue o-ring is for the servo cover.
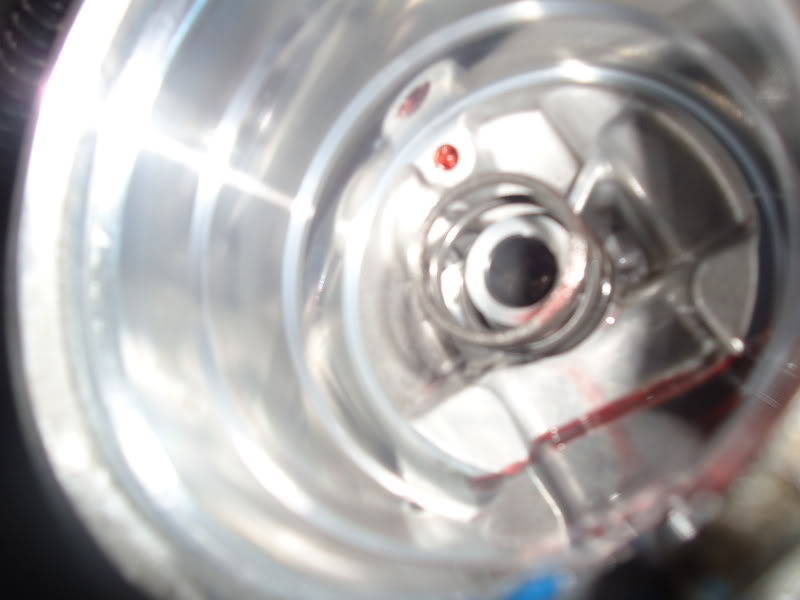
We are ready to reinstall in the transmission now. In this photo you will see a small spring (servo return spring). IT DIDN'T COME OUT WHEN I REMOVED THE SERVO UPON DISASSEMBLY, IN THE EVENT THAT IT DID, MAKE SURE YOU RE-INSTALL IT. This photo will show you the placement. it has a snout it locates itself on.
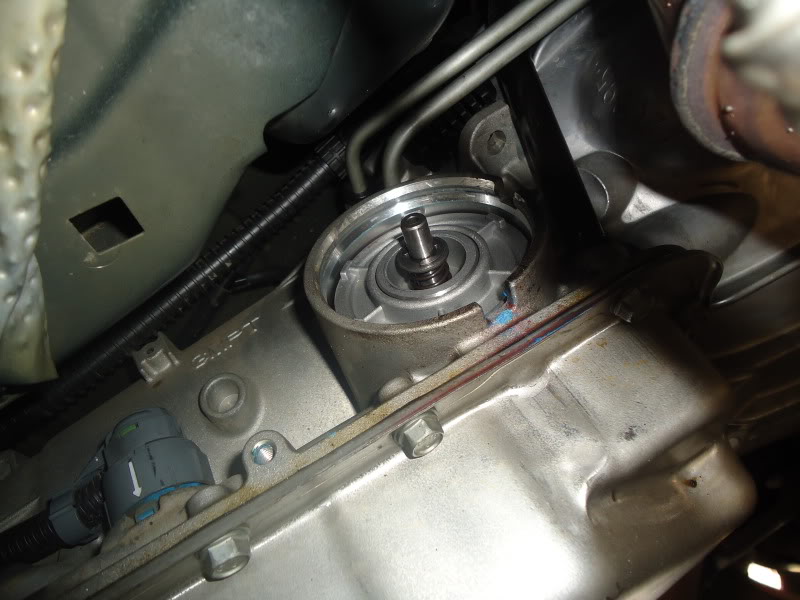
Ensure the edge of the case where the cover goes is clean, you do not want to damage an o-ring or drag dirt in when you slide the assembly back in.
With that being said, slide the assembly in. Once it is fully in, reinstall the 4th apply piston that was removed earlier. NOTE: MAKE SURE THAT YOU HAVE THE THE 4th APPLY PISTON TURNED THE CORRECT WAY.
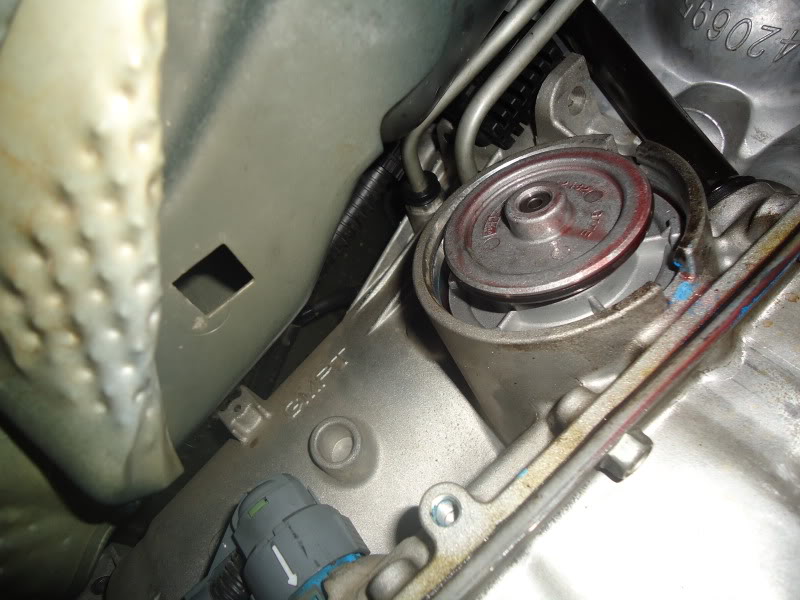
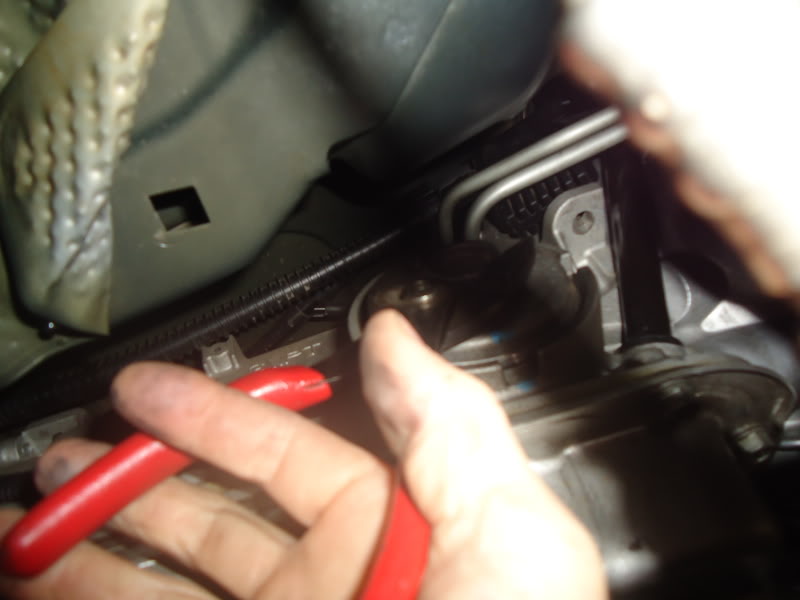
Now, install the new o-ring on the servo cover. Be sure to put some transmission fluid on it to ease the installation of the cover and prevent damage to the o-ring. Install the cover by hand, it will push in fairly easy. Now you can use your prybar to fully compress the cover into the case. Install the c-clip and MAKE SURE IT IS SEATED PROPERLY.
I noticed A LOT of difference in the 1-2 shift. Enough I had to remove some of the line pressure I added during tuning, I put it back to stock. It is so much more crisp and positive. No more dragging into 2nd gear at WOT. I have all my TQ MGT removed and it bumps nicely.
I hope that this helps some people. By far the best 20 bucks you can spend on your transmission and it will help save the trans for sure
Slide the pin back in the 2nd apply piston, install the NEW oil seal ring on the small end of the 2nd apply piston. Make sure to lube all the o-rings with a dab of transmission fluid when assembling. On the 2nd apply piston, these rings are "cut" . Make sure they are squeezed together fully, it should look as if it isn't cut when its installed properly. Once you have the oil seal ring on the small end of the 2nd apply piston, slide the 2nd apply housing over the 2nd apply piston making sure the housing is turned the right way. You can also install the Brown O-ring on the servo housing and the Oil seal ring on the big end of the 2nd apply piston.
Now install the small spring, washer and "e" clip. MAKE SURE THE CLIP IS FULLY SEATED IN THE GROVE!
Here is the assembly, ready to go back in. The blue o-ring is for the servo cover.
We are ready to reinstall in the transmission now. In this photo you will see a small spring (servo return spring). IT DIDN'T COME OUT WHEN I REMOVED THE SERVO UPON DISASSEMBLY, IN THE EVENT THAT IT DID, MAKE SURE YOU RE-INSTALL IT. This photo will show you the placement. it has a snout it locates itself on.
Ensure the edge of the case where the cover goes is clean, you do not want to damage an o-ring or drag dirt in when you slide the assembly back in.
With that being said, slide the assembly in. Once it is fully in, reinstall the 4th apply piston that was removed earlier. NOTE: MAKE SURE THAT YOU HAVE THE THE 4th APPLY PISTON TURNED THE CORRECT WAY.
Now, install the new o-ring on the servo cover. Be sure to put some transmission fluid on it to ease the installation of the cover and prevent damage to the o-ring. Install the cover by hand, it will push in fairly easy. Now you can use your prybar to fully compress the cover into the case. Install the c-clip and MAKE SURE IT IS SEATED PROPERLY.
I noticed A LOT of difference in the 1-2 shift. Enough I had to remove some of the line pressure I added during tuning, I put it back to stock. It is so much more crisp and positive. No more dragging into 2nd gear at WOT. I have all my TQ MGT removed and it bumps nicely.
I hope that this helps some people. By far the best 20 bucks you can spend on your transmission and it will help save the trans for sure