
Larger radix intercooler exchanger
 Jan 4, 2008 | 11:35 AM
#61
 Jan 4, 2008 | 11:38 AM
#62
 I'll probably head home for lunch to get the h/e and bring it out of the rain
Jan 4, 2008 | 11:54 AM
I'll probably head home for lunch to get the h/e and bring it out of the rain
Jan 4, 2008 | 11:54 AM
#63

Thanks Joe!!! Awesome turn around time! i got it next day, now's that what i call GREAT customer service. I was all giddy thing morning messing around with it and the 90mm TB that i lost track of time and was late to work I'll probably head home for lunch to get the h/e and bring it out of the rain
I'll probably head home for lunch to get the h/e and bring it out of the rain
Jan 4, 2008 | 12:27 PM
#64
TECH Fanatic
iTrader: (2)
Joined: Nov 2004
Posts: 1,051
Likes: 0
From: ODESSA, TX
mine is on order from Joe @ Left Coast (sponsor ----->). It's the heat exchanger for the Caddy cts-v Magnuson part #68-01-00-089. I should be getting it either today or tomorrow and doing the install this weekend. I'm going to move the stock h/e to the lower bumper and put the larger one infront of the radiator and run them in series. Should help me a lot with towing
If so please let me know if there is any fitment issues.
Jan 4, 2008 | 02:35 PM
#65


 Jan 4, 2008 | 02:52 PM
#67
Yeah it's going on a 1/2 ton, it's the truck in my signature. I don't forsee any huge issues ::knock on wood:: but you never know. I've already scoped it out and have a pretty good idea where i'm going to mount everything. I'll take plenty of pictures of the install.
If somethings goes terribly wrong i'll be on a tow bed in front of Magnuson on Monday morning with a case of beer waiting for Brian to show up
If somethings goes terribly wrong i'll be on a tow bed in front of Magnuson on Monday morning with a case of beer waiting for Brian to show up


 Jan 9, 2008 | 11:36 PM
#70
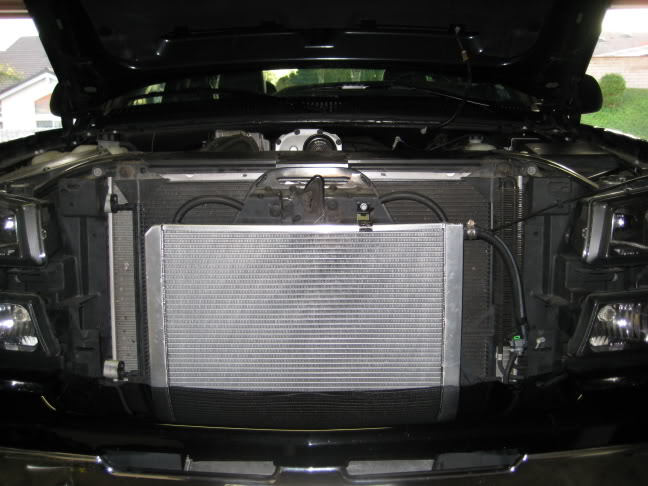
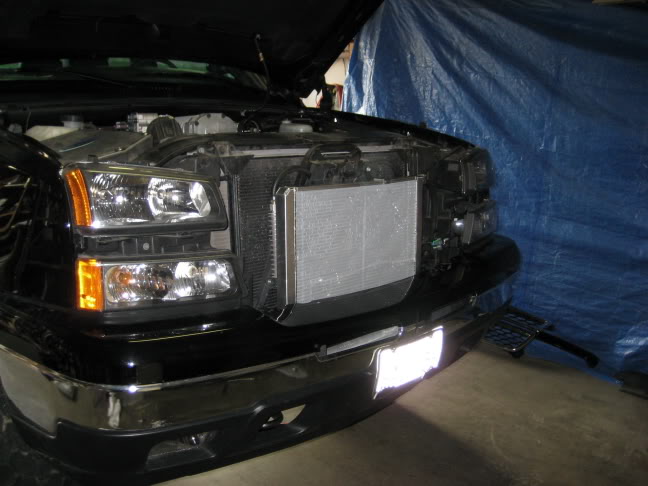
This heat exchanger is a BEAST!! I moved up the location of the upper bracket to hold the h/e higher up and expose more of it to incoming air. It also fills up the front better and doesn't look as wierd as when it is located a few inches lower.

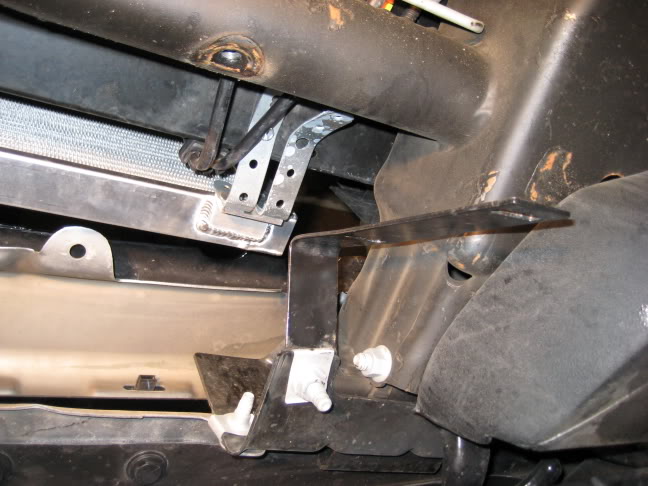
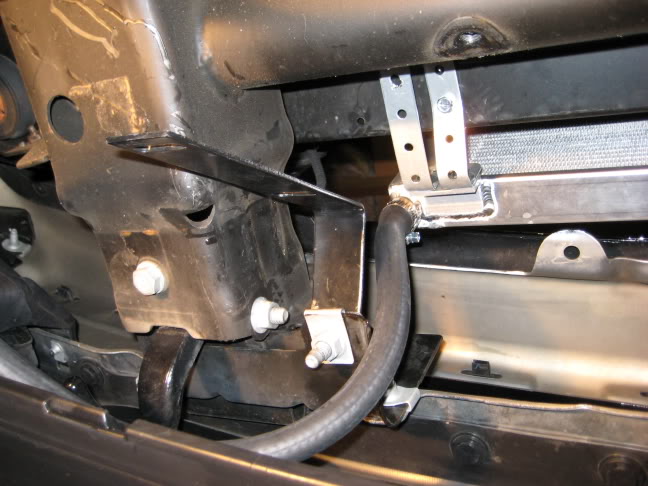
The view through the driver side tow hook at the lower h/e. I removed the backing to fit the new h/e and have the barb where i wanted it. It also provides more airflow to the lower h/e. I'm debating cutting up my lower fender to get more airflow, but i want to do it in a concealed way. I have to think about that one more and how/if i'm going to do it


I used thru-bolts to secure the bottom of the h/e to the frame. I orignally used self tapping screws, but with the weight of the h/e full of fluid and vibration using thru bolts was definitely the way to go. Much more secure and a lot less worry
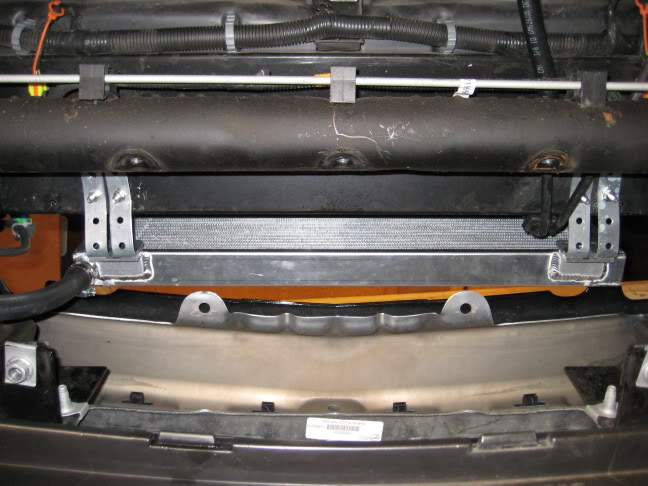

The original h/e mounted in the lower fender in series with the larger one


I had to modify the orginal brackerty to fit in the lower fender and angle the way i wanted it to. Made it simiar to the brackets used in the JoeGibbs setup. The bottom h/e is actually mounted and routed the same exact same way as the Gibbs setup except the pump is in the original position, not moved to the lower h/e


Original look with h/e in it's orignal location

The view through the driver side tow hook at the lower h/e. I removed the backing to fit the new h/e and have the barb where i wanted it. It also provides more airflow to the lower h/e. I'm debating cutting up my lower fender to get more airflow, but i want to do it in a concealed way. I have to think about that one more and how/if i'm going to do it
I used thru-bolts to secure the bottom of the h/e to the frame. I orignally used self tapping screws, but with the weight of the h/e full of fluid and vibration using thru bolts was definitely the way to go. Much more secure and a lot less worry
The original h/e mounted in the lower fender in series with the larger one
I had to modify the orginal brackerty to fit in the lower fender and angle the way i wanted it to. Made it simiar to the brackets used in the JoeGibbs setup. The bottom h/e is actually mounted and routed the same exact same way as the Gibbs setup except the pump is in the original position, not moved to the lower h/e
Original look with h/e in it's orignal location
Last edited by xsports33; Jan 10, 2008 at 11:03 AM.