


Custom Radix Heat Exchanger How To
 Feb 15, 2006 | 04:00 AM
#1

Thread Starter
TECH Senior Member
iTrader: (6)
Joined: Jul 2005
Posts: 5,257
Likes: 0
From: Decatur, AL
 Custom Radix Heat Exchanger How To
This is an instructional to make a larger Radix hx that has proven to drop intake air temps by 20* at the end of a 1/4 mile run. I was able to add 5* more timing. You can do this mod for less than $150 if you have the tools.
Parts list:
- Jeg's Jegster Scirocco radiator #555-51170 $109.99
- 90* 5/8" tube to 3/4" pipe thread. I got a lot of 10 from Mcmaster.com for $7.14 #5463K327. You can use brass that you can pick up at your local hardware store but will cost MUCH more. 1/2" pipe thread could be used as well.
- 1/16" thick sheet metal. I got a 8" wide piece from Lowe's for ~$8
- 2-1" rubber expandable freeze plug you can get at your local parts store $2.99 each.
- 4- 1/4-20x1/2" long bolts
- 2- 1/16" thick washers or equivalent for spacers
Tool List:
- 1/4-20 tap
- 1/4-20 bottom tap
- 9/32 drill
- 3/8" drill
- 5/8 - 1" drill set. I got mine at Harbor freight for $20, it works for light duty drilling.
*EDIT* I have found that a 15/16 hole saw works the best
- 3/4" Pipe tap
Start out by making 2 identical brackets out of the 1/16" sheet steel:
[IMG]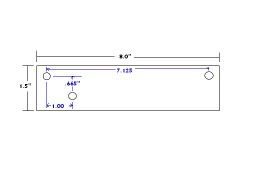 [/IMG]
Photobucket would not let me enlarge this drawing so the dimensions are"
1.5 x 8.00 Hole dimensions are 7.125", .665", & 1.00" Drill holes to 9/32"
You will either need a drill set to step up the sizes to a final 15/16(59/64 works also) or a grinder and a set of calipers to very carefully open up the hole to just under the 15/16 drill size so you can finish it off. Drilling the hole to 15/16 without stepping up in size will either be impossible or likely tear up the hx trying. Below are pics of the tool you need.
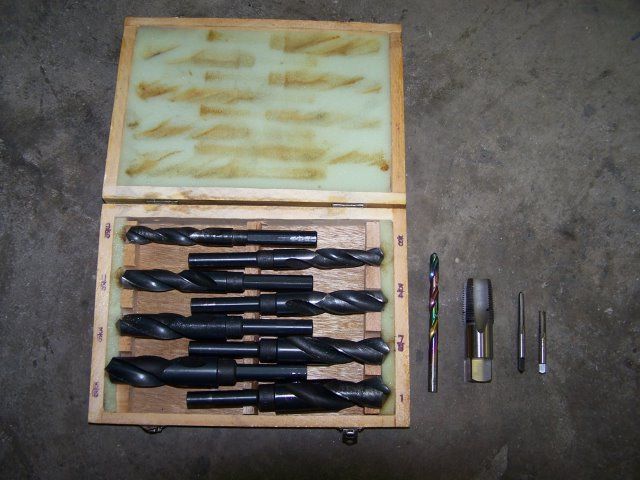
or this:
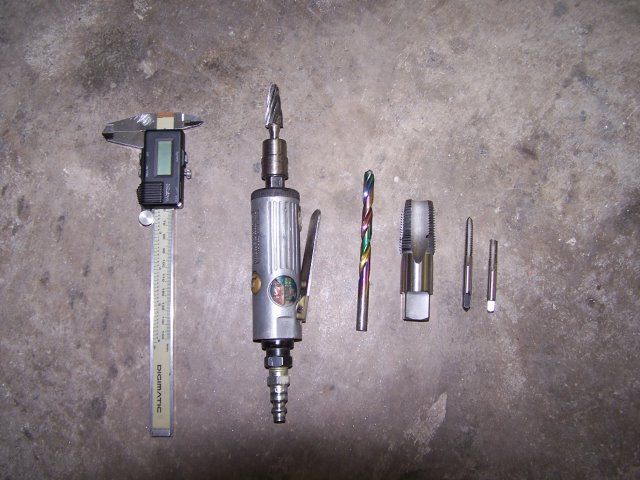
Drill out the ends of the tank, which are oposite of the fill cap, to the 15/16(59/64) and tap with a 3/4" pipe tap. One end of the tanks has a baffle 1/2" in, drill through this as well. Be extremely carful when you tap and not tap too far in. The threads are tapered and the hole enlargens as you go. If you tap too deap the fitting will never tighten up.
[IMG]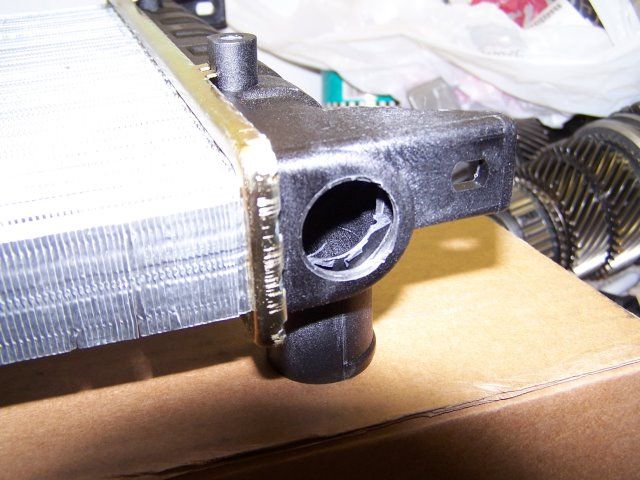 [/IMG]
Install the 90* barb fittings and use some RTV silicone or pipe tape on the threads to ensure seal.
Tap the 4 bracket bosses on the back side of the radiator with the 1/4-20 tap and bottom tap to ensure threads all the way to the bottom. Install the brackets and the washer spacers on the side which has slightly shorter bosses to prevent the bolt from bottoming out. Do not over tighten the bolts. Nice and snug is plenty, remember you are screwing into plastic.
[IMG]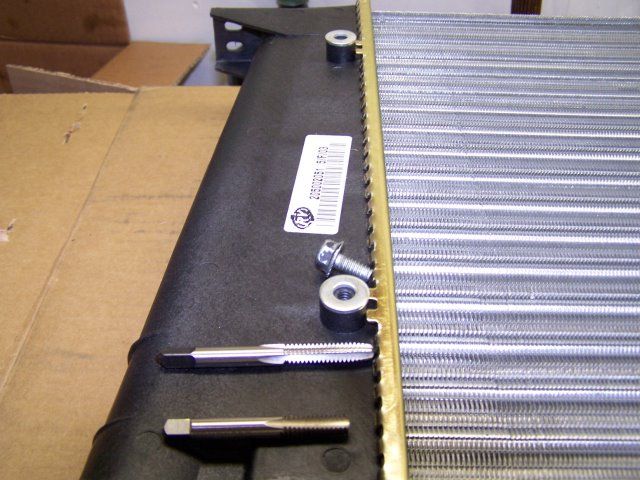 [/IMG]
Install the rubber plugs in the old hose holes. Tighten them down leaving approximately 2.5-3 threads showing do not over tighten, you could break the plastic.
[IMG]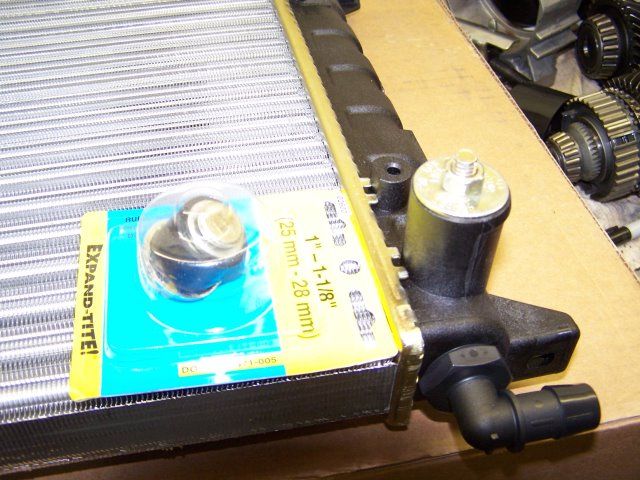 [/IMG]
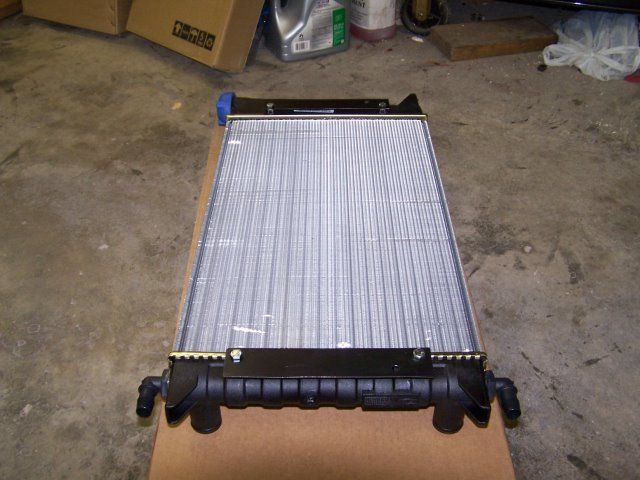
Here is your finished product!
[IMG]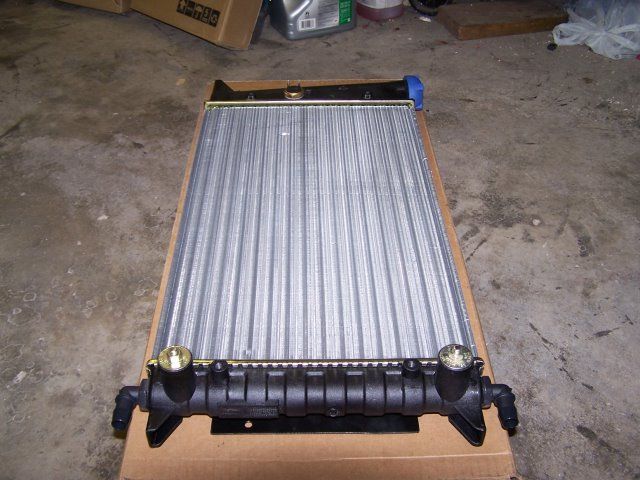 [/IMG]
Installation:
You must grind a small spot on the small lower cross-brace for clearence of the new brackets on each side. I had to remove the plastic air deflector between the bumper and lower radiator. The rest is pretty much self explanatory in the pictures.
[IMG]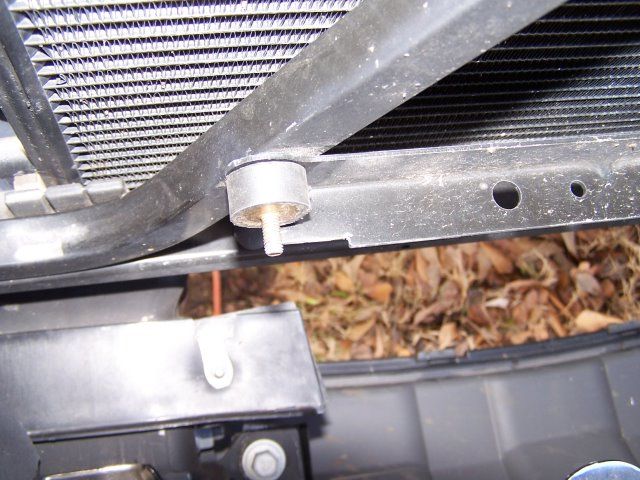 [/IMG]
[IMG]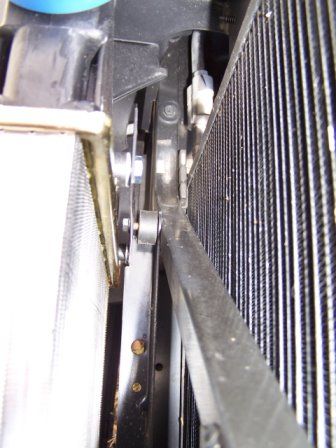 [/IMG]
[IMG]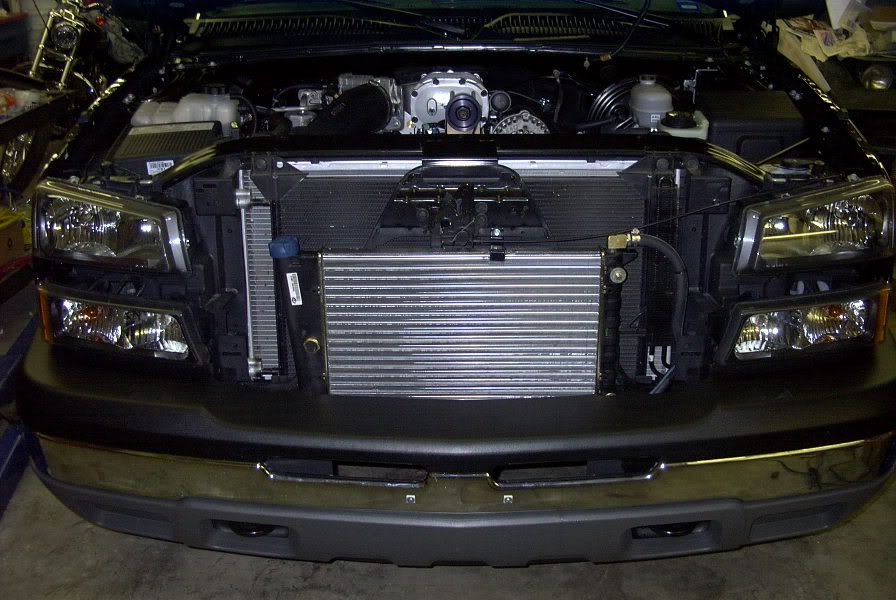 [/IMG]
Note: This has only been trial fitted and used, as of current, on 03-05 1500 Chevrolet truck front ends. I feel that it should clear the grill on other models but can not varrify. I have a 12" fan on the front of mine which ought to tell you how much clearence I have. The only clearence troubles that may arise could be at the ends of the Hx.
Parts list:
- Jeg's Jegster Scirocco radiator #555-51170 $109.99
- 90* 5/8" tube to 3/4" pipe thread. I got a lot of 10 from Mcmaster.com for $7.14 #5463K327. You can use brass that you can pick up at your local hardware store but will cost MUCH more. 1/2" pipe thread could be used as well.
- 1/16" thick sheet metal. I got a 8" wide piece from Lowe's for ~$8
- 2-1" rubber expandable freeze plug you can get at your local parts store $2.99 each.
- 4- 1/4-20x1/2" long bolts
- 2- 1/16" thick washers or equivalent for spacers
Tool List:
- 1/4-20 tap
- 1/4-20 bottom tap
- 9/32 drill
- 3/8" drill
- 5/8 - 1" drill set. I got mine at Harbor freight for $20, it works for light duty drilling.
*EDIT* I have found that a 15/16 hole saw works the best
- 3/4" Pipe tap
Start out by making 2 identical brackets out of the 1/16" sheet steel:
[IMG]
[/IMG]Photobucket would not let me enlarge this drawing so the dimensions are"
1.5 x 8.00 Hole dimensions are 7.125", .665", & 1.00" Drill holes to 9/32"
You will either need a drill set to step up the sizes to a final 15/16(59/64 works also) or a grinder and a set of calipers to very carefully open up the hole to just under the 15/16 drill size so you can finish it off. Drilling the hole to 15/16 without stepping up in size will either be impossible or likely tear up the hx trying. Below are pics of the tool you need.
or this:
Drill out the ends of the tank, which are oposite of the fill cap, to the 15/16(59/64) and tap with a 3/4" pipe tap. One end of the tanks has a baffle 1/2" in, drill through this as well. Be extremely carful when you tap and not tap too far in. The threads are tapered and the hole enlargens as you go. If you tap too deap the fitting will never tighten up.
[IMG]
[/IMG] Install the 90* barb fittings and use some RTV silicone or pipe tape on the threads to ensure seal.
Tap the 4 bracket bosses on the back side of the radiator with the 1/4-20 tap and bottom tap to ensure threads all the way to the bottom. Install the brackets and the washer spacers on the side which has slightly shorter bosses to prevent the bolt from bottoming out. Do not over tighten the bolts. Nice and snug is plenty, remember you are screwing into plastic.
[IMG]
[/IMG] Install the rubber plugs in the old hose holes. Tighten them down leaving approximately 2.5-3 threads showing do not over tighten, you could break the plastic.
[IMG]
[/IMG] Here is your finished product!
[IMG]
[/IMG] Installation:
You must grind a small spot on the small lower cross-brace for clearence of the new brackets on each side. I had to remove the plastic air deflector between the bumper and lower radiator. The rest is pretty much self explanatory in the pictures.
[IMG]
[/IMG] [IMG]
[/IMG] [IMG]
[/IMG]Note: This has only been trial fitted and used, as of current, on 03-05 1500 Chevrolet truck front ends. I feel that it should clear the grill on other models but can not varrify. I have a 12" fan on the front of mine which ought to tell you how much clearence I have. The only clearence troubles that may arise could be at the ends of the Hx.
Last edited by mjhoward; Apr 13, 2006 at 04:52 PM.



 Obviously this is STICKY material!
Feb 15, 2006 | 07:10 AM
Obviously this is STICKY material!
Feb 15, 2006 | 07:10 AM
#4
Thread Starter
TECH Senior Member
iTrader: (6)
Joined: Jul 2005
Posts: 5,257
Likes: 0
From: Decatur, AL

Thanks. It isn't show quality, but it is functional and cheap.
Due to my lack of time I have to go up on the price so I can justify doing it. PM me if you are interested in me supplying this for you.
Mods-I know i'm not a sponsor so if you would not like for me to advertise this just let me know. I would be more than happy if everyone did this mod themselves.
Due to my lack of time I have to go up on the price so I can justify doing it. PM me if you are interested in me supplying this for you.
Mods-I know i'm not a sponsor so if you would not like for me to advertise this just let me know. I would be more than happy if everyone did this mod themselves.



Trending Topics

 Feb 16, 2006 | 10:16 PM
#10

Looks good.
How much bigger is this than hte Radix H/E?
Could you also then mount the stock Radix H/E under this one for a dual setup? I thin k I saw someone who ran a dual setup like that.
How much bigger is this than hte Radix H/E?
Could you also then mount the stock Radix H/E under this one for a dual setup? I thin k I saw someone who ran a dual setup like that.
Last edited by BLASTER; Feb 16, 2006 at 10:23 PM.