
2000 sierra 6.0l on3 kit build


 Mar 4, 2014 | 12:46 PM
#57

Thread Starter
Teching In
Joined: Apr 2013
Posts: 42
Likes: 0
No dyno numbers yet made couple runs on truck it pulled pretty strong pulling engine out due to good amount of blowby under boost will be going with a 408 and will later upgrade turbo to 88mm had to mod grill somewhat and make all new brackets to fit 4" i/c behind grille
Mar 5, 2014 | 04:29 PM
#59

Former Vendor
Joined: Nov 2012
Posts: 482
Likes: 0
I wanted to follow up in detail for the downpipe issue addressed in this thread. Ive been slammed in here as well as the weather just being terrible. I use the shop truck as my daily driver so its been hard to get a chance to do the testing. Ive finally got some time and started last evening. Here are the results and solution when installing your On 3 1500 truck turbo system:
A few customers have brought to our attention that the downpipe is very tight and hard to install the 2nd section of the downpipe going parallel with the truck floor. I wanted to test this and pulled a production kit from the shelf and installed it on our shop truck to see whats going on exactly. After testing, it would be very difficult to get it clamped and for sure would rattle. We have a very simple and easy fix for this and will send any current customers that have purchased this clamp to solve this.
Here are the photos showing the issues needing addressed:
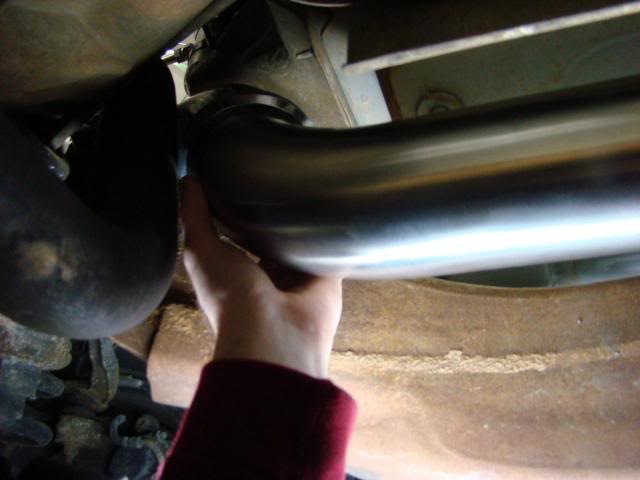
As you can see everything is lined up at the top still:
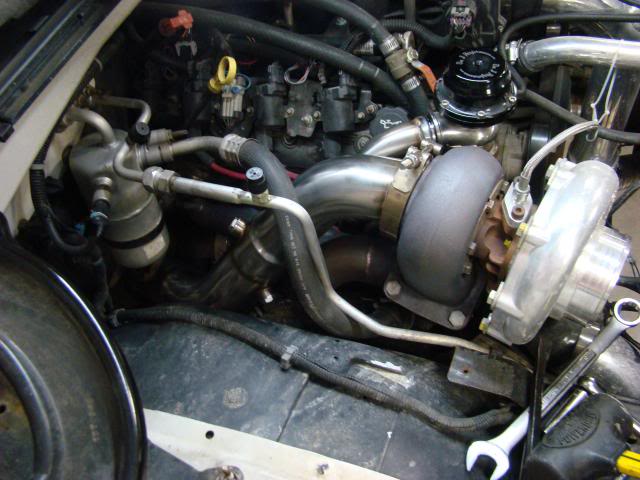
Before moving forward, if you have the tubing all wrapped (header and downpipe) the clearance between the 2 are very tight and might also throw off the turbo to downpipe. So in that one area where they are close, you might want to not wrap. We highly suggest that you don’t wrap the parts anyhow and get them coated if anything.
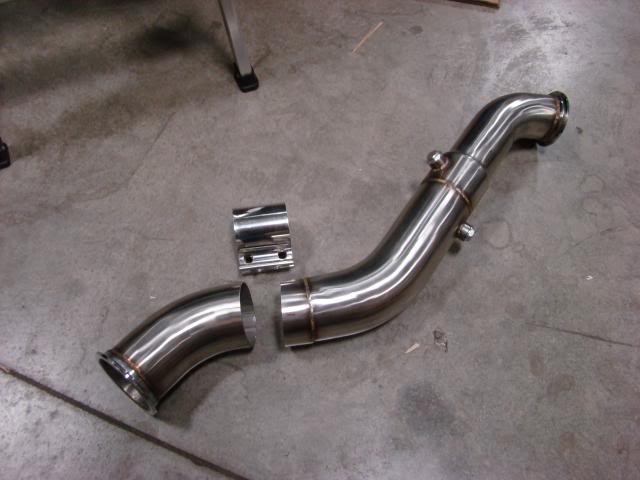
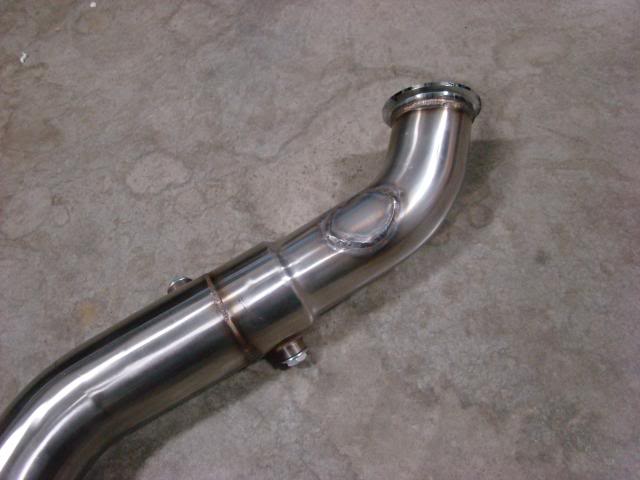
On to the solution, when installing the downpipe, you will need to make one cut. There is no welding involved so please do not be alarmed. Take a look at the photo and note the location of the cut, its ~1.25” past the weld. This straight section needed about 3/8-1/2” extra in length to push the lower v-band past the crossover pipe. The stainless steel lap band we will send out makes up for this difference and will provide clamping force between the two. We use this style is a lot of our systems post-turbo to allow for more adjustment.
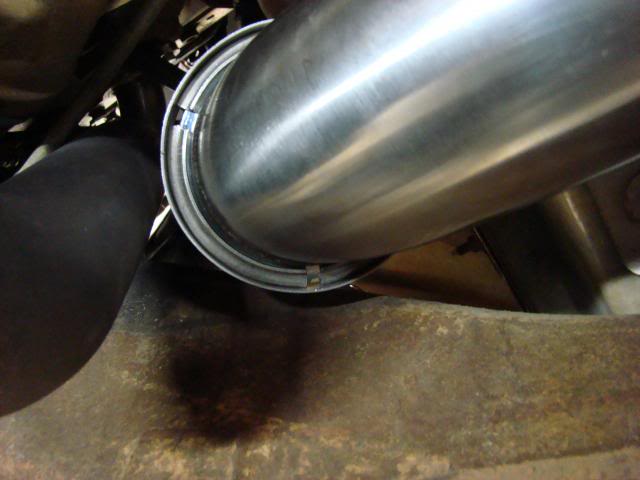
This illustrates how the clamp will sit when installed on the truck. You mainly just want it right in the middle of the straight section so that the clamp isn’t on the bend.
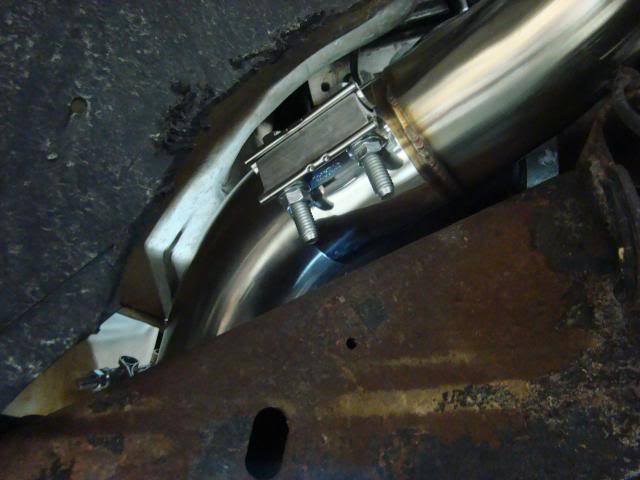
Now with that installed, you are able to clearly move the lower flange out past the crossover the needed room and clamp it down.
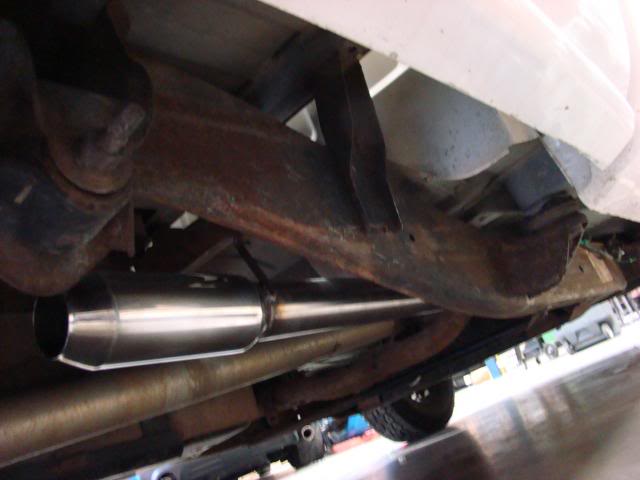
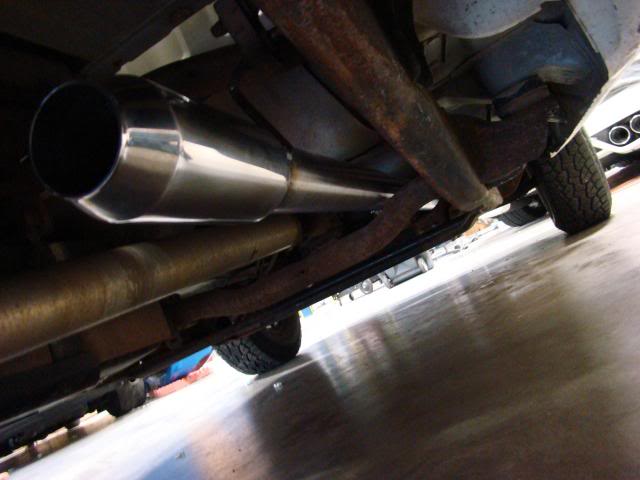
On my truck I went ahead and welded in a straight through muffler while I was at it and also just welded it to the stock hanger. Installs very clean this way, sounds good and keeps the exhaust past the cab. Im going to end up making a 90 off of this and come out of the bed right in front of the rear tire. We didn’t have a free lift so I was on jack stands and didn’t want to finish it today. Main objective was to make sure we had a solution for the customers and relay this info to everyone installing and future customers getting ready to install
Also a service we might start to offer is an external dump for the wastegate. On our shop truck, we ended up cutting off the re-circulation pipe and welded it shut. Personally I like it this way but some people think its too loud when in boost. There is a little performance gain in doing so when making decent power but I did it for addition adjustment as well. When its re-circulated, there is limited adjustment. With it vented to atmosphere, you can rotate the downpipe around more and get it exactly where you need it. Although now with the lap-band being added to the 1st section of the downpipe, this isn’t as crucial.
Hope this helps clear everything up and any questions, please let us know. Any current customers needing the new exhaust clamp, please email me at On3performance@aol.com with your info. We will get you the addition clamp out to assist with finishing your installs
A few customers have brought to our attention that the downpipe is very tight and hard to install the 2nd section of the downpipe going parallel with the truck floor. I wanted to test this and pulled a production kit from the shelf and installed it on our shop truck to see whats going on exactly. After testing, it would be very difficult to get it clamped and for sure would rattle. We have a very simple and easy fix for this and will send any current customers that have purchased this clamp to solve this.
Here are the photos showing the issues needing addressed:

As you can see everything is lined up at the top still:

Before moving forward, if you have the tubing all wrapped (header and downpipe) the clearance between the 2 are very tight and might also throw off the turbo to downpipe. So in that one area where they are close, you might want to not wrap. We highly suggest that you don’t wrap the parts anyhow and get them coated if anything.
On to the solution, when installing the downpipe, you will need to make one cut. There is no welding involved so please do not be alarmed. Take a look at the photo and note the location of the cut, its ~1.25” past the weld. This straight section needed about 3/8-1/2” extra in length to push the lower v-band past the crossover pipe. The stainless steel lap band we will send out makes up for this difference and will provide clamping force between the two. We use this style is a lot of our systems post-turbo to allow for more adjustment.

This illustrates how the clamp will sit when installed on the truck. You mainly just want it right in the middle of the straight section so that the clamp isn’t on the bend.

Now with that installed, you are able to clearly move the lower flange out past the crossover the needed room and clamp it down.

On my truck I went ahead and welded in a straight through muffler while I was at it and also just welded it to the stock hanger. Installs very clean this way, sounds good and keeps the exhaust past the cab. Im going to end up making a 90 off of this and come out of the bed right in front of the rear tire. We didn’t have a free lift so I was on jack stands and didn’t want to finish it today. Main objective was to make sure we had a solution for the customers and relay this info to everyone installing and future customers getting ready to install


Also a service we might start to offer is an external dump for the wastegate. On our shop truck, we ended up cutting off the re-circulation pipe and welded it shut. Personally I like it this way but some people think its too loud when in boost. There is a little performance gain in doing so when making decent power but I did it for addition adjustment as well. When its re-circulated, there is limited adjustment. With it vented to atmosphere, you can rotate the downpipe around more and get it exactly where you need it. Although now with the lap-band being added to the 1st section of the downpipe, this isn’t as crucial.

Hope this helps clear everything up and any questions, please let us know. Any current customers needing the new exhaust clamp, please email me at On3performance@aol.com with your info. We will get you the addition clamp out to assist with finishing your installs