Some sprucing up of the RCSB
 02-10-2013, 08:23 AM
#1
Good morning fellas
Was cruising the projets portion of the forum today, and realized i never posted a thread with the recent work ive been doing to the truck.
For a little background heres a link to the last project of the truck.
My LQ9 6.0l Build and Swap Thread - PerformanceTrucks.net Forums
Cliff Notes are
99rcsb, when iw miles truck. Owned for probably 6 or 7 years now
Bunch on exterior interior mods
5/8 drop
Bars
Wilwoods
lq9 with 2.5 243 and a tsp tqr 2
level 7 flt 4l65e
etc etc
Anyway when i did the motor swap I wanted to take my time and really go through every nut and bolt, sandblast, prime and paint everything. I intended on keeping this truck for as long as possible, so why not make it as nice as I can?
When the motor was was done
This year I decided I wanted to try and switch the suspenion up for something a bit "nicer".
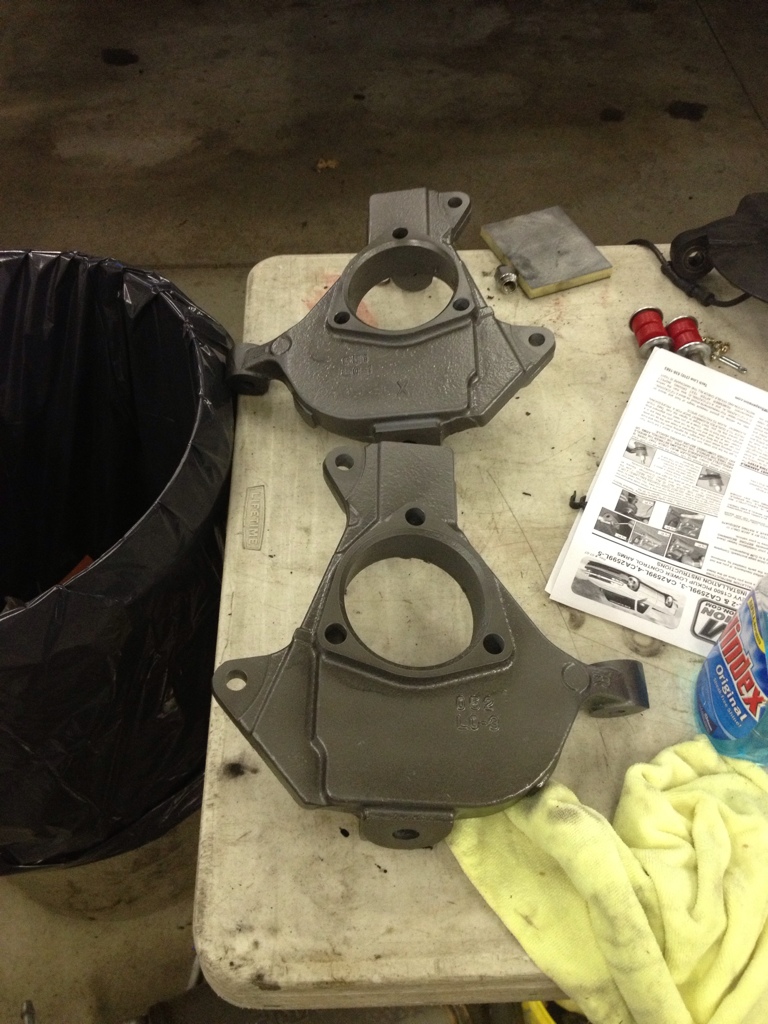
Truck has 2" mcg 17" spindles, and 3 " springs for the drop. It had really horrible bump steer, so I decided I would try a 5" DJM Control arm kit, both UCA and LCA to try and improve the right, and correct BJ angles. I installed oem spindles, and belltech 1" cc/ec drop springs. Which netted me about .5" drop on the rcsb
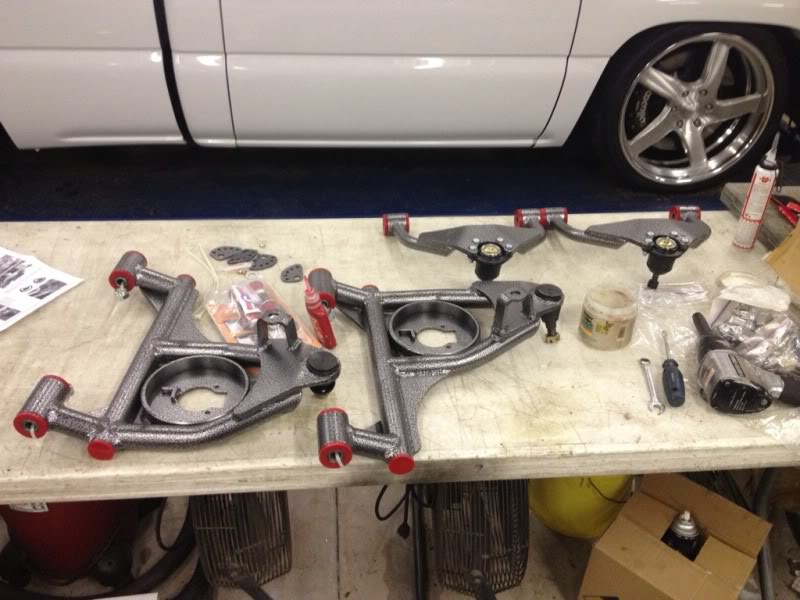
stock spindles refinished
Assembled. Also put brand new inners in, the orignal ones were getting a bit beat.(not in pics)
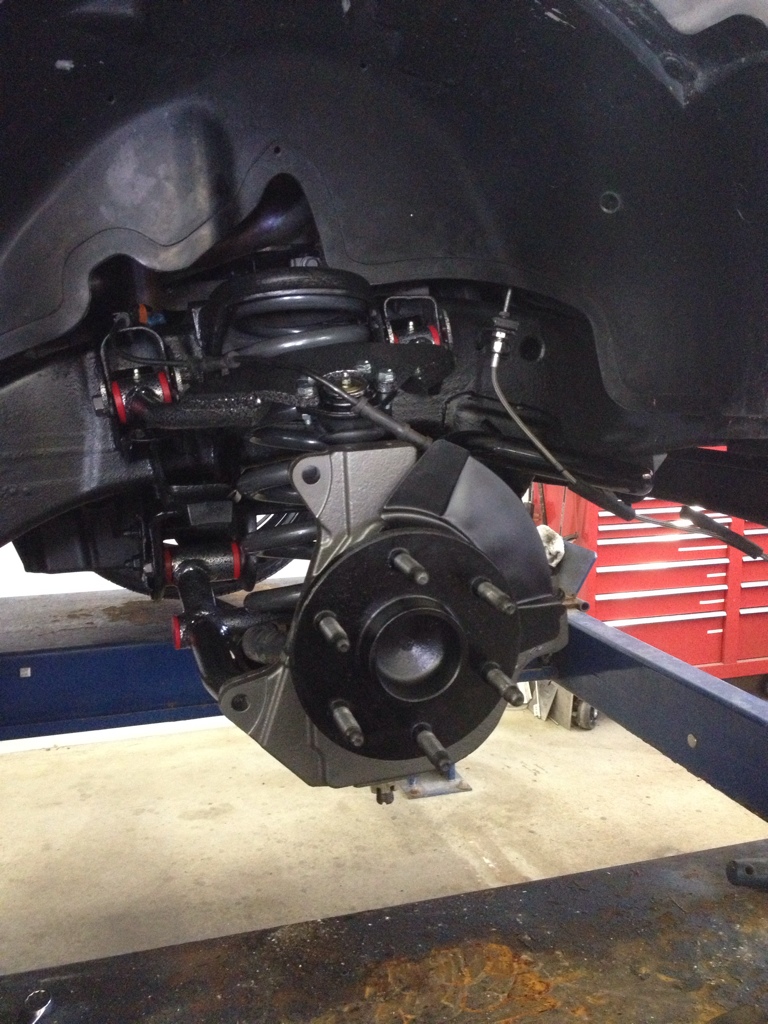
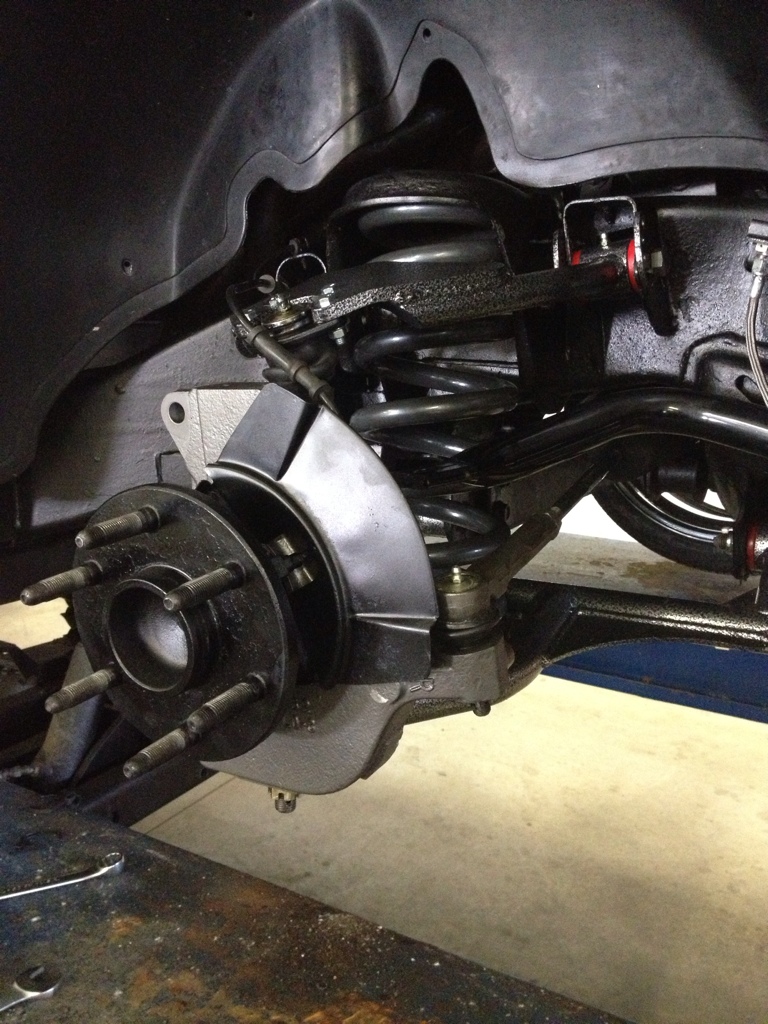
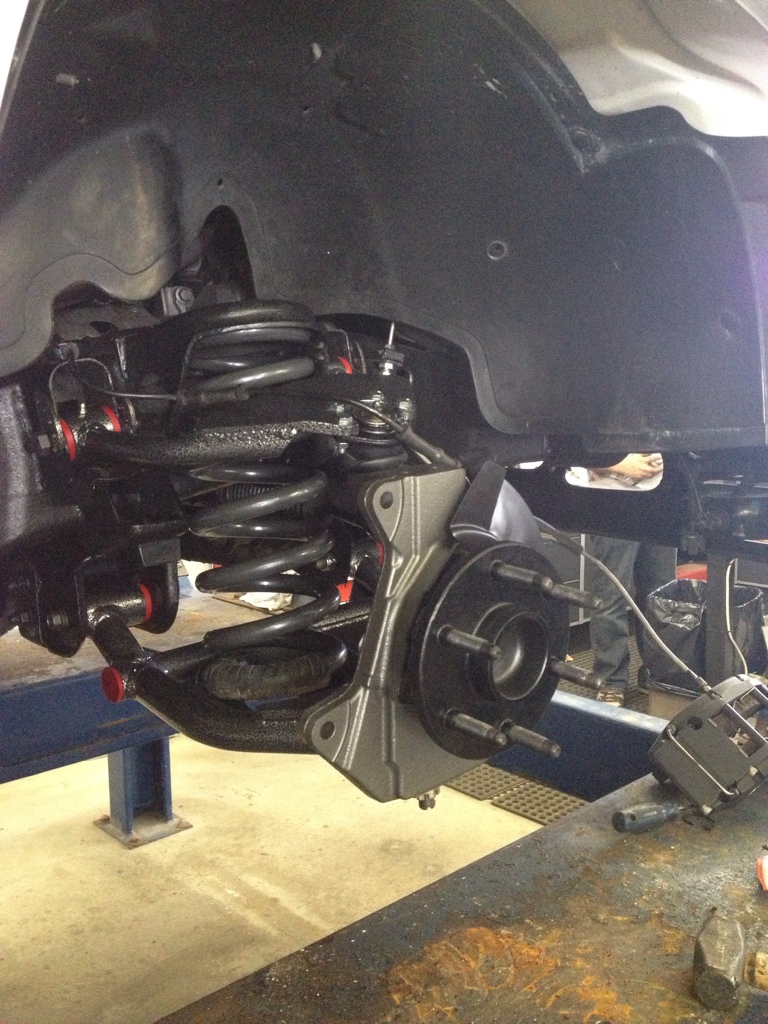
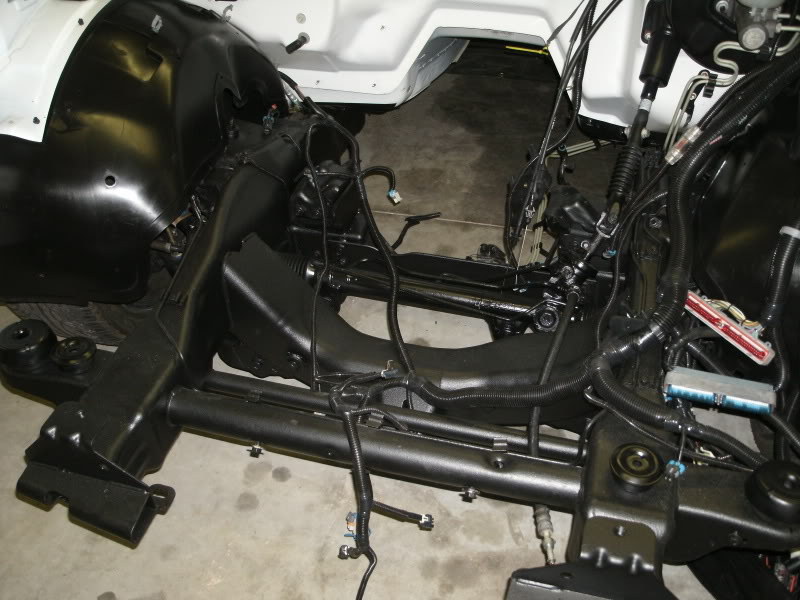
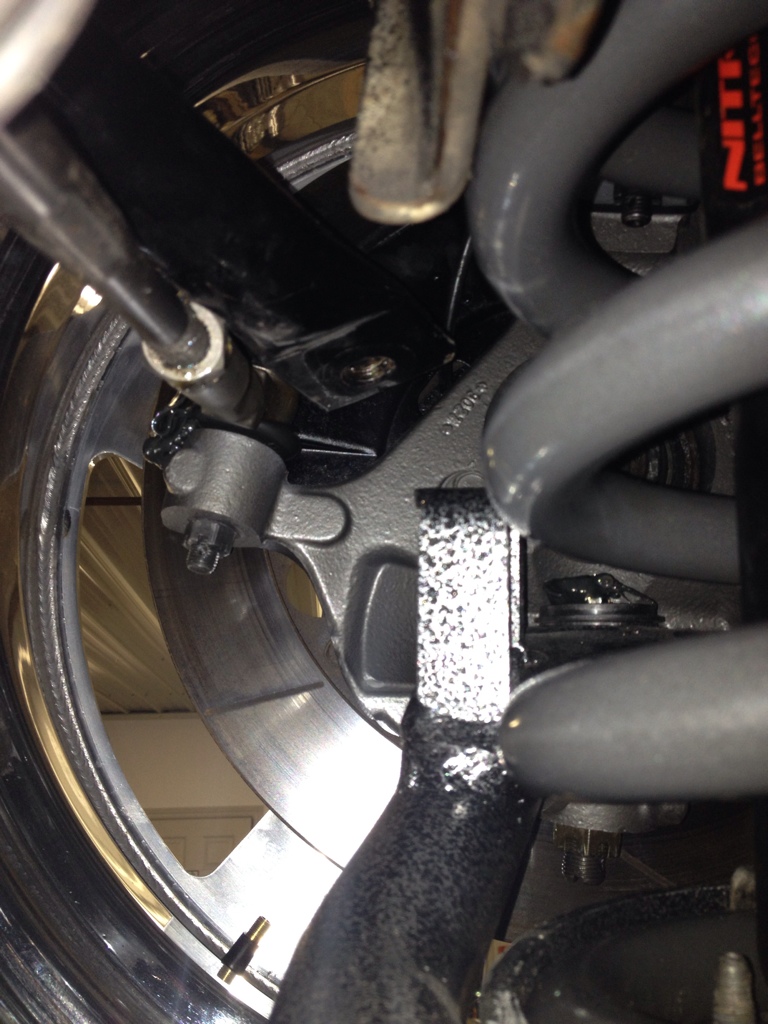
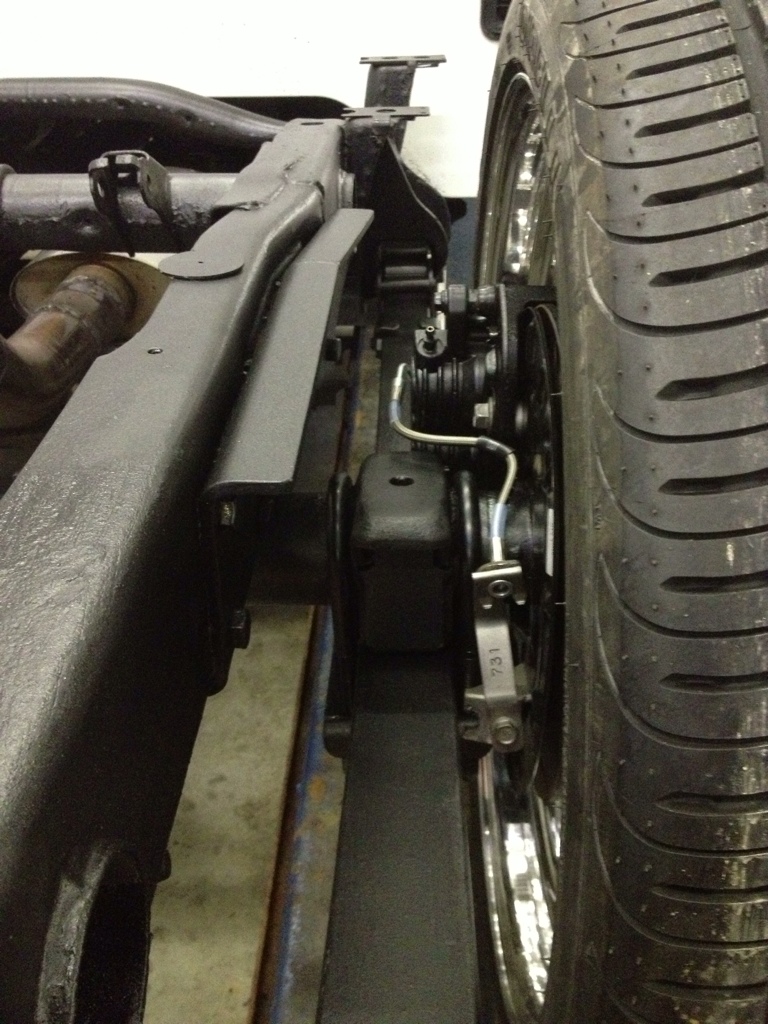
The results I had were dissapointing. The Bump steer was even worse. So my next step is ordering 16" MCG coils, to help eliminate bumpsteer. ITs not so muchp roven that they are better, however I have owned 5 nbs trucks, 2 of them have had 17" spindle and bumpsteered very bad, while the other 2 have had 16" spindles and drive perfect. I beleive that is the culprit, but i will report back on how the result is. Also the swya bar was about 2" away from where the link kit was suppose to connect. DJM had no resolution, said they would make me a bracket. however with how bad the bumpsteer was I wasnt gonna waste my time.
Heres a pic of the sway bar location
Was cruising the projets portion of the forum today, and realized i never posted a thread with the recent work ive been doing to the truck.
For a little background heres a link to the last project of the truck.
My LQ9 6.0l Build and Swap Thread - PerformanceTrucks.net Forums
Cliff Notes are
99rcsb, when iw miles truck. Owned for probably 6 or 7 years now
Bunch on exterior interior mods
5/8 drop
Bars
Wilwoods
lq9 with 2.5 243 and a tsp tqr 2
level 7 flt 4l65e
etc etc
Anyway when i did the motor swap I wanted to take my time and really go through every nut and bolt, sandblast, prime and paint everything. I intended on keeping this truck for as long as possible, so why not make it as nice as I can?
When the motor was was done
This year I decided I wanted to try and switch the suspenion up for something a bit "nicer".
Truck has 2" mcg 17" spindles, and 3 " springs for the drop. It had really horrible bump steer, so I decided I would try a 5" DJM Control arm kit, both UCA and LCA to try and improve the right, and correct BJ angles. I installed oem spindles, and belltech 1" cc/ec drop springs. Which netted me about .5" drop on the rcsb
stock spindles refinished
Assembled. Also put brand new inners in, the orignal ones were getting a bit beat.(not in pics)
The results I had were dissapointing. The Bump steer was even worse. So my next step is ordering 16" MCG coils, to help eliminate bumpsteer. ITs not so muchp roven that they are better, however I have owned 5 nbs trucks, 2 of them have had 17" spindle and bumpsteered very bad, while the other 2 have had 16" spindles and drive perfect. I beleive that is the culprit, but i will report back on how the result is. Also the swya bar was about 2" away from where the link kit was suppose to connect. DJM had no resolution, said they would make me a bracket. however with how bad the bumpsteer was I wasnt gonna waste my time.
Heres a pic of the sway bar location
Last edited by bgray; 02-10-2013 at 08:59 AM.
 02-10-2013, 08:31 AM
#2
So as the front sits now I have the Stock LCA arms blasted and painted satin black, with new urathane bushings pressed in. Im just waiting for my 16" spindles to arrive and I will swap out the DJM LCA, Stock spindles and spring, leaving in the DJM UCA(corre upper bj angle)
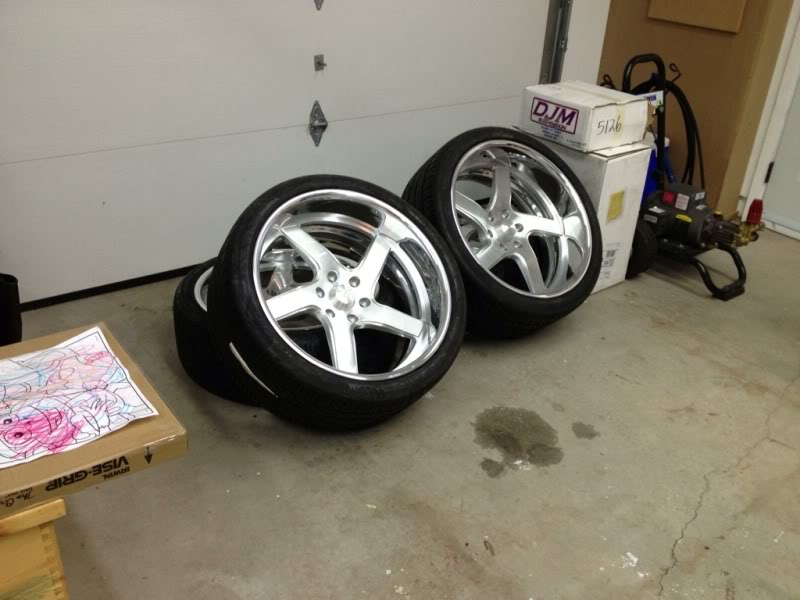
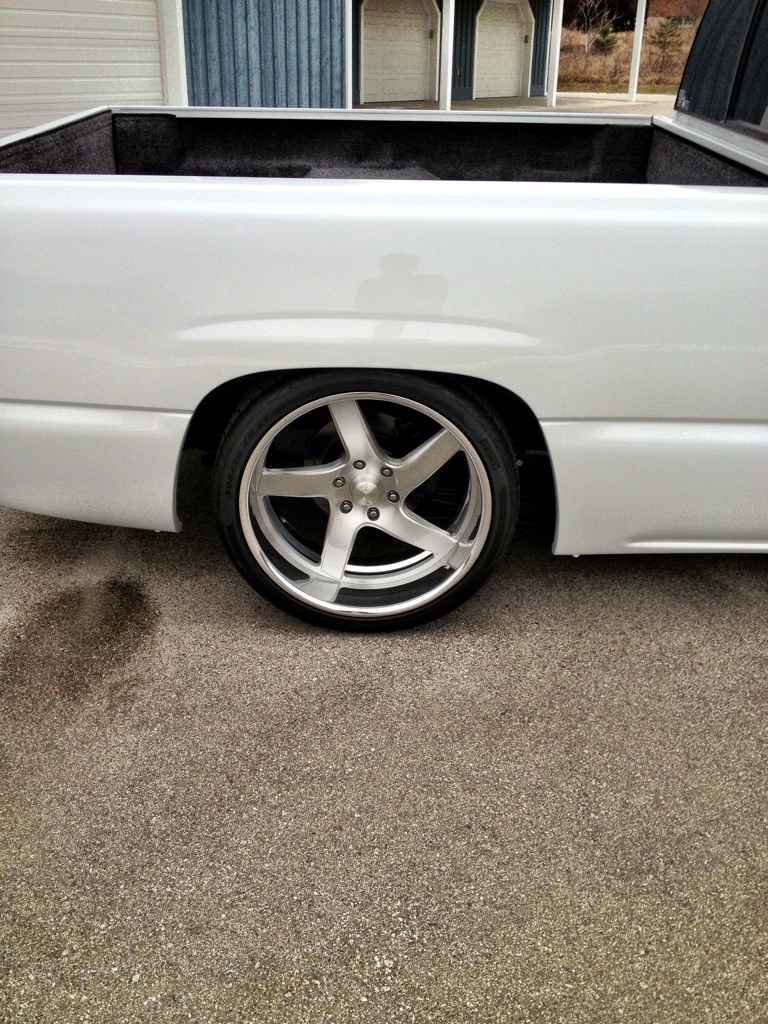
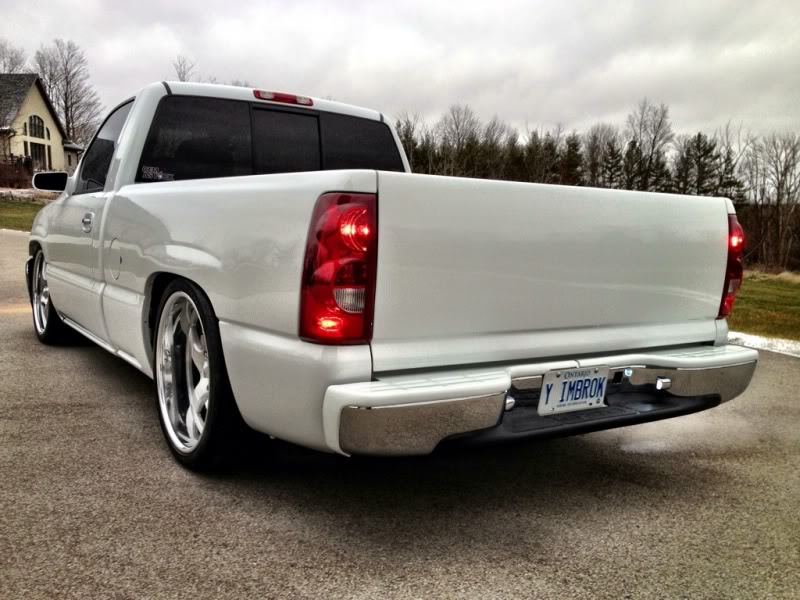
For the rear of the truck I ordered a new set of wheels that required me to shorten the rear end 5" overall to tuck the rims. They are Raceline Illusions with polished barrels, and powercoated centers.
22x10 4.75" BS - 305/30r22
22x8.5 6" bs 255/35r22
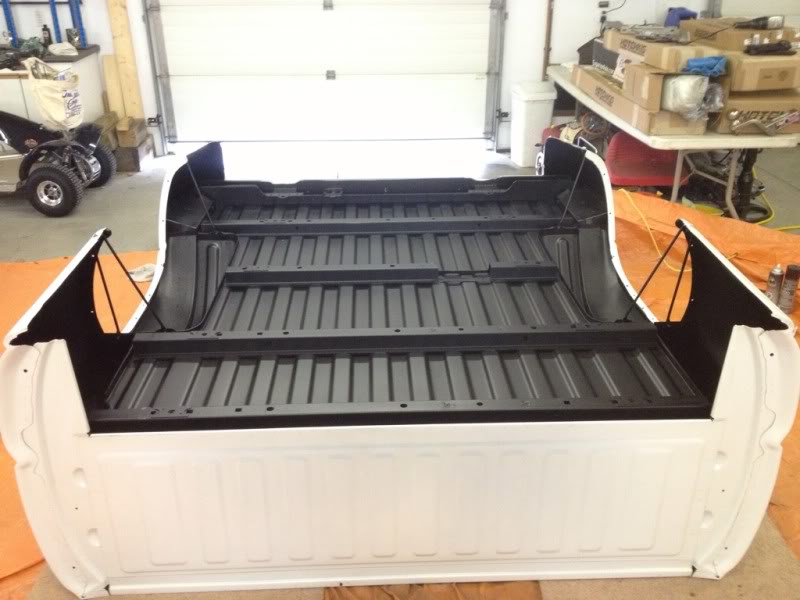
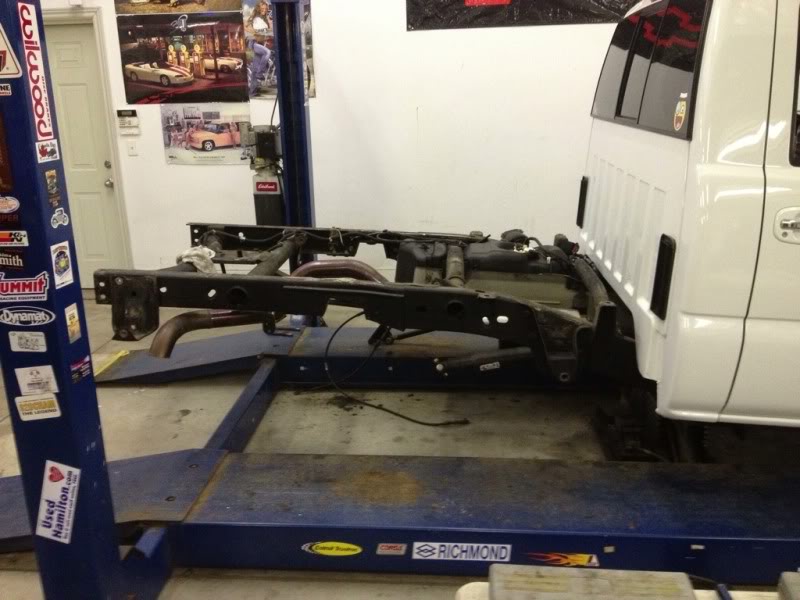
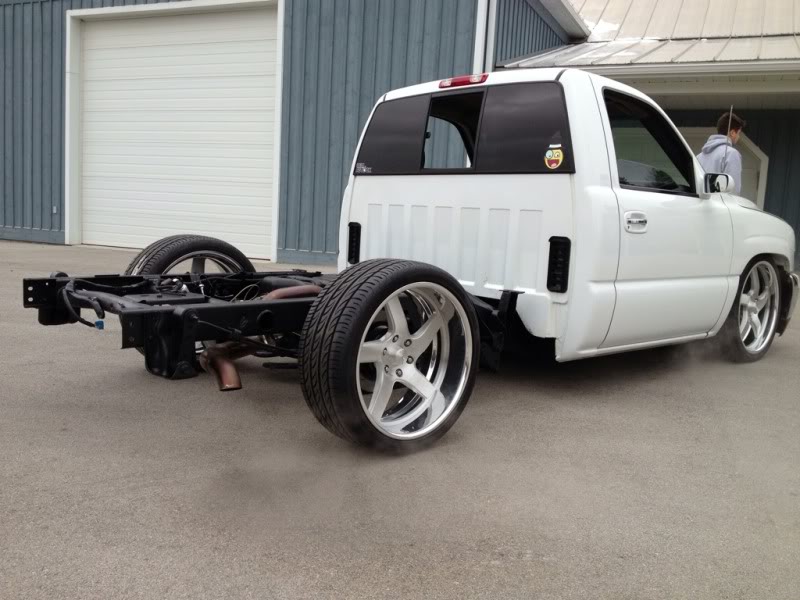
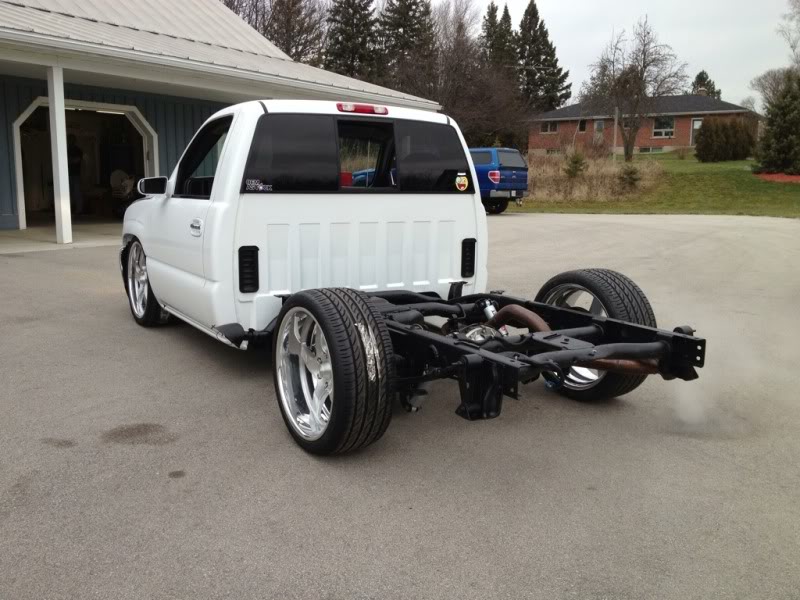
Took the truck out and pulled the bed off
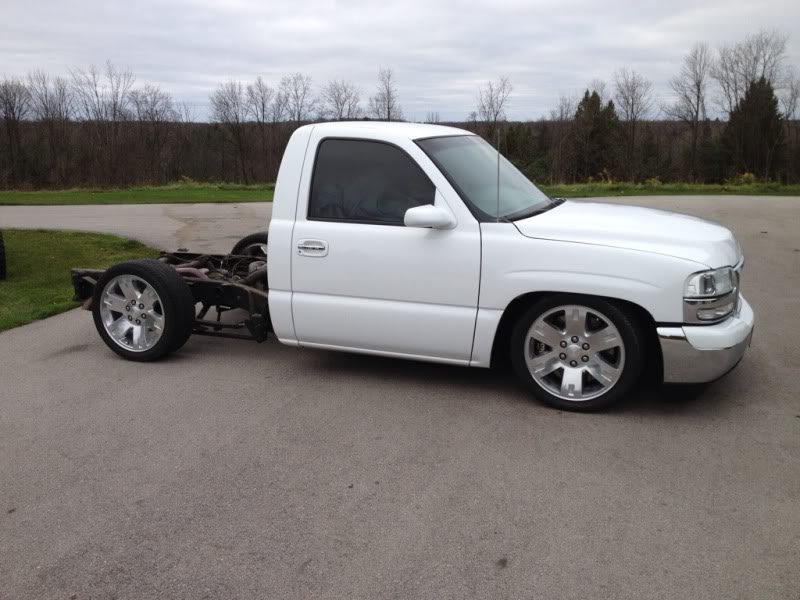
Bed off to be coated
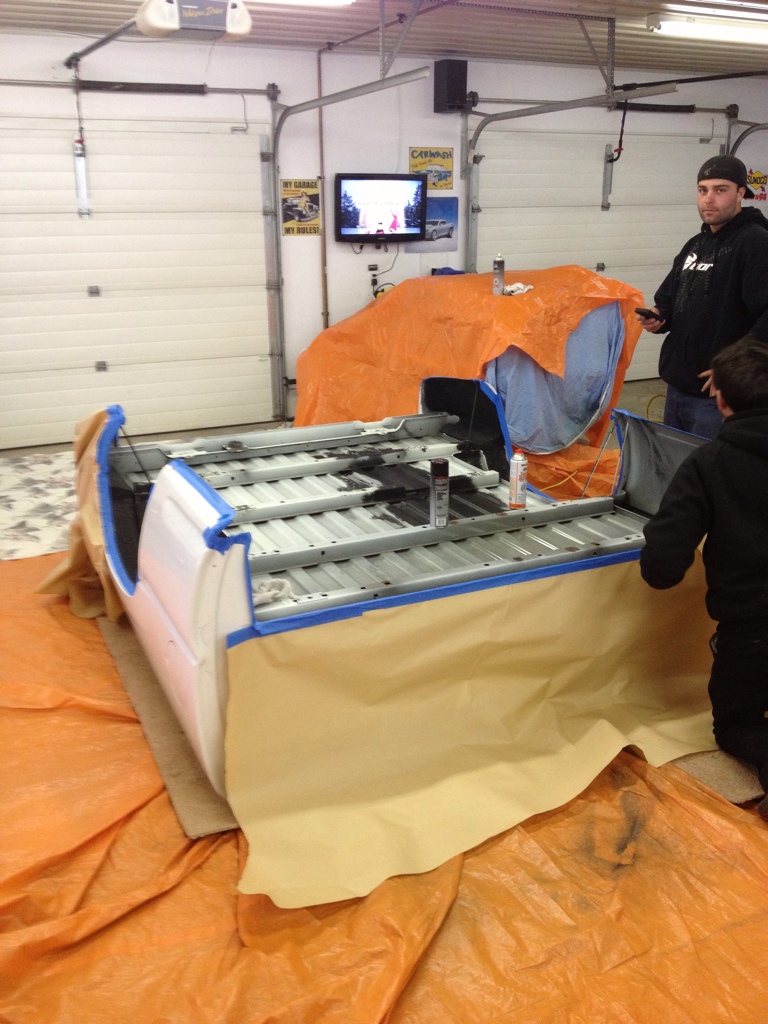
Coated
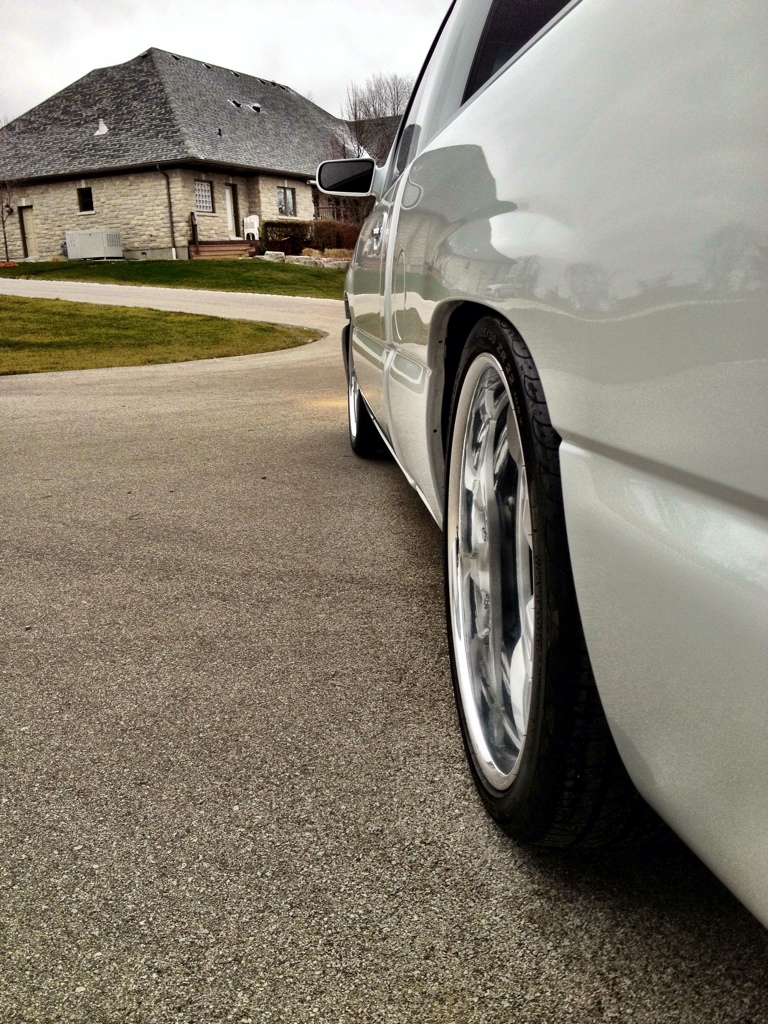
Test fitting
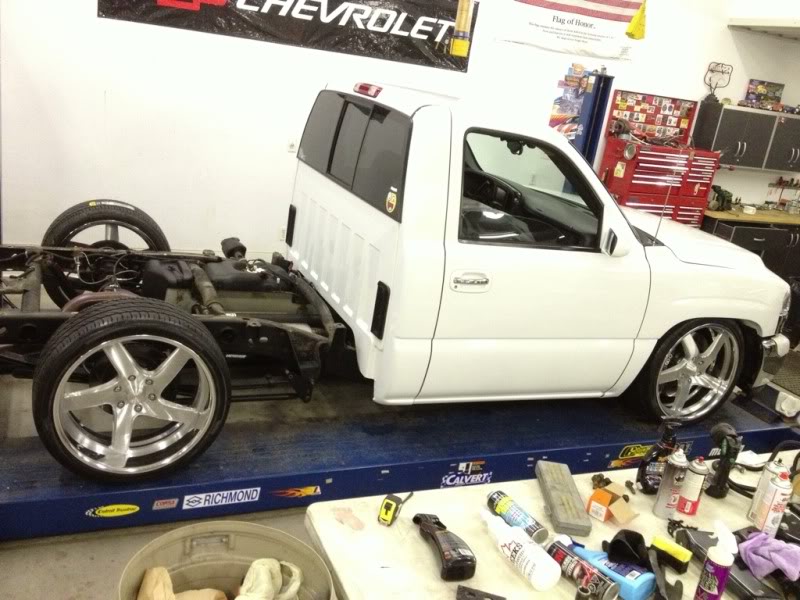
Front is perfect, andd doesnt rub any lock to lock. Rear was on for final measurements. I ordered the wheels knowing what i needed to shorten the rear too, however, best to measure and make sure before i get it done
For the rear of the truck I ordered a new set of wheels that required me to shorten the rear end 5" overall to tuck the rims. They are Raceline Illusions with polished barrels, and powercoated centers.
22x10 4.75" BS - 305/30r22
22x8.5 6" bs 255/35r22
Took the truck out and pulled the bed off
Bed off to be coated
Coated
Test fitting
Front is perfect, andd doesnt rub any lock to lock. Rear was on for final measurements. I ordered the wheels knowing what i needed to shorten the rear too, however, best to measure and make sure before i get it done
02-10-2013, 08:43 AM
#4
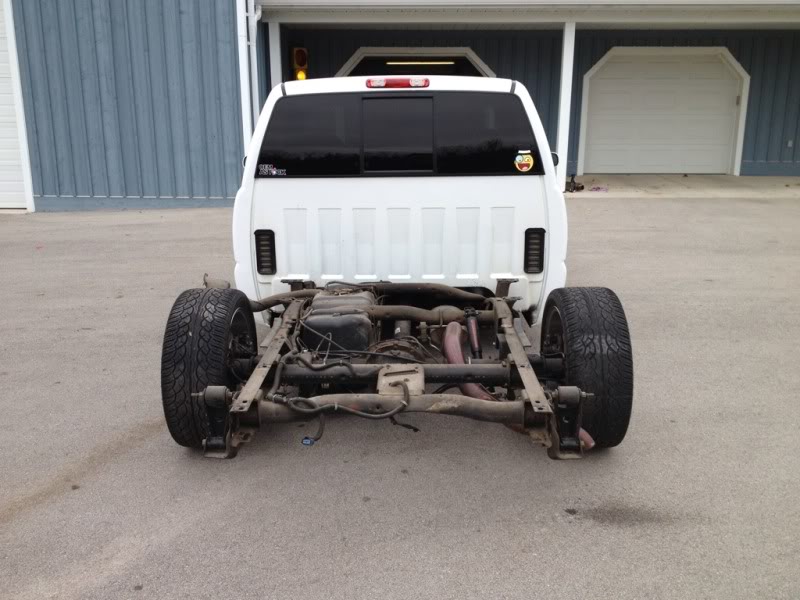
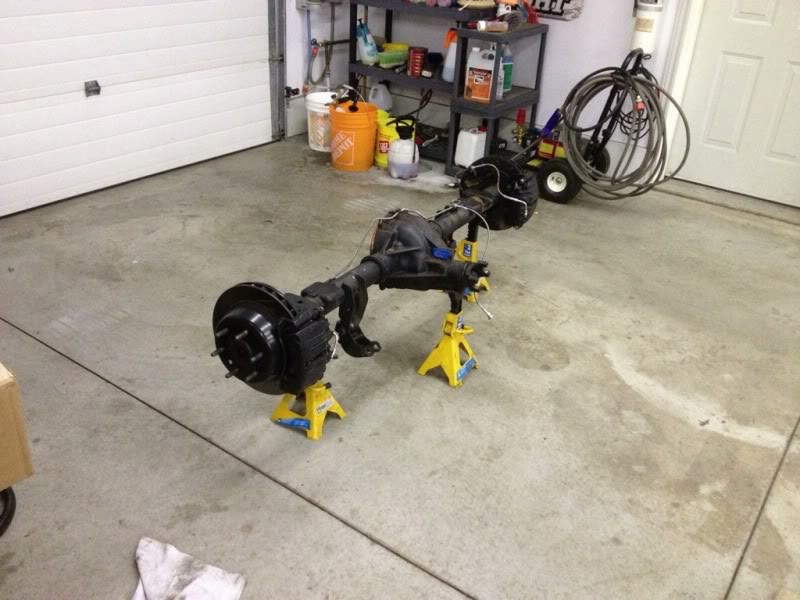
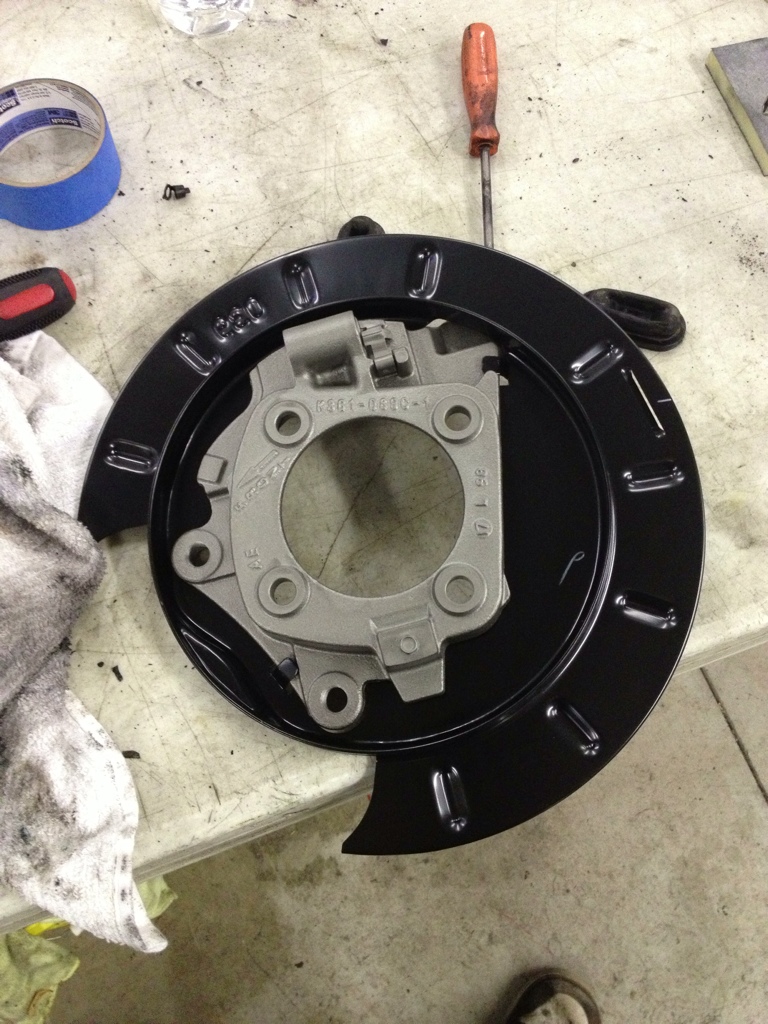
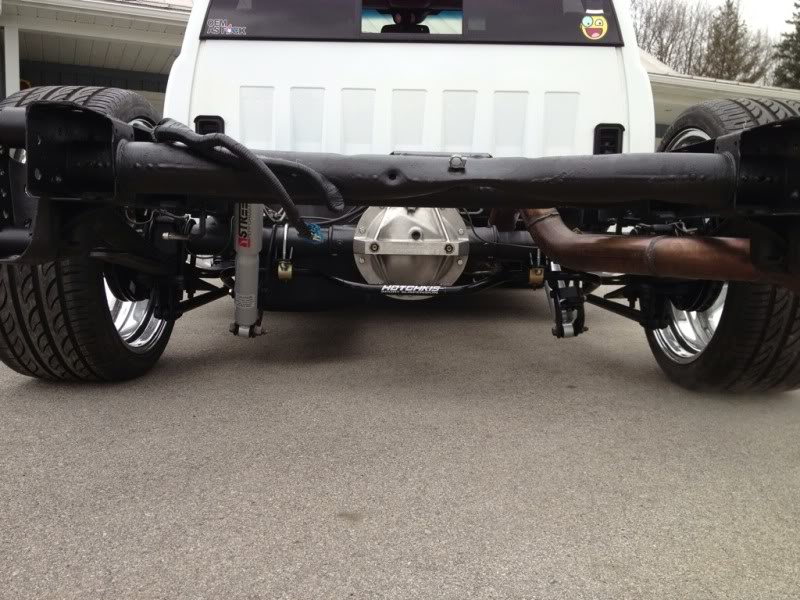
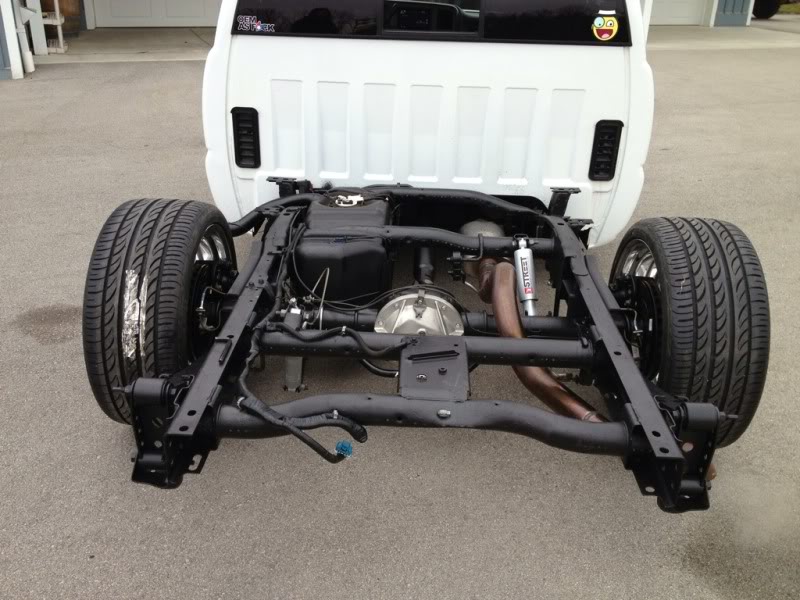
By shortening the rear I ran into an issue with the suburan rear brakes. Becasue they are bigger then the factory single piston, when shortened they would have contacted the leaf spring. So i had them rotate the axle tube 16 degrees up so they would clear.
Mostly stripped
Coated up
Painted Hubs and new backing plates
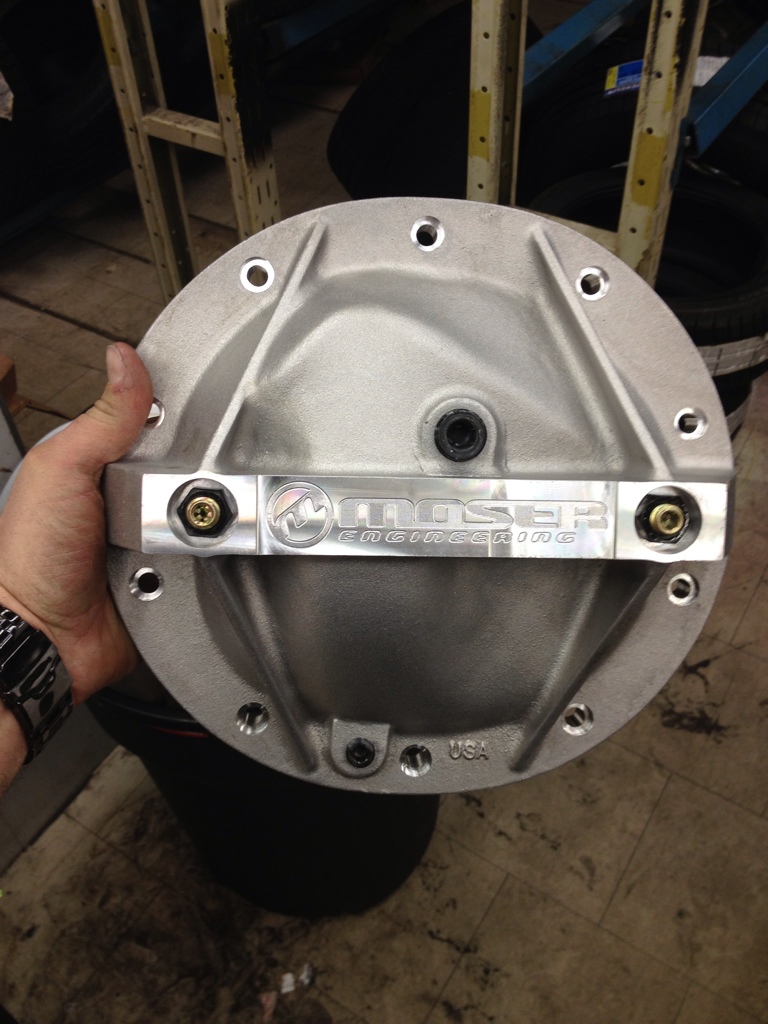
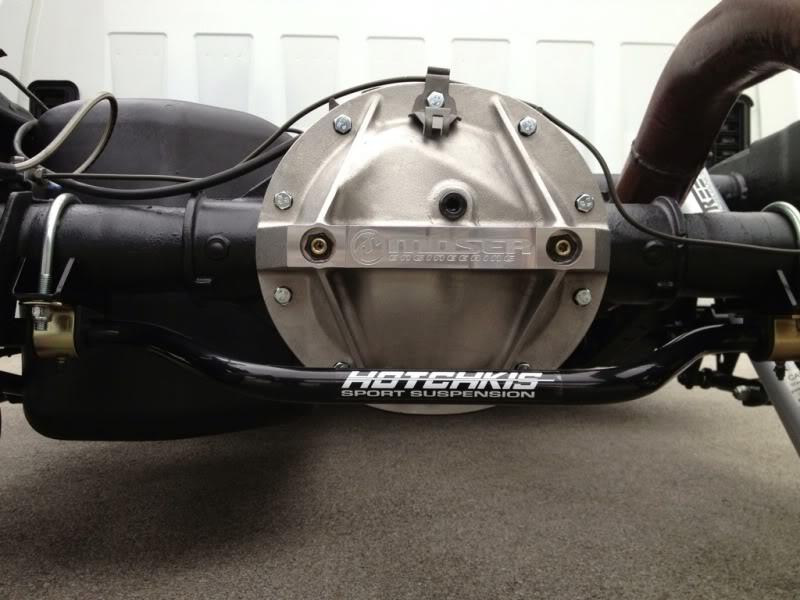
Moser girdle
Shortened 2.5" each Moser axles
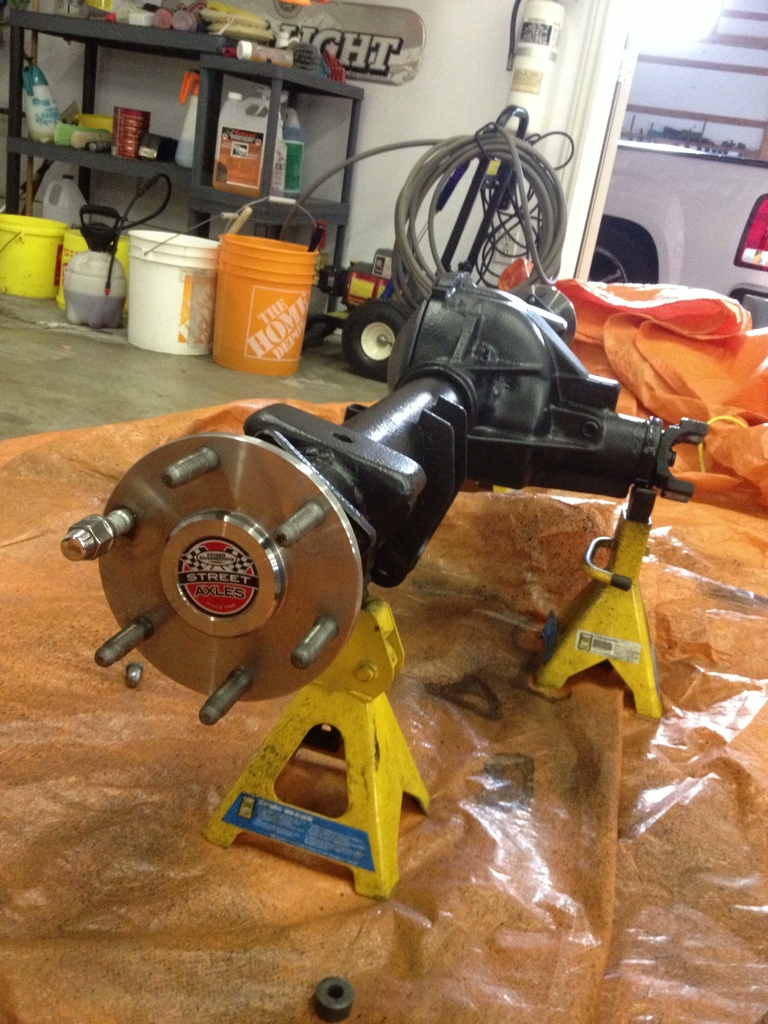
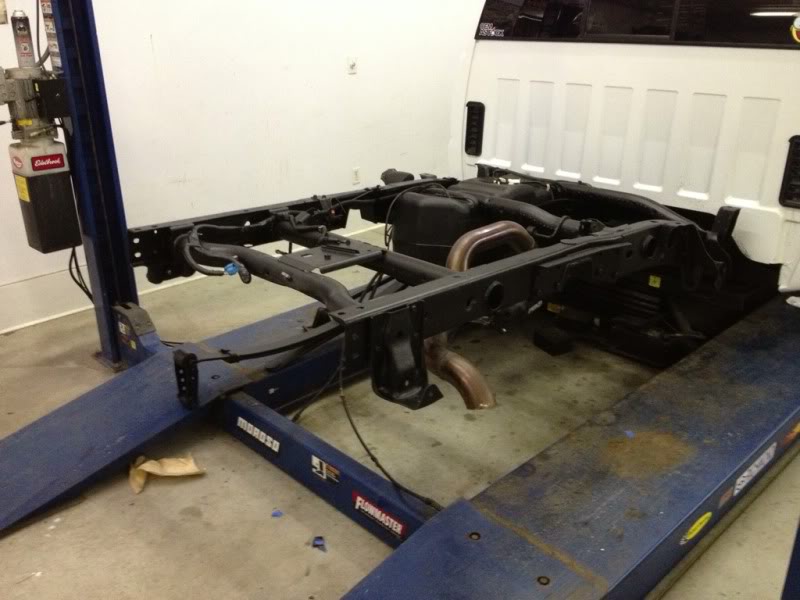
Back in the truck
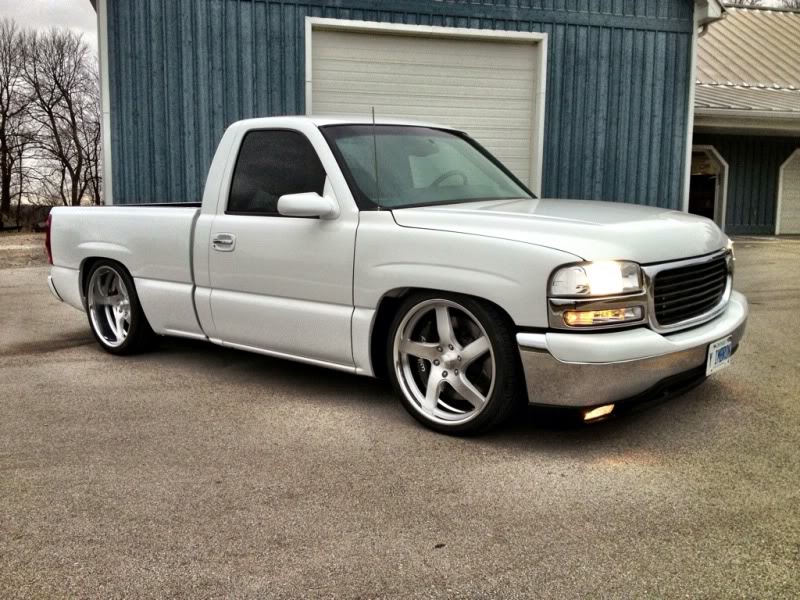
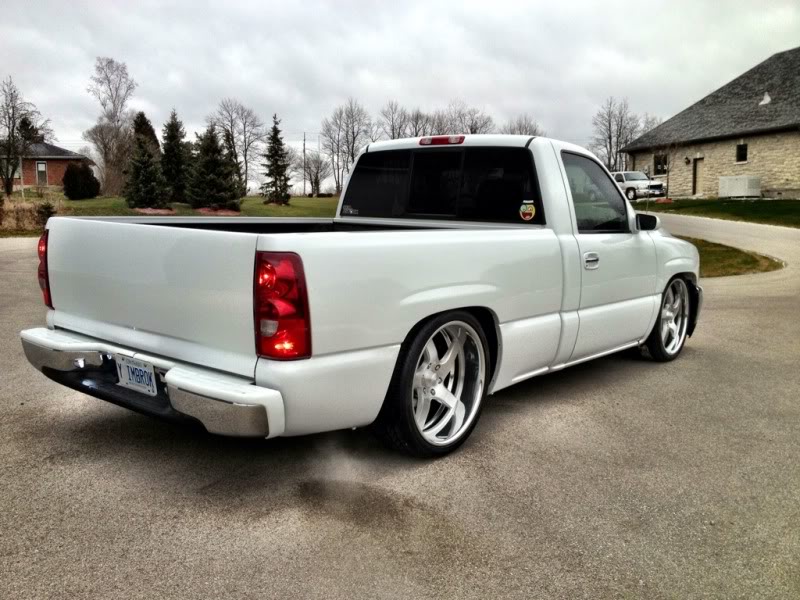
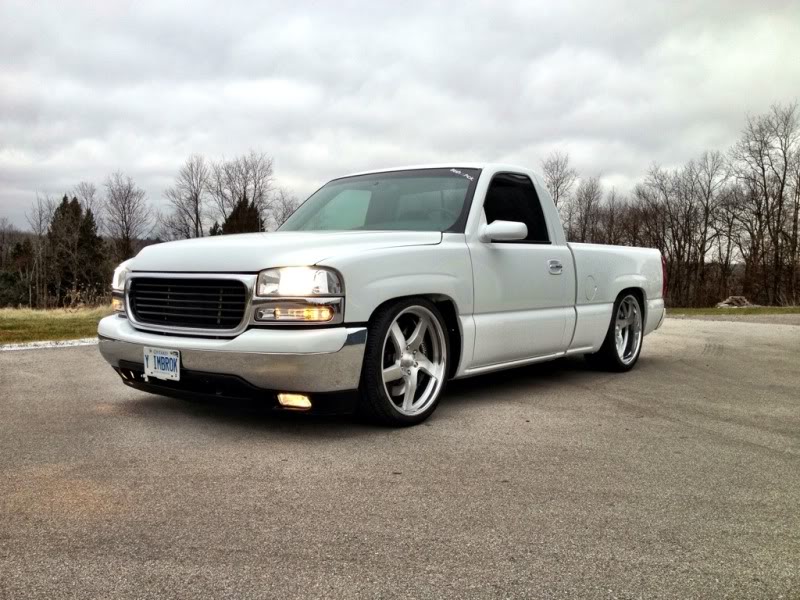
Once everything was bakc together I had to take it off the hoist to put the bed on. Drove it outside and took a few pictures before the bed went back. I had to make new brakes lines, and do a certain amount of test fitting to get the flex line, hardlines etc to work with the short and rotated axle. But overall i was very happy with its finish. The hotchkis sway, cal tracs, and SS brakes lines were all previously done. The truck did get a new set of Belltech SP shocks. I have a set in my 4/6 cc and love how they ride, so i figured id see how they work in my rcsb
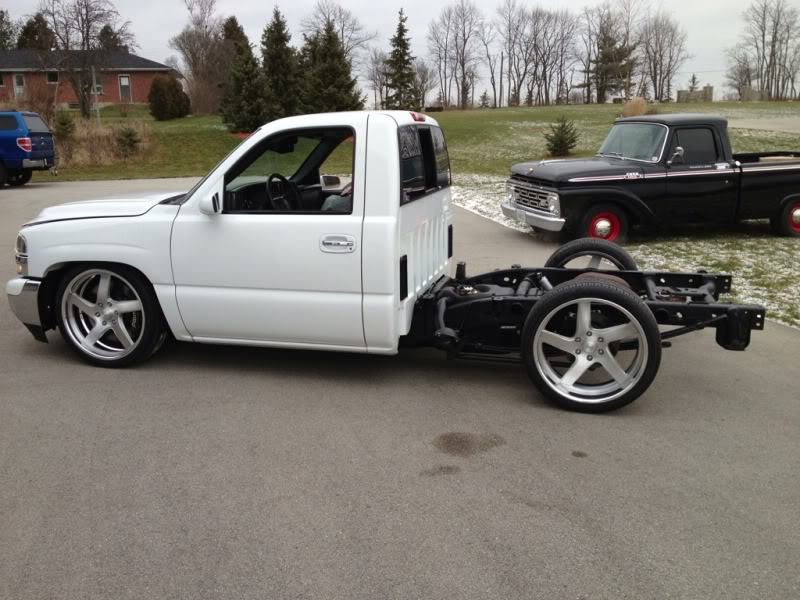
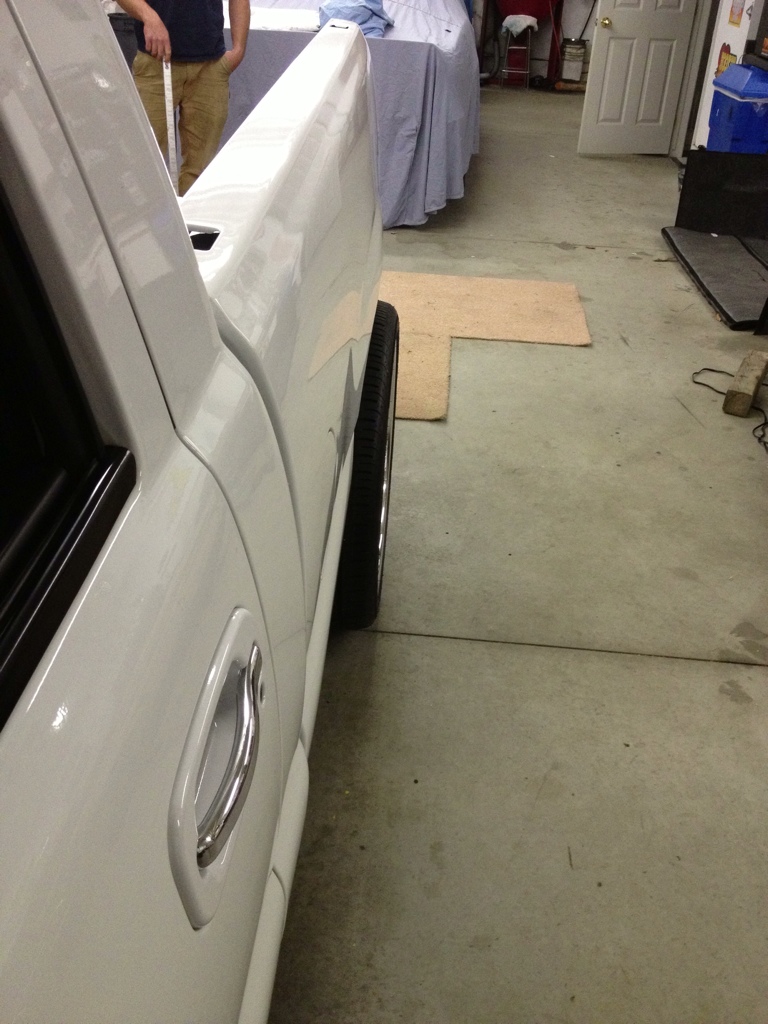
Next we pulled it back inside and and fitted the bed. Nerves were defiently high It doesnt matter how many times you measure something it still gets on your nerves of the "what ifs". Luckly it fit perfectly. We measured everything to have less then a .25" of clearance to the bedside. The reason for that is ive seen a few shortened trucks that have to much cut and to big of backspace. The wheels get sucked in to far and they look they a fat lady on high heels lol
Mostly stripped
Coated up
Painted Hubs and new backing plates
Moser girdle
Shortened 2.5" each Moser axles
Back in the truck
Once everything was bakc together I had to take it off the hoist to put the bed on. Drove it outside and took a few pictures before the bed went back. I had to make new brakes lines, and do a certain amount of test fitting to get the flex line, hardlines etc to work with the short and rotated axle. But overall i was very happy with its finish. The hotchkis sway, cal tracs, and SS brakes lines were all previously done. The truck did get a new set of Belltech SP shocks. I have a set in my 4/6 cc and love how they ride, so i figured id see how they work in my rcsb
Next we pulled it back inside and and fitted the bed. Nerves were defiently high It doesnt matter how many times you measure something it still gets on your nerves of the "what ifs". Luckly it fit perfectly. We measured everything to have less then a .25" of clearance to the bedside. The reason for that is ive seen a few shortened trucks that have to much cut and to big of backspace. The wheels get sucked in to far and they look they a fat lady on high heels lol
Last edited by bgray; 02-10-2013 at 09:03 AM.
02-10-2013, 08:53 AM
#5
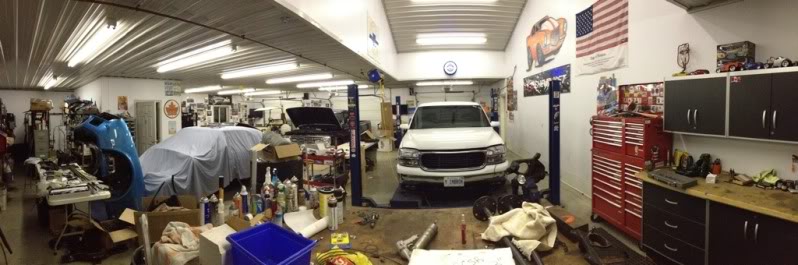
Shops a bit packed, but i thought id try the panaramic feature on my iphone 4
Now that im waiting on the spindles to arrive to button up the front end I decided I would give my FAST LSXRT and 102mm Combo another shot. There is a bog thread outlining the issue I had with 2 warped In takes. I shipped it back to Comp Cams, they said they fixed it and shiped it back.
It sat in my parts arrive for almost a year as I was discourage to install it from previous issues.
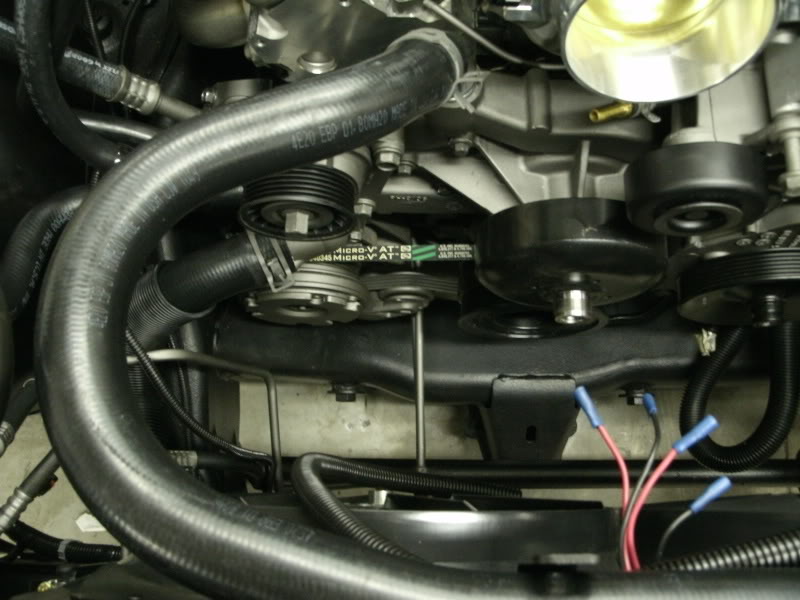
Im happy to report tho all went well. If defiently is fixed and not leaking. I even went as far as using a smoke machine to smoke the intake to issure it was air tight. Everything tested good, and Im currently working with Justin and Blackbear to smooth out the tune. However, I found a good local guy that I Think will be able to get the tune where I need it. Justin has been great, but my setup is a tough one to tune via internet, and The down time between emails does take up alot of wasted time.
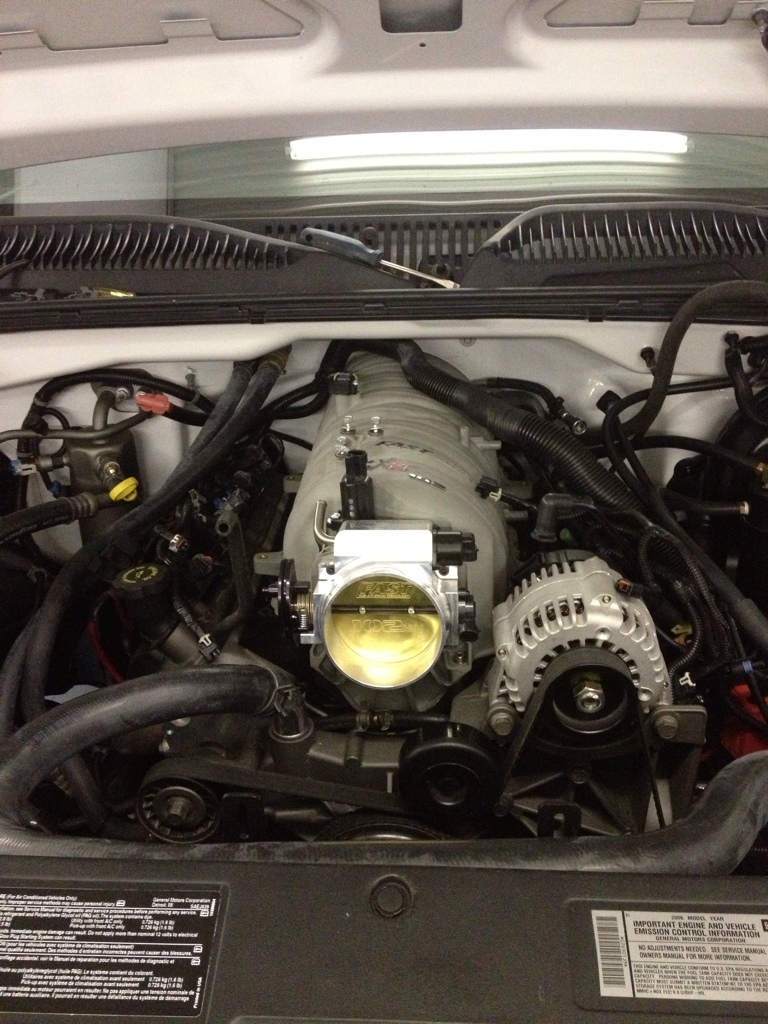
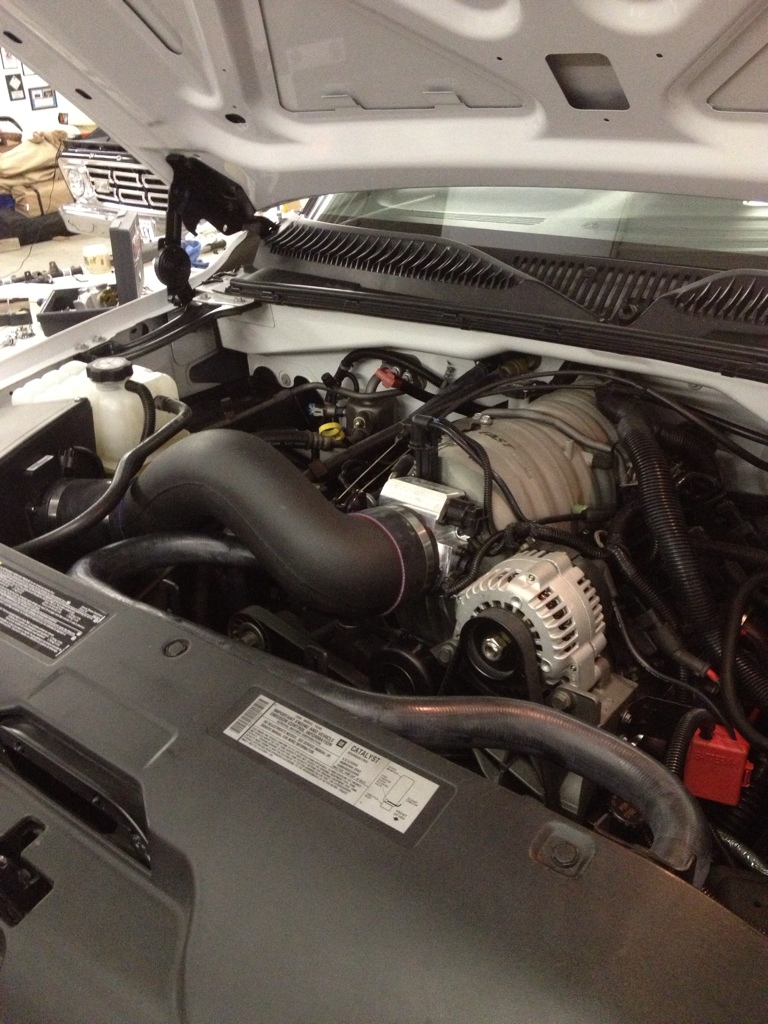
After those pics were taken I removed all the evap and wiring and tucked it in alot better. I was able to tuck the harness behind the intake and run it besides the coils. I did have to extended the MAP, IAC, TPS, ALT, and EVAP electrical connectors, but it helped everything fit much cleaner.
The intake definetly changed the sound of the truck also, I took a video as it was chopping away in the shop
Lq9 prc stge 2.5 tsp tqr v3 - YouTube
Now that im waiting on the spindles to arrive to button up the front end I decided I would give my FAST LSXRT and 102mm Combo another shot. There is a bog thread outlining the issue I had with 2 warped In takes. I shipped it back to Comp Cams, they said they fixed it and shiped it back.
It sat in my parts arrive for almost a year as I was discourage to install it from previous issues.
Im happy to report tho all went well. If defiently is fixed and not leaking. I even went as far as using a smoke machine to smoke the intake to issure it was air tight. Everything tested good, and Im currently working with Justin and Blackbear to smooth out the tune. However, I found a good local guy that I Think will be able to get the tune where I need it. Justin has been great, but my setup is a tough one to tune via internet, and The down time between emails does take up alot of wasted time.
After those pics were taken I removed all the evap and wiring and tucked it in alot better. I was able to tuck the harness behind the intake and run it besides the coils. I did have to extended the MAP, IAC, TPS, ALT, and EVAP electrical connectors, but it helped everything fit much cleaner.
The intake definetly changed the sound of the truck also, I took a video as it was chopping away in the shop
Lq9 prc stge 2.5 tsp tqr v3 - YouTube
 02-10-2013, 08:54 AM
#7
So as it sits now were working on the tune, and awaiting those spindles. Im definetly eager to drive the truck to see how the bumpsteer has progressed, and of course how good those pirellis smoke.
Once I get the spindles I will update the thread as i go
Once I get the spindles I will update the thread as i go


