

My new powerplant (408 with a healthy direct port shot)


 Oct 23, 2008 | 08:54 AM
#72

Got it from brian (BlownChevy) a while back. Worked great.
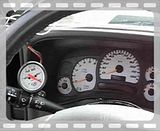
3.75" to 4" reducer. I get all my silicone, clamps, tubing, bungs etc. from Verocious Motorsports dot com.
3.75" to 4" reducer. I get all my silicone, clamps, tubing, bungs etc. from Verocious Motorsports dot com.
 Oct 25, 2008 | 10:00 PM
#74
Alright, quick update. One, it idles...not ideal by any means but she idles like a harley. Lots of work to do here HOWEVER my tuning laptop died. I can't access the hard drive! I must have 200 tunes and as many scans from numerous vehicles on her. Looks like I need to pony up for a new one.
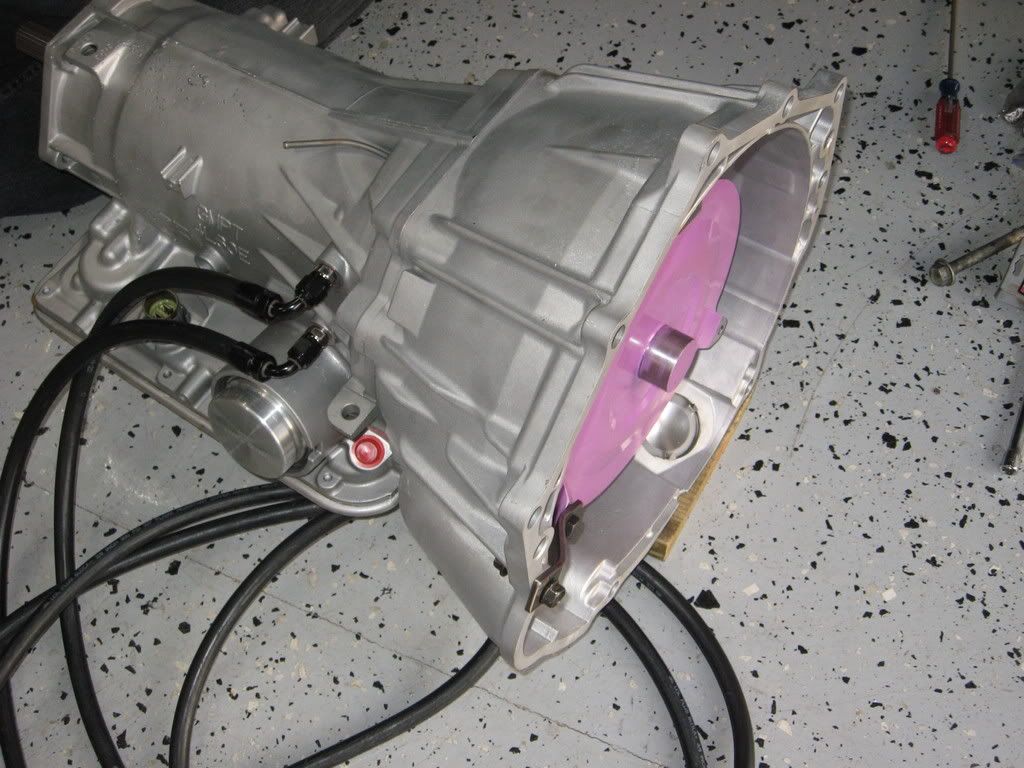
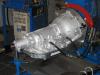
Anyway, Installed the transmission a few weeks ago and everything went very smooth. I did away with the stock hard lines in favor of some "semi" flexible push-lock lines with -AN fittings. I can now route my lines AWAY from the headers and allow for better flow IMHO. Here is a quick shot of the newly refreshed FLT level V with a NEW billet output shaft as well as a hot off the lathe billet INPUT shaft. I feel good that there is nothing I can do to this tranny to make it stronger however I am inevitably going to have to do the 80E swap. This puppy should have enough to get me through NA tuning at least as well as a few car shows in the spring. For this motor I traded in my 2800 10.5" PI Vig for a smaller 9.5" multi disk Vig in the stall range of 3400. Here is a quick pic prior to install:
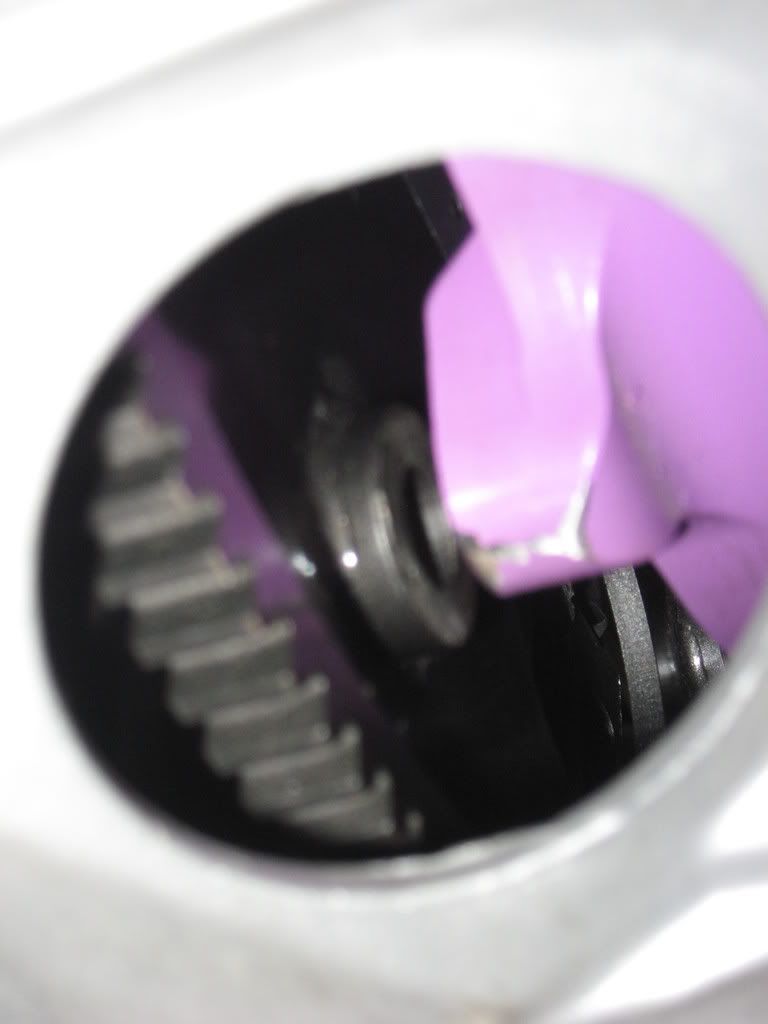
I got lucky again and only had a little over an 1/8th inch of space from my converter pads to the flexplate when fully seated into the tranny. I could have squeezed a washer in there however since I was within tolerances given by PI, I didn't mess with it. The picture is a little deceiving, there was only a little over an 1/8th inch of space...
Bolting up the converter is one of my least favorite tasks to do. I opted for new ARP converter bolts due to the fact that my TCI flexplate is thicker than stock which means the PI converter bolts would not work (I would only get 1 complete turn). I used a depth gauge on my caliper and came to ~18mm from flexplate to bottoming out in the converter mounting holes. The PI converter bolts were only 11mm. There are two part numbers for ARP hardware for our converters. I chose the ones that had a length of 15mm. These will assure me that the bolts would have plenty of bite and not bottom out in the converter mounting pads. Some guys use grade 8 bolts (M10x15mm) however my local hardware store SUX for metric grade 8 bolts. Figured why not get the ARP's and not worry about it. Red loctite was used as usual. The following picture shows how I tighten the converter bolts. I take a thick screwdriver and wedge it through the FP. I then place a closed ended ratchet wrench on the converter bolt and use a longer wrench over the open end for leverage. This way gives me VERY good confidence that the converter bolts are tight since getting a torque wrench in there is just about impossible:
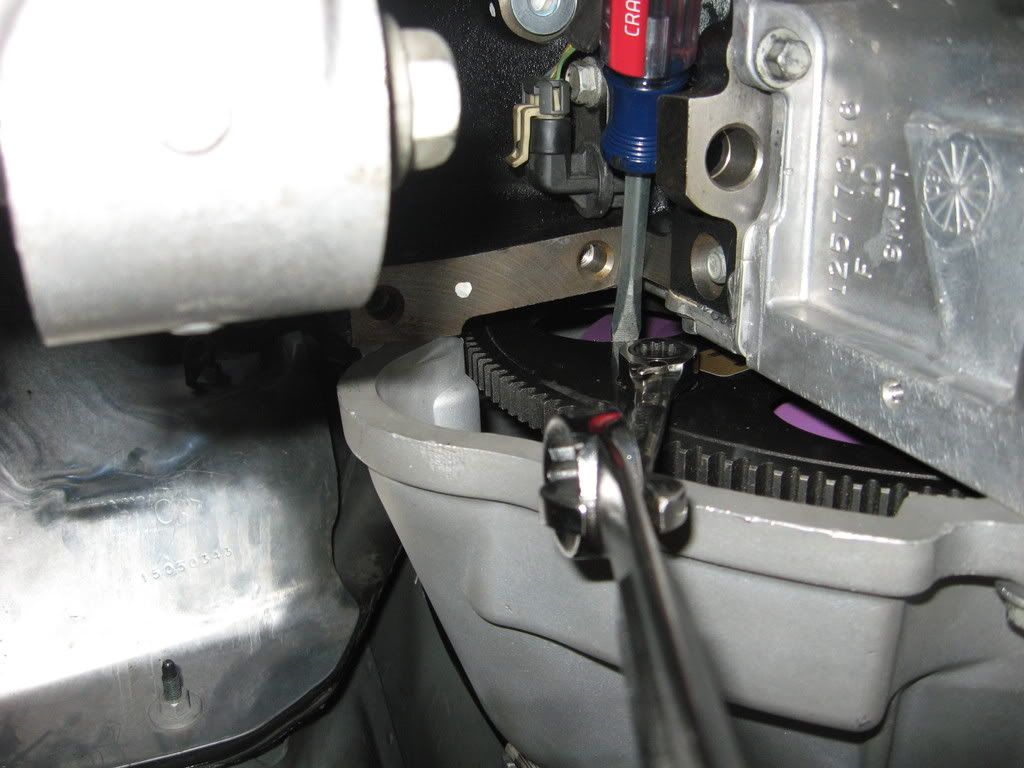
For those who never did a tranny swap, this picture is looking from under the truck, up, on the passenger side where the starter is removed. Always start all three converter bolts before torquing them down or you may have difficulty inserting the remaining bolts after torquing one.
The rest of the install was really uneventful. A group of members came over to assist with the T-case, D-shafts and header install. Thanks again guys for the fun day!
In the mean time, I will be cleaning up the engine bay and snap a few pictures of the final installed package with all of the trimmings. I dressed it up some with add-ons and cleaned up the engine bay. I had to bend the "firewall" to get the ABEAR coil covers to fit, swap out the incorrect oil pressure sensor I installed several pages earlier, fix 2 small fuel leaks and adjust my fuel pressure. The Areomotive FPR is supposed to come adjusted to 50psi ambient however mine was at 80PSI making start-up a real PITA until I figured it out.
Here is an idle clip. It is at 1075 rpms so the chop isn't as noticeable. At say 950, it sounds like a NASCAR! and shakes your teeth out of your head. Enjoy this one as I trim down the idle and make some new ones!
Click on the picture and listen to the whole thing!
Anyway, Installed the transmission a few weeks ago and everything went very smooth. I did away with the stock hard lines in favor of some "semi" flexible push-lock lines with -AN fittings. I can now route my lines AWAY from the headers and allow for better flow IMHO. Here is a quick shot of the newly refreshed FLT level V with a NEW billet output shaft as well as a hot off the lathe billet INPUT shaft. I feel good that there is nothing I can do to this tranny to make it stronger however I am inevitably going to have to do the 80E swap. This puppy should have enough to get me through NA tuning at least as well as a few car shows in the spring. For this motor I traded in my 2800 10.5" PI Vig for a smaller 9.5" multi disk Vig in the stall range of 3400. Here is a quick pic prior to install:
I got lucky again and only had a little over an 1/8th inch of space from my converter pads to the flexplate when fully seated into the tranny. I could have squeezed a washer in there however since I was within tolerances given by PI, I didn't mess with it. The picture is a little deceiving, there was only a little over an 1/8th inch of space...
Bolting up the converter is one of my least favorite tasks to do. I opted for new ARP converter bolts due to the fact that my TCI flexplate is thicker than stock which means the PI converter bolts would not work (I would only get 1 complete turn). I used a depth gauge on my caliper and came to ~18mm from flexplate to bottoming out in the converter mounting holes. The PI converter bolts were only 11mm. There are two part numbers for ARP hardware for our converters. I chose the ones that had a length of 15mm. These will assure me that the bolts would have plenty of bite and not bottom out in the converter mounting pads. Some guys use grade 8 bolts (M10x15mm) however my local hardware store SUX for metric grade 8 bolts. Figured why not get the ARP's and not worry about it. Red loctite was used as usual. The following picture shows how I tighten the converter bolts. I take a thick screwdriver and wedge it through the FP. I then place a closed ended ratchet wrench on the converter bolt and use a longer wrench over the open end for leverage. This way gives me VERY good confidence that the converter bolts are tight since getting a torque wrench in there is just about impossible:
For those who never did a tranny swap, this picture is looking from under the truck, up, on the passenger side where the starter is removed. Always start all three converter bolts before torquing them down or you may have difficulty inserting the remaining bolts after torquing one.
The rest of the install was really uneventful. A group of members came over to assist with the T-case, D-shafts and header install. Thanks again guys for the fun day!
In the mean time, I will be cleaning up the engine bay and snap a few pictures of the final installed package with all of the trimmings. I dressed it up some with add-ons and cleaned up the engine bay. I had to bend the "firewall" to get the ABEAR coil covers to fit, swap out the incorrect oil pressure sensor I installed several pages earlier, fix 2 small fuel leaks and adjust my fuel pressure. The Areomotive FPR is supposed to come adjusted to 50psi ambient however mine was at 80PSI making start-up a real PITA until I figured it out.
Here is an idle clip. It is at 1075 rpms so the chop isn't as noticeable. At say 950, it sounds like a NASCAR! and shakes your teeth out of your head. Enjoy this one as I trim down the idle and make some new ones!
Click on the picture and listen to the whole thing!


 Nov 2, 2008 | 10:34 PM
#79
"I feel good that there is nothing I can do to this tranny to make it stronger...."
OK.....Well I got a couple other things up my sleeve! That is a nice looking piece you got there. Vince
OK.....Well I got a couple other things up my sleeve!
That is a nice looking piece you got there. Vince