Camping Truck Build, '01 Suburban 2500
 07-28-2013, 09:38 AM
#11
TECH Fanatic
Thread Starter
The engine swap was done in August of 2012 during the hottest week of the year. In Houston, that is saying a lot. The wife was out of town so I took the week off work to complete the swap.
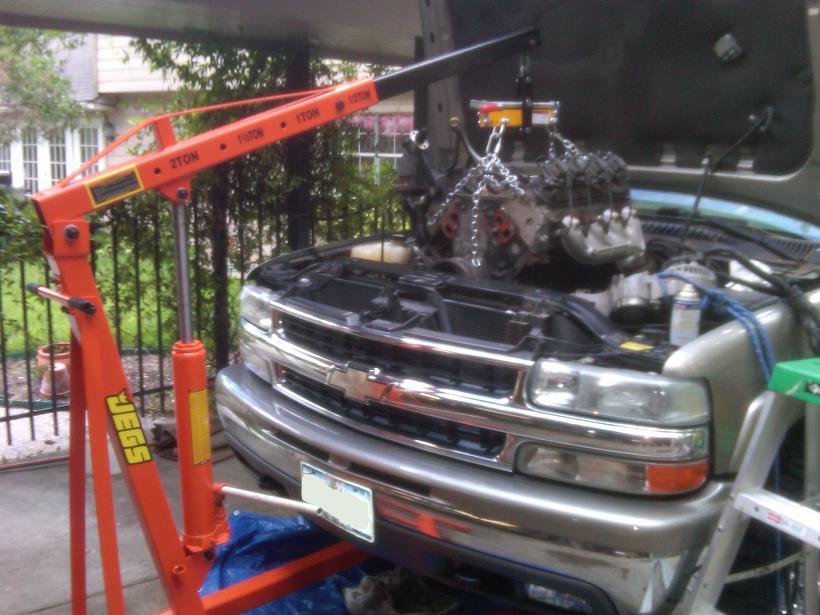
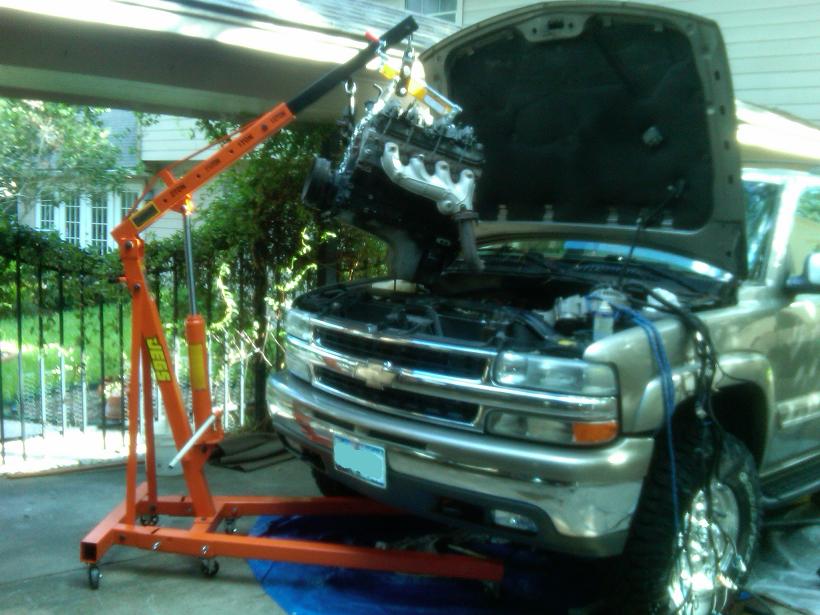
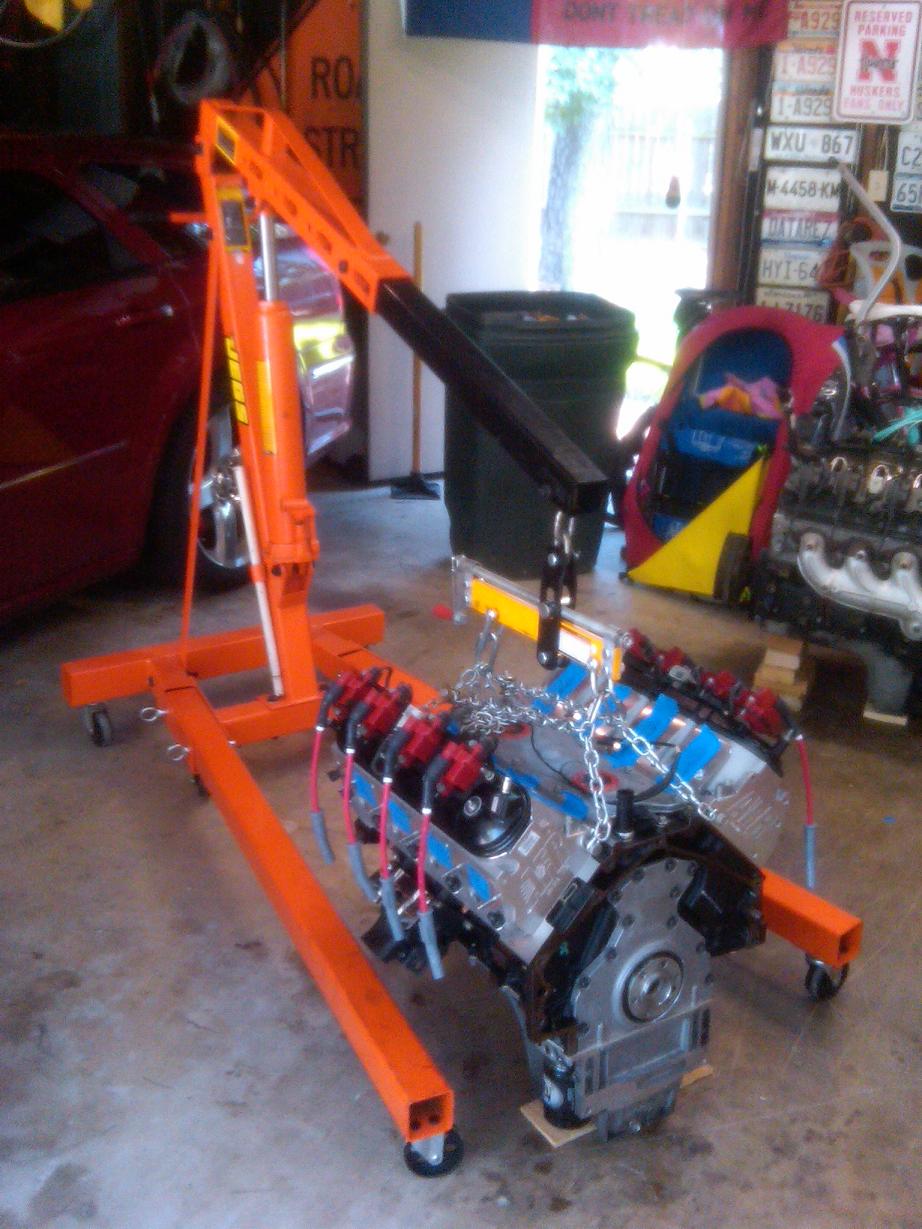
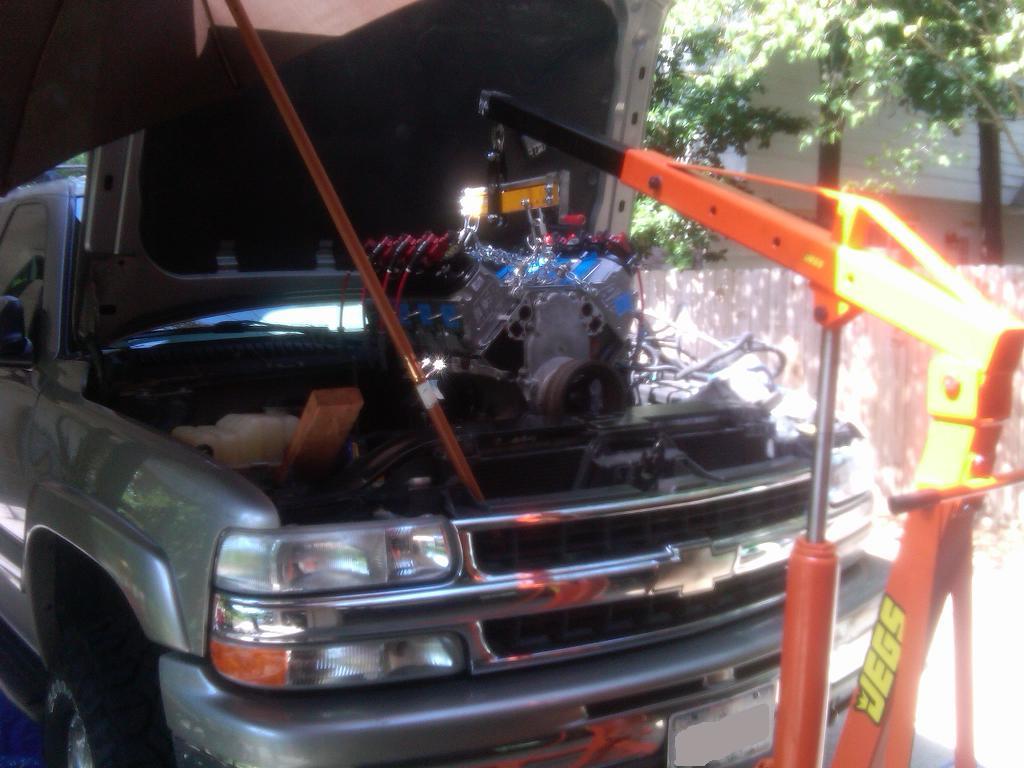
Here are a few shots of the new engine ready for install.
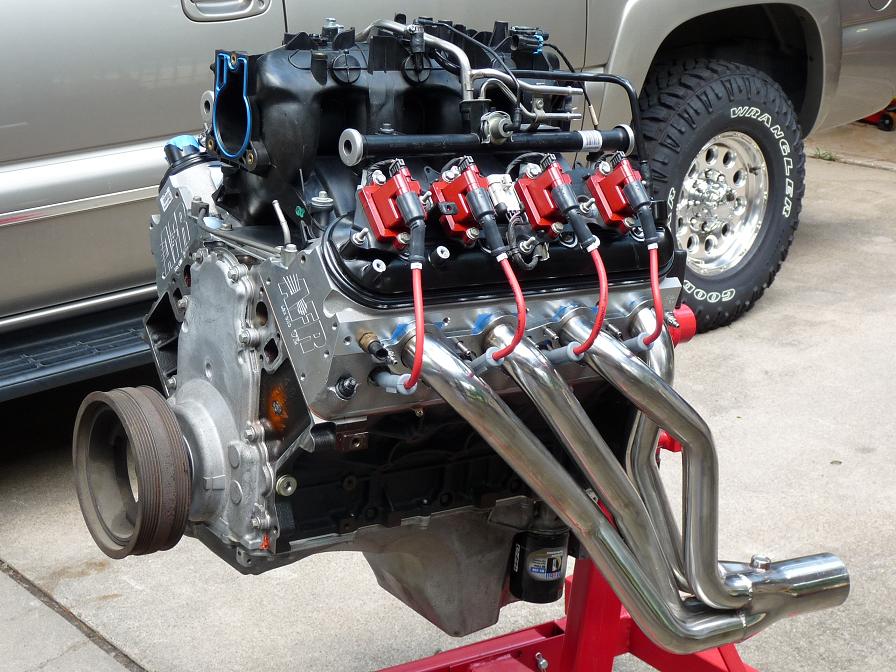
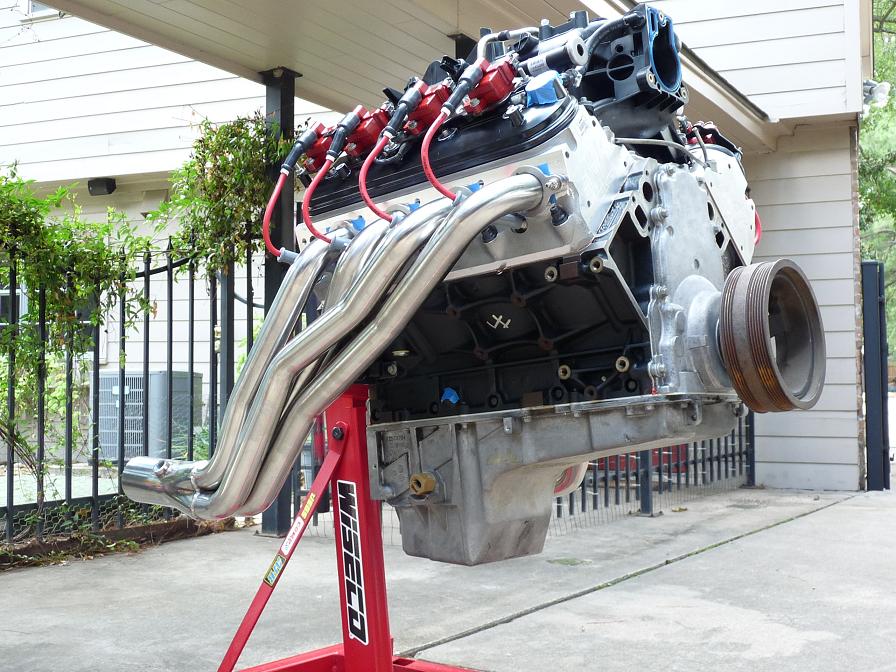
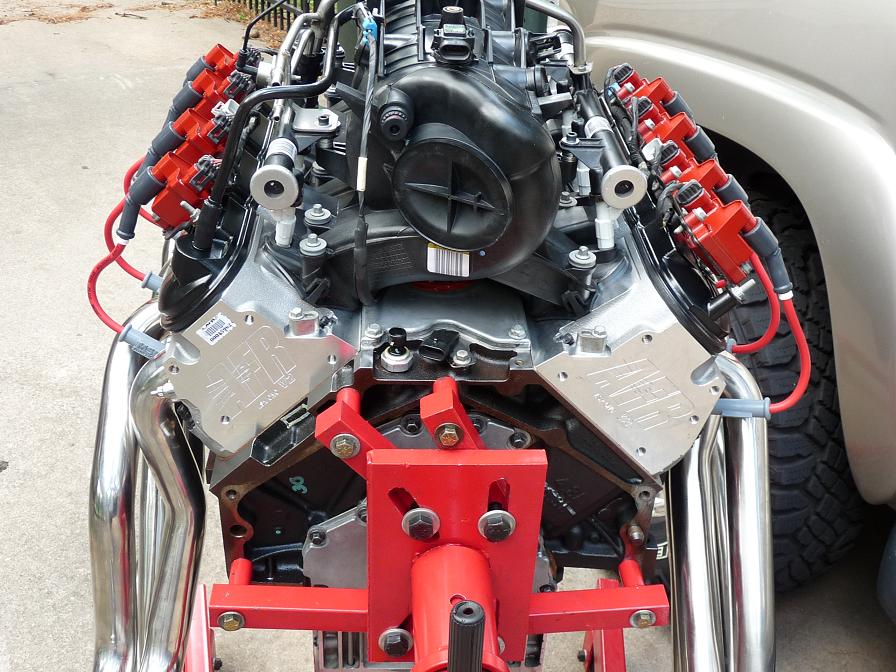
Now on to the swap. I parked the burb in a section of the driveway that allowed me to still get the Magnum in and out of the garage. I drained the coolant, cut the exhaust, removed the wiring harness, removed the PS pump and AC compressor (without disconnecting either system), and pulled the engine. The Harbor freight 2t hoist performed great and I had zero problems clearing the front end on 33" tires.
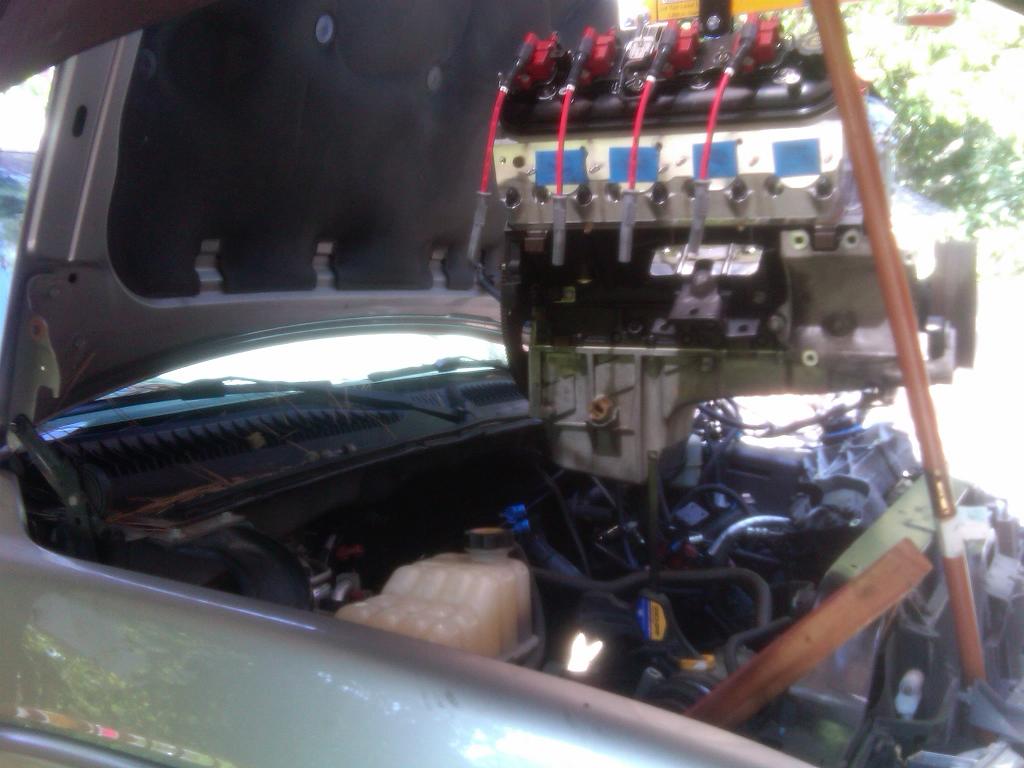
now on to installing the new engine.
Here are a few shots of the new engine ready for install.


Now on to the swap. I parked the burb in a section of the driveway that allowed me to still get the Magnum in and out of the garage. I drained the coolant, cut the exhaust, removed the wiring harness, removed the PS pump and AC compressor (without disconnecting either system), and pulled the engine. The Harbor freight 2t hoist performed great and I had zero problems clearing the front end on 33" tires.


now on to installing the new engine.


Last edited by RezinTexas; 07-29-2013 at 06:04 PM.
 07-28-2013, 09:38 AM
#12
TECH Fanatic
Thread Starter
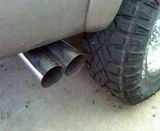
This post is for the exhaust modifications.
Here are the specs:
1. 1-3/4" TSP SS LT Headers
2. Dual 3" striaghtpipes
3. Magnaflow 12599 2x2 muffler
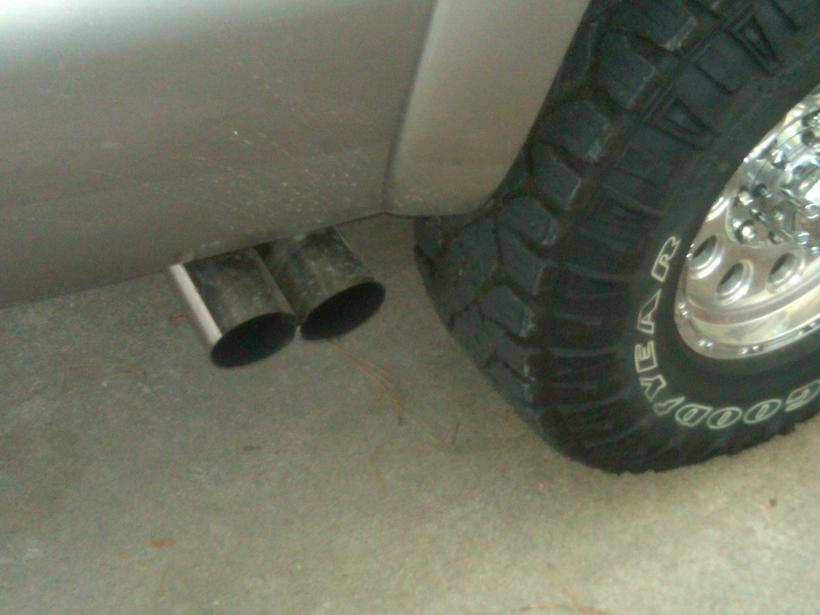
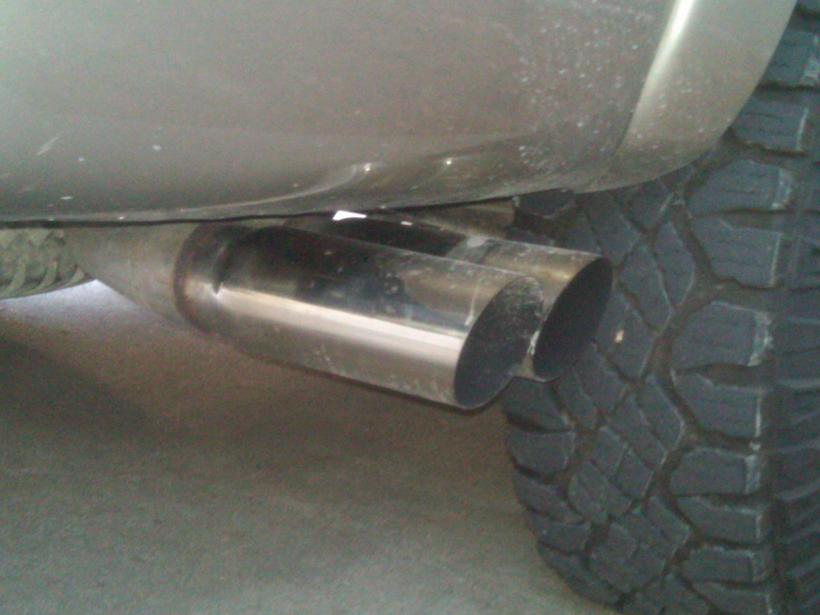
4. Dual 4" tail pipes over axle, side exit.
The headers fit OK. Here are a few issues.
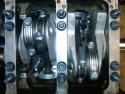
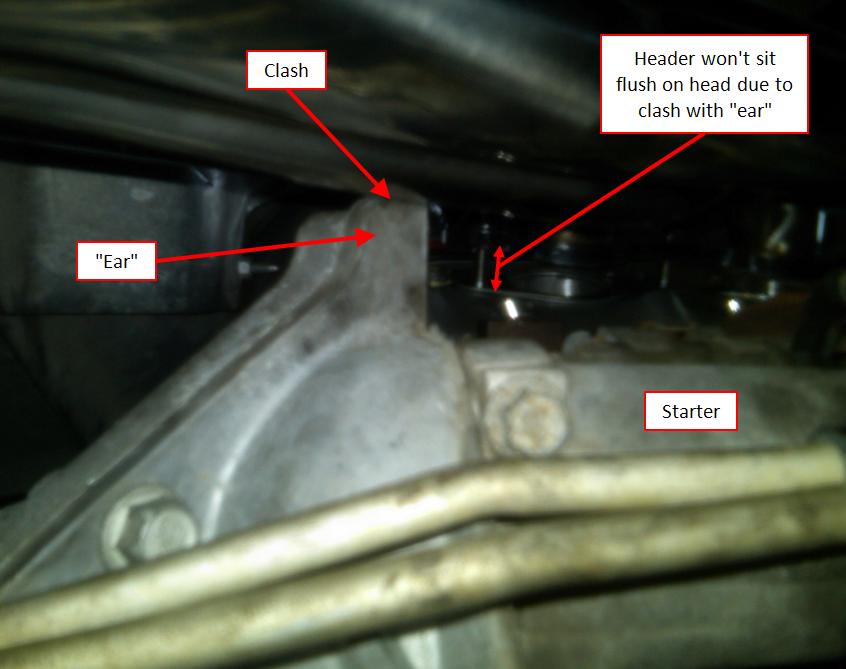
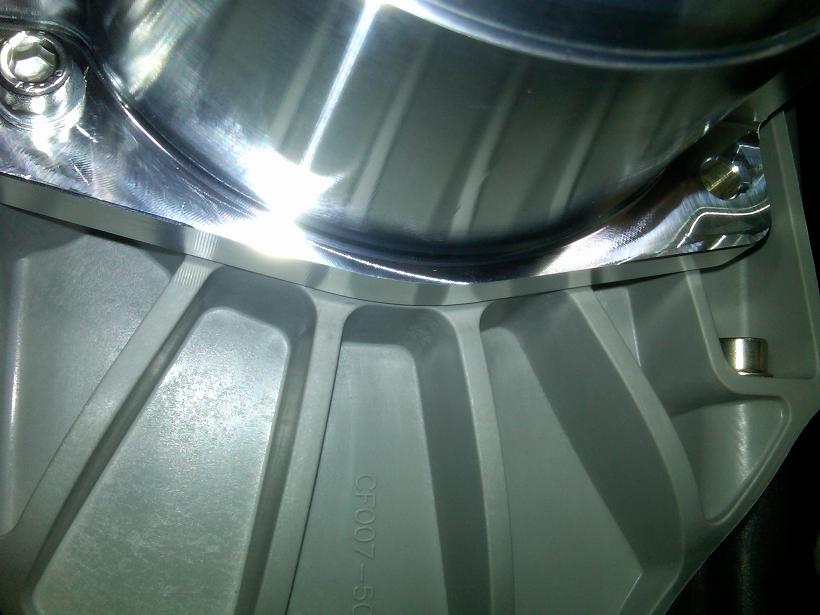
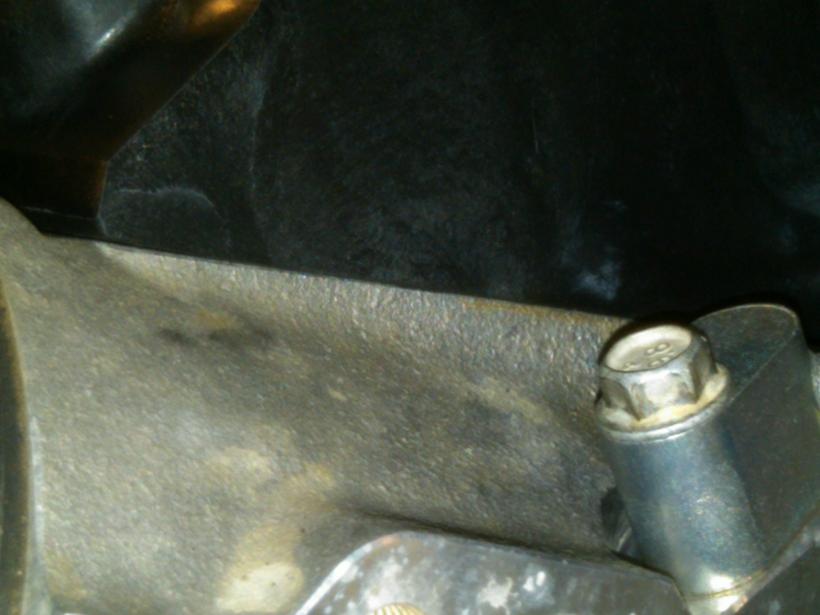
1. On the passenger side of the 4l80e tranny belhousing there is a small "ear" that needs to be cut off. This "ear" does not have purpose that I could tell (no bolts or seals) so off it came.
Before:
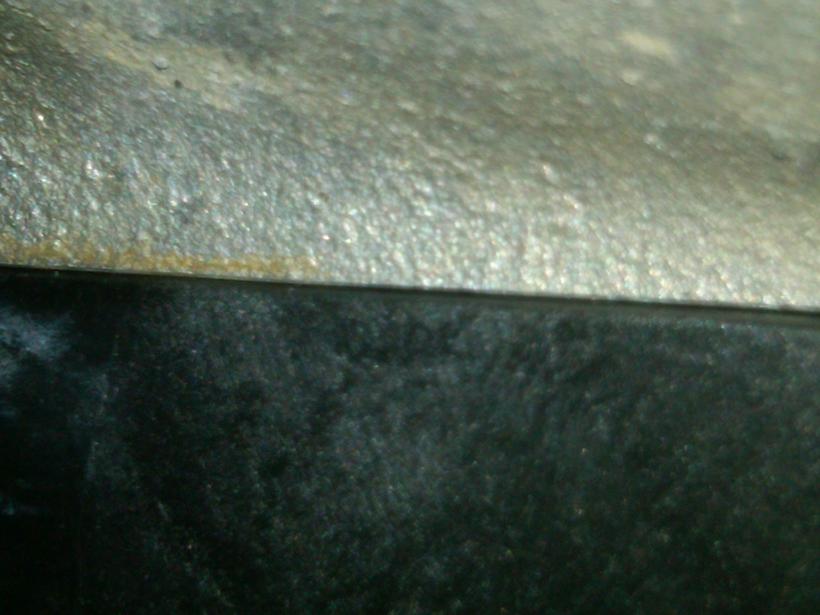
After:
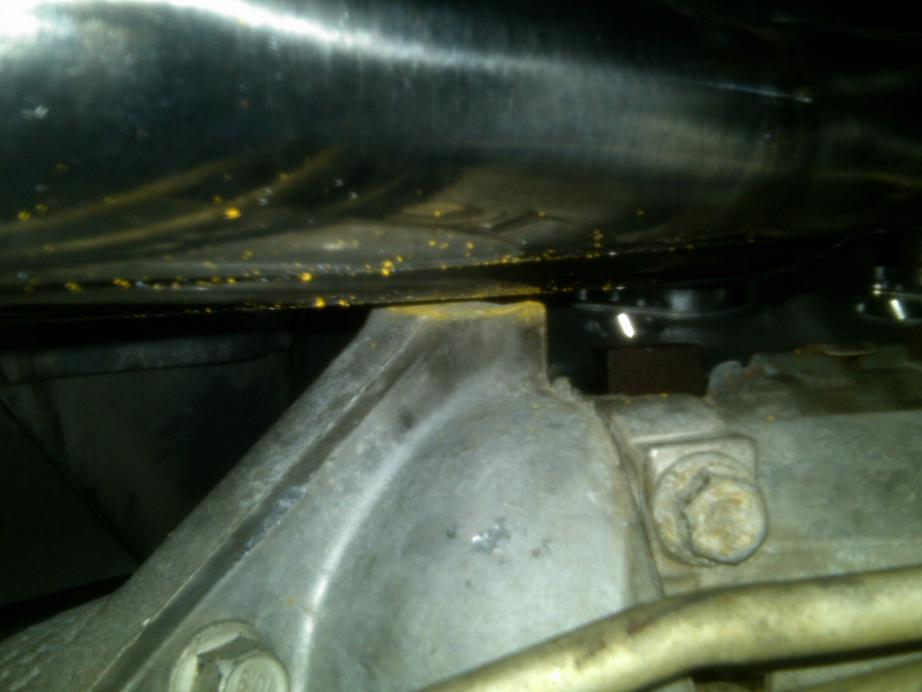
^the yellow particles are paint chips from my reciprocating saw blade. It doesn't show in this angle, however there is about .25" of clearance there.
2. The exhaust hanger/heat shield assembly that is bolted to the side of the transmission needs to be completely removed. The passenger side LT collector dumps straight into where this thing is located. You will have to fab a new hanger, or run without one. I am currently running it without one.
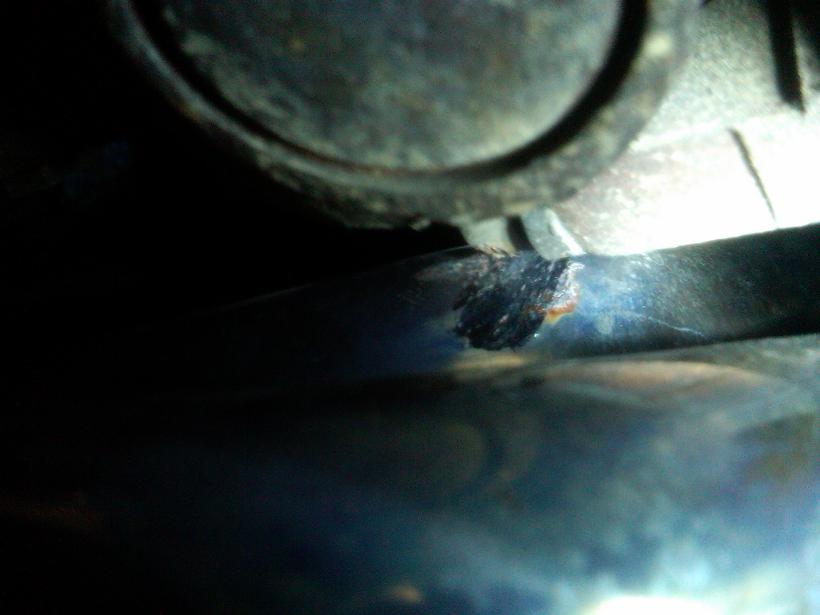
3. On the drivers side, one of the primaries has a clash with the U-joint bolts on the front diff input shaft. They didn't even touch until I hit a bump during a "hard" corner. The clash has since gotten a little worse and there is a little dent in the primary now. Here is the best photo I could get:
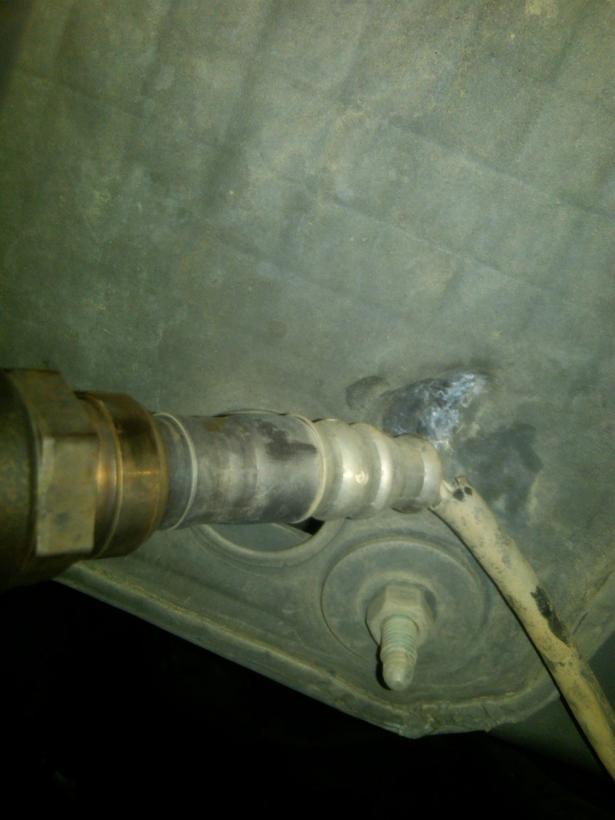
4. The passenger side O2 sensor clashes with the underside of the truck body and insulation material. see below. This hasn't actually caused any problems, however its definitely not a great fit.
All the piping was welded up with aluminized pipe and crush bends. I'm not very happy with it, but for the huge $$$ savings, it will have to do for now. I'd really like to get a welder and learn how to weld exhaust. Then I could buy SS mandrel bends and fab the system myself. Anyone ever done that?
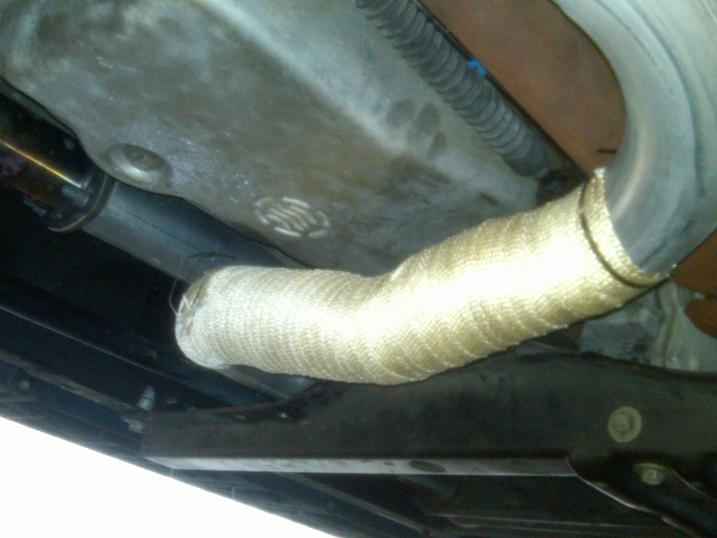
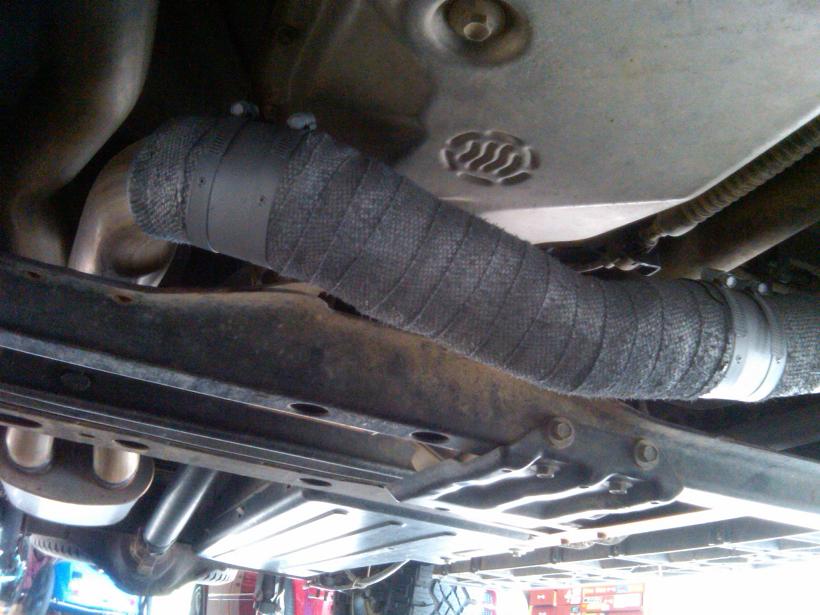
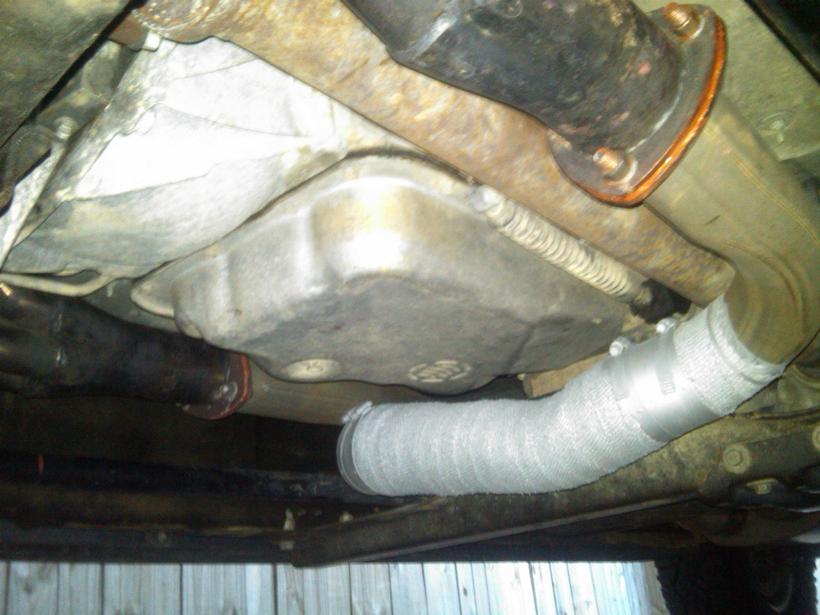
The drivers side crossover was re-routed over the transmission, which caused the tranny to hard-shift from the heat. I fixed that with some header wrap, silicone sealer spray, and some big SS hose clamp sleeves from Home depot. This completely solved the hard shifting issue.
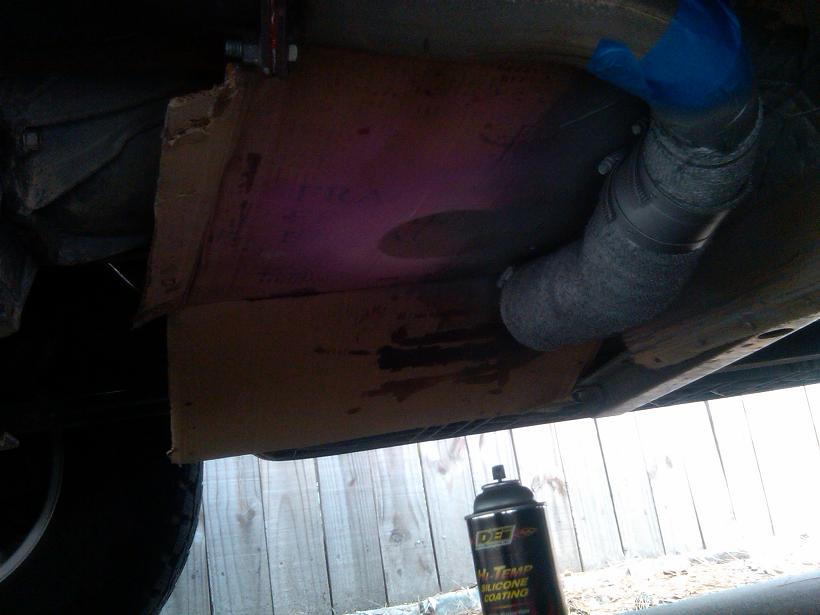
The next problem is the flange leaks. I've tried composite, copper, aluminum gaskets. They all leak. I'm currently running the aluminum gaskets with hi-temp copper RTV. You can see it in the last pic above. This has stopped the leak 95%, however I would still like to upgrade to some ball flanges. I don't know how long the RTV is going to last...
Here are the tips:
Here is a crappy video (before the LSXRT swap). I'll get a better one soon, I promise!
Here are the specs:
1. 1-3/4" TSP SS LT Headers
2. Dual 3" striaghtpipes
3. Magnaflow 12599 2x2 muffler
4. Dual 4" tail pipes over axle, side exit.
The headers fit OK. Here are a few issues.
1. On the passenger side of the 4l80e tranny belhousing there is a small "ear" that needs to be cut off. This "ear" does not have purpose that I could tell (no bolts or seals) so off it came.
Before:
After:
^the yellow particles are paint chips from my reciprocating saw blade. It doesn't show in this angle, however there is about .25" of clearance there.
2. The exhaust hanger/heat shield assembly that is bolted to the side of the transmission needs to be completely removed. The passenger side LT collector dumps straight into where this thing is located. You will have to fab a new hanger, or run without one. I am currently running it without one.
3. On the drivers side, one of the primaries has a clash with the U-joint bolts on the front diff input shaft. They didn't even touch until I hit a bump during a "hard" corner. The clash has since gotten a little worse and there is a little dent in the primary now. Here is the best photo I could get:

4. The passenger side O2 sensor clashes with the underside of the truck body and insulation material. see below. This hasn't actually caused any problems, however its definitely not a great fit.

All the piping was welded up with aluminized pipe and crush bends. I'm not very happy with it, but for the huge $$$ savings, it will have to do for now. I'd really like to get a welder and learn how to weld exhaust. Then I could buy SS mandrel bends and fab the system myself. Anyone ever done that?
The drivers side crossover was re-routed over the transmission, which caused the tranny to hard-shift from the heat. I fixed that with some header wrap, silicone sealer spray, and some big SS hose clamp sleeves from Home depot. This completely solved the hard shifting issue.


The next problem is the flange leaks. I've tried composite, copper, aluminum gaskets. They all leak. I'm currently running the aluminum gaskets with hi-temp copper RTV. You can see it in the last pic above. This has stopped the leak 95%, however I would still like to upgrade to some ball flanges. I don't know how long the RTV is going to last...
Here are the tips:


Here is a crappy video (before the LSXRT swap). I'll get a better one soon, I promise!
Last edited by RezinTexas; 08-03-2013 at 09:29 AM.
07-28-2013, 09:40 AM
#14
TECH Fanatic
Thread Starter
The next few posts show the LSXRT manifold swap.
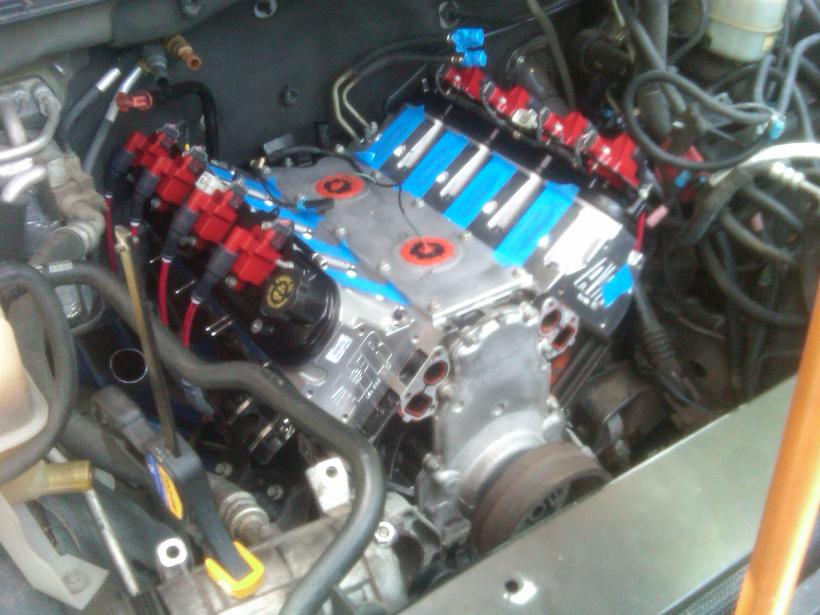
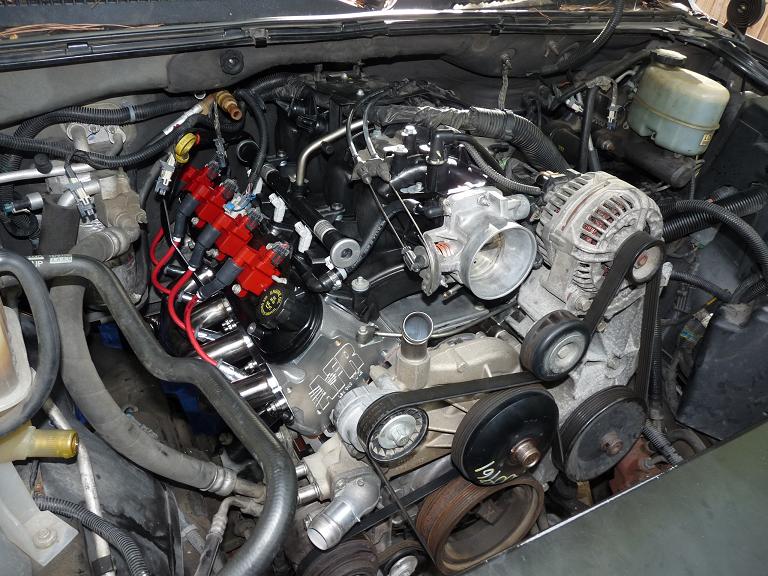
The engine had previously been built and swapped with the original LM7 intake manifold and throttle body. Obviously this was not ideal, however funds were maxed out at the time of the swap so I had to make do. Here is how it looked.
10 months later (and after buying the wife a new piano $$$$$ !!), I had the approval and funds to finish the engine with the intake manifold.
The plan was to get the LSXRT and a 92mm throttle body. Patrick G had advised to keep with the 92mm for best tunability. This truck needs to stay street (and off-road) friendly at all costs.
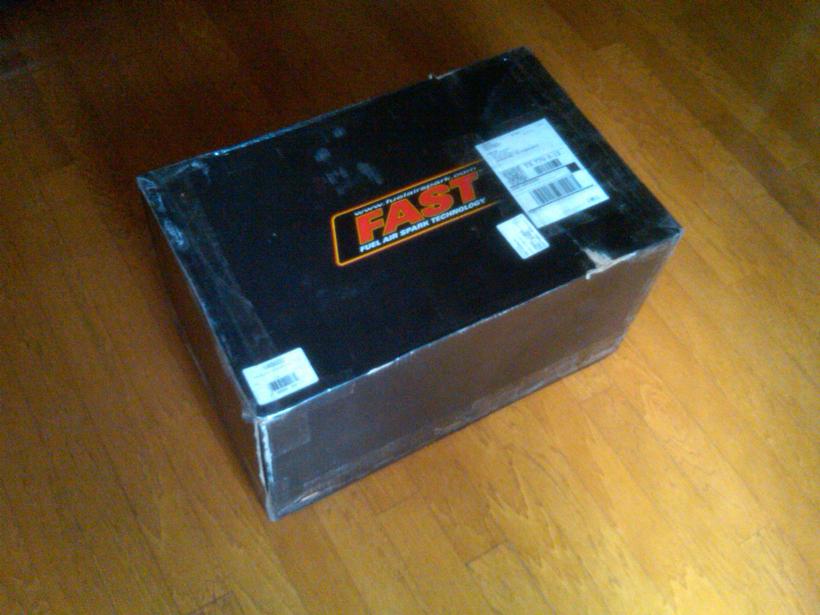
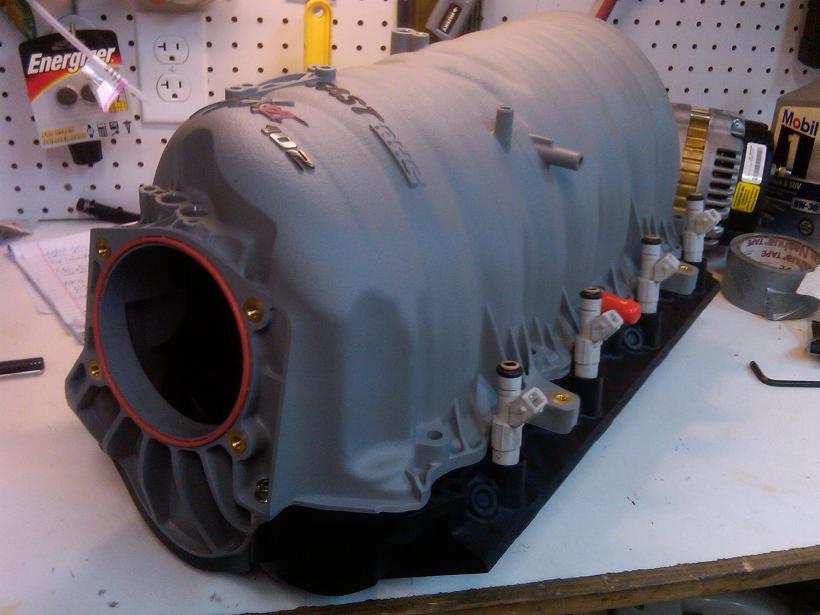
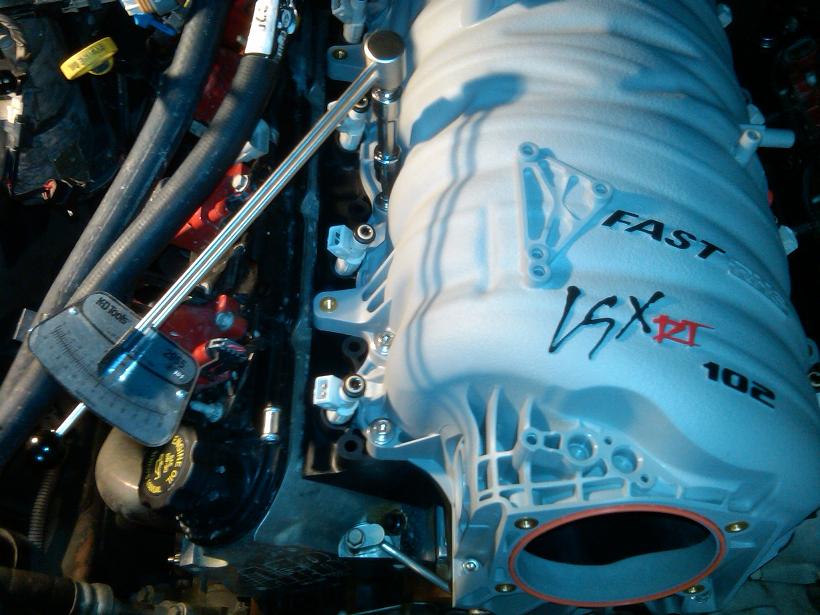
So I shelled out $1500 for the "Mamofied" LSXRT after reading a few build threads with his handy work. Here are the pictures:
Fresh from Tony himself
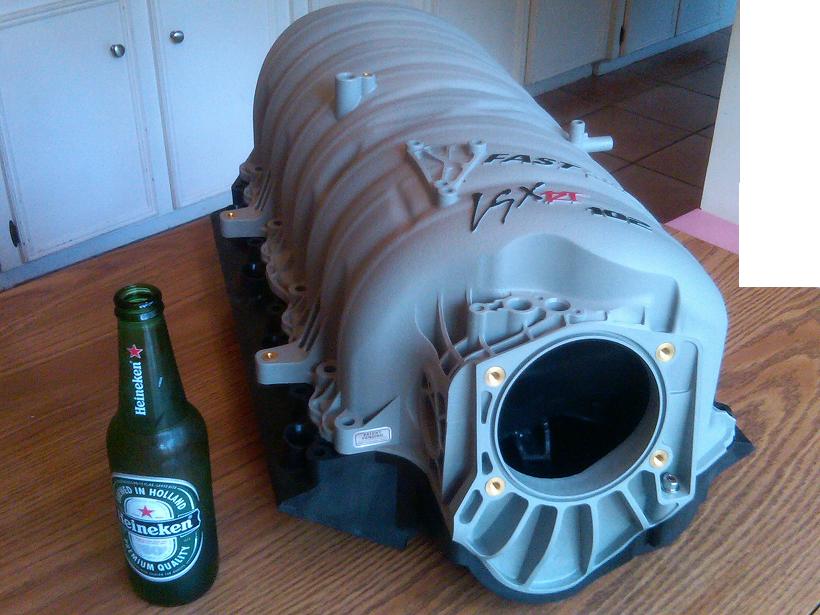


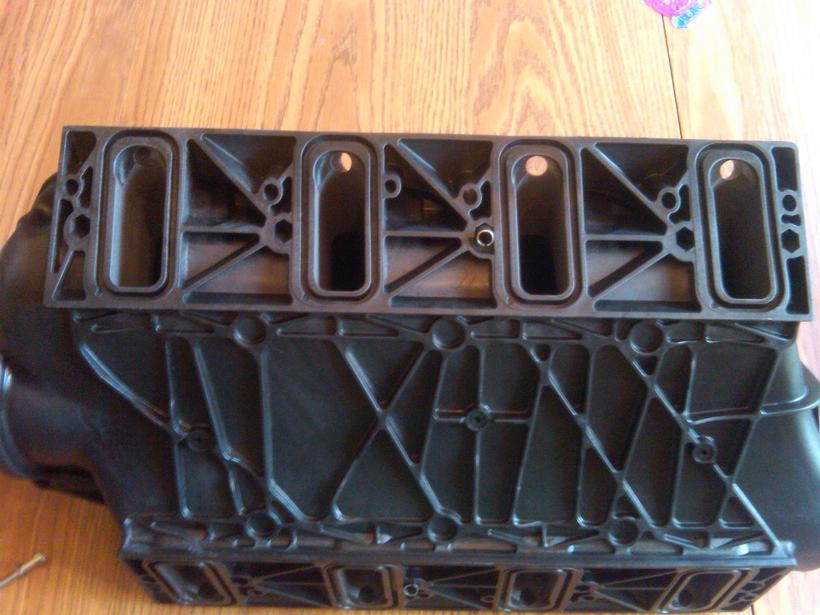
The width measurements of the bottom ports were extremely consistent. Very skilled work applied to this manifold. I measured all of them at 1.050" +/- 0.002", except for one which was at 1.067".
The manifold requires holes to be drilled for the relevant sensors and vacuum ports, etc. The instructions here were really good and I only drilled the holes I needed. Overall, I do not have very many connections to the manifold since I have no EGR and no vacuum brake booster (hydro-boost). I also didn't drill for the EVAP solenoid because I relocated it.
I drilled the hole for the top MAP sensor, and the top opening for the fuel pressure regulator line. I'm also using the side input from the PCV dirty side (with new catch can).
I capped all holes on the back side of the LSXRT. I want all my connections where I can see them!
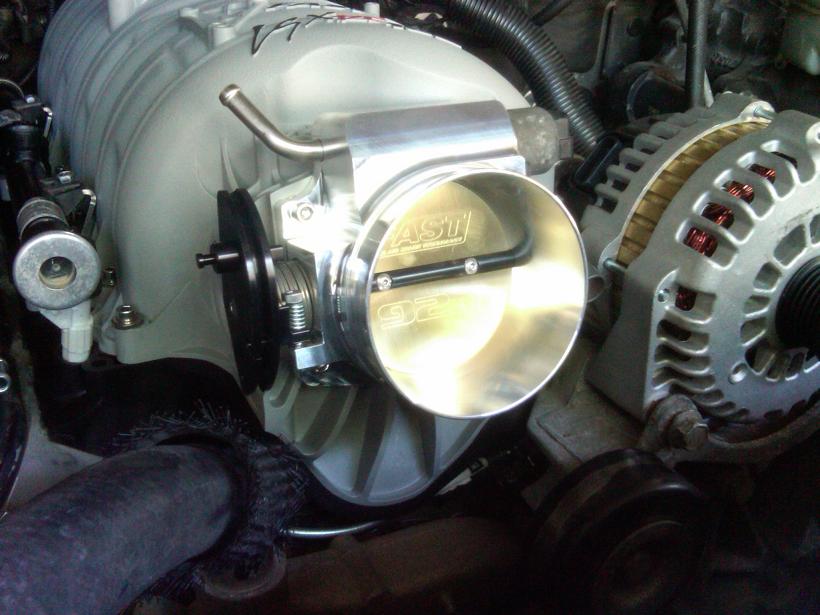
I ran into a problem with the Throttle Body. I ordered the Nick Williams 92mm TB and here is the result. I started another thread about this and someone posted a picture of this TB doing the same thing on an OEM 90mm intake manifold. In my opinion this is a terrible quality TB and I will never buy something from that manufacturer again.
I replaced the NW TB with the FAST 92 and the fitment is perfect.
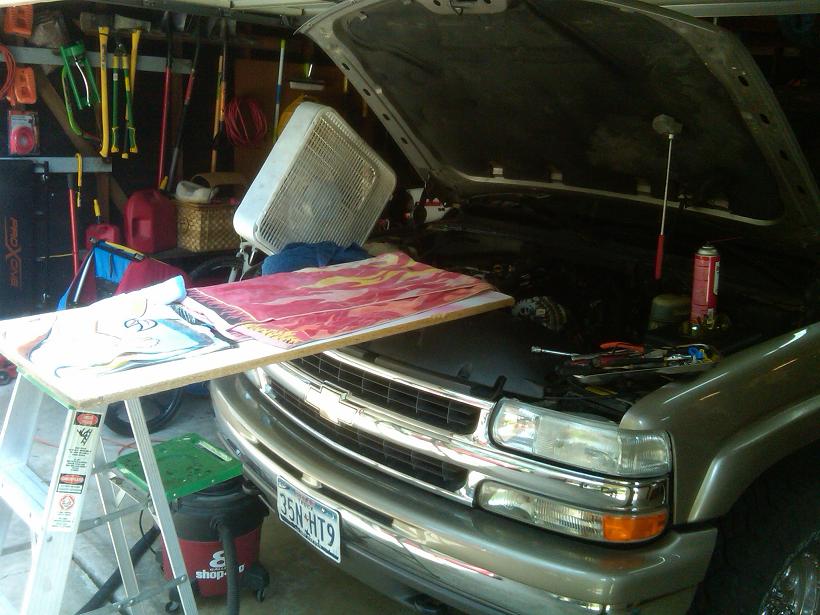
On to the swap! Here is the work platform I used. Very comfortable and the big fan in my face was great.
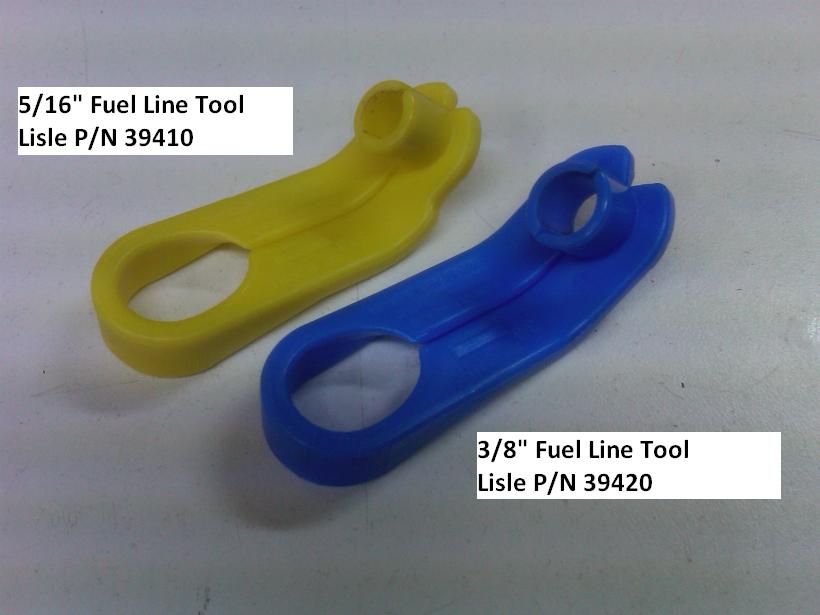
Here are the fuel line tools I used. Worked like a charm.
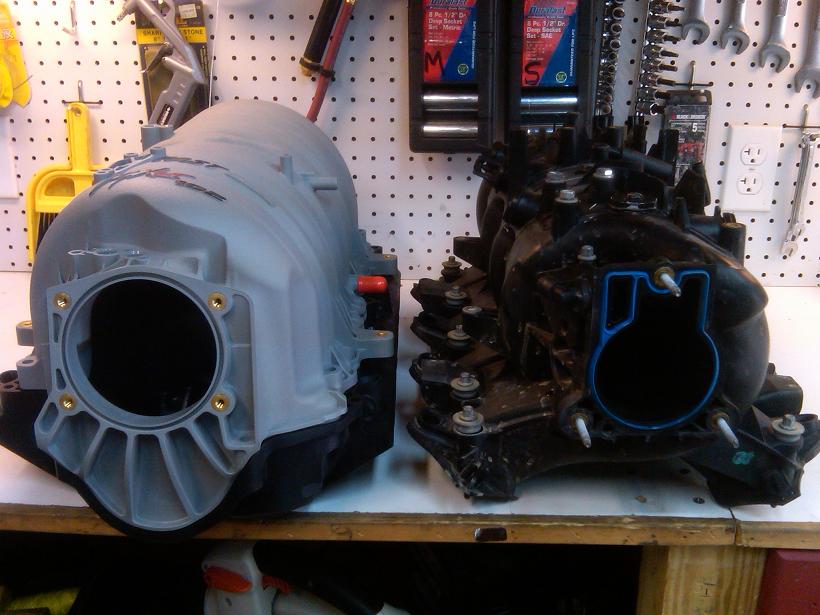
I'm not going to detail how to remove the OEM manifold, it's pretty straightforward. Here is the comparison shot.
The engine had previously been built and swapped with the original LM7 intake manifold and throttle body. Obviously this was not ideal, however funds were maxed out at the time of the swap so I had to make do. Here is how it looked.

10 months later (and after buying the wife a new piano $$$$$ !!), I had the approval and funds to finish the engine with the intake manifold.
The plan was to get the LSXRT and a 92mm throttle body. Patrick G had advised to keep with the 92mm for best tunability. This truck needs to stay street (and off-road) friendly at all costs.
So I shelled out $1500 for the "Mamofied" LSXRT after reading a few build threads with his handy work. Here are the pictures:
Fresh from Tony himself


The width measurements of the bottom ports were extremely consistent. Very skilled work applied to this manifold. I measured all of them at 1.050" +/- 0.002", except for one which was at 1.067".


The manifold requires holes to be drilled for the relevant sensors and vacuum ports, etc. The instructions here were really good and I only drilled the holes I needed. Overall, I do not have very many connections to the manifold since I have no EGR and no vacuum brake booster (hydro-boost). I also didn't drill for the EVAP solenoid because I relocated it.
I drilled the hole for the top MAP sensor, and the top opening for the fuel pressure regulator line. I'm also using the side input from the PCV dirty side (with new catch can).
I capped all holes on the back side of the LSXRT. I want all my connections where I can see them!
I ran into a problem with the Throttle Body. I ordered the Nick Williams 92mm TB and here is the result. I started another thread about this and someone posted a picture of this TB doing the same thing on an OEM 90mm intake manifold. In my opinion this is a terrible quality TB and I will never buy something from that manufacturer again.

I replaced the NW TB with the FAST 92 and the fitment is perfect.

On to the swap! Here is the work platform I used. Very comfortable and the big fan in my face was great.

Here are the fuel line tools I used. Worked like a charm.

I'm not going to detail how to remove the OEM manifold, it's pretty straightforward. Here is the comparison shot.

Last edited by RezinTexas; 07-28-2013 at 10:00 AM.
07-28-2013, 09:44 AM
#15
TECH Fanatic
Thread Starter
Here is how it looked after the OEM manifold was removed. Looks like I had some oil seepage. I was not running a catch can.
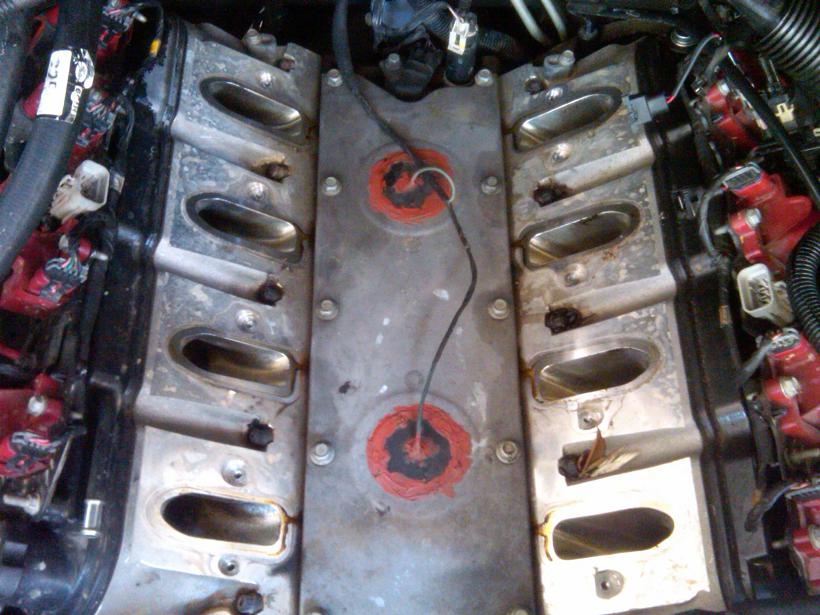
I cleaned it up and swapped over the new low profile valley cover bolts.
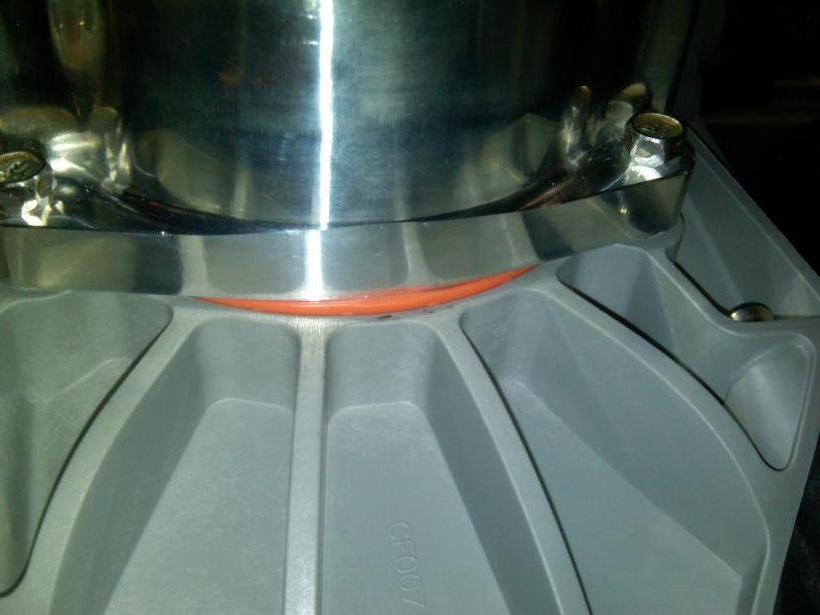
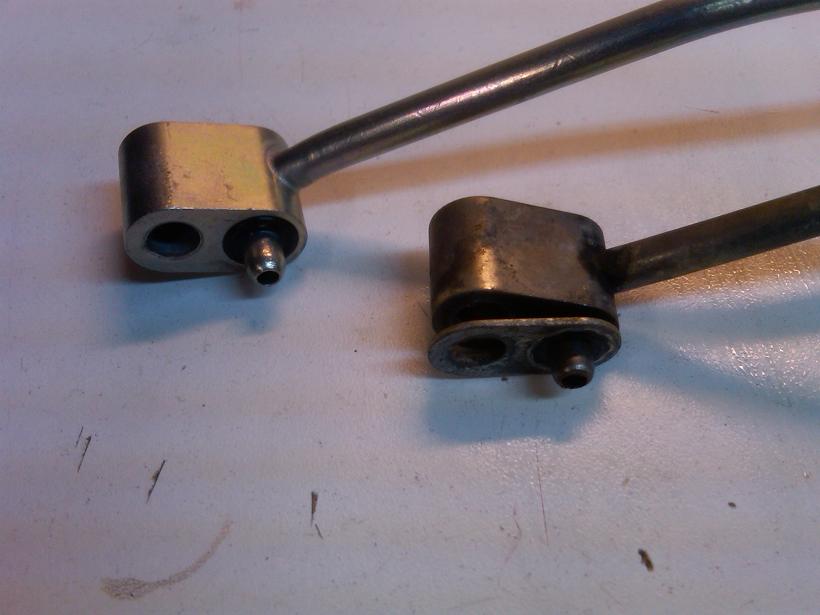
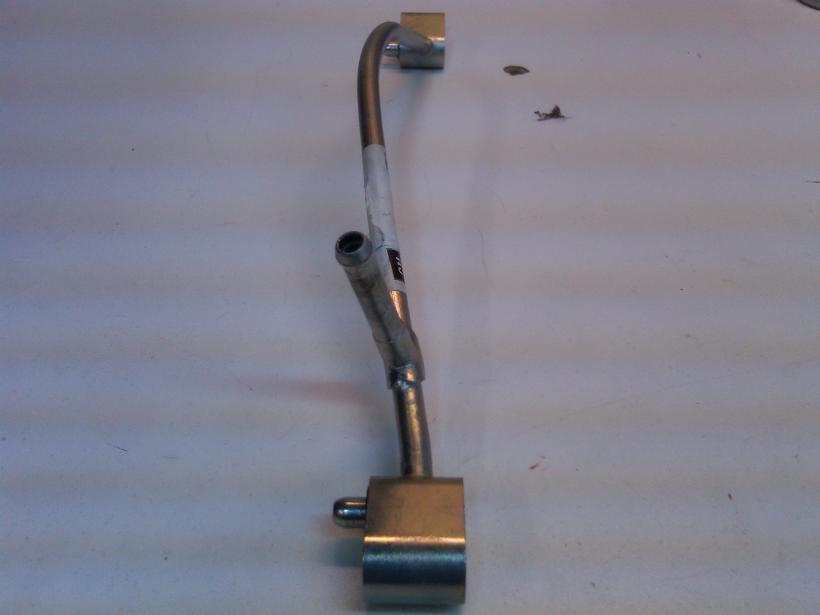
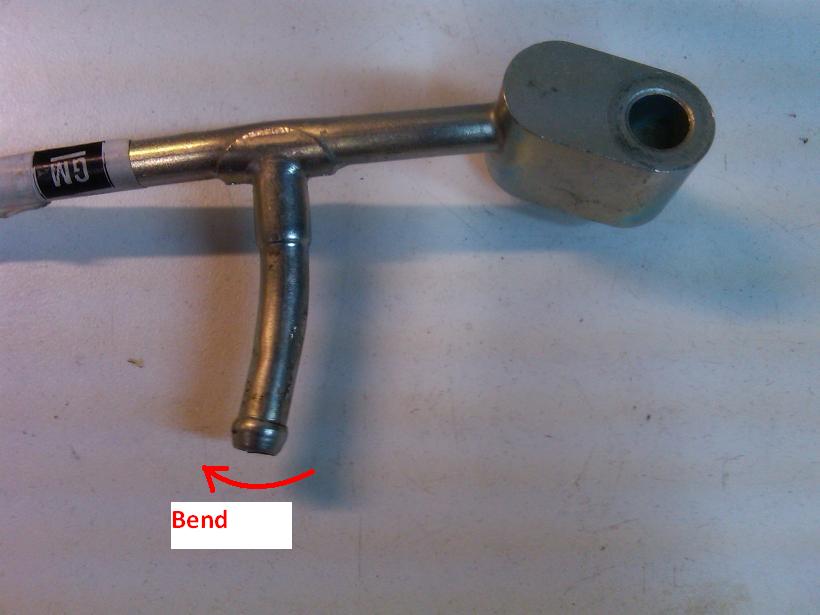
Now to deal with the coolant steam vent crossover tube. I was using one from an '04 LM7 and it was clearly not going to fit. The instructions that came with the LSXRT said to get GM P/N 12602544, so I went to the dealer and forked over $70.
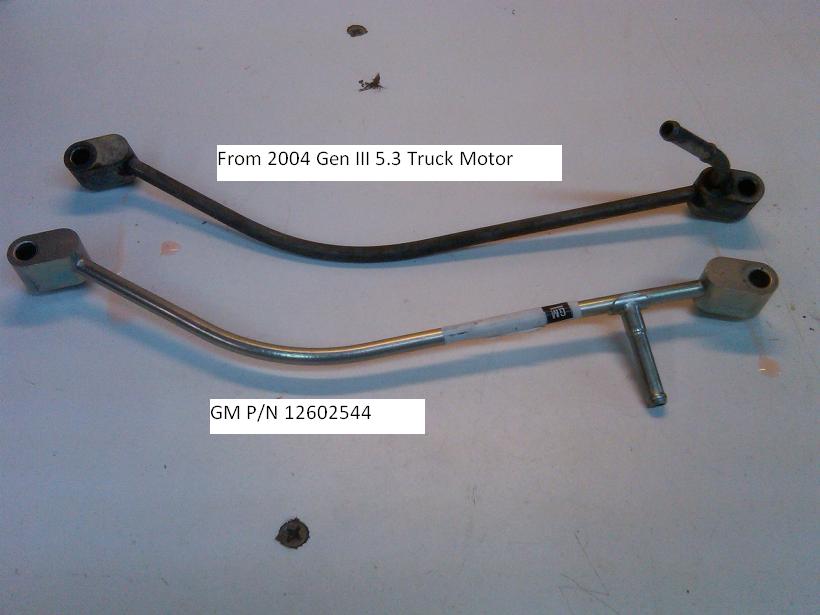
You can see how the new crossover tube uses an integral seal, compared to the old one.
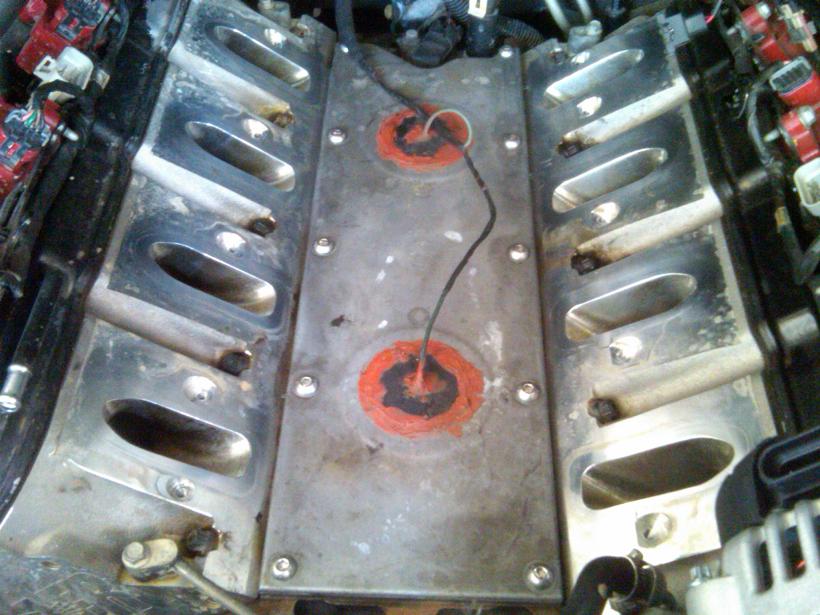
I installed the new crossover and went for a test fit with the LSXRT bottom shell. Clash:
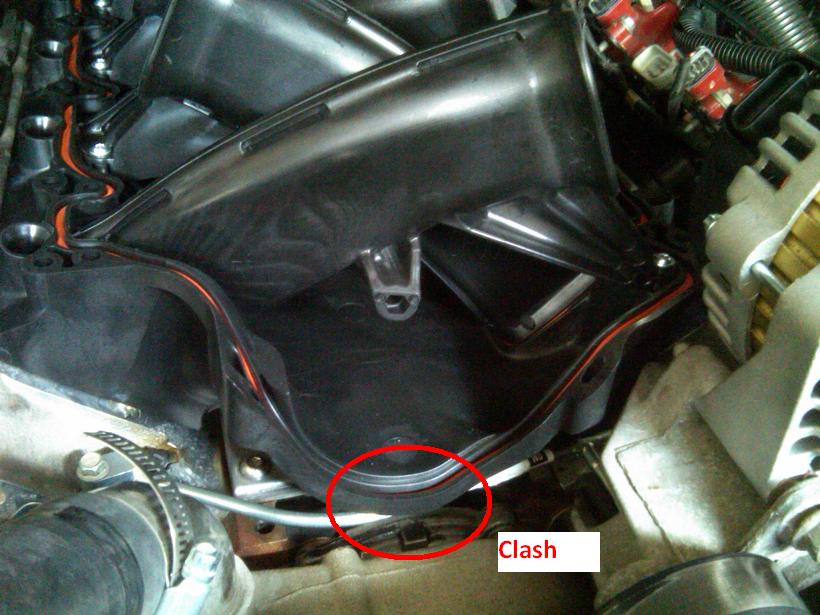
No problem, hit it with a rubber mallet a few times until the intake can sit flush with the heads.
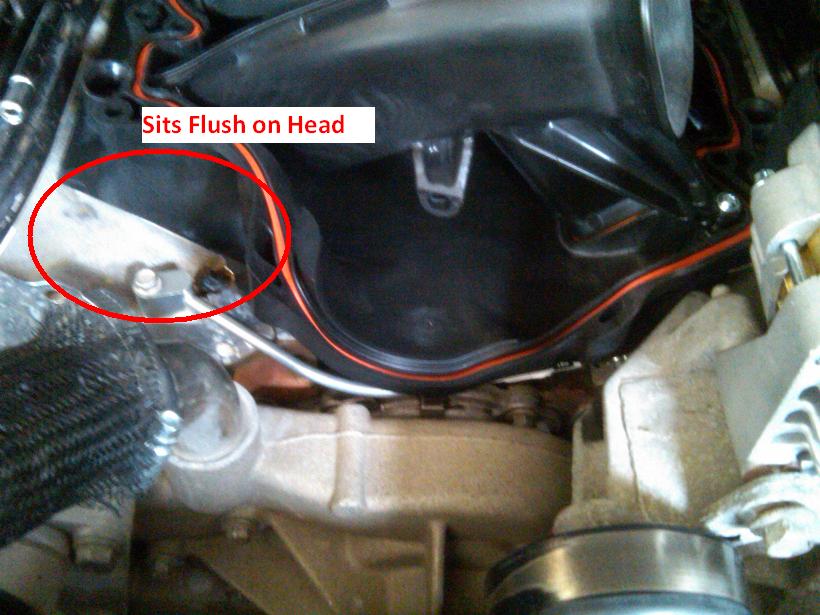
Passenger side:
Driver Side:
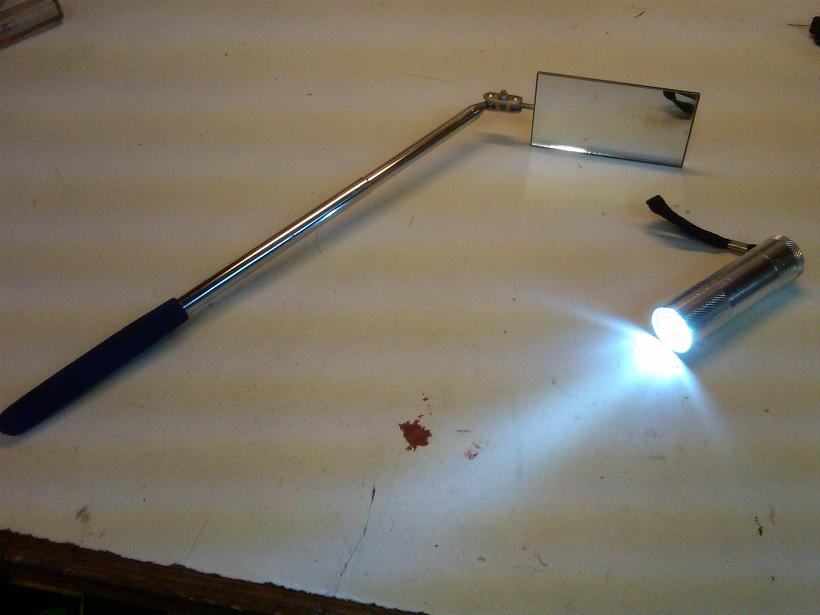
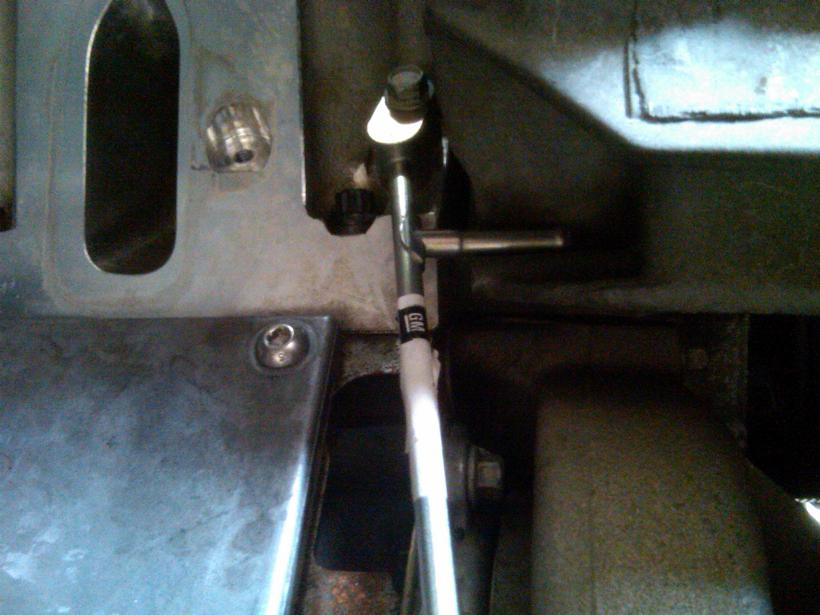
Also, get a mirror and flashlight and look behind the LSXRT to ensure it sits flush.
Here is what the crossover tube looks like after bending it with hammer to clear the LSXRT.


I cleaned it up and swapped over the new low profile valley cover bolts.

Now to deal with the coolant steam vent crossover tube. I was using one from an '04 LM7 and it was clearly not going to fit. The instructions that came with the LSXRT said to get GM P/N 12602544, so I went to the dealer and forked over $70.

You can see how the new crossover tube uses an integral seal, compared to the old one.

I installed the new crossover and went for a test fit with the LSXRT bottom shell. Clash:

No problem, hit it with a rubber mallet a few times until the intake can sit flush with the heads.

Passenger side:

Driver Side:

Also, get a mirror and flashlight and look behind the LSXRT to ensure it sits flush.

Here is what the crossover tube looks like after bending it with hammer to clear the LSXRT.
 07-28-2013, 09:46 AM
#16
TECH Fanatic
Thread Starter
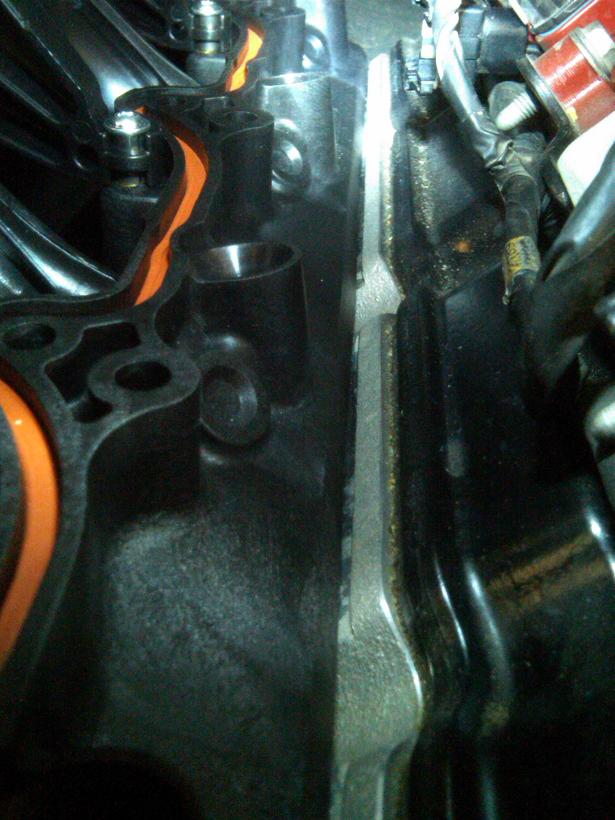
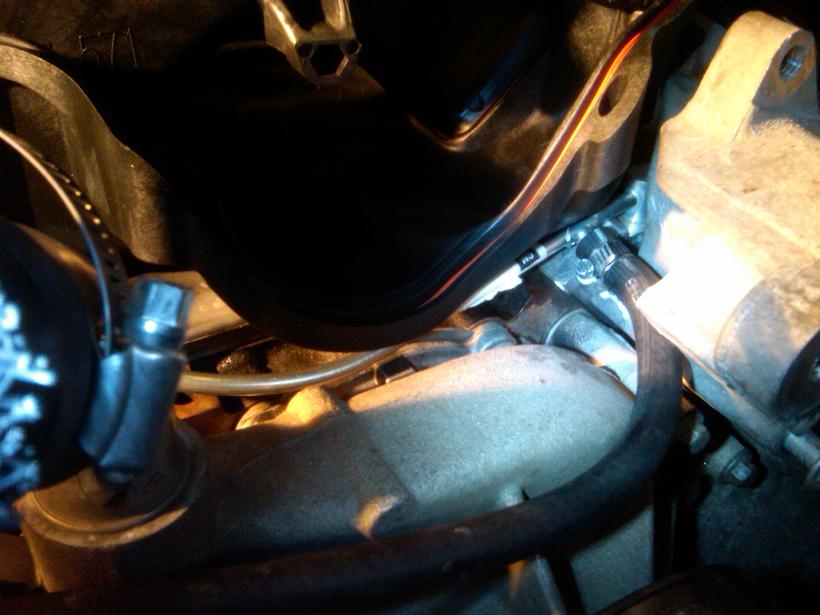
Here is the second problem with the new crossover tube. Hard clash with the alternator / PS pump bracket assembly.
Time to remove the alternator and PS pump bracket assembly. Start with the PS pulley.
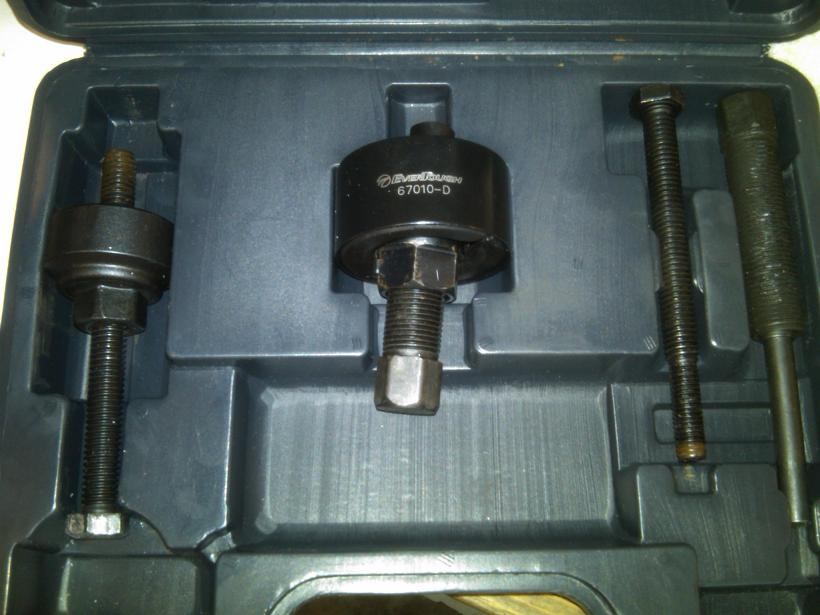
Much more space with that thing removed!
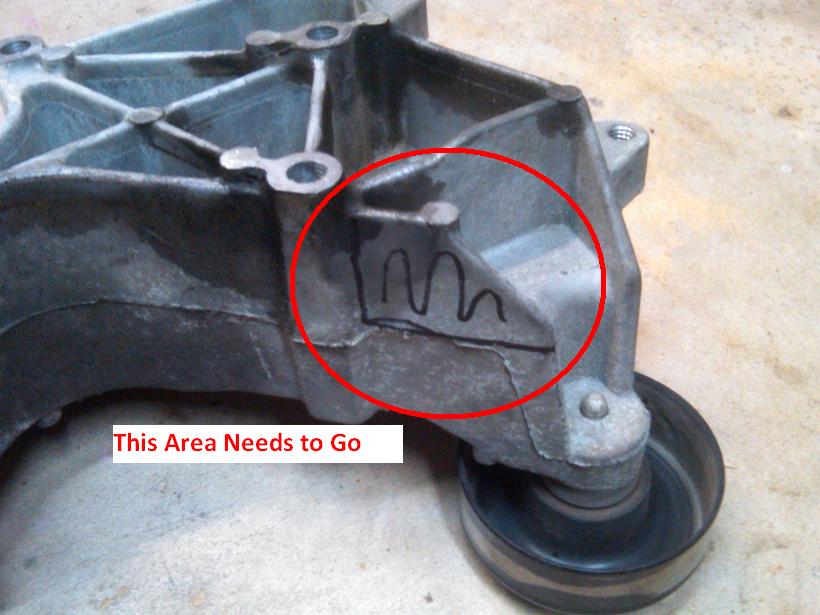
This area needs to be removed.
Done.
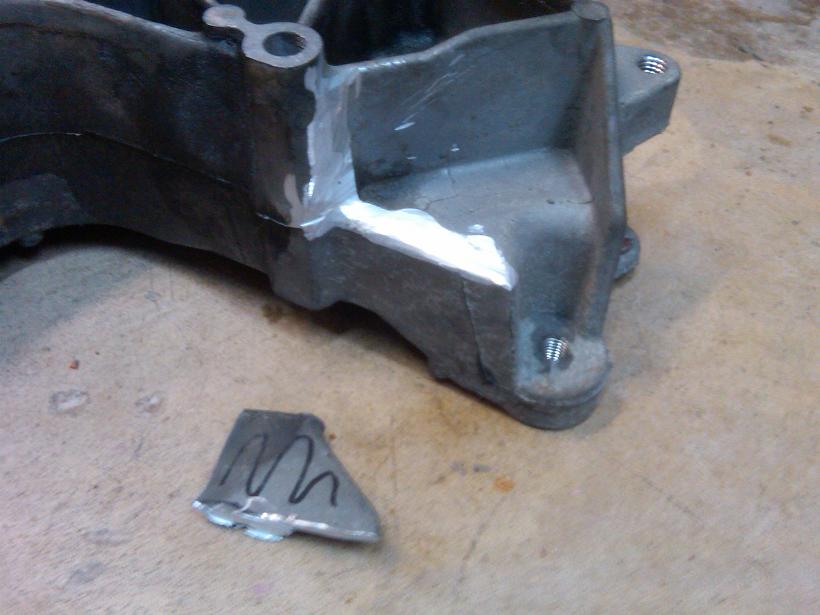
Bend the crossover tube exit just a tad.
Perfect fit!

Final test fit with LSXRT lower shell.
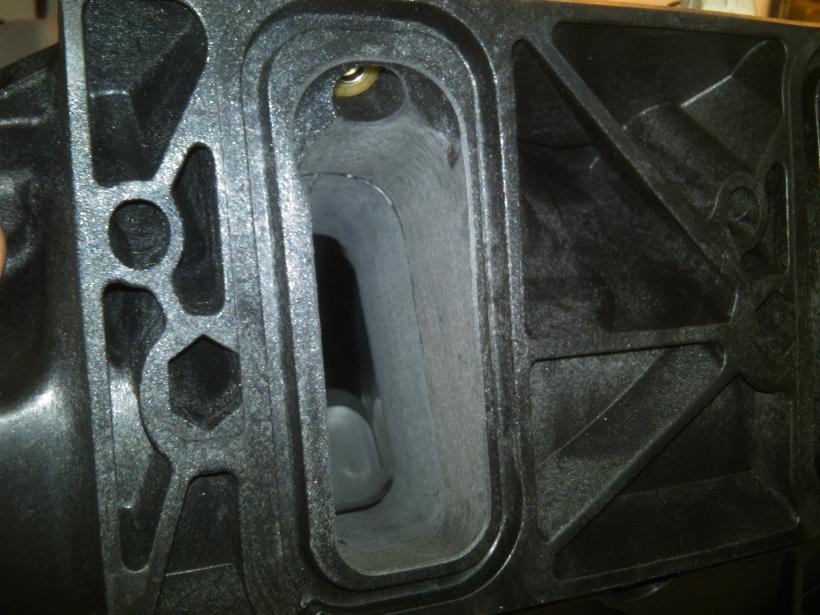
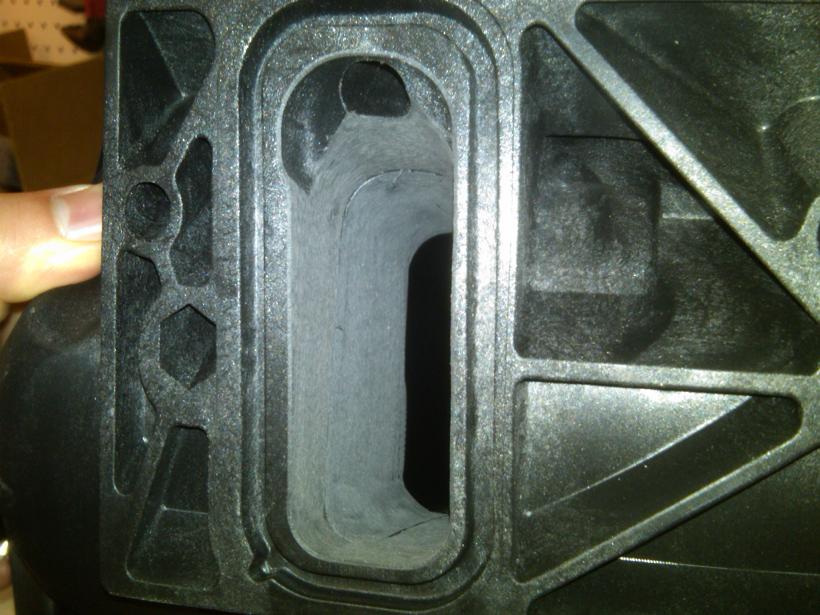
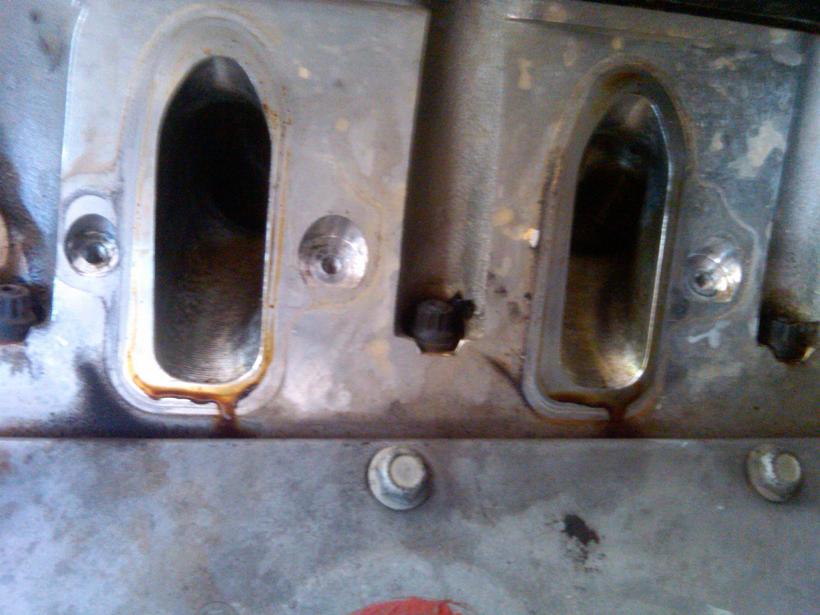
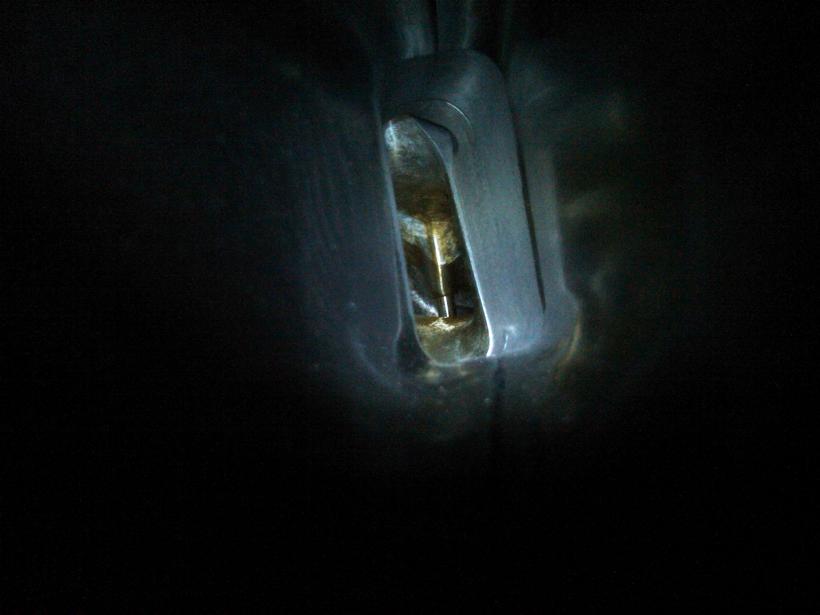
View down the runner on cylinder #2. Yes I realize this is not port matched.
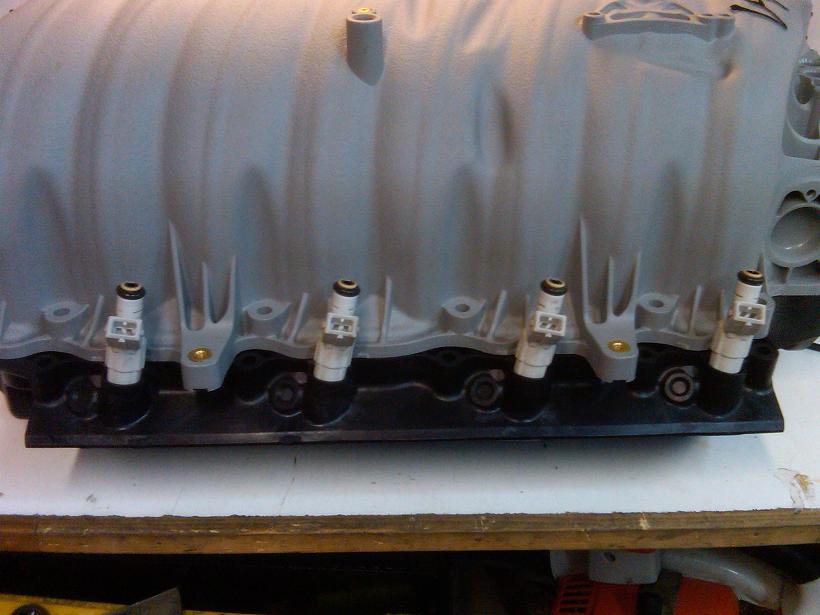
Now onto the injectors. I'm running FAST P/N 303608 36lb rated. Tony M recommended these, said they were good to 600 rwhp LS motors.
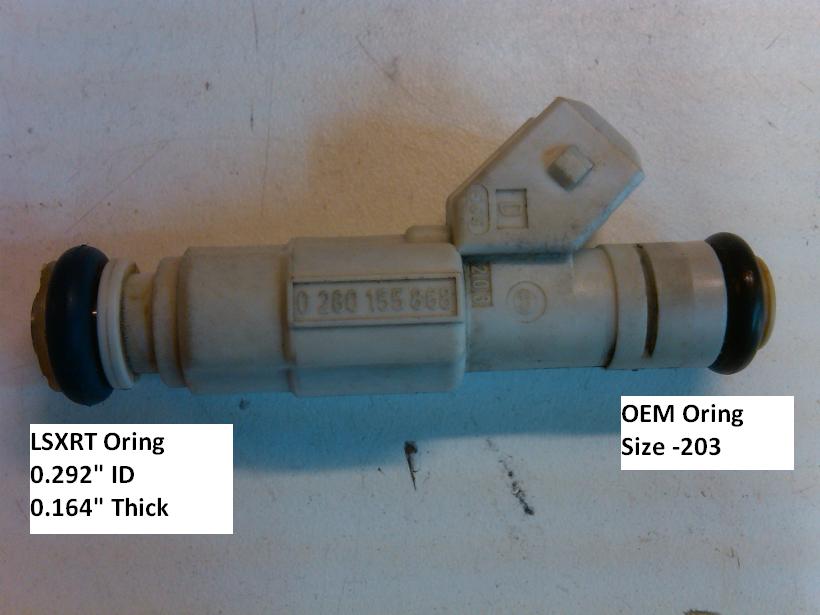
put a little oil on the orings, it's a tight fit into the LSXRT.
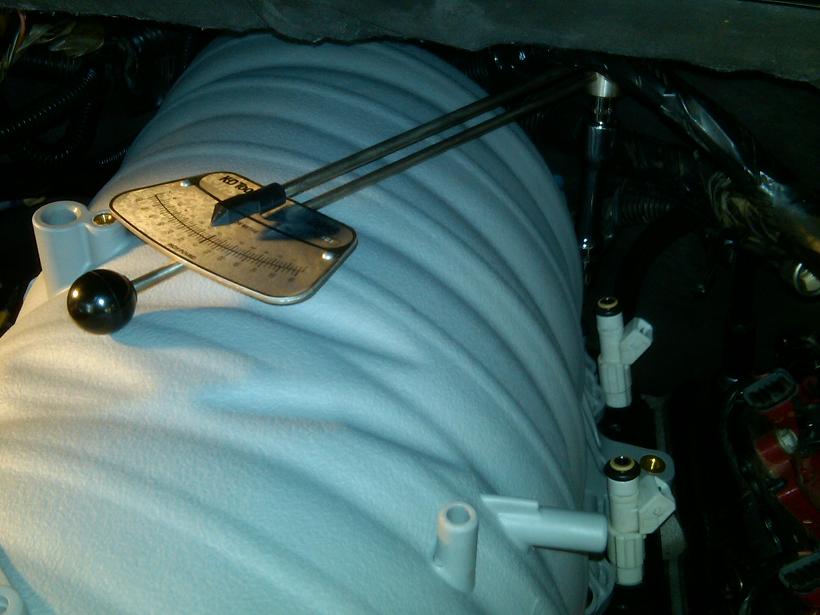
Another thing I'll mention is the critical torque sequence of installing this intake. The instructions call for 2 passes of 45 and 78 in-lb (respectively) in a circular outward pattern. I decided to go more than 2 passes, and ended up going about 10 passes. And I'm glad I did, after each pass the bolts were all loose again. This just goes to show how rigid this manifold is and how critical the torquing sequence is. Dong ~10 passes ensures that none of the gaskets get pinched.
I used a beam type in-lb torque wrench as shown. This was able to access all 10 bolts.
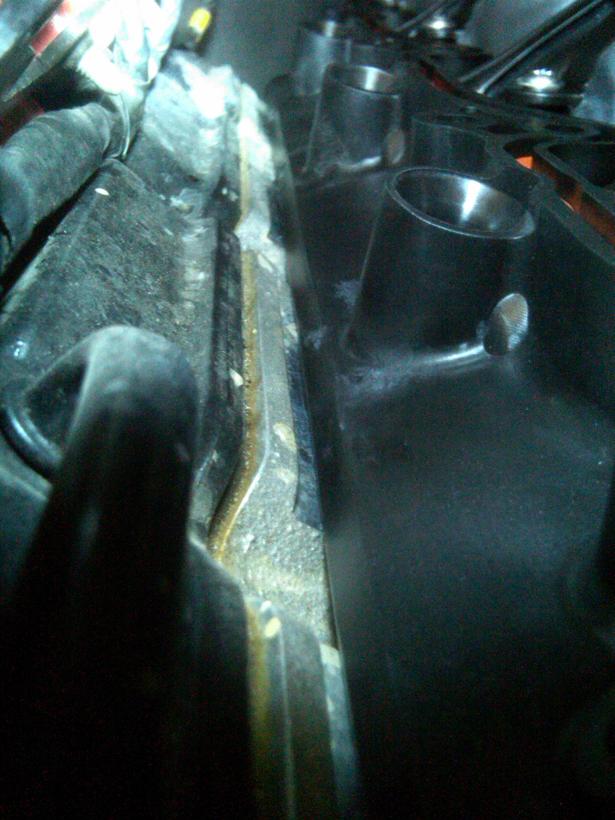
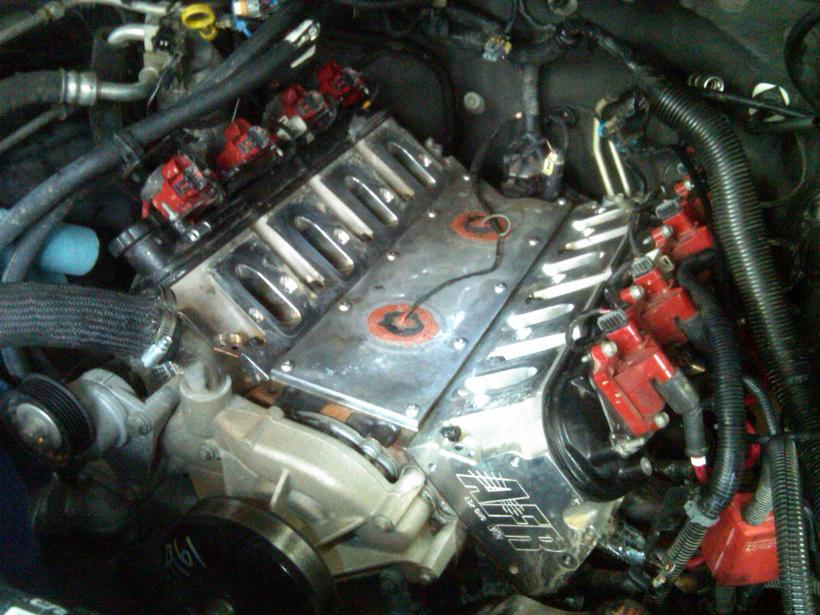
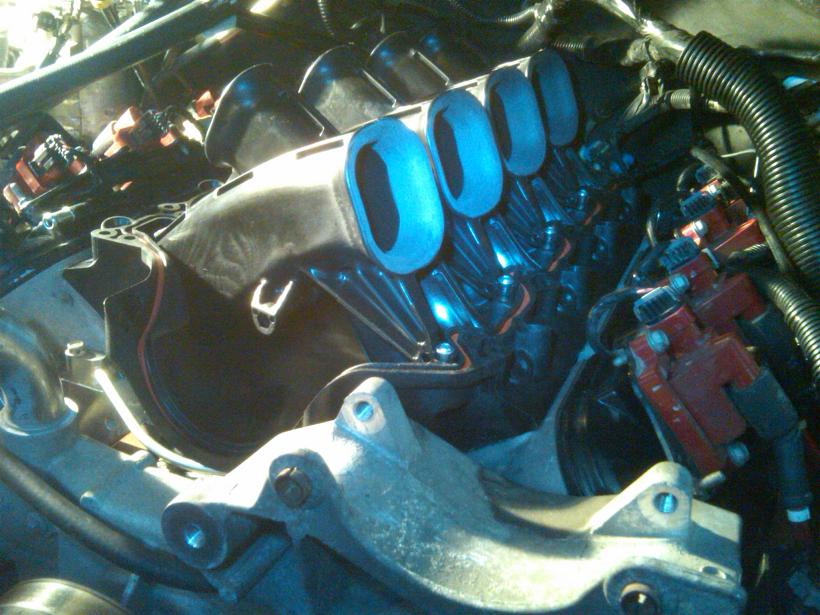
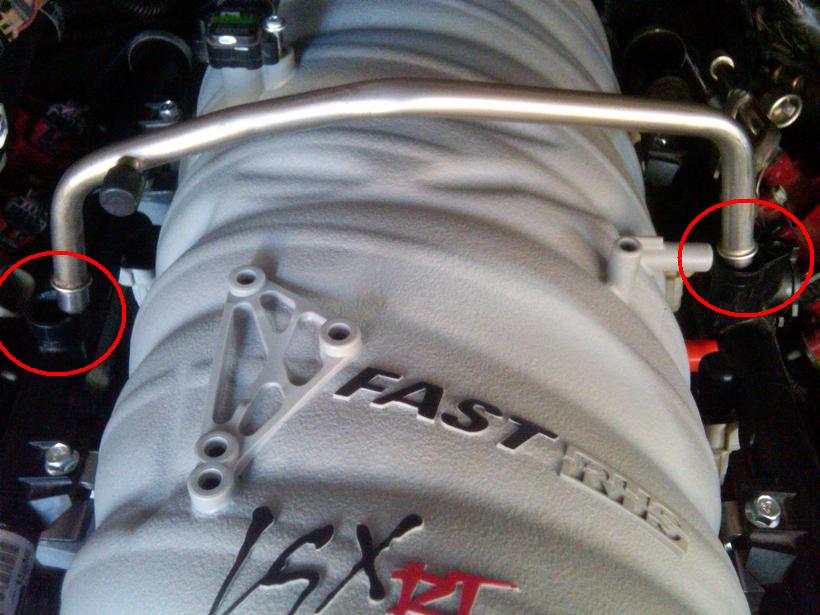
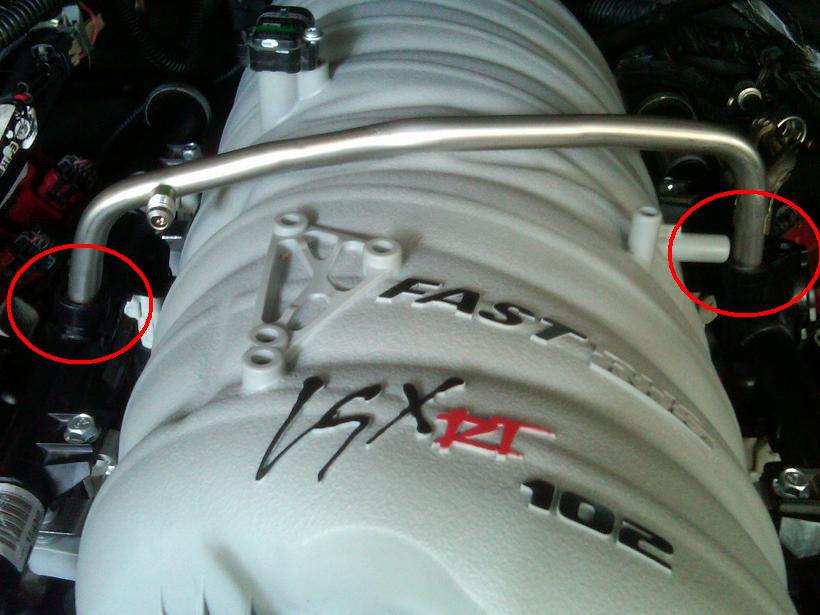
When I was done I carefully checked front and rear of each cylinder bank. The LSXRT was completely flush with the heads in all cases. There was no gap or misalignment at all. You can see it in these pictures:
Passenger Side
Drivers side

Time to remove the alternator and PS pump bracket assembly. Start with the PS pulley.

Much more space with that thing removed!

This area needs to be removed.

Done.

Bend the crossover tube exit just a tad.

Perfect fit!

Final test fit with LSXRT lower shell.


View down the runner on cylinder #2. Yes I realize this is not port matched.

Now onto the injectors. I'm running FAST P/N 303608 36lb rated. Tony M recommended these, said they were good to 600 rwhp LS motors.

put a little oil on the orings, it's a tight fit into the LSXRT.


Another thing I'll mention is the critical torque sequence of installing this intake. The instructions call for 2 passes of 45 and 78 in-lb (respectively) in a circular outward pattern. I decided to go more than 2 passes, and ended up going about 10 passes. And I'm glad I did, after each pass the bolts were all loose again. This just goes to show how rigid this manifold is and how critical the torquing sequence is. Dong ~10 passes ensures that none of the gaskets get pinched.
I used a beam type in-lb torque wrench as shown. This was able to access all 10 bolts.


When I was done I carefully checked front and rear of each cylinder bank. The LSXRT was completely flush with the heads in all cases. There was no gap or misalignment at all. You can see it in these pictures:
Passenger Side

Drivers side

Last edited by RezinTexas; 07-29-2013 at 05:27 PM.
07-28-2013, 09:48 AM
#17
TECH Fanatic
Thread Starter
Here is the FAST 92mm Throttle Body compared to the 74mm OEM unit from an '01 LQ4.
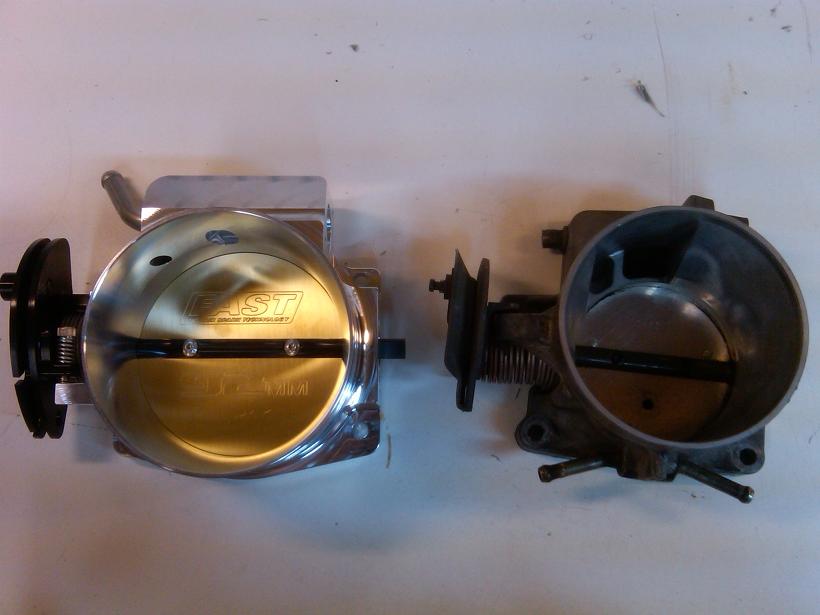
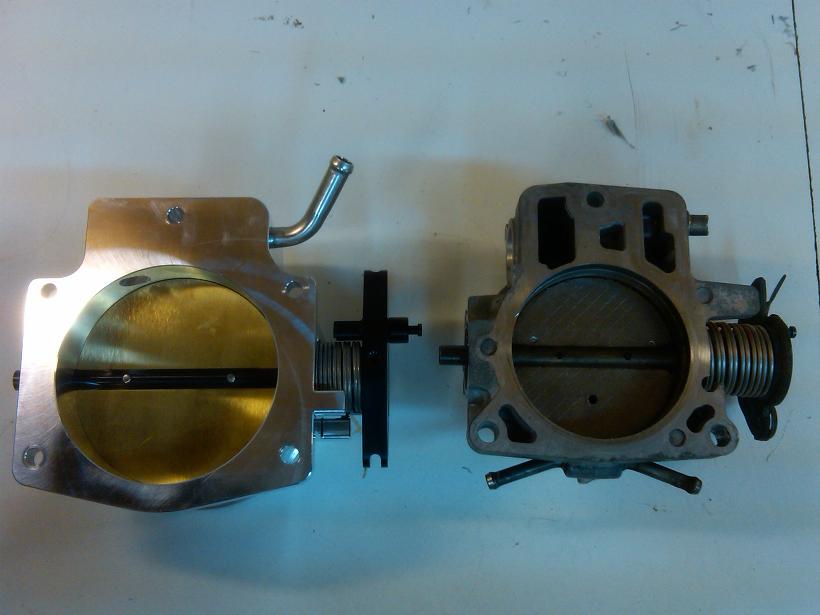
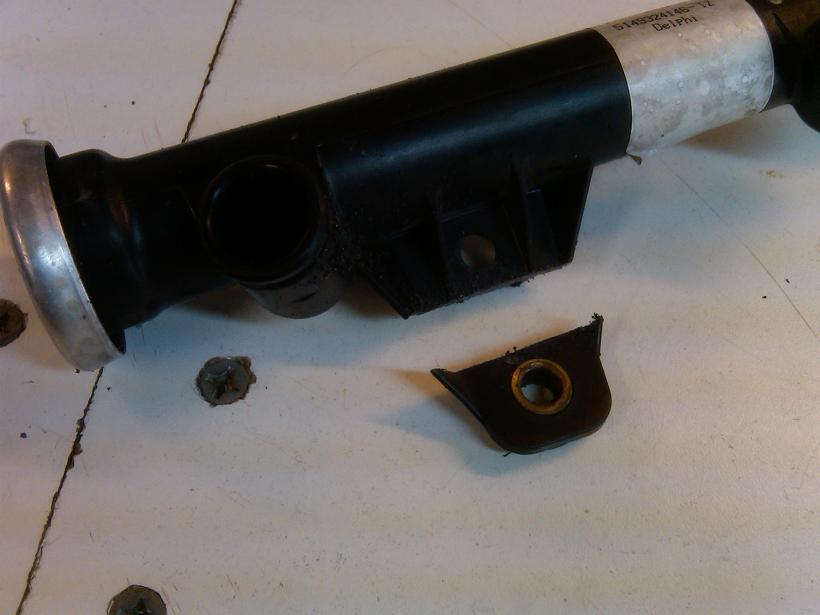
The EVAP solenoid won't fit at all. These pictures show the NW TB, however it was the same with the FAST TB. I decided to re-locate the EVAP solenoid.

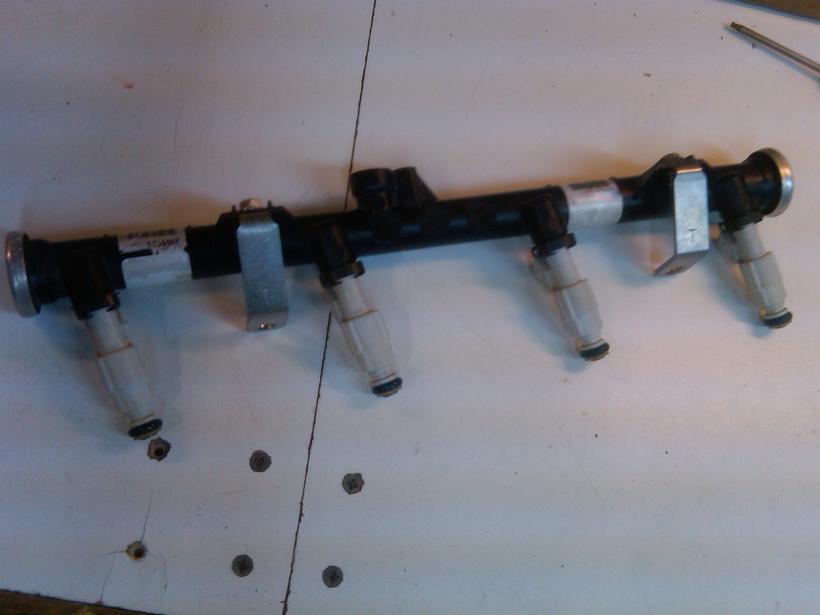
Now on to the fuel rail modification and installation. I realize now that I should have just done billet rails and new hose connections, etc. It would have been a lot easier!
I ordered FAST P/N 146030-KIT for $66 shipped. It had good instructions and seemed easy enough, so I started the swap.
Drill and cut the mounting tabs as shown with supplied template.
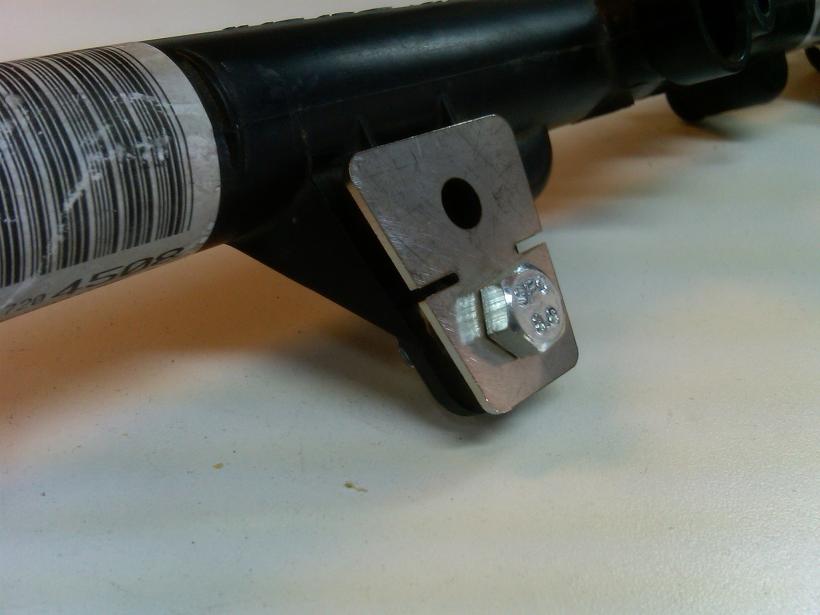
These mount to the new holes in the rails.
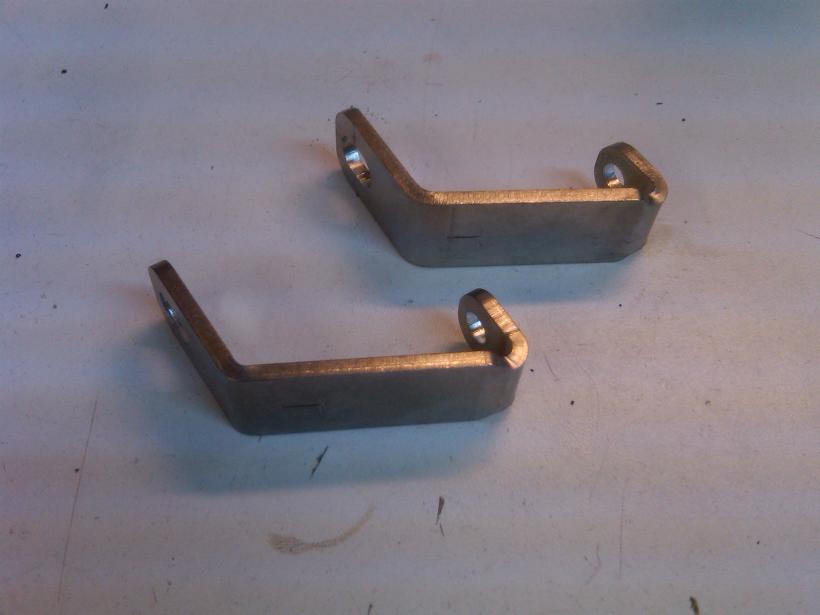
Major PITA to get these on, btw...
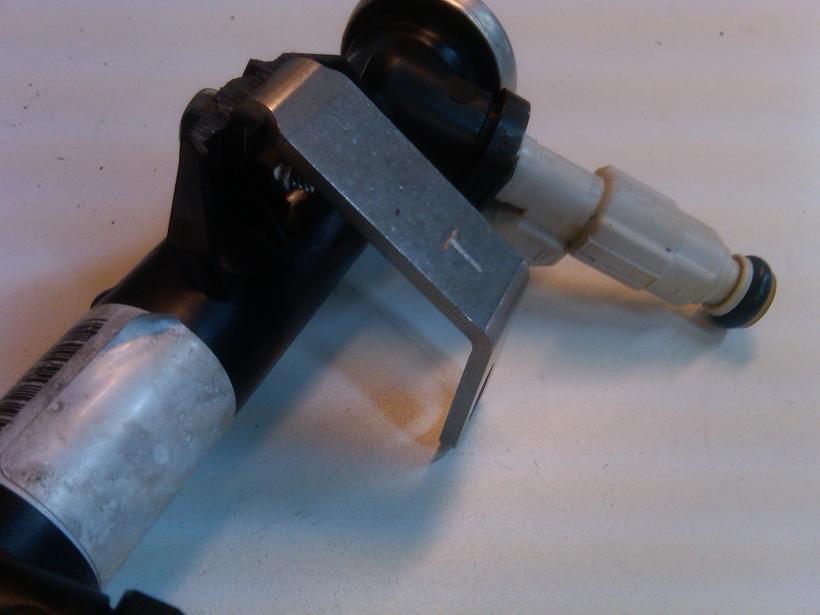
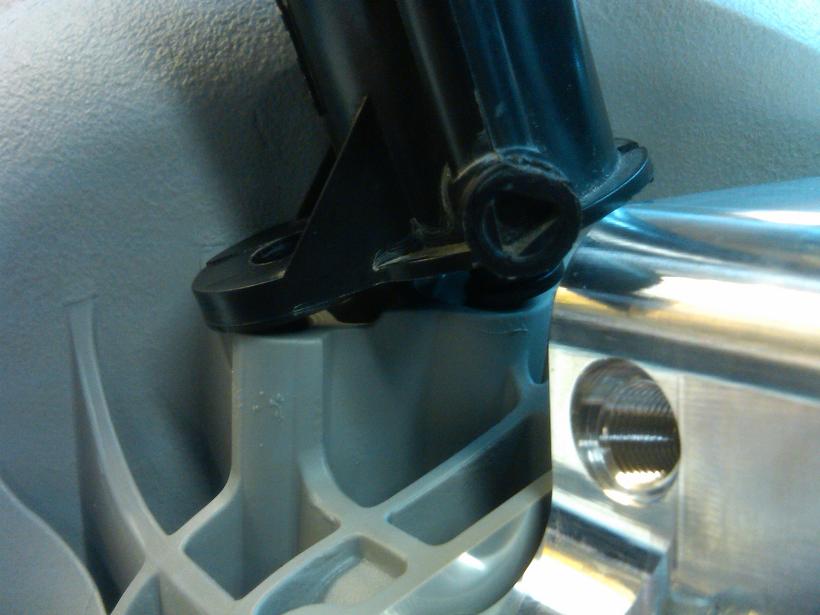
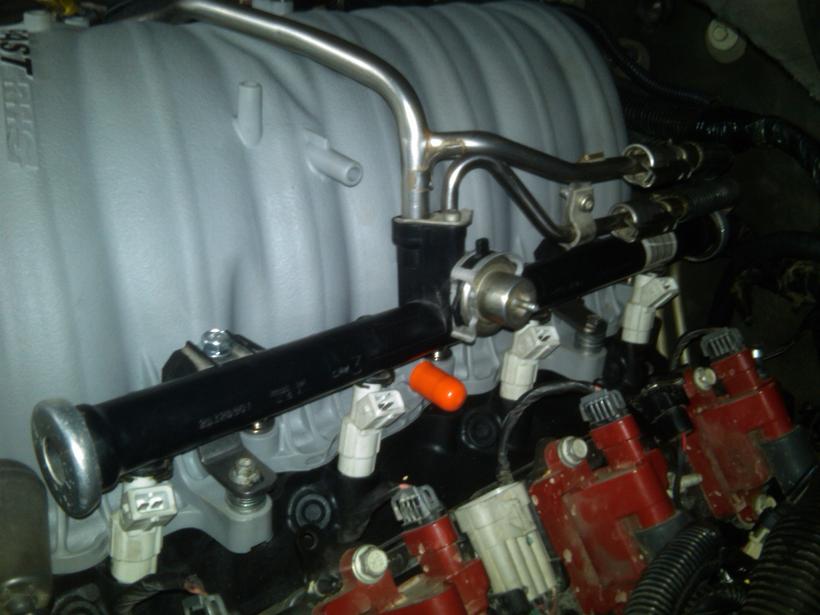
MAJOR PROBLEM!!
So now I spend the next 3 hours or so bending the pipe and bending and tweaking the fuel rail mounting brackets to get the mounting angle right. Very frustrating work, but eventual success.
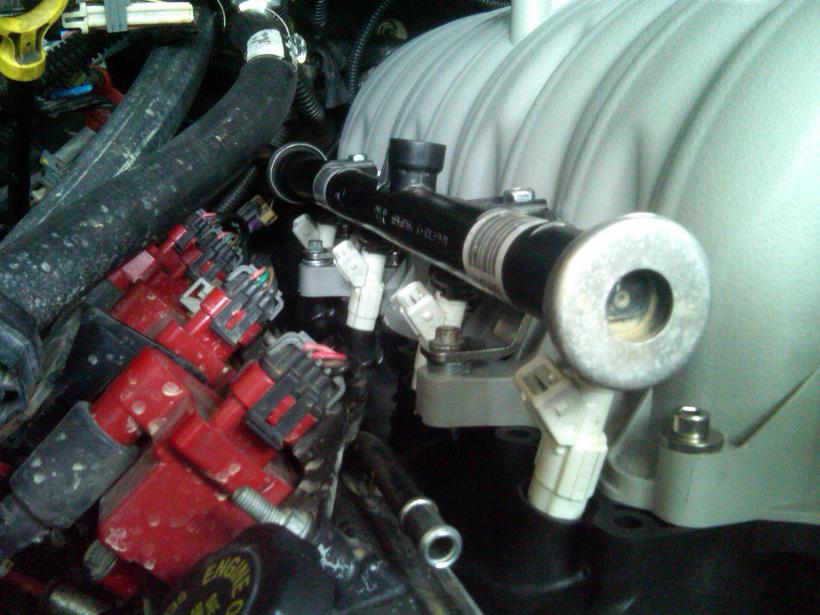
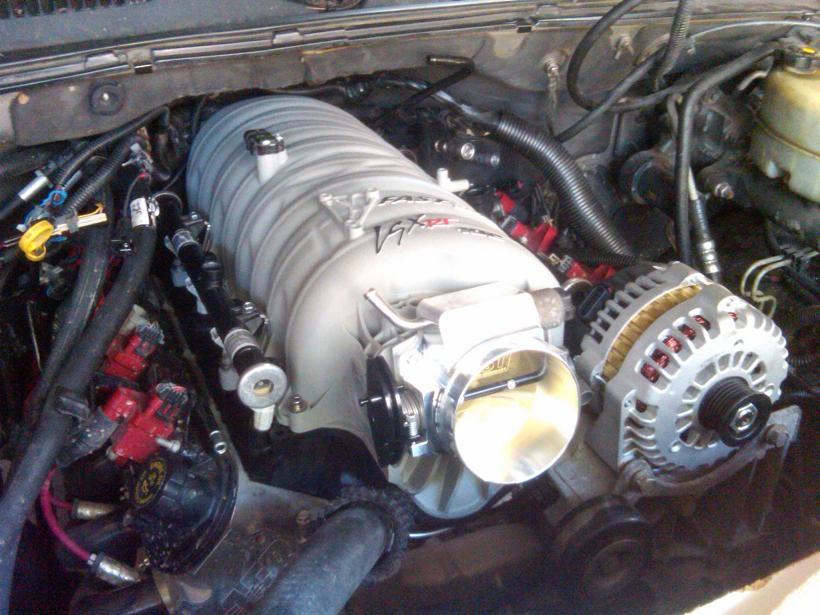
I know it's ugly and the rest of the engine is dirty. That is 100% pure Ouachita mud right there! This is an off-road camping truck after all...
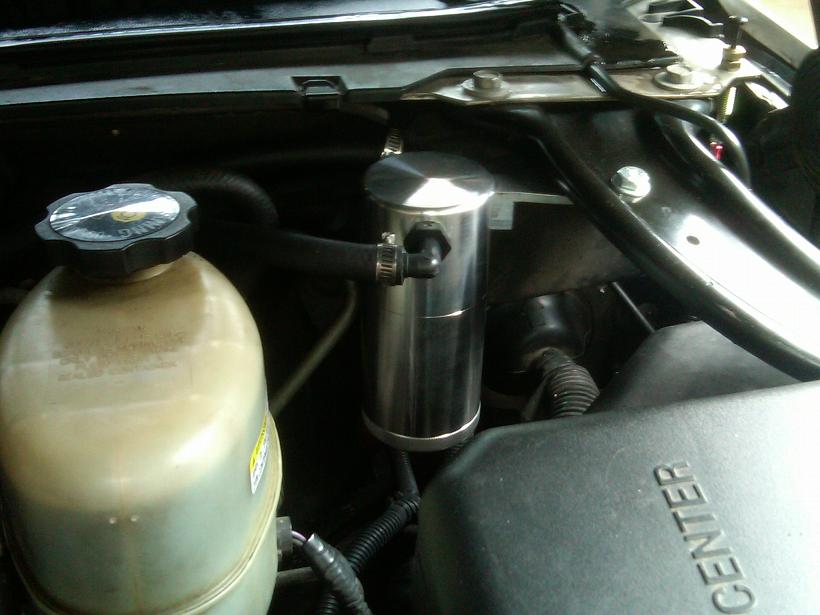
New catch can. $110 on ebay, it's made for a G8, the bracket works well for where I wanted to put it.
Some pics with the TB installed.
As of 28-July-13, I'm still working to tidy up the wiring and plumbing, more pictures to come later.


The EVAP solenoid won't fit at all. These pictures show the NW TB, however it was the same with the FAST TB. I decided to re-locate the EVAP solenoid.


Now on to the fuel rail modification and installation. I realize now that I should have just done billet rails and new hose connections, etc. It would have been a lot easier!
I ordered FAST P/N 146030-KIT for $66 shipped. It had good instructions and seemed easy enough, so I started the swap.
Drill and cut the mounting tabs as shown with supplied template.


These mount to the new holes in the rails.

Major PITA to get these on, btw...


MAJOR PROBLEM!!

So now I spend the next 3 hours or so bending the pipe and bending and tweaking the fuel rail mounting brackets to get the mounting angle right. Very frustrating work, but eventual success.

I know it's ugly and the rest of the engine is dirty. That is 100% pure Ouachita mud right there! This is an off-road camping truck after all...

New catch can. $110 on ebay, it's made for a G8, the bracket works well for where I wanted to put it.

Some pics with the TB installed.


As of 28-July-13, I'm still working to tidy up the wiring and plumbing, more pictures to come later.
 07-28-2013, 10:07 AM
#20
TECH Fanatic
Thread Starter
Yeah, FAST definitely didn't research all the possible vent tube setups. Someone told me that the '08+ truck vent tube works without any modifications though. Unfortunately I didn't have the chance to verify this.