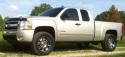
How too remove NNBS GMT900 07-08 Silverado Headlights
 03-27-2008, 10:18 PM
#1
TECH Resident
Thread Starter
iTrader: (4)

Join Date: Oct 2005
Location: Houston, TX
Posts: 894
Likes: 0
Received 0 Likes
on
0 Posts
This how too is for Silverado trucks, GMC trucks may be similar but not identical.
Only tools required are a ratchet, long extension, deep 10mm socket, reg 10mm socket, pliers, screwdriver.
First take notice of your headlight aim on a wall or something to verify upon reassembly that they are still aimed properly.
Get a towel and place it over your bumper so you dont scratch it in case of a mishap.
This took me about 1 hour to remove, install and take all these pics, so without a camera it shouldnt take longer than 30min tops.

First is to remove the plastic shroud held on by pushpin clips. Just take a flathead screwdriver and pry up on the centerpin...repeat this to all.


After all pins are removed lift off the shroud and place to the side.

Next is to remove the grille. The grille is held on with (4) 10mm bolts, one on each end and two in the middle....just remove those.


Next there are 6 metal clips that hold the grille to the center/bottom. There are four in the middle and one at the bottom on each end. I use a pair of pliers and squeeze the spring clip while pushing outwards gently till you hear it click a little. Just start in the middle then do the bottom left/right ones last...it should pop loose.


Dont worry about the grille falling off, it has two bent molded pieces in the middle that will prevent that.

After all this just remove the grille and place to the side

Only tools required are a ratchet, long extension, deep 10mm socket, reg 10mm socket, pliers, screwdriver.
First take notice of your headlight aim on a wall or something to verify upon reassembly that they are still aimed properly.
Get a towel and place it over your bumper so you dont scratch it in case of a mishap.
This took me about 1 hour to remove, install and take all these pics, so without a camera it shouldnt take longer than 30min tops.
First is to remove the plastic shroud held on by pushpin clips. Just take a flathead screwdriver and pry up on the centerpin...repeat this to all.
After all pins are removed lift off the shroud and place to the side.
Next is to remove the grille. The grille is held on with (4) 10mm bolts, one on each end and two in the middle....just remove those.
Next there are 6 metal clips that hold the grille to the center/bottom. There are four in the middle and one at the bottom on each end. I use a pair of pliers and squeeze the spring clip while pushing outwards gently till you hear it click a little. Just start in the middle then do the bottom left/right ones last...it should pop loose.
Dont worry about the grille falling off, it has two bent molded pieces in the middle that will prevent that.
After all this just remove the grille and place to the side
Last edited by JB1; 03-28-2008 at 05:47 PM.
 03-28-2008, 05:48 PM
#2
TECH Resident
Thread Starter
iTrader: (4)
Join Date: Oct 2005
Location: Houston, TX
Posts: 894
Likes: 0
Received 0 Likes
on
0 Posts
The drivers side headlight is held on with 4 bolts....two on top and one at each lower corner. You will need to remove the debris flap thats in the way of the lower bolt/bracket...take note of its position for reassembly.


Two top bolts


The lower bolt thats accessed from the front needs to be removed and the bracket rotated out of the way. This is some kinda floating bracket design.


The last bolt must be accessed thru the fenderwell. Just remove the lowest bolt and kinda fold the plastic liner out of the way and you will see the last bolt thats removed. Again...all of these are 10mm.


After all the bolts are removed and the floating bracket swung out of the way...you can now remove the headlight. The headlight has two locating pins that align it to the fender. You will need to kinda slide/wiggle/jiggle it out until you gain access to the single wire connector.


To reinstall just reverse order these instructions. I plug it in first, then get it into place with the align pins in the fender, then barely start a top bolt, then the lower floating bracket, then the fenderwell bolts, then assure its flush with the fender then tighten the top two bolts.
Test your headlights to ensure all the bulbs light before proceeding
The passender side is basically the same, however the bolt under the fenderliner is harder too see but it is there.

Also on the passenger side/or drivers side....you can remove this vertical bracket if its on your way. I had too on the passenger side but not the drivers side for some reason.


Again, just reverse the procedure to re-install as described above previously.
Test your headlights to ensure all the bulbs light before proceeding
Next just re-install the grille by placing the clips just till they touch the slots...then one by one beginning in the middle push the grille inwards till they snap. The grille mounts are slotted so slide it left to right and get your gaps even before installing the 4 upper 10mm bolts.

Last is to re-intsall the top shroud by placing all the push-pin clips in the holes.

Two top bolts
The lower bolt thats accessed from the front needs to be removed and the bracket rotated out of the way. This is some kinda floating bracket design.
The last bolt must be accessed thru the fenderwell. Just remove the lowest bolt and kinda fold the plastic liner out of the way and you will see the last bolt thats removed. Again...all of these are 10mm.
After all the bolts are removed and the floating bracket swung out of the way...you can now remove the headlight. The headlight has two locating pins that align it to the fender. You will need to kinda slide/wiggle/jiggle it out until you gain access to the single wire connector.
To reinstall just reverse order these instructions. I plug it in first, then get it into place with the align pins in the fender, then barely start a top bolt, then the lower floating bracket, then the fenderwell bolts, then assure its flush with the fender then tighten the top two bolts.
Test your headlights to ensure all the bulbs light before proceeding
The passender side is basically the same, however the bolt under the fenderliner is harder too see but it is there.
Also on the passenger side/or drivers side....you can remove this vertical bracket if its on your way. I had too on the passenger side but not the drivers side for some reason.
Again, just reverse the procedure to re-install as described above previously.
Test your headlights to ensure all the bulbs light before proceeding
Next just re-install the grille by placing the clips just till they touch the slots...then one by one beginning in the middle push the grille inwards till they snap. The grille mounts are slotted so slide it left to right and get your gaps even before installing the 4 upper 10mm bolts.
Last is to re-intsall the top shroud by placing all the push-pin clips in the holes.


Trending Topics
03-11-2012, 05:23 AM
#8
TECH Veteran
iTrader: (1)

Join Date: Aug 2011
Location: Alaska
Posts: 4,104
Likes: 0
Received 0 Likes
on
0 Posts
I will be clearing my headlights soon (maybe tomorrow if bored enough) and will take tons of pictures when I do it. It's all pretty straight forward just don't forget about the bolt that you get to from inside the fender I believe.